RSS
 

Posts Tagged ‘Creative’

How to Use Creative Aperture to Maximum Effect

15 Nov

One of the most powerful controls on your camera is the aperture setting. It’s so useful that a good proportion of photographers utilize aperture priority as their primary setting, allowing them to quickly change this setting for creative aperture use.

So what are the ways you can use aperture to get creative photos? There are several ways and some different effects that can be achieved. So read on, and see how you can add these creative approaches to your photography.

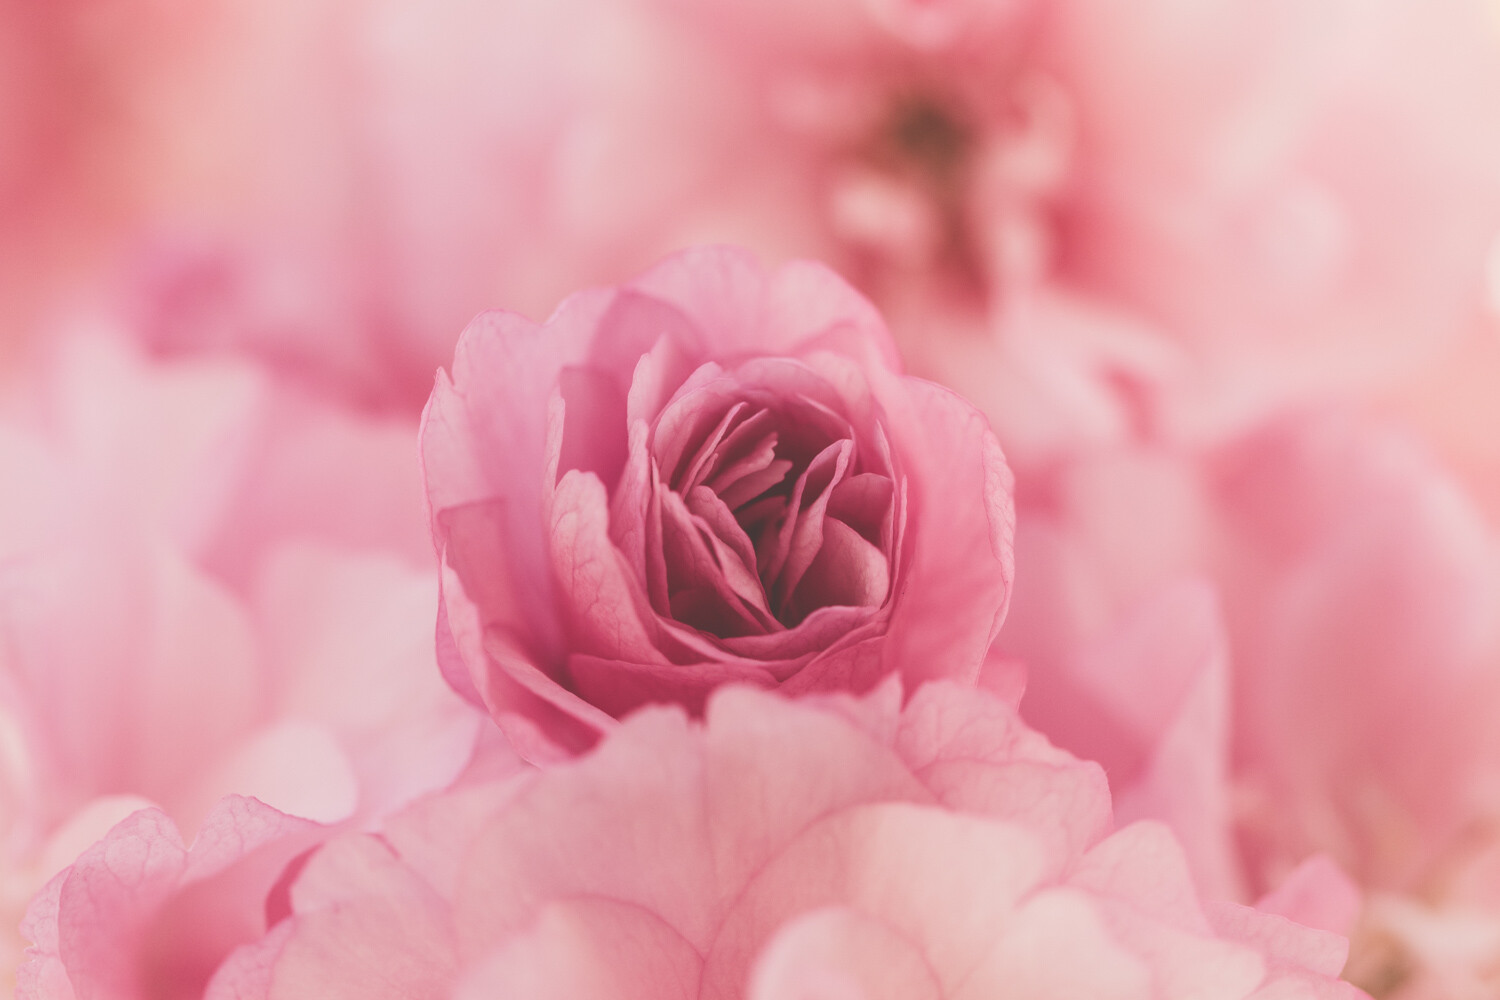
You can use aperture to create bokeh like this.

Creating Bokeh in Your Photos

Almost certainly the first thing you’ll think of with creative aperture is bokeh. So what is this and how is it achieved?

What is Bokeh?

Bokeh is the area of the photo that’s out of focus, and the level of blur achieved will depend on a number of factors. The word itself come from the Japanese word ‘boke,’ which translates as blur.

Using aperture to blur out the background is an ideal way of making the main subject standout more.

How Creative Aperture Makes Bokeh

You’ll create bokeh by using a lens with a large aperture, and sometimes with a lens that has a long focal length. The best lenses for creating bokeh are prime lenses, mainly because they offer larger aperture. To create bokeh focus on an object in the foreground, and ensure there is a separation to the background. When using a lower focal length with a large aperture the distance of separation between fore and background can be relatively small. If you use a longer focal length with a lens that has a smaller aperture you can still achieve bokeh as long as the background is far behind your foreground object. To sum up use your lenses largest aperture, and ensure you leave enough distance to the background so it’s blurred.

  • Light source – One of the most attractive aspects are what are sometimes called ‘bokeh balls.’ When you have points of light in the background, they’ll become enlarged orbs because of bokeh. Look to place city lights in the background during blur hour, or light reflecting off leaves to create this type of bokeh.
  • Tell the story – One way of subtly telling a story in a scene is to blur out the background, but leave enough definition to see what’s happening in the background. Perhaps you can photograph some food, with the chef making that food blurred into the background.

You can use bokeh for simple minimalism in a photo.

Creative Bokeh

It’s possible to get even more creative with bokeh, by turning it into various shapes. The idea behind this involves placing a piece of black card over the front of your lens. You’ll need to cut the shape your want to create with your bokeh in the center of that card first though! To find out more about how to do this you can read this guide. Remember you’ll need some light sources in the background, so how about experimenting with some fairy lights this Christmas!

Get those creative sparks flying with different shaped bokeh!

Lensbaby

Lensbaby is a series of lenses produced with the idea of using bokeh in your photo. It’s a little like a tilt-shift lens and will create stretched bokeh as you change the position of the focal sweet spot. This lens can be fun to play around with, though it doesn’t produce the sharpest photos you’ll ever see.

The Sweet Spot

While this area of aperture usage isn’t especially creative, it’s worth knowing about. The lens sweet spot refers to the aperture which produces the greatest sharpness across your photo. Each photo will have a different sweet spot, but generally between f8 and f11 is the sharpest point for your lens. Knowing your lenses sweet spot is essential knowledge for landscape photographers. Keep in mind that if you have elements close to your foreground, you may need to use focus stacking to keep sharpness across the entire image.

Landscape photographers will often use an aperture of f8 for their photos.

Starburst Effect

A starburst can be produced when you have a single focused light source. This can be a street light, all the way up to the sun! The effect is produced by closing your aperture down to a number smaller than f16. Each lens will produce a slightly different starburst as well. This depends on the type of diaphragm used in your lens to open and close the aperture. The lens diaphragm has a number of blades and depending on how many of these there are, your ‘star’ will have different numbers of spikes.

The sun can have a star look to it, by hiding it behind the tree.

  • Photographing city lights – This is relatively straightforward, as you just need to close down your aperture. Keep in mind however that a small aperture will mean your photo is less sharp.
  • Photographing the sun – To do this you’ll need the sun to be partially blocked. This might mean hiding the sun behind some tree leaves, or waiting for the sun to just about disappear behinds some clouds or headland. In these conditions, the sun won’t dominate the rest of the frame as much, and you can create a star effect with it by closing down your aperture.

Starburst Filters

Not related to creative aperture, but this is an alternate way of creating starbursts in your photo. Once again this will create starbursts from a point of light in your frame. The light spikes will be longer though, and you might decide this creative effect is not for you.

City lights provide a great point of light, and this can be made into a starburst.

Get Your Own Creative Aperture Photos!

So now it’s your turn to use one of the key settings to its creative potential! Get your camera on aperture priority, and see what you can produce!

Do you have a favored way of using aperture for your photography? We’d love to hear your experiences with this setting.

Finally, please share your photos with the digital photography school community, by posting them in the comments section below.

The post How to Use Creative Aperture to Maximum Effect appeared first on Digital Photography School.


Digital Photography School

 
Comments Off on How to Use Creative Aperture to Maximum Effect

Posted in Photography


4 of the Best Lenses for Creative Dog Photography

14 Nov

It’s now estimated that of the 12 million households in the UK, 44% have pets. This equates to approximately 51 million pets owned. Of those, 9 million are dogs and 8 million are cats. With dogs and cats recognized as legitimate members of our families, just like our children, it’s no wonder we want to share them with the world. Pictorially speaking.

4 of the Best Lenses for Creative Dog Photography 1

Cavachon, Dorset © Andrew Sproule

Adult dog owners post a picture or talk about their dog on social media on average six times per week. They also watch dog videos or check out dog pictures about three times a week — and, one in ten has a social media account exclusively for their beloved woofer. It’s a similar picture (pardon the pun) in many countries around the world.

The perpetual advancements in smartphone camera technology allow us to be able to snap and share good quality pics of our very special soul mates, anytime and virtually anywhere.

Despite the ever-ready benefit of having a camera at hand (or should that be ‘in hand’), the demand for superior quality, longer lasting, tangible keepsakes such as albums or wall art has never been higher.

As a working dog photographer, I am inundated with questions pertaining to all aspects of pet photography as you can imagine. And I love to help where I can. The questions that I’m asked most often relate to lenses:

‘What is the Best Lens for Pet Photography?’

Now, this is a somewhat loaded question. However, the answer really depends on you. What you’re trying to achieve, your style, your budget, whether you’re a hobbyist or professional, a generalist or targeting one type of pet etc. If your chosen system is Nikon, Sony or another, that’s absolutely fine. Rather than focus on the brand, this article outlines how particular lenses can be used to create different effects in certain situations.

90% of my work is focused on dogs, predominantly in outdoor on-location situations. I use two Canon full-frame camera bodies, which has inevitably influenced my choice of lenses.

I would love to be able to provide you with a catchall solution to this question. Nevertheless, it’s only right that I concentrate on providing you with details about what works for me. I trust that you’re able to take away information that you find helpful and constructive, and that you can use in your own unique situations.

4 of the Best Lenses for Creative Dog Photography 2

Springer Spaniel Sussex © Andrew Sproule

So, here’s an overview of what I tend to use on most of my dog photography sessions. As a heads-up, I’ve avoided the technicalities of each lens and instead focused on how these lenses can be used creatively.

Clients hire me based on my style and my approach to dog photography. That works for me because I’ve always liked to get up close and personal. I often get at or below the dog’s level to afford me a dog’s eye view of the world.

Now, I have a certain style, but when it comes to a commissioned shoot, my focus and my duty are to offer my clients a gallery of images jam-packed with diversity. One sure-fire way to achieve this is through the use of several different lenses. In this post, I’m going to concentrate on the four that I tend to use the most.

Zoom Lens: 70-200mm f2.8

I like to ease myself into most photo sessions to ensure the client’s dog is relaxed right from the offset. I tend to stand back a bit (or lay down in most cases!) and start with the 70-200mm f2.8. This zoom lens (although quite heavy for its size – over 3lbs) is a real workhorse. It has a very handy focal range, outstanding autofocus, and excellent image quality. Because I always work hand-held (often in varying light conditions), its 3-stop image stabilization (IS) is a godsend.

However, if I need a bit more focal length I will pair the 70-200mm with a 1.4x extender. There is the inevitable small drop in image quality, which can be more noticeable in older versions of the extender. However, if it’s this versus no shot at all, then it’s a no-brainer.

The 70-200mm f2.8 is an extremely versatile lens that allows you to capture a variety of shots from playtime, scenic, group, portrait and so much more. It’s a lens that is always with me on my photo shoots.

4 of the Best Lenses for Creative Dog Photography 3

Labradoodle, Kent © Andrew Sproule

Prime Lens: 85mm f1.2

For situations that call for stunning background blur, I reach for my 85mm f1.2 (non-IS). I absolutely love this prime lens for its light gathering properties and superb image quality. Again, for its size, it’s heavy. That is to be expected though as there’s an awful lot of glass in there. In fact, there’s so much heavy glass that it affects the autofocus speed.

Therefore, I use this lens primarily when I know I’m going to have subjects that can remain fairly still, even if it’s just for a few seconds. I hardly ever shoot at f1.2 either. The plane of focus is so narrow that you can often see a difference in sharpness between a dog’s eyes. A dog that is facing me! It’s that narrow. I find f2-f4 is the sweet range.

Zoom Lens: 24-70mm f2.8

If I were only allowed to use one lens on a dog photography session it would be the 24-70mm f2.8. This lens, which offers my most-used range of focal lengths, is often described as ‘the best performing Canon full-frame compatible general purpose zoom lens available.’ And breathe!

And, I have to agree.

The 24-70mm is super sharp, super fast and super accurate, so I can forgive Canon for this lens’s lack of image stabilization. They (Canon) sacrificed IS to ensure this lens would retain ultimate image quality and I can live with that.

The amount of flexibility and control the 24-70mm lens affords me means that, on average, over 65% of the images I present at my clients’ viewing appointments have been taken with this lens.

4 of the Best Lenses for Creative Dog Photography 4

Pug, London © Andrew Sproule

Wide-Angle Zoom Lens: 16-35mm f4

Finally, the lens I most like using is the 16-35mm f4. It’s an extremely sharp ultra-wide angle zoom that’s full-frame compatible. It is incredibly fast and quiet, extremely accurate and the image quality is excellent. This is the lens that allows me to truly have some fun with my subjects. If I’m working with a dog that’s unfazed by having a lens unusually close to them, then I can truly come away with some magical and whimsical portraits.

As you’ve read, it’s horses-for-courses. In my case, it has taken quite a few years to get to this point. The crucial take-out is that you need to discover for yourself what works for you. The best advice I was given was to get out there and shoot. The more dogs I photographed the more I was able to hone in on what lenses worked for me.

So, don’t be afraid to invest in pro-quality lenses, especially if you’re a working professional. You owe it to your clients to be using pro-level gear. And, these lenses really hold their value. They can be resold or part-exchanged if they don’t quite work out for you. If it’s a toss-up between several lenses, consider hiring first. It’s an effective way to help you narrow down the many choices available.

Good luck out there!

What lenses do you use for dog photography? Share with us your experiences in the comments below.

The post 4 of the Best Lenses for Creative Dog Photography appeared first on Digital Photography School.


Digital Photography School

 
Comments Off on 4 of the Best Lenses for Creative Dog Photography

Posted in Photography


Flickr confirms it’s sparing Creative Commons, non-profits from the new 1,000 image cap

08 Nov
A Grazing Encounter Between Two Spiral Galaxies — NASA on The Commons

Last week, Flickr announced it was removing the previously-required Yahoo login, adding new “Pro” features, and adding a 1,000 image limit on free accounts.

The news, particularly the 1,000 image limit on free accounts, hasn’t exactly gone over well, here on DPReview and other forums. One complaint in particular is what will happen to the hundreds of thousands of Creative Commons photos currently being hosted on Flickr.

Creative Commons CEO, Ryan Merkley, even got in on the topic, saying on a post on the Creative Commons blog, “Many users are concerned such a limit on free account capacity might cause millions of CC images to be deleted from the Commons. A lot of people have reached out to us directly and asked what we can do. I’m confident that together we can find solutions, if we assume goodwill and bring our collective creativity to the problem.”

He later added in the blog post, “I have confidence in Don and Ben and the SmugMug and Flickr teams: they want to do right for the Commons, and they understand how deeply CC and the photo Commons is integrated into the goodwill that Flickr has retained over all these years.”

Well, we now know the fate. In a post on the Flickr blog, SmugMug Co-Founder and CEO, Dan MacAskill, announced Flickr is sparing Creative Common photos from the 1,000 image limit. Flickr will also keep any photos in the Flickr Commons that have been uploaded by institutions, including NASA, The Smithsonian, The National Archives UK, and The British Library, and others, saying “all these organizations already were Pro or have received a free Pro account from us, so they have unlimited storage.”

The post also address non-profits who rely on Flickr for image hosting. He says SmugMug has worked hand-in-hand with 501(c)(3) organizations and International charities in the past to provide free, unlimited storage and will continue to do so going forward with Flickr. Flickr has even set up a dedicated page where non-profits can fill out a form to get started on getting a free Flickr Pro account set up.

MacAskill ends the article saying “Whatever changes come in the years going forward, the importance of these photos will always matter to us. We not only want to preserve the photos we have, we want to keep partnering with organizations such as libraries, museums, and government agencies to contribute to The Flickr Commons as well. And we will continue to work hard to keep these photos safe and available for the world to view and enjoy.”

You can read the post in its entirety on the Flickr blog.

Articles: Digital Photography Review (dpreview.com)

 
Comments Off on Flickr confirms it’s sparing Creative Commons, non-profits from the new 1,000 image cap

Posted in Uncategorized


Blur and Creative Photography – Why Your Images Don’t Need To Be 100% Sharp

06 Nov

Blur and creative photography – Why your images don’t need to be 100% sharp all of the time.

Blur and Creative Photography - Why Your Images Don't Need To Be 100% Sharp 1

I have an image of a blueberry shot on the end of a spoon with my macro lens. It has a very narrow depth of field (DOF).  Only the front of the blueberry is in focus. The rest has a lovely soft blur.

The first comment when I posted it on Facebook was ‘it would look better if it were all in focus.’

No.

There is a perception amongst some photographers who are very invested in the technicalities of shooting, that absolutely every image has to be 100% sharp. While it is an entirely valid choice – and I fully support the decision to shoot their images that way – it is not the ‘only’ choice.

For those of us who want to explore different creative styles, have fun with different lenses and push the boundaries of what photography can allow us to do in creating art, there are plenty of alternatives.

NOTE: To clarify, sometimes an image ‘just is’ out of focus for whatever reason. This article addresses the photographers deliberate creative choice to use softness or blur in a picture.  It may be a subtle difference for some, but it is a difference.

Blur and Creative Photography - Why Your Images Don't Need To Be 100% Sharp 2

Beyond Bokeh

It amuses me that many photographers believe all images ‘must be tack sharp.’ Still, they are out there taking photos of birds, portraits or wedding shots with very soft blurred bokeh backgrounds. However, the reasons they do so are perfectly valid.

Some photographers do so to:

  • soften a distracting background
  • bring the subject into prominence
  • make it aesthetically pleasing
  • give depth and 3D feel to the image

But for bokeh to work well, you need to have some specific elements present and happening. Such as decent quality lenses, a lot of distance behind the subject to the background, and good soft light. Not every shoot offers those situations, nor can everyone afford the best lens.

What if we want even more softness in our image, including the subject? Maybe we want the background sharp, and the subject blurred – a technique often used in some street photography styles.

What about ICM – Intentional Camera Movement? Or Wabi-Sabi, the Japanese/Zen aesthetic of the beauty of imperfection.

There are so many other ways to see the world and present our images with our unique creative viewpoint. If that means smearing stuff on a filter in front of your lens, then smear-away :).

Blur and Creative Photography - Why Your Images Don't Need To Be 100% Sharp 3

Learn To Love the Blur

Bring your hand as close to your face as you can, so you can still focus on it. What happens to the background?  If you shift focus to the background instead, your hand blurs.

Distant mountains are blurred as we physically cannot focus clearly that far away.

So its natural for blur to be present in our images. Therefore if we choose to use it more creatively to give our pictures a different feel or mood, we are enhancing a natural element in our world.

Painters can represent a tree in different ways depending on their technique and style. It may be rendered beautifully with every leaf painted as an individual element. It may have stark lines representing a trunk and branches, or colorful blobs in the background.

Photography can be playful, creative, stylistic and artistic as well. We can allow ourselves to love blur.

Blur and Creative Photography - Why Your Images Don't Need To Be 100% Sharp 4

Intentional camera movement is popular with stands of trees, soft beach scenes, and fields of flowers. To enhance it, even more, some people stretch plastic film in front of the lens. Or wrap it around the front leaving a small opening to shoot through.

I know flower/macro photographers who wrap gauze fabric around the front of their lens for an alternative soft effect and to add some color as well. Stretching pantyhose across the front of the lens is also cheap and effective.

Smearing petroleum jelly on a filter screwed to the front of the lens is reasonably common for an effective soft blur effect.

Blur and Creative Photography - Why Your Images Don't Need To Be 100% Sharp 5

Lens Choices

Lenses with an F stop of 2.8 to 1.4 give a very narrow depth of field, which highlights the subject and softens the background. Macro lenses are excellent for this effect.

Many portrait and wedding photographers will have an 85mm portrait lens with an F-stop in this range. Often specifically used to blur the background for a nice effect.

Lensbaby are well known for their special effect lenses. Their lenses offer lots of creative blur effects.  The ‘Composer’ range allows you to select a specific point in the image to be in focus while softening the remainder. The ‘Twist’ range gives a swirly bokeh effect in the background, and there are other options too.

‘Helios’ and ‘Vivitar’ vintage lenses are experiencing a renaissance in popularity. They have many creative bokeh effects (including the swirl style) and are quite cheap in comparison to Lensbaby. They are vintage manual-focus lenses and may need a specialist mount to attach to your modern camera, but can they can be purchased at very affordable prices.

Blur and Creative Photography - Why Your Images Don't Need To Be 100% Sharp 6

Vintage ‘Helios’ lens gives very swirly bokeh blur in this image

Have Fun

For some people, it can be scary to let go of the need for sharpness and embrace the softer side. Other people sit happily in that place and rarely shoot a classically sharp shot.

There is room within photography as a creative medium for us to be artistic. To let go of the perceived rules, relax and have some fun doing something different.

Yes, some effects are niche, and you may not want to use them all the time. But you wouldn’t use a Fish-Eye lens every day either.

Having a range of choices gives you much more scope to shoot differently, add your unique take on an image. Using different lenses can help us see the world in new exciting ways and open up opportunities to create memorable images.

Blur and Creative Photography - Why Your Images Don't Need To Be 100% Sharp 7

Ways to Play

1. Bokeh

Bokeh relates to the quality and smoothness of your blurred background when you shoot the subject with a shallow depth of field. Different lenses give a varied type of bokeh. Usually, the better quality fast primes or macro lenses have the smoothest, most pleasing bokeh.

Bokeh happens when the subject is closer to the camera than it is to the background. Shooting wide open, i.e., F2.8 to F1.2 will give maximum blur of the background.

So try to shoot your subjects wide open with a narrow depth of field. With the background further away from them, you will achieve the nice soft blur.

Blur and Creative Photography - Why Your Images Don't Need To Be 100% Sharp 8

2. Selective Focus

When you combine a narrow depth of field, such as F2.8, with selecting a specific part of the subject, it will soften everything else in the image.

Doing so creates a lovely effect with flowers and macro imagery.

Blur and Creative Photography - Why Your Images Don't Need To Be 100% Sharp 9

3. Shoot Through

Place something in front of the lens to add some level of softness.  It can either completely cover the lens or be wrapped around it to only soften the edges.

You can use:

  • nylons stretched across the lens
  • gauzy fabric wrapped around the lens
  • plastic film across or wrapped around the lens
  • filters smeared with petroleum jelly
  • hold fabric or flowers in front of part of the lens to add softness (common in flower photography)

4. ICM (Intentional Camera Movement)

Intentional Camera Movement is when the camera is deliberately moved during the shutter opening and closing to add blur to the image. A neutral density filter can assist with giving you a slightly longer shutter speed if shooting in daylight.

You may have seen this used in shots of forests with vertical stands of tree trunks.

5. Vintage Lenses

Try purchasing ‘Helios’ or ‘Vivitar’ Lenses (or other options) and related mounts for your camera. Many of these lenses have unexpected visual effects (sometimes seen as a fault) but can be used effectively for creative shots.

6. Specialty Lenses

Lensbaby offers a range of lens solutions to give you a variety of soft effects.

Blur and Creative Photography - Why Your Images Don't Need To Be 100% Sharp 10

Lensbaby Velvet 56 at F1.8 is very soft and adds a glamour effect

7. Filters

Soft Focus filters get screwed in front of your lens and are useful in portrait and glamour work. Otherwise, many people mimic this effect in post-processing via Photoshop.

Blur and Creative Photography - Why Your Images Don't Need To Be 100% Sharp 12

Conclusion

For those who strive to have every image as sharp as possible, continue with your efforts. If you who want more variation, flexibility, and creativity in your work, there is space to play and create that style of an image too.

It doesn’t have to be expensive. The vintage lenses can be bought online for under $ 100 (depending on freight and exchange rates).

Give yourself permission to relax, experiment and play, and create something unique!

Come over to the soft side. We like it here! ?

Share your images with us in the comments below.

Blur and Creative Photography - Why Your Images Don't Need To Be 100% Sharp 13


The post Blur and Creative Photography – Why Your Images Don’t Need To Be 100% Sharp appeared first on Digital Photography School.


Digital Photography School

 
Comments Off on Blur and Creative Photography – Why Your Images Don’t Need To Be 100% Sharp

Posted in Photography


Five Reasons Why I Finally Bit the Bullet Switched to Adobe Creative Cloud

19 Sep

When Adobe announced that they were transitioning their apps to a subscription model of the Adobe Creative Cloud in 2013, I almost fell out of my chair while clutching the cardboard box for my copy of Lightroom 4. It seemed absolutely crazy to me that Adobe would ask photographers and other creative professionals to spend money every month subscribing for software that they could simply buy once and use forever.

In the years that followed I resisted moving to Creative Cloud and continued to buy new versions of Lightroom one by one until a few months ago when I finally bit the bullet and subscribed. I was one of Adobe’s harshest critics in those intervening years and staunchly refused to buy into Creative Cloud for several reasons until I realized five important things that finally got me to switch over.

Five Reasons Why I Switched to Adobe Creative Cloud - couple portrait

Much of my hesitation to switch was due to the fact that I didn’t really understand the service Adobe was offering with their Creative Cloud Photography plan. That’s the one that lets you have Lightroom and Photoshop for $ 10/month.

What I failed to recognize was that Lightroom and Photoshop are just the tips of the iceberg, and there’s a whole slew of additional Adobe services that users have access to with a CC subscription. None of these by themselves are worth the price but when you examine all the ancillary benefits you get alongside great software it makes the idea of renting the software I used to own a lot more palatable.

Syncing between Lightroom Classic and Lightroom CC

When you subscribe to the Photography plan you get two versions of Lightroom, each with unique features and benefits designed to cater to specific types of photography workflows.

Lightroom Classic CC is the name of the traditional desktop app that has been around since 2007, now available only through a Creative Cloud subscription. This is for desktop-centric workflows where all your photos reside on a single computer.

Lightroom CC is a new different version of Lightroom designed for a cloud-centric workflow where all your photos reside in the cloud and can be edited anywhere – in a browser, on a tablet, on a phone, or even using Lightroom CC on a desktop computer.

What you might not realize is that you can use both of these programs together, with the key difference being the location where your original pictures actually reside. If you are accustomed to a traditional desktop-centric workflow you can use Lightroom Classic CC to sync specific albums in the Cloud.

This basically uploads low-resolution preview files of your photos to your Creative Cloud account. These previews, then, can be edited anywhere using Lightroom CC and the next time you load Lightroom Classic CC on your desktop all your edits are automatically synced to your original photos and catalog file.

photo editing in Lightroom CC - Five Reasons Why I Switched to Adobe Creative Cloud

I started editing this photo on my computer in Lightroom Classic CC. Then I pulled it up in my browser and made additional changes which were synced back to my desktop.

The key difference between both types of workflows is that when using albums published to the cloud from Lightroom Classic CC, your originals remain on your desktop which means you can’t export high-resolution images from Lightroom CC. However, for photographers who want to edit their pictures on the go and then return to their desktop for any final tweaking and exporting, this is an outstanding solution and one that could make the difference to those on the fence about subscribing.

One final note about this: The $ 9.99 Photography Plan includes 20GB of cloud storage, but the albums that you publish to the cloud from Lightroom Classic do not count against that 20GB. This is because they use low-resolution previews instead of your actual images which is fine for flagging, cropping, keywording, color correcting, and most of the other adjustments you would want to make on a mobile device.

family photo in Lightroom - Five Reasons Why I Switched to Adobe Creative Cloud

Having access to my photos on mobile has sped up my culling process enormously. It’s much faster for me to flag, reject, and rate photos on my iPad and the results are synced right back to my iMac in Lightroom Classic CC.

Photoshop is Included

I’ll be the first to admit that even though I call myself a photographer I rarely use Adobe Photoshop and instead do most of my post-processing in Lightroom. I do, however, have an old copy of Photoshop CS5 that I bought about eight years ago which I use when I really need to do some heavy processing.

But it’s slow, lacks a lot of modern features, and has an interface and layout that is confusing, to say the least. It also crashes on me a lot which doesn’t exactly help matters whenever I do need to use it.

Despite these issues, the fact that Photoshop is included did not do much to initially sway my barometer when it came to shelling out $ 9.99 each month for the Creative Cloud Photography plan. I forced myself to get by with what I had even though it was not really suiting my needs anymore.

image in Photoshop - Five Reasons Why I Switched to Adobe Creative Cloud

But the more I thought about subscribing to Creative Cloud the more I realized how nice it would be to have the full version of Photoshop ready when I needed it.

No need to think about buying, upgrading, or figuring out whether the version I had would really be current with the latest online tutorials. It just started to make sense for a small-time photographer like me to pay what really is a modest monthly fee to have the latest and greatest tools at my disposal for when I needed them.

Since I don’t use Photoshop all that often it would not be worth the price of a Creative Cloud plan by itself, but combined with everything else it sure did make a lot of sense.

Share albums publicly

I take a lot of photos of family, friends, and events just for personal use and like most people, I enjoy sharing these images with others. Until subscribing to Adobe Creative Cloud my workflow for this type of sharing was somewhat convoluted and involved exporting small-sized images from Lightroom, saving them to a Dropbox shared folder, generating a public link, and sending that out to others.

I couldn’t do much in the way of limiting access privileges either, and meanwhile, the images were taking up space in my Dropbox account that is perpetually near its limit anyway.

Now my process is much simpler, a lot more efficient, and results in a greater degree of control over what I can actually let other people do with my images. After publishing an album to the cloud from Lightroom Classic CC you can log in to Lightroom on the web, on mobile, or just load up Lightroom CC and generate a public link for any synced album.

Moreover, you can get an embed code, choose to allow downloads and show metadata, and even let people filter the photos according to Flag status.

album sharing - Five Reasons Why I Switched to Adobe Creative Cloud

While the images that are publicly viewable using this method are the low-resolution previews and not full-size images for printing, they are more than enough for most people.

The tradeoff in terms of overall simplicity and ease of use is more than worth it for me, and I’m not taking up valuable space in my Dropbox account or other file-sharing services.

Adobe portfolio

This might not be useful for some photographers but I have found Adobe Portfolio to be an incredible asset as a Creative Cloud subscriber and it really was one of the primary reasons I eventually chose to upgrade. Previously I was paying a service nearly $ 100/year for my photography website. But when I realized that Adobe Portfolio could do everything I need and was included with a Creative Cloud subscription I canceled my other hosting service and moved everything over to Adobe.

adobe portfolio - Five Reasons Why I Switched to Adobe Creative Cloud

Adobe Portfolio won’t give you the fanciest website in the world, but it could very well get the job done for you at not much more than what you are paying for a website now.

All Creative Cloud subscribers have access to Adobe Portfolio which, though not as full-featured as some of the other hosting providers, is more than enough for my needs and possibly yours as well. As an added bonus it syncs with Lightroom so I can create albums on my computer and have them synced automatically with my website. Something that was not possible at all with my previous hosting company.

If you are at all interested in Creative Cloud but unsure about the $ 9.99 monthly fee, I recommend looking at your current website hosting solution and comparing it to Adobe Portfolio. It is quite likely that the latter could suit your needs just fine and end up only costing you a bit more than what you are already paying for a website.

adobe portfolio - Five Reasons Why I Switched to Adobe Creative Cloud

Adobe Portfolio doesn’t have the breadth of features offered by other website platforms, but it does have a decent selection of themes and some solid options for photographers who want a simple, effective way to showcase their work online.

The price was right

As I looked at all the features offered by Adobe Creative Cloud I kept on coming back to the monthly fee, and for years I just couldn’t reconcile the idea of being locked into a perpetual contract just to use software that I could go out and buy once but use forever. However, I kept coming back to other software I had purchased like Aperture, Final Cut Express, and even other Adobe apps like Fireworks that simply wouldn’t run on my computer anymore.

Sure I had bought these apps but as time went on the only way to use them was to purchase new versions anyway. In the meantime by not upgrading I was losing out on the bug fixes, added features, and overall speed improvements offered by their newer counterparts. In some cases, like Final Cut Express, apps were simply deprecated by their developers leaving me with no choice but to upgrade anyway.

software - Five Reasons Why I Switched to Adobe Creative Cloud

I’ve paid hundreds of dollars over the years for software that I can’t use anymore, or won’t be able to use in the near future because it has been deprecated by its developers.

I still don’t like the idea of being locked into a monthly fee for software but when I considered all the benefits that came with what really was a modest price (only about $ 30 more than I was paying just for my website) the choice became clear. I’m not saying that Creative Cloud is right for everybody but it was definitely the right choice for me and, depending on your needs, it could be right for you too.

The post Five Reasons Why I Finally Bit the Bullet Switched to Adobe Creative Cloud appeared first on Digital Photography School.


Digital Photography School

 
Comments Off on Five Reasons Why I Finally Bit the Bullet Switched to Adobe Creative Cloud

Posted in Photography


3 Quotes for the Creative Photographer

18 Sep

Most of us photographers struggle with our creativity. As time goes on you’ll likely experience fewer moments of passionate inspiration and longer periods of hard work and creative dryness.

It was during a period of creative dryness in my photography business that I discovered a whole breed of photographers who had been able to express their creativity in surprising ways.

They brought every part of their life to their photography, found beauty in unlooked-for places, and got in over their heads. Their ideas were just what I needed to breathe new life into my own photography.

Let me share with you three quotes that will help you understand yourself as a creative photographer.

3 Quotes for the Creative Photographer - boat on a lake

It’s liberating as a creative photographer to forget about making money or comparing yourself to other photographers and just go play with your camera. For me, it’s climbing sand dunes or wading through water at sunset. It brings me to life.

1. You Bring Your Whole Self

“You don’t make a photograph just with a camera. You bring to the act of photography all the pictures you have seen, the books you have read, the music you have heard, the people you have loved.” – Ansel Adams

When you first became a photographer you likely focused on finding the perfect camera and lenses. For a while, it was all about chasing gear. But in the end, the gear doesn’t satisfy. Unless it helps you expand your creative horizons it becomes a worthless dust collector sitting on a shelf somewhere.

Fuji Cameras - 3 Quotes for the Creative Photographer

These are my favorite cameras to use. The Fuji x100s is perfect for everyday life. I’m nostalgic about the photo quality of the iPhone 4s. It was the first phone camera I ever used. The Fuji XT1 along with a portrait lens and silent shutter mode is perfect for portraits.

You probably tried your hand at copying what you saw on Pinterest or other photo sharing groups. I bet that once you were successful you got bored and moved on quickly.

Gear and gimmicks don’t satisfy you. In fact, you’re more likely inspired by the books you read, even though they are non-visual because they fire up your imagination.

3 Quotes for the Creative Photographer - kid in a dingy on a lake

Two winters before this photo was taken, my imagination had been fired up after reading “The Wind in the Willows.” But I had no idea how to capture that in photos. That is until one spring when the bay that we live on overflowed its banks and took over our yard! I bought a dingy for my son, put on my chest waders and spent the evening in and on the water. Ratty would be proud of us.

The creative photographer brings to their work their whole life, their whole selves. That usually includes a whole host of other creative endeavors like music, painting, writing, or acting, even if you pursued them at different moments in life.

Photograph of Alice Cooper - 3 Quotes for the Creative Photographer

Though I loved photography as a kid, I was a musician before I became a photographer. Knowing what it’s like to perform and connect with the audience, I always look for those engaging moments when I photograph bands. Is there anything more engaging than Alice Cooper in a straight-jacket staring down the barrel of your lens?

Alice Cooper with a booze bottle. 3 Quotes for the Creative Photographer

An Alice Cooper performance goes beyond the music and incorporates drama as well. The story that is played out for the audience is part fiction and part biographical. Alice brings everything to the stage, including his past battles with alcohol, showing the audience and fellow musicians what can be accomplished in life and art.

2. Making Beauty Out of Chaos

“I don’t just look at the thing itself or at the reality itself; I look around the edges for those little askew moments – kind of like what makes up our lives – those slightly awkward, lovely moments.” – Keith Carter

As a creative photographer, you’re often going to feel like you don’t fit in. You’ll likely find it hard to commit to one type of photography for the rest of your life (or as a business).

Here’s one idea that might characterize everything you photograph; beauty out of chaos.

Creative photographers are often at the fringes, on the edge of chaos and order, in unpredictable situations, trying to make something beautiful in difficult situations.

Kieth Carter quote - 3 Quotes for the Creative Photographer

Many of us deeply resonate with Carter’s words as we “look around the edges for those little askew moments.” While it’s natural to photograph the happy, predictable moments of life, I’m most at home looking around the edges. When a little guy “acts up” he’s taken out of the game to the edges for a time-out. But aren’t these the defining moments of life? I was drawn by the boy’s face and his inability to look his father in the eye.

boy and his father - 3 Quotes for the Creative Photographer

The situation was irresistible to me as a photographer. It was a “theological” moment and I was fascinated by the boy’s unwillingness to look his father in the eye. He expressed himself through his hands and fingers instead.

kid wiping his eyes - 3 Quotes for the Creative Photographer

I love that even the dirt on his arm speaks to his guilt. You can’t plan these moments, you just appreciate them as they come.

You’re likely drawn to “the real,” not being satisfied with mere poses but what happens between the poses, at the edges of a photo session – those “slightly awkward, lovely moments.”

Window silhouette of 2 kids - 3 Quotes for the Creative Photographer

No parent in their right mind would allow their kids to play in the curtains. Those curtains will end up a complete mess. But, even for just a moment, I saw beauty in that mess.

Golden hour silhouette - 3 Quotes for the Creative Photographer

Sometimes those moments in the window are more serene. I couldn’t help but notice afterward that the curtain ties were “slightly askew.”

3. You’ve Got to Get in Over Your Head

“I realize more and more what it takes to be a really good photographer. You go in over your head, not just up to your neck.” – Dorothea Lange

With the pursuit of the perfect camera behind you (happy to use whatever camera you’ve got on hand), and Pinterest a distant memory, you bring everything you’ve got to your photography. But even when you find yourself up to your neck, you’re still holding back.

There’s nothing to force your creativity quite like walking into a situation that puts you in way over your head. You’ll be forced to figure out what to do at the moment.

Rock band photography - 3 Quotes for the Creative Photographer

I still remember the first time I took the stage as a musician. It was a high school talent show on a makeshift stage in the cafeteria. All I could think was, “How did I get myself into this?” I knew I wasn’t qualified in any way to be on that stage (even though it was just a bunch of tables pushed together). But the moment took over and I knew I was made for the music.
To this day, I look for raw emotion when photographing musicians.

I daresay that, for most of us, going in over our heads means overcoming ourselves. Overcoming our social anxiety, fear, and laziness. While a little social anxiety, introversion, or laziness can kill your creativity – it can also fuel it.

Successful creative photographers talk about how they challenged themselves through their fears and assumptions and constantly embraced constraints that forced them to grow as people and as photographers.

What do you look like as a creative photographer?

I love hearing from you. Which ideas do you resonate with and what do you look like as a creative photographer? Let’s chat in the comments below.

The post 3 Quotes for the Creative Photographer appeared first on Digital Photography School.


Digital Photography School

 
Comments Off on 3 Quotes for the Creative Photographer

Posted in Photography


Seagate 14TB IronWolf and IronWolf Pro NAS HDDs are made for creative pros

14 Sep

Seagate has introduced new hard drives for Network Attached Storage (NAS) devices: the 14TB IronWolf and 14TB IronWolf Pro HDDs. The new models offer users access to high-performance hardware alongside management and recovery tools, making it possible to upload and download large amounts of data remotely without stressing about drive failures.

Both the 14TB IronWolf and IronWolf Pro models feature Seagate’s AgileArray technology, which optimizes the HDDs for multi-drive storage systems. Both models also offer up to 256MB cache, but the IronWolf Pro has a longer mean time between failures (MTBF) of 1.2 million hours versus the IronWolf’s 1 million hours.

As well, the 14TB IronWolf comes with a 3-year warranty, whereas the IronWolf Pro has a 5-year warranty. The regular IronWolf model is targeted at small businesses and home use with a 180TB/year workload rating, while the IronWolf Pro is intended for creative professionals, among others, with a 300TB/year workload rating.

The Pro model includes data rescue services, which are an optional addition for the IronWolf model

Both the 14TB IronWolf and IronWolf Pro feature rotational vibration sensors, but differ in support for multi-drive configurations: the IronWolf can be used in devices with up to 8 bays and the IronWolf Pro can be used in devices with up to 24 bays. The Pro model includes data rescue services, which are an optional addition for the IronWolf model.

Seagate’s IronWolf product page doesn’t currently include the 14TB model in its retailer availability search, but Tom’s Hardware reports that the 14TB IronWolf costs $ 530 USD and the 14TB IronWolf Pro costs $ 600 USD.

Via: Seagate

Articles: Digital Photography Review (dpreview.com)

 
Comments Off on Seagate 14TB IronWolf and IronWolf Pro NAS HDDs are made for creative pros

Posted in Uncategorized


Adobe won’t support older operating systems with its next major Creative Cloud update

29 Aug

If you’re not one to update your computer gear often, you might want to reconsider. Adobe has issued a notice future releases of Creative Cloud programs will no longer support older versions of MacOS and Windows operating systems.

‘As we prepare for our next major release of Creative Cloud, we wanted to share some information on updated operating system requirements,’ says Adobe. ‘To take advantage of the latest operating system features and technologies, the next major release of Creative Cloud will not support Windows 8.1, Windows 10 v1511 and v1607, and Mac OS 10.11 (El Capitan).’

Adobe notes all past and current versions of Creative Cloud applications will continue to work on the aforementioned operating systems. Creative Cloud Desktop — the management application for all Creative Cloud apps — will continue to be supported on Windows 7 or later and MacOS 10.9 (Mavericks) and later.

According to Adobe, ‘focusing [its] efforts on more modern versions of Windows and Mac operating systems allows [it] to concentrate on developing the features and functionality most requested by members, while ensuring peak performance that takes advantage of modern hardware.’

Articles: Digital Photography Review (dpreview.com)

 
Comments Off on Adobe won’t support older operating systems with its next major Creative Cloud update

Posted in Uncategorized


6 Types of Portrait Backgrounds for Creative Images

26 Aug

There are many options when choosing backgrounds for your portraits. You can pretty much do anything you want. The key to remember though is lighting and positioning your subjects in relation to that background.

Whether that be natural or artificial lighting, outdoors or indoors, it is vitally important to understand how light also affects your background and not just the subject of your portrait.

#1 Busy or patterned background

6 Types of Portrait Backgrounds You Can Use for Your Images - busy patterned background

Before you look at various types of backgrounds, I’d encourage you to experiment. Don’t be afraid to make mistakes or to try your ideas out. That was what I did with the portraits above. I wanted to see how a portrait could look using a busy background in my own home. I decided to use LED lights for these and moved either the subject or the light around depending on how I wanted the background to look.

Backgrounds can either strengthen your portraits by directing focus toward your subject or vice versa. If the background is too busy such as the one above right, (I feel there is a weaker focus on the girl) make sure your light draws focus towards the subject rather than the lighting the background too much.

I didn’t want the background to be completely dark, however, as I wanted to capture the fairy lights in the fireplace as well as the detail of the wallpaper and other decors. To achieve this, I shot with a small aperture for greater depth of field and put my subject closer to the background. All of these required balancing the exposures in post-processing.

The photo on the left also has a very busy background – a patterned wallpaper. However, unlike the busy photo of the right, I didn’t want to emphasize the pattern but planned to use it as a blurry background. In order to achieve this effect, I shot with a shallow aperture and positioned my subject away from the wall.

#2 Dark textured background

6 Types of Portrait Backgrounds You Can Use for Your Images - dark background

The above set is another one of my experiments. This time I wanted to use textured fabrics in a natural way as a backdrop.

The lighting I used for these portraits was a simple window light coming from the side. The choice of dark fabrics was because I wanted to draw attention to the face and keep everything else rather minimal but rich in texture.

In contrast to the busy patterned background, I reigned in the color palette here to just browns and skin tones. They are simple portraits but are very rich in texture.

#3 Bright background

6 Types of Portrait Backgrounds You Can Use for Your Images - bright background kids photos

When I do outdoor family shots, this is one of my go-to-backgrounds. I look for bright spaces which are not the sky but are brighter than the subject such as foliage, trees, and leaves showing the bright sky behind it.

As long as it’s bright but is not the sky, it’s fine to use. The most important thing to remember is to put your subject in front of the bright background and expose for their face. This means the background gets brighter and the face is properly exposed. Use a flash to light the face if you want but as long as you properly expose the face, the image looks right.

6 Types of Portrait Backgrounds You Can Use for Your Images - kids photos by trees

Another thing to remember is to avoid having any dappled light on your subject’s face. The background can be dappled such as the trees with the light coming through on these the images above but never on the faces. That would more often than not, ruin your image unless you are intentionally doing so in an artistic shot, for example.

#4 Plain dark or light background

kids with dark background - 6 Types of Portrait Backgrounds You Can Use for Your Images

Plain backgrounds whether they be light or dark or mid-tone in color, make for classic portrait shots. You can’t go wrong with them as long as you know what you are doing with your lighting.

In the portraits above, I simply used a dark wall and window light for the main light. I put a reflector on camera right to bounce some of the light. That’s it.

dps-portrait-background-examples

The portraits above were shot in the client’s kitchen where they had a bench by the wall. It was perfect for some quick natural and fun portraits of the children for as long as they sat still! The lighting here was merely the window and skylight on the far right and a weak bounced fill flash behind me on camera left.

My main tip when shooting plain backgrounds is to match the lighting to the background so that if the background is light, then the subjects tend to be lit in the same strength. Similarly, when the background is dark, then I tend to light the subject with a moodier tone.

6 Types of Portrait Backgrounds You Can Use for Your Images - kids on light background

Although this is a personal preference, technically I prefer an even contrast between the subject and the background.

#5 White seamless background

white background portrait of a boy - 6 Types of Portrait Backgrounds You Can Use for Your Images

Contrary to what many people believe, a pure white background is not so easy to achieve. What I mean by that is that you can’t just set up a white background and your subject, take a picture, and you have your nice clean white seamless background. If you do this, you’ll end up with a light grey or off-white, rather muddy background.

Actually, in order to get that bright white background, you have to light the background and light your subject as well.

If you want to learn how to do this properly, read this article I have written and it will show you a step-by-step process of achieving a clean white seamless background – 3 Rookie Mistakes to Avoid When Shooting on a White Background.

#6 Fake background

fake background kids photos - 6 Types of Portrait Backgrounds You Can Use for Your Images

Yes, you can fake a background in Photoshop!

The photos above were shot on a plain dark wall similar to #4 and then I added textures in Photoshop afterward. You do need a separate image of a texture to overlay on the dark wall.

You can see how this is done on this article here I have written on adding overlays: Basic Photoshop Tutorial – How to Add Creative Overlays to Your Portraits

sun flare portrait - 6 Types of Portrait Backgrounds You Can Use for Your Images

Another way of faking it in Photoshop is by adding a sun flare. The background here was just a plain white wall but it was shot in a windowless room with very little ambient light. I used a flash at camera-left to mimic window light. In post-production, I added sun flares so it looks like the girl is sitting next to a window.

Here is an article where you can learn ways on how to add sun flares to your photos in post-production; 2 Quick Ways to Add a Sunflare in Photoshop

I hope this article has helped you in choosing backgrounds for your portraits. If you have any other ideas you wish to share, please do so in the comments below.

The post 6 Types of Portrait Backgrounds for Creative Images appeared first on Digital Photography School.


Digital Photography School

 
Comments Off on 6 Types of Portrait Backgrounds for Creative Images

Posted in Photography


Five Tips for Creative Pet Photography

24 Aug
pet photography creative black dog profile

Creative Pet Photography

How do you capture beautiful and unique photographs of your pets? While social media is littered with average snapshots of dogs and cats, it is possible to take your pet photography to the next level. In fact, it’s very simple.

In this tutorial, you’ll learn five ways to create incredible, unique photographs of your pets. These tips will allow you to capture unforgettable images of your beloved cat or dog, while at the same time preserving priceless memories.

husky dog - Creative Pet Photography

Tip #1: Get down to your pet’s level

When doing pet photography, it’s important that your camera is eye-level with your pet.

All too often, pet photographers shoot from an upright position, looking down. While this can sometimes work (we’ll discuss one example in Tip #3 below), it generally results in an unflattering pet portrait. This is because the ground makes for an unpleasant background.

Instead, crouch, kneel or lie down in front of your pet.

dog - Creative Pet Photography

I got down on my knees to photograph this dog (named Cookie Monster).

Notice the way the background changes from hard ground to a softer bokeh. You might even get a beautiful image of your pet’s head lying in the grass.

This is exactly what you want. It will make people stop and look twice. It will make your pet pop off the page.

So, when photographing your pet, get down low.

husky dog Creative Pet Photography

I photographed this husky mix, Penny, from a low angle.

Tip #2: Use a wide-angle lens

You can capture beautiful images of your pet no matter your equipment. However, it’s pretty standard to use a portrait lens, somewhere in the 50-85mm range, to photograph pets.

If you want a unique image, switch it up and pull out your wide-angle lens.

wide-angle Creative Pet Photography

With such a lens, the opportunities are endless. You can take an environmental portrait, one that shows off your pet in a stunning environment.

Or you can show your pet from a more intimate perspective by getting in close.

Regardless, you won’t go wrong using a wide-angle lens. You’ll capture beautiful pet portraits that will make your friends jealous.

Tip #3: Use the cute pose

The cute pose is my name for the pose that dogs often show. You know the one: in a sitting position, big eyes, looking up. The sort of pose that makes your heart melt.

cute pose - Creative Pet Photography

Lincoln exhibiting the cute pose.

How do you actually capture the cute pose?

I like to hold a treat just above my camera and tell my dog to sit. That way, he strikes the pose without any other prompting. His head points up to follow the treat. His eyes plead.

If you want a special image of your pet, the cute pose is an excellent way to go.

cute dog Creative Pet Photography

Tip #4: Get close

Do you want intimate pet portraits? I know I do.

One of my favorite ways to do this is to get close.

dog eye - Creative Pet Photography

I focused on the eye of this beautiful dog.

Many pet photographers often aim to capture the whole of their pet. But for a different image, try zooming in, getting close. Focus on a small part of your pet: their head, eyes, nose, or teeth.

The resulting image will be both intimate and unique. You’ll capture the details of your beautiful pet. And you’ll make more artistic, aesthetically pleasing images.

dog nose - Creative Pet Photography

I wanted to focus on the colorful fur of this dog, Hamilton.

To create intimacy in your pet photography, get close.

Tip #5: Capture the tongue

My final tip for unique pet photography is one of my favorites: capture your pet’s tongue in action.

People often strive to create static, formal images of their pets. These are nice, but sometimes you want to loosen up a little. You want to portray not just the physical features of your pet, but their personality.

That’s where the tongue comes in.

dog tongue - Creative Pet Photography

This involves a lot of waiting and watching. Some pets do more with their tongue than others. I like to wait for my dog to yawn. When his mouth is open, tongue lolling out, that’s when I press the shutter.

If you can capture your dog or cat with their tongue out, I guarantee you’ll love the resulting image. First of all, you’ll feel a connection to your pet, one that a formal portrait doesn’t really provide.

Second, viewers will feel a connection to your pet. They’ll start to understand his or her quirks better. They’ll start to appreciate your pet the way that you do.

licking tongue - Creative Pet Photography

To sum up: To capture unique images of your pets, make sure you photograph their tongue.

Conclusion

With so many photographs of pets in the world, it may seem impossible to distinguish yourself from the pack. It may feel like you’re getting the same photographs over and over again. Like you’re capturing photographs that aren’t intimate, photographs that don’t really give a window into the life of your pet.

However, if you follow the five tips above, your images will look beautiful, and they’ll also be more unique.

dog panting Creative Pet Photography

Capturing these unique pet portraits is simple.

  1. Start by getting low.
  2. Then whip out that wide-angle lens.
  3. Next, experiment with the cute pose.
  4. Fourth, get close. Really, really close.
  5. Finally, capture your pet’s personality by showing their tongue.

Once you get more experienced, you can mix and match different tips. You might photograph your dog in the cute pose with her tongue out. You might get low while using a wide-angle lens.

The possibilities for unique and stunning pet portraits are endless. So just get out there with your best friend, and start shooting. Do you have any other tips for unique pet portraits? Please share them in the comments below.

dog with blue collar - Creative Pet Photography

The post Five Tips for Creative Pet Photography appeared first on Digital Photography School.


Digital Photography School

 
Comments Off on Five Tips for Creative Pet Photography

Posted in Photography