RSS
 

Posts Tagged ‘Camera’

How to Select the Right Camera Memory Card

17 Apr

In today’s market if you want to buy a camera memory card, you may find it challenging to select the right one. A card comes with the following criteria; type, speed, price, capacity. If you want to buy a high capacity card with low price it might come with a low transfer speed. If you wish to buy a high transfer speed with high capacity card it may come with a really high price. If you want to strike a balance between both, you really have to compromise on quality.

Paul Hudson

By Paul Hudson

What is a memory card?

A small removable memory medium which can be used to store data on one medium and to transfer the data to another medium.

Let’s see each criteria which will help you decide on a memory card in detail.

Capacity

This one is fairly straightforward, and not a big deal. A 32GB memory card can hold up to about 1000 RAW photographs. Assuming that one RAW file size is 30MB, in general a Canon 5D MKIII will produce a RAW file between 25-35MB in size. Likewise a 16GB card can hold up to about 500 photographs, and so on. If you shoot in jpeg format, then a 32GB card can hold around 3200 photographs, assuming you have your jpeg settings as fine in detail, and large in file size. With that setting a jpeg file will come in at an average size of 10MB on a Canon 5D MK III camera.

Types

There are many types of memory cards available on the market ranging from Micro SD card, SD card, CF card, M2 (from sony). But there are only three type of cards being used primarily in the photography world, Secure Digital (SD) card, Eye-fi card, Compact Flash (CF) card.

Micro SD card

Micro SD card is a miniature version of the SD card and meant to be used in mobile phones. This card has capacity, as well as transfer speed restrictions. That is why it is used primarily in Smartphones where one can store music and apps, or any other relatively less active data.

Daniel Sancho

By Daniel Sancho

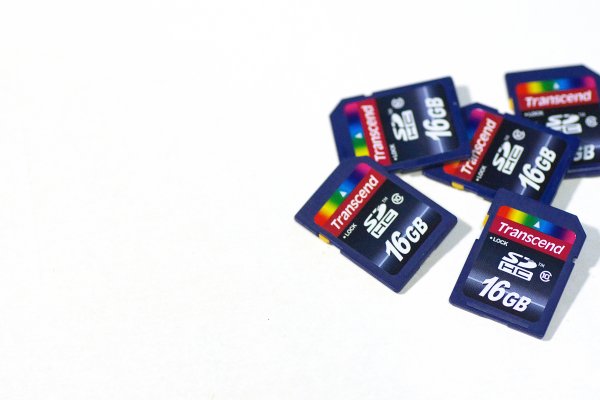
Secure Digital card (SD card)

This type of the card is widely being used in digital cameras, primarily in point and shoot cameras and secondarily being used in professional cameras. The constraint in using this card is the capacity of the card. The initial high capacity is only 2GB when introduced in 1999. But as the time and technology progressed a later version as SDHC is introduced with a higher capacity of 64GB in 2006 (HC means Higher capacity). The recent third iteration of SD card been announced in 2009 as SDXC cards (XC stands for extended capacity). This type of card offers up to 2TB and increased transfer speed.

Eye-fi card

These are unique SD cards that come with built-in WiFi. This allows you to transfer the data to your computer or a cloud based service or even to your Smartphone directly, thus enabling you to clear off the memory as you shoot, without having a need to replace the memory card. It is even possible to geotag your photographs with the available wireless service, but with less accuracy though.

Bfishadow

By bfishadow

There seems to be a promising future for this card!

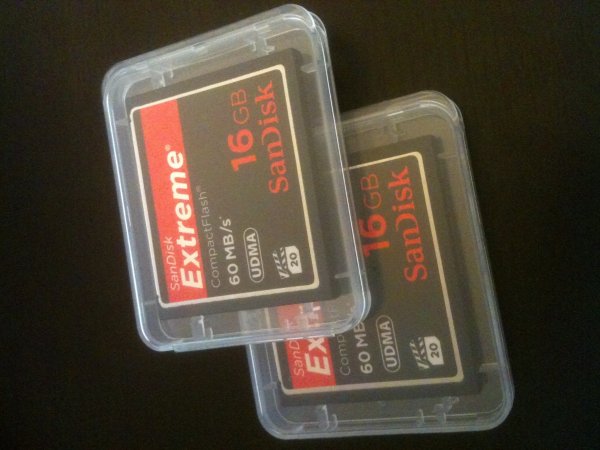
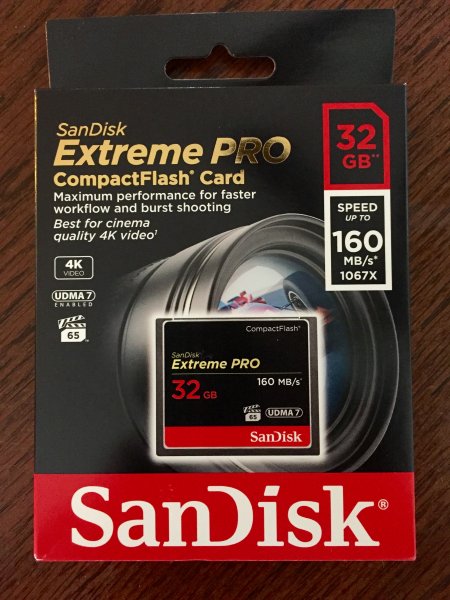
Compact Flash card (CF card)

First introduced in 1994, CD cards have high speed, and high capacity. This is the reason why CF cards occupy the primary card slot in professional cameras. Present SD cards are equalling the speed and capacity of CF cards, but camera manufacturers are not leaving CF cards just yet. They often provide slots for both an SD and CF card, but some photographers wish they would offer two SD card slots instead. This provides some extra space inside the camera and saves money for the photographer (CF cards costs roughly twice that of SD cards). Hopefully they will switch the importance to SD cards in the near future.

As the name suggests this is a flash memory which aids high speed reading/writing speed, and has a higher capacity too.

Speed

Speed in SD cards

All memory cards come with speed, either mentioned or not. Speed here means both writing and reading. The one indicated on the card is the maximum speed the card can read, but the most important thing is the write speed. Read speed is the time taken to read the data from the card and the write speed is the time taken to write the data. Simply put read speed comes into action when you transfer the data from the card, write speed comes into play when you shoot. In general the write speed is about half of the speed of read speed in SDHC cards. In few other cards both the read and write speeds are about the same.

Simon Yeo

By Simon Yeo

The speed of cards have been classified into classes by the SD Association, which are referred to below. The speeds are primarily meant for video recording, where sustained recording (write) is required and it is supposed to be the minimum worst case scenario speed.

You really need to give weight to this one single-most important factor, when you buy a memory card. All SD cards have a class noted on them. Check the attached diagram below:

Class Minimum Speed
2 2MB/s
4 4MB/s
6 6MB/s
8 8MB/s
10 10MB/s

Later, in 2009 another class, UHS, was introduced by the SD association and is designed for SDHC and SDXC memory cards. UHS utilizes a new data bus that will not work in non-UHS host devices. If you use a UHS memory card in a non-UHS host, it will default to the standard data bus and use the “Speed Class” rating instead of the “UHS Speed Class” rating. UHS memory cards have a full higher potential of recording real-time broadcasts, capturing large size HD videos and extremely high quality professional HD.

Courtesy – SanDisk website.

UHS Class Minimum Speed
1 10MB/s
3 30MB/s

Speed in CF cards

Laurie Cooper-Murray

By Laurie Cooper-Murray

When it comes to CF cards the speed is often mentioned as X times and in many cards it’s been mentioned as MB per second, which is pretty straight forward. Whereas when the speed is mentioned as 600X or 1066X what exactly does it means? X means 150Kb per second. It is a standard brought over from optical media recording. Now to find out what exactly the speed is of 600X – to find this multiply 600 by 150 and divide the result by 1000. The final result is in MB per second. Eg., a 600X speed card is capable of 90MB per second read speed (600?150/1000).

The latest CF cards come with the UDMA 7 which improves in clearing the camera’s buffer memory quickly, which allows the camera to get ready for the next burst. Firmware upgrade is required for the Canon 5D MKIII (yours may require it also, check with the manufacturer) camera to make full use of UDMA 7.

Price

Phil Romans

By Phil Romans

When it comes to price, the fastest card is the primary criteria which decides the price. The next deciding factor is capacity of the card. An SD card is 50% of the price in the same capacity CF card. So, if you want to buy a high speed card with same capacity you will need to pay more. On the other side if you want to buy a high capacity card at a lower price, it is possible to do so but you’ll get a lower speed card.

Notes

  • If you use two cards at different speeds, the lowest speed is the deciding criteria for the burst. For instance if you use a CF card at 90 MB/sec in one slot and an SD card having the capacity of 45MB/sec (and you set RAW files for both cards) then you won’t get the advantage of 90MB/sec and the possibility of missing the shot. You have to use both cards at the same speed.
  • If you do not upgrade to the latest firmware for the 5D MKIII camera, the host memory will perform for UDMA 6 which significantly consumes more time in clearing the buffer memory.
  • I wish the camera manufacturers would switch to SD cards completely for both slots. The speeds of the SD card already matches with the CF cards, there is no point paying twice the price, and we’d get the added bonus of saving space inside the camera.
  • In few cases the SD card speed is higher than CF cards. For instance SanDisk Extreme Pro speed is 280 MB/sec but from the same manufacturer the CF card’s maximum speed is 160 MB/sec.

Hope you have gotten a bit of information from this article. Do share your thoughts in the comments.

googletag.cmd.push(function() {
tablet_slots.push( googletag.defineSlot( “/1005424/_dPSv4_tab-all-article-bottom_(300×250)”, [300, 250], “pb-ad-78623” ).addService( googletag.pubads() ) ); } );

googletag.cmd.push(function() {
mobile_slots.push( googletag.defineSlot( “/1005424/_dPSv4_mob-all-article-bottom_(300×250)”, [300, 250], “pb-ad-78158” ).addService( googletag.pubads() ) ); } );

The post How to Select the Right Camera Memory Card by Navan Viswa appeared first on Digital Photography School.


Digital Photography School

 
Comments Off on How to Select the Right Camera Memory Card

Posted in Photography


Trick Photography: Creating Appealing Illusions with Your Camera

16 Apr

Trick photography – creating appealing illusions with your camera Trick photography helps in creating an illusion of the scene through the ideas of the photographer. While there’re many, some of the popular trick photography ideas include tilt-shift, infrared, high speed, light painting, zoom & panoramic photography. Trick photography is a way to make a scene look more appealing and attractive Continue Reading

The post Trick Photography: Creating Appealing Illusions with Your Camera appeared first on Photodoto.


Photodoto

 
Comments Off on Trick Photography: Creating Appealing Illusions with Your Camera

Posted in Photography


Samsung Galaxy Note 4 camera review

14 Apr

The Note 4 is the latest iteration of Samsung’s top-end line of so-called ‘phablets’. In terms of design the new model is very close to its predecessor, the Galaxy Note 3, but under the hood, things have been upgraded significantly. A 1/2.6-inch 16MP BSI CMOS image sensor and F2.2 maximum aperture are shared with the Galaxy S5 but the Note 4 has gained an optical image stabilization system which makes it the first Samsung smartphone with this feature. Read our full review at connect.dpreview.com

Articles: Digital Photography Review (dpreview.com)

 
Comments Off on Samsung Galaxy Note 4 camera review

Posted in Uncategorized


Meet the Blackmagic Micro Cinema Camera, a Super 16 action camera with a Micro Four Thirds mount

14 Apr

Blackmagic revealed the Micro Cinema Camera today, a lightweight professional-grade action camera with a Micro Four Thirds lens mount and a Super 16 sensor. GoPros may be good enough for your extreme family vacation and your cousin Jeremy’s POV skateboard videos, but Blackmagic is counting on pro filmmakers needing more. Read on

Articles: Digital Photography Review (dpreview.com)

 
Comments Off on Meet the Blackmagic Micro Cinema Camera, a Super 16 action camera with a Micro Four Thirds mount

Posted in Uncategorized


Red introduces ‘Weapon’ camera with 8K sensor option

14 Apr

Red has unveiled its latest camera body and announced its next-generation 8K sensor. The Weapon body will be produced in magnesium alloy or carbon fiber and is available as an upgrade for users with the 6K ‘Dragon’ sensor. Anyone making the upgrade to the Carbon Fiber version will then be able to pay extra to get the forthcoming 8K sensor. Read more

Articles: Digital Photography Review (dpreview.com)

 
Comments Off on Red introduces ‘Weapon’ camera with 8K sensor option

Posted in Uncategorized


How to Start Your Own Camera Club

13 Apr
KjellLeknes

Kjell – camera club leader

A camera club is a great way to keep your passion for photography going, meet new people with similar interests, share your photos, and get inspiration from other photographers. Here are a few tips on how to get your own local camera club up and running. Before getting started, check if there already is a local camera club were you live. If so, join them! See how you can take part and contribute to their existing community. It is better to have one large community, than several smaller ones. As a team, you and your new team members can help each other. Local partners will be more interested in participating and sponsoring your events.

Finding members and venues for meetings

The membership of your camera club doesn’t have to be all photographers only. They can also be photography enthusiasts interested in seeing and discussing photography. Social online networks like MeetUp.com are popular places to find and start a camera club. It relieves you from much of the administrative work like; keeping track of who’s joining your meetings, sends reminders, limits RSVPs and generate waiting lists for full events.

Cameraclub2

Photo walk

Photographers are usually down to earth people. They don’t need a fancy hotel conference center to meet. Try approaching local high schools and photography related shops, galleries and museums. Perhaps the local library, book shop or municipality. See if they are willing to sponsor use of their venue for free. If not, see which event venues can be rented. You can charge your members a small fee to cover the costs. Ask if they give discounts for not-for-profit initiatives. Check where other local clubs meet and approach those venues.

Events and membership

Cameraclub1

Portfolio review

Cameraclub4

Model workshop

A camera club can have several different kinds of events such as; portfolio reviews where members bring their photos, share, learn and get inspired by each other; photo walks were you meet up and walk together taking photos. Expect the participation numbers to be low at first. Remember you are in the early stages of building your network. If your events are good, word will spread and your camera club will grow at an accelerated speed. Other types of events to keep in mind; visits to local galleries, workshops by hired instructors, and lectures by local professionals.

Cameraclub3

Model workshop

Cameraclub7

Model workshop

Be very clear in the communication with your members, and specify events in detail. It is important that participants have a very clear picture of what the event will be like. That way you increase your chances the event will meet expectations and become a great success. Decide early on if you want your camera club to charge a membership fee, or if it will be free. Keeping it free will mean more members. You can always charge per event to cover costs.

Website and social media

A camera club should have a website where people wanting to join can find basic information. It’s also a great way to feature member’s photos and advertise upcoming events. Facebook, Twitter and Flickr accounts would be natural add-ons.

Cameraclub6

Selfies with Vivian Maier at a gallery visit

Quality, not quantity

As your camera club grows, pay attention to the most active members. Invite them to help run the camera club. Together, your initiative can become a great success. Make a written partnership agreement. It doesn’t have to be in formal legal jargon. It just needs to be a simple outline; who is responsible for what, how events should be run, and what should happen with the camera club’s common assets should the partnership not work out. Make sure people you take on don’t have conflicting goals about what the camera club should become, or what you want to get out of it in the end.

Cameraclub5

Photo course for beginners

It is better to have a small camera club with good quality events, than a large camera club with little or no activity. Spend time developing events you think other photographers would love to participate in, this way, your camera club will grow at a comfortable rate with good quality events.

googletag.cmd.push(function() {
tablet_slots.push( googletag.defineSlot( “/1005424/_dPSv4_tab-all-article-bottom_(300×250)”, [300, 250], “pb-ad-78623” ).addService( googletag.pubads() ) ); } );

googletag.cmd.push(function() {
mobile_slots.push( googletag.defineSlot( “/1005424/_dPSv4_mob-all-article-bottom_(300×250)”, [300, 250], “pb-ad-78158” ).addService( googletag.pubads() ) ); } );

The post How to Start Your Own Camera Club by Kjell Leknes appeared first on Digital Photography School.


Digital Photography School

 
Comments Off on How to Start Your Own Camera Club

Posted in Photography


3 Valid Reasons it Might be Time to Upgrade Your Camera Equipment

11 Apr
Ludovic Hirlimann

By Ludovic Hirlimann

For all of you camera enthusiasts, lens aficionados and gear fetishists, hearts race and palms sweat when broaching the subject of camera equipment upgrades. Camera companies keep a constant flow of equipment releases coming to quench the insatiable appetite of those who are convinced they need the latest and greatest.

It’s important to keep in mind that just because the new iteration of your camera body or a new lens with an even longer list of acronyms outlining its features is released, it doesn’t instantly make your equipment obsolete.

All you savvy consumers should strive to be honest with yourselves and carefully consider the tangible benefits that you will enjoy from that upgrade. Certainly most of you will legitimately grow out of that point-and-shoot or entry-level DSLR, however, many make the jump too soon before you’re able to fully exploit the capabilities of your equipment.

Some good reasons to to upgrade:

If you are reading this, you have likely purchased a camera (and possibly additional lenses and other accessories), in which case you are familiar with what could be called the Christmas morning feeling.

#1 Renew your enthusiasm or spark creativity

For photographers, an upgraded body or a new lens can be an important catalyst to revive waning enthusiasm. Many certainly see this as a thinly veiled excuse for coughing up the cash for some new equipment, but it can provide a needed boost to drag you out of the dreaded photographers-block.

For example, adding a large aperture lens – with an f-stop of f/2.8 or greater – to your stable reveals a whole new perspective, enabling you to further blur out backgrounds and isolate your subject.

Depth of field 1

Depth of field 2

Similarly, a telephoto lens will enable you to compose tighter shots from farther away, or experiment with closely cropped shots from a short distance. As focal length increases (and with it the distance to the subject), depth of field decreases and background objects appear closer to the subject opening up new compositional opportunities.

Telephoto by Jeremie Schatz 1

If you are already shooting with a DSLR, depending on the lenses you are using, adding a teleconverter to your bag can be a less expensive option for increasing lens focal length. Teleconverters fit between the lens and camera, and add a certain level of magnification such as 1.5x or 2x. Many lenses are compatible with teleconverters, but not all, so be sure to check with the manufacturer before buying one.

Teleconverter by Jeremie Schatz 1

While some photographers can continue to produce compelling images with a basic body and a 50mm lens, many will discover a new realm of possibilities which unfold with the addition of new equipment.

#2 Your gear is limiting your progress as a photographer

Another way to legitimize an upgrade is if you recognize that your evolution as a photographer is being hindered by your equipment’s limitations.

One advancement which can be gained with a camera or lens upgrade is improved low-light performance. If you find yourself shooting fast-moving kids in your dimly lit house or indoor sporting events, you will quickly discover that shooting at high ISO settings at maximum aperture results in less sharp images riddled with color noise. Color rendition and saturation levels can also suffer greatly in these situations, especially in shadowed areas and with skin tones.

Unfortunately, other than the limited corrections you can make with editing software, an equipment upgrade may be a necessity if you want to get great looking photos in low-light conditions. Point-and-shoot and entry-level DSLR cameras sport better high-ISO performance than just a few years ago, but more advanced models show a drastic improvement in this regard and large aperture lenses can enable you to shoot at lower ISO settings.

In addition to better low-light performance, upgrading your camera body can put a bunch of useful features in your hands such as: a self-cleaning sensor, wireless uploading, increased pixel count, more accurate auto-focusing, faster shooting rates, dual memory-card slots, and more. Be sure to compare your current camera’s specifications with that of a potential upgrade and ask yourself if the added features will have a significant impact on your photography.

Memory card slots

Although it doesn’t go in your camera bag, upgrading your editing software can be a game changer for your photographic pursuits. Making the leap from using free editing software, to purchasing and learning Lightroom or Photoshop, can make drastic changes to your final images. These programs open up new avenues for stylizing your images, and countless plugins are available which can enable you to have even more control over the look and feel of your work.

Even if you have the software already, an upgrade in your understanding and ability to use it, can go a long way. Investing time in knowing how to use the software properly, may help boost the quality of your images.

Lightroom by Jeremie Schatz 1

#3 The equipment is no longer usable

A more utilitarian reason to upgrade equipment is that it is simply reaching the end of its usable life. Camera shutters are rated for a certain number of actuations, at which point the risk of failure and inaccurate shutter speeds increase.

Even the best lenses have many plastic parts, and most modern ones have internal motors with a finite life span. Stiff or stuttering zoom and focus rings, loud or slow focusing and loose lens mounts are a few indications that a repair or replacement is imminent.

This may be a non-issue for many who live by the “if it’s not broken, don’t fix it” philosophy, however, if you use your equipment for paying gigs or to document important events, you may end up regretting a potentially preventable equipment failure.

There are many reasons to make equipment upgrades and most of you will make that leap at some point, but it is important not to set your expectations too high as to what new gear will do for your photographs. Think about your goals and consider which is the most accessible path to take in order to reach them.

Sergio

By Sergio

I’ll leave you to think about this quote:

“A lot of photographers think that if they buy a better camera they’ll be able to take better photographs. A better camera won’t do a thing for you if you don’t have anything in your head or in your heart.” – Arnold Newman

googletag.cmd.push(function() {
tablet_slots.push( googletag.defineSlot( “/1005424/_dPSv4_tab-all-article-bottom_(300×250)”, [300, 250], “pb-ad-78623” ).addService( googletag.pubads() ) ); } );

googletag.cmd.push(function() {
mobile_slots.push( googletag.defineSlot( “/1005424/_dPSv4_mob-all-article-bottom_(300×250)”, [300, 250], “pb-ad-78158” ).addService( googletag.pubads() ) ); } );

The post 3 Valid Reasons it Might be Time to Upgrade Your Camera Equipment by Jeremie Schatz appeared first on Digital Photography School.


Digital Photography School

 
Comments Off on 3 Valid Reasons it Might be Time to Upgrade Your Camera Equipment

Posted in Photography


3 Tips for Getting Great Skin Tones Using Adobe Camera Raw

10 Apr

Skin tones can be one of the more difficult aspects of a photograph to master. Getting pleasing skin tones will make your image appear more eye-catching and attractive. If you know the right steps to take, skin can be pretty simple to master. Using these three simple tricks, using only Adobe Camera Raw (ACR), your skin tones will appear more balanced and pleasing to the eye.

Before3 1

After3 1

Note: working in Lightroom you can do the this as well, because the sliders and options are the same!

White Balance

When trying to get great looking skin tones, the first thing you should pay attention to is the white balance. Correct white balance will set the stage for great skin tones. If the white balance is too cool, your skin will appear gray or bluish. On the other hand, if the white balance is too warm, the skin will look yellow or orange. Neither of these options are very pleasing to the eye, and make the skin more difficult to work with later on.

To see if your white balance is accurate, use the white balance targeted adjustment tool. It looks like an eye-dropper and is located at the top of the screen. It is the third tool over from the left. Click on the dropper, then click on an area of your photo that is white. The whites of the eyes are a good place to start. This should give you a good indication of where the white balance should be set. If your image still appears too warm or cool to your taste, use the temperature slider located to the right of your screen, it is the first one. Adjust this by sliding it to the right or left until your get a pleasing white balance. You may have to adjust Tint as well.

Whitebalance1

Exposure

Next, make sure your exposure is correct. Take a look at the histogram located in the upper right hand corner of the screen. Ideally, you want it to look like a smooth bell curve, with the high point of the curve right in the middle. Check to make sure that the curve does not go too far to the left or the right. This may indicate that your photo is over or underexposed, causing your skin tones to either be gray and dark, or too bright and blown-out in some spots.

Exposure 2

If your curve does fall too far to one side, use the exposure slider to fix it. Located three sliders down on the right hand side of your screen, move it either left or right. Watch your histogram. When the majority of the curve is in the middle, you’ve got it! In some photos, there will be parts of your image that are very bright or dark, and cause your histogram to spike on parts of the curve. This happens often when you have a bright sky in the background. If this is the case, your curve will be off the chart on the right edge of the histogram. In an image like this, you would look at where the majority of your curve lies and ignore the parts of the curve that are out of range.

For more information see: How to Read and Use Histograms

Luminance

Finally, to give your skin tones just a little more brightness you will want to locate the luminance sliders (look for the HSL panel, the L stands for Luminance). You will see a horizontal strip of buttons directly under the histogram on the right panel. The fourth one to the left is HSL/Grayscale, click on that button. After selecting that option, three tabs will appear. Click on the Luminance tab. Choose the orange slider, which is two down, and move it to the right. You will notice that this affects mainly the skin in your photo and leaves the other areas of the image untouched. The more you move it to the right, the brighter the skin will appear. Keep moving the orange slider back and forth until the skin is the brightness you prefer.

Luminance 2

Before1 1

After1 1

Once you have adjusted your RAW image using these three steps, you can open it up in Photoshop to do any fine tuning or adjustments on the remainder of your photo. Your skin tones, however, should already look great and need little, if any additional work.

Before2 1

After2 1

Do you have any other tips for making great looking skin tones using ACR? Please share them in the comments below.

googletag.cmd.push(function() {
tablet_slots.push( googletag.defineSlot( “/1005424/_dPSv4_tab-all-article-bottom_(300×250)”, [300, 250], “pb-ad-78623” ).addService( googletag.pubads() ) ); } );

googletag.cmd.push(function() {
mobile_slots.push( googletag.defineSlot( “/1005424/_dPSv4_mob-all-article-bottom_(300×250)”, [300, 250], “pb-ad-78158” ).addService( googletag.pubads() ) ); } );

The post 3 Tips for Getting Great Skin Tones Using Adobe Camera Raw by Emily Supiot appeared first on Digital Photography School.


Digital Photography School

 
Comments Off on 3 Tips for Getting Great Skin Tones Using Adobe Camera Raw

Posted in Photography


6 of the Most Essential but Underused Camera Features

08 Apr

If you are just getting started in photography, you’ll be pleasantly surprised to find these six often overlooked features in the menu of your DSLR. While each one can be used to create professional quality results, extensive experience is not required to leverage their usefulness. Best of all, there’s no need to upgrade to a high end model. These settings are now found on even the most entry-level camera bodies. With the ability to take full control of your camera, you’re more likely to get the shot right at the time of the exposure.

1 roar

1) Flash Exposure Compensation

The pop-up flash gets a bad rap, and this is unfortunate as it’s actually a very useful tool when set properly. Out of the box, it simply provides too much light, resulting in a bright, washed-out appearance. The trick is to adjust the flash exposure compensation to a reduced output. As a starting point, bring it down to negative two (-2). This creates a soft quality of fill flash that’s immediately more pleasing. Should you need even less light, you can further reduce the flash to negative three. While it’s rarely necessary, you could even add intensity to the flash by raising it towards the positive. Just remember, effective use of flash is meant to soften, not eliminate shadows.

2 fill flash

2) Two Second Timer

This rarely used setting can open up a whole new world of creative possibility for you. It’s typically found in the “drive” menu, along with single shot, multi-shot burst mode, etc. If you’re in a place that doesn’t allow tripods, it’s still possible to take sharp photos, even with long exposure times.

Select the two second timer and rest the camera on a chair, or the ground. You can use the folded camera strap to angle the camera upwards if necessary. When you press the shutter, the camera will move initially. Don’t worry, you have two seconds for it to settle down before the camera actually fires. This is also helpful for tripods that are not as stable as they should be. If you don’t have a cable release, the timer is a terrific wireless alternative.

3 two second timer

3) Histogram

Think of the histogram as a visual cheat-sheet for photographing bright tones. To render a subject as true white, you want the data on the right hand side to be as close to the edge of the graph (histogram) as possible. This will indicate a crisp exposure rather than a muddy, grey appearance. As you change the exposure to let in more light, the histogram will inch towards the right. Keep adjusting your settings until it’s literally just a hair from the outer wall. You are now maximizing all of the wonderful dynamic range of which your camera is capable.

Once the data actually collides with the right hand wall of the histogram, you’ve technically overexposed part of your scene. This means there is no detail in the highlights, but rather a hotspot that is impossible to recover, even with sophisticated software. While this data is valuable, it doesn’t tell you exactly where the trouble spot is in your scene. This is where the “highlight alert” becomes a helpful aid.

4 histogram

4) Highlight Alert

By default, many camera models have the highlight alert turned off so you’ll need to enable it in the menu. Commonly referred to as “the blinkies”, this feature alerts you to the precise location that’s overexposed. With this knowledge, you can make a quick adjustment to the exposure, or even change your composition to eliminate the unwanted area. That translates to more consistent exposures with no washed-out areas. You’ll also be rewarded with less time in the digital darkroom, trying to fix problems that could have been prevented in the field.

5 waterfall

5) Live View

If you’ve ever struggled to achieve autofocus at night, or desire more accuracy for macro work, Live View will be your new favorite mode. With it, you can zoom in on a tiny portion of a subject at 5x and 10x magnification. This extreme close-up gives you the ability to carefully micro-focus on whatever is most important in your scene. Just note, the enlarged view on your LCD is not representative of your lens’ effective focal length. Upon pressing the shutter, the entire scene will still be captured in sharp detail. You’ll be amazed at the level of precision possible. For the ultimate in control, use this with manual focus and a sturdy tripod.

6 macro

Live View is not only useful for focus, but composition as well. For example, if your DSLR lacks a tilt or swivel screen, shooting from ground level can be a real challenge. With a live image on the LCD however, there’s no need to crane your neck for viewfinder access. The same idea can be applied to those crowded situations when you must raise the camera over your head. Instead of shooting blind, you can use Live View to better compose the shot.

6) Single AF Point

7 goose

Allowing the camera to automatically choose your focus point is one of the biggest causes of blurry photos. Don’t get me wrong, you can still use autofocus, but it works most consistently when you manually set the autofocus point. Otherwise, the camera will choose incorrectly, leaving the fence post sharp and your subject out of focus. While some cameras offer clusters of focus points, a simpler approach will often work to your advantage. By placing a single active AF point on what you want sharpest, you eliminate the guess work, and your percentage of keepers will soar.

Do you have any other hidden gems on your camera you’d like to share? What have you discovered in the menu of your camera?

googletag.cmd.push(function() {
tablet_slots.push( googletag.defineSlot( “/1005424/_dPSv4_tab-all-article-bottom_(300×250)”, [300, 250], “pb-ad-78623” ).addService( googletag.pubads() ) ); } );

googletag.cmd.push(function() {
mobile_slots.push( googletag.defineSlot( “/1005424/_dPSv4_mob-all-article-bottom_(300×250)”, [300, 250], “pb-ad-78158” ).addService( googletag.pubads() ) ); } );

The post 6 of the Most Essential but Underused Camera Features by Chris Corradino appeared first on Digital Photography School.


Digital Photography School

 
Comments Off on 6 of the Most Essential but Underused Camera Features

Posted in Photography


Meet our First Ever App!Disposable Camera

06 Apr

We made an app and we couldn’t be more excited to share it with you. Meet Disposable Camera!

We brought back everything good about Dispo Cams and none of the bad stuff.

Get back (or feel for the first time) the feeling of 27 potential prints burning a hole in your pocket.

Shoot a through a whole camera and get 27 prints back just like the good ol’ days.

Learn More About Disposable Camera

Or, Download It NOW


© laurel for Photojojo, 2015. |
Permalink |
No comment |
Add to
Disposable Camera”>del.icio.us

Post tags:


Photojojo

 
Comments Off on Meet our First Ever App!Disposable Camera

Posted in Equipment