RSS
 

Posts Tagged ‘Budget’

Xiaomi Redmi Pro quick review: dual-cam on a budget

08 Nov

Xiaomi Redmi Pro quick review: dual-cam on a budget

Dual-cameras are all the hype in 2016 and we have seen several high-end smartphones with the technology being launched in the past months, including the Huawei P9, LG G5 and, most recently, the Apple iPhone 7 Plus. While each device uses the dual-camera technology in different ways, one thing is common to all of those devices: a high price tag.

In the mid-range bracket of the market dual-cameras are still a rarity, but with the Redmi Pro, Chinese manufacturer Xiaomi has recently launched a dual-camera smartphone that is suitable for smaller budgets. The standard version with 3GB RAM and 32GB of internal memory is currently available for approximately $ 300. Not only is the dual-camera unusual at this price point, but its very solid metal body, deca-core chipset and 5.5″ OLED display make the Redmi Pro look and feel like a much more expensive device. 

The dual-camera setup combines a 13MP Sony IMX258 1/3.06″ sensor with a 5MP Samsung depth sensor. The system does does not offer any optical zoom capability, as on the LG G5 or iPhone 7 Plus, nor does it combine the captured image information from both sensors for improved image quality, ala the Huawei P9. Instead, it uses the dual-camera to simulate the bokeh of a fast lens on a large-sensor camera, something we first saw on the HTC One M8.  There is also a dual-tone LED flash and at the front the Xiaomi comes with a 5MP selfie-camera.

Thanks to retailer Gearbest.com that ships Xiaomi devices worldwide, we’ve had the chance to try the Redmi Pro and its dual-camera, shoot a wide range of samples and see how it generally performs as a device for mobile photography.

Key Specifications:

  • 13MP Sony IMX258 1/3.06″ sensor
  • Secondary 5MP Samsung depth sensor
  • F2.0 aperture
  • Dual-tone flash
  • 1080p video
  • 5MP front camera
  • 5.5-inch 1080p OLED display 
  • Mediatek Helio X20 Deca-Core processor
  • 3GB RAM
  • 32GB storage
  • MicroSD support
  • 4050mAh battery
  • USB Type-C port with quick-charging

Camera App

The Redmi Pro’s camera app is intuitively structured and easy to use.

The Redmi Pro’s camera app comes with a pleasantly simple and intuitive design. Above the shutter button you can find the button for switching to video mode. Other controls on the main screen let you activate HDR capture and the dual-cam’s Stereo mode. Swiping up opens the camera mode screen where you can enter Panorama and Manual modes among others. The latter only offers manual ISO and white balance, though. There is no manual control over shutter speed. Swiping down on the main screen opens up a thumbnail preview array of 12 simple filter effects. 

Image Quality

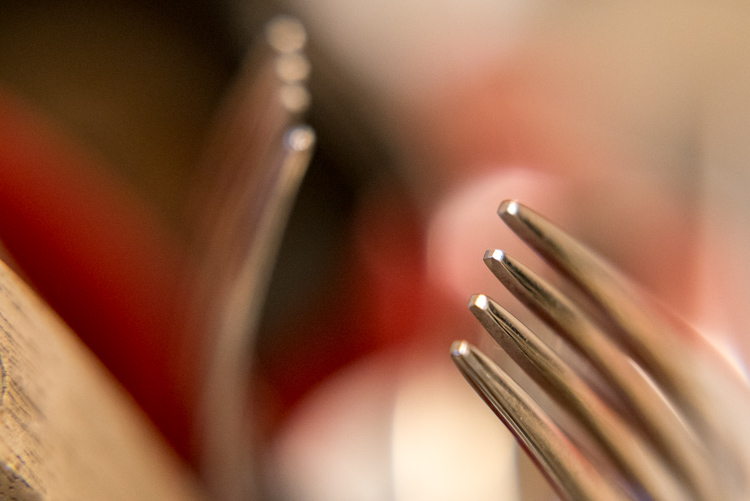
In bright light the Xiaomi Redmi Pro camera captures 13MP images that show very pleasant colors and good exposure in most conditions. For a smartphone in this price category the Redmi deals well with higher contrast scenes, keeping highlight clipping pretty well under control. 

Things don’t look quite as good when you start zooming into the image, though. At the center of the frame, image detail is decent for a mid-range device and luminance noise is kept at bay as well. However, our test sample’s lens shows strong softness on both the right and left edges of the frame, which is quite noticeable when viewing the image at screen size.

ISO 101, 1/834 sec
ISO 103, 1/1273 sec

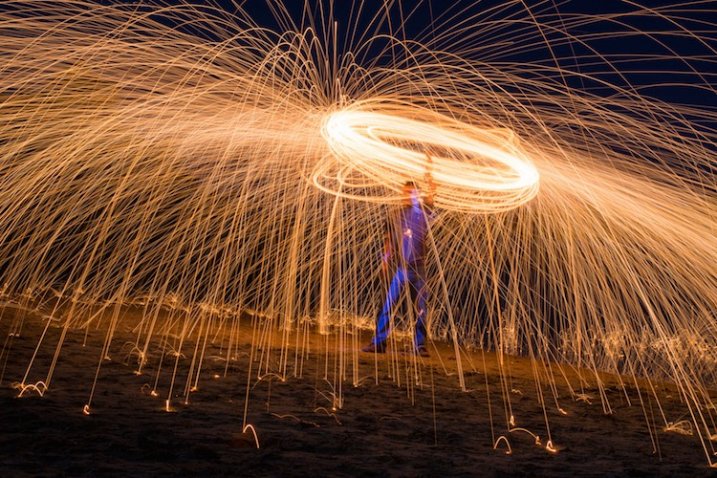
In low light situations the Redmi Pro uses a maximum ISO setting of 2050 and slowest shutter speed of 1/15 sec, which in combination with the F2.0 aperture, allows for usable exposures even in pretty dark interiors and night scenes. There is no optical image stabilization, so holding the phone steadily when shooting in dim conditions is recommended, but overall camera shake is not too much of an issue. 

As you can see in the samples below, the Redmi Pro is capable of capturing nice exposures and colors, even in pretty dim light. Lens softness aside, detail is pretty good for this type of device at lower ISO levels, but things start falling apart at ISO 800 and above. On the plus side, luminance noise is well-managed and chroma noise is hardly visible, even at the highest sensitivity setting. Overall, the Redmi Pro’s low light images look nice at web and typical social network size, but at larger viewing sizes the smearing of detail and strong lens softness don’t make for a good combination. 

 ISO 155, 1/30 sec
 ISO 405, 1/30 sec
 ISO 841, 1/30 sec
 ISO 1413, 1/15 sec

Dual-camera Stereo Mode

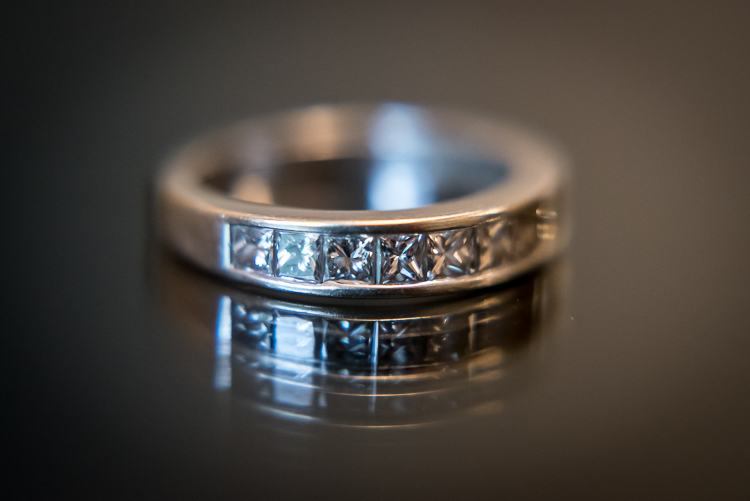
Stereo mode is The Redmi Pro’s feature highlight. Thanks to the secondary depth-sensing camera, the Redmi can distinguish between foreground and background. Applying digital blur to the latter simulates the shallow depth-of-field you can achieve with a DSLR and fast lens. In the camera app you adjust the ‘virtual aperture’ between F0.95 and F5.6 to control the degree of background blur. Alternatively you can change the focus point and the aperture after capture in the gallery app.

As you can see in the samples below, the feature works reasonably well, but under closer scrutiny it becomes obvious that Stereo mode is not too precise at distinguishing the focal plane, and the transition of blur is often too abrupt to look natural. Generally things look better if you choose a smaller aperture setting and make sure there is some distance between the foreground subject and the background. Stereo images are captured in 16:9 format and are 5.3 MP large.

 ISO 434, 1/30 sec, F2.4 virtual aperture
  ISO 101, 1/1445 sec, F2.0 virtual aperture
  ISO 101, 1/896 sec, F3.5 virtual aperture

In addition to refocusing and controlling the background blur you can apply a range of effects to your Stereo images in the gallery app. Again, the foreground/background separation is not too precise, but the modes can be fun to play with. 

 In the gallery app several effects can be applied to Stereo images.
Blackboard effect

Conclusion

In its price bracket the Xiaomi Redmi Pro can score a lot of points with its premium look and materials, a bright and sharp OLED display and very good battery life. The 13MP camera delivers good color and exposure across the ISO range but our test sample suffered from strong lens softness away from the center of the frame.

The dual-camera does not offer the same zooming or image quality improvement functions we have seen on some recent high-end models, but the effects can be fun to play with. Close-up the results of the shallow depth-of-field simulation do look a little artificial but they are good enough for social sharing.

Overall, the Redmi Pro looks like a good choice for those who want a high-end look and feel for little money and want to try out the dual-camera as a bonus. However, if image quality is your number one priority, and you can live without the dual-cam and metal body, the Motorola Moto G Plus might be a good alternative at a similar price point. The 32GB version of the Xiaomi Redmi Pro is currently available at Gearbest.com for $ 299.

What we like:

  • Premium look and feel
  • Very god battery life
  • Bright and sharp OLED display
  • Good exposure and color across the ISO range

What we don’t like:

  • Lens softness
  • No manual control over shutter speed
  • Imprecise background separation in Stereo mode

There are 22 images in our Xiaomi Redmi Pro gallery. Please do not reproduce any of these images on a website or any newsletter / magazine without prior permission (see our copyright page). We make the originals available for private users to download to their own machines for personal examination or printing (in conjunction with this review), we do so in good faith, please don’t abuse it.

Unless otherwise noted images taken with no particular settings at full resolution.

Review sample gallery

$ (document).ready(function() { SampleGalleryV2({“containerId”:”embeddedSampleGallery_1116046053″,”galleryId”:”1116046053″,”isEmbeddedWidget”:true,”standalone”:false,”selectedImageIndex”:0,”startInCommentsView”:false,”isMobile”:false}) });
Articles: Digital Photography Review (dpreview.com)

 
Comments Off on Xiaomi Redmi Pro quick review: dual-cam on a budget

Posted in Uncategorized


Xiaomi Redmi Pro offers dual-cam and OLED technology at budget price point

28 Jul

Chinese electronics manufacturer Xiaomi has today announced the latest model in its affordable Redmi line of smartphones. Looking at the device’s body materials and specifications it would not look out of place in the company’s flagship Mi series, though. 

In the imaging department the Redmi Pro features a dual-camera setup that combines a 13MP Sony IMX258 1/3.06″ sensor with a 5MP Samsung depth sensor. The dual-cam does not offer any optical zoom capability, like on the LG G5, nor does it combine the captured image information from both sensors for improved image quality, like on the Huawei P9. Instead, it uses the dual-camera to simulate the bokeh of a fast lens on a large-sensor camera, something we first saw on the HTC One M8. Like on the HTC and several other dual-cam devices, you can change the focus point of the image post-capture in the gallery app. 

There is also a dual-tone LED flash and at the front the Xiaomi comes with a 5MP selfie-camera. Images can be viewed and composed on a 5.5″ 1080p OLED display with full NTSC gamut. A fingerprint reader is on board for increased security and all the electronics are provided with power by a beefy 4050mAh battery that supports quick charging via a USB Type-C port.

The components are wrapped up in a gold or silver brushed metal unibody that gives the device a premium look. The Redmi Pro comes comes in several versions that differ in terms of processor power and memory. Pricing starts at approximately $ 225 for the deca-core Helio X20 chipset, 32GB of storage and 3GB RAM and go up to approximately $ 300 for the faster Helio X25 chipset with 128GB storage and 4GB of RAM.

Articles: Digital Photography Review (dpreview.com)

 
Comments Off on Xiaomi Redmi Pro offers dual-cam and OLED technology at budget price point

Posted in Uncategorized


Wireless tethering on a budget: control your camera from your phone or tablet for $40

13 Jul

Wireless tethering is nothing new, but it’s not exactly a cheap proposition. Well, that’s changed, as Seattle-based photographer Alan Lawrence shows on his blog. For around $ 40, you can wirelessly control and transfer images from your camera to your phone or tablet.

In short, this DIY wireless tethering requires a TP-Link MR3040 Battery Powered 3G Wireless Router, some software, a USB cable, and some time. Lawrence says the router is similar-looking to the CamRanger, a device that offers tethering functionality out-of-the-box, but the router retails for under $ 30 compared to the CamRanger’s $ 299 MSRP.

Once you’ve got your hands on the router (and he does say you need a specific version, which is the one linked above), you’ll need a $ 9 app called DSLR Dashboard for Android, or QDSLR Dashboard for iOS. The last thing you’ll need is a compatible USB cable, and you’re almost in business.

The DSLR Dashboard website has a link to download new firmware for the router, and once you’ve updated that, all you have to do is connect to the wireless network you’ve set up and launch the app. You can control your camera from your device and download files instantly after you’ve taken them.

You can read all the nitty gritty details over on Alan Lawrence’s blog.

Articles: Digital Photography Review (dpreview.com)

 
Comments Off on Wireless tethering on a budget: control your camera from your phone or tablet for $40

Posted in Uncategorized


Macro Photography on a Budget: An introduction to Close-up Filters

21 Jun

close-up-filters-flower

Have you ever seen some stunning pictures of insects, where you can clearly see each individual element of their compound eyes, or looked through your Instagram feed marveling at photos of flowers where you can see the tiniest detail on each individual petal? If so, welcome to the wonderful world of macro photography, one in which the little things in life are not only celebrated, but magnified to glorious proportions, and even the most mundane objects around us can take on beautiful otherworldly qualities when examined under near-microscopic detail.

This particular type of photography is not only stunningly beautiful but often prohibitively expensive, at least for the casual hobbyist. A good macro lens can easily set you back several hundred dollars, and that’s not counting the accessories like a good tripod, a ring flash, and other gear that is liable to turn this past-time into a debt-inducing money pit. Thankfully there are several good alternatives like extension tubes and lens-reversing rings to aid you in your quest for beautiful macro photography, but my personal favorite is one of the cheapest options available: close-up filters.

close-up-filters-anthers

This image, and all the other macro-style shots in this article, were not taken with an expensive macro lens but with a $ 35 set of close-up filters I screwed on to my 50mm lens.

A true macro lens is designed to create true 1:1 (life-size) replications of very small things on the image sensor of your camera. If you have a coin that is 2cm diameter, a high quality macro lens will be able to take a photograph of that coin wherein it is literally the same size on your camera’s image sensor. Taking these types of photographs requires a host of light-bending optical gymnastics on the part of your lens. In the process there are almost always tradeoffs in image sharpness and overall light-gathering ability, which is why macro lenses cost so much money, because they contain special glass elements to minimize any optical imperfections.

Close-up filters rely on a very simple, very old, idea to make it possible for any normal camera lens to focus on objects that are, as their name implies, very close to your lens. All lenses have a minimum focusing distance, which is as close as you can get to an object and still have it be in focus. A +2 filter will make it possible for a lens with a minimum focusing distance of 1 meter to now focus on something .3 meters away. A +10 filter would decrease the minimum focusing distance to .09 meters. The math is slightly complicated, but suffice it to say the higher the number on your filter, the closer your lens will be able to focus.

close-up-filters-leaf-droplet

Close-up filters are also very inexpensive and you can often find a set with three or four filters for under $ 40 that will work with your lens.

A close-up view of close-up filters

So what is a close-up filter? Simply put, it’s basically a magnifying glass that you screw onto the front of your camera lens. Just like their investigative counterparts wielded by famous fictional detectives through the ages, close-up filters rely on a single curved piece of glass that bends light in such a way as to enlarge whatever you are viewing. Don’t let the nomenclature confuse you; nothing is being filtered, but light is being altered before it enters your camera lens, in the same way that a magnifying glass alters light to make objects appear bigger.

close-up-filters-eye

The set of filters required to take a photo like this costs about the same as a movie and a large popcorn.

Limitations

Using close-up filters is a great way to get started with macro-style photography, but they have some very important limitations that you need to be aware of to start. First of all, they only do one thing, which is shorten the minimum focusing distance of your lens. You can’t use them for normal photography, since all you will see when you attach one to your lens is either a big blob of blur, unless you focus on something very close to your camera. It’s the same phenomenon that happens when you hold a magnifying glass at arm’s length instead of right next to your face, and it severely limits the usefulness of close-up filters.

True macro lenses work for a variety of photographic situations, and due to their high-quality construction are generally much sharper than non-macro lenses, which make options like the Canon 100m f/2.8 or Nikon 105mm f/2.8 so highly praised. Screwing an inexpensive close-up filter on the front of your camera might let you get fun shots of flowers, but it will in no way equal the astounding optical properties of a true macro lens.

Even something as mundane as forks sitting in a dish rack can turn into a work of art when viewed up close.

Even something as mundane as forks sitting in a dish rack, can turn into a work of art when viewed up close.

Another downside of close-up filters is that the images you create with them are not at all the same as what you can get from dedicated macro gear. Photos are generally much softer, will usually exhibit unpleasing artifacts like chromatic aberration, and don’t allow you to have the same pleasing background blur that you would get without the filters attached. Finally, while macro lenses will let you focus on objects that are very close as well as far far away, close-up filters will only let you focus on subjects that are right next to your lens. All these limitations might sound important, but they’re really not that big of a deal. Once you learn to work around them you can get some stunning images from your camera using close-up filters.

Close-up filters are nowhere near as sharp and optically brilliant as a true macro lens, but they can still produce some pretty good results.

Close-up filters are nowhere near as sharp and optically brilliant as a true macro lens, but they can still produce some pretty decent results.

Advantages of close-up filters for macro photography

After spending so much time pointing out the flaws with close-up filters you may wondering why you would want to even bother with them in the first place. As I mentioned earlier they are an incredibly inexpensive way to dip your toe into the waters of macro photography, and the results you can get from such a simple piece of glass will likely be far beyond what you ever thought possible shooting with your normal gear. The photo below of a yellow lily was taken with a standard 50mm lens and a +10 close-up filter, which is a fairly standard, inexpensive option. It’s not at all uncommon to find sets that include +1, +2, +4, and +10 filters all in one package that costs $ 40 or less.

An un-cropped image taken with +10 and +2 filters attached to a 50mm lens. Note the severe blue fringing on the edge of the petals, which is the result of using filters instead of a true macro lens.

An un-cropped image taken with +10 and +2 filters attached to a 50mm lens. Note the severe blue fringing on the edge of the petals, which is the result of using filters instead of a true macro lens.

After I shot that picture I took the filters off my lens and took another photo of the same flower as close as my lens would allow. As you can see there is a dramatic difference between the two images and even though the top picture is not as sharp as an image taken with a dedicated macro lens, the results are perfectly fine for someone just looking to dabble in this type of photography, without spending much money.

The exact same flower. Without the filters, this was as close as my lens would focus.

The exact same flower. Without the filters, this was as close as my 50mm  lens would focus.

Another fun feature of filters is that most of them can be stacked on top of each other, to get even greater magnification. To make the jewelry images below I used three filters on my 50mm lens: a +10, +4, and +2 all screwed into each other, and attached to the lens itself. I set the ring down on an iPad that was turned off to get a little bit of reflection, and while the result is not something I would use in a catalog or on a billboard, it’s more than enough to suffice for my needs.

close-up-filters-ring

It might look fancy, but the gear required to take this photo was pretty basic and inexpensive.

Unlike other faux-macro solutions, like reversing rings or some of the cheaper extension tubes, close-up filters still allow you to use autofocus. Even so, you might get best results if you focus manually or use focus bracketing to make sure you get just the right shot. Finally, one of my favorite aspects of close-up filters is how small and portable they are. I like to keep a +10 and +4 in my camera bag and if I find myself in a situation that would be good for some macro shots it’s fast and easy to screw one on, take a few shots, and put it back in my bag.

Are pictures taken with close-up filters as sharp and detailed as one would require for them to be printed in a magazine? No, not by a long shot. For truly brilliant close-up photos you need the right gear like a macro lens, but hopefully you can see why close-up filters, despite their limitations, do a decent job of getting you halfway there.

This insect is about the size of a quarter but it appears exquisitely detailed and larger than life when photographed with a close-up filter.

This insect is about the size of a quarter, but it appears exquisitely detailed and larger than life when photographed with a close-up filter.

Choosing the right close-up filters

Since close-up filters do not involve a lot of complicated technology and contain no moving parts, it’s hard to go wrong when looking for a set to buy. However there are a few considerations that you need to keep in mind.

First, look for a set of filters that fit your lens. Check the thread size of your lens by looking for the  symbol for the Greek letter phi  and the numbers immediately before or after it will be the size you need (look inside the back of your lens cap). Common sizes are 52, 55, or 58mm, but depending on your individual lens it could be quite different so make sure to find the size that fits your lens before you buy any filters.

Next it’s a good idea to get filters that are made from metal and glass, not plastic. Filters with a higher build quality are easier to screw on and off, less likely to get scratched, and may even include special anti-reflective coatings. You can sometimes find brand name options made by the big manufacturers like Canon and Nikon, but I get plenty of good results with third-party filters from companies like Hoya or Polaroid, and the results are just fine and they cost a fraction of the price as their officially-branded counterparts.

A set of close-up filters filters like this will help you get macro-style images without breaking the bank.

A set of close-up filters filters like this will help you get macro-style images without breaking the bank.

I hope this article has helped you learn a bit more about this inexpensive but quite practical solution for taking macro-style shots. Do you have any experience shooting with close-up filters? Are you the kind of photographer who prefers to shoot with actual macro lenses? I’d be interested in hearing your thoughts in the comments below, and please feel free to share your favorite macro photos.

googletag.cmd.push(function() {
tablet_slots.push( googletag.defineSlot( “/1005424/_dPSv4_tab-all-article-bottom_(300×250)”, [300, 250], “pb-ad-78623” ).addService( googletag.pubads() ) ); } );

googletag.cmd.push(function() {
mobile_slots.push( googletag.defineSlot( “/1005424/_dPSv4_mob-all-article-bottom_(300×250)”, [300, 250], “pb-ad-78158” ).addService( googletag.pubads() ) ); } );

The post Macro Photography on a Budget: An introduction to Close-up Filters by Simon Ringsmuth appeared first on Digital Photography School.


Digital Photography School

 
Comments Off on Macro Photography on a Budget: An introduction to Close-up Filters

Posted in Photography


Budget Lenses Roundup for Aspiring Professional Photographers

08 Mar

A little while back, I went over a handful of DSLR camera options for anyone who is looking to get started with professional photography. Since I discussed camera bodies, the next step is deciding on some lenses. And since we’re still trying to find some good options on a beginner’s budget, the lenses we go over are all on the Continue Reading

The post Budget Lenses Roundup for Aspiring Professional Photographers appeared first on Photodoto.


Photodoto

 
Comments Off on Budget Lenses Roundup for Aspiring Professional Photographers

Posted in Photography


Fujifilm’s budget FinePix XP90 rugged camera makes a splash

18 Jan

$ (document).ready(function() { SampleGalleryV2({“targetContainerClass”:”sampleGalleryImageViewerContainer”,”galleryId”:”1687256184″,”isEmbeddedWidget”:true,”selectedImageIndex”:0,”startInCommentsView”:false,”isMobile”:false}) });

Fujifilm has released the FinePix XP90, a relatively minor update to last year’s XP80 rugged camera. As with its predecessor, the XP90 is waterproof to 15m/50ft, shockproof from 1.8m/5.8ft, freezeproof and dustproof. The only major new feature is the LCD, which received a bump in both size and resolution (3″ vs 2.7″ and 920k vs 460k-dot).

It sports a 16MP BSI CMOS sensor and F3.9-4.9, 28-140mm equivalent lens with image stabilization. The camera has numerous special effects modes and can take HDR and panoramic photos. Video can be captured at 1080/60p or at frame rates of up to 480 fps (at lower resolutions). Naturally, Wi-Fi is also built in.

The XP90 can also serve as an action cam, with support for standard mounts and a dedicated mode which turns off the LCD for extended battery life. An optional 18mm equivalent wide-angle conversion lens is also available.

The FinePix XP90 will available in yellow, blue, orange and green for $ 229.95.

FUJIFILM ANNOUNCES NEW ADDITIONS TO THE X-SERIES LINE OF CAMERAS AND LENSES

X-Pro2, X-E2S, X70 and XF100-400mmF4.5-5.6 R LM OIS WR join the X-Series; all-weather FinePix XP90 gets the shot from sand to slopes

Valhalla, N.Y., January 14, 2016 FUJIFILM North America Corporation, a leader in digital imaging, today announced new additions to the award-winning X-Series line of premium fixed and mirrorless cameras, and ultra-high quality lenses, including: the FUJIFILM X-Pro2, FUJIFILM X-E2S, FUJIFILM X70 and FUJINON XF100-400mmF4.5-5.6 R LM OIS WR.  Fujifilm also introduced the new rugged and waterproof FinePix XP90, perfect for capturing amazing images everywhere, from underwater to mountain tops.

FUJIFILM X-Pro2

The FUJIFILM X-Pro2 is the new flagship range-finder style camera in the award-winning X-Series line. The X-Pro2 is the pinnacle of X-Series photography, and gives professional photographers an innovative Advanced Hybrid Multi Viewfinder capable of instantly switching between optical and electronic finders, a new 24.3MP X-Trans CMOS III sensor for truly remarkable image resolution, and a new X-Processor Pro that delivers dramatically improved response times for unmatched performance.

By combining these features with the ultra-high image quality of FUJINON X-Mount lenses and the world-renowned color reproduction technology refined over more than 80 years as a photographic film leader, the FUJIFILM X-Pro2 delivers the best ever results from an X-Series camera.

FUJIFILM X-Pro2 key features:

  • World’s first Advanced Hybrid Multi Viewfinder with 2.36 million dots and maximum speed of 85 frames per second
    • Diopter correction mechanism with an eye point of 16mm and a telephoto bright frame with enlarged focal length of 140mm
  • 24.3MP APS-C X-Trans CMOS III Sensor
    • Fast AF of up to 0.08 seconds
    • Phase detection AF and motion predictive AF for continuous shooting up to 8 frames per second
    • Start-up time of 0.4 seconds
    • Shutter time lag of 0.05 seconds
    • Shooting interval of 0.25 seconds
    • Focal plane shutter top speed of 1/8000 second
    • Flash sync speed up to 1/250 second
  • Dust and splash-resistant body with more than 61 points of weather sealing and freeze resistance to 14°F
  • High-precision 3” rear display with 1.62 million dots
  • Dual memory card slots (Slot 1 compatible with UHS-II Standards)
  • New monochrome  ACROS film simulation for smooth tones, deep blacks and rich textures
  • New Grain Effect mode for images reminiscent of old film photos, especially when printed
  • Maximum ISO performance up to 12800 sensitivity; Extended ISO ISO100, 25600, 51200
  • Improved electric charge transfer rate for ultra-fast readout speeds
  • Interval timer for shooting time-lapse sequences of one second to 24 hours, up to 999 frames
  • Free FUJIFILM Camera Remote application and Wireless Communication function allows users to remotely shoot images from smartphones and tablets via WiFi
  • Photos can be sent to the INSTAX Share Printer using the free INSTAX Share App (iOS and Android) SHARE Smartphone Printer
  • Full HD video 1080p at 60fps; bit rate of 36Mbps for clear capture of delicate movements; frame rates of 60 fps, 50fps, 30fps, 25fps and 24fps, supporting worldwide motion picture formats
  • Advanced creative filters
  • Optional accessories:
    • Hand Grip MHG-Xpro2 – improves grip and retains access to battery and SD card, and compatible with an Arca Swiss plate
    • Leather Case BLC-XPRO2 – genuine leather bottom case elegantly shows off the X-Pro2’s classic design while protecting the camera body with battery access


FinePix XP90

The new FinePix XP90 rugged digital camera is waterproof to 50ft./15m, shockproof from 5.8ft./1.75m., freezeproof to 14°F/-10°C and dustproof*,**. It features a 16.4MP CMOS sensor with a 28-140mm 5x optical zoom lens, Wi-Fi® connectivity for one touch transfers to smartphones and tablets, and captures full HD movies at 1080p, even underwater.

FinePix XP90 key features:

  • 16.4MP 1/2.3” CMOS sensor
  • Waterproof to 50ft./15m, Shockproof from 5.8ft./1.75m, Freezeproof to 14°F/-10°C and Dustproof
  • Complies with IP68 standards
  • 5x optical zoom with 28mm wide-angle setting
  • 3” LCD with anti-reflection coating
  • Wireless connectivity for instant image and movie sharing
  • Action Camera mode
  • Optical Image Stabilization
  • Full HD movie capture at up to 60 frames per second
  • Interval Timer Shooting and Time-Lapse Movie function
  • 480 frames per second slow motion mode
  • 11 Advanced Creative Filters
  • High Dynamic Range (HDR) capture
  • Motion Panorama 360°
  • Available in Blue, Yellow, Graphite with green, and Graphite with orange

The FinePix XP90 will be available in February 2016 for USD $ 229.95 \ CAD $ 239.99.

* Waterproof and dustproof protection standards of products, stipulated by IEC (International Electrotechnical Commission)

** Measurement method of MIL-Standard 810F Method5 16.5-Shock of the “MIL Standard”, a standard stipulating the durability of supplies procured by the American military, set by the United States Department of Defense

FinePix XP90 specifications

Price
MSRP $ 229
Body type
Body type Compact
Body material Metal, composite
Sensor
Max resolution 4608 x 3456
Other resolutions 4:3 (3264 x 2448, 2048 x 1536), 3:2 (4608 x 3072, 3264 x 2176, 2304 x 1536), 16:9 (4608 x 2592, 3264 x 1840, 1920 x 1080), 1:1 (3456 x 3546, 2432 x 2432, 1728 x 1728)
Image ratio w:h 1:1, 4:3, 3:2, 16:9
Effective pixels 16 megapixels
Sensor photo detectors 17 megapixels
Sensor size 1/2.3" (6.17 x 4.55 mm)
Sensor type BSI-CMOS
Color space sRGB
Color filter array Primary color filter
Image
ISO Auto, 100-3200, 6400 available at lower resolutions
White balance presets 7
Custom white balance No
Image stabilization Sensor-shift
Uncompressed format No
File format
  • JPEG (Exif v2.3)
Optics & Focus
Focal length (equiv.) 28–140 mm
Optical zoom 5×
Maximum aperture F3.9 – F4.9
Autofocus
  • Contrast Detect (sensor)
  • Multi-area
  • Center
  • Tracking
  • Single
  • Continuous
  • Face Detection
  • Live View
Autofocus assist lamp Yes
Digital zoom Yes (2X)
Manual focus No
Normal focus range 60 cm (23.62)
Macro focus range 9 cm (3.54)
Screen / viewfinder
Articulated LCD Fixed
Screen size 3
Screen dots 920,000
Touch screen No
Screen type TFT LCD
Live view Yes
Viewfinder type None
Photography features
Minimum shutter speed 4 sec
Maximum shutter speed 1/2000 sec
Exposure modes
  • SR Auto
  • Program
Scene modes
  • Portrait
  • Landscape
  • Sport
  • Night
  • Night (Tripod)
  • Sunset
  • Snow
  • Beach
  • Underwater
  • Underwater (Macro)
  • Party
  • Flower
  • Text
Built-in flash Yes
Flash range 4.40 m (with Auto ISO)
External flash No
Flash modes Auto, flash on, flash off, slow synchro
Drive modes
  • Single
  • Continuous Top
  • Continuous Last
  • Self-timer
Continuous drive 10.0 fps
Self-timer Yes (2 or 10 sec, group)
Metering modes
  • Multi
Exposure compensation ±2 (at 1/3 EV steps)
WB Bracketing No
Videography features
Resolutions 1920 x 1080 (60p, 30p), 1280 x 720 (60p), 640 x 480 (30p)
Format MPEG-4, H.264
Microphone Mono
Speaker Mono
Storage
Storage types SD/SDHC/SDXC, Internal
Storage included 96MB
Connectivity
USB USB 2.0 (480 Mbit/sec)
HDMI Yes (micro-HDMI)
Microphone port No
Headphone port No
Wireless Built-In
Wireless notes 802.11/b/g/n
Remote control Yes (via smartphone)
Physical
Environmentally sealed Yes (waterproof to 15m/50ft, shockproof to 1.8m/5.8ft, freezeproof to -10C/+14F, dustproof)
Battery Battery Pack
Battery description NP-45S lithium-ion battery & charger
Battery Life (CIPA) 210
Weight (inc. batteries) 203 g (0.45 lb / 7.16 oz)
Dimensions 110 x 71 x 28 mm (4.33 x 2.8 x 1.1)
Other features
Orientation sensor Yes
GPS None

Articles: Digital Photography Review (dpreview.com)

 
Comments Off on Fujifilm’s budget FinePix XP90 rugged camera makes a splash

Posted in Uncategorized


Photo gifts for every budget: 2015 Holiday Gift Guides

12 Nov

It’s not easy shopping for a photographer. We’re notoriously picky, our gear is confusingly named and the difference between something we like and something we don’t can come down to what seem like trivial details. But before you give up and just get a gift card, take a look through our carefully selected holiday gift suggestions, grouped by price range, for the photographer in your life. Read more

Articles: Digital Photography Review (dpreview.com)

 
Comments Off on Photo gifts for every budget: 2015 Holiday Gift Guides

Posted in Uncategorized


4 Tips for Doing Photography on a Budget

14 Jul

Several times in the past few months people have asked me how to get into photography without spending a lot of money. I must admit the idea of emptying your wallet to get all the camera bodies, lenses, flashes, tripods, and other gear you need to do some serious photography can seem quite daunting, it certainly was for me when I first got bitten by the photography bug.

The good news is you don’t really need the latest, greatest, and most expensive gear to make some stunning images thanks to the magic of modern technology. In many cases all you need to do some serious picture-taking is the camera you probably already have with you: your smartphone. However as good as modern mobiles can be, they do have some serious limitations (particularly due to their small image sensors) like limited low-light capabilities, and non-zooming lenses. If you really want to up your game and take advantage of the bigger image sensors, larger lens selection, and incredible accessories available for DSLR or mirrorless camera without breaking the bank – here are a few options to get you started.

photographing-on-budget-beach-sparks

You don’t need a lot of money to take pictures like this. A basic camera and some creativity will do just fine.

1. Buy used gear

New cameras sure are nice, and I can certainly understand the desire to have a model with the most megapixels, best image sensor, highest ISO, fastest autofocus, and coolest bells and whistles. But, before you rush off to drop hundreds or thousands of dollars on a brand new model though, consider this – every picture you have ever seen was taken with a camera older than one you can buy today.

Think of the most famous photographs in history: A man facing down a row of tanks in Tiananmen Square. Muhammad Ali standing triumphant over a defeated Sonny Liston. The 1984 National Geographic photograph of a young woman from Afghanistan. These were all taken on film cameras, with capabilities outmatched in almost every possible way by even the cheapest digital camera today. Certainly new cameras make the act of taking pictures easier in many ways with bright screens, easy-to-use controls, and a host of other features designed to help you get the hang of your hobby. But if you’re pressed for cash buying an older, used camera can be just as good.

photographing-on-budget-cottonwood-borer

Photo of a cottonwood borer beetle taken with my old Nikon D200 that is far less capable than any new DSLR on the market today.

To put my money where my mouth is, I take most of the pictures on my weekly 50mm photo blog not with my new Nikon D7100, but with my ten-year-old Nikon D200, which can be found used online for a fraction of what a brand new camera costs today. It’s only 10 megapixels, and doesn’t have features like wi-fi, a tilting screen, or even the ability to use live view – but it allows me to take beautiful images and that’s often the only thing that matters.

Buying a camera just a few years old can save you significant amounts of money while giving you a high-tech photographic instrument that your photographic forebears from decades gone by would only have dreamed about. Older cameras like the Canon Rebel T2i, the Nikon D80, Olympus PEN E-P2 and many others don’t stack up to modern cameras when you look at marks on a checklist of features, but all of them are capable of producing amazing images, and can be purchased used for much cheaper than any new camera today. This applies to more than just camera bodies, and you can find very good prices on accessories like lenses, flashes, tripods, and other equipment too.

My brother took this shot with a ten-year-old DSLR and a macro lens he found when cleaning out his basement.

My brother took this shot with a ten-year-old DSLR and a macro lens he found when cleaning out his basement.

I prefer buying used equipment from sites that offer some type of warranty or trade-in period if you decide you don’t like what you receive. Two of my favorites in the United States are KEH.com and Adorama Used. Other sellers like B&H offer used cameras, and you can often buy refurbished equipment directly from camera manufacturers that even come with a warranty. Some photographers I know get a lot of high quality gear for cheap on sites like eBay and Craigslist as well. Be forewarned that sites like these often make no guarantees as to the quality of what you are buying, but as long as you are careful you can find some good deals.

For some buying tips read: How to buy used camera gear 

2. Make your own gear

If you’re like me you may find yourself scrolling through websites, or flipping through catalogs, dreaming of all the camera gear that you don’t have, mostly because so much of it is too expensive. While many common photography accessories can be purchased used, you can actually make your own versions for almost no money at all. These won’t stand up the the daily rigors of a professional photography environment, but most offer similar functionality as their full-priced name-brand counterparts for far less cash. From do-it-yourself tripods to homemade lighting kits, the internet is brimming with articles, videos, and tutorials for enterprising photographers looking to fashion their own equipment to save a buck or two. The end result might look the same as a professional product, but you may be quite surprised at what you can come up with to expand your photographic horizons with a bit of searching and a willingness to try making things by yourself.

Read these dPS articles for some DIY projects:

  • Creating Effective DIY Studio Lighting With Household Items
  • 5 DIY Hacks to Have in Your Camera Bag
  • How to Make a DIY Light Panel or Scrim
  • DIY Light Modifier You Can Do With Savage Translum Material
  • DIY How to Build and Use a Reflector to Take Better Portraits
  • How to Make An Inexpensive Light Tent – DIY

As an example, here’s a photo of a toy train I took with my son one morning before I left for work. It required no special equipment, and took about 10 minutes to set up.

A toy train, seen in a whole new light.

A toy train, seen in a whole new light.

You might think a photo like this would require an expensive camera, a fancy studio, and a lot of costly lighting rigs, but in truth it was quite the opposite. I shot this using my trusty D200 on our dining room table with a bit of aluminum foil taped to a board.

No fancy lighting or expensive equipment required.

No fancy lighting or expensive equipment required.

This is only one case scenario out of thousands, and just goes to show that a bit of out-of-the-box thinking, and some creativity, can net incredible results without requiring a trip to the bank. While spending money on additional gear and equipment can certainly boost your capabilities as a photographer, this is just one way to take you skills to the next level without breaking the bank.

3. Learn to use the equipment you already have

Recently I was talking about cameras with a fellow photography enthusiast who was a bit frustrated with his DSLR. He wanted to shoot in Aperture Priority but have his camera also take care of setting not just the shutter speed but the ISO as well. As he told me about the new camera he was thinking about buying and pondering how he could save enough money to get it. I asked if I could look through his camera menus a bit. A minute later I found that his camera did indeed have an Auto ISO setting which did exactly what he was hoping, and saved him hundreds of dollars right there on the spot.

This is only the most recent example of a phenomenon I have encountered many times; the camera you already have can probably do a lot more than you realize. If you’ve never sat down and read the manual for your camera, you might be in for a pleasant surprise when you find out how much it can actually do. You can almost always find online tutorials dealing with your specific camera with a bit of internet searching.

The equipment I used to shoot this was not expensive (a $ 100 pocket camera) but I did have to learn about lighting, posing, focal lengths, background compression, and other aspects of photography.

If you want to seriously enhance your photography skills without buying a single piece of new gear, one of the best routes you can take is to learn from others. Most cities have photography clubs where members meet regularly to teach workshops, share tips, or just gather to talk about their favorite hobby with fellow like-minded individuals. Often these groups and clubs require nothing of new members except a passion for photography. Those that do charge a fee usually keep it reasonable and have a good motive for doing so; membership dues give the group access to better facilities, early sneak peeks at new equipment, or even a notable guest speaker.

If you don’t have one of these groups in your area there are plenty of online forums as well, such as the ones right here at Digital Photography School. Joining a community, whether face-to-face or online, is a fantastic way to learn more about the capabilities of your gear, teach yourself about the principles of photography, and make personal connections that can help you when you need it. No new equipment is required – just a willingness to meet people, stretch yourself, and try something new.

4. Get out and shoot photos!

This might sound a bit silly, which is why I’m leaving this until the very end. I often have conversation with people who want to improve their photography skills but think they can only do it by spending money. One of the best ways to improve as a photographer is to actually go out and take pictures, and if  you already have a camera this requires spending no money at all.

It’s easy to think that buying a new camera, lens, flash, tripod, or camera bag will inspire you to get your creative juices flowing and take better pictures, but after a while all that gear will usually start collecting dust just like the camera equipment you already have. Whether you have a mobile phone, a pocket camera, or a full-fledged DLSR or mirrorless model, you are in possession of equipment that is light years beyond what your forebears had only a few decades ago. The secret to improving your photography is not about spending even more money on an ever-growing cache of equipment, but simply taking what you already have, going out into the world, and using it.

Capturing the beauty of nature with an old and relatively cheap iPhone 5.

Capturing the beauty of nature with an old and relatively cheap iPhone 5.

What about you? What are some of your favorite low-budget tips for improving your photography? Share your thoughts in the comments below.

googletag.cmd.push(function() {
tablet_slots.push( googletag.defineSlot( “/1005424/_dPSv4_tab-all-article-bottom_(300×250)”, [300, 250], “pb-ad-78623” ).addService( googletag.pubads() ) ); } );

googletag.cmd.push(function() {
mobile_slots.push( googletag.defineSlot( “/1005424/_dPSv4_mob-all-article-bottom_(300×250)”, [300, 250], “pb-ad-78158” ).addService( googletag.pubads() ) ); } );

The post 4 Tips for Doing Photography on a Budget by Simon Ringsmuth appeared first on Digital Photography School.


Digital Photography School

 
Comments Off on 4 Tips for Doing Photography on a Budget

Posted in Photography


3 Ways to Try Macro Photography on a Budget

21 May

Editor’s Note: This is one of a series of article on macro photography this week. Look for a new one each day. The next newsletter will have them all if you miss any!

Ranunculus1

Has Macro Week here at DPS sparked your interest, but you’re still not sure whether you’re quite ready to invest in a macro lens of your own? If so, then this article is for you! I’ll outline three different ways that you can try out macro on a budget, and possibly even with gear that you already own.

Now, before any macro-purists fall off their chairs in disgust, let me say that the techniques outlined in this post will produce pseudo-macro images. In a true macro image, the subject is projected onto the camera’s sensor at a 1:1 magnification, which means that the subject is exactly the same size in real life as it is on your camera’s sensor. That’s not the case, or the intent here. The intent here is to allow those of you who haven’t tried macro photography, the opportunity to test the waters and see if it is even something that interests you before making a big investment in a macro lens.

1.  Use a Telephoto Lens

DoubleTulip

This image was shot about two feet away from this flower, using a telephoto lens at 220mm.

My very first dslr camera came in a package with both an 18-55mm lens and a 75-300mm lens. I don’t tend to use the 75-300mm lens very often, but when I do, it’s usually in a pseudo-macro capacity. If you have a telephoto lens already in your bag, give this a try–stand about two feet away from your subject, with your zoom lens at about 250-300mm. If you have trouble getting your subject to come into focus, continue to move backwards with your feet until you find the sweet spot. It’s important to zoom with your legs rather than your lens, in this instance, so that you can keep the background nice and blurry, and the focus on your subject. Once you find that sweet spot, you may want to set your camera on a tripod at that spot to avoid camera-shake as you’re taking the photo. I’ve also tried it hand-held a few times with good results, so don’t be afraid to give that a try as well.

Pollinator

This image was shot using a telephoto lens at 300mm. This is about as sharp as I’m personally able to get when photographing living creatures with this method, and it isn’t sharp enough in my book.

One of the benefits of this method is that it doesn’t require you to get particularly close to your subject, which is ideal if you’re interested in taking macro photos of living creatures. Personally, I find that it is still difficult for me to achieve sharp focus when it comes to photographing living creatures with this method (even with a tripod),  so I usually stick to more stationary objects like flowers. Still, if you already have a telephoto lens in your bag it may be worth your time to try this method first, before buying a macro lens. I say this only because I have more than one friend who thought they’d be really interested in macro photography of insects, only to discover that they actually couldn’t stomach seeing the insects up close in all their glory.

2. Try Extension Tubes

This image was taken with an 18-55mm kit lens + manual extension tubes.

This image was taken with an 18-55mm kit lens + manual extension tubes.

An extension tube is a nifty little invention that screws on in between your camera body and your lens. They come in different widths, and can often be stacked so that you are able to use more than one at a time. They do not contain any glass, but simply allow you to get closer to your subject than you would be able to normally, while still maintaining focus. When it comes to extension tubes, you can find something for nearly any budget. More expensive versions maintain the electrical connections that allow you to use the autofocus feature on your camera, while less expensive versions will not. Additionally, some extension tubes will limit your ability to control aperture in-camera. If you have a lens that has a manual aperture ring, you can control it that way, but otherwise you’ll be shooting wide open. Personally, I have one of the least expensive sets of tubes $ 15, and even though I don’t have the capacity to use autofocus or control my aperture, I have always really enjoyed my set of tubes for creating macro images.

This image was taken with an 18-55mm kit lens + manual extension tubes.

This image of a blueberry bush was taken with an 18-55mm kit lens + manual extension tubes.

That said, before you buy, you should know three things.

First, some reviewers have reported that the less expensive tubes have gotten stuck on their camera body and/or lens. Others have reported that the tubes did not hook securely to their camera body and caused their lens to fall off during use. I have not experienced either issue, but generally use the tubes on my second body, with my kit lens, neither of which I would be devastated to lose. It is a trade-off though—using my kit lens means that I’m not able to control my aperture as I would be with other lenses, which is a bummer (but also not a major issue for me).

Editors note: buyer beware, just be sure to shop around and read reviews (the good and the bad) before you buy any extension tubes. It may seem like a great deal but if they wreck your camera or your lens it won’t be.

Second, be prepared to get close. Like, REALLY close. It will feel really strange to have the lens almost touching your subject, but that’s typically about as close as you will need to go in order to achieve focus. If you’re too close try using a longer focal length lens, that will help with this issue.

Third, there is absolutely a learning curve with extension tubes, particularly those that don’t maintain the electrical connection with the camera. It’s not insurmountable, but you probably won’t be able to use them perfectly right out of the box. Just be prepared for some trial and error.

3. Reverse Your Lens

50mm lens hand-held in reverse up to an 18-55mm kit lens.

50mm lens hand-held in reverse up to an 18-55mm kit lens.

Did you know that you can turn any lens around and use it backwards? Well, you can! There are two different ways that you can reverse a lens to use it for macro photography.

The first way to use your lens in reverse is to buy a macro reverse ring. These rings are usually around $ 15, and you would need to know which lens you plan to use in reverse (different lenses require different sized reversal rings), AND whether you’d like to reverse the lens directly to the camera, or on to another lens.

Another instance of a 50mm lens being hand-held in reverse up to an 18-55mm kit lens. Note the major vignetting in this image--that was straight out of camera.

Another instance of a 50mm lens being hand-held in reverse up to an 18-55mm kit lens. Note the major vignetting in this image, along with an almost tilt-shift effect. Both were straight out of the camera

The second way that you can reverse a lens is to simply hand-hold it in backwards. If you have both a kit lens and a 50mm lens, attach your kit lens to your camera as usual, and then hold your 50mm lens backwards, up to the end of the other one. If you can, wrap your fingers around the place where the kit lens and the 50mm lens join together to minimize any accidental light leaks. Again, you’ll have to zoom with your feet, and you’ll probably have to get pretty close in order for things to come into focus. This method works best for creative macro—you’ll find that the focus is much softer than the other methods, and often includes unpredictable vignetting. That said, if I’m trying to create a macro image that feels ethereal, this is my go-to method.

Are there any other techniques you’ve used to create macro or pseudo-macro images without a macro lens? If so, please share!


macro-cover
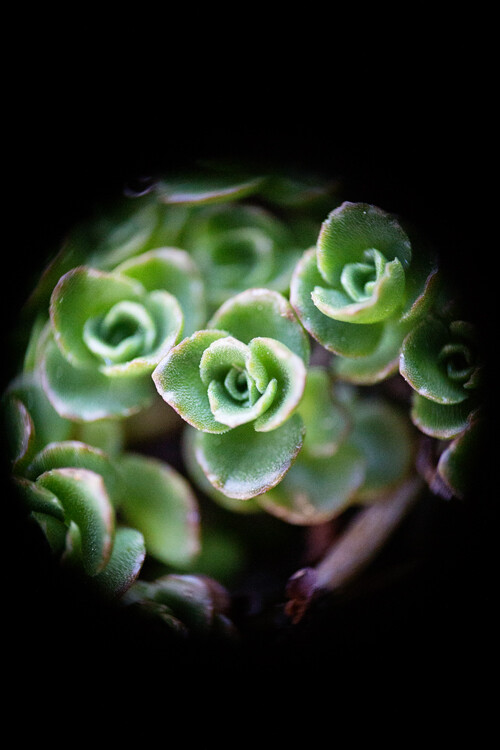
Want to learn more about macro photography? Check out Ed Versosky’s Introduction to Close-Up & Macro Photography ebook – just $ 10 (over 30% off) this week with coupon code: DPS. You will need to enter the code to apply the discount.

googletag.cmd.push(function() {
tablet_slots.push( googletag.defineSlot( “/1005424/_dPSv4_tab-all-article-bottom_(300×250)”, [300, 250], “pb-ad-78623” ).addService( googletag.pubads() ) ); } );

googletag.cmd.push(function() {
mobile_slots.push( googletag.defineSlot( “/1005424/_dPSv4_mob-all-article-bottom_(300×250)”, [300, 250], “pb-ad-78158” ).addService( googletag.pubads() ) ); } );

The post 3 Ways to Try Macro Photography on a Budget by Meredith Clark appeared first on Digital Photography School.


Digital Photography School

 
Comments Off on 3 Ways to Try Macro Photography on a Budget

Posted in Photography


Budget X: Hands-on with Fujifilm’s new X-A2

16 Jan

Fujifilm has announced the X-A2, a new version of its X-A1 budget X-series mirrorless interchangeable lens camera, which incorporates mostly minor changes compared to its predecessor. Like the X-A1, the X-A2 uses a conventional Bayer-pattern CMOS sensor and offers virtually identical ergonomics but now comes with an LCD screen which tilts upwards to 175-degrees for selfies. Other improvements include the addition of Fujifilm’s new ‘Classic Chrome’ film simulation mode. Click through for some images

Articles: Digital Photography Review (dpreview.com)

 
Comments Off on Budget X: Hands-on with Fujifilm’s new X-A2

Posted in Uncategorized