RSS
 

Posts Tagged ‘Better’

The Intimate Landscape – 5 Tips for Better Landscape Photography

28 Nov

Landscape photograph

A few weeks ago I spent seven days travelling across the northern tip of New Zealand’s South Island. Anybody who has been here knows that it is a beautiful place. I often come across remarks by photographers referencing New Zealand as a destination on their list of dream places to go to. Who can blame them? It’s a spectacular country, with beautiful landscapes.

However, the road trip brought home something of interest to all landscape photographers – landscape photography is hard. Really hard.

Not only do you need a beautiful location, but you are also relying on the weather and light to be conducive to the type of photo you want to take. If it isn’t, there may not be time on a short trip to wait for the ideal conditions.

It’s also a challenge to find an original way to photograph the landscape. Many other landscape photographers have been there before you. It’s difficult to create something new in a short space of time. Here are a few tips to help you do better landscape photography.

Split Apple rock, near Abel Tasman national park. I like this photo, but is it original? Not really – it’s a popular landmark and has been photographed by hundreds of photographers. It’s very difficult to create something new here.

Split Apple rock, near Abel Tasman national park. I like this photo, but is it original? Not really – it’s a popular landmark and has been photographed by hundreds of photographers. It’s very difficult to create something new here.

#1 Local knowledge

While there are ways to help ensure that you get the most out of a trip away (watch for those tips in an upcoming future article) today I want to make the point that one of the biggest advantages any landscape photographer has is intimacy with the landscape.

Intimacy comes from a deep knowledge of ,and a connection with the landscape. It’s an appreciation of the people that live there and the history of the location, plus an understanding of how the landscape changes through the seasons. People who have an intimate relationship with a region usually live there, or visit often. They are not passing through (like I was on the South Island). They know the best places to take photos, and when the light, seasons and weather are most likely to align to create the best results.

If you are struggling to find ways to photograph your local landscape, maybe it’s time to come at it from a different perspective. How can you turn your familiarity with your local landscape into an advantage?

Let me give you some practical examples. I live in Wellington, a city at the southern end of New Zealand’s North Island. I’ve never thought of it as a great location for landscape photography. Relatively speaking, it doesn’t have the spectacular landscapes of the South Island, nor the sub-tropical bush or white sand beaches of the northern half of the North Island. However, I’ve found other ways to incorporate the landscape in my photos.

Landscape photograph

#2 Long exposure and night photography

I know some good locations for these, including places that I would never have found on a short visit. The coastline south of the city has some beautiful, rugged locations. Walking along the sea front during all four seasons has given me an appreciation of how beautiful and changeable it is. The light and landscape change with the seasons and the weather, and I’d never understand that if I didn’t live here. Best of all, once I’ve found a location, I can wait out periods of inclement weather and return when the light is best to take advantage of it.

The benefit of these techniques is that they help you create photos with a very different look to what many photographers will take.

Example from another photographer

I recently came across the work of Mark Gee, another Wellington resident. He’s rather good at night photography. Most of his photos are taken in the local area and show an intimacy with the landscape that only comes with local knowledge and time.

Landscape photograph

#3 Try some special techniques

Painting with light and steel wool spinning are two that come to mind. The lack of spectacular landscapes has pushed me off into different directions as I look for more ways to make the most of the scenery we do have here. Mark Gee’s work has inspired me to try some night photography, and that ties in neatly with these techniques. Again, the freedom to return to the locations I want to use when the sky is clear and there is no wind is priceless.

If you are looking for original ways to photograph your local landscape, perhaps either of these techniques will help!

Portrait in the landscape

#4 Portraits

I take most of my portraits outside, using my favourite locations as backdrops. Sometimes a certain location may not be great for landscape photography, but it is ideal for taking portraits. The local landscape has become a part of my portrait work, and my style. If I lived somewhere else, my portraits would have a different feel to them.

How can you incorporate your local landscape in portraits?

Are there any other ways to utilize the local landscape?

#5 Use storytelling

There’s one way I can think of – tell a story. Perhaps there is the potential for a documentary project in your area. Stories are inevitably about people, so think about how local people interact with, or depend on the local landscape. For instance, activities such as running, sea kayaking, cycling, surfing and wind-surfing are all popular here in Wellington. Any one of those could make an interesting documentary project.

Or something more simple, such as Nathan Wirth’s seascapes with a Buddha.

What options do you have in your local area?

Ultimately, all these ideas are about the same thing: going deep and exploring your relationship with your local landscape in a way that isn’t possible on a brief visit. It’s the same reason that National Geographic photographers go away on assignment for months at a time. Intimacy with your subject and time produce a depth of coverage that you can’t get any other way.

Mastering Photography – additional learning

il-06

My ebook Mastering Photography: A Beginner’s Guide to Using Digital Cameras introduces you to photography and helps you make the most out of your digital cameras. It covers concepts such as lighting and composition as well as the camera settings you need to take landscape photos like the ones in this article.

Post originally from: Digital Photography Tips.

Check out our more Photography Tips at Photography Tips for Beginners, Portrait Photography Tips and Wedding Photography Tips.

The Intimate Landscape – 5 Tips for Better Landscape Photography

The post The Intimate Landscape – 5 Tips for Better Landscape Photography by Andrew Gibson appeared first on Digital Photography School.


Digital Photography School

 
Comments Off on The Intimate Landscape – 5 Tips for Better Landscape Photography

Posted in Photography


The Path to Better Photography

09 Nov

Ed Verosky is a professional photographer and author based in New York. In this article, Ed presents his recommended path to learning photography. This, along with his eBooks on the subject, have greatly improved the skills of thousands of photographers. To learn more about improving your photography, visit his site and check out his extensive eBook collection (currently 62% off at SnapnDeals).

If you’ve ever wanted a little guidance when it comes to learning photography from top to bottom, this DPS post is for you! There’s a lot of information out there, and tons of books, tutorials, workshops, etc. to learn from. But it’s not always easy to know where to start, or where you should focus your efforts when it comes to really improving your knowledge of the art and craft of photography. With that in mind, here’s a "learning road map" I’ve put together for you that has helped many of my readers. I hope it helps you with your quest to become a better photographer.

NewImage

Getting Started

First of all, I want to thank you for taking the time to read this. You’re probably looking at this right now, excited about the possibility that you might actually learn something new, something that will elevate you as a photographer in some way. Whether you are a beginning photographer, or someone who’s been at this for a few years, you probably have the desire to improve on this thing that you love.

Photography means something special to you; it’s a kind of magic that allows you to express yourself. It’s your way of communicating and sharing with the world. Whether you’re doing what you love to earn extra income, or simply for the pure excitement and enjoyment of it, that’s reason enough to want to keep improving and learning and growing. It’s not only the technical skills, but the psychology and artistic sensibility of what we do as photographers that keeps us constantly in the need to learn and adapt to everything from new gear, to new people/clients, to our own ways of expressing ourselves.

How to Use this Post as a Guide

Print this post out. It’s your guide and starting point. It can serve as a road map to learning the basics of photography, helping you to build a solid foundation from which to grow and become really good at what you do. I encourage you to use this road map and seek out multiple resources, like DPS, to further your understanding of each topic that follows. My blog, newsletter, video tutorials, and ebooks will also definitely help you learn about these things quickly and in great detail. But I routinely direct people to outside resources as well, because I think it’s important to learn from more than one teacher in order to really drive home the knowledge and principles of photography.

I’m very excited about this journey you’re on, and it’s my goal to do everything in my power to help you get everything you want out of your photography. I’m obsessed with teaching and demonstrating what I’ve learned and all the new things I continue to learn. I’m sincerely happy that I have another person I can share this excitement with right now. That’s you!

Now, we’ll begin our discussion of the four topics that I feel are most important in your development as a good photographer: the camera, the lighting, the subject, and post-processing.

The Camera

The first part of becoming a complete photographer is knowing how your camera works, inside and out. Your camera is the main mode of communication between you and the outside world as a photographer. Like your voice, your photographic vocabulary is extremely limited without some good understanding of how best to tell a story. Put the effort into learning everything about your camera and and it will pay off, big time. Plus, you’ll be able to speak intelligently about your craft, and be able to ask the right questions when it comes to the topic of lighting. The camera and the lighting; knowledge of one topic supports an understanding of the other, so you need both. Start with your camera.

NewImage

Good resources will provide numerous visual examples to help you understand how exposure works. The sequences above are just a few that I use in my eBooks to illustrate the interdependent nature of exposure controls on the camera.

———————–

Here are some of the most important things you should learn about:

  • Raw and JPEG. The differences between Raw and JPEG file formats. Learn what the differences are and why one is not always better than the other. For example, I strongly recommend that people shoot in the largest Raw format their cameras produce. But that’s not always the practical choice, nor is it always necessary. In general, however, Raw will provide you with the highest quality file from which to work with. From there, you can export out to fine-tuned JPEGs that are sure to produce prints and web display images of excellent quality. But this isn’t the whole story, and you should probably investigate what these file formats are capable of, and how they work with your post-processing software, so you can make the most informed decisions according to the demands and limitations of your schedule, software, and client needs.
  • ISO, Aperture, and Shutter Speed. These are the fundamental components of exposure and a huge topic for photographers. Our cameras are able to keep these three components in check for us in automatic shooting modes, but the auto-metering and exposure mechanisms don’t always get it right. Understanding exactly how ISO, aperture, and shutter speed interrelate will give you complete control over exactly how your exposures turn out. You need to understand this topic in order to make educated decisions about how to adjust exposure even when using automatic shooting modes. There are shortcuts to learn, too. But I cannot stress how important it is to get a real, rock-solid, understanding of exposure.
  • How to do the math of photography. It’s easy once you get the hang of it, and it’s an essential part of working with all aspects of exposure and lighting. What is this "math" all about? Well, it comes down to how light is measured in photography; we talk about light in terms of "stops" which are traditionally full increments of camera and lighting adjustments. Each stop either doubles or halves the amount of light you’re working with. For example, when working with apertures (often talked about in terms of f-stops), moving from one full f-stop of say, f/5.6 to f/8.0 cuts the light entering the camera by half. Likewise, changing your shutter speed from 1/500 sec. to 1/250 sec. allows twice as much light to expose the camera sensor. ISO works the same way; ISO 200 makes your sensor twice as sensitive to the light hitting it as ISO 100. Lighting has a similar math with a few good rules you can follow. Knowing all of this and putting it to use will put you in complete control of your lighting and exposure.
  • White Balance. Light comes in many different colors, even when it looks white to your eyes, a light source can reproduce as blue, green, or orange. Learn how to control and fix it both in-camera and during post-processing. When you’re using different types of light sources together like flash and household incandescent lamps, you’ll have to make some decisions about how to handle the difference in light color, if at all.
  • Shooting modes. Which camera mode do you typically shoot in? There are several to choose from including full automatic, program, aperture priority and shutter priority. There’s also manual mode which is very important to know how to use. In fact, for studio-type lighting, manual mode is usually the best choice. Learn what each camera shooting mode does. Each one has a real purpose and knowing how to choose the right one is crucial.
  • Manual mode. Understand how to use it and gain total control over every aspect of exposure. No, you don’t have to shoot in manual mode all the time to be considered a "real" photographer, but for many situations, knowing how to use your camera in manual mode will save you from disaster. Manual mode is also important in studio work and anytime shooting conditions require you to do the thinking when your camera’s auto modes aren’t cutting it.
  • Understand all the metering, focusing, and drive modes on your camera. It’s easy to find one thing that works and simply stick to it. But sometimes you need to switch things up to get better results as conditions change. Learning what your camera’s capabilities are is going to come in handy.
  • Evaluate and fix your shots. Know how to most effectively use all the tools available on your camera to properly evaluate and adjust your exposures as you’re shooting.

Ok, remember the broad list of things you need to learn: camera, lighting, subject, and post-processing? Well the list above is just the CAMERA part! Trust me, I know that part alone can seem overwhelming, and that’s why most people never bother to learn it all. That’s a real shame, because it’s the first part of becoming a complete photographer; you need to know everything about how your camera works.

Fortunately, you don’t need to know everything from the start. If you’re using your camera in a way that’s working for you right now, keep doing that. There’s no reason to give that up. But in the meantime, start building on your current understanding and usage of the camera and learn a little bit more as the weeks go on. Soon, everything’s going to start coming together and you’ll find that you have a total command of the camera. That’s the goal. Read the best resources on using your DSLR, and just commit to wanting it. It’s going to happen, I promise!

Lighting

Although setting your camera to one of the auto exposure modes is a great way to solve the immediate problem of getting a properly exposed image, it won’t solve your lighting concerns, and it’s your lighting that really makes the difference. Many photographers soon realize that what separates their images from better work is the application of good lighting techniques and different types of lighting sources. I would say that the ability to skillfully use lighting is the number one technical skill a photographer should seek to acquire in order to produce good work. Unfortunately, this is also the number one place photographers tend to drop the ball.

NewImage

Learning how to control your light will allow you to easily create effects like overpowering daylight (above). Here, the right combination of camera settings and flash power create a nighttime effect, even though there is actually bright window light coming into the studio.

———————–

Sure, lighting isn’t easy at first, and maybe that’s why so many photographers just give up on learning how to do it properly. It takes time, experimentation, and a good teacher to help you get to where you need to go with photographic lighting. Good books and tutorials can help you with that. When I teach, my goal is to show readers how to use natural, constant, and flash lighting in a way that really gives them a handle on it quickly.

In order to really master lighting for photography, you should learn the following things:

  • How light actually behaves. By learning the properties of light, you can easily control the way it can be directed, redirected, and modified to suit your needs.
  • How light is measured in photography. There’s a very easy and powerful math to photographic lighting (which I touched on earlier). It’s been around for a long time and has served photographers well. Learning how to measure light is crucial to good lighting and good exposures.
  • How to use strobe/flash lighting. This is one of the most powerful and convenient types of lighting you can learn to use. Knowing how to use both on-camera and off-camera flash is what separates many photographers. While it’s ok to feel comfortable being a "natural light only" photographer, it’s also limiting.
  • Lighting for portraiture. Using your knowledge of lighting will transform your portraiture work to a new level. There are five important lighting patterns you should absolutely know. Starting with a single light source, you can apply these patterns and build upon them to eventually create portraits that take advantage of multiple lights.
  • Mixing and matching light sources. Make sure to understand how different light sources (although many appear to look white to your eyes) will cause major color shifts in your exposures. You can handle these problems in-camera with good white balance techniques and also during post-processing.

The Subject

I believe in teaching portraiture in a semi-traditional way; instructing on the fundamentals and quickly moving to a more freestyle approach. An appreciation for traditional lighting patterns and contemporary portraiture will give you a good foundation for all of your portraiture work. But in today’s marketplace, the old traditional portraiture isn’t the only game in town. Working photographers should look beyond typical portraiture to find ways to differentiate themselves from others. One of the main things I like to stress is that you should start thinking about unconventional posing, directing, lighting, etc. eventually developing your own style.

NewImage

Great subjects can inspire you to get creative with your posing and lighting techniques. This type of experimentation will help you develop your own unique style.

———————–

Again, this all begins with really knowing the fundamentals of lighting, and getting very comfortable with your gear so it becomes an extension of your vision and not something that gets in the way of the creative flow. But simply knowing how to use the tools and basic techniques of your craft isn’t enough. You need to let go of the things that hold you back from creating your best work and explore new ways to look at and create portraiture. Yes, the soft skills like working with subjects and clients are important which is why it’s one of my favorite things to teach.

Here are some of the most important themes and topics I tend to discuss on a regular basis:

  • Classic Lighting. The basic traditional lighting patterns are classics and always look great. Even if you’re the type of photographer who doesn’t like to do things the traditional way, get to know the classics because they come in handy and the principles they’re based upon apply to ALL types and styles of lighting.
  • Creative Lighting. I strongly encourage you to go nontraditional, too. Working with your subjects in a way that encourages creativity includes bending and breaking the rules of traditional lighting.
  • Developing Your Own Style. It’s imperative for working photographers to do this in order not to drown in a sea of competition where so many are producing work absent of any unique style or vision. Amateurs have even more reason to explore the artistic areas of portraiture since it is a part of the amateur heritage to do so, and also because they don’t have the burden of producing work according to the tastes and needs of paying clients. When I talk about developing your own style, I don’t necessarily mean that you can, or should attempt, to do it deliberately. I don’t think you can create a true style as much as you can identify it by looking back at your work as time goes on. But in the meantime, take this as a cue to work in a way that is your own.
  • Portraiture Projects. One of the best ways to expand your body of work, as well as come up with new imagery that you otherwise might not have thought of, is to start a photo art project. Starting with just a simple idea or theme, you might find yourself discovering many different ways to express it. Even a very general concept has a tendency to build on itself as it becomes, at the same time, more defined and diverse. This process of creation and discovery can only enhance your artistic vision and technique.
  • How to Find Great Subjects. Good models are everywhere, you just have to know how to find them. This is another thing I talk about in my books, but the main message here is that family, friends, and strangers can all make great subjects. You don’t always have to look to "model" directory websites to find great people to photograph. I’ve gotten some of my best results through other means.
  • How to Direct Your Subjects. Whether your portrait subject is a client or a collaborator in your next artistic vision, it’s very important to get them excited and on-board with your ideas for the shoot. They are the actor in your drama, the star of your movie, even if your "theater" is only an ad-hoc studio setup, your subject’s confidence and enthusiasm are key ingredients for a successful shoot.
  • Make Your Work Personal. This is very important. No matter what, or who, you photograph, if you invest something personally in your efforts, it will show. Your work will be less generic and more substantive. It’s often said that all portraits are really self-portraits. While it’s not always that evident, the truth is that the best portraits happen when you recognize something special as you click the shutter. And what you recognize most often comes from a very personal place.

Post-Processing

It can be argued that post-processing happens the moment a digital camera processes the data off the sensor, and certainly when a file is converted, via some programmer’s algorithm, for view in a RAW conversion engine common in most digital workflows. Why not make the absolute most of the tools available to you, just as photographers have always done? It used to be darkroom tools, like various ways of developing film and selectively exposing photographic paper during the printing process, which allowed the photographer to enhance or correct problems with an original negative. Now it’s digital. Of course you can ruin any photograph with overdone effects or cheesy gimmicks. But used thoughtfully, post-processing techniques can help make a good picture an outstanding one.

NewImage

  • Raw Conversion Software. I recommend that you learn how to use Raw conversion software which powers and comes built-in to Adobe’s Photoshop and Lightroom products. Working with Raw files has gotten to be a rather seamless part of the normal workflow.
  • Image Editing. Software like Lightroom and Aperture make organizing and basic editing a breeze. Adobe Photoshop is the standard professional editing (retouching) tool of choice, however, the less expensive Photoshop Elements might have just enough features to allow you to do the type of post-processing you’re interested in.

Try out these products for free by clicking on the following links. You should see a "Trial" link on each product’s information page:

  • Adobe Lightroom
  • Adobe Photoshop
  • Adobe Photoshop Elements

Of course there are also other fun and effective ways to post-process your images, including using some popular mobile device apps. This is one of my favorite topics to cover as I’m a big fan of iPhone photography and mixing DSLR photography with phone photography editing and sharing technologies.

Some of the things you might be interested in learning include:

  • Retouching. Using Photoshop tools like the clone tool, liquify, and healing tools to remove blemishes, tighten up body parts, and otherwise improve the overall look of your portrait subjects. "Photoshopping," "airbrushing," or retouching is so prevalent these days, it’s almost expected that you offer this to paying clients as part of the service. You can learn to do at least the basics by watching a few tutorial videos on YouTube, but I suggest you also invest in some basic detailed instruction from books like the popular ones by Martin Evening. Once you get that under your belt, you’ll be ready to tackle more advanced topics.
  • Effects. There are several effects that are popular with photographers these days, including texturing, compositing, and alternative color processing and black and white conversions. Some effects can be purchased as presets and actions making them simple to apply. However, I recommend you also learn how to create and manipulate images directly so you’ll know exactly how to get the looks you want and make them unique.
  • Image Preparation. You’ll also want to know the best ways to prepare your images for use in various applications like prints of specific sizes, on-line web galleries, distribution and presentation on the web, etc. Knowing the ins-and-outs of image resolution and quality settings will help you make the most of your photography. After all, what good is all the work you’ve done up to this point if you don’t know how to best present your images in the end?

This Is Just The Start

I realize there’s a lot of information in this post. At the same time, it’s not complete, just one general outline based on my experience and teaching methods. But I strongly encourage you to find your place on this map and start navigating your way through it. It will take some time, but that’s one of the best things about photography, the discovery.

——————

To get started, you can download my popular eBook bundle at a special discounted price (62% off) on SnapnDeals. Everything I’ve talked about above (and more) can be accessed now so you can get started today.

Post originally from: Digital Photography Tips.

Check out our more Photography Tips at Photography Tips for Beginners, Portrait Photography Tips and Wedding Photography Tips.

The Path to Better Photography

The post The Path to Better Photography by Guest Contributor appeared first on Digital Photography School.


Digital Photography School

 
Comments Off on The Path to Better Photography

Posted in Photography


Moon Photography: 6 Tips for Better Moon Photos

29 Oct

The moon is something so familiar to us, and yet so strange that it’s mesmerizing. It’s at once commonplace and extraordinary. As photographers, we are drawn to it in an attempt to convey the intrigue we feel when we look at it.

But moon photography can be tricky.

Moon Photography: Just the Moon, by Anne McKinnell

A bright full moon creates one of the most high contrast situations there is, posing a difficult challenge for photographers. Often photos of the moon appear like a spotlight in the sky that looks more like the sun than the moon.

Moon Photography Tips

To get the best possible pictures of our one-and-only moon, it’s important to know a few things about it first.

1. Learn the Phases of the Moon

The moon itself emits no light, it’s simply a huge rock being lit up by the sun. As it orbits the earth, and as the earth orbits the sun, how much we see of that reflection changes from a bright, full moon to no apparent moon at all.

Moon Photography: By Tomruen [Public domain], via Wikimedia Commons

By Tomruen [Public domain], via Wikimedia Commons

Because of our counter-clockwise trajectory around the sun, the shadow it casts on the moon is always moving to the left; after a new moon (no moon), the illuminated side starts to creep in from the right edge, expanding towards the left side each night. As the moon’s apparent size gets bigger, we call it “waxing”.

Once the moon is full, the shadow starts to reappear – again on the right side – and grow leftwards, shrinking the visible moon until it is dark again. This is called “waning”. Therefore, any time you want to know what the moon will look like tomorrow, look at it tonight; if it is lit on its right side, it is waxing towards fullness. But if it’s lit on the left, it is waning, and will soon be gone.

The twilight sky also holds clues to the lunar phases. If the moon is visible before sundown, it is waxing, but if you can see it before sunup, it’s waning. Alternatively, you can always look up a calendar online, or download a moon phase app that will do the calculations for you.

2. Use the Right Equipment

To maximize the success of your moon photography, there are a few bits of a gear that will come in handy.

Moon Photography: Moonrise over the Oak Bay Marina, in Victoria, British Columbia, by Anne McKinnell

  • A zoom lens.
    If you’ve ever taken a shot of the moon and been disappointed by the tiny white blob that results, you’re probably using too short of a focal length. A standard wide-angle lens makes everything appear smaller, particularly things that are far in the distance. To get a close-up shot, use a focal length of at least 200mm or more. Longer lenses will result in greater magnification and detail.
  • A tripod.
    To support the weight of this large lens, and to allow the slow shutter speeds that may be necessary to get a good exposure, mount your camera securely on a sturdy tripod.
  • A shutter release.
    These come in both wireless and wired options and will allow you to fire the shutter without having to depress the shutter button and risk camera shake. If you don’t have one, use your camera’s self-timer to achieve the same benefit.

3. Get a Good Exposure

The moon is very intricate and detailed, with craters, channels, and mountains dotting its surface. If the moon in your photo turns out bright white, it is overexposed. This happens frequently because the blackness of the surrounding sky throws the light meter off.

To fix this, turn down your exposure compensation (+/-), or use your camera’s spot metering mode to expose for the moon alone. Check your camera’s manual for information about how to do this on your specific model.

Moon Photography: Long Nights Moon by Anne McKinnell

For best moon photography results, bracket your shots. Some cameras will have an automatic bracketing feature, but if yours doesn’t, you can simply do it manually. First, take one shot at the automatically-determined settings. Then, using exposure compensation, take the same shot at -0.5EV, and one at +0.5EV. Do the same at -1EV and +1EV, and continue to +/-1.5EV and beyond if necessary. Later, you can choose the best exposure when you view them on your computer.

4. Find the Best Times and Places to Shoot

Unless the city is a part of your scene, you probably don’t want a lot of urban light pollution spilling into the sky when you’re trying to photograph a pristine moonlit night. You’ll get the cleanest shots outside of dense civilization. Explore backcountry roads, or take a hike into the nearby mountains to find truly dark night skies.

That said, a common problem photographers run into with moon photography is the harsh difference between a brilliantly lit moon and a pitch-dark sky. To avoid this, consider shooting during the “blue hours”, when the sky glows faintly after the sun goes down, or before it comes up. There is less contrast at this time, though the moon is still bright.

A moon phase app can help you determine when there will be a full moon during twilight.

5. Create an Interesting Composition

Supermoon at Bryce Canyon National Park, Utah, by Anne McKinnell
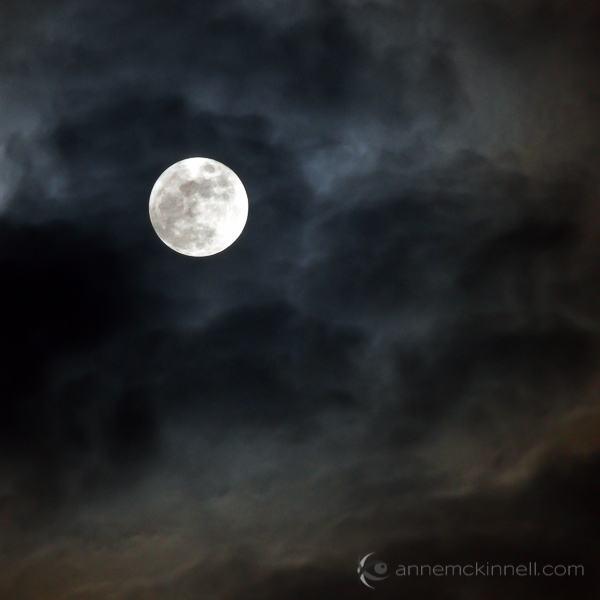
As compelling as a beautifully sharp, detailed image of a lonesome moon is, once you’ve seen one, you’ve seen them all. Getting that perfect close-up is excellent practice, but try to get creative by placing the moon within a more complex composition.

For instance, you could try framing it behind trees and buildings, or reflecting it off the surface of a still lake. Placing other objects in the foreground gives the moon context and scale that it lacks on its own. Think of the moon as a single element which should be incorporated along with other compositional elements and techniques to make a great final photograph.

6. Combine Multiple Exposures

Incorporating other objects can complicate things though, and you may find that the perfect exposure for the moon doesn’t match that of the rest of the scene. Sometimes natural light doesn’t cooperate, and the camera doesn’t see things the way our eyes do. This is where digital photography comes in really handy, allowing you to play with your images to create the scene the way you saw it, even if the camera saw it a little differently.

To do this, take several shots at different exposures by bracketing, as mentioned above. When you open the files on your computer, choose two: the one with the best exposure on the moon (‘Image 1′), and the one with the best exposure on the rest of the scene (‘Image 2′). Using an image editing program, select the moon from Image 1 and copy it, then paste it into Image 2, covering the moon in that picture. Use the eraser tool with a heavily feathered edge to remove any imperfections and blend the edges together. This method may take some trial and error to get it just right, so try it several times with several different shots to get the hang of it.

Moonrise over the ocen in Sidney, British Columbia, by Anne McKinnell

When performing this technique, try not to stretch or enlarge the size of the moon. The goal of image editing is to faithfully recreate a scene that the camera simply can’t capture all at once, so beware of any visual exaggerations that make the composition look unnatural or inauthentic.

Share Your Moon Photography Tips and Moon Photos

Got any more moon photography tips to add? We’d love to see them in comments below. Also feel free to share any photos you’ve taken of the moon.

Post originally from: Digital Photography Tips.

Check out our more Photography Tips at Photography Tips for Beginners, Portrait Photography Tips and Wedding Photography Tips.

Moon Photography: 6 Tips for Better Moon Photos

The post Moon Photography: 6 Tips for Better Moon Photos by Anne McKinnell appeared first on Digital Photography School.


Digital Photography School

 
Comments Off on Moon Photography: 6 Tips for Better Moon Photos

Posted in Photography


Canon EOS 70D Dual Pixel AF: for better or for worse?

11 Oct

70Dnews1.jpg

Canon’s latest enthusiast digital SLR sports a radical new sensor-based autofocus system, where nearly every pixel is dedicated to phase-detect autofocus. As we come close to completing our review of the Canon 70D, we’ve run the new AF system through a battery of tests to see what, if anything, it means for the enthusiast shooter. Click through for the whole nine yards, as well as new information about the camera’s movie autofocus and Wi-Fi functions.

News: Digital Photography Review (dpreview.com)

 
Comments Off on Canon EOS 70D Dual Pixel AF: for better or for worse?

Posted in Uncategorized


5 Ways to Take Better Smartphone Photos

21 Sep

When you think about smartphone photography what comes to mind? My guess is you probably think about Instagram, photo filters, bad selfies and any number of other keywords that describe this new wave of photography.

hero

Today, I’m going to share a few tips on how you can improve your smartphone photography and start capturing interesting photographs wherever you are with whatever you have in your pocket. If you like this post you might also want to check out this DPS eBook specifically written for improving your iPhone photography.

Oh and no just because Apple improved their camera in the 5s doesn’t mean that they’ve created a device that will make you a better photographer – you’ll just get the same boring images – unless you learn how to become a better photographer.

Take Your Time and Treat it Like a DSLR

Smartphone photos on Flickr, Facebook and Instagram get a bad reputation for being terrible because well, 95% of them are terrible. One of the biggest reasons that this is the case is because 95% of the photos on these sites are taken not as photographs, but as a way of sharing moments – they’re snapshots.

IMG_0826-650x650

People aren’t thinking about capturing a photograph – they’re thinking about how cool that thing that happened in front of them is. If you want to truly impress people with your smartphone photographs you have to first and foremost start treating your smartphone more like a camera and less like a phone.

In the photo above I noticed that the sun setting behind me was reflecting off the mirror at the other end of the bar. I positioned my beer and spent a few minutes taking different shots, both in portrait and landscape orientation, as the sun quickly passed its way below the horizon.

Think With Filters in Mind

The great thing about smartphone photography is the ease of which you have to process your captured image. While it might not be true that every photograph looks “better” with a filter, it is certainly true that filters can add interest to an otherwise boring photo. That said you shouldn’t simply think “oh well I’ll just add a filter to it to make it awesome” instead think “that would look really cool with this filter!” and then shoot your photo accordingly.

IMG_0104

When I saw these two hikers sit down in front of me on a recent hike I knew right away that it’d make for a great “old time” family portrait style photo. I framed the shot and instantly went in that direction when I process the image – there was no doubt in my mind as to how I wanted the image to look from the moment I captured it.

Get Into Strange & Uncomfortable Positions

Smartphones are light, easy to maneuver and have a large screen making it possible to compose your image in awkward positions. Use this to your advantage and don’t be afraid of looking like someone who’s had a few too many hallucinogenic drugs in public. If you’re taking a photo people will understand won’t they?

So get down on your knees, on your back or hang upside down and have fun capturing photos that you would otherwise be unlikely to get with a larger heavier device.

Use Third Party Lenses

In most cases the third party lenses are best used for specialty situations like fisheye or macro photography that the built in cameras just aren’t capable of doing. With the iPhone I use the Olloclip 3 in 1 attachment and absolutely love the macro lens (read my full review here).

Dragonfly Macro

The above photograph was captured using an iPhone 4S with the Olloclip Macro attachment and to be honest the quality of this photograph even stunned me when I finally got it onto my computer. One of the key points to keep in mind here is that when you are using this lens you are required to be about 10-15 millimeters away from your subject to achieve focus – that’s incredibly close to a an insect that typically is fairly skittish.

Use Third Party Camera Apps

Yes the smartphones come with built in functionality, but in most cases they are fairly basic and while they will work well enough if you’re looking to capture a snapshot to go beyond that there are certainly better options out there. Many of the good quality camera apps on the market offer improved stability control, better filter options, and the ability to pick a focus and exposure point separately allowing for better control over the final image. Seeing as there are so many good apps out there rather than listing one that I recommend how about you leave your favorites in the comments below!

Have Fun and Share

Okay so ultimately the best part of smartphone photography is how easy it is to share your creations with the world. So now that you’ve learned how to take better smartphone photos how about sharing some of your favorites below – let us know which phone and apps you’re using to capture the images!

Learn more about taking photos with iPhones with our iPhone PHotography eBook.

Post originally from: Digital Photography Tips.

Check out our more Photography Tips at Photography Tips for Beginners, Portrait Photography Tips and Wedding Photography Tips.

5 Ways to Take Better Smartphone Photos


Digital Photography School

 
Comments Off on 5 Ways to Take Better Smartphone Photos

Posted in Photography


How to Use Leading Lines for Better Compositions

17 Jul

A leading line paves an easy path for the eye to follow through different elements of a photo. Usually they start at the bottom of the frame and guide the eye upwards and inwards, from the foreground of the image to the background, typically leading toward the main subject.

The easiest place to find a leading line is on a road. Roadways are inherently leading because they go somewhere, give us a feeling of motion, and the lines often point so far inwards that they reach a vanishing point – the place where two or more lines converge into theoretical infinity.

Avenue of Oaks, South Carolina, by Anne McKinnell

The leading lines of the road converge to create a sense of infinity.

When leading lines, such as roads, connect the foreground to the background of a scene, they help to create depth and dimensionality which draws the viewer into the image.

Leading lines are all around us in cities and in nature. Your job as the photographer is to find them and arrange them in your photograph so that they lead towards something, even if that something is infinity.

Sunset at Ross Bay, Victoria, British Columbia, by Anne McKinnell

The logs on the beach draw the viewer’s eye into the frame and lead up to the house.

When you’re setting up a shot, take a moment to examine the scene for its prominent lines. Clear your mind, relax your eyes, and notice where they are naturally drawn to.

Pay special attention to man-made things such as:

  • roads
  • fences
  • boardwalks
  • bridges
  • bricks
  • anything in a row such as lamp posts
  • buildings
  • doorways
  • window panes

In nature, pay particular attention to:

  • rivers
  • shorelines
  • waves
  • sand dunes
  • trees
  • tall grass
  • cliffs
  • rocks
  • sun rays
Boquillas Canyon by Anne McKinnell

The soft leading line of the river’s edge creates depth in the image.

Once you’ve identified your strongest lines, consider how you can use them to enhance your composition. Depending on your intention, you might:

  • create depth and perspective by positioning a strong line leading from the foreground to the background;
  • create a visual journey from one part of your image to another;
  • place your subject where the lines converge to give the subject more importance in the frame and draw the viewer’s attention directly to it; or
  • make a cyclical composition, with the lines leading the eye in a circular motion and never out of the frame.

Arranging the elements in the frame may involve the use of different lenses to change perspective, but usually you can accomplish it simply by moving yourself so that the point of view you choose is purposeful.

Japanese Garden by Anne McKinnell

The leading line of the path leads the eye directly to the maple tree.

Leading lines are the key compositional element that carries our eye through the photograph. They can be used to tell a story, to place emphasis, and to draw a connection between two objects.

Use them creatively and with expressive purpose to help you tell your unique photographic tale.

Post originally from: Digital Photography Tips.

Check out our more Photography Tips at Photography Tips for Beginners, Portrait Photography Tips and Wedding Photography Tips.

How to Use Leading Lines for Better Compositions


Digital Photography School

 
Comments Off on How to Use Leading Lines for Better Compositions

Posted in Photography


Pro-Tips for Shooting Better Instagram Videos

13 Jul

Extra vids for bloggers: 1, 2, 3

“Well that’s weird,” you thought. “My Instagram photos are moving.”

What you thought might be the coolest side effect of downing too much coffee turned out to be Instagram’s latest major app update — Instagram video!

Just when you were totally kicking butt on Vine, Instagram video showed up with its 15 filters, extra long video length and the fact that you get to share your videos with all your friends on Instagram.

Now is the time to put your cinematographic moves into high gear, which is why we’re here to bestow on you, dear readers, a heap of Instagram video pro-tips.

Learn how to edit your shots, get better sound, and make your friends say “ooooh” at the creative ways you’ll be playing with video, all in the confines of 15 seconds.

Now you can sip your coffee with ease ’cause all you need is a tap to focus.

Photojojo’s Guide to Instagram Video

p.s. We’re hiring for an amazing opening at Photojojo. We’re looking to re-invent what/how/where we publish online, and we’re seeking one amazing somebody to lead the charge. Learn more and apply for our Editorial & Community Lead.

p.p.s. Tell friends!

Basics You Need to Know

What is it? It’s the Instagram you know and love, only now you can shoot and share videos, too. Videos show up in your stream the same as photos, and they load as you go. You can shoot videos that are three seconds minimum, 15 seconds max, and the format is square.

How is this different from Vine? Four main things make Instagram video stand apart. 1) Filters, 15 to be exact. 2) The ability to go back and delete or add scenes after you’ve shot some of your video. 3) Longer videos. Vine caps videos at six seconds. 4) No looping.

Featured in video: The Macro Lens Band.

How do you shoot a video? Tap the camera button to go into photo shooting mode. You’ll see an icon of a video camera on the bottom right. Tap it, and you’re now in video shooting mode. To shoot video, hold the big video button down. For as long as you’re holding it, it’ll shoot video! This means you can shoot one long stream or shoot a series of clips to make a mini movie.

Can you upload old videos? No, actually! We kinda like it that way, though. That way, you know everyone’s videos were shot right at that moment, and it also gives you a fun challenge.

What’s this thumbnail business? When you go to upload, you’ll see the option to pick a thumbnail. This is the image that will show up on your stream. Take time to pick the best frame! This’ll make it more likely that your followers will take out the time to watch it.

What’s that camera icon with parentheses around it? That’s the shake reduction icon, and you’ll only see it if you’re using an iPhone 4S or 5. After you’ve shot some video and hit next, it pops up. Watch your video with it on and off (just tap it to turn it on and off). You’ll notice if the video is shaky, it’ll lessen it.

Pro-Tips to Make Your Vids Stand Out

  1. Edit as you go.

    One of the coolest things that sets Instagram video apart from Vine is that you can view your video (with filters on it even!) and then go back and delete or add shots. See the video to the right for how to delete a shot from your video.

    The stage to do this is before you’ve uploaded the video and when you’re ready to add filters. To delete a shot, go back to video shooting mode, tap the “x” button on the bottom left. It’ll highlight the last shot in red. Tap the button again to confirm that you want to delete that shot. Now you can keep adding new shots or leave it as is!

  2. PSA: Stabilization crops your video.

    Here’s something to keep in mind. That neato stabilization feature we talked about above crops your video frame. That means your video will look a little zoomed in. View it with stabilization and without (by tapping the stabilization icon) and decide if you want to go with it or not.

  3. Adjust exposure as you shoot.

    To adjust how light or dark your video is, tap around your screen when you’re in shooting mode. You’ll notice if you tap a dark spot, the entire image will brighten, and if you tap a light spot, the entire image will get darker. Since exposure and focus go hand-in-hand, this also means the spot you’re tapping will be the part of your video that’s in focus.

  4. Lighting = Better vids.

    When you don’t have enough light, you’ll notice your video will end up looking pret-ty grainy. The more well-lit your video is, the sharper, more contrasty and vibrant it’ll look! (You want that.) To get more light, simply go near a window, use something to bounce light like a wall or a reflector, or nab yourself an external light made for phones (like the Pocket Spotlight or Kick seen in the vid on the right).

  5. Prevent those weird video pulsations.

    When playing back one of your videos, you’ll notice sometimes it’ll pulsate seemingly out of nowhere. Totally odd. But it’s not that odd when you think about it. Your camera’s focus and exposure are trying to keep up with the changes happening in your frame.

    Maybe something super close suddenly shows up in the video or something super bright pops up. Your camera might take a second to adjust and thus pulsates. It can also be caused by your phone shaking. To prevent it, keep your phone steady with a hand-held stabilizer or a tripod. (Check out the stabilizer in the vid below.)

  6. Think about sound.

    If you’re talking over your video, one way to get better sound is to use your headphones since it has a built-in mic. Smart, eh? If you don’t want any sound at all, turn off anything in the background, close windows, or tell the people near you to stay quiet for the next 15 seconds (pretty plz!). You can even leave a note in your caption simply instructing to listen with or without sound.

  7. Upload a video later in time.

    You can’t technically upload an old video, but you can shoot a video and keep it on Instagram to upload at a later time. Do this by –

    1) Shooting the video.
    2) Turning on Airplane Mode in your phone’s settings.
    3) Going back into Instagram and trying to upload the video. Since you’re not connected to the internet, your upload will fail. It’ll stay in your Instagram stream as a failed upload with a button next to it to retry the upload.
    4) Upload it anytime after that by tapping the retry button. Keep in mind, the video might disappear if you turn off your phone or “x” the app.

  8. Save your videos to your phone.

    Your video will save to your phone every time you upload one to your stream. To make sure your phone does this, go into your Instagram settings and turn the “Save Original Photos” to “On.”

  9. Pause and play.

    Say you’re in the middle of watching a super enthralling Instagram video, but you have to step away for a second. You can pause the video by tapping it. You can also replay a video by tapping it after it’s ended, so that adorb-as-heck vid of your baby niece can last 45 seconds instead of just 15!

  10. Embed your videos into a website.

    Just a couple days ago, Instagram introduced embedding, which lets you put an Instagram video into a webpage. Go to your Instagram page on the web, which would be “instagram.com/[your screenname here]“. Click on the video you want to embed, then click on the arrow icon to the right of it. The embed code will pop up, and you just copy and paste it into your blog or Tumblr post. NEAT!

Creative Ways to Play with IG Video

  1. Get cool FX with phone lenses.

    So you know how you can switch out lenses on your DSLR to get different effects? You can do the same on your phone with phone lenses.

    A macro lens will give you a crazy super close-up view of whatever you point it at to get all the tiny detail you wouldn’t normally be able to see. A fisheye lens gives you that 180-degree view that you’ve seen in some of your favorite skate or music videos. A telephoto lens will give you a zoomed in view! We used these three phone lenses in the video to the right!

  2. Tell a story by making transitions.

    What’s rad with Instagram video is that you can get pretty savvy about editing together various scenes. You can make your video less choppy and weave a story by creating visual transitions. One way is to cover the lens, so that all you see is black. When you take the cover away, the image will slowly come into view (try it!). Another way to transition is to blur the scene with something like plastic or a glass bottle. Or pan from one end of the room to the next, where your main subject is. Get creative!

  3. Take your video places!

    Like *amazing* places. You can shoot underwater or in the snow with waterproof cases or strap your phone to your bike with a bike phone mount. (BTW! The underwater vid to the right was shot with this waterproof case.)

  4. Use a hashtag to link a series of videos.

    Let’s say you get really serious about your movie-making and want to tell a longer story with your videos. Or maybe you came up with a sweet theme that you want to keep shooting around. You can link your series of videos together by coming up with a unique hashtag. That way your friends can follow along with your mini series!

  5. Make a stop-motion.

    Stop-motions might seem like a really challenging project to take on, but you can totally do it! You just need a tripod or a place to keep your phone still, a few props, and a good idea. Here’s how to shoot a stop-motion: shoot a second of video, move your prop, then shoot another second of video, and so on, until you have a few seconds of movement. That’s it!

  6. Get crazy smooth panning. (Like in the movies!)

    Remember how the cameras dramatically panned across Gatsby’s estate? You can get dramatic panning fx, too! Maybe not at a Gatsby scale, but a slow smooth pan across a scene can make for some rad shots that look right out of a movie. We used a camera table dolly for our pan in the vid to the right!

  7. Make a moving photo.

    If you’ve ever seen cinemagraphs, you’ll know what we mean by moving photos. The idea behind a moving photo is to pick a scene that is has only one or two moving parts in it. When you shoot your video, you won’t move the frame. The frame stays the same, while a small part of the image moves.The Instagram blog also had an official moving photo hashtag for a weekend — check out some rad vids.

Related posts:

  1. Re-Animation: Turn Found Photos into Mesmerizing Videos Did you know you can make an animated video without…
  2. FlipClips — Print Your Short Videos into Magical Flipbooks If you bought your digital camera in the past few…
  3. The Ultimate Guide to Vine: Pro-Tips, Awesome Ideas, and Who to Follow! It’s easy to forget about the video function built into…


Photojojo

 
Comments Off on Pro-Tips for Shooting Better Instagram Videos

Posted in Equipment


6 Tips for Getting Better Parade Photos

27 Jun

My last article I went over 15 tips for successful fireworks photography. This week I’m following up with 5 tips for better parade photos. I figured it is the season for parades and they’re so much fun I want to give you a few quick tips to help you get more engaging, stunning photos at any parade.

#1 Location, location, location

Find a good spot by getting there early and checking out the parade route. This seems like a no-brainer, but the lighting can be tricky especially if you’re in a spot where the floats and people are half in the sun, and half in the shade. So select a spot where you can either get them all in the shade (and have a shady background too), or all in the sun. Don’t be afraid to move if you find the location you selected isn’t working, for whatever reason. Maybe the lighting is bad, or the background is too busy or too bright. Then see tip #2 below!

#2 Use your feet

Unless this is prohibited by parade marshals or the local police (check first if you aren’t sure so you don’t get in trouble), don’t be stuck to sitting on your butt on the curb.  Get up and move around. Most people that attend parades find a spot and basically camp out there for the duration. But what do you see the real photojournalists doing? The guys and gals that work for the newspapers? Right, you see them following the parade and getting right out on the street.

use-feet-parade

Notice where I am standing here? In between the dancers, they literally walked around me!

**NOTE: do not get yourself in trouble, if the parade marshal or police tell you to cease and desist please listen to them and follow their guidelines. Perhaps find out ahead of time if you need special permission to walk the parade route.**

#3 Join the parade and a part of it

I followed this float for 5 blocks because their music was so good!

I followed this float for 5 blocks because their music was so good!

Joining the parade either officially, or unofficially can get you closer to the action. Volunteer to be security, or help out and ask if you can bring your camera along. You may get access to backstage areas, or being on the street in places that you might not otherwise get to go.  Many parades, at least here anyway, encourage people to get up and join in and march along behind the bands, or dance behind the floats with the great music. That’s part of what makes parades to universally fun. We have a parade called “Cariwest” which is a celebration of Caribbean culture and music. They highly encourage people to follow them and dance along the entire parade route. I love to attend this parade because it’s so colorful and I can get close to the action. Try to find ones like this, often in smaller cities or towns the rules are more relaxed, so get out of the big city if need be.

#4 If in doubt, back-light your subjects

As I mentioned earlier you can encounter some really tricky lighting situations at a parade. I tend to like to put the sun behind my subjects, then I expose so they are well lit and the background gets overexposed or blow out. I’m fine with that as opposed to the opposite of drab photos in the shade with no sense of drama and separation. The sun creates a rim light (outline on the subject) and separates them from the usual boring buildings behind them.

back-lighting1 back-lighting2

#5 Use a telephoto lens but get in close

Often in my beginner photography classes my students assume that the longer telephoto and zoom lenses are for photographing things far away. While that is sometimes the case, as in wildlife or birds, they have other great uses as well. See my article on “How to achieve blurred backgrounds in portraits” as those tips apply here as well. Using a longer lens and large aperture, will help you get the distracting background of the parade route more out of focus.

get-closer

I also suggest you get physically closer to the people you’re photographing. This will do two things . . .

First it let’s them see you’re taking their photo, and allows interaction with them if only by eye contact. They know they’re on display in the parade and expect to have their photo taken many times. So if you are hesitant or tentative taking people’s photos this is a perfect opportunity because you have a whole stream of willing subjects literally parading in front of you (sorry pun intended). Sometimes you’ll get a great reaction when they see your camera like the series of images below. She turned, saw me, and I captured a few shots as she rotated and pointed right at me. If I were out on the street edge, likely that wouldn’t have happened.

Second, it will simplify your images and allow you to focus more on one thing at a time. Parades can be visually stimulating, and overly busy so getting in closer will help solve those problems. Pick one person, or one part of a float and get closer.

Float details

Float details

#6 Try to create a series of images that tell a story

Over on my own site I wrote “What is your message? Storytelling photography” and gave some examples. As you photograph the parade try and create a series of images that tell the story of the event, and relate it to someone that wasn’t there. What do you see, hear, feel, taste and touch? What is the main thing you want tell people that see your images of the parade? Journalists will say that you need to cover: wide, medium and long. What that means is show the big picture by shooting some wide shots; show the medium range like one person or one float; and show long or tight shots like details of costumes of floats or musical instruments.  Try to also capture some action images, dancers in mid-bounce, drummers with hands or drumsticks all a blur in motion. A story also needs a beginning, middle and end. Think of those things while you photograph and you may surprise yourself with the results.

peak-parage-action

Hmm, is it just me or are these firemen enjoying the parade just a little too much?!

Hmm, is it just me or are these firemen enjoying the parade just a little too much?!

Bonus tip

Don’t forget to drink lots of water, stay hydrated, and have some FUN with it!

Have a great summer (if you’re in the northern hemisphere) and enjoy it while it lasts.

Post originally from: Digital Photography Tips.

Check out our more Photography Tips at Photography Tips for Beginners, Portrait Photography Tips and Wedding Photography Tips.

6 Tips for Getting Better Parade Photos


Digital Photography School

 
Comments Off on 6 Tips for Getting Better Parade Photos

Posted in Photography


How to Make Your Photo Experience on the Web Better and Faster

07 Jun

As a fan of the new Flickr redesign, I’ve been particularly impressed with how fast so many images load — an impressive feat given the new image rich, justified, mosaic view, with infinite scroll. Seeing more images, faster, invites more engagement and makes the site a more compelling place to visit. I think Flickr engineers have done a lot of optimizing behind the scenes and are continuing to tweak the site in new ways to make it even faster.

There are some users in the Flickr Help Forum, however, who moan about the newer version of Flickr being slow for them. While it makes some sense to me that a more image intensive design would impact speed, as fast as the new Flickr is for me, (on both my own account and other test accounts), I think there is more to it than just that.

In a new image intensive internet, companies can’t always design and optimize for the lowest common denominator. At some point engineers and designers must just let the Internet Explore 6.0 crowd go. If they haven’t upgraded by now, it now becomes their problem not yours.

Staying on top of the most current technology can help optimize your internet experience. Some of these things that I’m doing are free and some cost money. I do understand that not everybody has the money to just go out and buy a new computer and am not suggesting that it’s your responsibility to do all of these things. These are just some ideas that might help you make your internet experience better and faster.

1. Upgrade your computer. My rule is that I upgrade my primary computer (a MacBook Pro) every three years. As a heavy computer user (and as someone who makes money from my photography and must consider time as a resource in that), this is a no brainer. If it’s been over three years, and you can afford it, consider buying a new machine. Get a Mac. ;)

2. Upgrade your computer’s operating system. I’m currently running the latest version of Apple’s OS Mountain Lion, Mac OS 10.8.3 10.8.4. Make sure you are using whatever is the most current OS for your machine.

3. Consider your internet connection. Are you getting the fastest possible speeds? Years ago when I was on DSL, it was announced that they were putting U-verse fiber into the neighborhood. I was the first guy to jump on that and make sure I got it. Survey each of the internet service providers in your neighborhood and find out what their upload/download speeds are. Don’t stop there though. Also make sure you are on the fastest plan that they offer. The U-verse plan that I have is their Max Turbo and provides 24 Mbps download speeds. Consider the value of your time and make sure you are on the fastest plan possible from your ISP.

4. FREE! Make sure you are running the latest version of Google’s Chrome browser. Once you finally get rid of IE, Safari or Firefox, you will learn to love Chrome — it’s faster and better.

5. FREE! Change your DNS settings to Google’s public DNS, 8.8.8.8 or 8.8.4.4 A lot of people don’t know about this trick, but it will dramatically speed up your internet. Google gives you instructions on how to do this here.

6. If you use your computer remotely a lot (like I do) in places where you don’t always have good, fast, wifi, consider getting a Sprint 4G card. Heavy computer internet surfing takes a lot more bandwidth than cell phones. Using your cell phone to tether to your computer probably works if you just need an occasional log in (I use FoxFi for this on my Android phone which is free) — but this data counts towards your bandwidth limits. Sprint is the only current wireless provider that I’m aware of that offers truly unlimited, unthrottled mobile bandwidth in the U.S. Their 4G service, is a bit more expensive, but is generally speaking very reliable and very fast.


Thomas Hawk Digital Connection

 
Comments Off on How to Make Your Photo Experience on the Web Better and Faster

Posted in Photography


Spinpod wants to help you snap better panorama pictures

06 Jun

spinpod_crop.jpg

Capturing the perfect panorama shot with a smartphone can be tricky. A new gadget currently gaining ground on Kickstarter could help you achieve a perfect panning motion, and even aid in motion time lapse photography. Spinpod works with both iOS and Android devices, as well as cameras. See it in action on connect.dpreview.com.

News: Digital Photography Review (dpreview.com)

 
Comments Off on Spinpod wants to help you snap better panorama pictures

Posted in Uncategorized