RSS
 

Posts Tagged ‘Better’

10 Tips for Better Cityscape Photography

17 May

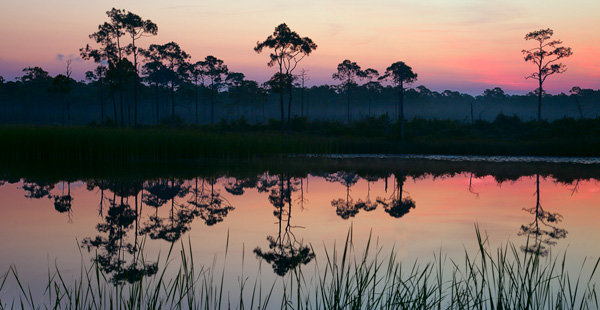
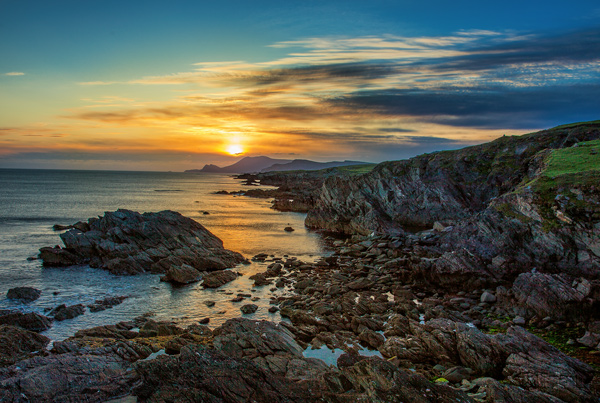
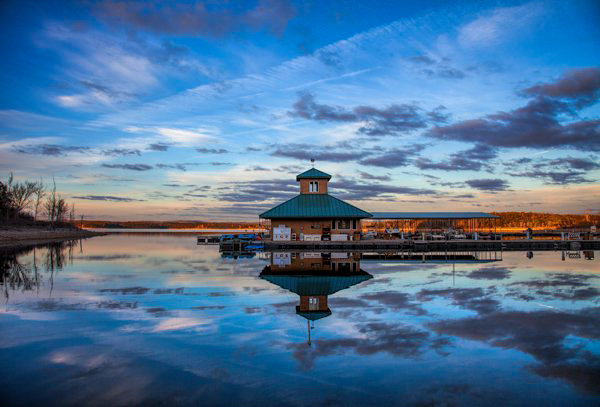
This article is based on the new eBook: Landscapes, Cityscapes & Photography Tricks – 50% off for a limited time only.

Photography is escapism. We want to see what we can’t with our own eyes; towering skyscrapers, endless skylines, the people of faraway cultures. We long for the distant, so it makes sense that cityscape photos are so popular and marketable. I hope these 10 tips will help you take better cityscape photography, and inspire you to explore faraway cultures.

Cityscapes1

1. Right After Sunset is a Fantastic Time for Cityscape Shots

After the golden hour settles, the sky grows darker, while city lights illuminate below. This immediately post-sunset or pre-sunrise moment (known as twilight or the Blue Hour), I would argue, is the best time for shooting cityscapes. Building lights turn on before the sky turns off, and the balance of light can look almost equal. It’s a great combination of tones, and worth getting up in the morning to catch.

Cityscapes2

2. Capture the Whole Skyline with a Wide Angle Lens

For cityscapes, focal lengths between 12-35mm are a good bet. Not a necessity, but you will appreciate the wide angle, more often than not. This will allow you to capture a nice skyline without having to be miles outside the city, and allow you to include an entire skyscraper in vertical format, while standing near its base.

Cityscapes3

3. Use Your Camera’s Self-timer and a Tripod for Crisp Results

For shooting during the golden hours, and after dark, a tripod is practically essential if you want sharp crisp results. Better yet, set your camera up on the tripod, and set your camera’s two or 10-second self-timer so you don’t have to touch or jostle the camera during the actual shot. This will help your camera stay more stable, avoid blur, and capture stunningly sharp results.

4. Look for Those Leading Lines

Just like for landscape photography, leading lines are an integral part of three-dimensional cityscape composition. They add perspective, depth, and intrigue to any image, while taking the viewer on a journey from one point of the frame to another.

Cityscapes4

In cityscapes especially, leading lines can create a strong sense of coherence in an otherwise chaotic scene. Think of train tracks for example. Rows of tracks, surrounded by eager commuters and tall buildings, could easily appear cluttered and frenetic (which could be a good thing, or could seem unfocused). But, slicing the image up with the right composition and a clean line, or series of lines, can cut through the chaos.

5. In the Evening, Look for Good Vantage Points Over Busy Intersections

Practice your long exposures, then look for busy intersections of a city. Finding the right location for heavy traffic can be tricky. You’ve got to know a city pretty well, or at least have an idea of where the congested thoroughfares are located. The idea here is blurred movement; traffic in a straight line may be interesting if you’ve got some variety in the shot (maybe skyscrapers or a city icon nearby), but failing that, you’re going to want to see some movement, leading lines and curves. That’s why bendy roads and intersections work so well; you can create light lines out of conflict, movement and chaos.

Cityscapes5

6. Just like Rivers are Great in Landscapes, Fountains are Great in Cityscapes

Photographing fountains within your cityscape can add another element of beauty and serenity to your image. Most cities are full of them. From small, historic, fountains that can add interest to a composition to huge water fountain light shows that blast water up in the air and make for exciting and spectacular photos.

Cityscapes6

7. Look for Patterns

Patterns have the ability to bring a sense of visual rhythm and harmony to an image. While at first sight, a common city scene may appear dull or bland. Focusing on repeating strong graphic elements, like shapes, lines, colors or forms, will draw the viewer’s attention, and make the whole thing a lot more interesting.

Cityscapes7

8. Don’t Be Afraid to Include Pedestrians in the Shot

When it comes to intersections, some bigger cities; New York, Tokyo, Toronto; will have four-way crosswalks, where pedestrians stream across in all directions, stopping cars on all four sides of the intersection. These make especially great hectic shots, with cloudy masses, surrounded by headlights and condo lights.

Cityscapes8

9. When Tripods Aren’t Allowed – Improvise

Many businesses with great city views that attract photographers, have gotten the impression that tripods mean professional work and therefore, money. These establishments won’t let photographers in with a tripod, likely because they might be able to make money by charging a permit fee or production fee. I’ve run into this problem mostly in the U.S., but have also come across it in a few international cities I’ve visited. It is upsetting indeed, but instead of letting it defeat you, try to do your best with what you have.

Cityscapes9

Look to see if there is a place where you can set your camera down for the shot so you don’t have to hold it risking blur from hand movement. You can use tables, pillars, walls, edges, benches, anything that is flat and safe. If you can’t find a flat surface, you can make one. Prop your camera up with your jacket or other item of clothing.

10. See Bad Weather as an Opportunity (Carefully)

Not only does bad weather add an edge to your photo, but stormy weather creates skies that are full of color and texture, providing a feeling of gloominess, fury, eeriness and even peace. In short, the stormy sky portrays emotion.

Cityscapes10

With moisture everywhere, it just seems like the city glows more right after a rainfall. Most surfaces and structures will appear more colorful when wet, as water tends to bring out the saturation.

I hope these have been some helpful tips to get you started!

For Further Training:

This relentlessly in-depth new eBook is designed to help you master challenging lighting conditions no matter your experience level, take more compelling photos, post-process them to perfection, and delve even further into long exposure tricks so you know all the possibilities. By knowing all the techniques possible, it is my hope that you will learn a lot faster than I did and start seeing hidden photo opportunities that others might miss.

Found here: Landscapes, Cityscapes & Photography Tricks

googletag.cmd.push(function() {
tablet_slots.push( googletag.defineSlot( “/1005424/_dPSv4_tab-all-article-bottom_(300×250)”, [300, 250], “pb-ad-78623” ).addService( googletag.pubads() ) ); } );

googletag.cmd.push(function() {
mobile_slots.push( googletag.defineSlot( “/1005424/_dPSv4_mob-all-article-bottom_(300×250)”, [300, 250], “pb-ad-78158” ).addService( googletag.pubads() ) ); } );

The post 10 Tips for Better Cityscape Photography by Richard Schneider appeared first on Digital Photography School.


Digital Photography School

 
Comments Off on 10 Tips for Better Cityscape Photography

Posted in Photography


18 Awe-Inspiring Tips to Take Better Photos

27 Apr

Today all of us play the role of photographers – using small electronic cameras, smartphones or tablets, we document each and every moment of our lives. If you’d like to take better photos and memorize moments in your life in a more professional way, have a look at those 18 key tips. 1. Keep it to the eye level Just Continue Reading

The post 18 Awe-Inspiring Tips to Take Better Photos appeared first on Photodoto.


Photodoto

 
Comments Off on 18 Awe-Inspiring Tips to Take Better Photos

Posted in Photography


RAW vs JPEG: Which is Better Shooting on DSLR?

24 Apr

The photography world is constantly rattled by many opinion clashes. Which is the better camera, which is the better photography style and even which format is better to save photos in. These and many more questions keep cropping up and seem like never ending. This discussion will help you in putting an end to at least one of such questions, Continue Reading

The post RAW vs JPEG: Which is Better Shooting on DSLR? appeared first on Photodoto.


Photodoto

 
Comments Off on RAW vs JPEG: Which is Better Shooting on DSLR?

Posted in Photography


Shooting Better Waterfalls: Five Tips for Improving Your Waterfall Photography

14 Apr

Cave Selfie

Perhaps there isn’t a more sought after and photographed subject than water. More specifically, waterfalls. When you really think about it, waterfalls are one of the most basic and simple things that we can find in nature. They are just streams or rivers that happened, by one geological occurrence or another, to find themselves flowing over some height of cliff or stone or other drop-off. Still, we remain captivated by the simple beauty and serenity that can come from being near, and photographing a waterfall.

That’s where we, as photographers, often slam face first into a huge creative and artistic wall. How can you make an interesting photograph of something that has already been so extensively covered by countless other photographers? While there is unfortunately no secret formula for all waterfall photo sessions, there are some very simple and useful tips that can help you create better, and more unique images, of these phenomenal natural occurrences. Let’s dive in (get it?) and get started on the path to better waterfall photography.

Have a plan

I always stress the importance of research and preparedness before any photographic excursion regardless of what the subject or goal might happen to be. This is especially true when you, the outdoor photographer, are readying yourself to photograph waterfalls. There is simply no denying that the more you know about a location, the better your odds will be of coming home with images that you are happy to claim as your own.

Conduct some quick research and find out what the main waterfall or waterfalls are in the area you plan to visit. Google (or another search engine) will be your absolute best friend in this regard. Try to find as many images as you can before you set out so that you can be inspired and have a head start on coming up with your own unique compositions that haven’t been tried with that particular spot.

Map

Also, if at all possible, print out a map of the area and highlight the waterfalls that you feel are the most promising for you on that particular day and focus on those first. Don’t waste time trekking into a place that probably won’t yield a good result. Know before you go, and you will make better use of your time and become a much more efficient shooter.

Use a tripod

The topic of using a tripod can sometimes scare you off just from the sheer repetition of the statement. For whatever reason it seems like this essential bit of knowledge is where most beginner photographers find themselves in a state of complete denial. Believe me, I know how uncomfortable, to downright physically painful and tiring it can be to carry a tripod on your person for an extended amount of time. Still, though not always convenient, a tripod will always help you in the long run to produce better photographs. There is simply no other way to limit camera shake without having a solid shooting platform – there just isn’t. You will need such a platform for the longer exposure times often used when encountering waterfalls. End of story.

Another fact that beginners, and even some seasoned photographers, fail to grasp is that the quality of the tripod plays an essential role in its overall use to you. You will need a tripod that locks securely and reliably, and can handle the weight of whatever camera rig you happen to be shooting, as well as the shooting conditions. I can’t tell you how many long exposure images I ruined due to drifting of the tripod head because all I had available was a suboptimal tripod.

The biggest gripe I hear concerning tripods is that the good ones are too expensive. It’s true that a quality tripod will not be cheap. However, it is just as true that you can still obtain one without being outrageously expensive. Shop around and find a tripod that has good reviews, fits your current needs, and will also grow with you as a photographer. Do you really need carbon fiber? Do you need the most advanced ball head? Ask yourself questions like that and your purchase will make less of a dent on your pocketbook. A good tripod will last you years and yield incredible benefits. It will literally pay for itself and be one of the best investments you will make.

Make the waterfall the secondary subject

Foreground Focus

This image puts the colors of the moss and the detail of the foreground as the first point of interest and less on the waterfall itself.

This tip may seem a little counter intuitive but stay with me. It’s fairly straightforward to walk up to the front of a waterfall and snap a quick photo to take home. That’s great if that’s all you want. But let’s face it, you wouldn’t be pouring through all the great content here on dPS if all you wanted was to make average photos. You want to shoot with a purpose, and make photographs instead of taking snapshots. One of the best ways to do this is to think about the subject differently than the average photographer, and waterfalls offer a great opportunity to do this.

When you arrive at a particular falls you should really study the scene. Give yourself a few minutes before you even start thinking about making an exposure. Watch how the water flows and interacts with the other pieces of the scene. It may be rocks, boulders, sand, trees or any number of artifacts found in such places. Don’t let the waterfall itself distract you from the other photographs that could be there.

After all, the waterfall is not the only thing you notice so why should it be the only thing you show your audience? Look for ways to include different parts of the scene and even have the falls take a back seat if that makes a stronger image. Pay attention to what is often overlooked by other photographers. If you do this you will almost always be able to present the waterfall in a way that has never been seen before.

Pay attention to color

Color is a great way to grab the attention of your viewers and pull them into a photograph. Never underestimate the creative power of color when photographing waterfalls. Water is an incredible thing because it not only reflects the different colors around the surface such as the sky and leaves, but also the colors that come from underneath as well.

Use Color

The first step to getting the most interesting colors from a scene is to always shoot in RAW if at all possible. Shooting RAW will allow the most information to be recorded by your camera sensor, which will in turn give you much greater latitude for getting creative later with your post processing. Experiment with creative white balance and see what happens. Enhance the vibrancy and saturations in some areas and decrease them in another. You will be surprised how much more lively and interesting a waterfall can become with simply letting your imagination run free, and by using color creatively.

On the flip-side of the color coin, is that some waterfalls work much better when photographed in black and white. I have often said that I prefer images that tell a story through black and white, unless the color of the scene can speak louder. If you find yourself shooting a waterfall that lacks a lot of native color then why not put your pre-visualization skills to work (you’re still practicing that, right?) and try to imagine how the image could appear in black and white? Look for contrasts between light and dark areas on rocks, and contrasts within the water itself. Are there any interesting textures or reflections?

Here’s an unprocessed RAW version of a waterfall. Notice there’s not much color to boast about.

Virgin Falls RAW

Here we see the same image after a little cropping and black and white conversion.

Virgin Falls Processed

Lastly, with this photo, the textures and light really made the image so I converted it to black and white as well.

Rocks and Falls

Never discount the power of a monochrome image. Black and white waterfall work can be extremely profitable especially when you’re shooting in the drab and often colorless winter months.

Don’t forget to protect your gear

This isn’t really a tip, but rather a lesson that should be learned and become second nature to the serious waterfaller. When shooting a waterfall of any large size and flow there will always be moisture in the air, whether it is visible to you or not. The shear force of the water impacting the terminus of the fall, with render small droplets into the air that will absolutely ruin your shot and potentially destroy your camera and lenses.

Without Water Drops

The air surround a thirty-five foot waterfall without flash.

Water Drops

Then with a flash firing to show the moisture in the air.

Always use some protective barrier to protect your camera and lens while you set up for your exposure, and for transport around the waterfall. This barrier doesn’t have to be fancy. Personally I use pre sized slip-on plastic container covers that you can pick up at virtually any grocery store. They are perfectly waterproof and fit snugly around my camera and are unnervingly cheap.

Protect Gear

The same goes for your lenses. Even if they are in your camera bag, always protect them from the moisture. Again, low tech is often your best option here. I simply wrap my lenses in a cloth and place them individually into resealable sandwich bags. The cloths will help to absorb any condensation that builds up from temperature changes and were a hard learned lesson for me. Lastly, minimize the amount of time you leave the cap off your lens, and always carry a good lens cloth for wiping the front between takes.

Shooting even small waterfalls can be very rewarding, and are a great way to just get out and enjoy nature. Learning to shoot them creatively, however, can be a little more challenging. That doesn’t mean that it has to be difficult or intimidating. Just remember these five simple tips and you’ll be ahead of the game when it comes to waterfall photography:

  1. Research and plan beforehand.
  2. Don’t desert your tripod.
  3. Think of the waterfall as part of a whole and not the only part of a scene.
  4. Learn to use color creatively or when to get rid of it altogether.
  5. Always protect your gear from the elements.

Now go out and do what you love to do!

googletag.cmd.push(function() {
tablet_slots.push( googletag.defineSlot( “/1005424/_dPSv4_tab-all-article-bottom_(300×250)”, [300, 250], “pb-ad-78623” ).addService( googletag.pubads() ) ); } );

googletag.cmd.push(function() {
mobile_slots.push( googletag.defineSlot( “/1005424/_dPSv4_mob-all-article-bottom_(300×250)”, [300, 250], “pb-ad-78158” ).addService( googletag.pubads() ) ); } );

The post Shooting Better Waterfalls: Five Tips for Improving Your Waterfall Photography by Adam Welch appeared first on Digital Photography School.


Digital Photography School

 
Comments Off on Shooting Better Waterfalls: Five Tips for Improving Your Waterfall Photography

Posted in Photography


Boxed Water is Better: Paper Packaging Beats Plastic Bottles

06 Apr

[ By WebUrbanist in Design & Products & Packaging. ]

boxed water image

The brand tells you what it is in bold minimalist script: better, but more specifically, its packaging is better than the dominant plastic bottle alternative – a square peg for what product designers have long assumed was a round hole.

boxed water versus bottles

Aside from the (cardboard carton) material itself being more sustainable, the trick is in the shipping: a single truck packed with pallets of flat-pack water boxes means 25 fewer trucks than shipping plastic bottles to a bottling plant.

boxed water is better

Plastic bottles not only take up more space when filled (thanks to their rounded shape), but far more space when empty in the first place. They are also being banned in some cities, which means more market opportunity for companies like Boxed Water Is Better.

boxed water on shelves

The recyclable packages also stand out on the shelves – white cartons and black type stacked alongside complex logos and variegated shapes of their plastic relatives.

boxed water better

Some will still question the need for conveniently-packaged water altogether, and in a perfect world (perhaps someday) we would all use reusable containers, but for now this seems like a solid (or liquid) step in the right direction. Meanwhile, the company helps customers go green indirectly as well, planting two trees for each picture of their product posted – not bad marketing, either.

Share on Facebook


[ By WebUrbanist in Design & Products & Packaging. ]

[ WebUrbanist | Archives | Galleries | Privacy | TOS ]


WebUrbanist

 
Comments Off on Boxed Water is Better: Paper Packaging Beats Plastic Bottles

Posted in Creativity


7 Tips to Take Better Family Photos

02 Apr

Regardless of the type of photographer you are, family photos are among the most important pictures you’ll ever take. Here are some things to keep in mind.

#1 – Make sure the family is prepared

Picture1

Even if it’s a few emails, a phone call, or an in person meeting at a coffee shop, have a consultation with the family at some point before the shoot. Address things like what the family will wear (use a service like Pinterest to create a board for the family to look at for suggestions on how they might dress), what time of day would be the best for them, and what they’re looking to get out of the shoot (i.e., candids, headshots, or a holiday card).

Send out an email a day or two before their appointment with the time, date, and place of the session. Provide a checklist reminding them to make sure the kids are fed and they pack any essentials with them. Depending on the season, your checklist will change (e.g., knit hat reminders in winter and sunscreen and water it the summer). A family shoot will never go perfectly, but by making sure the family is prepared, you can maximize the likelihood that things will go as smoothly as possible.

#2 – Become friends with the kids (bribery is underrated)

Picture2

Young or old, everyone loves little gifts. Stop by the Dollar Store before your next shoot and pick up some bubbles, a baseball, stickers or a tiny stuffed animal. If it’s autumn, stop by a farm market and a grab a small pumpkin. Summer? Grab a bunch of wildflowers. These tiny gestures will take some pressure off the parents, gain you points with the kids, and have the added benefit of making the pictures more fun and interesting. It’s a win – win.

#3 – Let parents play with their kids

This is when the magic happens. If you let the parents be who they are and more importantly, let kids be kids, the pictures will start to fall into your lap. Facial expressions on both the parents and children will be authentic and genuine. Smiles will come more easily, and your job is just to capture the moment.

Picture3

#4 – Provide direction

Don’t be afraid to move the parents around and tell them where they need to be. Even if you’re just casually photographing your neighbor’s family, you’re the professional and people will listen. If a location isn’t working or the light is poor in a certain area, suggest an alternative in a positive way. Say something like, “Why don’t we try moving into that large open shade area by that tree, it will give us a break from this heavy sun”, rather than, “The light is horrible here, let’s move”.

Relying on the parents to direct their kids can make your job a lot easier too. A little boy will listen to his mom who tells him to hug his sister over a stranger that he just met.

Picture4

#5 Make everyone feel comfortable

Most people feel awkward having a camera pointed at them. Keep the conversation positive and periodically tell everyone how great the pictures are looking. You can even show them a few shots along the way. Your enthusiasm and excitement for what you’re seeing will put everyone at ease and make your job much easier.

Picture5

#6 – Improvise

The night before the shoot I’m usually scouring Google for “family photo tips” or pulling the “How to Pose Children” books off my shelf. Preparation is essential. But photographing a family is a mixture of luck and skill, and when you’re in the thick of it and things aren’t going as planned, you’re going to have to improvise. Kids won’t sit still? Pop on a telephoto lens, back off and let them run around a bit. You might be surprised at the photos you get when you’re forced to do what wasn’t planned.

Picture6

#7 – Embrace the outtakes

As photographers we want every photo to be a masterpiece – perfect light, natural expressions, everyone looking at the camera. But sometimes the best photos that you wind up taking are the most ridiculous — a boy with his hand up his nose, a brother embracing his crying sister, or one sibling looking at the other with a crazy face. Don’t stop shooting just because the kids aren’t cooperating for a moment, or the parents are chasing them around. Sometimes these situations can lend to the funniest and most memorable shots.

Picture7

We all wear different hats as photographers. One of these days, you’ll be asked to do family photos. Keep these tips in mind and you’ll be one step ahead.

Please share your comments and any other suggestions below.

googletag.cmd.push(function() {
tablet_slots.push( googletag.defineSlot( “/1005424/_dPSv4_tab-all-article-bottom_(300×250)”, [300, 250], “pb-ad-78623” ).addService( googletag.pubads() ) ); } );

googletag.cmd.push(function() {
mobile_slots.push( googletag.defineSlot( “/1005424/_dPSv4_mob-all-article-bottom_(300×250)”, [300, 250], “pb-ad-78158” ).addService( googletag.pubads() ) ); } );

The post 7 Tips to Take Better Family Photos by Joe Turic appeared first on Digital Photography School.


Digital Photography School

 
Comments Off on 7 Tips to Take Better Family Photos

Posted in Photography


Flat elements developed by Harvard could make camera lenses smaller, lighter and better

11 Mar

A team at Harvard School of Engineering has developed a method for making flat lenses that could dramatically reduce the size and weight of camera lenses in the future. The method employs tiny silicon antennas positioned on flat glass components to redirect light when it reaches the surface of the lens instead of relying on refraction and the thickness of glass to bend light in a particular direction. Learn more

Articles: Digital Photography Review (dpreview.com)

 
Comments Off on Flat elements developed by Harvard could make camera lenses smaller, lighter and better

Posted in Uncategorized


4 Reasons Shooting at Sunrise and Sunset Will Help You Take Better Photos

10 Mar


Tree-2

Perhaps the most important change you can make to improve your photography is to change the time of day you are shooting. It is as simple as that. Photos taken in the middle of the day all have problems that can be avoided if you photograph near sunrise or sunset. Photographers agree on very little, but they all seem to agree that the times around sunrise and sunset are the best for photography. In fact, many photographers go so far as to put their cameras away during the hours between 9 a.m. and 5 p.m.

Getting up at dawn, or hanging around after sunset, is generally not convenient. It is no fun to get up well before sunrise, especially in the summer when sunrise comes early. But if you want to elevate your photography, that is how to do it.

You may have heard all this before, but in this article I will explain why, and show you some of the reasons why sunrise and sunset can help you take better photos.

Schoodic

Reason #1: Avoid harsh contrast

The bright light of the midday sun creates harsh shadows in your photography. Nearly every object within your view will create harsh shadows. Obviously large objects like trees and buildings create such shadows, but it goes at lot further. When photographing a person, for example, you will likely encounter harsh shadows on their faces. Even something as small as grass or leaves will leave unsightly black shadows in your pictures.

Photographing near sunrise or sunset fixes this problem. At those times, the sun’s rays are coming from a more horizontal angle, which means that the rays have to pass through a lot more of the earth’s atmosphere before reaching you.  That makes the light more diffused.

In addition, the times just before sunrise and after sunset don’t involve any direct rays at all. At those times you are dealing only with indirect rays of the sun. You will not have a problem with harsh shadows.


Telluride-2

Reason #2: Maintain tones within your camera’s dynamic range

In all outdoor photography you have to cope with the problem that the sky is invariably brighter than the foreground. Sometimes it is much, much, brighter. If you meter light based on the brightest part of your camera’s view, which is inevitably the sky, the shadows in your picture will end up as pure black. Conversely, if you meter light based on the foreground or shadows in your camera’s view, the brighter portions of your picture will be overexposed or even blown out (pure white).

For pictures taken during the middle of the day, this problem can be exacerbated. That is when the sky is at its brightest. If your foreground is not as bright, you are will have a problem where the scene is beyond the dynamic range of your camera.

When photographing around sunrise or sunset the sky is not quite as bright as it is when the sun is high in the sky. This cuts down the dynamic range your camera has to capture, so it is possible to capture the entire scene in full detail.


WesternLake-2

Reason #3: Avoid the commonplace

You simply cannot take a unique picture by photographing the same places, at the same time, from the same angles as everyone else. If you want your pictures to stand out from the crowd, you need to do something different. Photographing at sunrise and sunset goes part of the way in giving you that something different.

Most people are used to seeing the world as it exists in the middle of the day, they are not used to seeing it at sunrise and sunset. A typical day will have 10 hours of midday lighting, but the sunrise and sunset last only a little while. Further, people often miss them entirely. People are usually sleeping at dawn, or if not, are getting ready for work and not focused on the sky.

By photographing at sunrise and sunset, you are showing your viewers something they don’t see all the time. It avoids the commonplace. It will make your pictures more interesting to your viewers.

Achill

Reason #4: Capture the sky at its most vibrant

People often go to scenic locations to watch the sunrise or the sunset. There is a reason for that: because those are the times when the sky is at its most dramatic. As a photographer, that is the sky that you want to capture.

Skies at sunrise and sunset are full of color. The orange of the sun combines with the blue of the sky and creates interesting colors. When there are clouds in the picture as well, there can be a variety of different colors. Conversely, in the middle of the day, the sky is blue (if you are lucky, otherwise it is grey). By photographing at sunrise and sunset, you can capture those colors in your pictures. To make sure you are capturing the colors at their most vibrant, set your camera to meter off the sky and then underexpose a little bit.

Marina-2


Conclusion

I hope this article explains the advantages of photographing around sunrise and sunset. It is one thing – and perhaps the only thing – that I can guarantee will improve your photography. But one final note to help you maximize the benefit, is that you should not arrive at your location at sunrise and/or leave at sunset. Rather, arrive about 45 minutes before sunrise and hang around at least that long after sunset. These periods when the sky is bright, but the sun is beyond the horizon, sometimes result in more dramatic images than the sunrise/sunset itself. I have often seen people pack up when the sun dips over the horizon, only to miss the most dramatic colors of the day.

I would also encourage you to check out the importance of photographing at these times for yourself. The next time you are on your favorite photo sharing website, look at your most-liked photos. Make a quick note of how many of them were taken at sunrise or sunset. My bet is that it will be a lot of them.

So if you want to take more dramatic and interesting photos, take them at sunrise or sunset. The good news is that it doesn’t cost you anything. You don’t have to buy any special gear. Yet this one change will make more difference than any new camera or lens.

googletag.cmd.push(function() {
tablet_slots.push( googletag.defineSlot( “/1005424/_dPSv4_tab-all-article-bottom_(300×250)”, [300, 250], “pb-ad-78623” ).addService( googletag.pubads() ) ); } );

googletag.cmd.push(function() {
mobile_slots.push( googletag.defineSlot( “/1005424/_dPSv4_mob-all-article-bottom_(300×250)”, [300, 250], “pb-ad-78158” ).addService( googletag.pubads() ) ); } );

The post 4 Reasons Shooting at Sunrise and Sunset Will Help You Take Better Photos by Jim Hamel appeared first on Digital Photography School.


Digital Photography School

 
Comments Off on 4 Reasons Shooting at Sunrise and Sunset Will Help You Take Better Photos

Posted in Photography


Better, buffer: Nikon D7200 First Impressions Review posted

02 Mar

Nikon’s D7200 has some big shoes to fill. The D7100 was one of our favorite midrange DSLRs of the past few years, and though it’s by no means a radical upgrade, the D7200 presents some notable new features. It has a 24.2MP CMOS sensor with no optical low-pass filter, an updated 51-point AF system sensitive to -3EV, a much larger buffer that can take up to 27 Raw images at 6 fps, and Wi-Fi with NFC. Read more

Articles: Digital Photography Review (dpreview.com)

 
Comments Off on Better, buffer: Nikon D7200 First Impressions Review posted

Posted in Uncategorized


How to Take Better Action Photos

25 Feb

141005 Semper Paratus 4022There are many sports photographers. We generally hear about those who specialize in a specific genre of sports photography like motorsport, tennis, golf, or surfing.

If you are just starting out and want to gain some experience and build a portfolio, what can you do to take better action shots?

What separates a true sports photographer from an amateur?

A sports photographer will get the shot they want as they see it, of the action they need to report on, every time. Their ability to pick the correct exposure, composition, focus, and amount of blur in the background comes down to their knowledge and understanding of the elements covered below.

Know your equipment

Your camera, whether it is an entry level or top of the line DLSR, has the ability to take amazing action shots.

You need to take control of your camera so that you get the results that you want from it when you push the button. You will need to adjust the way your camera focuses, allow continuous focus tracking, set the focus point on your camera to be focusing on the right spot, and set your camera to take multiple frames per second. Controlling the shutter speed and aperture so that you can blur the background or freeze action, allowing you to get the shot you envisage.

Understand your sport

Before you even pick up your camera, you really need to understand the sport that you want to capture. You need to know where the action is happening, and when it’s likely to happen. You will also need to know what will make your pictures amazing in the eye of the competitor, or their sponsor, (your customers).

130224 Nostalgia Drags 1454

With motorsports, for example, it may be a spot on the track where accidents happen or a corner that will show the skill level of the driver. You need to know which part of the racetrack the drivers use, and which angle would suit that section of track.

shooting-fast-action-05

In understanding drag racing, I know that the moment the driver puts his foot down on the green light, the car will lurch forward and the front wheels will lift like this by using a fast shutter speed I have been able to freeze this action.

With surfing, it may be which wave in a set will deliver the best surfing and allow the rider to get the most out of the wave. You must be able to pick out which are the good surfers and which are the amazing surfers, just by seeing how they interact with the waves, how long they will stay up, and if they are doing tricks.

In short, you need to be aware of what is going on where the action is. This allows you to plan your photo so that you can adjust the composition to suit.

Compelling composition

I personally prefer an action shot where the athlete has space to travel into, making sure that he/she is the main focus of the image. With this in mind, picking the correct focus point so that objective is achieved may mean not using the centre focus point. By using a different length lens you can change your composition without having to move to another location. Longer lenses can get you too close to the action, which sometimes means you may miss what is happening around the athlete – so experiment with a few different focal lengths.

Shooting fast action 04

In this image I have used the right most focus point and given the rider room to “ride into” by panning and blurring the background. Thus, I have been able to make the rider stand apart from the crowd.

Make what’s important stand out

By setting your composition, you can then decide if you need to blur the background or make it part of the drama in the shot. You can do this by controlling the shutter speed; slowing it down to blur, speeding it up to freeze, panning with your subject, or by using a large aperture lens and shallow depth of field to blur the background.

Why blur the background at all?

Generally, you need to blur the background to separate the athlete or the subject from the background; ideally, they are the main focus of the shot. With spectator sports, the spectators in the photo may distract the viewer of the photo. By making them out of focus or blurring them with a panning motion, you make the athlete stand out.

Shooting fast action 03

By using a small number aperture I have been able to separate the rider from the crowd.

If you are going to use panning to blur the background, make sure that you have a focal point in the shot that is sharp. That spot needs to be the pivotal place in the photo. If it is an athlete for example, you usually need to make sure their face is sharp. With motorsports it could be one of the sponsor’s logos or the racing number, but could easily be the driver’s helmet. This is important as without one thing in sharp focis, it tends to be more of an abstract art piece than an action shot. As artistic as these blurry pans are, if the sponsors can’t see their logos or the competitors can’t see their faces, you may have a tough time selling the pictures.

Aperture priority versus shutter priority mode

With this in mind, you need to make a decision to either use aperture priority and a large aperture to blur the background, or shutter priority mode and slow down the shutter speed and pan to blur the background. If you are looking to do slow shutter speed panning, make sure you have taken enough sharp frozen images of the event before you practice this. At least that way you will have some images for your portfolio.

Now that you have your camera settings sorted, you need to anticipate when the action is going to happen. This would also include following the path of the athletes as they pass you. If you have set the shutter speed and picked your composition, you lastly need to use tracking focus.

Using continuous focus

Start focusing on your subject BEFORE they are in the right spot for the composition, and continue to keep tracking them after the shot. More unexpected action may happen after, so it’s best to be prepared to photograph it. Knowing how your camera will act, and react, when you push the button with shutter lag (the time between pushing the button and the picture being taken) and multiple frames per second, you can start to follow your subject well before you intend to take the picture. But be ready to shoot at any moment’s notice as the action happens.

130224 Nostalgia Drags 1449

130224 Nostalgia Drags 1454

130224 Nostalgia Drags 1455

130224 Nostalgia Drags 1456

By continuing to shoot after “the shot” I caught the car hitting the ground and the sparks flying even though this was happening quite fast I didn’t use burst mode, instead I took every frame.

Burst mode

If you have the luxury of multiple frames per second, and lots of memory cards to fill, you could follow and just continuously shoot, then cull the images you don’t like. Memory cards are cheap, but is it the best use of your time? Both while at the event and after the event?

Photograph the whole event, not just one aspect

When you are going to an event to take pictures, plan it. Make sure you are aware of where you can stand and how that will affect your pictures. Change your locations to get a mixture of angles. Change your focal length to get a mixture of wide and long shots. Change your shutter speeds to get a mixture of freezing action and blurring the background.

141102 CrossFit SPEED Hells Playground Team 0081

141102 CrossFit SPEED Hells Playground Team 1090_1

141102 CrossFit SPEED Hells Playground Team 0682_1

141102 CrossFit SPEED Hells Playground Team 0275 141102 CrossFit SPEED Hells Playground Team 2822

By using a mixture of vantage spots, you can get some very different angles of the same event.

Step by step checklist:

  • Make sure the camera is set to: Multiple frames per second (as high as it can be), continuous focus, the correct shutter speed or aperture setting
  • Set up your shot compositionally by using different focus points
  • Track your target for as long as you can before you take the picture
  • Keep tracking your subject after you have taken the shot, as there may be more action
  • Use the multiple burst modes sparingly – be decisive about what you want and take one or two shots either side

So what are you waiting for? Get out your manual, make the changes to your settings and take a few risks (with the settings of course) and push yourself to take better action photos.

‘s photography journey started in the late 1990’s when he bought a film camera and started motor sport in the mid 2000’s, published in various car magazines. He enjoyed capturing a mixture of the cars, and people. Contracting to an event company doing school formals, he worked on posing and getting people on side quickly. Building on the above he started No Green Square, teaching you how to get the best out of your camera.

googletag.cmd.push(function() {
tablet_slots.push( googletag.defineSlot( “/1005424/_dPSv4_tab-all-article-bottom_(300×250)”, [300, 250], “pb-ad-78623” ).addService( googletag.pubads() ) ); } );

googletag.cmd.push(function() {
mobile_slots.push( googletag.defineSlot( “/1005424/_dPSv4_mob-all-article-bottom_(300×250)”, [300, 250], “pb-ad-78158” ).addService( googletag.pubads() ) ); } );

The post How to Take Better Action Photos by Michael Coppola appeared first on Digital Photography School.


Digital Photography School

 
Comments Off on How to Take Better Action Photos

Posted in Photography