RSS
 

Posts Tagged ‘Better’

5 Tips for Taking Better Portraits in Nature

23 Jul

I can’t get enough of being outside in nature.

I often go out on trail runs with my friends, and we spend most of the run grinning from ear to ear, exclaiming how lucky we are to be here on this earth, and how beautiful every single thing is. I love to go camping with my family, where we set up hammocks in the trees, listen to the birds singing, and the leafy wind sounds as we gaze up into the sky.

900

So it makes perfect sense to me to take photos of people in the great outdoors. Nature elevates the whole photo to something much more interesting than a simple studio backdrop. People are my favorite subjects, and nature is my favorite setting, so I’d love to share a few ideas to help your nature portraits be even more exciting.

1 – Nature’s Colors Can Complement Perfectly

300

Sometimes you may notice that your subject’s hair, eyes, lips, or clothing matches some floral blooms, leaves, sky, or rocks perfectly. Photographing your subject with colors in mind can bring out some of those things beautifully, and make a gorgeous photo. Sometimes the colors may match exactly, or they may be opposite on the color wheel, and make your subject just pop.

For example, if your subject is wearing purple, keep an eye out for yellow leaves. If you are doing your photographs in a place with lots of green, pops of red can really stand out. If your subject has startling blue eyes, use water or the sky to bring out that blue even more. Start paying attention to the colors in your photos, along with composition, light, etc., and your photos will have a whole new dimension to them.

700

2 – Focus on Nature and Let the People Blur into the Background

600

For a new perspective, try focusing your camera on nature in the foreground, and letting the people in the background be out of focus. This is especially effective for photos that feel like you’re getting a glimpse of something private, like a kiss, or a mother with her newborn baby.

You can do this by setting your aperture wide (a low number, for example, between f/1.8 and f/2.8), setting your camera to let you choose the focus point, then making sure your focus point is on the flowers, leaves, or rocks in the foreground. Make sure your subjects are standing far enough behind your foreground, so they will definitely be out of focus. You want it to look like it was done purposely, not like you accidentally missed the focus on your subjects.

3 – Be Playful and Interact With Nature

400

Nature is full of props to make your photos even more fun. You can use logs, rocks, and branches to perch on. You can use leaves or snow for your subject to blow on, or throw, in the air. You can have them walk through a stream, or throw rocks from the bank. Use a flower to tuck in the hair, or to smell. The ideas are endless, and if your subjects are really outdoorsy and they interact with nature regularly, make sure to capture that during your photo session with them.

Be kind to nature around you, though, and try to leave everything the same or better than you found it. Remember that if everyone broke branches, picked a bouquet of wildflowers, or stomped on untouched fragile foliage, there would be nothing left for any of us to enjoy. Tread lightly, pick up any trash, and don’t leave a trace.

200

4 – Dress Mother Nature up a Little Bit

800

You can create a whimsical, unexpected photo, with a few unlikely props. Carefully hanging a chandelier from a tree, or a bench or couch in a field, can be a lot of fun. Try props like a retro typewriter in the middle of a forest, or balloons at the beach. It’s hard to look at a photo with something so playful and fanciful, without smiling.

5 – Make Nature the Star of the Show

100

I love images of beautiful scenes in nature, but I love a photo of a person IN a beautiful scene in nature even more. It shows scale, and adds so much interest to the photo. Your human in the photo may almost be an afterthought, maybe even almost blending in to the scene.

Look for beautiful scenes that would make pretty photos alone, then add your person into the shot. These types of photos work perfectly to print up gigantic and hang up on the wall. Close up photos are fantastic, but sometimes pulling way back, and getting more scenery than person in a photo, is the perfect thing to do.

1000

Summary

I hope these tips give you some ideas to get out and take some portraits in nature.

How have you used nature to enhance your portraits? I’d love to see your nature portrait photos in the comments if you’d like to share.

500

googletag.cmd.push(function() {
tablet_slots.push( googletag.defineSlot( “/1005424/_dPSv4_tab-all-article-bottom_(300×250)”, [300, 250], “pb-ad-78623” ).addService( googletag.pubads() ) ); } );

googletag.cmd.push(function() {
mobile_slots.push( googletag.defineSlot( “/1005424/_dPSv4_mob-all-article-bottom_(300×250)”, [300, 250], “pb-ad-78158” ).addService( googletag.pubads() ) ); } );

The post 5 Tips for Taking Better Portraits in Nature by Melinda Smith appeared first on Digital Photography School.


Digital Photography School

 
Comments Off on 5 Tips for Taking Better Portraits in Nature

Posted in Photography


8 Quick Tips to Produce Better Forest Photography

21 Jul

As my nation (USA) celebrates 100 years of the National Park Service, renewed interest in our untouched landscapes is growing, and that’s a great thing. Even with the selfie-crazed tourists crowding our parks and national monuments, it’s a positive point that more of us are getting out into the great outdoors and connecting with this land of ours.

A side benefit of this movement is a renewed interest in nature and the outdoors in general. Even 58 national parks in the U.S., it may not be possible for all of us to get to them as often as we’d like. Luckily, we can enjoy nature in our own backyards, as there are state parks, forests, and trails for us to explore almost everywhere you turn in America (and likely wherever you live also).

040916_-2

As with any environment, forest photography brings its own unique challenges to the table, but at the same time offers an almost unlimited array of subject matter, due to the variety of flora and fauna in these locations. Add in the side benefits of experiencing the fresh air and sunlight of the outdoors (which our bodies were built for), and you have all the reasons you need to snap some photos in the woods!

Let’s cover a few tips and recommendations when heading for the trails, then get out there and enjoy!

1 – Safety first

As with any outdoor photography project, you need to consider the environment you’re going into. Be sure to bring a camera bag or backpack to store items in, and to keep your extra gear and accessories out of the weather. Items to bring could include snacks, a compass, a map (a topographical map is always best if available), sunscreen, bug spray and a dry towel or rag to remove moisture, dirt, or rain from any exposed gear.

2 – Gear up

As always with shooting landscapes, a tripod is a must. Both wide-angle and narrower primes lenses, such as a 50mm can come in handy. I personally use a 24mm prime lens to capture wider forest shots, to get many trees in the frame at once, but then switch to my 50mm to get closeups of things like leaves, insects, or flowers.

HauntedWoods

Though there are cases for and against using them, a clear ultraviolet (UV) filter can be useful to keep dirt and grime off of your lens element. I don’t use them myself, and find if I’m careful with my lenses I can keep them clean without needing a protective filter. Always use a microfiber cloth for cleaning your lenses, not rags or towels of any type, especially if you take one for other purposes while you’re out in the forest.

Finally, a polarizing filter can come in handy, as it will help cut reflections in any body of water such as a river or stream, and also deepen and enhance colors in the scene. Keep in mind that you’ll be reducing the amount of light coming into your camera when using a filter like this, so plan accordingly (just bring your tripod).

3 – When to get out there

As outdoor or natural light photographers, we know that the best times to shoot are early mornings or late evenings, and to do our napping at noon. But forest environments are one of those places that can still work well during bright, more direct sunlight.

This is due to the canopy above that you’ll usually have, which filters out some of the harsh light, and gives you more of a lighting situation you’d expect to find at the edges of the day. As in many situations, if you can’t avoid the light from directly overhead, you can always switch over to black and white, and take advantage of the sharper shadow edges, and higher contrast.

062814_

With that being said, your subject will almost always be more magical if you head out during the early hours of the morning, or late in the evening. If you’re near water, you may experience some ground fog, which can add serious mood to your images, and the sunlight will be dramatically cooler or warmer than in the middle of the day, depending on what time you decide to go.

In short, plan your excursion for the first two or three hours after sunrise, or before sunset, for the best results.

4 – Try vertical orientation

Primeval

Landscape shooters are used to primarily using horizontal or landscape orientation for the majority of their images, but when you’re in the forest, portrait orientation can sometimes work better. Since you’re dealing with tall trees as your primary environment, wide-angle shots can capture more of a scene when shooting vertically, and give the image a sense of grandiose scale and height.

5 – Color contrast is key

One drawback to shooting in a forest environment (unless you’re in the northeast United States during the fall, or any area where foliage changes near the end of the year) is the lack of color contrast. The majority of your environment will most likely be composed of green leaves and brown tree trunks.

Flora can help break up the monotony by adding color to the scene. Look for patches of brightly colored flowers of yellow or red; even white flowers can change the contrast profile within the frame.

040916_

Playing the sun off of the environment can also add color, without needing a physical object. Golden-hour light and sun glare placed in your photo by composition, can inject the warmth of oranges and reds, and give your image a more vibrant look.

6 – Use Black and White

Sometimes when you’re shooting, nothing seems right. The light isn’t hitting the way you’d like, colors are off, or you just don’t get a sense of drama from your photo. This can happen in a forest environment, sometimes due to the general consistency of color from scene to scene; a lot of greens and browns can make it hard to highlight a subject.

Shooting in black and white (or processing the images later as monochrome) can let you concentrate on what the light is doing in your scene, by removing the element of color that can sometimes distract you from how varying levels of light affect the image.

Forest

If you’re going to shoot the photo itself in black and white in-camera, be sure to switch over to RAW + JPEG in your camera settings, that way you’ll have an unprocessed RAW file and a black and white JPEG for each frame you take. Or simply shoot in RAW mode so you’ll still have the full range of color data, in case you’re not happy with the results. But you’re shooting in RAW anyway right?

7 – Post-Processing the results

Photos taken in wooded areas benefit from many of the same post-processing workflow you’d normally do with other images, but there are some additional things you can do to give these images a bit more pop.

Lighting tends to be a little more dramatic in the forest, since you usually have a canopy of trees to filter some of the sun, and can result in gorgeous rays hitting the forest floor, or leaves and plants highlighted by shafts of light. You can enhance these by using a bit of contrast, specifically on these areas. You can also add a bit of vibrance to the image overall, and play around with the hue/saturation of the individual colors of green and brown, to bring out the natural feel of the shot.

040916_-3

For my own images, I like to soften the image overall via the Clarity slider in Lightroom (to give it a dreamy or magical feel), and then target the subject or other important areas of the photo and add clarity and sharpness back in with a local adjustment (+Clarity plus -Clarity balances out, for example:  -30 Clarity plus +50 Clarity equals net +20 Clarity on the area targeted, use the Adjustment brush tool to apply this).

8 – Leave the forest as you found it

I love the planet we’re on, and it angers me to no end when I see evidence of people not caring about the effect they have on the natural surroundings. Beer can rings and cigarette butts at beaches, plastic bags on roads near the forest, and the list goes on.

We should consider it a privilege to document this incredible world we live in, and the most important thing we can do is also the simplest; leave the area as you found it. This means many things including; not littering the woods or forest with any traces of man-made products such as trash, as well as not interfering with nature by getting too close to wildlife, or disturbing sensitive plants or trees.

030616_

Little things like this may seem trivial, but if we all participate in this practice, we could have a positive effect on our natural world and keep it a little more serene for generations to come. As photographers, we have an even greater responsibility to be conscious about what impact our actions might have on our environment.

Conclusion

Most of us have access to forest areas, fortunately, so it’s easy to try out this kind of photography. While this type of nature photography presents a few challenges, as long as you’re prepared with the right gear and a little knowledge, it can be an enjoyable experience, will help connect you with our natural world, and maybe even enlighten you a bit.

Do you have any stories or images of your adventures in the wild woods or forest that you’d like to share? Engage with us by commenting below, and get out there and have fun!

This week we are doing a series of articles to help you do better nature photography. See previous articles here:

  • 3 Habits Every Outdoor Photographer Should Develop to Avoid Missing Shots
  • 5 Tips for Better Nature Photography
  • 27 Serene Images of the Natural World
  • Weekly Photography Challenge – Nature
  • 10 Ideas for Photographing Nature in your Backyard
  • 6 Tips for Capturing Character and Personality in Wildlife Photography
  • 5 Tips for Setting the Focus in Your Landscape Photography
  • 7 Tips for Better Marine Wildlife Photography
  • Tips for Processing Landscape Photos – from Basic Edits to Artistic Interpretation
  • 5 Tips for Avoiding Boring Photos of Mountains

googletag.cmd.push(function() {
tablet_slots.push( googletag.defineSlot( “/1005424/_dPSv4_tab-all-article-bottom_(300×250)”, [300, 250], “pb-ad-78623” ).addService( googletag.pubads() ) ); } );

googletag.cmd.push(function() {
mobile_slots.push( googletag.defineSlot( “/1005424/_dPSv4_mob-all-article-bottom_(300×250)”, [300, 250], “pb-ad-78158” ).addService( googletag.pubads() ) ); } );

The post 8 Quick Tips to Produce Better Forest Photography by Tim Gilbreath appeared first on Digital Photography School.


Digital Photography School

 
Comments Off on 8 Quick Tips to Produce Better Forest Photography

Posted in Photography


7 Tips for Better Marine Wildlife Photography

19 Jul

I’m an ocean girl. To me, there is no better way to spend a summer day than to get out on the water and explore the mystery that is the deep blue sea, and hopefully experience some of the majestic creatures that live in it and on it.

Whether you are photographing on shore or from a boat, there are a few tips that will help you improve your marine wildlife photography. Underwater photography, though, is an entirely different thing, with a different set of techniques, that are not covered in this article.

Humpback whale breaching near Campbell River, British Columbia

Humpback whale breaching near Campbell River, British Columbia

The photos in this article were all made in the cool waters off the west coast of North America, but the same tips apply to marine photography all over the world.

1 – Explore the Shore

Let’s start with the shore where you’ll find all sorts of sea creatures. Check the tide tables, and if you can find a rocky beach at low tide. You’ll discover all the animals that live in the shallow tide pools such as urchins, sea anemones, starfish, mollusks and crabs.

Mollusks in a Tide Pool in Big Sur, California

Mollusks in a Tide Pool in Big Sur, California

Except for the crabs, they don’t seem to mind your presence one bit, so you can get some practice photographing the creatures that don’t notice you. Crabs sometimes pay attention, but if you don’t get too close, you may find they come out of the tide pools, and out from under rocks, and sometimes put on a bit of a show. I photographed this crab in Big Sur, California, where it came out from a crack in the rocks, and proceeded to make all sorts of bubbles as it began molting.

Crab at Big Sur, California

Crab at Big Sur, California

Close to shore, you may also be able to photograph sea otters and river otters (which are also found in salt water). Like other animals, given enough space and time to get used to you, they will go about their daily tasks in your presence, even looking directly at you (and your camera) allowing you to make images that feel intimate.

River Otters, Redwood National Park, California

River Otters, Redwood National Park, California

You’ll also find all kinds of sea birds to photograph such as gulls, geese, ducks, cormorants, and eagles.

2 – Get Out in the Deep

My favourite way to photograph marine wildlife is to get out in a boat. Whether you kayak, row, paddle, sail or use a power boat, there’s nothing like the freedom a boat gives you when it comes to exploring the ocean and finding wildlife. If you don’t have access to a boat, consider renting one. Or, try a whale watching tour, which are well worth the money for the photo opportunities they provide including whales, dolphins, seals, and sea lions.

Orcas and commercial fishing boats near San Juan Island, Washington.

Orcas and commercial fishing boats near San Juan Island, Washington.

Weather makes all the difference between an enjoyable day on the water, and those days that make you feel a little on the green side. Check the weather forecast before choosing your day, and once you are out there, keep an eye on changing conditions to stay safe.

If you are driving the boat yourself, and you expect some choppy seas, you should keep your camera safe and dry while underway. I store mine in a Pelican case, which is shockproof and waterproof, so I don’t have to worry about my camera while driving the boat. When shooting, try not to get splashed because salt water can do a lot of damage to your camera.

Sea lions basking on rocks near Vancouver Island, British Columbia.

Sea lions basking on rocks near Vancouver Island, British Columbia.

3 – Shoot Handheld

For marine wildlife photography, shooting handheld gives you the freedom to move quickly, as the animals do. Unless you are photographing animals that don’t move very much in the tide pools, a tripod or monopod can slow you down and you’ll likely miss the shot. They are also not very practical on boats.

Instead, use a high ISO, a fast shutter speed, and shoot handheld. Remember to turn your image stabilization on to prevent any camera shake blur. I usually start out with ISO 400 and a shutter speed of 1/1,000th of a second, then make changes based on lighting conditions and the speed the animals are moving. For dolphins and whales, an even faster shutter speed may be required.

Pacific White Sided Dolphin in Johnstone Strait, British Columbia

Pacific White Sided Dolphin in Johnstone Strait, British Columbia

4 – To Polarize or Not?

When shooting in tide pools, a polarizing filter can be helpful to cut through the glare of light reflecting off the surface of the water, and allow you to see through to the creatures that are underwater. Aside from that however, I don’t generally use a polarizing filter because the cost of doing so is about one stop of light. If I’m not trying to see through the water, I would rather have that stop of light for a faster shutter speed, or a lower ISO for better image quality.

5 – Lenses

You’ll need a variety of lenses for shooting marine wildlife. If you are shooting birds and whales, you’ll need a long telephoto lens to get you close enough to make an image with impact. I like to use a 70-300mm zoom lens or a 400mm prime lens for most of my marine wildlife photography.

Dolphins, on the other hand, will require a wide angle lens because they tend to get very close to the boat. My favourite lens for dolphins is my 11-35mm. So bring a variety of lenses along, and just make there is no salt water spraying around when you switch lenses.

Bald Eagle in Campbell River, British Columbia.

Bald Eagle in Campbell River, British Columbia.

6 – Focus Modes

When photographing the creatures that don’t move too much, one shot auto focus or even manual focus is fine. But when shooting animals that move fast, you’re better off using continuous autofocus mode because it locks on to your subject and tracks its movement, increasing your chances of getting a sharp image. It’s not easy though. Getting focus fast enough to capture the moment is probably the biggest challenge in this type of photography.

7 – Respect the Animals

When you are so close that your presence changes the animal’s behaviour, you are too close. Respect their space by using a longer lens, instead of getting too close. Don’t forget, in most areas there are rules about how close you can get to marine wildlife, especially whales. Usually it is around 100 meters or 100 yards, so check the rules (laws) in your area before heading out.

Cormorants on Middlenatch Island, British Columbia.

Cormorants on Middlenatch Island, British Columbia.

I hope these tips help you capture the sometimes elusive, but majestic creatures of the sea, the next time you explore the shoreline or go on a boating adventure.

This week we are doing a series of articles to help you do better nature photography. See previous articles here:

  • 3 Habits Every Outdoor Photographer Should Develop to Avoid Missing Shots
  • 5 Tips for Better Nature Photography
  • 27 Serene Images of the Natural World
  • Weekly Photography Challenge – Nature
  • 10 Ideas for Photographing Nature in your Backyard
  • 6 Tips for Capturing Character and Personality in Wildlife Photography
  • 5 Tips for Setting the Focus in Your Landscape Photography

googletag.cmd.push(function() {
tablet_slots.push( googletag.defineSlot( “/1005424/_dPSv4_tab-all-article-bottom_(300×250)”, [300, 250], “pb-ad-78623” ).addService( googletag.pubads() ) ); } );

googletag.cmd.push(function() {
mobile_slots.push( googletag.defineSlot( “/1005424/_dPSv4_mob-all-article-bottom_(300×250)”, [300, 250], “pb-ad-78158” ).addService( googletag.pubads() ) ); } );

The post 7 Tips for Better Marine Wildlife Photography by Anne McKinnell appeared first on Digital Photography School.


Digital Photography School

 
Comments Off on 7 Tips for Better Marine Wildlife Photography

Posted in Photography


5 Tips for Better Nature Photography

15 Jul

One of the most challenging things about photography is finding good subject matter. People want to see images of places and things that they normally may not get to witness in person. It’s not always easy to find fresh and appealing material that will draw in your viewer and capture their attention.

Luckily, with a little looking, you have the most abundant resource you will ever need to produce wonderful photographs, that have appeal and carry timeless beauty: nature. That’s right, our incredible natural world offers virtually limitless opportunities for you to bring out the very best in yourself so you can show others the awesomeness that surrounds us all.

Nature

Whether you’re shooting in rugged mountains, the ocean, or in your own backyard, there are ways to get the most out of your photography to be sure you produce some of the best images you possibly can, each and every time. Here are five easy to follow tips, which will help you take better nature photography, as you venture out to explore the natural world!

#1 – Go Small

The vast majority of the comings and goings occurring in nature, take place completely unknown to us. Wonderful little occurrences move constantly along in harmony, and can offer great chances for getting an equally wonderful photograph.

Dew

When you’re out shooting in nature, don’t forget to pay attention to the smallest of details. Bring a lens that has a decent zoom (over 50mm) and is capable of focusing close-up. Certainly you don’t need a macro lens in order to get great photos of small things, but do keep in mind that the closer you can get the better off you will be.

Lens

Look for insects going about their daily lives, and pay special attention to the patterns in nature that can be found in leaves, flowers, and the Earth itself.

Plant

Getting close to small natural wonders means that you are also likely to be get a little dirty, so remember not to go out shooting wearing your best clothes.

#2 – Look Up, Look Down, Look All Around

Far too often we unintentionally view the world that is directly in front of us, and neglect to see the literal big picture. There is so much more to see if we would only look tilt our heads up. There are many wonderful things to photograph above our heads, and even greater opportunities for creative photography.

Trees 1

Look for interesting and dramatic cloud formations, and incorporate clouds in your shots of other natural scenes. Remember that hardly anyone likes looking at an uninteresting sky, so try and compose your shots with that in mind.

Field

It doesn’t stop at merely looking for cool cloud formations either. Get instant creativity in your shots by using leading lines, and vertical perspectives to give your images a uniqueness, that is sure to catch the attention of your viewers.

Crops

Trees 2

The same goes for looking down onto your subject. There are many interesting perspectives to be had by shooting straight down on your subject from above.

Hedge

The key thing to remember here, is that your goal is to show things in nature in ways that most people don’t get to see, or have not even considered looking for in the first place. Make use of the power of perspective, and pay attention to everything around you, whether it’s above your head or below your chin.

#3 – See the Light

Light is the basic force behind all photography. It illuminates your subjects, and brings shadows and contrast to your photos. Learning to understand the nature of light is a lifelong journey for any photographer. Using the light found in nature is one of the best ways to add impact to your images and gain powerful compositions. Seeing light is something that takes practice, but that doesn’t mean that you aren’t capable of using it to your advantage right now.

Sunlight

When you’re out shooting, be sure to pay close attention to the way shadows are cast, and by whatever you happen to be photographing. Seeing the contrasts within the scene helps you to avoid dry and drab photos that are generally unappealing.

Direction of light is also very important, and can make a place or object look completely different depending on the angle of the sun. Be sure to visit a location more than once, at varying times of day (or even at night), so that you can find your creative spark.

#4 – Get out Early . . . Stay out Late

If you are searching for good natural light for your photographs, it means that you have to be there when it happens. That good light almost always comes about in the morning hours as the sun rises, or in those late evening hours when the sun begins to disappear. You must be prepared to get out and be ready for this great light if you want to increase your chances of getting great shots.

While you are definitely able to find good light throughout the day, it’s a good idea to get out and about early, or late in the day, so that you can see the gorgeous effects of morning and afternoon light.

trees 3

Furthermore, most animals and insects operate at their peak during the very early and late hours of the day. Even if it means losing a little sleep, it will almost always be worth the trouble to make sure you’re there when the magic happens.

#5 – Bring Backup

One of the most depressing feelings you will ever experience as a photographer is that of a dead battery, or a full memory card, as a beautiful scene disappears before your eyes. It’s always worth your while to bring an extra battery and memory card (extra film) so that you’re prepared when Murphy’s Law makes an appearance. Stack the odds in your favor when shooting the natural world be being prepared.

Lens Cloth

This doesn’t end with simply bringing an extra battery either. A lens cloth and blower brush can save the day when you get a little rain or dirt onto your lens. Being prepared for the small things isn’t difficult, and it ensures that you’ll be ready when the time to click that awesome photo comes along.

Follow these five simple tips and make the most of your time shooting out in our amazing natural world. Have some tips of your own? Be sure to share them in the comments below as well as your nature photography images.

This week we are doing a series of articles to help you do nature photography. This is the second, also read: 3 Habits Every Outdoor Photographer Should Develop to Avoid Missing Shots  – and watch for more coming soon! 

googletag.cmd.push(function() {
tablet_slots.push( googletag.defineSlot( “/1005424/_dPSv4_tab-all-article-bottom_(300×250)”, [300, 250], “pb-ad-78623” ).addService( googletag.pubads() ) ); } );

googletag.cmd.push(function() {
mobile_slots.push( googletag.defineSlot( “/1005424/_dPSv4_mob-all-article-bottom_(300×250)”, [300, 250], “pb-ad-78158” ).addService( googletag.pubads() ) ); } );

The post 5 Tips for Better Nature Photography by Adam Welch appeared first on Digital Photography School.


Digital Photography School

 
Comments Off on 5 Tips for Better Nature Photography

Posted in Photography


4 Ways to Get Inspiration from the Streets to do Better Wedding Photography

14 Jul

Be inspired by decisive moments on the streets to create better wedding photography.

If you are reading this article you must have some interest in street photography, or maybe you are starting as a professional wedding photographer, but most likely you are interested in both fields. This will give you some ideas on how to draw inspiration from street photography that you can use in your wedding work.

A street photographer can be anyone going out to wander the streets of a city with their camera, in order to make photographs that tell the human story of daily life as it occurs on the streets. A wedding photographer on the other hand, is one that is hired to capture memories, tell the love story, and the unfolding special day in a family’s life. The wedding photographer is a professional with enormous responsibility to find, and deliver the right frames, that will recreate trusted memories, decades after the big day is over.

A clear personal artistic voice is what separates one photographer from another. That voice is who you are, but that voice of yours needs constant care and development, in order for it to be a dominant factor in your photographic style as a professional photographer. Competition, changing trends, and the release of new gear also have their own voices that can influence your photography. Maintaining a balance between your inner world and the outer influences is key to success as a street-wedding photographer.

The following tips came from the world of street photography and are perfectly suited for the wedding photographer. If you master them on the street, you can go to a wedding with confidence, and sing your own song with your camera.

1 – Planning versus reacting

Wedding photography tips
What it takes to make great decisive moment photographs is, that first of all you need to see them before they occur. The longer before the better, it will give you the time to plan your composition, and work towards a frame that will be exciting and tell a story. In order to see things before the happen it takes looking around your subject, and constantly look at the surroundings of the bride, rather than focusing your attention only on her. This way you will be able to notice other elements and people that make your frame more interesting and communicative. Even as short as two or three seconds can be long enough for a street photographer to plan a good frame.

If you look around and plan your next shot you have a greater chance of catching the decisive moment, rather the one that follows.

2 – Create emotion

wedding photography tips motion
Freezing and blurring the movement of objects and people are two ways to communicate emotion in a photograph. It is a property that is unique to still photography, and is a big part of the photographic language. But often many photographers think that a wedding photograph has to be sharp and in focus, and the end result is often a precise documentation of reality, rather a poetic description of the moment. Give yourself the time it takes on the street to fully understand how the blurring and freezing of motion is being read and perceived by the viewers.

Master motion techniques then bring them into the weddings you photograph.

3 – Understand the way light can work for you

wedding photography tips light
Explore the way light falls on things, and the way it looks in your street photographs. When your are under the stress and responsibility of a wedding day the thinking side of your brain often takes over, and shuts down the creative side. You may see the wedding as a checklist of photographs to be taken, images of subjects, rather than decisive moments to tell a story.

One way to keep the creative brain in charge of things is to remind yourself constantly to work with the light, see light, change it if necessary, and let go of the subjects. If you are photographing the bride getting ready, she is the subject whether you think about it or not, now it’s time to think about light.

4 – Responsibility and integrity

wedding photography tips

Whether you work for yourself as a street photographer, or as a professional wedding shooter, you should be able to sleep well at night. You should never publish street photographs that might hurt someone’s feelings or cause them damage. However, that being said, you should also remember that the act of photographing people on the streets doesn’t harm them in any way, and have no fear to do your art.

There is another side to the coin of responsibility, that is integrity. when you are hired to photograph a wedding be sure to have shown only photographs that were made by you, that are a good representation of your style and voice. Be sure to let your clients know that they are going to get artistic street-wedding photographs if that is what you want to give them!

googletag.cmd.push(function() {
tablet_slots.push( googletag.defineSlot( “/1005424/_dPSv4_tab-all-article-bottom_(300×250)”, [300, 250], “pb-ad-78623” ).addService( googletag.pubads() ) ); } );

googletag.cmd.push(function() {
mobile_slots.push( googletag.defineSlot( “/1005424/_dPSv4_mob-all-article-bottom_(300×250)”, [300, 250], “pb-ad-78158” ).addService( googletag.pubads() ) ); } );

The post 4 Ways to Get Inspiration from the Streets to do Better Wedding Photography by Ouria Tadmor appeared first on Digital Photography School.


Digital Photography School

 
Comments Off on 4 Ways to Get Inspiration from the Streets to do Better Wedding Photography

Posted in Photography


4 Tips for Better Child Photography by a Mom

10 Jul

Elena Shumilova and her family moved to the country and she started photographing her two sons. Then she put her images online and something magical happened – the world loved them! She has over 50 million views of her images and counting.

In the first video below you can see how she captures the natural moments of her children’s lives in such a way as to captivate the world. Then watch the second to get four tips you can use to do the same and do better child photography of your own kids, grandkids or neighbors.

Mom Captures Childhood of Her Sons

4 Expert Tips for Child Photography

You can see more of Elena’s images of childhood here.

Are you inspired? Go take some photos of the children in your life and share them below!

googletag.cmd.push(function() {
tablet_slots.push( googletag.defineSlot( “/1005424/_dPSv4_tab-all-article-bottom_(300×250)”, [300, 250], “pb-ad-78623” ).addService( googletag.pubads() ) ); } );

googletag.cmd.push(function() {
mobile_slots.push( googletag.defineSlot( “/1005424/_dPSv4_mob-all-article-bottom_(300×250)”, [300, 250], “pb-ad-78158” ).addService( googletag.pubads() ) ); } );

The post 4 Tips for Better Child Photography by a Mom by Darlene Hildebrandt appeared first on Digital Photography School.


Digital Photography School

 
Comments Off on 4 Tips for Better Child Photography by a Mom

Posted in Photography


6 Ways of Using Reflector to Take Better Portraits

03 Jul

I’ve been making my living as a photographer for over 20 years, and have accumulated thousands of dollars of gear over time. I have the latest Canon SLRs, a full complement of lenses, strobes, light stands, gels, filters, soft boxes, tripods, and even some video and audio gear. But the one thing that often makes the biggest difference in the quality of my portraits is a simple $ 20 reflector. I never leave home without it and neither should you.

When shooting outdoor portraits, the first thing many photographers think about is the background, but the pros consider the quality of the light first and foremost. They know, for example, that a portrait with nasty overhead lighting is not going to work, no matter how cool the background.

Photo12

A reflector can help you salvage bad light, and turn okay light into something magical. You can use your reflector from below to fill in shadows, or from above to block distracting light. You can bounce the sun from the silver reflector to create a main light, or you can use a reflector with a black side to create deeper shadows. You can even sit on your reflector to keep your pants clean when shooting outside, or pop it open dramatically to dazzle young children.

Most of the photos in this article were shot with a 5-in-1 reflector you can buy for less than $ 20. 5-in-1 refers to the fact that the reflector and cover can combine to give you five different options: white, silver, gold, and black sides, as well as a diffuser.

Here are 6 tips to help you use this versatile tool, a reflector, to transform your photos.

1. Using a Reflector for Fill Light

The most traditional use of the reflector is to simply reflect light into the shadows. I took my wife Karen out into our local park to demonstrate this.

Photo1

In the photo on the left (above), she is photographed in nice soft light, but there are still pretty deep shadows under her eyes and chin. In the photo on the right, she is holding a reflector at her waist. The shadows on her face are noticeably lighter and there is a subtle catch-light (reflection of the reflector) in her eyes. If she were an older person with more textured skin, the contrast would be even more dramatic.

Photo2

Of course, you may not always want to fill in the shadows in this way, but if you are trying to flatter someone it almost always helps. You don’t even need an official photo reflector. Anything that reflects light will work. In a pinch I’ve used everything from old newspapers to a nearby person wearing a white shirt.

2. Using a Reflector as the Main Light Source

This is one of my go-to reflector moves, and an easy way to wow your friends and family. You place your subject with the light hitting them from behind, then use a reflector to bounce the light back into their face. You will get nice soft light on their face, with a dramatic rim light on the back of the subject’s head. The only trick is positioning yourself so the light doesn’t go straight into your lens and create lens flare (unless you like that look, of course).

Photo3

In the photo above the is sun hitting the left side of her face and arm. The light from a reflector is bouncing back some of the sun to light up her face.

You may also notice the shallow depth of field in this photo. If you are lighting with a reflector, you can jack up your shutter speed as much as you like to allow for a wide aperture (this photo was shot at 1/1250th of a second at f/2.0, with a 50mm lens). If you were using flash to create this same effect, you would have to lower your shutter speed (to 1/250th or whatever matches your camera’s maximum) to sync with the flash, requiring a larger aperture and greater depth of field (killing the whole look).

Yes, yes, some of you are no doubt thinking, “What about high speed sync?!” Well, yes, that could give you the same effect if you had the right equipment (and know how to do that). Or, you know, you could just use an old newspaper.

Photo4

In the next example above, we positioned Karen against a tree and had her cousin Claudia reflect a spot of sunlight on her from about 10 feet away. At this distance, the light from the reflector looks more like it is coming from a grid spot or snoot (hard light) – in other words, it’s a focused and dramatic beam (notice the fall-off of light on her legs). It’s a cool look that you can recreate with a reflector, a few feet of aluminum foil, or your bathroom mirror. Your friends will be wowed, and ask what fancy gear you used for the shot (and your family will ask what happened to the bathroom mirror).

Using a slight variation of this technique, we moved the reflector slightly behind the subject (relative to the camera) to created a dramatic rim light on the face in a profile shot (see below).

Photo4a

3. Using a Reflector to Block Light

Sometimes you’ll find yourself in some beautiful shady light under a tree, except for that pesky sunbeam that finds its way through the leaves to light up your subject’s left ear. When this happens, turn your reflector into a light blocker (sometimes called a flag or gobo).

A few years ago, I was doing a maternity portrait in a local park, when a newspaper photographer snapped my picture using just this technique. If you look at the reflector, you can see the bright spots of sunlight that it’s blocking (imagine how those spots would have ruined the final image if we didn’t block them).

Photo5

Photo6

4. Using a Black Reflector to Create More Dramatic Shadows

Sometimes you actually want to deepen the shadows. I use this technique all the time in my headshot studio. Below is a photo of me with a white background. In one shot, I have a silver reflector opposite the main light, sending light back towards my left cheek. In the other, the reflector has a black cover on it, gobbling up reflected light, leaving a dark shadow on the cheek.

Photo7

Photo8

Except for the small change of literally flipping the reflector from one side to the other, the lighting setup is identical, but as you can see the difference is pretty dramatic. (For you studio lighting enthusiasts out there, my key light here is a large soft box, and there are two bare heads pointing at the background to make sure it is nice and bright white).

This is the same technique used in the famous Steve Jobs portrait where he has his hand on his chin. In addition to creating a little drama, you can also use this technique to give someone a photographic face-lift by trimming pounds from the dark side of their face and under their chin.

5. Who Holds the Reflector?

You may be saying to yourself, “But, I don’t have an assistant! Who’s going to hold the reflector for me?”. I usually don’t have an assistant either, but there is usually someone nearby who is more than happy to help, be it a family member, passerby, intern, wedding guest, etc. Sometimes you can even have the subject of the photo hold the reflector themselves (as in the photo of my wife holding the reflector at her waist in the photo above). Of course if you’re in the studio, or outside on a day without too much wind, you can just pop your reflector onto a light stand (like in the studio shots of me above).

In the photo below, I was shooting wedding portraits on a beach in the Florida Keys. My reflector assistant that day was one of the bridesmaids, who truly enjoyed helping her friends out with their portraits.

Photo9

Photo10

6. Reflectors in the Environment

Once you get the hang of reflectors, you’ll probably start noticing reflected light everywhere. Ever see a white building getting blasted by the sun? Well that’s nothing but a giant reflector! Depending on what’s around it, you may have found yourself a giant studio, with no rental fee.

Mind you, anything that reflects enough light can work as a reflector. A brick building, large truck, flock of seagulls flying by at just the right moment…

Final Notes

Although they may not be as sexy as strobe kits, reflectors can often yield similar, or superior results for your portraits, and are cheaper and easier to use. I will leave you with a few more assignment photos, shot using nothing more than a reflector.

In the child portraits below, note that there is light behind the kids in both cases, but there is still beautiful light on their faces. Same goes for the athlete portraits.

Photo11

Photo12

As a final image, I leave you with a group of wedding guests who were so enamoured of my reflector that they wanted a picture with it. Hopefully you will soon have similar feelings towards your own reflector!

Photo13

Do you have any additional reflector tips to add? Please do so in the comments below.

googletag.cmd.push(function() {
tablet_slots.push( googletag.defineSlot( “/1005424/_dPSv4_tab-all-article-bottom_(300×250)”, [300, 250], “pb-ad-78623” ).addService( googletag.pubads() ) ); } );

googletag.cmd.push(function() {
mobile_slots.push( googletag.defineSlot( “/1005424/_dPSv4_mob-all-article-bottom_(300×250)”, [300, 250], “pb-ad-78158” ).addService( googletag.pubads() ) ); } );

The post 6 Ways of Using Reflector to Take Better Portraits by Dennis Drenner appeared first on Digital Photography School.


Digital Photography School

 
Comments Off on 6 Ways of Using Reflector to Take Better Portraits

Posted in Photography


How to Use a Travel Photography Shot List to Come Home with Better Photos

01 Jul

Checking off your travel photo listWant to bring back travel photos that your friends actually enjoy viewing on Facebook? Want to make sure you don’t miss anything when visiting a new culture? Then it’s time to make a list!

We all have our easy ruts we fall into when photographing, but travel, for me, is about expanding my view. That’s why I take a travel shot list and try my darnedest to get at least one of each shot when visiting a new location.

What’s on my list?

Here are some tips for you to help make a travel photography shot list for your next trip. Feel free to use my list and add to it with your own ideas.

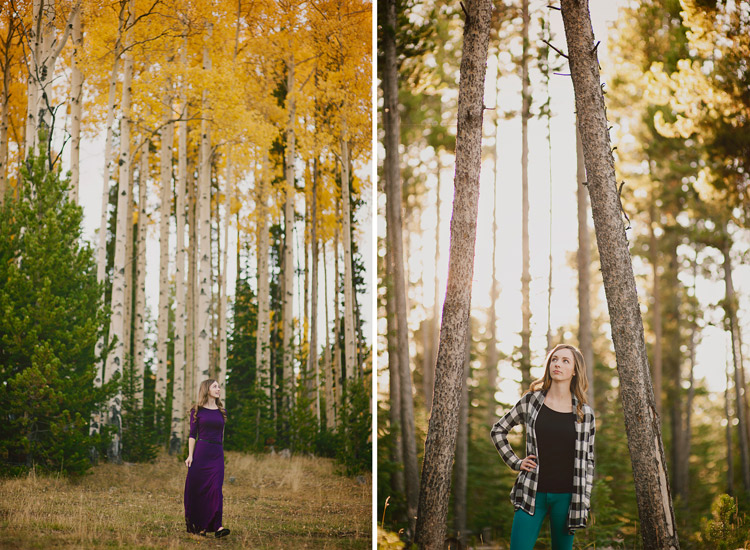
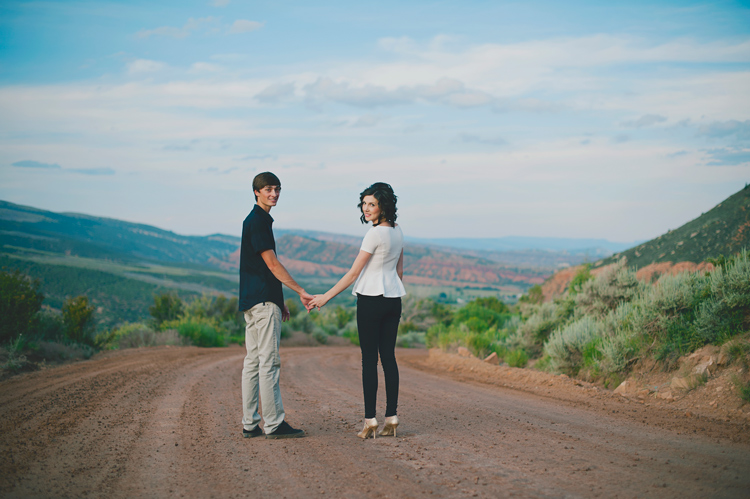
1 – People – old, young, and in-between

Spread out your people photos between age ranges. I’ve seen a bazillion images of old ladies from Cuba, while often missing are people like me; middle aged and fairly normal, even a bit boring. Round out your people photos with more variety, is all I am saying.

Portraits in Bhutan

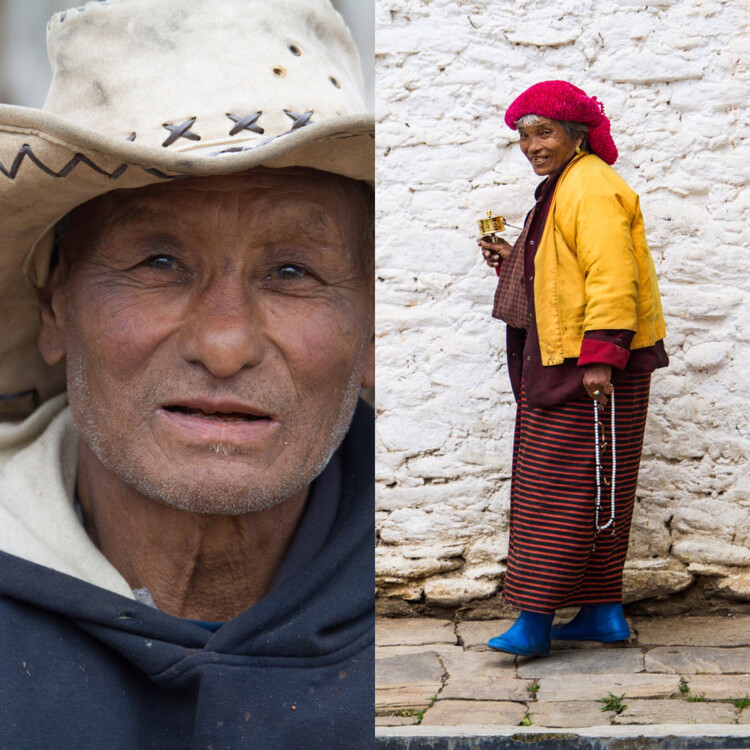
What’s not to love about those shoes and that smile?

Kids are an easy target as they often love having their picture taken. You will need to be aware, though, that not all parents wish for their children to be photographed. That’s the crux of it; parents worry how the images this stranger just took will be used. Sometimes all it takes is a simple “Hello” first to the parents to gauge if taking photos is okay. If language is a barrier, you can also point to your camera, then to the children with an inquisitive look on your face. Either way, no matter the answer, respect the parent’s choice.

Peruvian kids

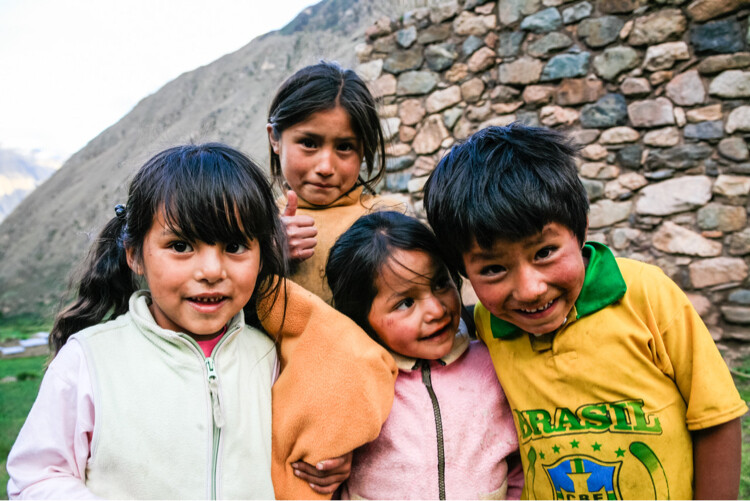
Kids playing in Inca ruins, Peru

Delhi street market scene

Street scene in Delhi, India with people my age.

Men at Red Fort, Delhi, India

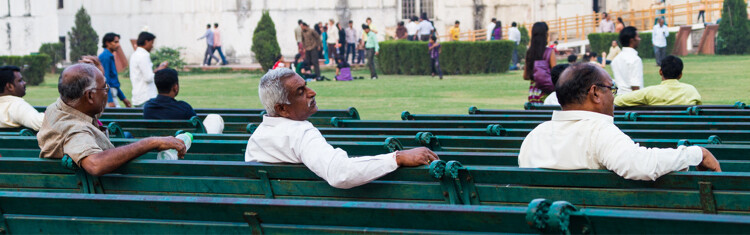
People watching at the Red Fort, Delhi, India

2 – Food – preperation, presentation, social aspect

Food brings us together. It’s a basic need we can all relate to, even if we don’t know exactly what we are about to eat.

Cooking at a Sikh Temple

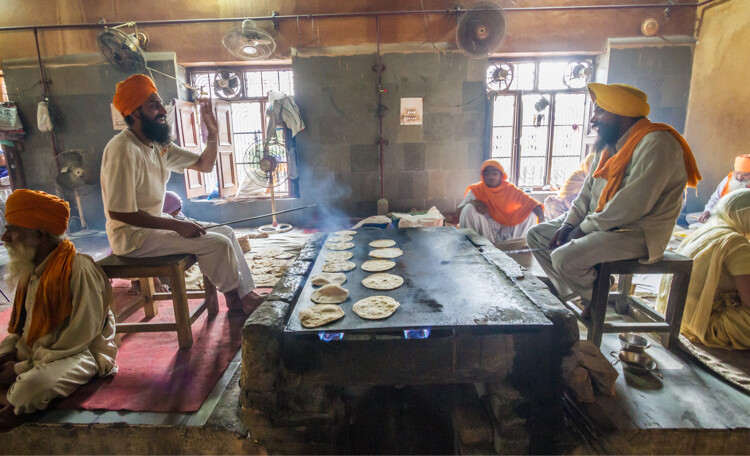
Inside the commercial sized kitchen at the Golden Temple in Amritsar, India

Don’t just shoot the Instagram-worthy image of a plate of the amazing new delicacy you are experiencing, find a way to shoot the preparation of food. Get behind the counter (where it’s allowed) to see how it’s cooked, and where it comes from. As you plan to share these photos (why else are you taking them?), you may find that a large, and often hidden, swath of your friends and followers have a strong interest in food prep.

Buddhist monastery kitchen in Nepal

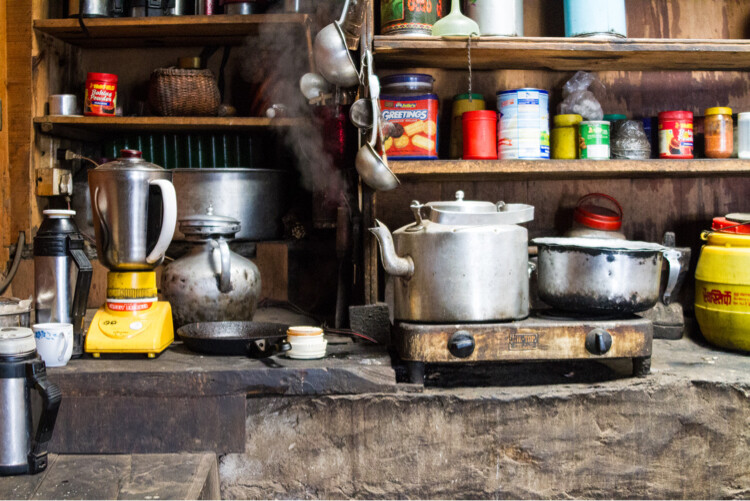
The full kitchen at a monastery, high in the Himalayas of Nepal

3 – Architecture – old, new, juxtaposed

In some locations the old and the new architecture matches, Bhutan comes to mind. I watched artisans paint a brand new home with traditional patterns and motifs from the nearby 400 year old monastery. Everything there fit a certain style.

Buddhist Temple in Punakha, Bhutan

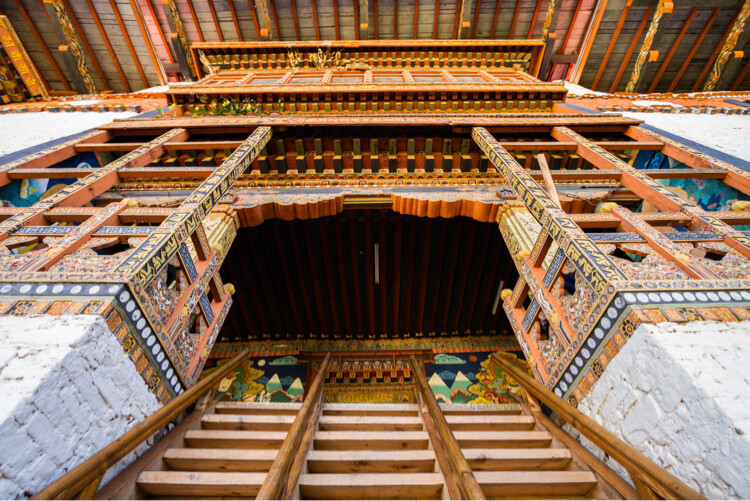
Looking up at the Punakha Temple, Bhutan

Then we have countries making vast changes from the old style to what constantly evolves as modern – think of Tokyo or Dubai. Look for the differences even where you think there is just one style.

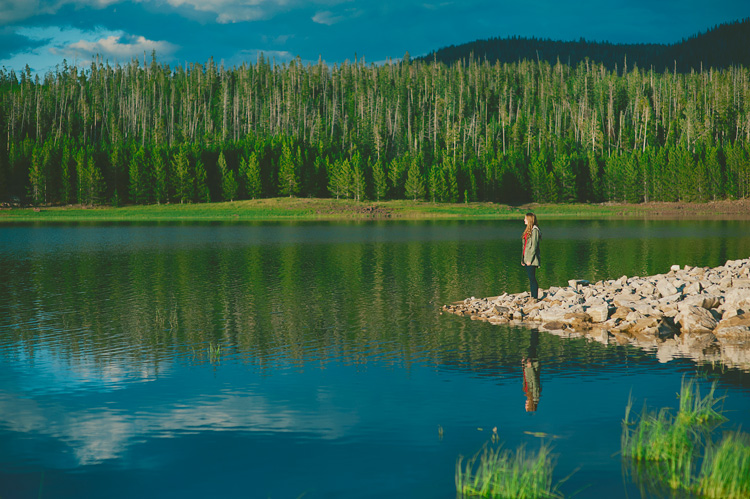
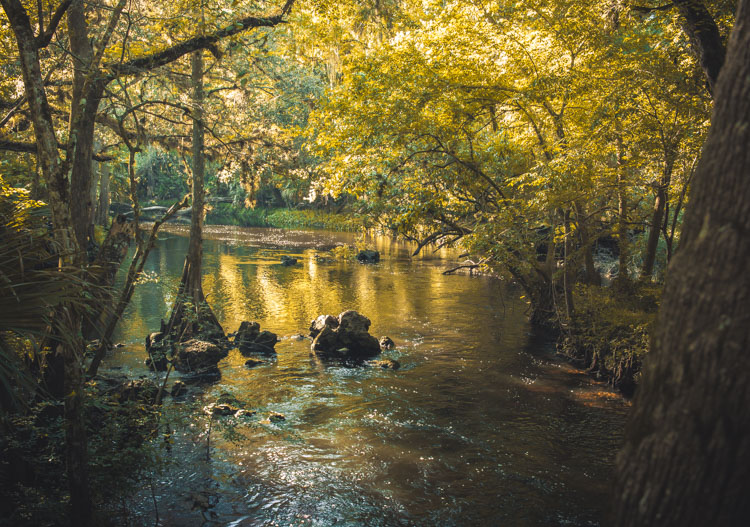
4 – Water – how is it used?

While food brings us together, water is even more vital to our lives. In California we are familiar with our current drought, but forget that not every place has this problem. Some places are quite extravagant with their use of water, while it is a scarcity in others.

Water in use in Nepal and India

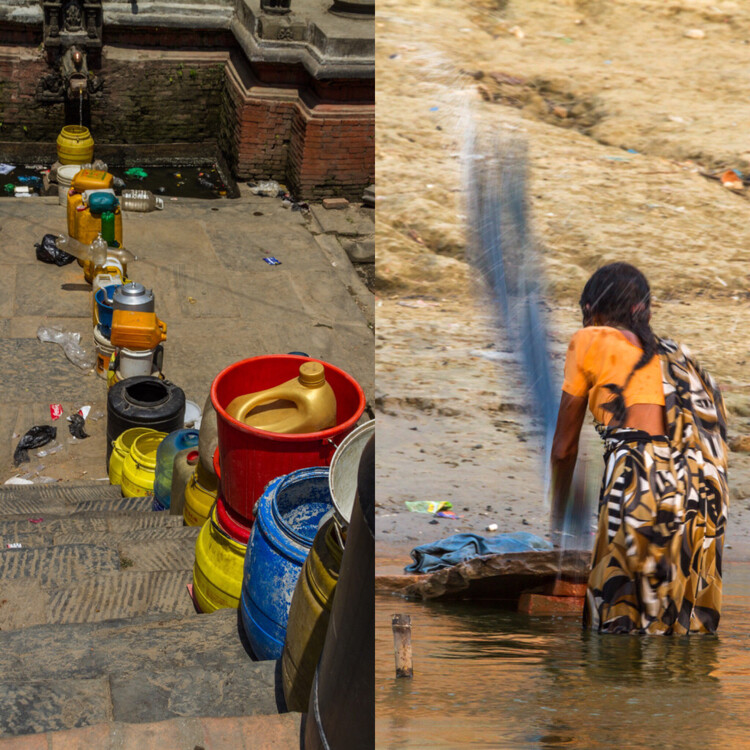
Scarcity of water in Kathmandu means water lines, while a woman in Varanasi, India, washes her clothes in the river.

How do the locals use water? Do they wash their laundry in the rivers? Are there fountains everywhere? Are their cities built along waterways, or with vast ports?

Infinity pool and Dubai

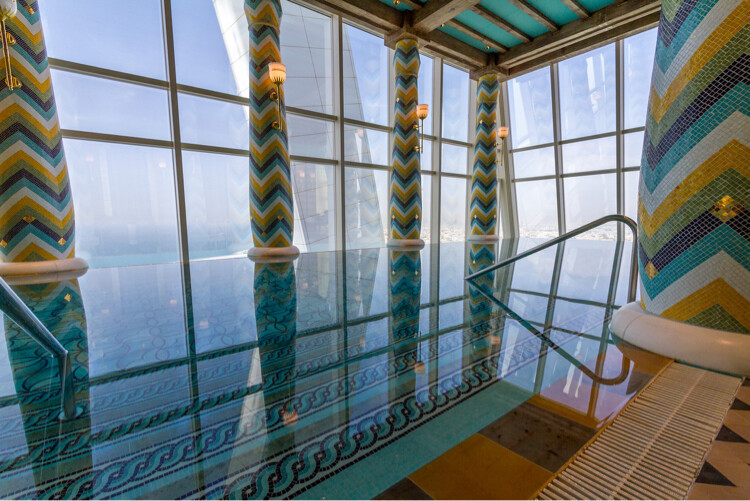
An infinity pool 23 stories up in the Burj al-Arab, Dubai, UAE

Old water storage tank overflowing and leaking

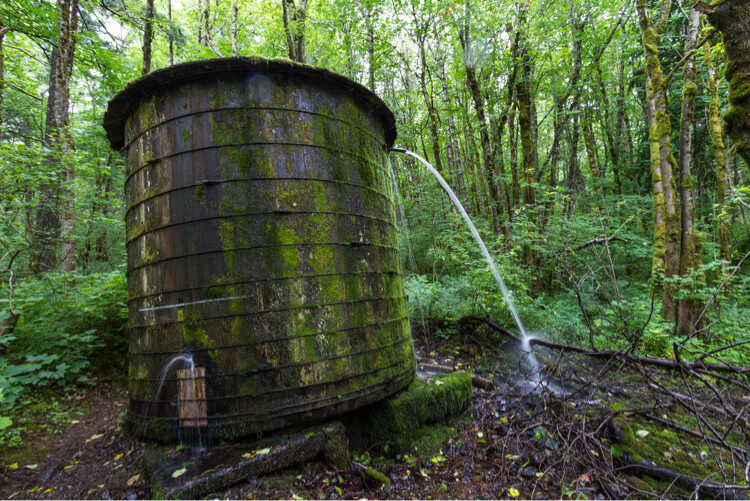
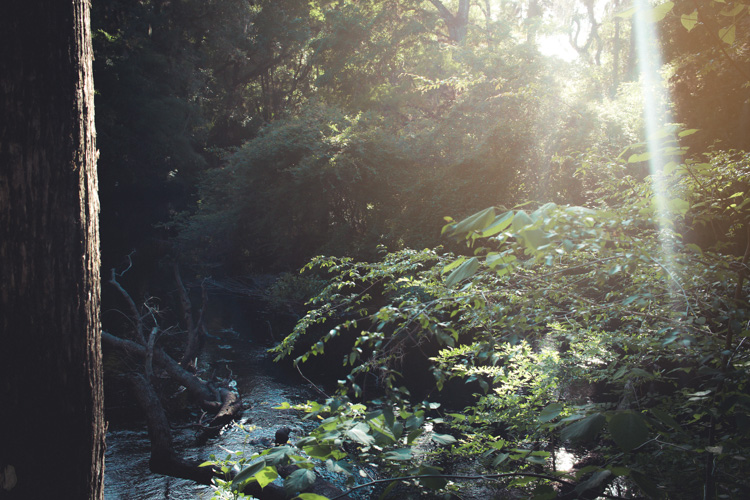
In the woods of Oregon, there is often way too much water.

5 – Transportation – private and public

How do people get around? At home we have our patterns, and often don’t see the other forms of transport we might use. But when you travel, it will hopefully be obvious how the people there transport themselves.

Tuk-tuk ride at night

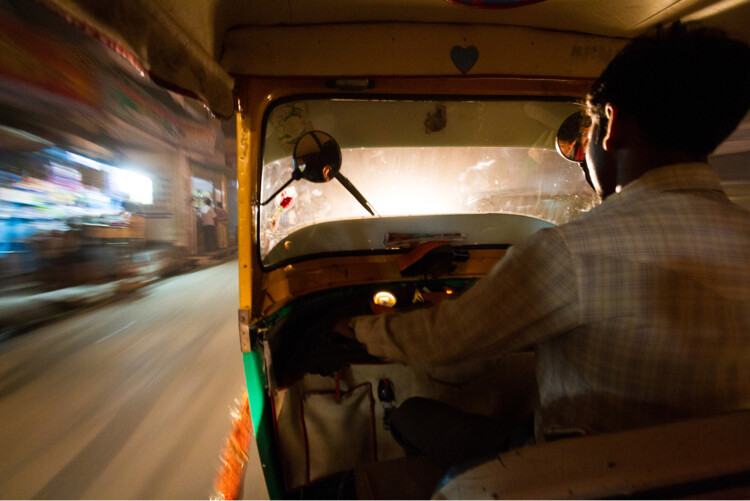
Tuk-tuks in Amritsar, India, are the easiest way to get around town.

It might a passel of buses, camels, rickshaws, taxis, or Maseratis.

Also, how are goods moved? Does your location have shipping traffic and a lot of cargo? From continent to continent, the methods for moving goods from here to there can be vastly different.

Boating on the Ghanges River

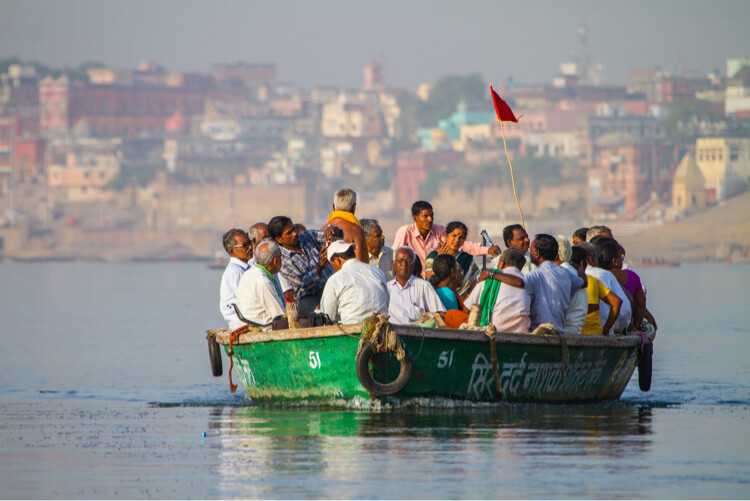
Boating along the Ghanges River in Varanasi, India

6 – Commerce – macro and micro

When I think of macro-commerce I think of things like whole industries like: agriculture, tourism, and banking.

With micro- commerce, I think of markets and vendors, where money actually changes hands. Who’s selling what, and who is buying? Is there a special technique to transactions?

image

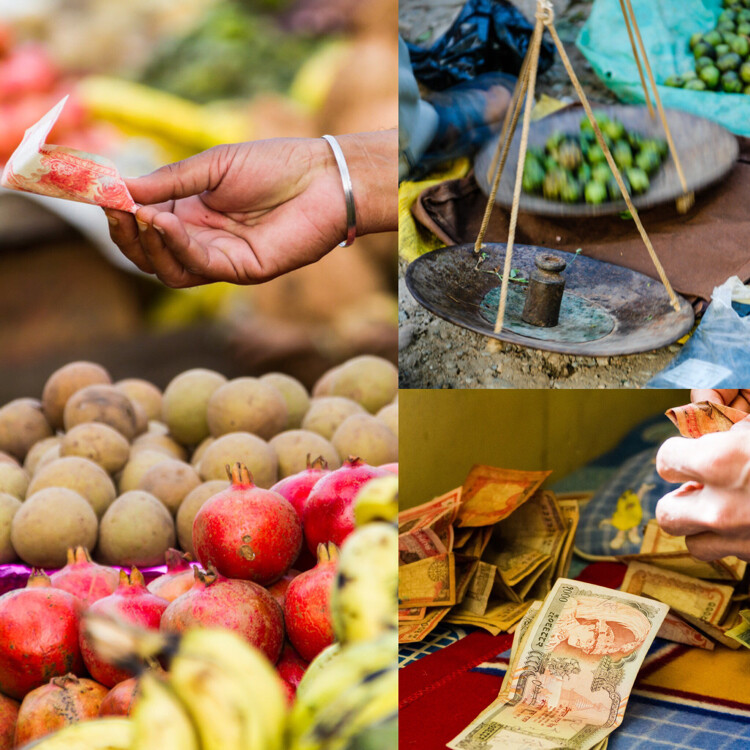
Try to capture both the large scale, and intimacy of commerce, and show how things may be very similar, or very different from what you are used to back home.

7 – Nighttime

When the sun goes down, don’t stop shooting! Learn to find light, and exploit its unique qualities during the night. Maybe you have some moonlight or some neon in your location. No matter the source, there is still light at night.

Balanced Rock, Arches National Park, at Night

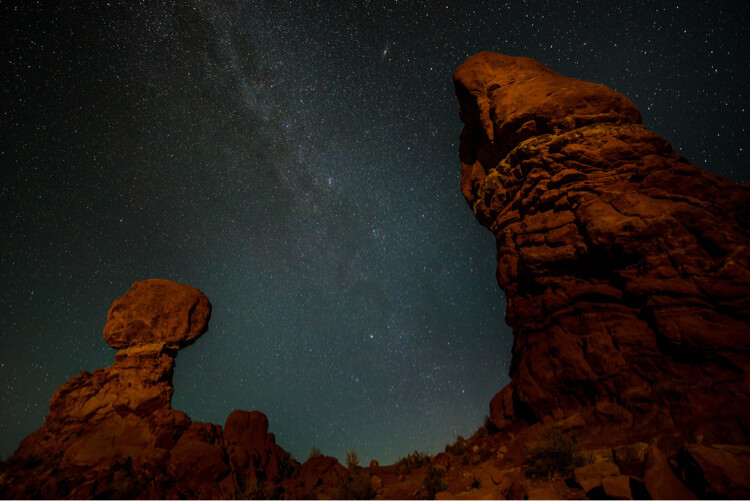
Balanced Rock in Arches National Park, Utah, USA takes on a new look at night.

Does your location shut down when the sun hits the horizon? Or does it rally for an all-night bender?

I found the markets in Aqaba, Jordan come to life once the heat of the day was done. I also found that the town had way more neon signs than I ever expected, but hadn’t bothered to notice while touring in the daylight. Get out at night and explore.

Noel in Aqaba, Jordan

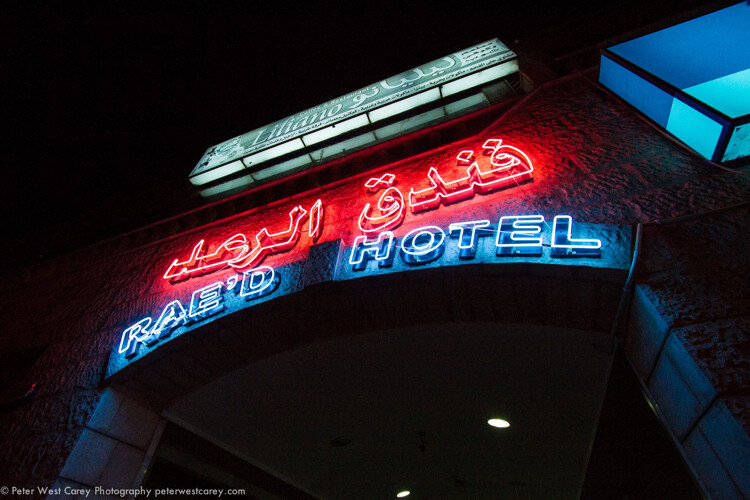
Neon in Aqaba, Jorda

image

8 – Religion

How different parts of the world practice religion has always fascinated me. There isn’t a single part of this globe, that does not have some nod to the local religion, in some aspect of their lives.

Minaret of a mosque in Oman

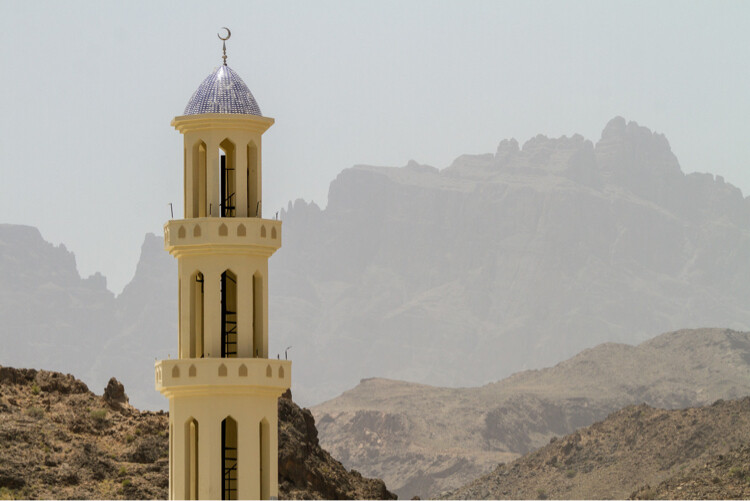
Colorful minaret in Jebel Shams area of Oman

It may be subtle, such as a small altar to burn incense, or it could be the overt repetition of churches across a city. Travel is a time to break out of your routine and try new things. Stick your head (respectfully) inside a temple. Tour a mosque. Visit a cemetery to see the influence of religion on those in the past.

Buddhist monks in ceremony, Bhutan

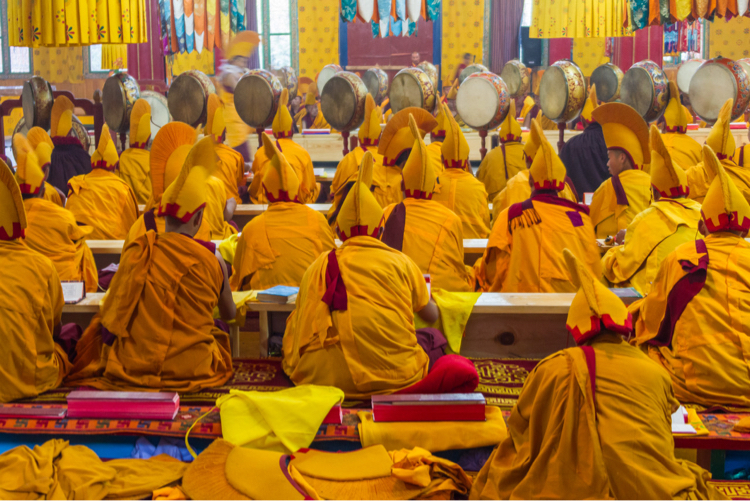
Photography inside many Buddhist temples in Bhutan is banned, but on the night of this retreat for monks from all around the valley, I was allowed to shoot the ceremony.

Military tombstones and flags located in Eastern Washington, USA

Military tombstones and flags located in Eastern Washington, USA

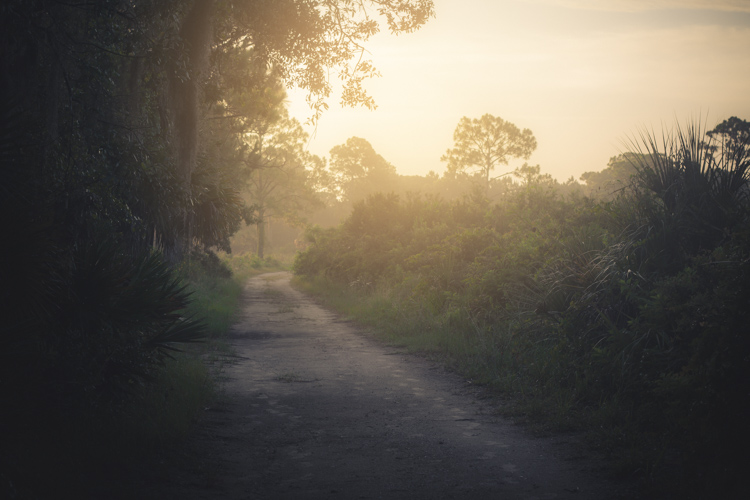
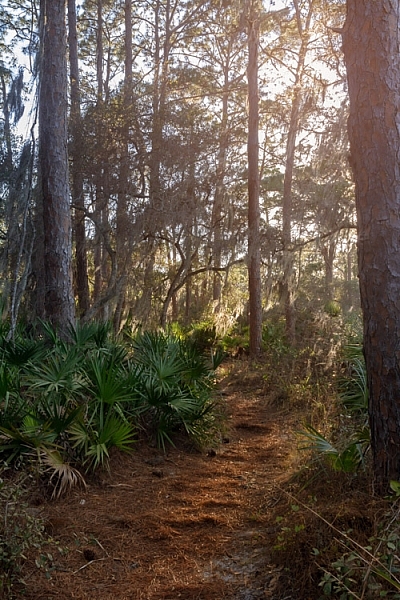
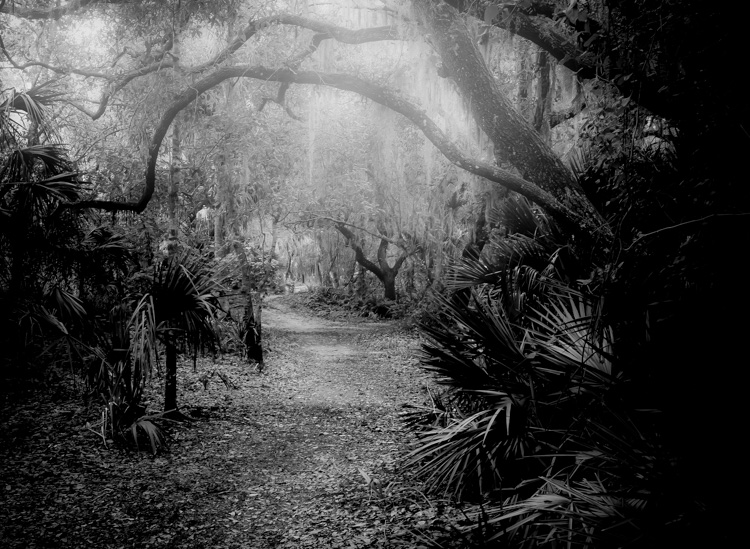
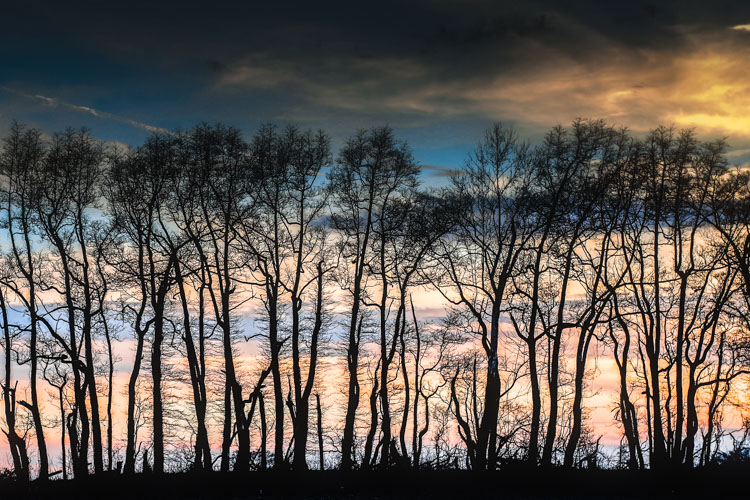
9 – Landscapes – natural and manmade

I love landscapes, so they come easy to me. But, I have not always been a fan of cities and people. So, it takes me some effort to really appreciate the organization and layout of a nice cityscape. But it’s always worth it to bring back a mix of both in your images.

View of Canyonlands National Park at sunset

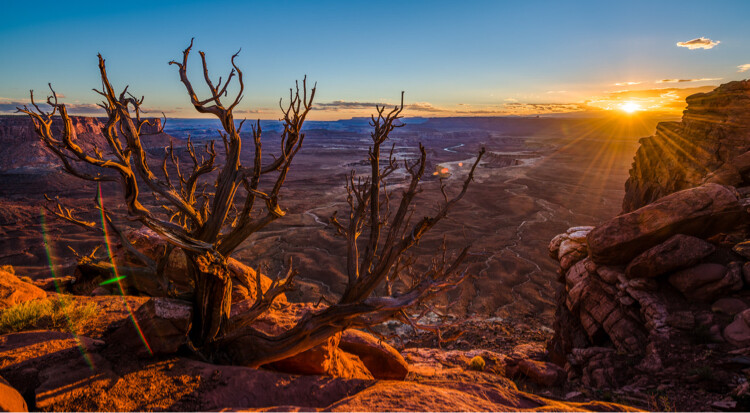
No people to see. Canyonlands National Park, Utah, USA.

Photographers and Cho Oyu, Nepal

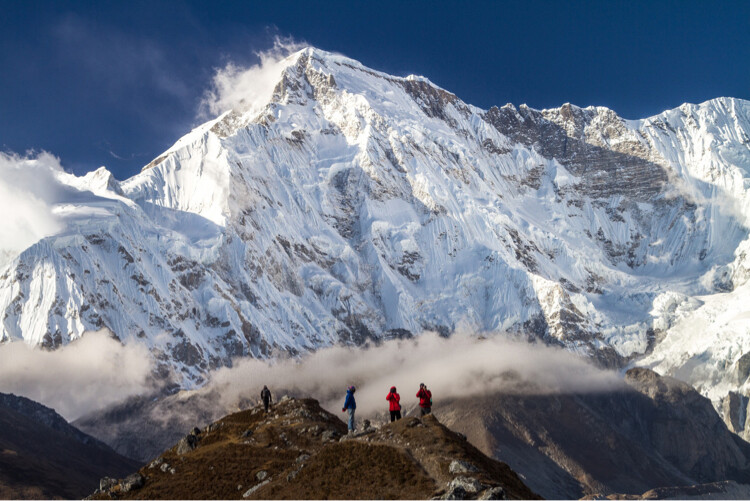
A few people give a sense of scale to Cho Oyu, the 6th highest mountain in the world, Gokyo, Nepal.

Sunrise view of Seattle, Washington and Mount Rainier

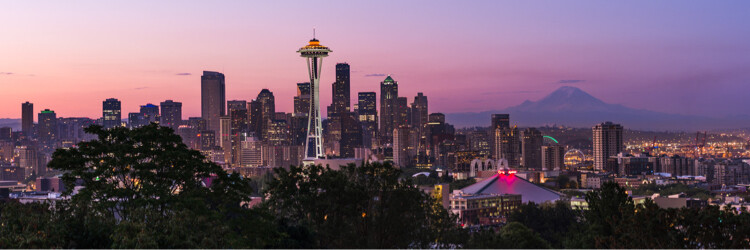
Here there are a lot more people in Seattle, Washington, USA

I am reminded of the craze for photos of Iceland. I’ve seen my fill, and rarely was a single cityscape in the mix. Black sand beaches with ice, waterfalls, all that stuff shows up – but most photographers have left out the manmade landscape. Include it! At least once.

10 – Icons – clichés big and small

I know people who refuse to shoot iconic locations. “They’ve been over shot and I wouldn’t be caught dead shooting them,” is a common refrain. Ignore those people.

Taj Mahal and reflection

The classic Taj Mahal view.

You’re traveling, so have fun. Shoot the Eiffel Tower if you’re in Paris. Hit up Mesa Arch in Canyonlands National Park, and why not get a reflecting pool image of the Taj Mahal, or a cigar smoking lady in Havana? Do it. Get a posed photo of Masai Mara villagers, a llama in front of Machu Picchu, pretend to push over the Tower of Pisa.

Heck, even get a photo of that same waterfall everyone else visiting Iceland has shot.

That being said, you probably shouldn’t share only the cliché shots. Unless you’re on assignment to shoot something highly unique, go ahead and hit the clichés, then move on to the rest of the list. Better yet, look around your cliché location for something new to bring back and share.

Tourists at teh Taj Mahal

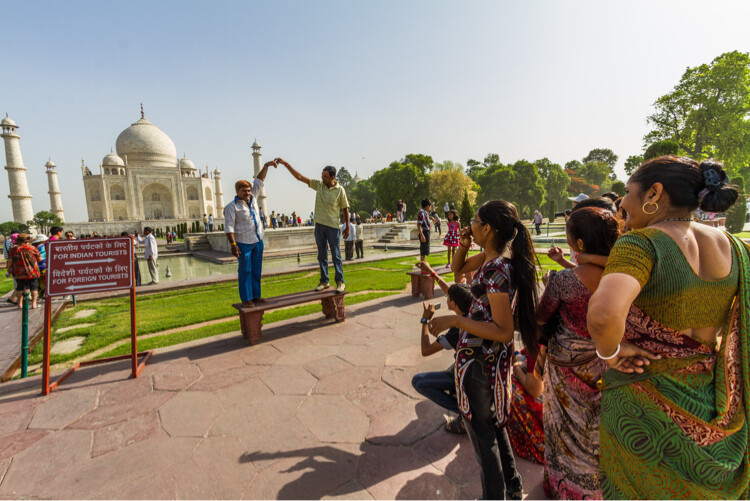
The not-so-classic view of the Taj Mahal, but a lot more fun.

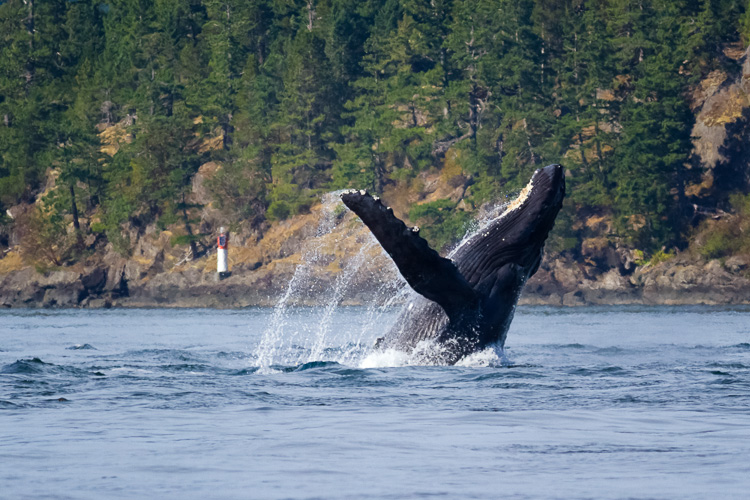
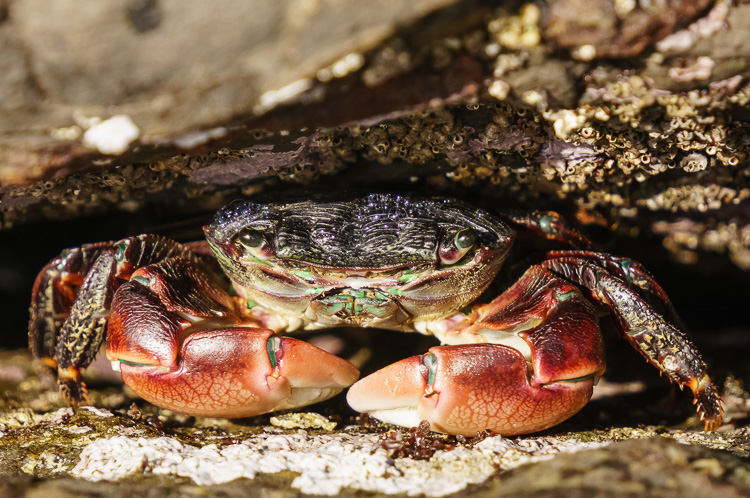
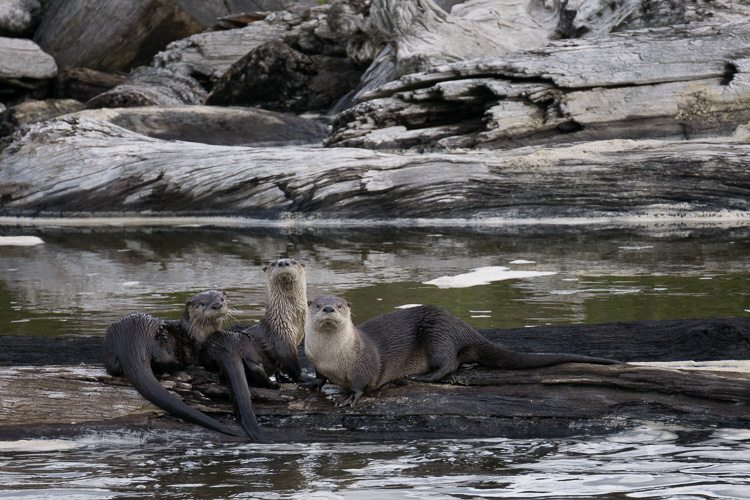
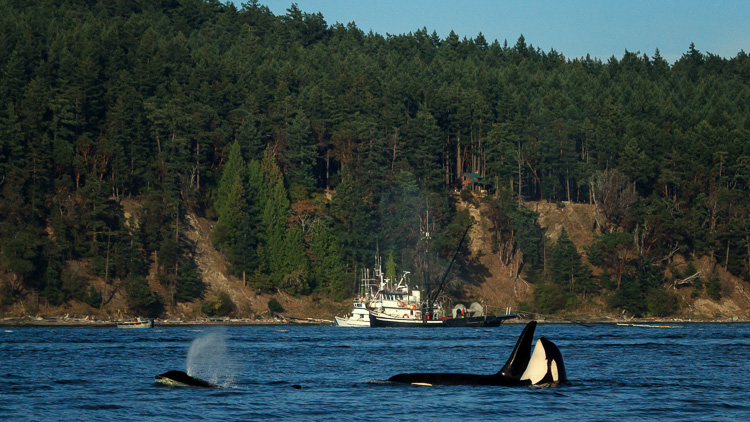
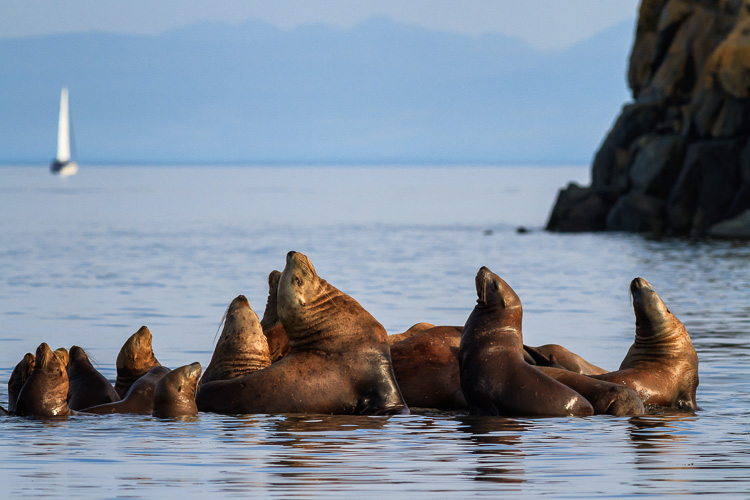
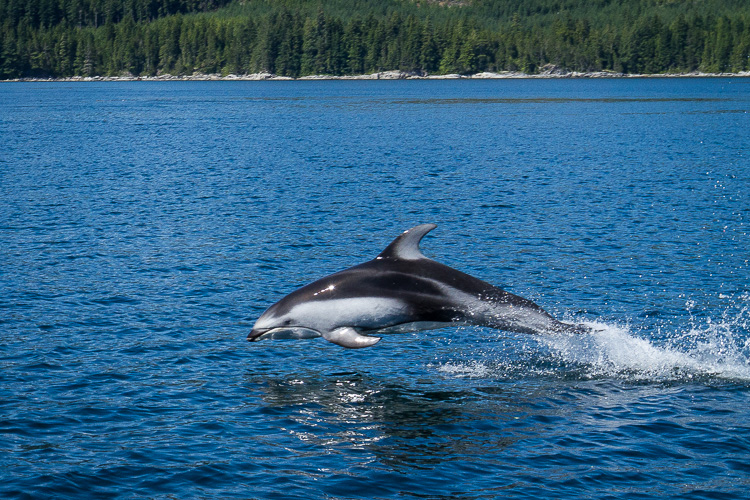
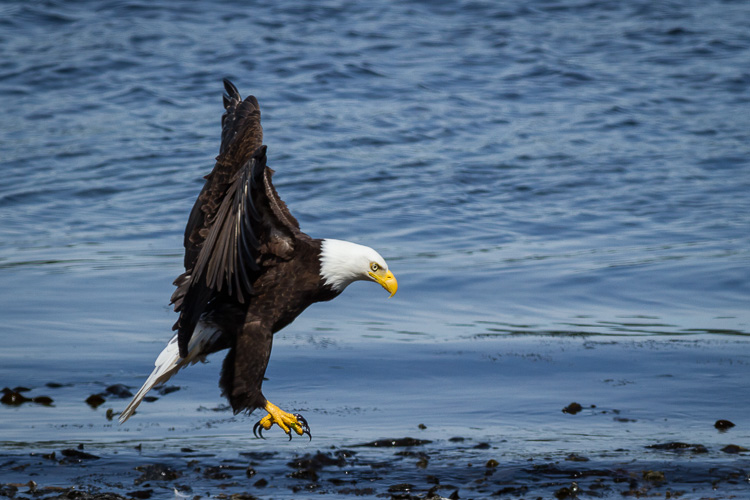
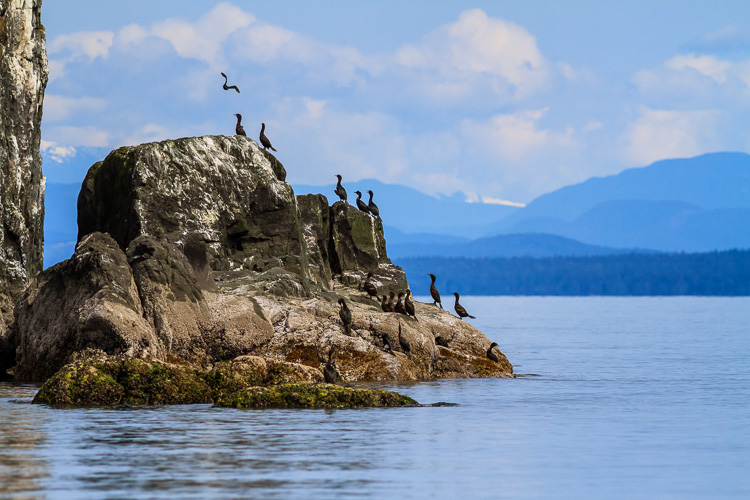
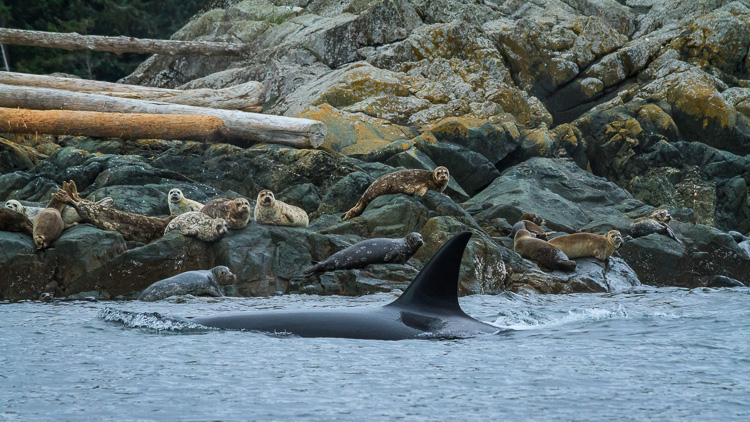
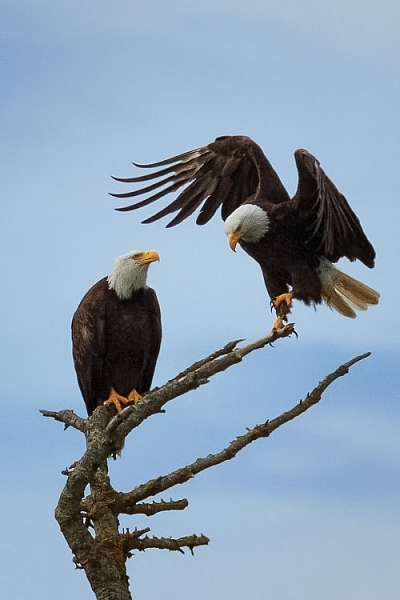
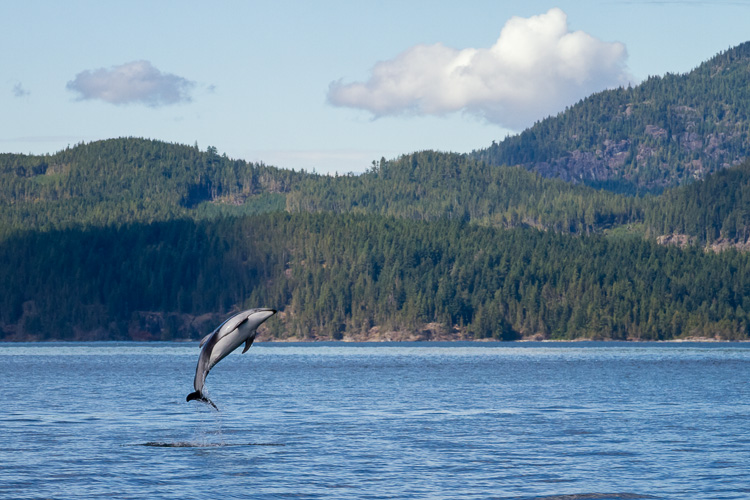
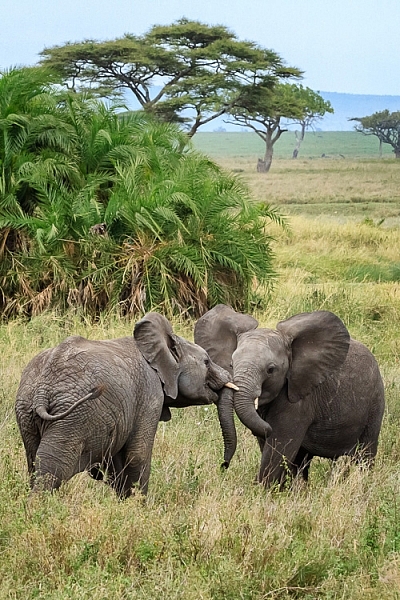
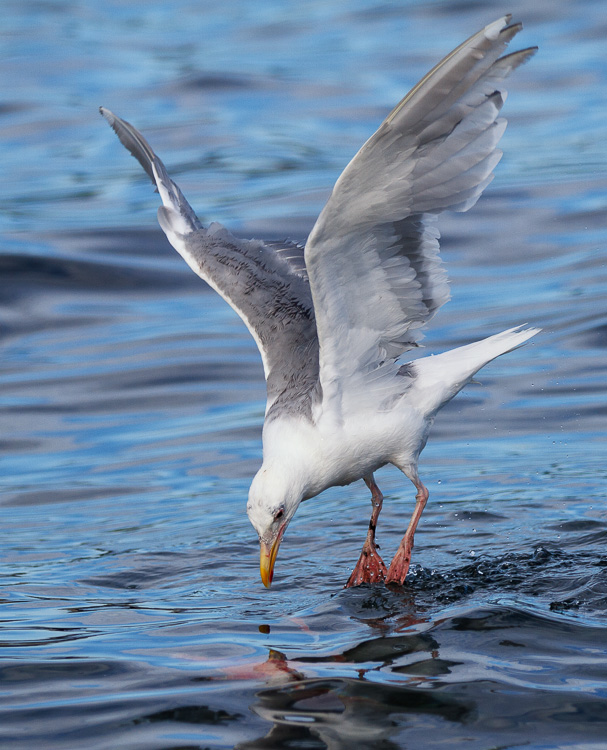
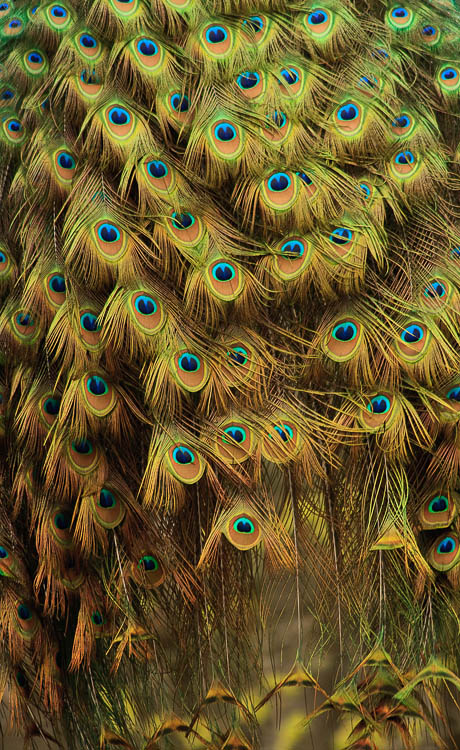
11 – Wildlife – domestic and truly wild

My daughter’s obsession with taking photos of cats in Morocco sticks with me as a reminder to not ignore the domestic animals, along with the wild. I’ve photographed big cats in India and Africa, tarantulas in Peru and breaching whales in Alaska. But, I’d be remiss if I didn’t convey the fact that the town of Essouira, Morocco, with its fresh fish markets, is a haven for cats of all kinds.

Breaching humpback whales, Alaska, USA

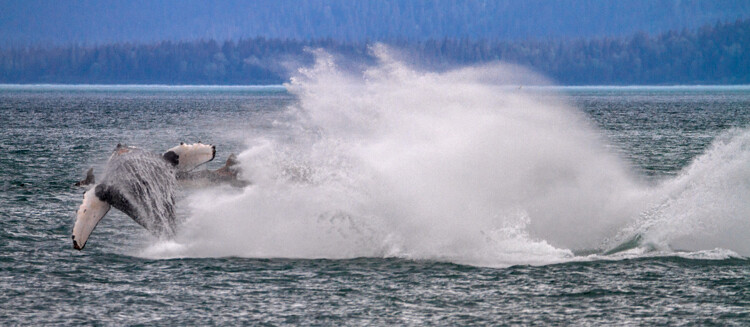
Humpback whales in Alaska, USA

FIghting Hippos, Serengeti National Park, Tanzania

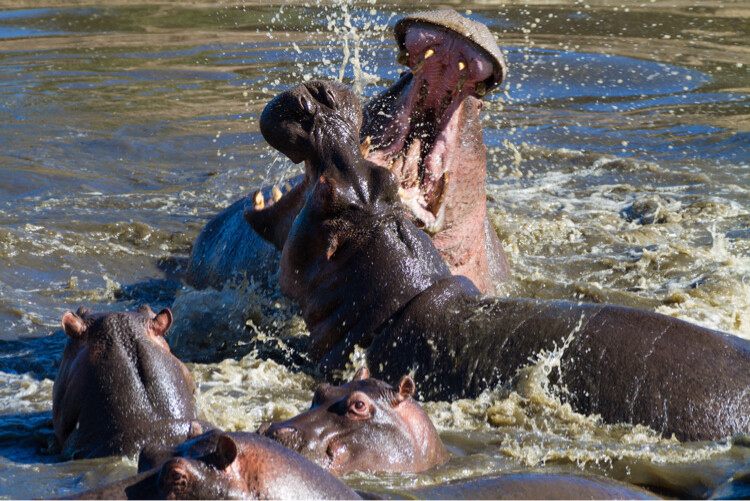
Fighting hippos in the Serengeti National Park, Tanzania

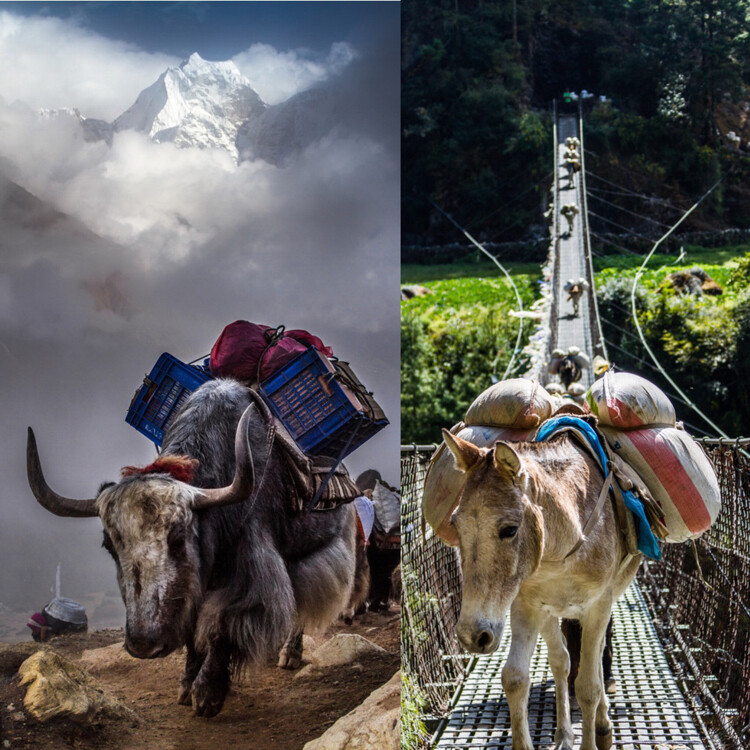
What about the beasts of burden? The donkeys, llamas, horses and camels? Put those on your list as well.

image

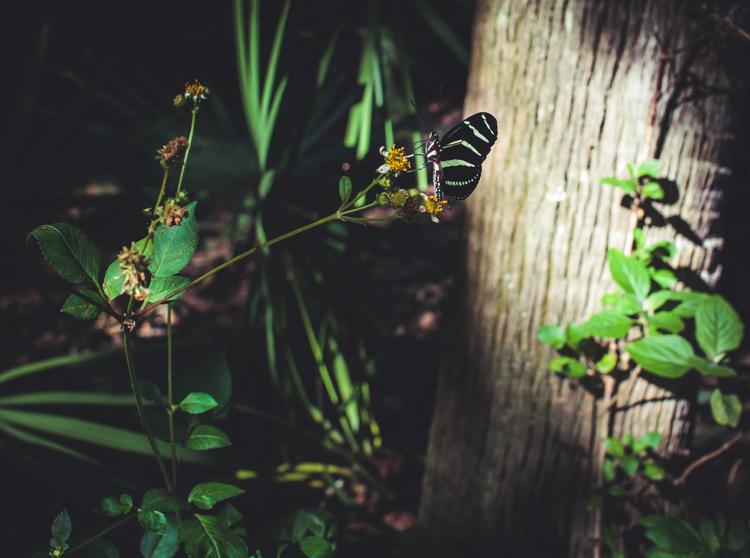
12 – All the pretty plants and flowers

Some of us just don’t care that much about plants. A green thing giving off oxygen at home is the same as a green thing giving off oxygen halfway across the world.

Rhododendrons in the Himalayas, Nepal

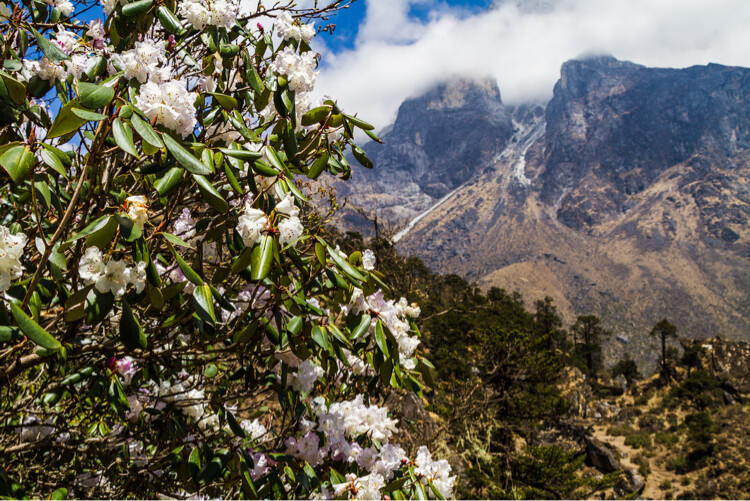
Rhododendrons at 14,000′ up in the Himalayas

But, I had no clue there were rhododendrons in the Himalayas of Nepal, much the same (but smaller), as both the ornamental and wild versions, I knew in Washington state growing up. When you get down to the tropics, the plants certainly get exotic, don’t they? Grab their wonderful colors and adaptations to share with friends back home.

Conclusion

This list can be just a start for your own customized version. Take it, shape it, make it your own. Put your favorite things on the list, but also keep those that don’t interest you. Growth as a photographer comes from trying new things and shooting new subjects.

Lastly, when it’s time to share your trip photos, I would suggest using 2-4 images from each category when making an online album. This will force you to pick only the best and it will give your viewers a good cross section of what you saw on your travels.

googletag.cmd.push(function() {
tablet_slots.push( googletag.defineSlot( “/1005424/_dPSv4_tab-all-article-bottom_(300×250)”, [300, 250], “pb-ad-78623” ).addService( googletag.pubads() ) ); } );

googletag.cmd.push(function() {
mobile_slots.push( googletag.defineSlot( “/1005424/_dPSv4_mob-all-article-bottom_(300×250)”, [300, 250], “pb-ad-78158” ).addService( googletag.pubads() ) ); } );

The post How to Use a Travel Photography Shot List to Come Home with Better Photos by Peter West Carey appeared first on Digital Photography School.


Digital Photography School

 
Comments Off on How to Use a Travel Photography Shot List to Come Home with Better Photos

Posted in Photography


Bowens introduces Limelight Mosaic LED panels with better color accuracy

21 Jun

UK lighting manufacturer Bowens has announced an update to its Limelite Mosaic LED panels that it claims is ‘significantly more colour accurate than previous models.’ The Mosaic2 panels boast a CRI and TLCI of 94 while the original models managed only 84, but the Mosaic2 panels are less powerful at 4000Lux@1m instead of up to 5200Lux@1m.

The new panels come in Daylight and BiColour versions with the BiColour model offering temperatures of between 3000-5600K. The lights are dimmable from full power to 0% and Bowens says their cool running temperature makes them suitable for a wide range of applications including shooting food. Both panels can be controlled remotely via an external DMX (Digital Multiplex) mixer which allows multiple panels to be controlled at the same time.

The daylight version will cost $ 834/£654 and the BiColour will be $ 1000/£835. For more information visit the Bowens website.


Press release:

Bowens launches groundbreaking Mosaic2 LED panels

Limelite by Bowens has announced the launch of groundbreaking Mosaic2 LED panels – with ultra-high CRI 94/TLCI 94 light output.

Available in Daylight (5600K) and BiColour (3000K-5000K) options, Mosaic2 uses 576 cutting edge high fidelity LEDs, dimmable from 100-0%, to create 1×1 panels that are extremely powerful and significantly more colour accurate than previous models.

Alan Walmsley, Bowens sales and marketing director said: “Mosaic2 is a powerful addition to our comprehensive portfolio of light tools. These new units, which target the full gamut of photo and video enthusiasts as well as working professionals, embrace the rugged build-quality synonymous with all Limelite products. They are quick to set up and easy to use. This is a truly multi-purpose lighting solution providing feature rich LED panels suitable for small or large studios.”

He added: “These metal-bodied panels, which weigh in at just 1.4kg, create high levels of soft, flattering light that can be further shaped and controlled with our comprehensive range of accessories.

They are also an ideal choice for photographers working with babies, small children and animals who might be startled by flash lighting. And users shooting heat sensitive subjects such as food will benefit from Mosaic2’s cool-running operation.”

The new panels, which will have an RRP of £654 (Daylight model) and £835 (Bi-Colour model), are also designed for video and broadcast work both in studio and on location (with optional battery mounting accessories)

Tim Haskell, Limelite business development manager said: “Mosaic2 1×1 LED panels are used by leading broadcasters and global news gathering operations. Mosasic2 can be controlled remotely via an external DMX mixer and multiple panels can easily be linked and used as a single panel.”

Mosaic2 key features:
*Outstanding colour fidelity
*Ultra-bright LEDs (up to 4000Lux@1m)
* Exceptional build quality
*Fully dimmable and user programmable
*Pre-mounted AC adaptor and international cable kit (use anywhere in the world)
*Wide range of light control, mounting and battery power accessories

Pembrokeshire-based photographer and Panasonic GH camera ambassador Ross Grieve added: “I trialled the new Mosaic2 lights and they are superb. They are now my go-to panels for events and training programmed. I also use them as reflectors when I need more bounce. These panels are child’s play to use and with full control over colour temperature and brightness I have all the power and control I need.”
bowens.co.uk

Articles: Digital Photography Review (dpreview.com)

 
Comments Off on Bowens introduces Limelight Mosaic LED panels with better color accuracy

Posted in Uncategorized


5 Tricks from Professionals to Help You Do Better Wildlife Photography

17 Jun

Whether professional or an amateur, most photographers who enjoy wildlife photography do it because we love being outside in nature, and we love to share our experiences of the world’s wild creatures. Carrying our cameras, and making images along the way, helps us to truly see and appreciate what nature has to offer.

Orca, also known as killer whales, hunting seals by Anne McKinnell

But there’s more to making a captivating wildlife photograph than simply having an animal in the frame. If you just snap a shot when an animal is in front of you, you may find that your photograph lacks the impact you were after.

Next time you are out in the wild, try out these five tricks that professional wildlife photographers use to capture the world’s wild creatures at their best.

1. Watch and Learn

Every one of the world’s many species of animals are different. You cannot photograph them all the same way. But, if you spend some time observing your creature’s behaviour, you’ll be better equipped to click the shutter at exactly the right moment.

Two bald eagles by Anne McKinnell

It’s all about that special moment when the animal is doing something – whether it’s flying, walking, making eye contact, or interacting with another animal. Like spending time with friends, you come to know when they are going to do a particular thing and what triggers a reaction. Once you observe and understand their behaviour, be patient, be quiet, and wait for the right moment.

We often think of wildlife photography as being exciting, but more often than not, better images are made when it is a quiet, contemplative experience.

2. Use Faster Shutter Speeds

Many a great wildlife photograph has been ruined when an animal moves faster than the photographer anticipated, resulting in a slightly blurry image. It has happened to us all. Try not to let that happen by increasing your camera’s ISO, which will allow you faster shutter speeds.

Pacific White Sided Dolphins by Anne McKinnell

Even when your subject is absolutely still, you never know when they’ll decide to move, and that could be the magic moment you’ve been waiting for. Be ready by using a shutter speed of at least 1/500th of a second.

3. Carry Two Camera Bodies

The most important thing is to capture that special moment, so don’t miss it by changing lenses. It’s better to pick two lenses to work with, and have each mounted on its own camera body. Then, when you need to switch, you simply put down one camera, pick up the other, and you’ll be ready to shoot in less than one second. I usually use one camera with a 70-300mm lens, and the other with a 400mm lens.

Two elephants playing in Serengeti National Park, Tanzania by Anne McKinnell

4. Don’t Get Rusty

You don’t have to wait until you have an exotic animal to work with! Keep your skills sharp by practicing with whatever animals are nearby. You might surprise yourself and come up with some of your favourite shots. Practicing with seagulls and geese, will ultimately improve your photos of cranes and spoonbills when you have the opportunity to shoot them.

Seagull looking at underwater sockeye salmon by Anne McKinnell

Try setting up a bird feeder outside your window and you can practice on the birds that come right to you.

5. Vary Your Compositions

Usually when we photograph wildlife, we want the animal to fill as much of the frame as possible. But once you get that shot, don’t keep making the same shot over and over. Try some different compositions, such as getting super close to just part of the animal. You can shoot just the eye, or zoom in on an interesting detail.

The tail feathers of a peacock by Anne McKinnell

Then try zooming out and photographing the animal and its environment. Also try to change your perspective. Get on eye level with your subject or try making an image from a lower angle.

By understanding your subject, having good techniques under your belt, and lots of practice, you’ll be well on your way to making more captivating wildlife photographs. If you have any other tips of tricks for wildlife photography please share them, and your images in the comments below.

googletag.cmd.push(function() {
tablet_slots.push( googletag.defineSlot( “/1005424/_dPSv4_tab-all-article-bottom_(300×250)”, [300, 250], “pb-ad-78623” ).addService( googletag.pubads() ) ); } );

googletag.cmd.push(function() {
mobile_slots.push( googletag.defineSlot( “/1005424/_dPSv4_mob-all-article-bottom_(300×250)”, [300, 250], “pb-ad-78158” ).addService( googletag.pubads() ) ); } );

The post 5 Tricks from Professionals to Help You Do Better Wildlife Photography by Anne McKinnell appeared first on Digital Photography School.


Digital Photography School

 
Comments Off on 5 Tricks from Professionals to Help You Do Better Wildlife Photography

Posted in Photography