RSS
 

Posts Tagged ‘Best’

Dpreview Users’ Poll: Best Camera of 2012?

22 Dec

Mysterians.png

Well, hasn’t 2012 gone by quickly? We’re nearly at the end of another year, and 2012 was one of the busiest that we can remember, as camera manufacturers regained some momentum after the worst of the economic downturn and various natural disasters. This year saw a lot of innovation and movement at the top of the ranges of biggest camera manufacturers, making it a fantastic year for photo enthusiasts and reviewers alike (even if we are completely exhausted at this point). So at the end of an incredibly busy year we want to know which cameras stood out for you. Click through for a link to our end-of-year poll. 

News: Digital Photography Review (dpreview.com)

 
Comments Off on Dpreview Users’ Poll: Best Camera of 2012?

Posted in Uncategorized


Best Practices for Communities on Google+

21 Dec

Community Coffee

I love communities. There are great big giant communities that are social networks themselves, but then there are smaller and more intimate communities where over time you really do get to know people better. These have always been the communities that I end up liking best. Places where you can go and eventually some really cool people end up setting up part of their daily internet experience there. I used to use Flickr groups for these sorts of communities, now I use Google+ (for a lot of specific reasons).

Google+ communities are new though and so I thought I’d take a few minutes to point out some best practices for how to engage, grow and participate in communities.

1. If you are starting a new community yourself, there are several important things to think about. How you manage and grow your community will have a lot to do with the success. For starters, you must be committed to moderating the community. This means showing up, doing a lot of the grunt work (removing spam, managing members, etc.).

I think it’s important to be as friendly as you can and to welcome new members personally even when you have time.

It’s also important that you grow the community. If it is a public community, try and get the word out. Promote your community on Twitter, Facebook, Flickr and your other social networks. Be sure to use the invite feature on Google+ to invite your friends — you may have to break down some of your larger circles into less than about 190 blocks of individuals if you want to invite a circle. Did you know that you can “share” your community to your current G+ stream? Consider putting a link to your G+ community on your G+ profile page. Don’t over invite someone to your community though. If you invite them once and they decline that’s probably enough. If you keep inviting them you will feel spammy.

Think about why you are starting a community. Should you even start one? What is unique about yours? Does it make sense to start a new general community for photograpy, or is there some unique area of photography you want to explore (portraits, urbex, long exposure, a specific geographic area, etc.)

2. Communities are best started with a closer group of friends. Find some of your friends who share your passion for whatever your community is about and make them mods. Make sure that they are on board with helping to manage, grow and promote the community as well.

3. Be nice. The worst communities are full of negative people. Try to avoid these types as much as possible — not just on Google+ but in life in general. :)

As a leader of a community especially it’s your job to try and set the tone. I’m all for free speech, but I’d recommend against allowing bullying and harassment in your community. If you see it call it out gently. If someone is a real problem or trolling consider banning them.

4. As a participant in a community be thoughtful when you join a community. Are there rules? Try to figure out what these rules are. Try to engage with others on their posts first before starting lots of your own. Nobody likes spam. Don’t just show up to a community to post your photos and leave, or to promote some other community and leave, or worst of all dump commercial spam or links to stupid websites. Make sure you are posting the right thing in the right area. Some communities don’t want you to post dumb mind numbing photos in the discussion threads. Maybe there is a specific place for you to dump your photos. Find out where that is first.

5. The best communities are about discussions. Participate in these discussions. Find good ones that you like and get to know people through participation. +mention people specifically by name in community discussions. Unfortunately Google+ communities don’t bump threads yet :( and so this may be the only way that someone knows you are engaging them in a conversation in a community of fast moving threads.

6. Consider adding the most active members of your community to a specific circle. This helps you look at their stuff outside of the community as well. Circle sharing is also a great way to help promote your community. For the main community that I’m involved in, Light Box, I’ve created a circle for everyone who gets a photo voted into our Light Box. I shared it when it hit 100 members, 200 members and will share it next when it hits 500 members, 1,000 members, etc.

7. Pro Tip (thanks Ricardo Lagos): When you start a community make a separate private community just for your mods. Here you can hash out issues that come up with the community. You can discuss problems together privately and discuss policy issues. While you certainly will want to get the larger community opinion on the guidelines or direction of your community, having a smaller place for those most invested to figure things out is good too.

8. Add different sections to your community. Create an FAQ.

9. Try out different communities, but don’t try out too many. I think it’s a good practice to check out a bunch of communities to see where you like hanging out. Different communities will have different flavors. If you spread yourself too thin though it will be harder to get to know people there. Take some time finding a few communities that you really like and then once you settle in invest more time with those communities. Remember the key to enjoying a great community is individual participation.

10. Remember not to neglect your other participation on G+. It’s easy to get sucked into a community and end up spending all of your time there. As much as communities can become really nice little watering holes where you become better friends with some members over time, remember that the world is big and that one of the things that still is nice about G+ is that there is a whole big network out there without community walls. Some people will not want to join communities. Some people don’t have TIME to join communities. Make sure to take some time keep up with these folks as well. :)


Thomas Hawk Digital Connection

 
Comments Off on Best Practices for Communities on Google+

Posted in Photography


10 Best Photography Books for Beginners + 20 More to Consider

20 Dec

Searching for a good photography book can be a quite difficult task that may simply waste your time and efforts. So I decided to help you in this pursuit. I have been browsing the web and reading customers reviews for two days in order to find the best photography books for beginners. Here I have collected 10 photography books recommended Continue Reading

The post 10 Best Photography Books for Beginners + 20 More to Consider appeared first on Photodoto.


Photodoto

 
Comments Off on 10 Best Photography Books for Beginners + 20 More to Consider

Posted in Photography


Dpreview Users’ Poll: Best Camera of 2012?

20 Dec

Mysterians.png

Well, hasn’t 2012 gone by quickly? We’re nearly at the end of another year, and 2012 was one of the busiest that we can remember, as camera manufacturers regained some momentum after the worst of the economic downturn and various natural disasters. This year saw a lot of innovation and movement at the top of the ranges of biggest camera manufacturers, making it a fantastic year for photo enthusiasts and reviewers alike (even if we are completely exhausted at this point). So at the end of an incredibly busy year we want to know which cameras stood out for you. Click through for a link to our end-of-year poll. 

News: Digital Photography Review (dpreview.com)

 
Comments Off on Dpreview Users’ Poll: Best Camera of 2012?

Posted in Uncategorized


Best Equipment Setup for Beginner Photographers

19 Dec

www.snapchick.com SnapChick talks about the best DSLR setup for beginner photographers.


Blog Project: Your Best Photos From 2012

17 Dec

As has become a tradition on the JMG-Galleries blog I’d like to invite you to take part in the 6th annual best photos of the year blog project. This is by far my most popular blog project. Year over year this project has continued to rapid increase in participation with last years participation hitting 289 participants (see Best Photos of 2011, Best Photos of 2010, Best Photos of 2009, Best Photos of 2008 and Best Photos of 2007). Around this time of year people start to ask if I’d be running this project again. The answer clearly is YES! 1. I love this project and I love that so many people get excited about it. 2. It’s a great way exercise to improve your photography (10 Ways to Top Your Best 20xx Photographs). So with out any further delay here is how you take part to submit your best photos of 2012.

How to Participate (Read Carefully)

  1. Review & select your best photos from 2012.
    Note: Photo edit carefully narrowing down your results to your best 10 or 5 photos. Reference Pro Tips: Photo Editing with Gary Crabbe for pointers.
  2. Create a blog post on your web site or a Flickr/500px set containing your best photos from 2012.
  3. Complete the form below by Saturday JANUARY 5th at 11:59PM PST to take part. The following Tuesday I’ll post a link to all submitted sites and photos on my blog. Through out the week I’ll also share the results across all my social media accounts.

Spread the Word!
Feel free to spread the word of this project on Twitter, Facebook, Google+, photo forums you frequent and/or your blogs. All who are interested in taking part are invited.


Thanks again for taking part and spreading word of this years Best Photos of 2011 blog project.

Copyright Jim M. Goldstein, All Rights Reserved

Blog Project: Your Best Photos From 2012

The post Blog Project: Your Best Photos From 2012 appeared first on JMG-Galleries – Landscape, Nature & Travel Photography.


JMG-Galleries – Landscape, Nature & Travel Photography

 
Comments Off on Blog Project: Your Best Photos From 2012

Posted in Equipment


Tell us About the Best Shot You Never Got Due to Malfunction & WIN a JOBY UltraFit Sling Straps

12 Dec

UltraFit_SlingStrap_iso.jpg
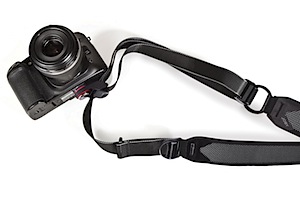
I’m excited today because one of our sponsors – and good friends – JOBY are offering to give 5 of our readers 2 of their UltraFit Sling Straps in a competition today.
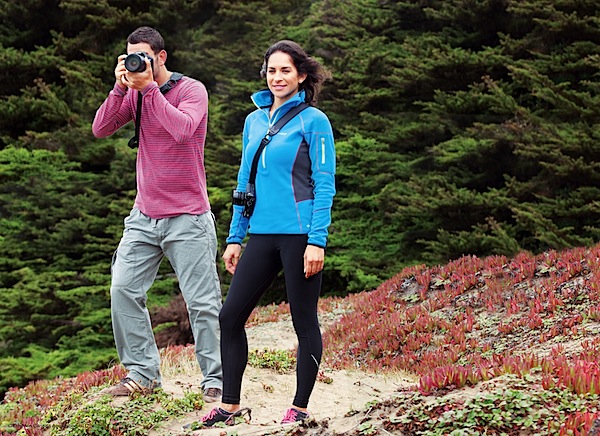
To win all you need to do is to leave a comment below telling us about:

The Best Shot You Never Got Due to a Malfunction with your Gear.

That’s right – if you’re mourning a shot you never got due to a dead battery, a lens cap not taken off, a broken camera or a camera strap that got in the shot now is the time to get some pay back!

Our friends at JOBY have launched their revolutionary UltraFit Sling Strap that adapts from cinched to shooting so you never miss a shot and now they are offering it for you.


UltraFit_SlingStrap_Family_0185.jpg

To win the prize of 2 straps (1 for you and 1 for a friend) simply tell us about your photography malfunction in 50 words or less in comments below and JOBY will provide YOU with the straps for the holidays.

About JOBY UltraFit Sling Strap

Never miss a shot with the new UltraFit Sling Strap from JOBY that makes your photography comfortable, quick and more fun.  The SpeedCinch system allows for easy extension and quick ability to cinch to your body for stability; you can also lock the strap in cinched position for added security. The comfort is all in the design; male and female straps with the UltraFit Layered Pad Technology and S-curve designed specifically for the female body.  The strap easily and securely attaches to your DSLR or CSC camera with the LockSafe ¼”-20 Attachment™. See it in action.

Check out a demo of the straps by JOBY in this video:

UltraFit Sling Strap for Women by JOBY from JOBY Inc on Vimeo.

The Prize and Conditions of Entry

5 dPS readers will be chosen from the comments left below. Each winner will receive 2 UltraFit Sling straps. One for them and one to give to a photography loving friend! To enter leave a comment below telling us about the shot you missed due to a gear malfunction before midnight US Eastern time on Friday 21st December. JOBY will choose the winners and we’ll publish their names here on the dPS blog in the following week.

Conditions: There is one entry per person and entries are open to our global audience (we’ll get your prize shipped to you anywhere in the world).

So get to it – in comments below tell us about the best shot you never got due to a Malfunction with your gear! Good luck!

Post originally from: Digital Photography Tips.

Check out our more Photography Tips at Photography Tips for Beginners, Portrait Photography Tips and Wedding Photography Tips.

Tell us About the Best Shot You Never Got Due to Malfunction & WIN a JOBY UltraFit Sling Straps


Digital Photography School

 
Comments Off on Tell us About the Best Shot You Never Got Due to Malfunction & WIN a JOBY UltraFit Sling Straps

Posted in Photography


The Best Thing For Your Smartphone Images

08 Dec

Set Your Smartphone Pictures Free

For the photographic community I think it’s fair to say that the jury is still out so far as the legitimacy of smartphone photography goes. Some say that it’s a fad, others that it is the future. Although I am no evangelist, I do think that the quality of images now achievable is pretty impressive and I can believe a future where the point and shoot is surpassed by the smartphone camera. As you can probably tell, I love taking pictures with my camera phone.

So if you are like me your phone is probably jammed with all kinds of images none of which do anything more than live on your handset or PC.  I have always been a massive fan of printing my images, there is just something so satisfying about taking a picture from conception to capture and finally on to paper yet for some reason we don’t think that this applies to the pictures we take on our phone.  Recently I discovered the joy of printing images directly from my phone and I can hand on heart say that it’s the best thing you can possibly do with your smartphone pictures.  Just in case you aren’t sure how to get started here is a short guide:

Disclaimer – The steps below cover wireless printing from the iPhone (just because it’s the only smartphone I have).   It is possible to print from Android handsets however the operating system doesn’t (I believe) do this natively so you may need to download an separate app to do this but the process should be broadly similar.

  • The printer – The best way to print directly from your phone is by using a wireless printer however not all printers support Apple AirPrint so don’t forget to check that your printer is compatible.  The Apple website contains a list of compatible printers however its worth checking your printer manufacturers website also.
  • Get your media – You can print on any media which your printer can handle however my preference is to use one of the various pre cut photo papers which are readily available online or in any stationary store.  I personally like to print on 6 x 4 glossy sheets as I find that this give a pleasing balance between image size and quality.  You can go larger if you like but don’t forget that the maximum size you can print and maintain image quality will be dependent upon the resolution of your camera.   A batch of 50 sheets retails in the region of £5 (about $ 8 US) so assuming you already have a printer its a pretty cheap investment.

Printing

As iOS have inbuilt support for wireless printing (via AirPrint) sending your images to your printer is actually very simple.  Check out the video below to see the actual process but in summary here are the main steps:

  • Navigate to your Photos app.
  • Select a photo to print.
  • Tap the share icon (the one with the pointing arrow).
  • Tap the print icon.

Summary

Printing from your phone is a fantastic way to make more of your smartphone images and is an especially good way to share your mobile masterpieces with friends and family.  Having recently discovered the joys of printing from my phone I can highly recommend giving this a try, its cheap, easy and a great way to bring your smartphone pictures to life. Enough said!


Post originally from: Digital Photography Tips.

Check out our more Photography Tips at Photography Tips for Beginners, Portrait Photography Tips and Wedding Photography Tips.

The Best Thing For Your Smartphone Images


Digital Photography School

 
Comments Off on The Best Thing For Your Smartphone Images

Posted in Photography


How to Pick the Best DSLR Lens – WOMP

05 Dec

In this episode we do a shoot-out of four brands of “professional” lenses to see which is best for your DSLR. What is the best lens to spend your hard-earned cash on? Do the camera-brand lenses from Nikon and Canon outshine the much-cheaper 3rd party kit? To save your sanity when shopping for a lens, we put them head to head. It’s a complicated topic, and for sure there are some things that are beyond the scope of the video. So if you’re really considering purchasing one of these lenses, check out the more-detailed write-up at www.crisislab.com. Featuring Kevin Good, John Pellett, Shanta Parasuraman Created with the tireless help of:: Paul Good, Jenna St. John Music: The Static www.the-static.com (recorded at Sonic Sweets) ossi & (c)AndyBoy! soundcloud.com Thanks to: Marc Alexander, Suzanne Robertson Want to figure out the right lens for your camera? In this episode, Kevin runs an entertaining experiment on the best 24-70mm f2.8 lenses available, the Canon EF, the Nikon AF-S, the Tamron SP, and the Sigma, to see which one holds the most bang for its buck. Elements like the best sharpness, bokeh, vignetting and brightness, and optical stabilization are put into account, and Kevin and John pick their winner. Let us know in the comments what you think! Canon EF 24-70mm f2.8: rcm.amazon.com Nikon AF-S: rcm.amazon.com Tamron SP: rcm.amazon.com Sigma: rcm.amazon.com Subscribe to BAMMO: bit.ly Share on Facebook: ow.ly and Twitter: ow.ly Created by: Kevin Good Executive Producer

 
Comments Off on How to Pick the Best DSLR Lens – WOMP

Posted in Nikon Videos


Make Your Last Shot Your Best Shot

30 Nov

Lately I’ve noticed a common occurrence when I review my images from a photo shoot. More often than not the very best frame is the last one.

I think it’s because I’ve been pushing myself further than I used to by consciously carving out my vision of the subject.

For example, when I was in Charleston, South Carolina, I scouted out a beach location that had a lovely pier and faced east. Perfect for sunrise. I got up extremely early, while it was still dark outside, went to my location flashlight in hand and got set up for the morning’s first rays.

When the sun came up it didn’t take me long at all to get the shot I had envisioned. Here it is.

Pier at Folly Beach, Charleston, South Carolina.

There were a couple of other photographers on the beach that morning too. They had come down from the nearby swanky beachfront hotels and made images that were probably very much like the one I made. Then they went back.

I bet they were just in time for breakfast. My mouth watered a bit as I imagined what they were in for. Mmmm, yummy bacon, croissants still warm from the oven, a cheesy omelet. I looked back towards the hotels and paused for just a moment before my conscience told me “NO! FOCUS!” and when I looked back the light had changed just a bit and I smiled knowing I was going to make images that were even better than my initial vision.

When I am at a scene, I always try to focus on whatever attracted my attention in the first place. In this case it was the pier. Sure, the beach was lovely and the sky was lovely, but it was the pier that made this place different from any other beach.

I moved closer and closer to the pier, simplifying the composition, using a different point of view and different lenses to arrange the elements of the scene until I got these two images, neither of which I had envisioned before the shoot.

Pier at Folly Beach, Charleston, South Carolina.Pier at Folly Beach, Charleston, South Carolina.

I carved out my vision of the subject and removed elements from the scene until I was left with only a small portion of what was in my initial image.

A similar thing happened when I was at Green Point in Gros Morne National Park in Newfoundland, Canada. I went down to an east facing beach for a sunrise shoot and made this image.

Green Point Beach, Gros Morne National Park, Newfoundland, Canada.

There was a very similar scene looking at the beach in the other direction.

Green Point Beach, Gros Morne National Park, Newfoundland, Canada.

But after that, then what? The thing that was different about this beach than any other I had been on were the pinkish granite stones the size of footballs. And I couldn’t help but give them my attention since they were extremely difficult to walk on. They were wet, each one moved as I stepped on it, and when the powerful atlantic waves came in I had to grab my tripod and rush up the beach for fear of being swept away. It was the stones that were the attracting feature.

So I changed my point of view by getting down low, used my wide angle lens to get in close, and removed all other elements from the scene to make this image.

Green Point Beach, Gros Morne National Park, Newfoundland, Canada.

The next time you go on a photo shoot think about carving out your vision of the subject and being conscious of what you want to express in your image by answering these questions:

  • What is your photograph about?
  • How can you arrange the elements of the scene to bring out your subject’s best quality?
  • What elements are best left out?
  • What is the true subject?
  • What kind of effect do you want the subject to have on the viewer?

Get closer and closer to your true subject, changing your point of view, and removing elements from the scene until you get that shot that expresses your vision.

You will find that your compositions improve as you go and you might find too that your best shot is your last shot.

Post originally from: Digital Photography Tips.

Check out our more Photography Tips at Photography Tips for Beginners, Portrait Photography Tips and Wedding Photography Tips.

Make Your Last Shot Your Best Shot


Digital Photography School

 
Comments Off on Make Your Last Shot Your Best Shot

Posted in Photography