RSS
 

Posts Tagged ‘Beginners’

DPReview Recommends: Best Cameras for Beginners

26 Nov

Screen_Shot_2013-11-25_at_4.39.37_PM.png

It’s that time of year when thoughts turn to gift-giving, and photography is more popular than ever before. Choosing a first camera is extremely important. If you’ve got a friend or a family member who’s taking his or her first steps into the world of photography, we’ve prepared some recommendations for you, from best cameras for absolute novices, up to models more suitable for a student or budding enthusiast. This is the first in a series of articles giving our current recommendations for various different people and scenarios. Click through to read more.

News: Digital Photography Review (dpreview.com)

 
Comments Off on DPReview Recommends: Best Cameras for Beginners

Posted in Uncategorized


Studio Lighting Tips For Beginners

04 Jun

Even as a new photographer you’ll no doubt be aware of the not-so-secret ingredient to creating stunning photographs – lighting. But there are so many things to consider so where do you start? This article will hopefully ‘shed some light’ on some basic but important techniques to improve your shots.

Choose the best light source

Remember that your lighting setup should depend on the purpose of your shoot, the time of day (if you want natural light), and what you’re capturing. Your first task therefore is to choose the right type for the job. So without further ado here’s a breakdown of the main lighting sources and what they’re best for:

  • Continuous light sources, as the name implies, stay lit continuously much like a lightbulb or tube. They’re a great option for beginners on a budget as they’re generally much cheaper than flash lights. A big benefit is that they immediately show you where shadows will appear in the studio. Be wary that such lighting tends to release a lot of heat – not ideal for photographing human subjects for long periods.
  • Flash lighting tends to be a lot more powerful than continuous equipment and is great for capturing quick-moving subjects – for instance when you’re shooting a family session in your studio with energetic children running about.
  • Natural light isn’t for everyone. It can boost portraiture shots with a realistic, natural quality when there’s plenty of it (and vastly reduces the strength of catch light in the eyes). However, if there isn’t enough, it can have an adverse effect on your subjects – giving them a dull, dark look. If your studio allows for a good amount of natural light though, I do recommend you at least give it a try.

Portrait photography ideas

An excellent way of brightening up your portraits without using harsh lighting is by utilising a reflector. Simply sit your subject near a window and place a reflector up to a metre from their face – the natural light bounces off, illuminating the portrait and filling up unwanted shadows. Don’t want to spend lots on a reflector? Make your own! Simply use a sheet of card covered in tin foil. You’ll be surprised how effective it is.

studio-lighting-tips-beginners

Also, try experimenting with the angles of the light source in relation to your subject. Small angle adjustments can make big differences to the look of your photos. As a general guide, lighting from a person’s side produces more of a shadow-heavy yet dramatic style, whilst placing the light behind creates a silhouette. To emphasise your subject even more, or to highlight a particular aspect (such as their hair), try experimenting with a second flash light. We do of course recommend you master a one-flash set up first before taking on two.

Photographing children

As we suggested before, using continuous light sources near people can sometimes cause discomfort due to the high amount of heat they emit, and is even more of a concern for young children. If there’s sufficient natural light available, it’s best to use that. Otherwise, opt for a softbox attachment. For movement-heavy shoots, go for flash.

lisa2

For older children I suggest utilising both flash and continuous. Softboxes help brighten children’s already cute faces and you may want to try large umbrellas to really enhance the catch lights.

Lisa Gill is a professional photographer who also teaches a range of courses from her studio in Buckinghamshire, UK.
http://www.lisagillphotography.co.uk

dslrBlog

 
Comments Off on Studio Lighting Tips For Beginners

Posted in Photography


An Introduction to Photoshop Compositing for Beginners

26 May

by Sarah Hipwell

NewImage

What is compositing? Simply, it means to combine two or more images to make a single picture.

As a photographer, I’m constantly coming up with different concepts that I feel might make a good photo. But it is not always possible to get the perfect shot in one session. There have been numerous occasions while on a shoot where the light was not bright enough for the particular shot that I had in mind. On other occasions the background was too distracting. This is where the ability to create composite imagery in Photoshop is a huge advantage.

To produce a composite image in Photoshop, you need to isolate the subjects from the background of your various source photos. When I started out, I used the pen tool to help isolate my subjects. Now, I use the ‘quick selection’ and ‘refine edge’ tools which are superb and are a much faster way of doing extractions, especially for isolating hair!

But for this tutorial, I’m going to use the pen tool to create a path which I then save this as an alpha channel selection. I believe the pen tool should never be overlooked as an excellent way for beginners to increase their proficiency level with Photoshop. If you are new to using the pen tool, it does take a bit of getting used to but after time, you will pick up speed and accuracy. The big plus side to creating paths in this way is that they are re-editable and non-destructive.

I have highlighted three key features:

  1. Selection. Good selections are critical for compository work
  2. Composition.
  3. Uniform color balance and light.

Here’s the method:

  1. The Pen Tool – With the Pen Tool selected in the toolbar, choose a starting point on the photo, click and drag around the area to be selected. This will create a path outline to be saved in the Paths Palette.
  2. Place the images – When I want to bring other images into a composite, I prefer to Place them into the file. What this means is that the image is brought into your psd file on a separate layer as a Smart Object. The photo can be moved into position, made larger or smaller without affecting the quality.
  3. Match Color – When all the elements of the photo are edited and in place, I use Match Color tool as an effective way to balance the color between the two images.

NewImage

I took the photo above for a concept shot titled ‘Recycled toilet paper’. I wanted a bright blue sky with white fluffy clouds as the background. The above shot did not have the background that I wanted. So I waited a couple of days and I got the shot I wanted. See below:

NewImage

I made my selection using the pen tool to isolate the toilet rolls and clothesline. Zoom in up to 300 – 400% to get a good outline, as shown below.

NewImage

Holding down the Alt/Ctrl key enables you to move anchor points and direction lines and again make any edits to your lines and curves.

When you have finished plotting your anchor points, you can then save this outline in the Paths Palette. This selection can then be added as a layer mask. It should resemble the black and white image on the right below.

NewImage

I imported the new sky background by going to the File menu and select Place. The image then appeared as a Smart Object and on a separate layer. I had to reduce the size but the quality of the image was maintained.

When I was happy with the position of the new sky background, I merged all the layers onto one. I used a keyboard shortcut (Cmd/Ctrl+Alt+Shift+E) to achieve this. The reason for this is that the next adjustment isn’t non-destructive so that if I want to redo this edit, I would have to delete the layer and repeat the above step again.

The final adjustment was to go to Image menu and select Match Color to make sure the color is balanced between the two images. Using Image>Adjustments>Match Color I played with the two sliders to get the color of the image more uniform in appearance. See the link below where I uploaded the final composite image to iStockphoto.com

http://www.istockphoto.com/stock-photo-6231026-recycling-toilet-paper.php?st=faf18be

See more of Sarah Hipwell’s work at her website – SarahHipwell.com

Post originally from: Digital Photography Tips.

Check out our more Photography Tips at Photography Tips for Beginners, Portrait Photography Tips and Wedding Photography Tips.

An Introduction to Photoshop Compositing for Beginners


Digital Photography School

 
Comments Off on An Introduction to Photoshop Compositing for Beginners

Posted in Photography


The 10 Ultimate Camera-Care Tips for Beginners and Experts Alike

29 Mar

The most important thing you can do for your camera is to take care of it well. If you look after your camera properly, it will reward you with a long life. A lot of people know how to take pictures, but not everyone knows how to extend the life of their camera through proper care. If you want to Continue Reading

The post The 10 Ultimate Camera-Care Tips for Beginners and Experts Alike appeared first on Photodoto.


Photodoto

 
Comments Off on The 10 Ultimate Camera-Care Tips for Beginners and Experts Alike

Posted in Photography


Photography Tutorials/Lessons for Beginners EP3-Expert Shooting Modes?7d,t3i/600d,t2i/550d,t1i/500d

05 Jan

CLICK HERE TO SIGN UP FOR MY MONTHLY NEWS LETTER: eepurl.com Pick up an “OH SNAP” T-Shirt! kreativevuetv.spreadshirt.com Follow me on these social outlets: www.un-WIREDTV.com http www.twitter.com www.instagram.com KreativeTechLA.blogspot.com http ================================================= In this episode I’ll show you all the different expert shooting modes available on your DSLR camera. Although each camera manufacturer may display these expert shooting modes slightly differently, they all function the exact same way. If you currently own or just purchased a DSLR, you have probably at one point thought to use these expert shooting modes, but just stayed away from them from a lack of understanding. DON’T WORRY! By the end of this tutorial, you will have a complete understanding of what each expert shooting mode does and when to use it.

Just some of my many pictures from iceland with my Nikon D3000 camera. Feel free to comment or suggest ways for me to take better pictures! I am just a novice and hoping to get a little more into photography so please no hate! If you subscribe i can make more videos! Song is Coldplay – Hardest Part I used both 18-55mm and 55-200mm lens.
Video Rating: 5 / 5


10 Best Photography Books for Beginners + 20 More to Consider

20 Dec

Searching for a good photography book can be a quite difficult task that may simply waste your time and efforts. So I decided to help you in this pursuit. I have been browsing the web and reading customers reviews for two days in order to find the best photography books for beginners. Here I have collected 10 photography books recommended Continue Reading

The post 10 Best Photography Books for Beginners + 20 More to Consider appeared first on Photodoto.


Photodoto

 
Comments Off on 10 Best Photography Books for Beginners + 20 More to Consider

Posted in Photography


For Beginners – Learning to See

16 Dec

A granite shoreline on a local lake offers endless opportunities for images.


Photography is about vision – real or perceived.

Before we take the camera out of the bag we must first learn to look at what we are seeing, and to see at which we are looking.

Often times beginning photographers will stop dead in their tracks and in haste put the camera to their eye. Then the search begins, the human form will go through contortions resembling those of Gumby and Pokey while the lens is zoomed in and out, raised up and down, and enough gadgets are incorporated to leave any mechanical engineer in awe.

The fact of the matter is that once we have recognized a scene worthy of photographing, the one element that often fails in the process is the inability to see, to really see, what it was that stopped us in the first place.  Once the camera is raised to the eye you should be looking at what it was that you had earlier seen, thus, the camera simply becomes a mechanical device to record the image that the grey matter located four-inches behind the viewfinder has already registered.

So, “how do we learn to see,” you might ask?

This is a million dollar question, and hopefully, the answer is one that you will chase for as long as you are physically able to hold a camera. As we learn to see we incorporate a vision or style, and as you journey along this wonderful path you will find that you will revisit that same subject in a different light as your vision and style evolves. This is healthy and shows a maturity and progression.

But first we must give our eyes exercises so the act of seeing becomes an intuitive process.

As we learn to read, we read slowly by studying each syllable of each word, and annunciating those syllables aloud. As our reading skill improves we learn to read silently, and eventually will often be speed-reading by skipping or scanning words in our left-to-right habit instilled form. We don’t see every word, we just intuitively know what noun, verb or adjective is next simply by scanning that line.

This is a problem for the new photographer. For years we have trained ourselves to not only read, but also to look from left-to-right, and as such we often skip over pertinent details.

A backyard garden is a prefect training ground for the nature photographer. Get down low and study those flowers to see what surprises may be waiting.


One of the first tricks I learned many years ago had nothing to do with photography, but was drilled into me by an army sergeant. It only took a few smacks up the back of my head to learn how to look from right-to-left when scanning a landscape in an effort to see the hidden “enemy” in our mock battles. This process of reverse reading forced me to slow down and read each tree as if it were a syllable I was seeing for the first time. Even today, about thirty years after I called that sergeant every adjective not found in a descent dictionary, I still find myself scanning a landscape from right-to-left.

If you don’t believe this will help in your visual acuity, just read the first line of any paragraph in this column. Notice how your eyes skip and jump ahead of what your mind is absorbing? Now read that same line from right-to-left, I’ll bet you are even turning your head with your eyes as you slowly study each word.

Now put this skill to practise. When you are out at your backyard bird feeder, or at the neighbourhood park, start scanning those trees looking for birds from right-to-left. Soon this will become an intuitive process, and you will see more birds in the forest or spiders on flowers than you ever imagined. Only by seeing that bird or spider can you then make a picture of it.

As the great purveyor of quotes, professional baseball player Yogi Berra, once said: “You can observe a lot by just looking around.”


By training our imagination at the same time as our eyes, a whole new world of opportunities can open. This lake is a centuries-old canoe route for the indigenous aboriginal community. By rotating the image I imagined the Great Earth Mother with arms and hands holding her pelvis and the unborn child in her womb.

Post originally from: Digital Photography Tips.

Check out our more Photography Tips at Photography Tips for Beginners, Portrait Photography Tips and Wedding Photography Tips.

For Beginners – Learning to See


Digital Photography School

 
Comments Off on For Beginners – Learning to See

Posted in Photography


5 Photography Tips for Beginners

10 Dec

The road is for the journey, the real excitement lies in the ditches.

Acquiring good pictures is a very relative term. I have viewed images from seasoned and well respected photographers that have left me scratching my brow and asking “why is that image so important and stellar that it sends the art critics ga-ga?  On the other hand I have viewed the work of amatuers that were sublime and left me in awe.

Such is photography as an art medium.  As an amateur it matters not what others think of your images as long as you are true to yourself and have satisfied the reasons why you made the image in the first place.

Oftentimes magazines and articles on the web overlook the photographer who has acquired their first camera. The articles are written in such a fashion that the writer assumes the reader has a basic understanding. What if they don’t?

Below are five tricks for beginners that I have been teaching for quite some time.

Tip 1:   Control the Amount of Light Coming from your Flash

Many flashes on entry level point and shoot cameras “over-flash” the subject, and often there is little the photographer can do.  Until now that is. Carry a clean Kleenex brand nasal tissue with you, and carefully drape one layer of the tissue over the flash prior to pressing the shutter. Each layer of tissue will amount to lessening the flash output by an equivalent of one f/stop of light.

Many photographers find the most pleasing flash balance to be between one and two f/stops of fill light. Therefore take three photos: one with open flash, a second with one fold of tissue and a third image with two folds of tissue. Just make sure the tissue is white.

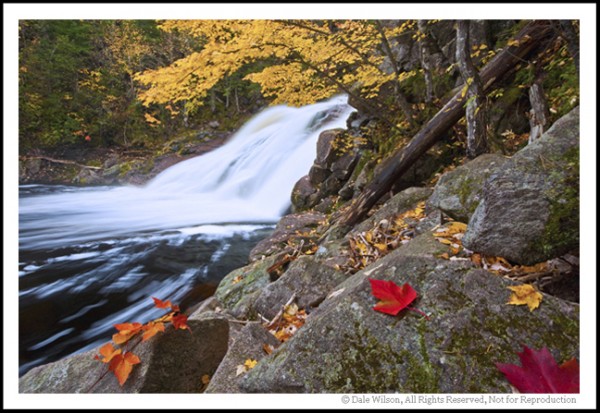
Overcast days are perfect for photographing water.

Tip 2:   Wait for the Right Light

If the sun is hiding behind those cumulus clouds on a regular basis, just wait it out – it won’t be long.  Oftentimes with autumn colour, when the red and yellow foliage is dry, it really lacks vibrancy if the scene is not lit with bright sunlight. Conversely, if the scene is damp with moisture from fog, frost, or light rain, the photograph will usually record better when the scene is bathed in a soft overcast light. Know your light and adjust your shooting to the conditions. Nice sunny days equal big blue-sky landscape pictures; grey overcast days are perfect for portraits of people and things with no sky in the picture.

Tip 3:   Use a Tripod, even with your Point and Shoot Camera

Many cameras have the capacity to be attached to a tripod; if yours does, then use it. You will be amazed how the use of a tripod will almost single-handed make your photos that much better. The reason is simple: It will provide you the opportunity to stand, kneel or lay down behind you camera and study the composition elements in the viewfinder or LCD screen. How can you possibly do that if the non tripod-mounted camera is continually moving?

Find interesting foregrounds and make that the centre piece of the image … sunsets are a dime a dozen.

Tip 4:  Get down and wet-belly it

Simply by viewing the scene from a different angle of sight, or perspective, your composition will improve dramatically. Observe experienced photographers the next time you are out shooting in a group. I’ll bet those photographers whose work you admire will have very dirty knees and seats on their trousers. Heck, some of us even wear contractors knee pads when working along rocky shorelines (I swear I have periwinkles imprinted on my knees).

Tip 5:  I’ve Saved the most Important for Last

Just get out of bed and do it.  It is usually advantageous when starting your photography career to give yourself assignments or participate in the weekly assignments found on the dPs website.  To paraphrase my good friend Daryl Benson: “You can attend all the workshops in the world and you can read all the books ever published, but if you are not out there just doing it then it is all for naught.”

Most importantly, if you are having fun you are doing it right – disregard the critics!

Post originally from: Digital Photography Tips.

Check out our more Photography Tips at Photography Tips for Beginners, Portrait Photography Tips and Wedding Photography Tips.

5 Photography Tips for Beginners


Digital Photography School

 
Comments Off on 5 Photography Tips for Beginners

Posted in Photography


DSLR Photography Tutorial – Shutter Speed – Important Lesson for Beginners

02 Dec

photographyequipment.yolasite.com (Budget Equipment) razzi.me www.facebook.com twitter.com Photography Tutorials & Tips: A detailed tutorial of different Shutter Speeds with sample pictures. Don’t forget to RATE, COMMENT and SUBSCRIBE. Behind The Scene Videos. www.facebook.com
Video Rating: 4 / 5

 
Comments Off on DSLR Photography Tutorial – Shutter Speed – Important Lesson for Beginners

Posted in Nikon Videos


Editing Software Tips For Beginners – Digital Photography Lessons by Berger Bros Camera

19 Nov

www.Berger-Bros.com One of the things that has made digital photography fun is the ability to use editing software to play around and do fun things with your photos. A big question for beginners is what digital editing software to use. Yvonne Berger, one of the instructors at Berger Brothers Camera in Amityville and Syosset Long Island, NY, warns that, for beginners, it is a mistake to go out and buy a whole bunch of software. She explains that a good program to start with (for MAC users) is iPhoto…because it’s very user friendly. However, if you’re on a PC you should start with Picasa. The next level of software would be the program Adobe Photoshop Elements. In fact Yvonne teaches an excellent 4 week course on Photoshop Elements which you can learn more about here: www.berger-bros.com
Video Rating: 4 / 5

The Pixel Racing Harness V2.0 is designed to distribute your equipment’s weight between your shoulders and hips. The rear quick release buckle is a new feature added to V2.0, making it a snap to attach the harness to any Think Tank Belt. Attaches to Pro Speed Belt, Thin Skin Belt, and Steroid Speed Belt Lightweight and compressible Foam padded Two stretch pockets Fully adjustable D–Rings to attach accessories One size fits all
Video Rating: 5 / 5

 
Comments Off on Editing Software Tips For Beginners – Digital Photography Lessons by Berger Bros Camera

Posted in Nikon Videos