RSS
 

Posts Tagged ‘Beginners’

Post-Processing Tips for Overcoming Beginners Acts of Omission

02 Apr

In an old dressmaking shop in Paris, a master-tailor has finished stitching a bridal gown. He is eager to show it to the world, but he knows that the job is not yet done. He has a few thoughts passing through his mind, and he has to make sure that the dress is presentable before the bride arrives. He tells himself that these threads dangling from here and there need to be trimmed, the ruffles need to be neatened, and the seams still need to be pressed. The master in him criticizes the dress until the tailor in him fixes the final details.

When it comes to photography, the story is no different. You must lose ownership of your image for a few seconds, and look at your own work with a fine-tooth comb. As beginners, we often rush to upload or print our photos, eager for appreciation and likes from others.

I have also been impatient in this way, though with time, I have now made it a habit to review my image critically at the end of post-processing. Here are some tips I hope that will help you taking your post-processing experience to the next level and pick up on some things that beginners often miss. I use Adobe Lightroom and Photoshop, so I will be talking about both where applicable.

Crooked images

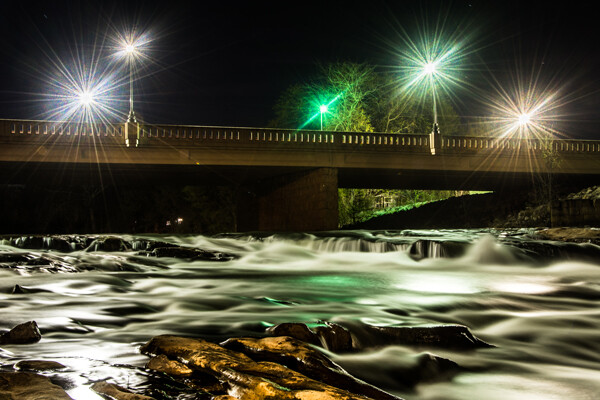
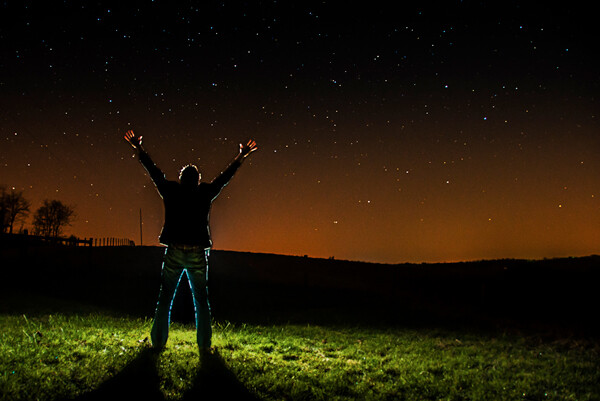
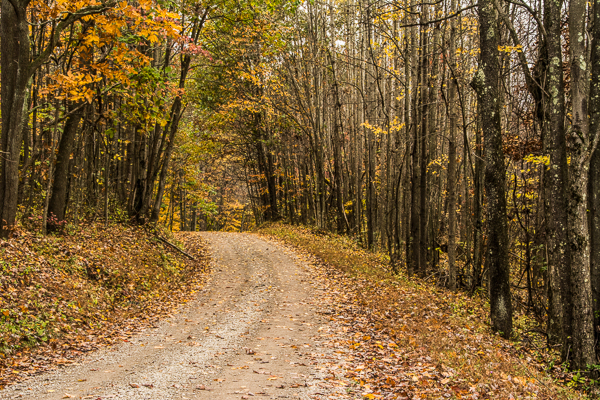
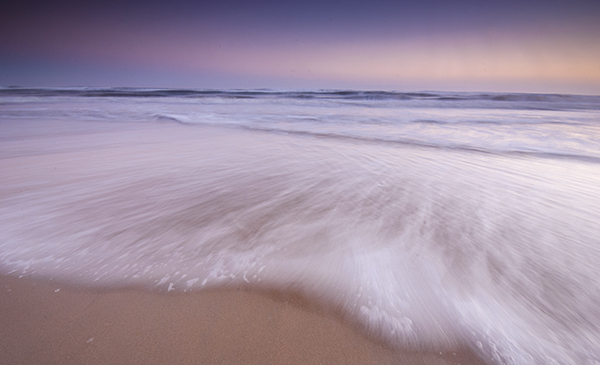
There is nothing more embarrassing than your client telling you that the photo is a bit askew. Once spotted, it is an eyesore that will forever jar when you look at your image. It is not easy to judge tilted images when it comes to mountains and forests, but landscapes are also more forgiving when it comes to a tilt. With seascapes, however, one needs to ensure that the sky meets water on the perfect horizontal for a harmonious and balanced image. Similarly, check the angles of your doorways and buildings, that they are aligned appropriately. Adobe Lightroom has a useful Straighten tool, as well as options in Photoshop.

Skew Horizon

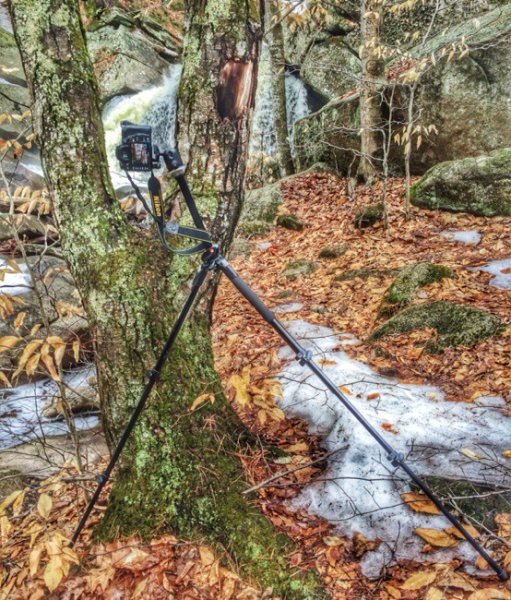
A crooked horizon is not always obvious; verify it using the proper tools.

Spots

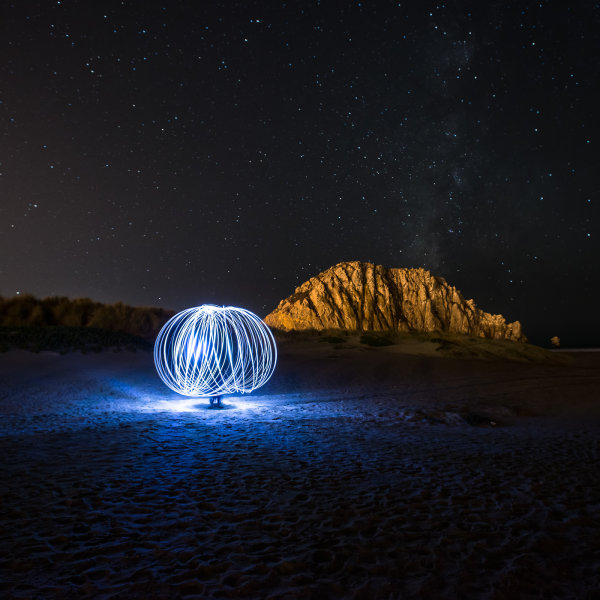
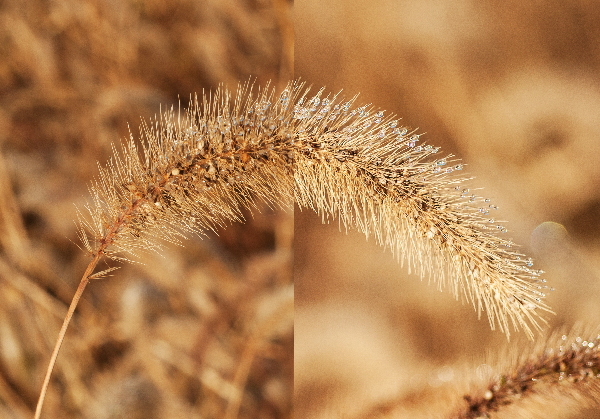
Zoom-in and inspect your photo to make sure that there are no spots. Dried water droplets and dust become more visible when you increase the contrast of colors in your post-processing. Adobe Lightroom has a Spot Removal tool, and Adobe Photoshop also provides various ways to remove spots from your image.

Spots

Imagine printing a large image with these spots. These are very visible.

Chromatic aberration

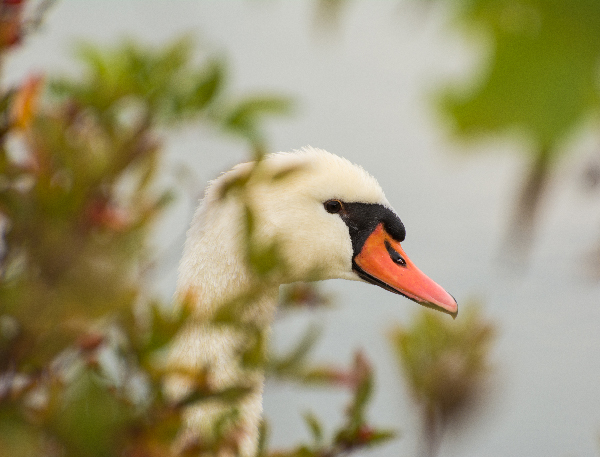
Chromatic aberration, or color fringing, often happens around the edges of objects in your images. Why this happens is a technical topic on its own related to your lens, but what you need to know is that modern tools help remove this problem. Adobe Lightroom has a Remove Chromatic Aberration tool that you can use to overcome this issue.

Chromatic_Aberration

With just one click, I was able to remove the color fringe from the edges.

Barrel distortion

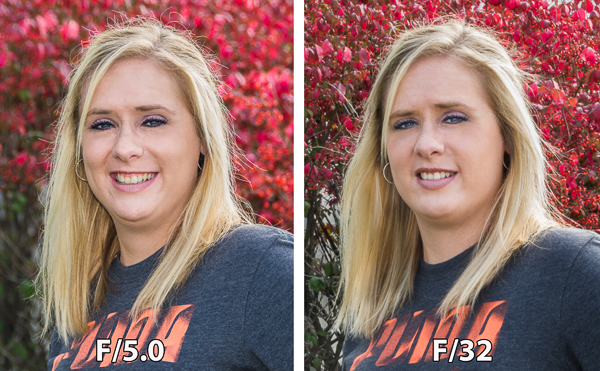
Barrel distortion is associated with wide angle lenses. It causes your image to look more like a sphere. You might get away with it if the elements in your scene are uneven, and not particularly familiar to the eye. However, you need to be aware that the wider your focal length, the more distortion your image will have. Adobe Lightroom allows you to remove barrel distortion using the Lens Corrections feature. In the following image, people standing on each side of the image have elongated faces. I did not, of course, include this in the bridal album!

Raaiqah & Taariq Wedding, November 2014

Unwanted objects

Look for unwanted objects in the scene. Remove shopping bags, cans, tins, ships on the horizon, and even people if they are not desired in the scene. I use Adobe Photoshop’s Content Aware fill tool to achieve the desired results.

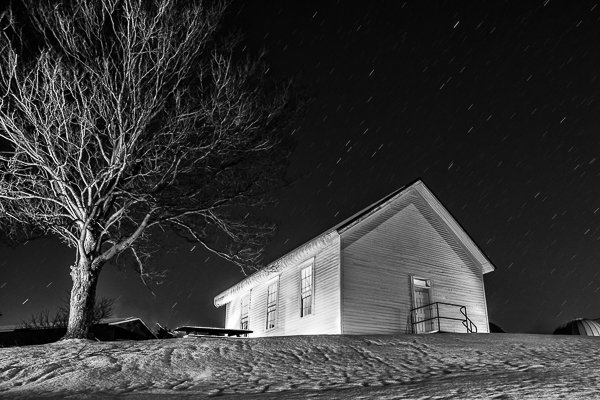
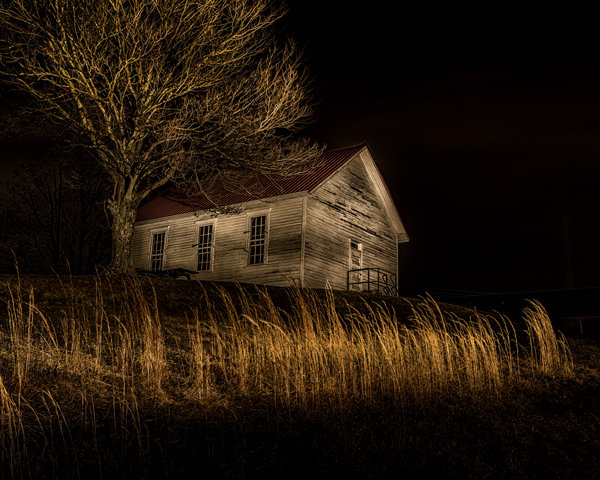
Image in black and white

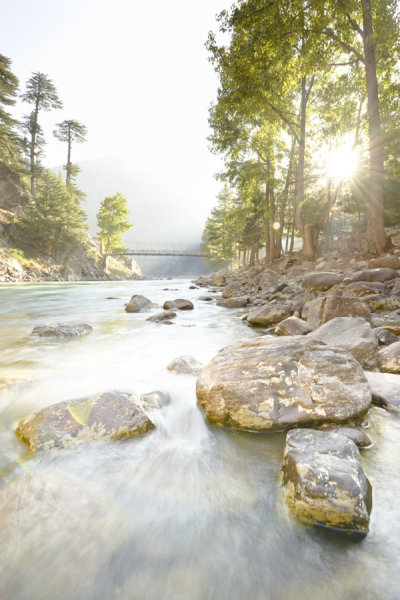
Before and after post-processing, I usually check my images in black and white. By not allowing yourself to be distracted by colours, this is a good way to see if an image is flat. I do this for several reasons. Some images are just meant to be black and white, especially the ones in which the colour adds little by way of interest, and in fact may distract from the subject. You might also want to turn an image into black and white because the sky is overexposed, in this way salvaging, rather than discarding the image altogether. By converting an image to black and white, sometimes unwanted distracting elements in the background of your image can be de-emphasized, with some additional light adjustment (e.g. a person standing behind your main subject in a portrait).

Color_Landscape BW_Landscape

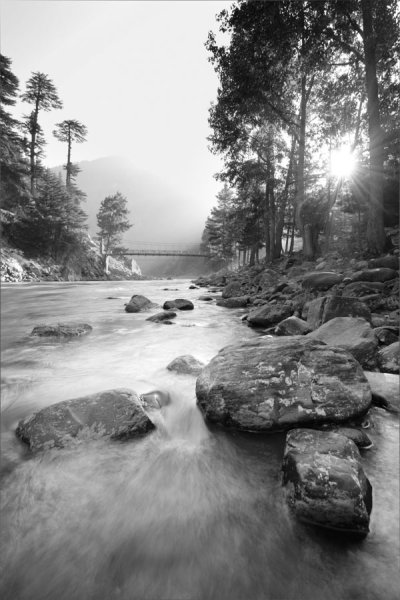
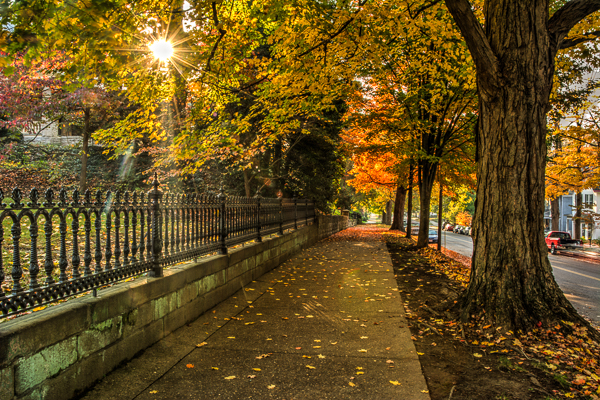
Black and White allows you to appreciate the landscape with emphasis on the harmonies and lines rather than on the colours.

Color_Portrait BW_Portrait

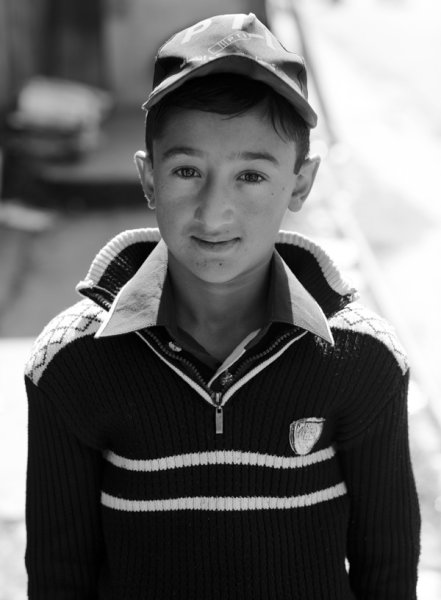
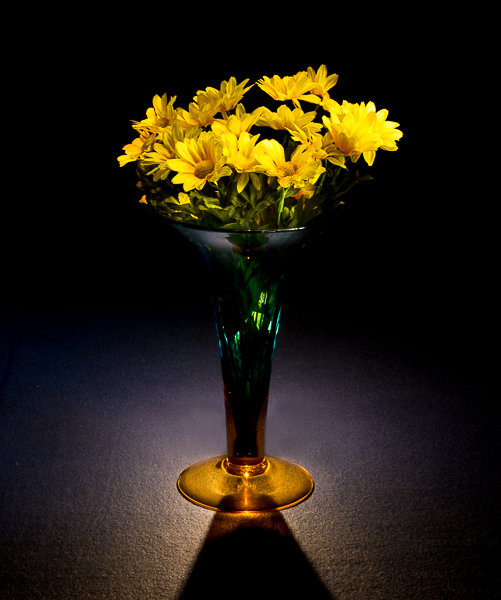
In black and white, the background is not as distracting.

Tip: Walk away

Once you have finished editing your image (or a batch of images), step back and give review it full screen. Turning off the room lights and leaning back is a good idea. Without the mouse and the keyboard in my reach, I can think about the image critically. I sometimes even walk away and let the image lie there for some time before returning for a fresh approach.

Whether you are a beginner or a professional, after putting effort into post-processing, you tend to think that you have done enough to make the image ready. You focus on certain areas too much, and your mind forgets to tell you that you need to look in other areas to see if the image is balanced and harmonious. So, take your time and allow the image to fully absorb without patience in the post-processing phase. A lovely image can be converted into a magical one by proper processing.

Though these steps may sound pedantic, a good image needs loving care.

I hope these tips are helpful. Your feedback and comments are welcome.

googletag.cmd.push(function() {
tablet_slots.push( googletag.defineSlot( “/1005424/_dPSv4_tab-all-article-bottom_(300×250)”, [300, 250], “pb-ad-78623” ).addService( googletag.pubads() ) ); } );

googletag.cmd.push(function() {
mobile_slots.push( googletag.defineSlot( “/1005424/_dPSv4_mob-all-article-bottom_(300×250)”, [300, 250], “pb-ad-78158” ).addService( googletag.pubads() ) ); } );

The post Post-Processing Tips for Overcoming Beginners Acts of Omission by Mujahid Urrehman appeared first on Digital Photography School.


Digital Photography School

 
Comments Off on Post-Processing Tips for Overcoming Beginners Acts of Omission

Posted in Photography


A Beginners Guide to Light Modifiers

25 Mar

Regardless of the light source you use (daylight, continuous or flash) it’s really easy to use light modifiers or shapers to train the light in any direction you want.

light-modifers

***A quick note about costs

Every kind of light modifier will have a top of the line version and a really cheap version. The main difference between the options is that the cheaper ones won’t be as durable. This becomes important when you’re using them every single day.

When you’re learning how to use them however, I recommend choosing cheap versions. You’ll figure out how they work and save yourself a lot of money.

I rarely work without some sort of diffusion because using naked flash spreads the light around too much. The result is hard shadows that I personally think look really unflattering.

Nobody is ever going to tell you, “Wow I love the way your hard lighting has captured and enhanced every single pore, line and blemish on my skin. I actually look ten years older. Thanks!”

There are, of course, many really cool uses for hard lighting and some photographers can make it look brilliant. I’m just not one of them. I like to control the light and only illuminate certain areas of my shot.

There are a couple of factors I consider before deciding what kind of light modifier to use:

1. What kind of lighting am I trying to replicate?

Fill Flash Light Styles HARD

As a general rule of thumb if you are in hard light conditions like full sun, then opt for a light modifier that creates hard light like a gridspot, beauty dish, fresnel lens or naked flash.

Fill Flash Light Styles Soft

If the light is soft like early morning, twilight, open shade, or overcast then chose a light modifier that produces soft light such as: a scrim, umbrella or softbox.

2. What kind of mood I’m in

What are the best light modifiers to recreate soft light?

The Umbrella

An umbrella creates a quality of light that is soft and abundant, and very forgiving. They are great to use if you want to light a large area with flat even lighting. Because umbrellas are quite easy to use, and relatively cheap, they are great as your first light modifier.

On the downside, umbrellas will over-light your shot spreading lots of light around. Lots of light. Everywhere. Like a hose with its spray nozzle set to “everywhere”.

UMBRELLA_bounce

Bounce umbrella throws light everywhere

Just like I consider eating Nutella straight out of the jar a sometimes food, you should consider using umbrellas as an only use in case of emergency style of lighting. If I overuse either, things tend to get a bit ugly.

Types of umbrella light shapers

  • Silver/gold reflective umbrella: These babies throw light everywhere. They are great for lighting large groups of people. The silver umbrella will give you a slightly cooler light, while the gold umbrella creates warmer light. Both produce a slightly harder light than the white reflective umbrella.
  • White reflective umbrella: This umbrella creates a soft light with slightly less spread and contrast than the silver or gold reflective umbrellas. Because the style of light created allows people to move around a lot and in a constantly even source of lighting, they are great to use when you are shooting groups and couples under pressure, like for an event.
  • White Shoot through umbrella: These are perfect as your first light modifier as they diffuse and spread light quite evenly.
Shoot Through_UMBRELLA

White shoot through umbrella

When my children were young, I taught them how to ride bikes using training wheels. The wheels boosted their confidence more than anything else. After a while, I took the wheels off and they rode on two wheels as if they’d been doing it all their lives.

Training wheels

I think using flash with umbrellas is the same. Use them as a learning tool until you get your balance, then move on to a better bike.

A final note on umbrellas

They are perfect for indoor lighting but become tricky, actually downright dangerous, to use outside. I’ve had countless (expensive) lights blown over using umbrellas! If you must use them then please make sure you have somebody holding them, or sand bags to keep them in place.

Scrim, baby

Scrim

After you’ve ditched your umbrella training wheels, the next step is to work with a scrim panel which is a square or rectangular frame with a fabric diffusion material covering it. Of all the light modifiers, a scrim is probably the most versatile and a must have in your kit.

Shapers scrim
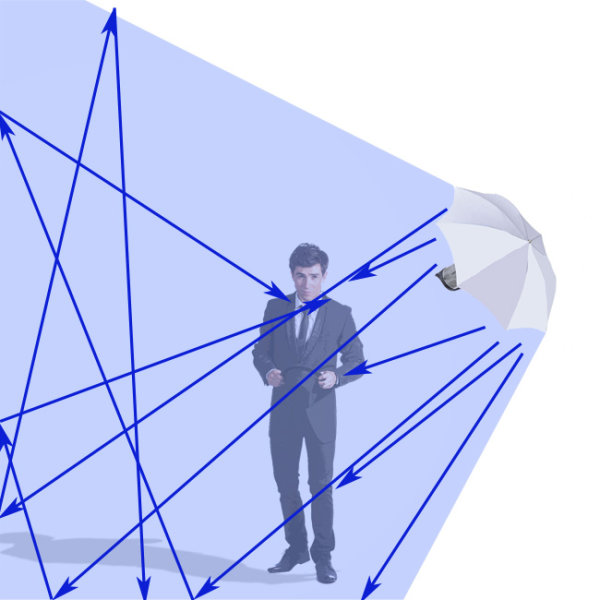
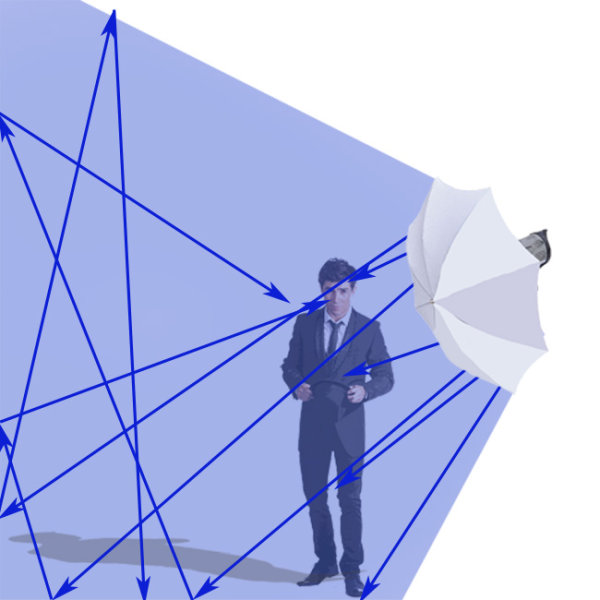
This is a really cool way to create large areas of soft diffused light, as if you were shooting next to a large window, or have light clouds over the sun.
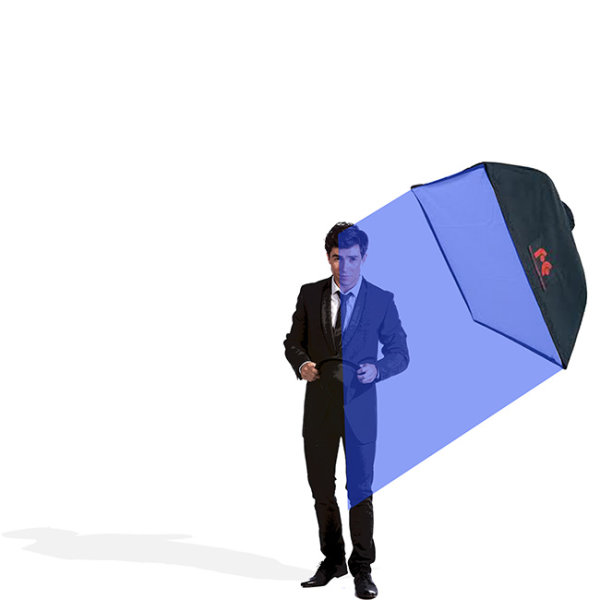
Remember: The larger the light source, the softer the light.

This is a piece of equipment that you can easily make yourself. I used a DYI one for my first 10 years as a photographer and they are great for diffusing flash, continuous light, and sunshine.

Using a softbox

softbox

Small softbox 580EX+Lumiquest+stand 1

This image of race-car driver, Glauco Junior Solleri, was taken using a speedlight and small Lumiquest Pro softbox. This is a low-cost and versatile modifier that creates a beautiful soft light source that you can easily control. In this instance I only wanted to light Glauco’s face and let the background go to black, If I had used an umbrella (and spray light everywhere) the entire background would also be lit, killing my moody vibe.

If I could only pick one light modifier to take to a deserted island, it would have to be the softbox. Small, medium, or large – this little puppy is my go to light source for 80% of my shoots.

Why? The quality of light is soft, flattering and malleable. Changing the angle and proximity of the softbox to the sitter easily changes the hardness of light, and direction of shadow.

It’s one of the light modifiers that, I feel, recreates the effect of soft daylight through a window. I think what I like most about this light modifier is that it’s subtle. Highlights gently merge to shadows. I think I love this light modifier more than Nutella – there I said it.

Different softboxes

I use a few different kinds of softboxes depending on where and what I’m shooting.

If it’s a studio shoot I love using my Chimira Medium softbox with white reflective interior. The white interior creates a softer light and this particular softbox has an extra layer of diffusion on the inside, adding even more softness to the light.

Some photographers remove this interior panel because they like having more contrast of the harder light (because it’s not as diffused as much), but I prefer less contrast. You can also increase the spread and contrast of your light by using silver or gold interior panels.

Shooting using beauty lights

The beauty dish I have is quite a cheap brand, which goes to show you don’t need to shell out a lot of money for every piece of equipment. I like mine because it works with my speedlight, my Elinchrom monolight, and battery flashes.

Beauty-2

I like that kind of versatility in equipment because it means I have more options on the day of the shoot, and less to carry around!

The beauty dish differs from other light modifiers because it gives you a distinct circular, soft-contrast light, which is perfect for lighting faces and defining bone structure such as cheek bones and chin lines. They also create a circular catch light in your model’s eyes, which makes the reflection seem quite natural.

You can see why these modifiers are popular with fashion/beauty and celebrity photographers.

The downside of using beauty dishes is that the fall-off, from light to dark, is very rapid so you’ll often get shadows under your model’s chin and nose. You can compensate for the shadows by adding a fill board, like a white reflector, to reflect light up, onto your subject’s face.

Why would you use this over other modifiers?

A beauty dish gives you a certain look. It will just light a small area and flatten out your model’s features. It makes people look great but you need to light your model in quite a specific way, lighting them from above, to really pull it off.

Using a grid spot

Gridspot Gridspot 2

A portrait shoot I did with Australian actor Scott McGregor shows lighting without gridspot (left) and with gridspot (right).grid

The gridspot is a bit of kit you can use in conjunction with a speedlight, monolight, or battery operated flash. The width of the grid and the size of the holes will affect the width of the light beam hitting your subject. This is a hard focused light. I love to use grid spots in the same way I use beauty lights.

Why would you use this over other modifiers?

I like using grid spots because they create a similar light to beauty dishes. The light is a bit harder but they’re perfect for single portraits because you can pop a bit of light onto someone’s face and shoulders without impacting the background mood.

They are also perfect to use outside as they won’t get blown about.

Gridspot typesjpg

BeautyDish+Grid 1

Beauty dish with a gridspot

Fresnel light (lens)

Fresnel

The Fresnel light modifier gives a soft, crisp and very distinct look to my portraits. In this portrait of Australian actor Robbie Magasiva, I’ve placed the Fresnel light slightly to camera right to create a shadow, which I’ve softened by using an umbrella (Sprays soft light everywhere) to increase the amount of daylight fill.

Fresnel 2

A Fresnel is a light modifier that can be focused. They were first used in lighthouses, then the technology was developed to include continuous lighting for movies and television.

The style of lighting is soft and crisp, reminiscent of 1940s portrait lighting. This style of lighting has become really popular lately, particularly with fashion and editorial photographers. The downside of this type of lighting is you need to hock a kidney to afford one.

Octabox

Beauty dish Octa

Here are two different ways to use the Rotalux deep octabox. The image on the left of actor Firass Dirani is shot using a deep octabox as a beauty dish. The light source is hard and drops off rapidly under his chin to give a hard and contrasty light source, which not only defines and sculpts his features it also gives the image an edgy look.

The image on the right of actor Harley Bonner is shot using the same Rotalux deep octabox as I used with Firass but this time I’ve added the interior and exterior bevel giving a much softer light which blends in with the muted light and low key feel I was going for.

An octabox is what you’d get if a softbox and umbrella got married and had babies. An octabox has soft light, just like its mama the softbox, but spreads its light around more just like his daddy the umbrella.

They are fantastic for lighting large groups evenly. The other advantage some people like is they give round catch lights.

I don’t own an Octabox because I’m not a huge fan but do have a Rotalux deep octabox, which is what you get if a softbox married a beauty dish and made babies. This, as far as I’m concerned is a match made in heaven for lighting single portraits.

Octabox

Octobox with the front panel in.

octabox-interior-baffle

Octobox with interior baffle exposed.

octa_as_beauty_dish

Octobox as a beauty dish.

Mixing modifiers

Combolights

Model credit: Fat Tony and Co., image courtesy Nine Network Australia.

I often mix my lighting modifiers to make my images more interesting. In this television promotional shot I did for Fat Tony and Co., I used a medium deep octabox as my main light and a gridspot as a hair light. I also added an umbrella for fill light to camera left because the deep octabox alone was too moody and I wanted more detail in the shadows.

Do you have a favorite light modifier or do you like working with naked flash? Do you have examples of your favorite images? Please share them in the comments below. I’d love to see them and hear your thoughts.

googletag.cmd.push(function() {
tablet_slots.push( googletag.defineSlot( “/1005424/_dPSv4_tab-all-article-bottom_(300×250)”, [300, 250], “pb-ad-78623” ).addService( googletag.pubads() ) ); } );

googletag.cmd.push(function() {
mobile_slots.push( googletag.defineSlot( “/1005424/_dPSv4_mob-all-article-bottom_(300×250)”, [300, 250], “pb-ad-78158” ).addService( googletag.pubads() ) ); } );

The post A Beginners Guide to Light Modifiers by Gina Milicia appeared first on Digital Photography School.


Digital Photography School

 
Comments Off on A Beginners Guide to Light Modifiers

Posted in Photography


Beginner’s Guide to Light Painting

13 Mar
Mill Falls in Logan, Ohio. Main source of light for this scene was the street lights on the bridge over the river. The bridge was light painted with a high power spot light and some light was also add to the rocks in the foreground. Exposure was 69 seconds. Aperture was set at f/14 to maximize the star burst on the street lights. This image won the auther Bruce Wunderlich a photographers choice award in the 2014 Shoot the Hills photo contest.

Mill Falls in Logan, Ohio. The main source of light for this scene was the street lights on the bridge over the river. The bridge was light painted with a high-powered spotlight. Light was also add to the rocks in the foreground. Exposure was 69 seconds. Aperture was set at f/14 to maximize the starburst on the street lights. This image won me a Photographers Choice award in the 2014 Shoot the Hills photo contest.

What is light painting?

Light painting is an imaging technique that uses a moving light source to add light to an under-illuminated subject while taking a long-exposure photograph. A scene or object can be brought to life by painting with a beam of light!

You, the photographer, becomes an artist, and instead of just capturing an image as presented, with light painting you create the image that the camera is capturing. Light painting may take lots of patience and practice to perfect, but the results can be very rewarding. But let’s not make this sound too complicated – light painting is a lot like any low light photography, except in this scenario we are putting an outside light source in motion to enhance an image. Let’s take a look at some of the basics for light painting photography.

School_house_in_snow

Schoolhouse in the snow – 170 second exposure, f/8, ISO 100. Notice the light coming from inside the school house, added from the outside by shining a flash light through windows on the back side of the building.


Tools

  • Camera – Any digital camera capable of manual settings (Bulb).
  • Tripod – One of the most important tools to produce light paintings is a sturdy tripod. In most cases your shutter is going to be open for several minutes and it is very important that your camera does not move during the exposure.
  • Shutter release – Either use a cable release or a remote shutter release to begin your exposure. If you don’t have either of these, use your camera’s timer function to initiate the shot. To light paint, it is very important that you never touch your camera or tripod to prevent vibrations during the exposure.
  • Stop watch – A stop watch or some other way of timing your exposures is helpful, since most of these exposures are going to require your camera set to Bulb.
  • Light source – Many different types of lights can be used to do light painting. These light sources are your brushes and may include: flashlights, torch lights, lasers, glow sticks, flash or strobes, cell phones, or even candles. Just about anything that can produce light can be used as a brush to do light painting. Different light sources will produce different colors of light. For example, a LED light source will produce a cooler (blue) colored light, while a halogen source will produce a much warmer (orange) colored light.
  • Color gels –  Color gels can be used over your lights to alter the tint of your light and add color to your painting.
Exposure time 30 seconds at f/8

Exposure time 30 seconds at f/8

Camera Settings

  • Mode – Use the Manual mode setting, which allows you to set your shutter speed and aperture.
  • Image quality – Set your image quality to RAW, which allows you to capture as much information about your image as possible. (This is not a necessity if you are uncomfortable with shooting RAW, but is a recommendation.)
  • White Balance –  If you are wanting to balance your lighting to the light source, choose either the Incandescent or Tungsten setting. However, sometimes experimenting with other white balance settings can produce some interesting light effects. Daylight white balance is a good starting point if you want to use the color tones of your light sources. Auto White Balance is not recommended.
  • ISO – Set to a low ISO, such as 100.
  • F-stop or aperture – Stop down to f/8 or f/10, which allows you to get more depth of field and enables you to use a longer shutter speed.
  • Shutter speed – Set shutter speed to Bulb, so your actual shutter speed will be determined by the amount of ambient light in the scene.
  • LCD brightness – Lower the brightness of your LCD preview, because the normal setting is too bright at night and will make your image look bright when it is really under-exposed.
  • Histogram – Use your histogram to help check your exposure. If the histogram charts heavily over to the left, your image is going to be mostly dark.
  • Blinkies – Turn on your blinkies (highlight warning) to help you determine if your highlights are exposed properly. It is perfectly acceptable for your brightest highlights to have the blinkies if the rest of your image is properly exposed.
  • Image Stabilization – Set to Off. With your camera on a tripod, having image stabilization turned on can actually fool your camera or lens and cause blurring in your image.
  • Long exposure noise reduction – Recommended setting is Off. This setting can be set to On, but will cause your exposures to double while the camera takes a second black exposure to help remove noise. If your camera is set to a low ISO, the noise level will be low enough in most cases to make this setting unnecessary. Still, it is a good idea to check your noise level before you start, and some older cameras may require this setting to be On to get usable noise levels.
Still_life

This vase was back lit with a candle and the flowers were painted with a small pen light. 30 second exposure, f/16 ISO 100.


Begin with ambient light

The first step before beginning any light painting is to determine the ambient light in your scene. Determining base exposures can be time consuming when you are experimenting with exposures that could be three to four minutes long. Here is a little trick that can help expedite this process.

  1. Set your ISO to six stops higher than the ISO you plan to use. Example, if you are planning to shoot at ISO 100, set your ISO to 6400.
  2. With your camera set at ISO 6400, experiment to find out how many seconds you will need to expose the ambient light of your scene. Every second of exposure at ISO 6400 is equal to one minute at ISO 100.
  3. So now set your ISO back to 100 and prepare to begin your exposure in minutes instead of seconds. Many cameras lowest ISO is 200 so 6 stops higher would be 12800, and if you cameras lowest ISO is 50, six stops higher would be 3200.
30 second exposure at ISO 800. In this image the ISO was increased to shorten the exposure to 30 second any exposure longer then that would cause a noticeable blur on the stars. Light Painting was applied from the front of the subject without letting the light shine directly back at the camera.

30 second exposure at ISO 800. In this image the ISO was increased to shorten the exposure to 30 second because any exposure longer then that would cause a noticeable blur on the stars. Light painting was applied from the front of the subject without letting the light shine directly back at the camera.

Focusing

Focusing your camera is an important step and in the dark it can sometimes be difficult to achieve. The simplest way to get your focus is to shine a light source to a spot in your scene that you have determined must be in focus. Using autofocus, place your focus point on the light and make sure your camera is focused on that point. Now change your camera from autofocus to manual and your focus will not change. But remember, if you move the camera you must turn your autofocus back and refocus. Back button focusing is another great way to achieve focus for light painting.

The Exposure

At this point, you have determined your exposure time and have your camera focused on your subject. It’s time to begin your exposure and start painting. Most cameras will allow you to set exposures of up to 30 seconds. For exposures over 30 seconds, set your shutter speed to Bulb. Use your cable release or remote to trigger your shutter open. Your shutter will remain open until you press the release again. Use your stop watch, or the timer on your phone, to time the exposure length.

1971 VW bus

This vintage 1971 bus was painted using one LED flash light on the outside, with a second light used inside to light up the interior of the bus. White balance was set to Daylight, which cause the LED light to produce the cool blue cast around the bus.

Painting techniques

  • Paint from the sides – Don’t just stand behind your camera and wave your light around over your image. Painting flat surfaces from the side will allow you to bring out the textures of the surface.
  • Use lots of different angles – for instance, when painting the ground hold the beam low and pan the light over the ground. This will keep the ground from appearing flat and bring out all the details of the surface. Also, by adding light from many angles your resulting image will have an interesting three dimensional effect.
  • Don’t stand between the camera and your light source or you will show up as a silhouetted ghost in your image.
  • Wear dark non-reflecting clothing and keep moving. Again, you do not want to appear as a ghost in your image!
  • Don’t shine the light source back at the camera, or else you will create a bright spot in the image.
  • Use a flash light with a red filter when you need to check your camera to make adjustments. The red light will keep you from ruining your night vision.
  • Different surfaces are going to react to light differently. Wood surfaces may require more light than shiny surfaces such as metal or glass, as rougher surfaces absorb more light than smooth surfaces.
  • Keep your light moving. Move the beam in slow strokes to add light and make faster strokes in areas where less light is needed.
  • Paint in up-and-down or side-to-side strokes, just like one paints with real paint.
  •  You are more than likely not going to get the shot you want on the first try, and it may take multiple attempts to get an image that you are satisfied with. For this reason, try to keep track of how much light you add to each surface. Develop a plan so that you can make adjustments to each exposure until you get the image you have visualized.
Howard Ignatius

30 second exposure at f/5.6, ISO 1250 (to get the stars to show up). By Howard Ignatius

Be Creative

These are a few basic tips to help you get started with light painting. There is so much more you can do with this medium. Be creative and fearless about trying new things. Once you start to get the hang of light painting, there is no limit to the images you can create with your camera in the dark and a few creative light sources. Do you have any additional tricks or tips for light painting to share?

googletag.cmd.push(function() {
tablet_slots.push( googletag.defineSlot( “/1005424/_dPSv4_tab-all-article-bottom_(300×250)”, [300, 250], “pb-ad-78623” ).addService( googletag.pubads() ) ); } );

googletag.cmd.push(function() {
mobile_slots.push( googletag.defineSlot( “/1005424/_dPSv4_mob-all-article-bottom_(300×250)”, [300, 250], “pb-ad-78158” ).addService( googletag.pubads() ) ); } );

The post Beginner’s Guide to Light Painting by Bruce Wunderlich appeared first on Digital Photography School.


Digital Photography School

 
Comments Off on Beginner’s Guide to Light Painting

Posted in Photography


A Beginner’s Guide to Mirrorless Cameras

13 Feb

Micro four-thirds cameras, otherwise known as mirrorless cameras, have been around for a little while now. And during the time they’ve been on the market, the companies that make them have been steadily improving on these pint-sized wonders. Many professional photographers in different fields are beginning to make the switch to mirrorless cameras, opting for something smaller than bulky DSLRs. Continue Reading

The post A Beginner’s Guide to Mirrorless Cameras appeared first on Photodoto.


Photodoto

 
Comments Off on A Beginner’s Guide to Mirrorless Cameras

Posted in Photography


A Beginner’s Guide to Working With Flash Off-Camera

23 Jan

FF HeroBW

I spent the first three years of my photography career avoiding the use of speedlights off-camera because I couldn’t wrap my head around the concepts and science behind them. I tried to cover it up saying things like “I’m a natural light photographer.” or “I really don’t like the aesthetics of flash photography.”

But then, I reluctantly invested in a flash for my first Nikon. This was the 90s, pre-digital, pre-autofocus, and pre-TTL. I had to calculate how much flash to use via a chart on the top of the flash. The formula was complicated, but if you knew how to split an atom, you were pretty much set.

Each shoot I went on that required flash was preceded by a sleepless night filled with anxious dreams about turning up to the shoot naked. And the thought of having to use flash also had a mild to moderate laxative effect on me.

Luckily those days are long gone and shooting flash has never been easier. In this tutorial, I’ll show you the quick and easy steps I take to shoot portraits using off-camera speedlights.

The Gear Essentials

A. Speedlights:

I use speedlights most often when I’m travelling and need light portable flashes, when I’m working on location without access to power, or when I’m working in small, confined locations where studio flashes would be too powerful or cramped.

I work with two Canon 580EX IIs. A great alternative if you are looking to save a few bucks is the Yongnuo YN-560 II. It has a very similar look to the Canon 580EX II and Nikon’s SB speedlight series.

B. Remote Triggers:

Remote triggers allow you to fire speedlights when they’re not mounted on your camera and are essential when using flash off-camera.

The cheapest and most reliable way to fire your speedlight off-camera is using a sync cord — basically you connect your speedlight to your camera via a long cable. The drawbacks of using a cable are that it reduces the distance you can be away from your flash, and can create a tripping hazard. Having said that, I still carry a couple of spare sync cables in my kit because remote triggers do fail from time to time, and the cords have saved my butt on a few occasions.

The next option is cheaper infrared triggers. They do the job of setting your flash off remotely, but they’re sensitive to bright sunlight and external factors such as alert lights on emergency vehicles and forklifts, etc., so they can go off without warning. I started out with a $ 30 set of triggers and used them for a couple of years before trading up to PocketWizards, which I’ve been using for the last eight years. A good entry level flash trigger is the YONGNUO RF-602 (approximatel $ 30).

Fill Flash Diagram 1W

C. Light Stands:

There are three options when it comes to mounting speedlights off-camera:

  1. First, you can use a light stand. Light stands vary in price from $ 20 to $ 200+ dollars, depending on the make and construction.
  2. Second, you can use a GorillaPod and mount your speedlight to a door or place it on top of something near your model.
  3. Third, you can mount your speedlight to an extension pole (or monopod) and have someone hold the light above your model. I like to do this because it gives me more options when shooting, and it also means there aren’t any light stands in the way of my shot.

D. Light Shapers:

Using a speedlight as a bare light source creates a very hard style of lighting similar to harsh sunlight. This looks great in certain situations, but I prefer to soften and control the light source by using a small or medium soft box over the flash unit. This creates a much softer, more flattering and realistic-looking light source.

A good one to start with is the LumiQuest Mini Softbox. It attaches to your speedlight with Velcro and folds flat for easy storage.

E. Camera with Hot Shoe Mount:

You will need a Camera that works in manual mode with a hot shoe mount.  The hot shoe mount is just a sexier way of saying that little square bit of metal on top of the camera that an external flash or wireless trigger slides into.

The Way

I used to believe that great portraits needed artificial lighting regardless of the environment. I often added two or three lights to my portrait shoots because I thought anything less was lazy or unprofessional. I actually felt guilty when I shot with natural light because I thought it was cheating.

Fortunately, I’ve gotten over that false notion and now understand that finding great light and being able to use it are learned skills, so is knowing when to use fill-flash in a portrait.

Nowadays, whenever I set up portrait shoots, I always look for opportunities to use great natural lighting first. It’s the most beautiful and flattering light for portraits, so if it ain’t broke, no need to fix it.

Having said that, there are many occasions when natural lighting is only just okay or even complete caca — and sometimes a portrait needs more mood or drama than the available light can provide.

The following is an example of how I used flash off-camera to light a heavily backlit image. My objective was to create an image that looked naturally lit. This technique can be used for any portrait that requires fill-flash using off-camera flash.

Daylight 001 Daylight 800ISO 001

Flash on camera 002

A. Here you can see that my model was heavily backlit, which makes a great silhouette, but not such a great portrait.

B. I attempted to correct the lighting by increasing my ISO, which overexposed the background and brings more detail to the motorbike, but leaves the model’s skin tone flat, dull and underexposed. It also added extra noise in the blacks. At this stage, I could also have used a reflector to bounce light back onto the model to help create a better skin tone.

C. A quick fix to this problem would be to shoot flash on-camera using TTL, which uses the camera’s metering system to calculate the correct amount of light needed to create the portrait.

As you can see in my example, the Canon 580EX II did an okay job of lighting my model, given I was about five meters (16′) away using a 200mm lens.

The thing I don’t like about using flash on-camera for portraits is that it tends to make them look unnatural and have flat, lit look. By using my flash off-camera, I can control the direction and amount of light going onto my model to achieve a more natural look.

FF Diagram

Here’s a bird’s eye view of my setup

My speedlight was positioned approximately one meter (three feet) from the model. I set it at a 45 degree angle because I wanted to make my model look like he was lit from the side.

I was working with a 70-200mm zoom lens set at a focal length of 200mm because I wanted to blur all the details in the background and work within a narrow focal range.

My camera was approximately six meters (twenty feet) from my model.

My ISO was set at 100 at f/4. I was working at f/4 rather than wide open at f/2.8 because I find it very difficult to make the eyes look sharp at f/2.8, at that distance, and in that extreme lighting condition.

Setting up the Gear

580EX+Lumiquest+stand 1

Setting up speedlights and radio slaves

For this motorbike model shoot, I mounted my speedlight to a light stand via an adaptor and used a small LumiQuest Softbox to soften and shape my light.

580EX+Power

PocketWizard+camera 1

To manually adjust the flash output of your speedlight, first switch the setting from its default of TTL to M (manual mode). As a general guide, I start with the following settings:

  • Full sun: 1/1 (full)
  • I would use a power setting of 1/1 (full) if you are shooting in full sun and need f/16 or higher.
  • If you are shooting wide open at f/2.8 or f/4, start at around 1/16th-1/32 power.

The above diagram is based on Canon’s 580EX II. For any other camera, check your manual for instructions on how to increase and decrease power. It should be very similar.

Fill Flash  001

  • Flash at 1/32 power is underexposed, skin tone looks muddy and there’s no detail in the blacks.
  • Flash set at 1/16th power is starting to look better.
  • Flash set at 1/8th power is looking good, but I prefer a slightly brighter skin tone.
  • Flash set at ¼ power is the correct reading for the look I was going for.
  • Flash set at ½ power gives a slightly overexposed skin tone, which is perfect for most portraits as it is a very flattering light (no model will ever tell you they love seeing all the detail in their pores and skin tone).
  • Flash set at full power is overexposed—there’s very little detail in the skin tone and the blacks are too light (gray).

A Step-by-Step Guide to How I Lit This Shot:

Daylight 001

Caption: My ambient reading was 4 at 1/125th second.

  1. Take an ambient reading to determine correct exposure for the background. In this case, my ambient reading was f/4 at 1/125th and ISO 100. This exposure will now remain fixed. I will next add light to create a nice skin tone.
  2. I ask myself if adding flash will improve or detract from the shot. In this case, the answer is a definite yes, it will improve my shot.
  3. I bring in my flash and set it up as per the diagrams above.
  4. The quickest and easiest way to figure out the best settings is to use a light meter (If you don’t have a light meter, you can still work with off-camera flash. It will just take a bit longer to work out your exposure). I believe the light meter is an essential tool in good portrait photography and would never leave home without one. When you use a light meter you know you have most accurate readings, and lighting becomes really easy.
    I suggest you set up your lights per the diagram, start at a power setting of 1/32, and gradually increase your power in small increments (1/32, 1/16, 1/8, ¼, etc.) until you get the desired results.
  5. Set your light meter to non-sync and press the button on the side of the meter. The non-sync button will flash on and off indicating it’s ready. If you don’t have an assistant, I suggest taking a radio slave off-camera and using it to test fire your flash so you can take a reading. Hold the meter in front of your subject’s face and point the sensor dome towards the camera.
  6. Keep increasing or decreasing the amount of light until you have it a half stop, to one stop over the ambient setting.
  7. If you want a clean, beauty-style shot with lots of shadow detail, add +1 stop of fill-flash and shoot at your ambient meter settings.

This is something I strongly urge you to practice with as many patient friends, family, and pets as possible so you can build up your confidence and really get to know your equipment.

Here’s the final image, the new background is from a shoot I did in St Marks Square, Venice last year. I merged the two images together using Photoshop.

FF FINAL BW

Glauco Junior Solleri, Vespa courtesy Glow Studios

What are your experiences of working with off-camera flash? I’m keen to hear about the flashes, modifiers and flash triggers you rate highly and anything you’d like to add to the discussion.

googletag.cmd.push(function() {
tablet_slots.push( googletag.defineSlot( “/1005424/_dPSv4_tab-all-article-bottom_(300×250)”, [300, 250], “pb-ad-78623” ).addService( googletag.pubads() ) ); } );

googletag.cmd.push(function() {
mobile_slots.push( googletag.defineSlot( “/1005424/_dPSv4_mob-all-article-bottom_(300×250)”, [300, 250], “pb-ad-78158” ).addService( googletag.pubads() ) ); } );

The post A Beginner’s Guide to Working With Flash Off-Camera by Gina Milicia appeared first on Digital Photography School.


Digital Photography School

 
Comments Off on A Beginner’s Guide to Working With Flash Off-Camera

Posted in Photography


Best Photography Tutorials for Beginners in 2014

30 Dec

Just getting started in photography? Or maybe you get a brand new camera or some photography toys for Christmas and want to get up to speed on how to use them?

JakeandLindsay Sherbert

By JakeandLindsay Sherbert

Over the past 12 months we’ve had some great articles geared towards the beginner or novice photographer. Here’s a little holiday reading for you to give you a good kick start:

  • Understanding Depth of Field for Beginners
  • 5 Beginner Tips for More Autofocus Success
  • How to Master Your DLSR in One Afternoon a Beginner’s Guide
  • Beginners Tips for Night Sky and Star Photography
  • Bird Photography Tips for Beginners
  • Nature and Wildlife Photography Tips for Beginners
  • A Beginners Guide to Seascape Photography
  • 5 Beginner Tips for Photographing Animals in the Wild
  • 5 Tips for Newbie Landscape Photographers
  • 10 Incredible Bird Photography Tips for Beginners
  • A Year of Photographic Lessons – Journey of a Novice Photographer
  • Step-by-step Guide to Long Exposure Photography
  • Understand Exposure in Under 10 Minutes
  • Camera Basics 101: The Exposure Triangle

googletag.cmd.push(function() {
tablet_slots.push( googletag.defineSlot( “/1005424/_dPSv4_tab-all-article-bottom_(300×250)”, [300, 250], “pb-ad-78623” ).addService( googletag.pubads() ) ); } );

googletag.cmd.push(function() {
mobile_slots.push( googletag.defineSlot( “/1005424/_dPSv4_mob-all-article-bottom_(300×250)”, [300, 250], “pb-ad-78158” ).addService( googletag.pubads() ) ); } );

The post Best Photography Tutorials for Beginners in 2014 by Darlene Hildebrandt appeared first on Digital Photography School.


Digital Photography School

 
Comments Off on Best Photography Tutorials for Beginners in 2014

Posted in Photography


Understanding Depth of Field for Beginners

12 Nov

DOF
You may have heard the term depth of field (DoF), but if you are new to photography you may not yet be taking advantage of how DoF can enhance your photos. A basic definition of depth of field is: the zone of acceptable sharpness within a photo that will appear in focus. In every picture there is a certain area of your image in front of, and behind the subject that will appear in focus.

This zone will vary from photo to photo. Some images may have very small zones of focus which is called shallow depth of field. Others may have a very large zone of focus which is called deepdepth of field. Three main factors that will affect how you control thedepth of field of your images are: aperture (f-stop), distance from the subject to the camera, and focal length of the lens on your camera. Here are some explanations and answers to other common questions concerningdepth of field.

How does aperture control depth of field?

Aperture refers to the access given to light from the lens to the camera sensors. The size of your aperture (the diameter of the hole through which light enters the camera) controls the amount of light entering your lens. Using the aperture (f-stop) of your lens is the simplest way to control your depth of field as you set up your shot.

Large aperture = Small f-number = Shallow (small) depth of field
Small aperture = Larger f-number = Deeper (larger) depth of field

It may be easier to remember this simple concept: The lower your f-number, the smaller your depth of field. Likewise, the higher your f-number, the larger your depth of field. For example, using a setting of f/2.8 will produce a very shallow depth of field while f/11 will produce a deeper DoF.

The image on the left was captured at 250th of a second at F5.0 which resulted in a very shallow depth of field,

The image on the left was captured at 250th of a second at f/5.0 which resulted in a very shallow depth of field.  Because of this the background is out of focus allowing the subject to stand out. The image on the right was captured at 1/5th of a second at f/32 which created a deep depth of field and a sharper background.

How does distance control depth of field?

The closer your subject is to the camera, the shallower your depth of field becomes. Therefore, moving further away from your subject will deepen your depth of field.

How does the focal length of a lens control depth of field?

Focal Length refers to the capability of a lens to magnify the image of a distant subject. This can get complicated, but the simple answer is that the longer you set your focal length the shallower the depth of field. Example: Your subject is 10 meters (33 feet) away, using a focal length of 50mm at f/4; your depth of field range would be from 7.5 -14.7 meters (24.6-48 feet) for a total DOF of 7.2 meters (23.6 feet). If you zoom into 100mm from the same spot, the depth of field changes to 9.2-10.9m (30.1-35.8′) for a total of 1.7m (5.7′) of depth of field. But if you move to 20m (66′) away from your subject using the 100mm lens, your depth of field is almost the same as it would be at 10 meters using a 50mm lens.

Image of a swan hiding in the tall grass captured  from about 5 meters with 300 mm focal length created a DOF only about 5cm.

This image of a swan hiding in the tall foliage was captured from about 5m (16′)  with a 300mm focal length lens. This combination of focal length and distance created a depth of field of approximately 5cm (2″).

What if I just have a point and shoot camera, or don’t know how to change those settings?

Even with a point and shoot camera, there are ways to control your depth of field. In the Scene Modes menu, look for a symbol of a human head, which is the setting for portraits. This will give you a narrow depth of field. In the same menu there is also a mountain symbol, which is a setting for landscapes, which will give you a deeper depth of field.

If you are a beginner with a DSLR there are some simple ways you can control depth of field and still use and automatic shooting mode. By choosing Aperture Priority mode you can set your aperture to get the depth of field that you want, and the camera will automatically set the shutter speed.

Can I set the depth of field exactly for each situation?

Yes, but because changing your aperture affects your shutter speed, the result may not meet the needs of your image. For instance, if you are trying to increase your depth of field by reducing aperture size you will also need to increase (slow down) your shutter speed which could make your image blurry. Understanding how all these settings work together can increase your control over depth of field.

Is depth of field equally distributed in front and back of my focus point?

No, it’s usually about one third in front and two thirds behind your focal point, but as your focal length increases it becomes more equal.

How will understanding depth of field improve my images?

Managing depth of field is one of the most important tools at your disposal, because having tack sharp images is one of the most important factors to getting that great shot. Knowing how to make the parts of your image you want sharp and the parts you want to be out of focus, is a great artistic tool to create great images.

Getting the right DOF for your shot can make the difference

Getting the right depth of field for your shot can make all the difference.

When should I use a shallow depth of field?

Using a shallow depth of field is a good way to make your subject stand out from its background and is great for portrait photography. Shallow DoF can also be useful in wildlife photography, where you want the subject to stand out from its surroundings. This is also useful because many wildlife photo opportunities are low light situations, and increasing your aperture size will give you more light. Shallow depth of field is also effective for sports photography where many times you want to separate the athlete from the background to bring attention to them. The result of this should also help give you a fast enough shutter speed to freeze the action.

This image captured at 300mm focal length and F/  produced a very shallow DOF. Because of this very shallow DOF it is important to set your focal point on the eye. Notice how the bird appears to pop out from the background.

This image captured at 300mm focal length and f/5.6 produced a very shallow depth of field. Because of this, it is important to set your focal point on the subject’s eye. Notice how the bird pops out from the background.

When should I use deeper depth of field?

In landscape photography it is important to get as much of your scene in focus as possible. By using a wide angle lens and a small aperture you will be able maximize your depth of field to get your scene in focus.

In this landscape captured at 50mm at F/16 Focus point was set at 8 meters which made everything from 4 meters to infinity in focus

This landscape was captured with a 50mm focal length at f/16. The focus point was set at 8 meters, which made everything from 4 meters to infinity in focus.

How can you determine depth of field?

There are several on-line sites that will provide depth of field charts for your camera and lenses. Also, there are a number of apps available for smart phone users that can calculate it for you while you’re in the field. Most cameras have a DoF preview button which will give you a preview as you look through the eye piece. (This is probably the easiest and most under-utilized method.) Using this button may cause your image to appear darker as you view it through the eye piece, but not to worry. Your image will be properly exposed as long as you have the correct exposure settings.

Can depth of field be adjusted to get everything in focus?

Yes, using what is called the hyperfocal distance. When you are focused at the hyperfocal distance, your depth of field will extend from half the distance to your focal point to infinity. Use a DOF calculator to find your hyperfocal distance. If you don’t have a DoF calculator, a good rule of thumb is to focus a third of the way into the scene. Using an aperture of about f/11 or higher with a wide angle lens will maximize your depth of field.

What about depth of field in macro photography?

Because most macro images are produced in low light and with a longer focal length, the depth of field is often very shallow. Adjust your lens to the smallest aperture that the light will allow. It may also be necessary to increase your ISO to allow you to properly expose the image and to maximize your depth of field. Still, in many macro images your DoF may be very minute. With this very narrow focus it becomes necessary to use a tripod, because even the slightest movement of the camera will move your macro subject outside your depth of field.

120 mm Marco at F8 still is a very shallow DOF with the lens only 15 cm from the focal point on the front flower.

This 120 mm macro even at f/8 still has a very shallow depth of field.

What is bokeh?

Bokeh (boh-ke) comes from the Japanese word meaning blur. This effect is produced by the out-of-focus areas in your image that are beyond the depth of field. Bokeh commonly refers to the pleasing circle shapes caused by the shape of the lens aperture. Usually created when shooting with your aperture wide open, such as f/2.8, bokeh can also be created with smaller apertures if the background is distant enough.

Bokeh in this image caused by the distance from the subject to the background which fell well beyond the DOF

Bokeh in this image was created by the distance of the subject to the background, which fell well beyond the depth of field.

To summarize controlling depth of field:

Increase depth of field

  • Narrow your aperture (larger f-number)
  • Move farther from the subject
  • Shorten focal length

Decrease depth of field

  • Widen your aperture (smaller f-number)
  • Move closer to the subject
  • Lengthen your focal length

Take control of your depth of field. Understanding how these adjustments control your it will greatly improve your photography. What questions do you have about depth of field? Please share your photos and comments.

The post Understanding Depth of Field for Beginners by Bruce Wunderlich appeared first on Digital Photography School.


Digital Photography School

 
Comments Off on Understanding Depth of Field for Beginners

Posted in Photography


A Beginners Guide to Seascape Photography

13 Oct
A somewhat abstract seascape scene, the movement of the water makes the image dramatic

A somewhat abstract seascape scene, the movement of the water makes the image dramatic

Seascapes are often seen as a subset of landscape photography. This is true, but I feel that seascapes have their own specific techniques that need to be thought about when you are shooting a scene. The typical sea scene could be a warm sandy beach, blue sky and some palm trees. That is generally the kind of image I try and avoid. For something more dramatic, you may want to try to shoot at sunset and try and capture something unique, rather than a typical postcard shot. When you get it right, your seascape scene should be breathtaking and exciting to look at. It should show the scene, but not look like the kind of shot that anyone could have shot. That means, you may have to scout for some unique or unusual vantage points along the coast.

Safety first please

Seascape photography can be dangerous. Very often you will be hiking over slippery and sharp rocks, the tide may be rising and the waves might be coming in closer and closer. Always be aware of your surroundings and be careful to observe what is happening around you. On more than one occasion, I have been trapped on a rocky outcrop with nothing but wild sea around me. Getting back onto dry land was a relief and an ordeal on those occasions. I have also been completely soaked by freak waves at times and almost lost my camera into the water more than once. So yes, seascape photography can be a little dangerous, but the results are well worth it. The first rule is always, safety first. If possible, go out with a fellow photographer so that there are two of you to help each other if necessary. So, with that disclaimer out of the way, here are some tips on how to set up to get some great seascape images.

Location considerations:

1. Tide

If you don’t know the tidal movements or the tidal range, it’s a good idea to find out. Most coastal towns will have a tide table or chart available, this is important information to know before you go out on your shoot. You can also simply Google “tide table for (city or town)” and all the tide times and measurements should be there. This is important because you may scout a location at low tide, only to return at high tide and find that the rock you were planning to stand on is now submerged under water. Also, the tide can affect the water movement and wave size. If it is high tide, there may not be as much water movement as you would like. It is also a good idea to chat with local photographers or fishermen to find out how the tide is moving.

The incoming tide trapped me on this rocky outcrop

The incoming tide trapped me on this rocky outcrop

2. Weather

Most coastal areas can be unpredictable from a weather perspective. A storm can roll in pretty quickly over a coastal town. Be sure to check the weather forecast for three or four hours before you plan to shoot, and an hour or two after you plan to end your shoot. Sometimes the weather and particularly the wind, can cause the conditions to become difficult to shoot in. One of my favourite apps on my iPhone is Accuweather. I use it often when I am in a location that I am unfamiliar with. It is very easy to use and has been about 90% accurate whenever I have used it.

3. Location

You need to decide where you want to shoot. Do you want to shoot from the beach, the rocks, or the elevated cliff? This will determine what kind of personal gear you will need to take with you (hiking boots, long pants, etc.) It is also a good idea to pack an extra sweater or rain jacket as it could become wet or cold very quickly. Be sure to look at where the sun will be setting. There is nothing more frustrating than being in the shadow of a headland with 80% of your scene in shade as the sun goes down. Remember to look out for channels where the sea water may run up into. These channels and gullies along a rocky coastline can be very dangerous as the water may recede when the tide is out, but as the tide comes in, they may be impossible to cross. If you cross the gulley in low tide and try to return at high tide, you may be trapped as the water could be too deep to cross over.

Magnificent light and moving water makes for a great image

4. Lighting

It is easy to forget your headlamp or flashlight when you are walking along the beach in the warm sunlight. You may be at your location until way after dark and when you decide to return, you will realize that it is pitch dark and the path back has changed because the tide has come in. Don’t forget to carry your headlamp or flashlight with you whenever you do any kind of landscape photography, but especially when you do seascape photography. I have been lost on a rocky coastal outcrop a few times and it is more than a little scary. Fortunately, I always carry my headlamp in my camera bag, no matter what, so that has helped me find my way back to the road or my car.

Photography considerations:

1. Shutter speed

Depending on the seascape scene you are shooting, you will have two choices. You can freeze the movement of the waves or you can blur the movement of the water. If you are shooting a seascape scene that includes rocks in the foreground and the water rolling over the rocks, then you may want to blur the water. This will give the water that soft silky effect and the images will look somewhat surreal. To slow things down even further you could use a neutral density filter to make the exposure time even longer. This will have the effect of really softening the water to the point that it may look misty. Depending on what your vision is for the shot, you need to decide how soft you want the water to be. To freeze the action of the water, you will need to be shooting at 1/1000th or faster. I find that freezing the action of the water is not always as dramatic as softening it. Being able to freeze the action is useful if you are shooting surfing or some other water sport.

2. Aperture

As with landscape photography, you will want to have everything from the foreground to the background in focus. That means you will need to be using an aperture of f/8 or smaller. This will also allow you to slow the shutter speed down, and get some soft water in your scene. Make sure that you focus your camera once you have decided on your scene and composition, then switch your camera to manual focus. That way, when the light begins to fade, your lens won’t be hunting to find a focus point.

Look for reflections in a seascape scene

Look for reflections in a seascape scene

3. Colour or black and white

Seascapes can work very well in black and white. You should shoot your images in colour and convert them afterwards in Photoshop or Lightroom. Both of these image editing suites have great black and white conversion tools and you will be able to make numerous adjustments to your image afterwards. If you shoot in black and white however, you can never get the colour back into the scene. You may try the image in black and white and realize it works better in colour, so be sure to keep shooting in colour.

4. Tripod

You will need a tripod to shoot seascapes effectively. You may be shooting after the sun has set and there is no way you could hold your camera still to get a great shot. Sharpness is key in a good seascape. Portions of your image will be blurred (water) but other parts of the image should be tack sharp (rocks, clouds, etc.) So be sure that everything is very sharp by using a tripod and a cable release if possible. Be aware if you set your tripod up on the sandy shoreline. As the sea comes in, it may cause your tripod to move or sink as the sand may not be firm enough to keep your tripod perfectly still. Always check your image afterwards to be sure that you have the rocks and clouds sharp.

A tripod will be necessary in low light conditions

A tripod is necessary in low light conditions

Subject matter

There are no shortage of scenes to shoot in a seascape scene. Some of the following are ideas to look out for on any beach:

  • Lighthouses – Always fun to shoot and if possible, shoot them in the early evening when the light first comes on.
  • Rocky outcrops – Moving water and rocky beaches make for great seascape images.
  • Reflections – if the tide is moving out on a flat beach, you can capture some amazing reflections of the sky on the shiny beach sand.
  • Colour of light – If you expose properly you can have a warm sky and the blue water in one image. This makes for a beautiful scene.
  • Storms – This is a little more tricky, but sometimes shooting a raging storm over the sea can make a fantastic shot.

If you live near the sea or are planning to visit the seaside, then try your hand at this genre of photography. The results can be very satisfying and you will be astounded how easy it is to produce consistently good results, once you know how. The important thing is to be sure that you are safe and aware of your surroundings at all times. Don’t be afraid to venture out to try this type of photography, it is a lot of fun and it is worth it for sure.

Good foreground interest will anchor the scene

Good foreground interest will anchor the scene

The post A Beginners Guide to Seascape Photography by Barry J Brady appeared first on Digital Photography School.


Digital Photography School

 
Comments Off on A Beginners Guide to Seascape Photography

Posted in Photography


Nature and Wildlife Photography Tips for Beginners

23 Sep

If you have an interest in wildlife or nature photography there is a good chance you have seen an image at some point that has completely taken your breath away. Maybe it was a photograph of a sweeping landscape washed in the golden light of the dying afternoon sun or close-up of some small natural miracle that you had never noticed before that moment. You might even have asked yourself, “How did they do that?”

Winter landscape

Well, the majority of those incredible photographs came about through a good deal of physical hardship, practiced patience, and a healthy amount of self-made luck.

Here are some tips to help you become stronger at wildlife photography and better at recording of the natural world.

Do your homework before heading out

Be as educated as possible before you ever make a photo. Doing your homework is one of the most important, yet loathed parts of wildlife photography. It never pays to walk into a situation and be completely clueless. Though you can never be totally prepared for every challenge you will face (that’s part of the fun) you can educate yourself so that you safely make the most of your outing.

What gear to pack

Advanced gear is not a requirement, however, patience and perseverance are essential. You don’t need the latest and greatest zoom lens or space-age gadgetry in order to produce outstanding nature and wildlife photos. At the same, you must also understand any limitations of your kit, so that you will have realistic expectations and avoid disappointment.

Deer

This photograph was made using the 28-135mm kit lens that came with my camera – after I slowly and quietly crawled into range.

Gear up for what you’ll most likely be shooting. Packing for a photographic outing can cause a lot of anxiety. It’s easy to over pack due to fear of lacking a piece of gear. Over packing though, can be even worse than under packing. You become weighed down and uncomfortable. You find yourself not enjoying what you’re doing which is one of the most preventable of all mistakes, made by photographers. Research the animals and scenes you are likely to encounter. Decide what is most and least important to you. Make choices, commit to them, and then let it go. It will make packing a lot less stressful.

If you plan on photographing wildlife, such as birds and animals that scare easily, then pack your best zoom lens so you can keep distance between you and your subject. Shooting landscapes or scenes where stealth is not a concern? You might consider taking along a wider angle lens to better capture your scene. Ultimately, there is no secret formula and no true all-in-one lens to cover every situation. Be informed before you leave so that you can make the best use of whatever lens you have.

A good bag is worth its weight in gold

All the planning in the world isn’t worth much unless you can comfortably carry your essential tools with you. Find a camera bag that can carry the gear you need easily, and is equally comfortable on your body. Bags range greatly in price and quality but you usually get what you pay for. For added piece of mind, you might consider a bag that is semi-weatherproof or water resistant.

My go-to lightweight bag for wildlife photography, shown with and without the handy rain cover deployed.

Camerabag

Read reviews and find a bag that fits your body, your gear, and your planned outing. You will have a much more comfortable and enjoyable experience. Speaking of comfort…

Shoes

Comfort items

Shoes: A good pair of hiking shoes or boots is one of the most important pieces of gear for any wildlife photographer. Grit, dirt, mud, water, insects, rocks, and creepy-crawlies – you need a pair of shoes or boots that can handle all of these elements. Your shoes should be well fitting and suitable for walking long distances. If your feet become uncomfortable it won’t be long before you start thinking about cutting your trip short.

Prepare a checklist

It’s always a good idea to have a mental checklist before beginning any shoot. Before your outing ask yourself the following questions:

  • Are any special permits or permissions required? Some National or State Parks and wildlife sanctuaries require special permits for access to certain areas, especially those deemed as backcountry environments.
  • Where will I park my vehicle? This is very important. Believe me, if you park your vehicle in an unauthorized area you will be stuck with a sizeable fine or worse, return to find your vehicle has been towed.
  • Are there time restraints of any kind? Most natural areas and parks have hours of operation just like a business. You might arrive expecting to shoot a great sunrise only to find out the location you chose isn’t accessible until after daybreak. Also remember that wild creatures and critters are usually most active in the early morning or late evening.
  • What are the expected weather conditions? This is a biggie. Know what to expect as far as the weather is concerned. Check the forecast the day of departure and keep tabs on it throughout the day if possible. NEVER chance endangering yourself or your equipment by venturing out unprepared for bad weather.
  • What are the times for sunrise and sunset? Again, be sure the places you want to capture a sunrise or sunset are accessible during those times. You need to also be aware of the schedule so that you can allow enough time to reach your location and set up your gear before it’s go time.
  • Are there any commonly photographed animals, landmarks, or structures? Research what is usually photographed around the area you plan to visit. Find a park ranger or staff member and ask about lesser known spots that are less travelled by tourists. Knowing what’s popular will save you time and help to avoid shooting a scene the same way it has been done time and time again. Look for ways to be creative and set your work apart!

So, you’ve researched your location and have a good idea of what to expect. Here are a few basic tips that can help you after you’ve reached your destination.

Shoot RAW

Shootraw

If possible, set your camera to capture images in camera RAW format. RAW image files are basically unprocessed, one might say uncooked, straight from your camera’s image sensor. They contain a massive amount of pixel information when compared to JPEG and take up a lot more memory card space. However, this additional information allows more latitude for adjustments in post-processing.

Use the lowest practical ISO

The ISO number of photographic film and image sensors relates to their sensitivity to light. The boiled down explanation is, everything else being equal, the higher the ISO number the less light is required to make an image. Unfortunately with higher light sensitivity comes increased image noise. In most (but not all) situations you will generally want to use the lowest ISO possible. That is not to say you should be afraid of bumping up the ISO. A fast shutter speed is often needed to capture the quick movements of wildlife and increased noise is far less noticeable than a blurred image.

Use AF continuous (AI Servo) mode when photographing wildlife

Afservo

Autofocus (AF) can be your best friend or your worst enemy. When it comes to photographing most wildlife, however, autofocus is a great tool! Animals and birds, especially the wild variety, are almost constantly on the move. They shift positions and move closer or farther away selfishly, with little regard for the photo you are so carefully trying to compose. This is when AF-Continuous and AF-Servo modes come in handy. Though called different names depending on your camera’s make, they both accomplish the same objective which is keeping a moving subject constantly in focus. Place your selected focus area over your subject and half-press the shutter button to engage the AF. Focus will be tracked for as long as you follow your subject while maintaining pressure on the shutter button. Read your camera’s manual (you’ve done that already, right?) for detailed information concerning specific autofocus capabilities for your model, and how each mode can be selected.

Don’t forget the tripod

“I really didn’t think I would need my tripod” are words that usually begin a sad story about how a potentially great shot is missed. In most wildlife and nature photography situations a tripod is always a good idea. It’s better to have access to one and not need it than to need it and not have one available. Find the lightest and most compact tripod that is sturdy enough to handle your camera setup.

Learn so you can prepare. Prepare so you can photograph. Photograph so you can grow.

Photographing wildlife can be difficult but it can also yield huge artistic, personal, and even spiritual rewards. So go out and have fun doing what you do, but don’t forget to put the camera down every now and then to enjoy the world around you.

“Nature never goes out of style.” – Unknown

The post Nature and Wildlife Photography Tips for Beginners by Adam Welch appeared first on Digital Photography School.


Digital Photography School

 
Comments Off on Nature and Wildlife Photography Tips for Beginners

Posted in Photography


Beginner’s Guide to Tripods

17 Sep

The lowly tripod – the unsung hero behind so many fantastic shots – finally gets its day in the spotlight here on dPS.

Do you want to photograph the stars? You’ll need a tripod. Want to get silky smooth waterfall photos? Yep tripod again. Need to photograph an HDR to extend the dynamic range of your scene? Oh yes, tripod required there too.

Basically, if you want to do anything more than point and shoot, you’ll need to bring your three legged friend along with you.

beginners-tripods

I’ve decided to write this article in a way that assumes you’re just starting out with your journey in photography. So for those of you who have spent some time getting to know your tripod and how to use it, please feel free to add your own advice to the comments section below.

Buying the right tripod

A tripod allows you to frame a shot exactly how you want, and keep it there indefinitely. This allows you to take long exposures, use heavy lenses without straining your arms, or compose the same scene with different subjects in order to photograph it later. All tripods are essentially the same – three legs meeting at a center-point that supports your camera. However, all tripods are not created equal.

Buying the right tripod can be a challenge, one that can easily cause you to give up, head to your local big box store, and by the first $ 30 dollar option you see on the shelf. This is not the best idea, especially since you’ve spent good money on that camera body and lens you’re trying to support. Would you trust a $ 30 plastic tripod to hold your camera steady for a shot like this? I know I wouldn’t.

sturdy-tripod-must

In general you want a tripod that’s strong enough to support your camera, light enough to carry with you wherever you go and affordable enough to not break your budget. Here’s some simple pointers to help get you started:

  1. Know what you need: For working in the studio weight and a compact height won’t be so important, but for landscape and travel you’ll want something light enough to hike with, and compact enough to fit in your luggage.
  2. Aluminum or carbon fibre: If you’re on a tight budget, or won’t be doing many rigorous activities with your tripod, then aluminum will be your go-to as it’s more affordable, but still offers great support. Carbon fibre will set you back a bit more than its aluminum counterpart, but it offers a huge benefit in terms of strength to weight ratio, so it’s ideal for the landscape photographer – especially those intending on more rigorous travels.
  3. Tripod heads: I’ve always been a fan of ball heads and honestly haven’t used anything else. They are often less expensive then the more feature packed options, and are smaller, lighter, and allow you to frame your shot quickly and easily.

Got any more buying tips? Share them below!

Using a tripod

In this video I share some basic tips on how to set up a tripod in various situations to get the best shots every time. I’ll talk a bit more about various setups below the video as well.

Low angle perspective

Many tripods offer the ability to get very low to the ground, which is a great way to change the perspective of a scene to create interest. If this is the sort of thing that you’re looking to do, make sure when you’re comparing tripod options that you pay attention to the minimum height specifications.

low-angle-perspective

When height is needed

When you’re looking to add height to the tripod remember to keep a few things in mind. As I mentioned in the video above, always extend your legs from the widest segment first, as these will offer more support than the smaller legs and always use your center column as a last resort. Finally, something I didn’t mention in the video but that’s also very important, is that weighing down your tripod can really help quite a bit when you’re out shooting on a windy day. You can either carry a sandbag with you, or simply use your camera bag if you’ve got a couple of heavy lenses or bodies inside.

When you’re on a tricky landscape

Finally, using a tripod on a tricky landscape like a hillside or staircase is something that takes a bit of planning. Each leg of the tripod will likely have to be extended to a different length, and positioned at a different angle, but the goal is to have your center column (and thus your center of gravity) aligned evenly between the three legs, and perfect straight up and down. This will give you the most support, and allow you the most freedom to frame your shot.

Throw it all out the window

Of course there are times when you just have to throw everything mentioned here out the window ,and do what you have to do to get the shot. As an example I’ll show you a shot I made earlier this year at Trap Falls, framing the waterfall inside of a Y-shaped tree.

trap-falls-framed

The tree is on a hill, and the base of the Y was a bit too high for my tripod fully extended, which meant that I needed to use every bit of the tripod to its full potential.

As you can see in the behind the scenes photograph below, the center column is extended well beyond what I’d consider an ideal situation. I wouldn’t necessarily call this setup stable, but it did allow me to get the shot I wanted. So like everything in photography, just because there are rules that you should follow whenever you can, if there’s a shot you can’t get by following them, but think you can get it safely by bending the rules a bit, then by all means go for it.

20140411-125515

Note: This is not a mysterious two legged tripod – the third leg is hidden behind the front leg due to the perspective of the shot.

The post Beginner’s Guide to Tripods by John Davenport appeared first on Digital Photography School.


Digital Photography School

 
Comments Off on Beginner’s Guide to Tripods

Posted in Photography