RSS
 

Posts Tagged ‘Beginners’

Next Level Techniques for Advanced Beginners

28 Sep

You’ve been bitten by the photography bug – it’s not an actual insect, but you know what I mean.

Andreas.

By Andreas.

After the salesman pried that hard-earned money from your hands, you brought home that tantalizing-looking DSLR and your friends looked at it like it was a dangerous alien device, inquiring what all of those buttons, dials, and switches actually do.

At the time you didn’t really even know what they did, but you did know that once you figured it out, some cryptic combination of clicking knobs, pushing buttons and twisting rings on that lens, you were going to produce some knock-out photos.

Since then, you have spent eons of your life that you will never get back reading and researching on Digital Photography School, and highlighting juicy passages in your camera’s user manual (that last part might not be true). And guess what? It’s paid off!

Now you know how aperture affects depth of field, how to use shutter speed to freeze or blur movement and that once mysterious acronym, ISO, finally means something to you. Looking back you now understand what it is like to be a beginner, and that realization alone has raised you to a new level.

JD Hancock

By JD Hancock

What now? You are getting some shots you are proud of, have a pretty firm grasp of the fundamentals and are ready to take it to the next level. You are ready to learn some new techniques, emerge from survival mode and get out there and photograph with intention.

Let’s take a look at some techniques that just might get you over that hump and give you the skills, knowledge and power to capture great photos consistently.

Understanding and Using Aperture and Shutter Priority Modes

These are features that the vast majority of DSLRs have, and even many point-and-shoot cameras on the market as well. Some purists may balk at the thought of using one of these “automatic” settings, but pro shooters have long ago learned the versatility and usefulness of these controls.

Aperture priority settings

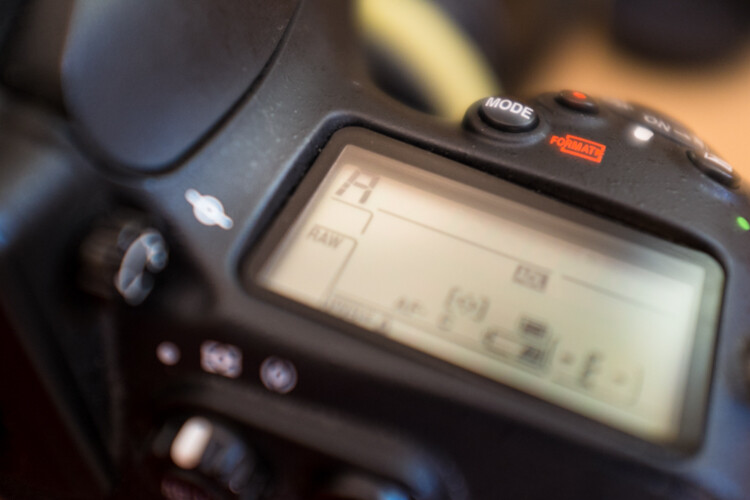
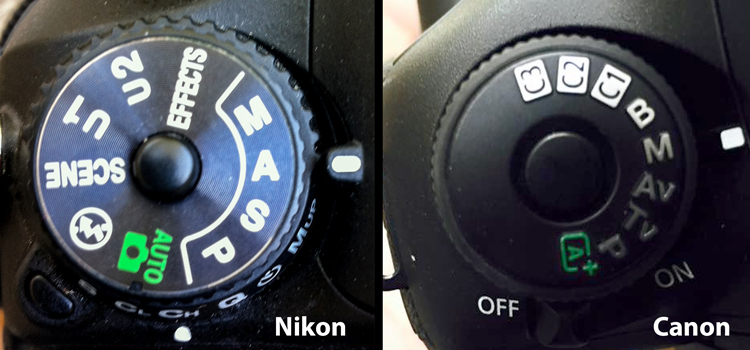
Aperture priority gives you full control of aperture while your camera takes care of the rest.

Although the various options for these settings may vary between manufacturers and camera models, the basic premise remains the same.

As the name suggests, these settings are pseudo-automatic. However, unlike the Program (P) setting, which does allow a minute amount of influence from the shooter, Aperture and Shutter Priority modes let you set certain parameters that change automatically to compensate for other adjustments that you remain in control of.

For instance, if your camera is set to Aperture Priority you retain the ability to adjust the Aperture to alter the depth of field as you see fit, and in conjunction with ISO, the camera will automatically choose the corresponding shutter speed for correct exposure. Many cameras give you the option to control ISO manually or let the camera adjust it for you.

The Shutter Priority setting does what you would expect, allowing you to control the shutter speed while the camera does the heavy lifting of setting the appropriate aperture.

Thomas Hawk

By Thomas Hawk

Some cameras offer the option to set limits on the extent of certain settings. For example, if you are shooting in aperture priority, you can set the camera so the shutter speed won’t drop below a predetermined speed or the ISO won’t exceed a maximum level.

My camera is set to Aperture Priority more often than not – this is personal preference. I know my camera like the back of my hand, and can anticipate how all the settings correspond to one another, so I feel comfortable using this setting under most conditions. It is certainly important to be comfortable using your camera in Manual Mode, however, you are likely to find that once you become accustomed to Aperture or Shutter Priority modes, you will have enough control without having to spin dials as much. Priority modes also help prevent accidental changes which can result in improper exposure.

Exposure Metering, Exposure Lock, and Exposure Compensation

A*J*P

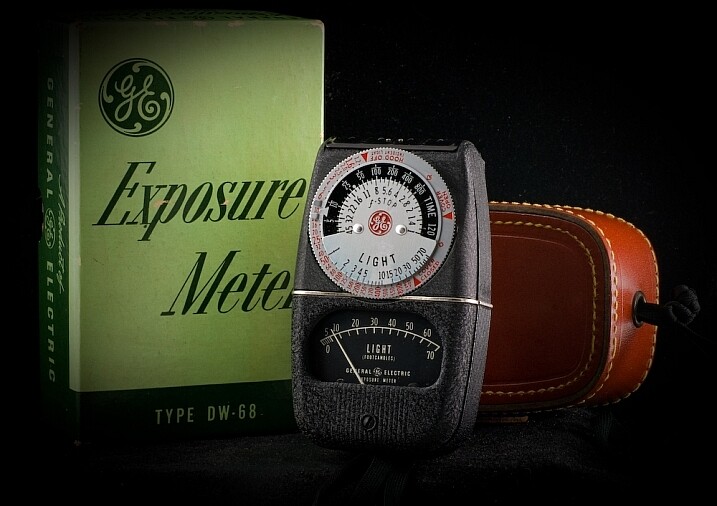
Vintage exposure meter – By A*J*P

While we’re on the subject let’s look at some other ways that you can work with your camera to get proper exposures in all sorts of conditions.

DSLRs give you a few different options as to how they meter and determine exposure for a given scene. The most common are spot, center-weighted and evaluative or matrix metering. Take a look at this handy cheat sheet that should help you wrap your mind around the concept.

Fancy technicalities aside, what are the practical applications of these different settings?

Spot metering

Since spot metering bases exposure on the reading from a very small area of the image, it is a great choice if the subject of your composition is small and significantly lighter or darker than the rest of the image, so you can hone in on the correct exposure. This metering mode can be useful for small backlit subjects, as the light source shining directly at the camera will most often result in an underexposed subject. Keep in mind that regardless of the type of focus points you are using, spot metering will read only about a 4mm radius (depending on the camera) from the very center of the focus point.

Center-weighted metering

Center-weighted metering takes the whole frame into consideration, but puts more value towards the center of the focus points (somewhere in the 12mm range). This setting works great when your subject takes up a larger part of the frame, or the lighting is more even. Consider a close-up portrait where spot metering might be too specific if it reads a shadowed or highlighted area, but center-weighted would give you more of an average.

Evaluative or Matrix metering

The last of three main metering types, evaluative (Canon) or matrix (Nikon) metering, determines exposure in a more complex way by taking into account composition, tones, color and some cameras can even factor in the distance objects are from the camera to estimate what the main subject is. This system of metering works great for landscapes and wide angle shots.

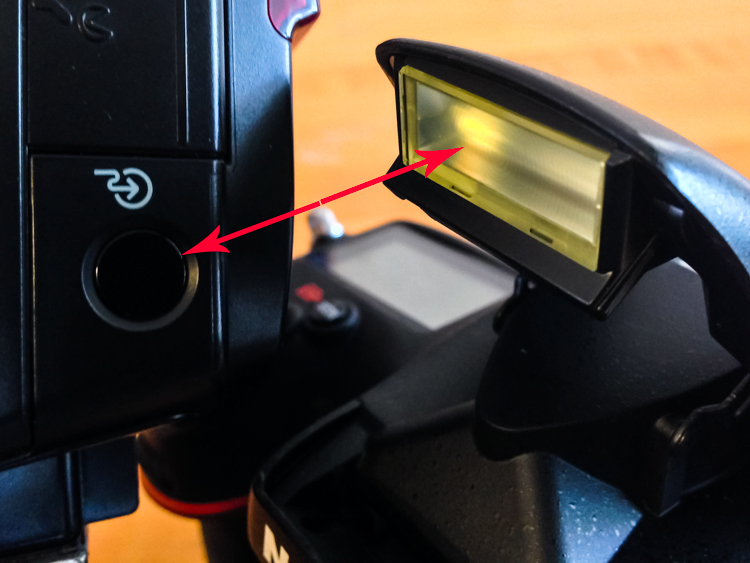
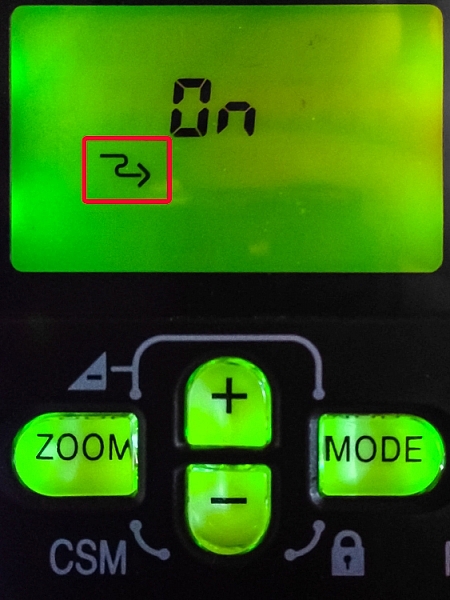
Many cameras are equipped with a dedicated exposure lock button or have customizable settings in order to delegate one. This is used when you want to take an exposure reading and hold it. If your subject fills a large part of the frame, the camera may do a good job at setting exposure. If the subject takes up only a small part of the frame, you can move in close to get an exposure reading, lock exposure and recompose the image.

Exposure/focus lock button

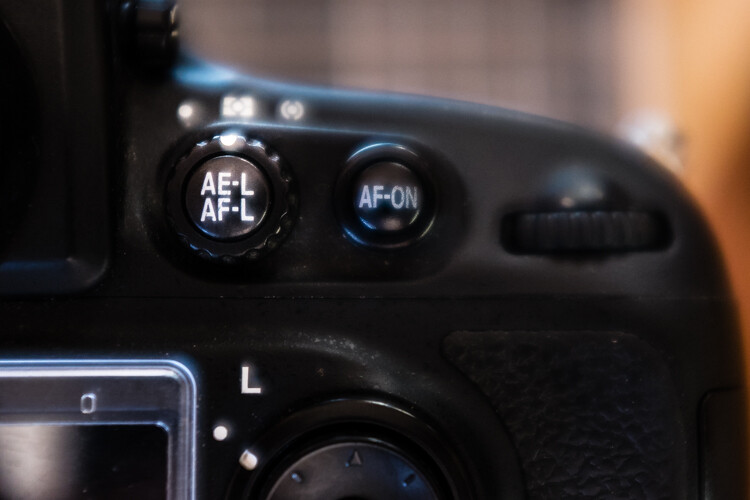
Once you familiarize yourself with the exposure/focus lock button, you will be surprised how often you use it.

Exposure compensation

Exposure compensation allows you to over or underexpose the image manually. This is most useful while using automatic or semi-automatic settings like Aperture or Shutter Priority. In the example of a backlit portrait, many photographers prefer to overexpose the camera’s suggested exposure, knowing that the reading will be wrong because of the lighting. You could certainly change your exposure metering to try and secure a more accurate reading, but with experience you can easily predict how the camera’s exposure meter will react ,and use exposure lock or exposure compensation as a more direct, and one-off, route to proper exposure.

Just keep in mind that the most challenging conditions for your camera’s exposure meter are high contrast situations, and with enough experience you will learn to “see” like your camera and easily be able to anticipate necessary compensations.

Selecting Different Focus Settings

To start with, there are two main categories of autofocus settings: Single and Continuous.

Single (One Shot on Canon) is intended for stationary subjects. When the camera finds focus in single servo mode, it holds that focus point until the shutter is released or the autofocus is released and re-activated.

However, single servo focusing can be very useful for action in certain applications. For example, one technique when shooting a moving, yet predictable subject, is to compose the image and lock focus on the spot where you know your subject will be, and wait for it to enter the frame (think panning).

In continuous focus mode, your camera will continually refocus while the autofocus is engaged. This is the setting to use if your subject, or you and your camera, are on the move. In continuous mode, many cameras allow you to choose how many focus points are live. Say you are shooting a sporting event and there are a lot of players, you may want to use fewer focus points in order to single out your subject.

Continuous servo autofocus

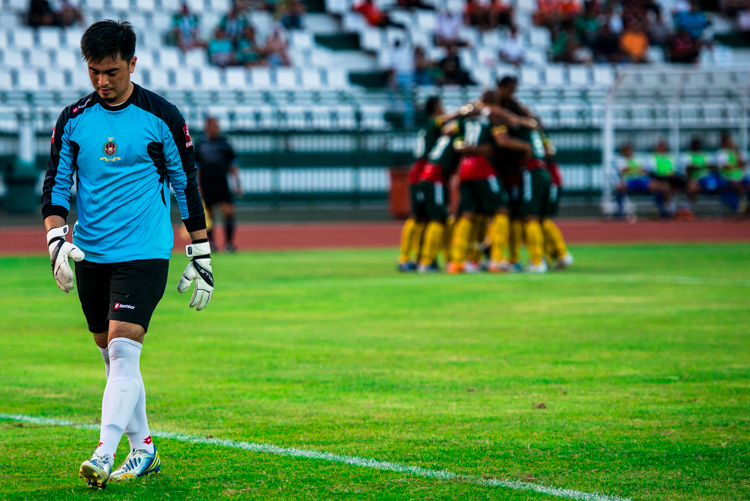
Continuous servo focusing is best used to maintain focus on moving subjects – especially if they are moving towards or away from you.

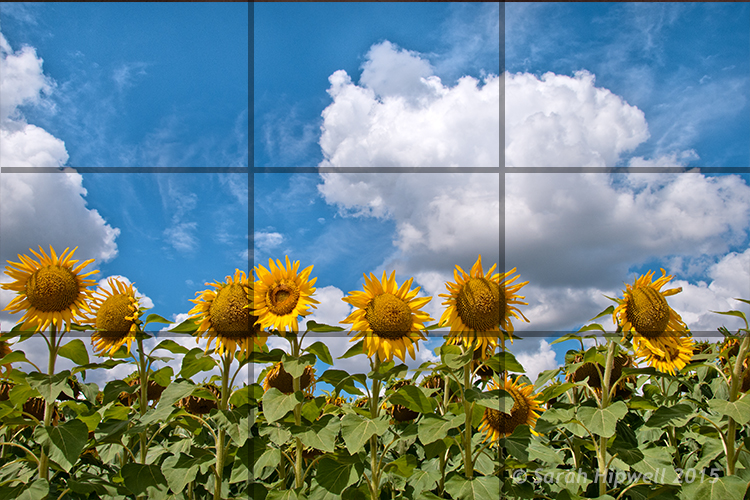
It’s also worth mentioning that just in case you haven’t figured it out already, you can move the focus points around the frame in the viewfinder with the multi-selector. This is key while trying to maintain a certain composition with a moving subject. Consider some basic compositional conventions such as the rule of thirds when setting your focus points for a shot.

Confirm Focus by Previewing Images at 100%, In-camera

As a digital photographer you are extremely fortunate to have access to a feature like this –film shooters didn’t/don’t have this luxury.

The concept is simple: if you are unsure whether you nailed a sharp image, due to camera shake or shallow depth of field, zoom in to 100% and do a little pixel peeping for confirmation. Make a habit of doing this instead of ending up in front of your computer in disappointment at a great shot that’s not sharp.

Zoomed to 100% in camera

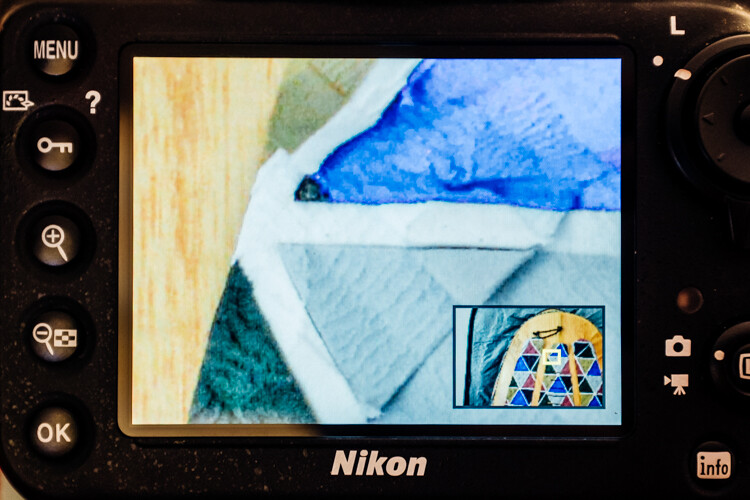
Zooming to 100% is a quick way to confirm you have a sharp image.

Some cameras (check your user’s manual to see if your camera supports this feature) allow you to customize a button which zooms directly to 100% for this purpose.

Many cameras have a setting (sometimes called shutter release priority) which won’t allow a picture to be taken unless it recognizes that your focus point is actually in focus. Personally, I loathe this setting. I think it is better to take your chances and at least try to get the shot. Although the focus may not be spot on, you still may get a usable image.

Conclusion

These are just a few of the major technical considerations to keep in mind as you bravely forge ahead in your photographic pursuits.

Every situation requires its own approach, and the more tricks you have up your sleeve, the more prepared you will be to nail the best shots. Keep your nose to the grindstone and embrace the challenge!

Do you have any other tips for the advanced beginner? Please share in the comments below.

googletag.cmd.push(function() {
tablet_slots.push( googletag.defineSlot( “/1005424/_dPSv4_tab-all-article-bottom_(300×250)”, [300, 250], “pb-ad-78623” ).addService( googletag.pubads() ) ); } );

googletag.cmd.push(function() {
mobile_slots.push( googletag.defineSlot( “/1005424/_dPSv4_mob-all-article-bottom_(300×250)”, [300, 250], “pb-ad-78158” ).addService( googletag.pubads() ) ); } );

The post Next Level Techniques for Advanced Beginners by Jeremie Schatz appeared first on Digital Photography School.


Digital Photography School

 
Comments Off on Next Level Techniques for Advanced Beginners

Posted in Photography


A Beginner’s Guide to Choosing Shooting Mode

22 Sep

Even the most seasoned veteran photographer may use a pre-programmed mode occasionally in order to concentrate immediately on a shot rather than take the time to calculate exposure and miss the opportunity for the great image. But if you are a beginner at photography or want to advance your photography skills beyond the use of Auto mode, begin by adventuring away from the green box.

When you are setting up your camera to capture an image, there are four basic results to consider: wide depth of field, shallow depth of field, motion blur or freeze motion. How do you know which mode to use to control these basics of photography? Let’s take a look.

Nikon-Canon-mode-dail

Auto (Green box)

In Auto mode, your camera will automatically set the shutter, aperture, ISO, white balance, and even the pop-up flash for you.

Advantages: This is a great option for beginners with a digital camera – but don’t become dependent on it! Only use it until you learn to take control of your camera.

Disadvantages: In certain lighting conditions the auto settings may produce undesirable images. For instance, a portrait that is heavily back-lit might just produce a silhouette. In low-light, you may end up with blurry and grainy images; also in low-light, the camera may choose to fire the flash to give more light and many camera models don’t provide a way to disable the flash if you don’t want it.

When to use: Any time you want to use your camera just as a point and shoot camera, this is your mode.

This portrait was intentional shot into the sun in Auto Mode. While the camera did a decent job with exposure, it might be a 1/2 stop under exposed. Auto exposure settings choose by the camera are 1/250th of a second at f/6.3 with ISO of 100. while the shutter speed and ISO are good, a wider aperture would have lessened the DOF and made the background less distracting.

This portrait was an intentional shot into the sun in Auto mode. While the camera did a decent job with exposure, it is a 1/2 stop under-exposed. The auto exposure settings chosen  are 1/250th of a second at f/6.3 with ISO of 100. While the shutter speed and ISO are acceptable, a wider aperture would have lessened the DOF and made the background less distracting.

Program (P)

In Program mode, your camera will automatically set the shutter speed and aperture, but will allow you to choose ISO, white balance, exposure compensation and flash options.

Advantages: This is a great next step for a beginner who wants to take a little more control of their camera and improve their images.

Disadvantages: As in Auto mode, certain lighting conditions may lead to unpredictable results, due to the partial automatic settings which leave some results to chance.

When to use: Use this mode if you want to take a good first step to ultimately taking complete control of your camera’s options.

Shutter Priority (TV – Canon) (S – Nikon)

In Shutter Priority mode, you select the shutter speed and ISO and the camera will automatically choose the proper f-stop for what it determines to be the correct exposure.

Advantages: Great for controlling freeze action and motion blurring of moving objects.

Disadvantages: In this mode you have control of your shutter speed, so you must be careful that your camera can choose an f-stop to give you a proper exposure. The type of lens you have available to use comes into play here. Most cameras can shoot at a very fast shutter speeds, but if your lens doesn’t have a large enough aperture to match that shutter speed the resulting image will be under-exposed.  For example, if you are shooting with a shutter speed of 1/4000th of a second, and the proper exposure for the speed of the subject requires an f-stop of f/2.8, but the widest opening on your lens is f/3.5, the image will be under-exposed.

When to use: Use this mode when you want to control the motion of the object you are photographing. Use a fast shutter speed if you want to freeze the motion or use a slow shutter speed if you want to blur the motion. This mode is also useful when using large mm lenses where you need to set a fast shutter speed to avoid blurred images due to camera shake.

Choosing shutter priority and setting shutter to 1/8th of a second to blur the water.

Shutter priority with a shutter to 1/8th of a second was used to blur the fast moving water.

Here are some suggested shutter speeds for Shutter Priority:

  • Freeze very fast motion – 1/3000th of a second
  • Athletes in motion – 1/500th to 1/1000th of a second
  • Birds in flight – 1/1000th to 1/2000th of a second
  • People walking – 1/250th of a second
  • Panning moving objects – 1/30th to 125th of a second
  • Blurring fast moving water – 1/8th of a second
  • Blurring slow moving water – 1/2 to 1 secondshutter

Aperture Priority (AV – Canon) (A – Nikon)

In Aperture Priority mode, you select the aperture and ISO and the camera will automatically choose the proper shutter speed for what it determines to be the correct exposure.

Advantages: Other than Manual mode (next paragraph), Aperture Priority is the most popular shooting mode photographers use, mainly because it controls what is in focus in your image. And in most cases the item you have in focus is the element that will make or break the success of your image.

Disadvantages: In low-light situations your camera may choose a very slow shutter speed that will produce a blurry image, either because of movement by the subject or camera shake.

When to use: Use this mode when you want to control the Depth of Field (DOF) of your image. The larger the aperture the more light reaches your camera’s sensor and the shallower the DOF. Reversely, the smaller the aperture the less light reaches your camera sensor and the deeper the DOF. Beware that changing your aperture will also affect your shutter speed. More light from large apertures requires a faster shutter speed and less light from small apertures requires a slower shutter speed.

Using Aperture Priority to set a larger aperture to increase DOF

Aperture Priority to set a larger aperture to increase DOF.

Here are some suggested f-stops for Aperture Priority:

  • Landscapes -f/8 or higher for more DOF
  • Portraits – Large aperture  (f/2.8) for shallow DOF to blur the background
  • Macro – f/8 or higher for more DOFaperture

Manual (M)

Manual mode allows you to change both the shutter speed and aperture settings independently from each other. No settings will be automatically set by the camera. Your camera’s built-in light meter will guide you on the exposure it determines to be correct, but you have complete control to adjust the shutter and aperture separately to get the exposure you determine to be correct for the image you are creating. Before you use the manual mode it is recommended that you have an understanding of the exposure triangle (shutter speed, aperture and ISO) and how each will affect your final image.

Advantages: This mode gives you complete creative control of the image you are capturing.

Disadvantages: While this mode has many creative advantages, you must be careful to always check the exposure with every image, especially when shooting in fast changing lighting conditions.

When to use: After you have learned to use this mode and learned the effects and results of the settings and how they work together, you will use this mode almost every time.

Here Manual mode was used to control the DOF and to use a slow shutter speed to blur the waterfalls.

In Manual mode, a small aperture was used to control the DOF while also setting a slow shutter speed to blur the motion of the waterfall.

Scene Modes

Scene mode is very similar to Auto mode. You choose the scene you are shooting and the camera will choose settings for you optimized for that scenario. Different camera models may have different scene modes, but listed here are some of the most popular:

  • Sports – Camera will increase ISO and use a fast shutter speed to capture fast action.
  • Landscape – Camera will use a small aperture to maximize the DOF; flash may also be disabled.
  • Portrait – Camera will use a large aperture to  throw the background out of focus. Some models of cameras will also use face recognition in this mode.
  • Macro – Camera will choose small aperture to give as much DOF as possible.

Advantages: As with the Program mode, these Scene modes are a beneficial starting point for beginners and will often give a better result than shooting in Auto mode.

Disadvantages: While these settings can produce desirable images at times, the results may vary and will not be reliable.

When to use: While these scene modes may be a step up from Auto mode for beginners, use these options as a starting point to learn your camera, understand its workings, and upgrade your photography skills.

Aperture-Shutter


So which mode is the best?

It is completely up to you which mode you feel most comfortable using. But if you are using the Auto, Scene or Program modes and you want to improve your photography, learning how to set exposures using the exposure triangle of shutter, aperture and ISO will help you make the best possible choices to create better images.  The two most popular modes used by professional photographers are Manual and Aperture Priority. Remember, professionals were once beginners too. Enjoy your camera experiences, no matter which mode you choose!

googletag.cmd.push(function() {
tablet_slots.push( googletag.defineSlot( “/1005424/_dPSv4_tab-all-article-bottom_(300×250)”, [300, 250], “pb-ad-78623” ).addService( googletag.pubads() ) ); } );

googletag.cmd.push(function() {
mobile_slots.push( googletag.defineSlot( “/1005424/_dPSv4_mob-all-article-bottom_(300×250)”, [300, 250], “pb-ad-78158” ).addService( googletag.pubads() ) ); } );

The post A Beginner’s Guide to Choosing Shooting Mode by Bruce Wunderlich appeared first on Digital Photography School.


Digital Photography School

 
Comments Off on A Beginner’s Guide to Choosing Shooting Mode

Posted in Photography


Easy Tips to Help Beginners Understand Composition

20 Sep
Title-portrait-subject's-eye-above-the-horizon-line

Place your subject to the right or left of centre. For portraits, the eyes should be above the centre line for a pleasant good composition.

Composition is all about the balance of the elements in your photograph. This also includes colors tones and textures. This is what separates a snapshot from a great shot. If you want to achieve a good composition, you need to plan it out and see where each element is going to be placed before you take the shot.

You may have heard photographers talk about seeing the shot in their head before they have actually taken the shot. It’s this ‘seeing’ that I’m going to describe in more detail. I’ll also demonstrate a few useful tips to train your eye in seeing or framing a scene with or without a camera, and in post-editing.

A good composition in a photo will most likely have followed a compositional rule. These are very useful to know. I’ve chosen five of these principles to describe how they work. I prefer to call them principles or guides rather than rules. There are many more, but these five are a good place to start.

cut-out-cardboard-frame

Cut-out cardboard frame for training your eye to see.


Let’s get back to seeing your shot or framing the scene. For this exercise, you won’t need a camera. You might get funny looks but bear with me. Choose any place, location that you want.

Cut out a frame from cardboard or any material you want as long as it’s a rectangle. See above.

You could equally use your hands, but I preferred using the cardboard frame.


frame-the-scene-hands

Framing your shot using hands.


As you will see, the frame narrows your field of vision and helps to block out distractions and look for the main focal point, which is what the viewer’s eye is drawn to. I can’t emphasize enough that this simple exercise will help you train your eye to see better in terms of composition. Don’t forget to get down low and look up too.


What-we-see

Take this metal bridge, for example. Not a very interesting photo.


framing-the-shot-bridge

By using the cardboard frame to ‘see’ the potential for an interesting shot.


final-image-how-we-see

Bring it into your post-editing software and create an interesting texture shot.

Another useful tip that I would highly recommend is a trip to your local art gallery to see great works of art. Not only is it visually pleasing, but you get the chance to study how these great artists used composition to great effect. So the next time that you happen to be in such a museum, observe and take note. Ask why you liked a particular painting? How were the elements in the painting arranged or placed? Where was the horizon line – a third up from the bottom? What about color and texture?

Okay, what if you don’t live near an art gallery? Then maybe a visit to your local library could be an option? Libraries are such a wonderful resource. In the art section alone, you have great masters, such as Leonardo da Vinci, Rembrandt and so forth. And of course, the masters in the photography world such as Henri Cartier-Bresson and Ansel Adams, to name just a couple.

Art-books

Go to your local library for inspiration from the masters in the art world to see how they used composition in their works.


Before you go and get your camera, let me explain the following five compositional principles I believe are a great starting point for beginners.

Rule of Thirds

You may have already heard of this one. This is an actual formula based on mathematical principles of harmony and proportion. It has been used by artists for centuries. So think of your photo with imaginary lines that are drawn dividing the image into thirds both horizontally and vertically. You place important elements of your composition where these lines intersect. Similar to a tic-tac-toe game.

rule-of-thirds

How the rule of thirds looks like. Where the lines intersect are the points in which to place your elements.

Rule of Odds

This may sound a bit odd (sorry, excuse the pun), but our brain looks for evenness and symmetry. So this principle asserts that having an odd number of objects in an image will be more interesting and, therefore, more pleasing. By having one or three elements is better than two.

Rule-of-odds

Odd numbers of elements are more pleasing and interesting than even ones.

Lines

Keep the horizontal lines level and the vertical lines straight. This is particularly important if you shoot landscapes, seascapes and cityscapes. Leading lines are also very effective for drawing the viewer to where the focal point is.

lines-straight

The red lines are to show the horizontal lines are even and the vertical lines are straight.

Color and textures

Color and textures are a great way to demonstrate good composition.

Color-and-rule-of-thirds

Here is an example of color and rule of thirds for this composition. Notice the curve elements.

Negative space

This is an abstract concept which describes the space around your subject, otherwise known as ‘white space’ that draws your eye to it. Basically like ‘sky’ or a blurred background that provides the main emphasis on the subject.
Think of it in terms of letting your main subject or object breathe by giving it room.

As photography is about creativity, rules are not meant to be strictly adhered to. In the bikini photo, although I used two of them and they are symmetrical, I used color to contrast the elements and by not placing them in the centre gives the photo a more pleasing compositional effect.

knowing-how-to-break-the-rules-color-as-composition

Although I used two pairs of elements and I know that these are even, the color contrast and using the rule of thirds still makes this image a good composition.

Right, let’s get the camera out. Most DSLR cameras have built-in grid lines and some have a virtual horizon or a spirit level. If your camera has none of these options, you can always add a leveling aid, such as a hot shoe-mounted spirit level or use the focusing points within the viewfinder.

Use your tripod to help you frame your shot so that you get a good composition. Look through the viewfinder, see what elements are in the frame. Then take a look at the scene in front of you with both eyes, then go back to your viewfinder, recompose, then shoot.

Practice will improve your understanding and shooting better compositions. Don’t expect to get it in one go. Give yourself time.

Last, but not least, cropping your images in post-editing. Whether you use Camera Raw, Photoshop or Lightroom, cropping your photos will give you a better understanding of how the principles of composition apply.

You can easily straighten crooked horizon lines by using the Crop Tool or get rid of barrel distortion in buildings using the Lens Correction filter in Photoshop. Or simply change the image dramatically from the one you shot originally. All of these edits can be done non-destructively, so you can crop to your hearts content!

original-title-shot

This is how the photo at top of this article was shot, yet when I cropped in tight on the model to the right, it gave me a different shot.

To summarize, like any complex subject that goes beyond just one article, I hope I have illustrated some useful tips to show the importance of composition in your photography. Please share your comments below.

googletag.cmd.push(function() {
tablet_slots.push( googletag.defineSlot( “/1005424/_dPSv4_tab-all-article-bottom_(300×250)”, [300, 250], “pb-ad-78623” ).addService( googletag.pubads() ) ); } );

googletag.cmd.push(function() {
mobile_slots.push( googletag.defineSlot( “/1005424/_dPSv4_mob-all-article-bottom_(300×250)”, [300, 250], “pb-ad-78158” ).addService( googletag.pubads() ) ); } );

The post Easy Tips to Help Beginners Understand Composition by Sarah Hipwell appeared first on Digital Photography School.


Digital Photography School

 
Comments Off on Easy Tips to Help Beginners Understand Composition

Posted in Photography


Reading List: 7 Great Photography Books for Beginners

04 Sep

We like to think of ourselves here at Photodoto as a resource that beginning photographers can utilize to help them improve their photography and find new, interesting sources of inspiration. We even have our handy-dandy 7-day email course, which you can receive for free by entering your email in the box just to the right of this paragraph. But sometimes, Continue Reading

The post Reading List: 7 Great Photography Books for Beginners appeared first on Photodoto.


Photodoto

 
Comments Off on Reading List: 7 Great Photography Books for Beginners

Posted in Photography


The Devil’s in the Details: Macro Photography for Beginners

14 Aug

The world around us, that which we often consider mundane, if we consider it at all, is infinitely detailed. The carpet beneath your feet, the grass in your front yard and along the sidewalk you stroll down each day, the corners of your cupboard behind the cereal boxes, all of these places contain mind-boggling facets and edges and curves, if Continue Reading

The post The Devil’s in the Details: Macro Photography for Beginners appeared first on Photodoto.


Photodoto

 
Comments Off on The Devil’s in the Details: Macro Photography for Beginners

Posted in Photography


Landscape Comp Tip for Absolute Beginners

11 Aug

Landscapes are some of the easiest shots to take – no arranging meetups with others, no double chins, and that fresh air is super invigorating!

If you’re just getting the hang of creating gorgeous landscape shots, you’ll benefit from understanding how to add a sense of depth with composition. Think of your photo as having three parts: foreground, middle-ground and background. Try to make sure there something of interest in all three sections.

Check out this article for a perfectly simple visual example of great landscape composition.

Photo by Scott Bourne


© Erin for Photojojo, 2015. |
Permalink |
No comment |
Add to
del.icio.us

Post tags:


Photojojo

 
Comments Off on Landscape Comp Tip for Absolute Beginners

Posted in Equipment


Beginners Guide to Using TTL Off-Camera Flash

05 Aug

So you want to use off-camera flash. But why? Your camera has that hot shoe there for a reason, right?

There are two things that you may not realize:

  1. That many DSLR-speedlight combos are capable of wireless off-camera flash using through-the-lens (TTL) metering without any additional equipment
  2. That using off-camera flash can take your photography to an entirely new level both in quality and creative potential.

Many references to off-camera flash talk about sync cords and wireless transmitters, when in fact, many DSLRs with a built-in pop-up flash have the ability to wirelessly control a speedlight. Likewise, many hot shoe mounted speedlights are fitted with an optical receiver to be wirelessly triggered.

Image of pop up flash and speedlight optical receiver

Look, no wires! On camera pop-up flashes are often capable of optically triggering speedlights.

The least painful way to cross the proverbial bridge into the realm of wireless off-camera flash – often referred to as a remote or slave flash – is by utilizing your camera’s ability to act as a remote trigger for a flash combined with TTL metering.

Most Nikon cameras from the D70, and flashes from the SB-R200 and up; and Canon cameras from the 600D (T3i) and flashes from the Speedlite 90EX and up offer these features, but check the manufacturer’s website to be sure what setups will work. There are also a wide selection of other brands of flash, often less expensive, that offer similar features.

A TTL-equipped flash is manufacturer specific. The TTL feature of a Nikon dedicated flash will only work with Nikon, however, it could possibly still be used in manual mode.

In a nutshell, TTL is the way that the camera sets the exposure and flash intensity automatically by firing a nearly imperceptible pre-flash, taking an exposure reading, and adjusting settings accordingly. Nikon calls it i-TTL and Canon has dubbed it e-TTL but it’s basically the same deal.

For wireless off-camera flash functionality, the built-in flash on your camera is set to send an optical signal to your flash which triggers it.

Photo taken with a hot shoe mounted flash

This photo was taken simply with a hot shoe mounted flash set to TTL metering and the camera set to aperture priority. Shot at 200mm, f/5.6 at 1/60th of a second with the flash pointed at a low white ceiling. Nice soft, even lighting.

Photo taken with off camera wireless flash

Exact same settings as the photo above except the flash was setup off-camera in remote mode, with TTL metering. It was placed at 45-degree from the subject and aimed towards the food. Voila! Directional, moody lighting.

First time users of this method will think they just discovered sorcery. Partly because it’s such a cool trick and partly because it is easy to achieve awesome results right away. Manually controlling an off-camera flash isn’t the end of the world but it requires more thought and consideration to balance the flash and camera settings to achieve desired results.

If you have a camera and a hot-shoe-mounted flash unit that are capable and you haven’t taken advantage of it yet, this is the point where you should start getting excited.

Setup for Nikon Equipment

Camera Settings (menu locations may vary depending on camera model)

  1. Open the Custom Settings Menu
  2. Scroll down and select menu “e” – Bracketing/flash
  3. Choose e3 on the list – Flash cntrl for built-in flash
  4. Choose the last selection on this list – Commander mode
  5. The first line item is Built-in flash, scroll right to highlight the Mode column. If you haven’t messed around with this it will probably be set to TTL.
  6. Scroll down until it reads – –. This means that the camera’s built-in flash will only trigger the off-camera flash and won’t add any additional light to your exposure.
  7. No need to change it but note what channel is selected as your flash will need to be set to the corresponding channel.
  8. Press OK.
  9. Pop open the built-in flash.

Flash Settings (varies depending on flash model)

Photo showing SB-600 remote flash setting

Users of Nikon speedlight models SB-600 and SB-800 are looking for this symbol indicating the flash is ready to be wirelessly triggered. The SB-800 selection is also marked Remote.

On some Nikon flashes you are looking for a curved arrow symbol that signifies it is set to be controlled wirelessly. On some models like the SB-600 and SB-800 this is accessed in the Custom Settings menu while the SB-700, SB-900 and SB-910 have a dedicated switch to set the flash to Remote.

Setup for Canon Cameras

Camera Settings (may vary depending on camera model)

  1. Press the Q button to open the menu.
  2. Cycle through until you reach the Built-in flash func. menu setting identified by a flash symbol. Press the Set button to select.
  3. Choose the middle menu item called Easy wireless flash shooting. This setting can also be found in the first page of the shooting menu under Flash control.
  4. No need to change it but note what channel it is set to as your flash will need to be set to the corresponding channel.
  5. Pop open the built-in flash

Flash Settings (varies depending on flash model)

On Canon a flash you need to set it to slave mode. Some Speedlite models have a dedicated switch for this setting, and others require you to hold down the zoom button to switch it on.

The system is an optical one, meaning that the receiver on the speedlight needs to “see” the signal from the on camera flash. A direct line of sight is recommended but I have found that you can often hide the speedlight slightly behind a wall or other object, and it will still receive the signal.

Other than the signal being interrupted by physical objects, it can also be finicky in bright daylight, and the range is limited compared to radio frequency triggers.

Food photo with off camera flash

Simply getting the flash off of the hot shoe and a couple of feet to the side casts more visible shadows and gives the photo more dimension.

Editor’s Note: If you have a system other than Canon or Nikon consult your camera and flash manuals for the settings. We apologize if you feel left out, but we are not able to cover every brand and combination in the scope of one article. 

Notwithstanding the limitations of the system, it’s an ideal introduction to off-camera flash with minimal investment of time or money – especially if you have the equipment already.

These are the very basics. Both Nikon and Canon systems are very flexible, and expandable, with the ability to adjust flash intensity from the camera, add additional flashes in groups, and in some cases, trigger other flashes from a master flash adding more versatility and utility.

After you get the system working its magic and have officially entered the  realm of off-camera flash, there are innumerable adjustments to make both on the flash and camera to gain more control, and fine tune your lighting to create the photo you see in your mind.

A Few Quick Tips

  • Very bright ambient light and flashing lights can interfere with the optical triggering
  • For best results, point the receiver window on the flash (usually covered with red plastic) toward the camera and rotate the flash head if necessary
  • If the background is too dark, try decreasing (slowing) shutter speed and/or increasing the ISO

If you want your subject and background to have more even lighting, take a look at Dragging the Shutter: Balancing Fill Flash with Ambient Light

For more technical information about flash placement, have a read of Working with Off Camera Flash and TTL.

Just starting out with off-camera flash? Let’s hear about your experience and see your results in the comments below.

googletag.cmd.push(function() {
tablet_slots.push( googletag.defineSlot( “/1005424/_dPSv4_tab-all-article-bottom_(300×250)”, [300, 250], “pb-ad-78623” ).addService( googletag.pubads() ) ); } );

googletag.cmd.push(function() {
mobile_slots.push( googletag.defineSlot( “/1005424/_dPSv4_mob-all-article-bottom_(300×250)”, [300, 250], “pb-ad-78158” ).addService( googletag.pubads() ) ); } );

The post Beginners Guide to Using TTL Off-Camera Flash by Jeremie Schatz appeared first on Digital Photography School.


Digital Photography School

 
Comments Off on Beginners Guide to Using TTL Off-Camera Flash

Posted in Photography


Beginners Guide to Creating and Applying Texture Overlays Using Photoshop

03 Aug

Creating and applying textures is surprisingly simple and fun to do.

Adding texture to photographs was happening long before the invention of Photoshop and other editing programs. In the days of the darkroom, we would scratch negatives with pins, sand paper them, stain the photographic paper with fixer before exposing, layer two negatives on top of each other in the enlarger, or push our film ISO to increase grain. These days, with editing programs being our digital darkroom, we simply have yet another way of adding texture to photographs.

What is a texture?

In digital photography terms it’s simply another layer added to your photograph in an editing program, usually an image of some sort of textural surface, such as paper, wood, concrete, etc., but anything at all can be a texture. They can be photographed, scanned or even made in Photoshop.

Almost anything can be used as a texture.

Some examples of textures. A friend’s work bench, a close-up of my lamp shade, a mossy rock, fog from a smoke machine, and some very ugly carpet.

Why use textures?

With the right texture overlay, and application of it,  you can add an extra level of depth and feeling to your photograph. You can use them for anything – from adding a vintage or grunge look to your photographs, to creating fine art pieces.

One of the best uses is to rescue a photograph that just isn’t quite working. I’ve been told no texture overlay will save a terrible photograph. While this is true for the most part, sometimes it can transform an otherwise unusable image to something more promising.

A texture can transform an otherwise unusable image into something more promising

A texture can transform an otherwise unusable image into something more promising.

Textures can be added to almost any kind of image. If you’ve ever downloaded a photography app for your Smartphone, you have most likely had them add a texture with the app’s built-in filters.

Some mobile phone apps add texture for you

If you’ve ever used a filter on a mobile phone app, you have probably already had textures added for you.

Getting started

You don’t need to create your own texture to get started. There are many pre-made, free textures available on the internet. A quick Google search will bring up a bunch of free texture sites. But not all textures are created equally, or usable legally. You need to look for textures that are a decent size and resolution, a 200px/72dpi texture over a 3200 px/300dpi image probably isn’t going to work so well.

You’ll also want to make sure the texture has the right copyright permissions. Sites like deviantart.com have many stock textures offered free by their artists for personal use. These artists ask that you simply return the favor by sending them a link to the image you created using their work. Other sites like freetstocktextures.com offer their images copyright free for personal and commercial use, as long as you aren’t reselling the texture images themselves.

Creating your own textures

Creating your own textures is as simple as taking a photograph. Why do that, when you can download free ones? Because it’s fun, your work is then completely all yours, and you can tailor your textures to suit your images. For example; if you’re photographing skateboarders at a skate park, you could also gather some shots of the concrete they skate on, or graffiti around the place to create original textures that work with, and possibly add to, the story of your subject matter.

create your own textures to add more story to your image

Textures can add a bit more of a story to your images.

The image above is of my daughter asleep after a day at the beach (many years ago) combined with texture of the water I took that day, to add to the story and memory of the day, and give the photo an extra dream like feel.

Create a texture with your scanner

Below is the first texture I created, one that I still use years later. It was created by scanning the bottom of an old baking tray. Scanning works well for textures of papers and other small flat surfaces.

You can also use a scanner to create textures. Thiis is a scan of the bottom of an old baking tray

Scanned texture from an old baking tray.

The baking tray texture was used in the image of the cello player at the beginning of this article, in combination with a manuscript image of the music she played on the day. I also used it in the image below; one of a series of images created in collaboration on album artwork with Canadian singer songwriter Sora. The texture was used to tie all the photographs in the album together even though some were taken by other photographers. Yet another use for textures!

Baking tray texture in combination with a few other textures.

Textures can be used to tie a series of images together.

Create a texture in Photoshop

You don’t need to understand complex Photoshop processes to create a texture quickly and easily. Here are a few simple steps to create a basic texture in a few minutes:

  1. Open a new file the size and resolution you require
  2. Brush around a couple of colors
  3. Add a Render Clouds filter
  4. Adjust levels for a bit of contrast
  5. Add a vignette and a color filter
Creating a texture in photoshop takes only minutes.

Paint in some colors, add Render Clouds Filter, some contrast, then some colour and vignette. Easy!

Instead of a Render Clouds you could use the Blur Tool to swirl your colors around, or try some of the other filters in Photoshop to get different effects. I tested it out on what was originally a rather terrible photograph of this orchid.

creating-and-applying-textures13

The texture, plus a few color adjustments and a warming photo filter, and it’s a whole different image.

create-and-add-textures09

While it does look a little like something you might see on your Facebook stream with a positive affirmation written across it in an awful font, it took me less than five minutes to do for this demonstration to show you how simple it can be to create a texture from scratch.

create-and-add-textures10

Applying your texture

It is really very easy to apply your texture. There are some more technical articles on adding textures here on dPS, but here is a quick guide to get you started.

Click and drag your texture thumbnail in the Layers palette over onto your original image. Your texture becomes layer 1 in your original image’s Layer palette. Choose your level of transparency with the Opacity Slider and use Free Transform Tool to move the texture about. Turn it around, enlarge or stretch. See where it sits best.

create-and-add-textures11

Then it’s simply fine tuning the Opacity, maybe putting Eraser Tool on a low opacity and painting out unneeded parts of the texture. Alternatively use a layer mask to paint out some areas, as well as back in, if you accidentally paint out too much.

create-and-add-textures12

Have fun with it and experiment. Try a few different layer blend modes, add multiple textures, or add the same texture image a few times, perhaps with each layer having a slightly different hue. There are no rules.

Have you created a texture that you love? Share it and its use (your images) in the comments below.

googletag.cmd.push(function() {
tablet_slots.push( googletag.defineSlot( “/1005424/_dPSv4_tab-all-article-bottom_(300×250)”, [300, 250], “pb-ad-78623” ).addService( googletag.pubads() ) ); } );

googletag.cmd.push(function() {
mobile_slots.push( googletag.defineSlot( “/1005424/_dPSv4_mob-all-article-bottom_(300×250)”, [300, 250], “pb-ad-78158” ).addService( googletag.pubads() ) ); } );

The post Beginners Guide to Creating and Applying Texture Overlays Using Photoshop by Lea Hawkins appeared first on Digital Photography School.


Digital Photography School

 
Comments Off on Beginners Guide to Creating and Applying Texture Overlays Using Photoshop

Posted in Photography


10 Things Photoshop Beginners Want to Know How to Do

22 Jun

Terry White is an Adobe Photoshop expert and in this video he answers the 10 things that Photoshop (particularly for Photoshop CC) beginners want to know how to do including:

  1. How to touch up a photo; how to make people look better
  2. Layers and adjustment layers; what are they and how to use them
  3. Working with layer masks
  4. How to crop a photo
  5. Adjusting the exposure and using the Adobe Camera Raw filter
  6. Removing something from an image
  7. Move or copy objects in a photo
  8. How to put a person from one photo onto a new background (or putting two photos together)
  9. How to add text
  10. Saving photos and saving formats that are shareable

It’s a bit of a long one but some really good tips in here that I’m sure you’ll find helpful if you’re new to Photoshop.

He also mentioned grabbing a Wacom tablet to use for your editing instead of a mouse. I use one in Lightroom as well and it is much better and more precise and doesn’t leave you with a cramped hand after working on images for hours.

googletag.cmd.push(function() {
tablet_slots.push( googletag.defineSlot( “/1005424/_dPSv4_tab-all-article-bottom_(300×250)”, [300, 250], “pb-ad-78623” ).addService( googletag.pubads() ) ); } );

googletag.cmd.push(function() {
mobile_slots.push( googletag.defineSlot( “/1005424/_dPSv4_mob-all-article-bottom_(300×250)”, [300, 250], “pb-ad-78158” ).addService( googletag.pubads() ) ); } );

The post 10 Things Photoshop Beginners Want to Know How to Do by Darlene Hildebrandt appeared first on Digital Photography School.


Digital Photography School

 
Comments Off on 10 Things Photoshop Beginners Want to Know How to Do

Posted in Photography


How to See the Light for Portraits: A Quick Tip for Beginners

05 May

Light1_2

As a beginning photographer, one of the easiest ways to move from taking average snapshots to more professional looking portraits is to develop a good understanding of light. Harsh and uneven lighting can often be distracting and make the photograph look amateur, whereas even lighting allows the viewer to focus solely on the subject and is more visually appealing.

Spending some time learning about the exposure triangle, the quality and direction of light is a great first step, something that I highly recommend to everyone. That said, even if you understand the theoretical aspects of light, it can still be difficult to walk into a park with your children, or clients, and know intuitively where to situate your subject for the best possible portrait lighting. So, I’d like to share one quick and easy trick that you can use to help you “see” the best light if you’re unsure of where to begin:

The Circle Trick

Step One:

Have your subject stand facing you, at the appropriate distance for whatever focal length you’re using. Think of the two of you being like a clock, with you in the center tether position and your subject as the clock’s hour arm in the 12 o’clock position. Take a photo.

In this instance, I was photographing my daughter in our backyard at about 6:30pm. My starting (12 o’clock) position was with the sun behind her.

Step Two:

Have your subject move to the three o’clock position. Pivot with them so that you continue to face each other. Take another photo.

Now, I’ve moved her into the 3 o’clock position. You can see that if you’re looking at her, the sun is predominantly on the left side of the image.

Step Three:

Have your subject move to the 6 o’clock position. Again, pivot with them. Take another photo.

Now, she’s moved into the six o’clock position, and is looking into the sun. You can see that’s going super well.

Step Four:

Have your subject move to the nine o’clock position. Continue to pivot with them, and take another photo.

Finally we’ve moved into the nine o’clock position. As you’re looking at her, the light is primarily on the right side of her face.

Step Five:

Review the four photos that you’ve just taken, and decide which one offers the most appropriate lighting for the look you’re trying to achieve.

Unless you’re shooting at high noon with the sun directly above you, you’ll probably notice that the lighting will vary dramatically between each of the four photos, with some being much more visually appealing than others. This gives you a great starting point to be able to visually “see” the light and quickly determine which direction you’d like your subject to be facing for your portraits (or in a large park, which general direction you may want to head for your session).

Bonus Tip:

If you notice pretty severe backlighting as in the photo for the 12 o’clock position above, and that is not the look you’re trying to achieve, try having your subject sit down!

This image was taken in the exact same location as the “12 o’clock” image above, only with my daughter sitting on the ground instead of standing.

Keep in mind that the circle trick works in the reverse as well, with your subject standing in the same location and you walking around them as the positions of the clock. Sometimes it’s easier for the photographer to do the bulk of the moving around rather than the subject. On the other hand, I spend a lot of time photographing elementary age children, and find that they really enjoy getting to be a special helper at the beginning of a photo shoot. Getting them engaged early on is a good way to help them to feel comfortable with me. In fact, even though I don’t actually need to use the circle trick anymore to be able to see the light, sometimes I still use it as a quick ice breaker at the beginning of sessions with younger children, showing them the four different photos at the end.

For many people, understanding the quality and direction of light is something that’s learned practically – the more you practice, the more you’ll eventually begin to be able to “see” the light intuitively. This is one really simple (and quick!) way to begin to train your eye to begin to see light – so if lighting for portraits is something that you tend to struggle with, grab a friend and give it a try!

googletag.cmd.push(function() {
tablet_slots.push( googletag.defineSlot( “/1005424/_dPSv4_tab-all-article-bottom_(300×250)”, [300, 250], “pb-ad-78623” ).addService( googletag.pubads() ) ); } );

googletag.cmd.push(function() {
mobile_slots.push( googletag.defineSlot( “/1005424/_dPSv4_mob-all-article-bottom_(300×250)”, [300, 250], “pb-ad-78158” ).addService( googletag.pubads() ) ); } );

The post How to See the Light for Portraits: A Quick Tip for Beginners by Meredith Clark appeared first on Digital Photography School.


Digital Photography School

 
Comments Off on How to See the Light for Portraits: A Quick Tip for Beginners

Posted in Photography