RSS
 

Posts Tagged ‘Beginners’

How To Find Your Lens’ Sweet Spot: A Beginner’s Guide to Sharper Images

03 Feb

Are you tired of blurry images?

It’s time to learn how to capture sharper images by finding your lens’ sweet spot. This will give you more confidence, save time, and help you take better photos.

In this article you’ll learn:

  • How to find your lens’ sweet spot (for sharper images)
  • Why you should shoot in Aperture Priority mode (and how to use it)
  • How to perform a test to get your sharpest image every time
  • How important is your lens’ sweet spot? Notice the difference

Mid range aperture sharper than wide open

In the above images of the clock, the one on the right is sharper. Look closely at the words and at the leaves behind the clock. The f/9 image is sharper throughout because it was shot in my lens’ sweet spot. The f/3.5 one was not.

First, take a look at your lens

In this beginner’s guide, we’ll use an entry level zoom lens as our example. Most kit lenses (the basic lens that comes with a DSLR) generally shoot their sharpest at the mid-range aperture settings. To determine the mid-range of your lens, you’ll need to know its widest (or maximum) aperture setting. It is located on the side, or end, of the lens and will look something like this 1:3.5-5.6.

For example, here it is on my Canon 18-55mm zoom lens.

Lens aperture range

This means that when my lens is zoomed all the way out, its widest aperture is f/3.5. When zoomed all the way in, its widest aperture is f/5.6.

The rule to finding that mid-range sweet spot, is to count up two full f-stops (aperture settings are called f-stops) from the widest aperture. On my lens, the widest aperture is f/3.5. Two full stops from there would bring me to a sweet spot of around f/7.

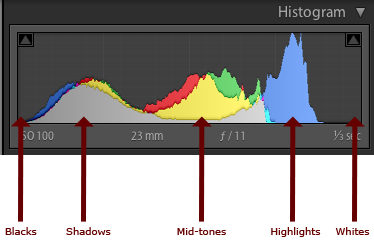
Use this chart to count your f-stops
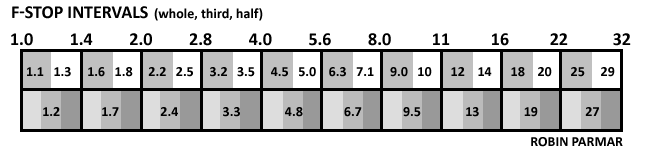
Robin Parmar

By Robin Parmar

There is some wiggle room in the mid-range, so anything from f/7 to f/10 will capture a sharp image. Once you know the mid-range of your lens, you can do an easy test to get your sharpest image. To perform the test you’ll need to shoot in Aperture Priority mode.

Take control with Aperture Priority Mode

Shooting in Aperture Priority allows you to choose the aperture setting you want, which gives you more creative control than Automatic mode. By controlling the aperture setting, it’s much easier to get a sharp image, and because your camera still chooses the ISO (if you are set to Auto ISO) and shutter speed automatically, it’s very easy to use.

You’ve probably heard that apertures like f/16 and f/22 are best for keeping everything in focus. While that can be true, focus does not always equal overall sharpness. Choosing a mid-range aperture will give you sharper images throughout. You can improve them even further by reducing camera shake with a tripod and a remote shutter release (or your camera’s self-timer).

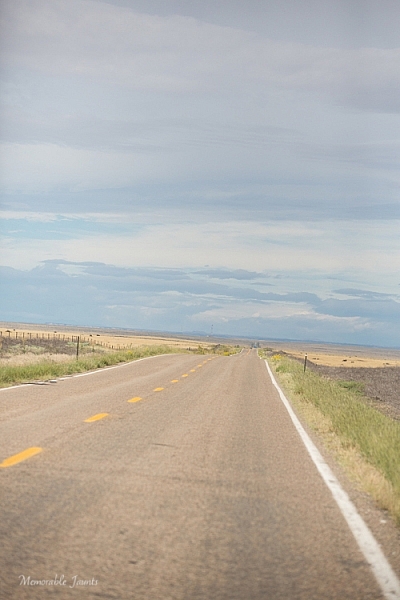
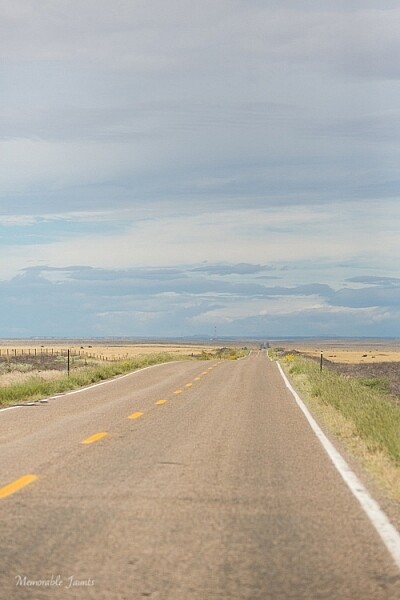
Here’s an example of how shooting in your lens’ sweet spot will give you sharper images.

Sharp images shot in lens sweet spot

Mid range f stop sharper than small f stop

In the above split-image, the f/9 image is sharper than the f/22 one. The needles and shadows are not as soft or blurry as in the f/22 shot (look at the crispness and sparkles in the snow too).

Switching from Automatic to Aperture Priority Mode

To take your camera out of Automatic and put it in Aperture Priority, just turn the large Mode Dial to Aperture Priority. This is what that looks like on my Canon (on Nikon and other brans look for the A).

Aperture priority on canon mode dial

Automatic mode is the green rectangle; Aperture Priority mode is the Av (or A on a Nikon). Once your camera is in Aperture Priority mode, turn the smaller Main Dial (shown here on the top of my Canon) to choose your f-stop.

Main dial canon

As you turn that dial, you’ll see the f-number changing on your screen. In the next picture, it’s set to f/9.5.

Aperture setting on canon LCD screen

Perform a Lens Sweet Spot Test

Once you have your camera set up on a tripod, performing a sweet spot test only takes a couple of minutes. To begin, put your camera in Aperture Priority mode, then compose your shot and take a photo at varying apertures. Start out with the widest, then click that main dial a couple of times (to the right) and take another. Keep doing that until you’ve taken seven or eight photos.

Upload your photos to your computer and zoom in on them. You’ll quickly see which aperture settings gave you the sharpest overall image.

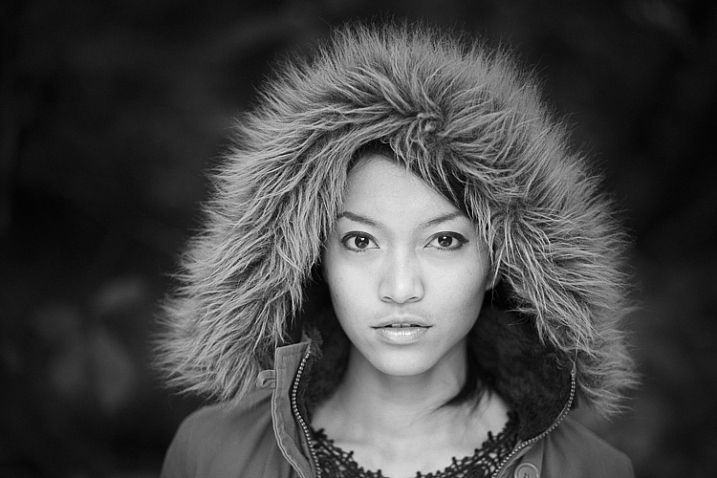
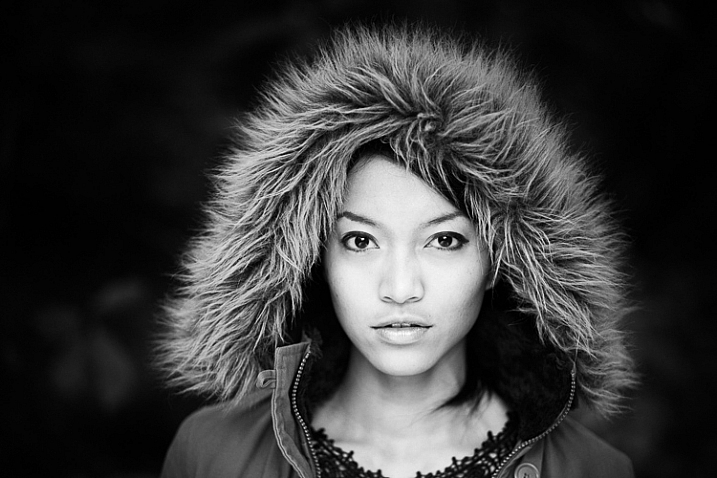
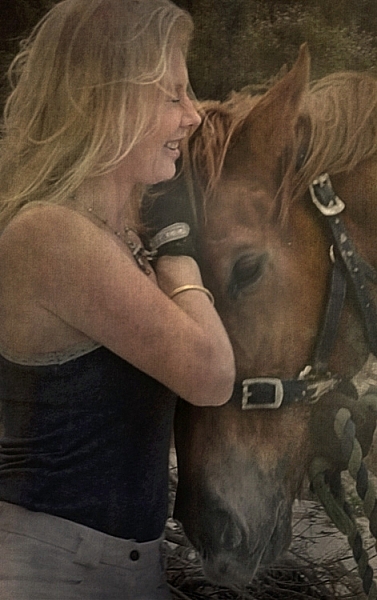
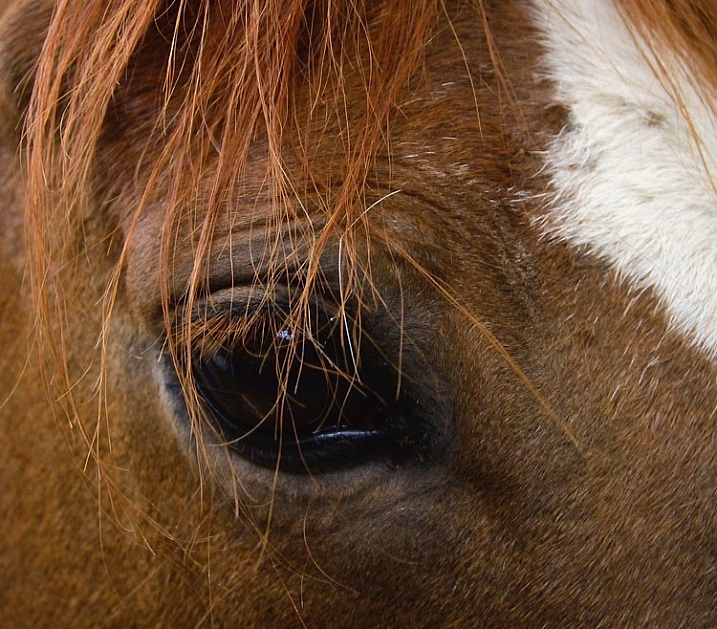
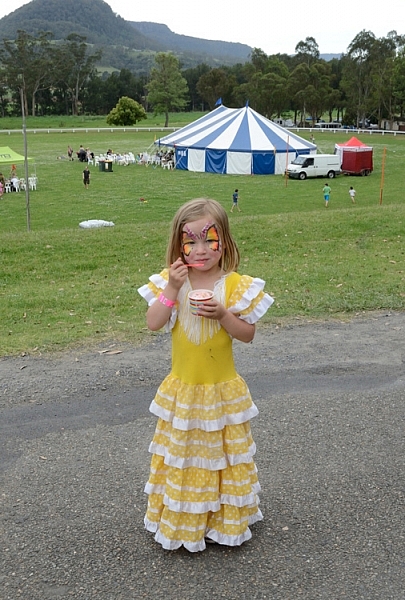
This next photo of my daughter was shot using natural light. Shooting in my lens’ sweet spot gave me a pretty sharp image, even in this low light setting.

Mid range aperture sharp image low light

Find your lens sweet spot for sharper images

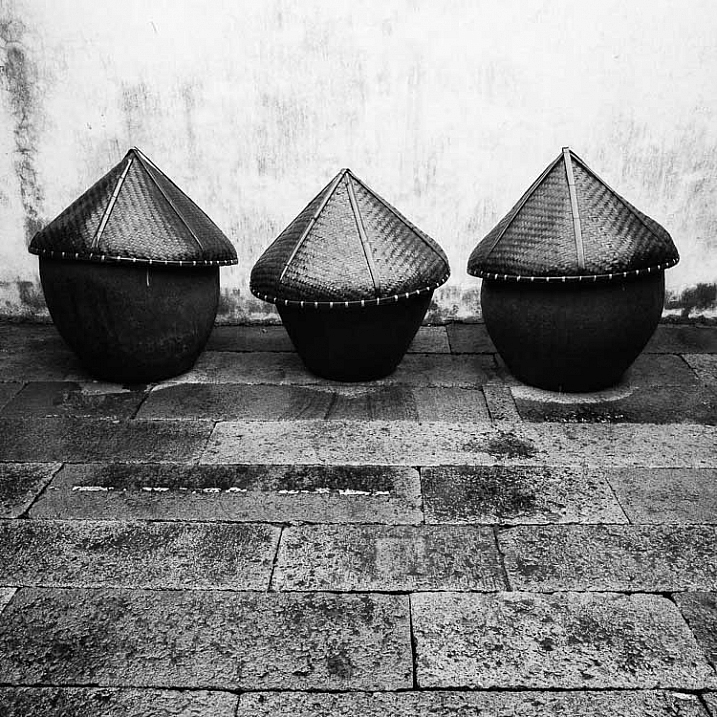
The close up of the mugs shows the advantage of shooting in the lens’ sweet spot. Whenever you want to make sure you get the sharpest capture possible, take a shot at each mid-range setting f/7, f/8, f/9, and f/10.

Getting Your Sharpest Images

Now that you know your lens’ sweet spot, it’s time to practice. I hope you’re as pleased with the results as I’ve been!

Mid range aperture for sharper images

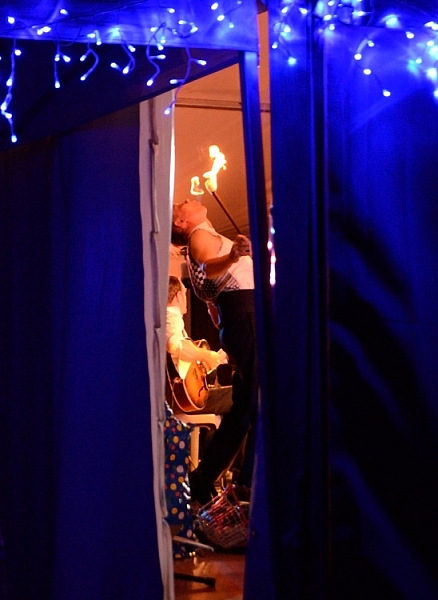
I love shooting in natural light, and learning how to capture sharper images in low light has made me so much happier with my photos.

Tips for capturing your sharpest images:

  • Shoot in Aperture Priority mode
  • Choose a mid-range aperture (usually f/7 to f/10)
  • Use a tripod and a remote shutter release (or your camera’s self-timer) to reduce camera shake
  • Take a series of shots at f/7 through f/10 when a sharp capture is especially important

But don’t stop here. Keep playing with settings in Aperture priority mode. It’s awesome to get images that are sharp throughout, but there’s a lot more to aperture than that.

Learn more about aperture and depth of field here.

Do you have any lens sweet spot tips to share? Please do so by commenting below.

googletag.cmd.push(function() {
tablet_slots.push( googletag.defineSlot( “/1005424/_dPSv4_tab-all-article-bottom_(300×250)”, [300, 250], “pb-ad-78623” ).addService( googletag.pubads() ) ); } );

googletag.cmd.push(function() {
mobile_slots.push( googletag.defineSlot( “/1005424/_dPSv4_mob-all-article-bottom_(300×250)”, [300, 250], “pb-ad-78158” ).addService( googletag.pubads() ) ); } );

The post How To Find Your Lens’ Sweet Spot: A Beginner’s Guide to Sharper Images by Dena Haines appeared first on Digital Photography School.


Digital Photography School

 
Comments Off on How To Find Your Lens’ Sweet Spot: A Beginner’s Guide to Sharper Images

Posted in Photography


A Beginner’s Guide to Choosing the Right Post-Production Software

12 Jan

When it comes to choosing your first piece of post-production software you may find yourself spinning in circles. There’s so much to choose from, and the whole idea of learning to do something new can be intimidating. This article will cover a number of the most well known software options available, and hopefully lead you towards the right decision for you.

Adobe Photoshop CC

Over the years no one has truly been able to displace Adobe’s dominance of the photography software market. Both Lightroom and Photoshop are hugely popular pieces of software and regarded as the go to platforms for professionals. Let’s break down both Lightroom and Photoshop individually to see what makes them so popular.

Adobe Lightroom

LR

Lightroom is the most popular tool available for post-processing your images. It can be used as an all-in-one solution for post-processing, image storage, and printing. Due to this all-in-one nature, Lightroom becomes a convenient and powerful option for both new photographers and pros alike.

One of the biggest differentiating factors of Lightroom verses other post-production tools is that it is widely supported by third party developers. What this means is that you can find a number of plugins for Lightroom that will allow you to extend your workflow beyond the core program. You’ll also be able to find a number of Lightroom presets, which can help you speed up your workflow by saving time for tedious edits. On top of that, sites like Smugmug and Zenfolio allow you to hook right into Lightroom, enabling you to share your photographs directly from your Lightroom catalog to your website.

Finally, due to the popularity of Lightroom, there is no shortage of support for you on the web. If you have a question about something related to processing an image with Lightroom look no further than YouTube or the many eBooks written on a number of different aspects of Lightroom’s features (including Loving Landscapes, a dPS ebook about processing your landscape images in Lightroom).

This whole package of features, extendibility, and resources, is why I’d suggest Lightroom as the first program for any new photographer looking to get into post-production. Not only are you getting a very capable program for editing and organizing your images, but you have the ability to extend the core features as your skills develop. You also have an endless supply of help from the many tutorials written on the platform over the years.

Adobe Photoshop

PS

Lightroom may be the best place to start as a new photographer, but Photoshop is a close second. The only reason I place Photoshop second on this list is due to its complexity. You still get the same great community of professional photographers, which enables you to learn more quickly, and you’ll still find a wealth of Photoshop Actions to help you speed up your workflow, but the learning curve for Photoshop is quite a bit more challenging than that of Lightroom, making it harder to recommend to a total beginner.

Adobe’s Creative Cloud platform is a subscription based model, which gives you access to both Photoshop and Lightroom for $ 10/month. The reason to pay the premium for Adobe’s products, over the ones I’ll list below, is not because they will perform better edits, but rather because of the way they integrate with other pieces of software, and the availability of tutorials on the web.

Open Source Options

If you’re not ready to invest money into your post-production workflow just yet, then these open source platforms are where I’d direct your attention.

GIMP

wilber_painterGIMP is the most well known Photoshop alternative out there. It has been around for years, works on both PC and Mac, and will provide you with many of the same tools that Photoshop offers. Being open source it doesn’t have the polish that Photoshop does, and won’t offer nearly as many third party options or tutorials. However, as a budget friendly way of processing your images, this is by far the best way to go.

Darktable

darktableDarktable is what I’d recommend if you’re looking for a RAW developer to substitute for Lightroom. Like GIMP, this is an open source option, which offers a number of features that will give you complete control of your images, and truly does compete with Lightroom in that area. Again where it’ll fall flat is that you’ll have less extendibility, and not as many resources to help you along the way. Note: Darktable does not work on Windows.

Other Tools

When it comes to post-production there are a number of what I’d call, supplemental tools available. These tools are designed to work in conjunction with Photoshop and/or Lightroom, and help you further refine your style as a photographer.

TopazLabs

logo_smallThe TopazLabs line of products includes 17 different pieces of software, each one specifically designed for its own unique purpose. These tools are designed to help you enhance and speed up your post-production workflow, but not necessarily replace Photoshop or Lightroom, although some of Topaz’s programs, like Impression and Texture Effects, do offer some standalone functionality that will let you create very different types of images.

Nik Softwarenik-logo

Like TopazLabs, Google’s Nik collection is a set of tools that will help you enhance and speed up your workflow. There aren’t as many different tools, and Google has a recent track record of killing off products that weren’t working for them without warning. But, the Nik collection is powerful, and will give you some great functionality beyond just Lightroom’s basic toolset.

Photomatix

photomatixPhotomatix has been the leader of the HDR post-production world for quite some time. Their product continues to produce some of the best controlled tone mapped images, and would be a great addition to your set of tools if you wanted to get deep into HDR photography.

Aurora HDR

aurorahdrAs an alternative to Photomatix, Aurora HDR is a newly released product from Macphun, in partnership with Trey Ratcliff. At the moment Aurora HDR is only for Mac and is an early stage product, so there’s bound to be some growing pains. That said, with backing from Trey Ratcliff, who’s made his name on HDR photography, this product could eventually get to where it wants to be – which is an all-in-one HDR tool, that doesn’t require Lightroom or Photoshop to produce images.

Not a beginner? What else would you recommend?

If your favorite piece of software didn’t make this list let us know why you like it, and why you’d recommend it over the others in the comments below.

googletag.cmd.push(function() {
tablet_slots.push( googletag.defineSlot( “/1005424/_dPSv4_tab-all-article-bottom_(300×250)”, [300, 250], “pb-ad-78623” ).addService( googletag.pubads() ) ); } );

googletag.cmd.push(function() {
mobile_slots.push( googletag.defineSlot( “/1005424/_dPSv4_mob-all-article-bottom_(300×250)”, [300, 250], “pb-ad-78158” ).addService( googletag.pubads() ) ); } );

The post A Beginner’s Guide to Choosing the Right Post-Production Software by John Davenport appeared first on Digital Photography School.


Digital Photography School

 
Comments Off on A Beginner’s Guide to Choosing the Right Post-Production Software

Posted in Photography


A Beginner’s Guide to Doing Black and White Photography

12 Jan

If you’ve never tried black and white photography before, you may be wondering what the appeal is. After all, isn’t it a little like black and white television or silent movies – an anachronism in our modern, high-tech age?

Black and white photography

The answer is no, definitely not. In the photography world, black and white is considered an art form. Some would even say only the best photographers work in monochrome. It’s a medium with a rich history, (look at the work of Ansel Adams, Edward Weston or Henri Cartier-Bresson for examples) and a bright future.

Just as importantly, working in black and white can help you become a better photographer. How? It’s all to do with composition.

Colour is very powerful, and tends to dominate the photo so much that it’s difficult to see other elements like tonal contrast, texture, shape, form and quality of light. Experienced photographers instinctively see these things, regardless of whether they work predominantly in colour or black and white. But if you’re just starting out, you may need some assistance to do so, and working in black and white photography will help you.

Black and white photography

Black and white emphasizes the textures of the rocks and sea in this landscape photo.

Naturally, there are certain subjects that tend to work better than others in black and white; two in particular are landscapes and portraits. If this is your first time shooting in black and white, then these are great subjects to try out.

Black and white photography

Black and white portraits emphasize expression and quality of light.

Black and white on your camera

Before digital photography the only way to work in black and white was to use black and white film. Thankfully, now it’s much easier to work in black and white, just by switching your camera to Monochrome Mode (check your camera’s manual if you are unsure how to do so, look for Picture Styles settings).

Cameras with electronic viewfinders automatically display the image in black and white, helping you see how the image will look, before you press the shutter. If you have a digital SLR you will get the same effect in Live View. This may be useful if you are working with your camera on a tripod (for instance, taking a landscape photo).

Usually at this point I advise you to use the Raw format. In the long run it’s easier than using JPEG, and gives you better image quality. But I appreciate that if you’re new to photography you may still be working exclusively in JPEG. The rest of this article works on this basis.

Working in Monochrome Mode

Once in monochrome mode you will see some extra options. They help you set your camera up to produce the best results. Again, check your manual if you are not sure where to find them.

Colour filters

The colour filter settings are left over from the days of film photography. Photographers would buy coloured filters, and use them to alter the tones in black and white photos. For example, if your scene includes a blue sky, then using a yellow filter will make the sky a little darker, an orange filter makes it even darker, and a red filter darker still.

Black and white photography

This scene works quite well in black and white, but it’s not nearly as dramatic as it could be.

Black and white photography

Applying the Red filter setting makes the blue sky go much darker, creating a much more dramatic version of the same scene.

There is also a place for green filters, which can bring out more detail in green subjects like leafy forests. Those four coloured filters (red, orange, yellow and green) have made their way onto most digital cameras as black and white settings.

Contrast

If you take a photo in flat light (for example, a portrait of somebody standing in the shade) the photo may look flat (two dimensional). So, you need to compensate by increasing the contrast. You can either do this in Photoshop or Lightroom after the photo has been taken, or you can do it in-camera with the contrast setting.

Black and white photography

The model was standing in the shade when I took this photo. The light lacks contrast, and the black and white photo is flat.

Black and white photography

Increasing contrast creates a much stronger image.

Cropping and the square format

Most modern cameras let you change the aspect ratio. The reasons why you might want to do that are a little complex, but the main one is that it lets you shoot in the square format, something you may already be used to if you use an app like Instagram on your smartphone. If your camera has an electronic viewfinder, it will display a square image for you, making composition much easier.

Black and white photography

Cropping to the square format emphasizes the shapes of the three pots.

Toning

Finally, you may have the option to tone your images. To be honest, unless your camera lets you apply toning affects subtly, I wouldn’t bother with these, as the effect is usually too strong.

Have fun!

Black and white is a beautiful medium to work in, one which you will appreciate the more you practice. In the meantime – have fun and enjoy yourself. You are following a path trodden by some of the most famous names in photography. And of course, if you have any questions about working in black and white, please let us know in the comments.


Masterlng Lightroom: Book Three – Black & White by Andrew S Gibson

Mastering Lightroom: Book Three – Black & White

My ebook Mastering Lightroom: Book Three – Black & White goes into the topic of black and white in depth. It explains everything you need to know to make dramatic and beautiful monochrome conversions in Lightroom, including how to use the most popular black and white plug-ins. Click the link to visit my website and learn more.

googletag.cmd.push(function() {
tablet_slots.push( googletag.defineSlot( “/1005424/_dPSv4_tab-all-article-bottom_(300×250)”, [300, 250], “pb-ad-78623” ).addService( googletag.pubads() ) ); } );

googletag.cmd.push(function() {
mobile_slots.push( googletag.defineSlot( “/1005424/_dPSv4_mob-all-article-bottom_(300×250)”, [300, 250], “pb-ad-78158” ).addService( googletag.pubads() ) ); } );

The post A Beginner’s Guide to Doing Black and White Photography by Andrew S. Gibson appeared first on Digital Photography School.


Digital Photography School

 
Comments Off on A Beginner’s Guide to Doing Black and White Photography

Posted in Photography


Histograms for Beginners

09 Jan

When the digital revolution came to photography it brought with it a plethora of advantages for photographers: making vast quantities of images with no increase in cost; seeing the photo immediately after you make it; changing ISO with each shot; and the advent of the digital darkroom; to name a few.

One of the most important benefits of digital photography is one that can be a little intimidating for new photographers – the histogram. But there’s no reason to shy away from it – it’s actually pretty easy to use once you understand how it works. The histogram is simply a graphical representation of the tonal range of your photo that helps you evaluate the exposure.

Before digital photography, we had to wait until we developed the film to know for sure whether we got a good exposure when we made an image. Now, by using the histogram, this information is at your fingertips before you take the shot (in cameras with Electronic Viewfinders), after you take the shot, and during post-processing as well.

How to Read Your Histogram

It’s easy: the blacks are on the left, the whites are on the right, all the mid-tones are in between.

histogram-info

The most important thing to know about the histogram is that a spike on the right, that touches the edge of the graph, is a problem. That means that there is a portion of your image where the highlights are “blown out”, or completely white with no detail. The reason this is such a big problem is that an area that is blown out contains no data at all, so you will not be able to do anything in post-processing to adjust it. This only applies if the spike touches the edge of the graph. If it spikes before the edge, that’s okay.

If there is a spike on the left edge, it means part of your image is completely black. You may want to use your exposure compensation to adjust the exposure to the right to make it brighter. But remember that having part of your image completely black, especially for a night shot, is okay.

There is no such thing as a perfect histogram. It’s just a graphical representation of the tonal range in your image. It’s up to you, as the artist, to decide what to do with this information. Having solid blacks and bright tones (provided they are not blown out) is not necessarily a bad thing.

Let’s take a look at some examples of how histograms will look for different types of images.

Histogram Examples

High Key Scene

When you have a scene that is high key, it has a lot of bright tones, and not so many mid-tones or blacks. When you are photographing a scene that you want to be high key, your histogram should be stacked up on the right side – but not going up the right edge. If you want your scene to be high key, but your histogram is showing a lot of mid-tones, your whites are probably going to come out looking more gray than you would like.

Pelicans at the Salton Sea, California

A high key or light toned scene

histogram-swans

Histogram for the image above showing mostly light tones

Low Key Scene

A low key scene is one that is dark, which you would expect when photographing at night. In this case, your histogram will be stacked up on the left side. You may have a spike on the left edge, which indicates solid blacks.

Star Trails in Guadalupe National Park

A low key or dark scene will have mostly tones on the left side of the histogram.

histogram-stars

Histogram for the image above showing a dark scene.

High Contrast Scene

A high contrast scene is one where there are lots of very dark, and very bright tones, and perhaps not so many tones in between. In this case, your histogram will show data on the left and right, and not so much in the middle.

Fountains of Bellagio

High contrast scene. Extreme brights and extreme darks with little in the middle.

histogram-fountain

Histogram of high contrast scene above.

Low Contrast Scene

A low contrast scene has a lot of mid-tones, and few and bright tones. Your histogram will have a bell shape.

Butchart Gardens

histogram-garden

Again, it’s up to you as the artist to choose what to do with this information. You have to decide whether the information in the graph is what you want or not. It’s just another tool in your arsenal, to help you transform your artistic vision into a photograph.

If you’re not happy with your histogram, use your exposure compensation to adjust the exposure by making the image darker or lighter. Or, you may choose to affect the light on the scene instead by using a flash, a reflector, or a diffuser. The choice is yours.

Understanding the Colour Histogram

You’ve probably noticed in the examples above that the histogram not only shows the tones in grayscale, but it also shows you colours. Yes, it’s possible to blow out a colour! If there is one particular colour that is very bright in the scene, sometimes that colour will become so saturated that you loose detail. This commonly happens with red flowers for example.

Red Flower with Bee

histogram-flower

To combat this, you can slightly desaturate the colour in post processing to bring back some of the detail in the flower petals. The histogram above shows the increase in red tones towards the brighter end of the scale.

When to use the Histogram

In the field, you can use the histogram in conjunction with Live View to see it before you make an image (or turn it on if you have a camera with an Electronic Viewfinder like many mirrorless models offer). You can also see it afterwards when you review the photo on your LCD screen. Either way, it’s critical that you use the histogram to check your exposure while you’re in the field. That way you have an opportunity to make another exposure while you are still on scene.

Don’t rely on your LCD to give you feedback about exposure. It’s great for checking composition and focus, but not exposure. That’s because the brightness of your LCD has nothing to do with the brightness of your image, since you can adjust the brightness of your LCD. For example, you can brighten it so you can see it more easily outside on a sunny day. But then if you don’t change the brightness back again and you look at it at night your images are going to appear super bright, when they actually are not.

The histogram is also available to you while post-processing your image. Use it to see where adjustments need to be made and to ensure that you don’t create areas that are too bright or too dark while processing your images.

I hope that gives you a better understanding of how to use this handy tool. If you have any questions about histograms please put them in the comments below.

googletag.cmd.push(function() {
tablet_slots.push( googletag.defineSlot( “/1005424/_dPSv4_tab-all-article-bottom_(300×250)”, [300, 250], “pb-ad-78623” ).addService( googletag.pubads() ) ); } );

googletag.cmd.push(function() {
mobile_slots.push( googletag.defineSlot( “/1005424/_dPSv4_mob-all-article-bottom_(300×250)”, [300, 250], “pb-ad-78158” ).addService( googletag.pubads() ) ); } );

The post Histograms for Beginners by Anne McKinnell appeared first on Digital Photography School.


Digital Photography School

 
Comments Off on Histograms for Beginners

Posted in Photography


Beginners Photography Tips – Best of 2015

30 Dec

Every year it happens, maybe this year it happened to you too? Many people get a new camera as a gift over the holidays, and now the fun begins, learning how to use it! You need a beginners guide to help you out.

Beginners Guide to Photography - Best of 2015

Or maybe you got a new flash or other piece of gear, are new to post-processing, or want to try a new technique. Well, you’re in luck because you’re in the right place to find all that. We have a lot of really great articles for newbie photographers like yourself. Here are a few of the best from 2015.

Beginners photography tips – best of 2015

  • 7 Incredible Tips for Beginner Photographers
  • Next Level Techniques for Advanced Beginners
  • A Beginner’s Guide to Choosing Shooting Mode
  • Post-Processing Tips for Beginners
  • Mastering the Exposure Triangle for Newbies
  • 5 Tips for Newbie Landscape Photographers
  • 4 Mistakes New Photographers Make and How to Avoid Them
  • Top 10 Things to do When Your New Camera Arrives
  • Seeing in Depth of Field: A Simple Understanding of Aperture
  • How to Take Control of Aperture and Create Stronger Photos
  • 6 Ways to Use Shutter Speed Creatively
  • Demystifying Shutter Speed
  • 6 Tips for Using ISO Effectively With Your Camera
  • Back Button Focus: What is it and why should you try it?

If you can’t find what you’re looking for here, try the search function (look for the magnifying glass upper right corner). We have over 5700 articles in our archives. If what you seek isn’t there, first of all I’d be really surprised, please add a comment below and tell us what topic you’d like our writers to work on next. Perhaps we can add it to our list.

You can also check out our course: Photo Nuts and Bolts which is designed for beginners.

googletag.cmd.push(function() {
tablet_slots.push( googletag.defineSlot( “/1005424/_dPSv4_tab-all-article-bottom_(300×250)”, [300, 250], “pb-ad-78623” ).addService( googletag.pubads() ) ); } );

googletag.cmd.push(function() {
mobile_slots.push( googletag.defineSlot( “/1005424/_dPSv4_mob-all-article-bottom_(300×250)”, [300, 250], “pb-ad-78158” ).addService( googletag.pubads() ) ); } );

The post Beginners Photography Tips – Best of 2015 by Darlene Hildebrandt appeared first on Digital Photography School.


Digital Photography School

 
Comments Off on Beginners Photography Tips – Best of 2015

Posted in Photography


Beginner’s Guide to Photographing Horses

22 Nov


Equine-photography-3b

There are two main aspects to consider when beginning to attempt any variety equine photography, the photographic side (technical and creative) and the dealing with horses side (sometimes unpredictable and dangerous).

Lets start with the animal side, in this beginner’s guide to photographing horses.

Equine-photography-4

I am not a horse person, but I have photographed a lot of them, and have spent a fair bit of time around them, their owners, and trainers, who have all taught me a lot.

Horses have distinct personalities which can range from extremes such as: a tendency gallop across a paddock to attack you on one end of the scale, to willing to defend you at their own expense at the other end. Their main instinct is flight, and they can be easily spooked by just about anything – including cameras.

There is a whole horse language involving their ears, leg stance, and head movement. The horse owners I have worked with prefer certain positioning of these things in photographs. For example, they really don’t like images where the horses ears are pinned back, which means the horse is not very happy. I would suggest spending some time googling horse body language before you set out on your first equine photo session – not only to know all the best positions, but to also know if a horse is about to attempt to do you some serious damage.

Equine-photography-1

Ears forward but relaxed means the horse is happy, where as ears like the other guy in the above image, can mean the horse is confused.

Never stand behind a horse. Never catch a horse by surprise. Make sure horse knows where you are, they don’t like people jumping out from behind bushes, or sudden movements. Never run up to a horse. One owner trainer tells me that even wearing bright colors can startle some horses.

Horses and cameras

Unless you know that a horse is very used to flash, using one could endanger you, the horse, or the handler/rider. I would avoid it at all costs. The sight and any sound of your camera can be enough to startle them, even just the slap of the mirror.

I recommend having a chat with owner or handler about the horse’s personality – is he flighty, bite-y? Loves to kick? Hates photographers? Has never seen a camera? Know all that before you go in camera blazing.

Equine-photography-10

If the horse is calm enough, have the handler introduce you. Let the horse approach you, sniff the camera, and move slowly, talk softly and calmly, and if it’s all okay to do so, give it a pat. If you’re unsure how the horse will react to camera sounds (or use silent mode if your camera has it), organize with handler to do a few test shots while the horse is calm, and you are all in safe positions, should the horse start bucking and kicking.

Pretty much all my horse photographs have been taken with a standard 18-55mm kit lens. That’s all we had at the local newspaper to photograph every kind of event, equestrian or otherwise. Regardless of what style of equine photography you are attempting, I would recommend a zoom lens so you can get in close on detail, without getting too close to the horse.

The photography

You’ll want a fairly fast shutter speed, even for portraits – those ears move fast. I’d recommend a minimum of 1/250th  for general photography, faster if the horse is moving at high speed. Generally you want good horse shapes where you can see all four legs, and the animal has its ears forward.

Equine-photography-12

Race horse trainer Ritchie Butler on Tom.

Events

When photographing equine events, like show jumping, you aren’t necessarily that close to the horse, but the same rules apply. Make sure you find a safe spot where the horse can see you from a distance, and don’t keep moving about. Remember not to move towards the horse and rider, and do not use flash. Check with any officials before you start.

An image that involves horse and rider in mid-jump, with all legs off the ground and front legs tucked under, is generally preferred by riders and owners. You’ll need a fairly fast shutter speed, somewhere around 1/650th – 1/800th is a good place to start. Set your camera to continuous release (burst) mode, and press the shutter just as the horse lifts off.

Equine-photography-7b

Photographs mid-leap, all feet off the ground and front legs tucked in, are preferred by show jumpers.

The races

When photographing horse racing I’d recommend the fastest shutter speed the light will allow, and again using continuous release mode. At some smaller race meets, it’s possible to get permission to get fairly close to finish line. For the shot below I asked officials if there was a safe position I could stand near the finish line, as well as capture horse and winners in the ring. They were happy to oblige once I told them I don’t use flash, and am aware that horses are very easily spooked.

Equine-photography-8

You don’t need super zooms or high-end gear to get a winning post shot, just access to a good position on the track.

The races is a good time to try your hand at some panning shots. Panning helps to capture the sense of movement and speed, by moving your camera along with your subject, creating a blur of motion in the background.  It can be a bit tricky at first, but here is a great article to help get you started with this technique.

Equine-photography-9

Panning to create a sense of movement.

Equine-photography-6

Portraits

Horse people generally not only love their animals, but are also obsessed with them, and have a strong connection to them. Aim to capture the love between horse and person.

The tender moments when horse and rider have forgotten about you and your camera, often happen at the beginning or end of your photo session, while getting the horse organized.

Details

Horses are great for detail shots. Owners often have favorite parts of their horse, like the star on a forehead or other markings, or the way the horse’s mane sweeps. A zoom lens would be handy for this, unless you, the horse, and your camera, get on well enough to get up close and personal.

Equine-photography-11

I didn’t need a zoom to get a close detail of this horse. This is Monty, I used to feed and blanket him twice a day for a several months, so we are old pals. His only concern about my camera was whether or not it was edible.

Take your time

Spend as much time as you can with both horse and owner. Take a whole day if you can. Slow down enough to notice opportunities like interesting backgrounds or light. Ask questions about the horse’s favorite things to do. A horse might get really happy after being taken out for the day, and like to jump around in the paddock afterwards, where you can grab some interesting images. The photo below was taken after horses were exercised on the beach. Once the saddle was removed, they threw themselves in the sand and rolled around delightedly.

Equine-photography-5

It’s a lovely thing to see and photograph happy horses.

Horses are wonderful to photograph, sometimes challenging, and with a wide scope of photographic styles and skills involved.  I highly recommend giving it a go. Just stay safe, be respectful of the horses, get creative, and have fun.

Equine-photography-2

Are you a horse person? I’d love to hear any more tips from you if know these creatures well, or have experience photographing them. We’d also love to see more horse photography from you, so post away in the comments below.

Giddy up!

googletag.cmd.push(function() {
tablet_slots.push( googletag.defineSlot( “/1005424/_dPSv4_tab-all-article-bottom_(300×250)”, [300, 250], “pb-ad-78623” ).addService( googletag.pubads() ) ); } );

googletag.cmd.push(function() {
mobile_slots.push( googletag.defineSlot( “/1005424/_dPSv4_mob-all-article-bottom_(300×250)”, [300, 250], “pb-ad-78158” ).addService( googletag.pubads() ) ); } );

The post Beginner’s Guide to Photographing Horses by Lea Hawkins appeared first on Digital Photography School.


Digital Photography School

 
Comments Off on Beginner’s Guide to Photographing Horses

Posted in Photography


Beginner’s Guide to Photographing Festivals

13 Nov

Photographing-festivals-1

Festivals are a great place to practice a wide variety of photographic disciplines for any photographer. With plenty of action in one central location, often over a couple of days or more, there’s a chance to try your hand at everything; portraiture, street photography, landscape, night photography, fast action, and more, as well as play with all kinds of lighting and subjects, and the chance to tell a photographic story.

So much to learn about photography all in one place.

Festivals are a great place to photograph everything from portraits to panoramas, and pretty much everything in-between.

There is a festival for just about everything from the massive Burning Man Festival, to small food, wine, music festivals, there’s some bizarre festivals like Tunarama in Australia, where the key event is tuna tossing. Unfortunately I didn’t make it to Tunarama, so for this article I have used images from a small country town folk festival. Regardless of the kind of festival you choose, here are some tips to get you started – a beginner’s guide to photographing festivals.

There's so many different festivals for photographers to practice theirs skills at.

Look up a local festival and get out there with your camera.

Camera gear

If you are a beginner reading this, chances are you have a DSLR with a standard kit lens, so you are good to go. I would highly recommend a zoom, but it’s not necessary, you can still get great images while learning a wide variety of photographic skills. For all these images I used either a standard kit 18-55mm lens, or a small point and shoot camera. If you have other lenses, take them, you’ll most likely have a chance to use them.

A tripod will also come in handy if you are going to photograph at night. Many festivals have fireworks, or people twirling glow in the dark things, that need long exposures.

Spare memory cards and batteries are pretty much essential, and a polarizing filter wouldn’t go astray for bright daylight.

Photograph your festival with any gear you have, even your phone.

You really don’t need fancy camera gear to get some interesting images at a festival.

Camera settings

If you are a beginner, and not used to rapidly adjusting manual settings on the fly, I would recommend starting with Auto or setting your camera to Program Mode, or pick an appropriate “Scene mode” for night and low light. But also take the opportunity to experiment with manual settings. Read up on low light, street photography, fireworks, etc., before you go. Try to avoid using your flash.

The bottom line though, in order to have a great time photographing a festival, and getting a few images you are really happy with, you don’t need anything more than your mobile phone – everything else is bonus. If you are using your phone, and I recommend you do so as well as use your camera, try looking up some free extra apps to experiment with.

Any gear will do for photographing a festival, even your mobile phone.

This image was photographed using a small point and shoot with its auto filters.

What to photograph

Photography everything. Shoot non-stop from the setting up, to the live acts, parades, stall holders (vendors), the crowd, surrounding landscape, behind the scenes, people in audiences, details, packing up, and even what was left behind. Sometimes shooting from dawn until evening, in close, panoramic, and everything in-between.

Photographing-festivals-12

Photographing-festivals-7

Photogrpahing-Festivals-19

Try to tell a story

You can capture a story in a whole series from a festival, or small series within a series, or within a single photograph.

Photographing-festivals-9b

Small festival stories can be fun to capture

These two pegged a drawing on the fence with a request for a lift to the next station. It worked!

Festivals are great to try capturing a story in one image or over many.

Locals hanging out at the festival bar.

Each festival I have been to, has a different feel. For example, a food and wine festival has a different crowd, and is more relaxed than a rock music festival.

Capturing small details and panoramas set the scene, give the viewer a sense of place. Then, capturing events, acts, and people give a sense of what is going on there. Capturing audience reactions and small details create a sense of really being there.

Photographing-festivals-23

Photographing-festivals-6

Photographing-festivals-11

Getting involved

Festivals are often annual events. Depending on the event, there may be an opportunity to volunteer. While you may spend most of your time helping out, you could have access to back stage, or other areas behind the scenes. When you have a decent portfolio, you could volunteer as photographer to build up an excellent portfolio to apply as official paid photographer.

The last festival I went to, I worked as an assistant to the artist in residence, dressed as a clown. This helped me to capture a lot of smiles, and some not so smiley expressions. Not everyone loves a clown.

Get involved in the festival you are photographing.

Photographing as a clown was a new experience!

This guy from the band 19-Twenty just noticed he was being photographed by a clown, and he didn’t miss a beat. I certainly wouldn’t have got that shot had I not been in my rather amusing costume.

Don’t be afraid to approach people

People photography is also a great thing to practice at a festival. It can be pretty intimidating approaching strangers, as it is to be approached by a photographer. But most people don’t really mind, and are often flattered.

Don't be afraid to approach strangers, most people are OK about it.

Most people don’t mind having their photograph taken if you are polite about it. Some, like this lass, love it.

So just ask, be honest with them, and let them know you are a beginner practicing at the festival. Perhaps even carry some cards or pieces of paper with your name, and a website, where they can see your images.

If you’re too shy, sometimes a smile and a wave, pointing to your camera and giving them a hopeful questioning look will do the trick. Or you can try a street photography approach, capturing people more candidly, and naturally.

Photographing-festivals-13

Thank you Elvis, thank you very much.

Keep doing the rounds

Walking around the entire the festival over different times of day/night, can provide fresh images of the same spot as the light changes, and different people and characters pass by. A stall that doesn’t look like much during the day, could be lit up beautifully at night. Capturing stall holders when busy and quiet, can provide two entirely different moods.
Photographing-festivals-16

Photographing-festivals-24

Photographing-festivals-21

Don’t get in the way

Try not to annoy the live acts, and audience, by photographing all the way through the entire act, or getting in anyone’s way. A good general rule for band photography is to only photograph for the first three songs.
Morris dancer with evil eye.

Keep your eye out for moments, rather than just firing away. Look for different angles and interesting color compositions.
Photographing-festivals-18

Photographing-festivals-17

The best tip I can give you is to have fun. Enjoy the festival, as well as photographing it. So much photographic fodder in one place, often with good food and music as well.

So get out there, find yourself a fun festival, and start photographing. Please share your festival photographs with us in the comments below. Have you any tips to add for our readers? Any great festivals to recommend?

googletag.cmd.push(function() {
tablet_slots.push( googletag.defineSlot( “/1005424/_dPSv4_tab-all-article-bottom_(300×250)”, [300, 250], “pb-ad-78623” ).addService( googletag.pubads() ) ); } );

googletag.cmd.push(function() {
mobile_slots.push( googletag.defineSlot( “/1005424/_dPSv4_mob-all-article-bottom_(300×250)”, [300, 250], “pb-ad-78158” ).addService( googletag.pubads() ) ); } );

The post Beginner’s Guide to Photographing Festivals by Lea Hawkins appeared first on Digital Photography School.


Digital Photography School

 
Comments Off on Beginner’s Guide to Photographing Festivals

Posted in Photography


Photography Tips for Absolute Beginners

12 Oct

So you have decided you might like to try getting into photography, you have either just acquired a new camera or are about to, where do you begin?

Here are some photography tips for absolute beginners to help get you started:

absolute-beginner-photography-tips-1r

Buying gear

Your gear does not make you a good photographer. If you are just starting out, a top of the line camera is likely to not ony be be a waste of money for you, but also make your learning process a bit trickier. A bit like buying a formula one race car to learn to drive.

When you do want to buy gear, research first. It’s really helpful to take a look at some photography forums or articles here on dPS to find tips on beginner cameras. Once you find something that sounds viable and fits your budget, read reviews, and again look to forums such as Flickr, where there is a chat group for nearly every brand or model of camera, and they are often more honest about any issues.

The same applies to other gear like lighting. You don’t need to set yourself up with professional soft boxes to try studio lit portraits, you can try some of these DIY lighting tips, or find some cheap beginner setups on Amazon or Ebay.

Take lots of photographs

“Your first ten thousand photographs are your worst” – Henri Cartier-Bresson

As with any skill, the more you use it, the better you get. As you progress with your photography and look back on those early beginner shots you thought were fabulous, you’ll be able to see Mr. Cartier-Bresson was very right.

Read the manual

Camera manuals are at best, the most boring thing you have ever read in your life, with the possible exception of that friend that wanted you to read all 600 pages of their poetry about love and skin rashes.

Wile not an exciting read, going over the manual is very helpful.

Camera manuals are not exactly a riveting read.

It’s a good thing both in the beginning, and to refresh down the track, to know how this wonderful instrument (your camera) actually works. Even if you don’t recall all of it, that doesn’t matter, you will learn or be reminded of something helpful.

Yet it’s such a hard thing to read that manual! So it’s best to place it somewhere where you can push through it in small instalments while you are passing some time such as: the bathroom, in the car if circumstances have you often sitting there waiting for the kids, or at work during lunch break. Just as long as you give that thing a good going over.

Workshops and courses

So you’ve got the photography bug. You might be thinking, “Ooooo! I’ll sign up to a bunch of courses, workshops, buy online courses.” It might seem like a good idea and while they can be fantastic, I don’t recommend going nuts with your enthusiasm, and signing up for courses and workshops the moment you get the photography buzz.

You are currently reading one of the most useful photography sites on the entire internet. There is more information, tips and tutorials on this site, and others, than you will ever need to get you started and beyond. Once you get the hang of things, then you will have a better idea of the type of courses and workshops that would suit you. So I’m not saying don’t take a course – just wait until you know what suits your needs.

Connect with other photographers

This is invaluable, whether you sign up to an online group that use your brand of camera, or join a local camera club, your photography will progress faster, and it will be more fun with the help of fellow shutterbugs.

Even other beginners can help you learn new photography skills.

Connecting with other photographers is a great way to learn more and get inspired.

Camera clubs often have monthly competitions to practice with and sometimes organize photo tours, exhibitions and other activities. Talking with knowledgeable photographers or even fellow beginners can not only inspire, but also keep you motivated.

Sign up to some reputable photography newsletters and Facebook pages, or even approach photographers you admire to ask questions. Most professional photographers don’t mind answering a few questions, as long as you are respectful and polite, and don’t demand too much of their time.

Try everything

You may have taken up photography with a certain style or subject in mind, but it can be helpful to try all styles. You never know what you might have a knack for, or what you will learn along the way.

Getting feedback

Your friends and family may love you but they will lie to you about your photography. Unless you have a very honest friend or family member who actually knows a bit about photography, it’s often more beneficial to get feedback from strangers.

Signing up to a photo sharing site where others can comment on your work will get you mostly honest feedback, sometimes brutally so. I posted the image below on a feedback site some years ago. Aware the image had faults, I was keen to hear what someone else could point out for me, that I might not have seen after working so closely on the image.

72102_442536687028_1346935_n

A fellow submitted a lengthy comment , basically pulled it apart, pointing out several (million it seemed) faults, he really went to town on it. But while the comments were brutal and borderline unkind, it was useful advice. All of which I ignored in regards to that image, but was useful for later attempts.

Enter free competitions

If you have loads of money to spend, and confidence in your work, by all means as a beginner enter some of the big competitions. You wouldn’t be the first to take out a major prize in the first few months of picking up a camera. But there are loads of free competitions out there for you to throw some images, at and see how they go. Have a read of this helpful guide to entering competitions.

Aim to get off Auto settings

If you really want to be a good photographer, this is vital. No rush though! Just enjoy photographing in Auto Mode, and experiment with the settings as you go. Manual settings are not nearly as difficult as some beginners think. It can be a bit like learning to drive. In the beginning, it can be challenging to manage gears, indicators, and steering, all the while trying not veer off the road. But, with a bit of patience and practice, it becomes second nature. When you are ready to try manual settings there are plenty of beginner guides and cheat sheets here on dPS.

The digital darkroom

If you are really into your photography, you will need some sort of editing program. In the days of film photography you needed a darkroom and the use of heavy chemicals. But these days, thanks to modern technology, you can edit almost anywhere.

With today's digital darkroom you can edit your photo's pretty much anywhere and chemical free.

These days your darkroom can even be in bed with some accompaniments.

There are free and simple programs like Picasa, which have their limits, but are good for those just starting out. Then there are the big guns like Photoshop and Lightroom, which can be daunting for beginners, but it’s worth learning even just the basics of these programs, if you intend to get serious about your photography at some point. As with getting off Auto settings, it’s not as difficult as it may seem at first, and the internet is bursting with free tutorials on pretty much any program you choose.

Have fun

This is the best and most important part of photography, the enjoyment of it.

Don’t get bogged down by unsuccessful attempts, or by comparing yourself to professionals. Even the best photographers in the world were beginners at some point. Just keep taking photographs, keep learning, keep challenging yourself, and above all keep enjoying the fun you can have with photography.

googletag.cmd.push(function() {
tablet_slots.push( googletag.defineSlot( “/1005424/_dPSv4_tab-all-article-bottom_(300×250)”, [300, 250], “pb-ad-78623” ).addService( googletag.pubads() ) ); } );

googletag.cmd.push(function() {
mobile_slots.push( googletag.defineSlot( “/1005424/_dPSv4_mob-all-article-bottom_(300×250)”, [300, 250], “pb-ad-78158” ).addService( googletag.pubads() ) ); } );

The post Photography Tips for Absolute Beginners by Lea Hawkins appeared first on Digital Photography School.


Digital Photography School

 
Comments Off on Photography Tips for Absolute Beginners

Posted in Photography


Post-Processing Tips for Beginners

10 Oct

They say photography is an art form, and I couldn’t agree more. There are so many elements that go into making a great piece of art. Not only do you need to know your gear and the environment you work in, but you also need to know how to put the finishing touches to your art, that takes it from good to great.

This can be quite challenging especially to a beginner. But like any great artist would say, all of this can be done with a lot of practice and patience. Great photos tend to have universal appeal. They are technically sound, and also have an editing style that appeals to the mass majority. While most photographers, including myself, advocate getting it right in camera, there are some basic steps that you may need to follow just to add the right amount of oomph to your images in the post-processing stage.

Choosing the right type of editing software

The type of editing you apply to your images does depend on the type of software you use. There are many different options for editing software on the market. Adobe Photoshop and Lightroom are two of the most popular ones for serious amateurs, and professional photographers. But if you are an absolute beginner they might be cost prohibitive for your needs. There are some good free editing software, like PicMonkey and Picasa, that work great at a basic level. If you are a cell phone photographer, then most smartphones have built-in editing software that does the job fairly well too. Apart from the basic editing steps they also have a ton of filters for adding some really cool effects to your images. But just be careful of the audience and the purpose for these cell phone images before applying funky filters.

For the purposes of this article, I will be using Lightroom. Most of the steps are common to all editing software, just choose the one that works for you and your photography needs.

Adjust the horizon

One of the first things I do to any image is to adjust the horizon, also known as straightening the image. I am not a fan of tilting my images. I find that when I look at tilted images, I don’t know which way is up. Am I supposed to turn my head to the right or the left? Crazy tilts make me dizzy. I don’t see images in tilts in my day-to-day, so why would I want to click images that are tilted. This is just my personal preference. I know some photographers who consider it very artsy to have tilted images. If that is your thing, then go for it and do what makes you happy. For images that have the horizon or leading lines in them, getting the horizon level is an absolute must.
Memorable Jaunts DPS Simple Processing Tips Before-01

This was taken from the passenger side of the car – I really loved the leading lines but knew the horizon was way off.

Memorable Jaunts DPS Simple Processing Tips After-01

In Lightroom, I adjusted the horizon, increased the contrast gently, and warmed up the image by adjusting the temperature slightly.

Adjust or crop out any unwanted elements

Nothing can be more distracting than an unwanted element in the frame. Before cropping or removing unwanted elements ask yourself whether the object is actually adding value to the image, or is it competing with the subject for attention. Removing unwanted elements can be done by using the clone/stamp tool in Photoshop, the spot healing brush Lightroom or a simple crop function in your photo editor of choice.
Memorable Jaunts DPS Simple Processing Tips Before-2

I loved the texture of the brick wall but hated the stains on the wall right near the chair.

Memorable Jaunts DPS Simple Processing Tips After-2

I chose a closer crop for the chair, and cloned out the stains using the spot removal tool in Lightroom. I also brightened the image a tad.

Remove any dust spots

This is something that is prominent if you are photographing against a light background, or when converting to black and white. If your sensor is dirty or has minute dust specks, they appear in your photographs. You can use the clone tool or even the patch tool (Photoshop) and clean out these dust spots in the image.

Adjust the exposure and contrast

After you have straightened the horizon and removed any unwanted or distracting elements from the frame, next adjust the exposure of the image. This adjusts the brightness. If the image is too dark, add light in and if the image is too bright, reduce light. Keep in mind that often times adjusting brightness will affect the contrast of the image as well. This can be fixed by adjusting the Contrast Slider in Lightroom. It makes the brightest parts of the image brighter and the darkest parts darker, and improves the overall look of the adjusted image.
Memorable Jaunts DPS Simple Processing Tips Before-3

While I adore this pose of my clients, the image is a little too dark (underexposed) as the light was changing very fast.

Memorable Jaunts DPS Simple Processing Tips After-3

As part of my edits to this image, I increased the exposure, warmed up the image by increasing the temperature and also adjusted the contrast a bit to add a little more umph (punch) to the image.

Adjust saturation

Typically if I have adjusted temperature and contrast in an image, I do not adjust the saturation slider. But this is a personal preference for most people. Adjusting the saturation value of an image can add a certain punch to an image, but use this tool with a light hand as you don’t want you image to look too processed.
Memorable Jaunts DPS Simple Processing Tips Before-4

I love this image of fresh snow on the blades of tall grass near my home. But, because everything was so dark and gloomy due to the snow, the image appears a bit flat and dull.

Memorable Jaunts DPS Simple Processing Tips After-4

I wanted to exaggerate the colors of the blades of grass to show that they were extremely dry and also pop-out the white snow on the grass. So I adjusted the saturation and vibrance sliders in Lightroom, and also warmed up the image by adjusting the temperature.

Export for web or print

Depending on what is the final treatment for your images, you can either save them as low resolution JPEGS or high resolution JPEGS. There are many other formats as well like TIFF, BMP, and GIF. JPEG are more universally accepted, and is the format that I use for all my images – the ones for print as well as for the web. Typically an image approximately 72PPI (pixels per inch) is considered as a low resolution image, ideal for the web. An image of 150DPI or 300DPI is considered a high resolution image ideal for print. DPI stands for Dots per inch. Per wikipedia, it is used to describe the resolution number of dots per inch in a digital print.

Ultimately how you process your images is an extremely personal decision. Choose the style and the tools that best describe your photography style. It is okay to experiment with the latest fads, filters, and looks but keep in mind that you may want your images to have a timeless look and feel so that years from now when you look at them, they still evoke an emotion.

googletag.cmd.push(function() {
tablet_slots.push( googletag.defineSlot( “/1005424/_dPSv4_tab-all-article-bottom_(300×250)”, [300, 250], “pb-ad-78623” ).addService( googletag.pubads() ) ); } );

googletag.cmd.push(function() {
mobile_slots.push( googletag.defineSlot( “/1005424/_dPSv4_mob-all-article-bottom_(300×250)”, [300, 250], “pb-ad-78158” ).addService( googletag.pubads() ) ); } );

The post Post-Processing Tips for Beginners by Karthika Gupta appeared first on Digital Photography School.


Digital Photography School

 
Comments Off on Post-Processing Tips for Beginners

Posted in Photography


A Beginner’s Guide to Buying a Camera

05 Oct
iPhone camera

Sadly, you may one day grow out of your cell phone camera.

So you’ve decided it’s time to buy a real camera? Maybe the cell phone camera just isn’t cutting it anymore, or you read an inspiring travel blog bragging about how they quit their day job, and now roam the planet selling snapshots they take along the way.

Either way, the decision has been made, and now it’s time to take the next step and figure out what gear you’re going to need to support this new endeavour.

The photographic gear market isn’t lacking in options, and it’s all talk about megapixel this and shutter speed that, but without a bunch of technical experience, how do you know where to start? There really isn’t a one-camera-fits-all option or we would all be using it.

Let’s take a look at some of the considerations you are going to want to keep in mind as you attempt to navigate the consumer minefield of cameras and photographic equipment when selecting and buying a camera. We will look at the major features shared among most cameras, and how they may influence your decision.

Price

Expensive camera equipment

Brace yourself: High-quality photography equipment often requires a significant investment.

That’s right, cameras all cost money, and sometimes lots of it. This is a logical place to start, unless, of course, money is of no consequence, in which case order a couple of Leica M Series cameras – one for you and one for me.

The easiest approach to budget is to come up with as narrow a budget window as possible. If you think you want to spend under $ 1,000, you will likely be overwhelmed with choices, while if you decide to look at the $ 800-$ 1,000 range, your options will be much more manageable to compare.

While you’re mulling over your photography budget, note what other accessories you may need or want. Don’t blow your entire budget on a camera body with no lens to mount on it. Do you want to acquire a tripod, external flash or even extra batteries and memory cards?

Types of Cameras

Generally speaking, there are point-and-shoot style cameras, mirrorless cameras and DSLRs (digital single lens reflex), but keep in mind that the lines can be pretty blurry between these.

Nikolaj F. Rasmussen

By Nikolaj F. Rasmussen

Point-and-shoot cameras are mostly compact and convenient. The constant with them is that the lenses are built-in and non-interchangeable, but usually cover a wide zoom range. Quality-wise they run the gamut from cheap with uninspiring quality, to pretty sweet ones like the Canon G1.

Mirrorless systems are all the rage and most of them have interchangeable lenses like the big DSLRs, at a smaller size. They are a great compromise of quality and versatility. Some are super classy like the Olympus OM-D and others deliver high resolution like the Sony A7S.

DSLRs are the classic, fancy-looking cameras, with all the buttons and big lenses (sometimes). Lower-end ones offer good quality, and give users a ton of control. There is a mind-boggling assortment of lenses and flashes available, as well as a myriad of other gadgets to achieve all sorts of creative effects.

Sensor

This is the part of the camera that replaced the film. The reason we care about these is because they range in size, resolution (megapixels) and sensitivity to light.

ZEISS Microscopy

By ZEISS Microscopy

As you’ve probably already deduced, big sensors with high resolution that are more sensitive to light are pricey. The biggest sensors in the camera types we are talking about are called full frame, and are the size of a 35mm negative (film). The majority of cameras on the market use a variety of smaller versions that we usually call cropped frame (DX for Nikon and APS-C for Canon). There are other size but these two make up the lion’s share of the market.

Right now camera companies are in a death match to out-resolution one another. While the average camera might boast 16-20 megapixels, some models are double that.

What do all those megapixels get you? You can think of it as the same as film grain, or the resolution of your TV. If you have a 36-megapixel camera, you can crop out 2/3 of the photo taken with that camera and still have a 12-megapixel photo. Higher resolution=finer grain.

Sounds like the more the merrier, but not necessarily. Lower-megapixel cameras are often more sensitive to light and work better in dark conditions. Also, resolution is directly correlated to file size so you will fill up your memory cards, and computer hard drive much quicker. Often times lenses for full-frame cameras are more expensive as well.

Memory cards

High-megapixel cameras come at a price as they eat up storage on your memory cards and hard drives.

ISO

This may sound familiar because when you had a film camera (if you are old enough) you probably used 400 ISO film. This is a measurement of the sensor’s sensitivity to light (short meaning, the long one is very technical).

If you want good results shooting in low-light conditions without a flash, you want to look at cameras that not only shoot at high ISO (1600 or greater), but can do so while producing decent shots. The Fujifilm X-T1, Nikon D800, Canon 5D Mark 3 and Sony RX100 get high marks in this category, but be warned, it’ll cost you.

Lenses

A sensor is only as good as the lens that you put in front of it. I just made that up but it’s true. Everything has to pass through the lens to get to the sensor.

If you’re going to go with a point-and-shoot camera, compare the zoom range (a number in millimeters) between several cameras. There are some that cover ridiculous ranges like the Nikon Coolpix P610 which zooms from 24-1,440mm. However, don’t be fooled by big numbers as you may never need that kind of range and another camera may have other features that are more useful to you.


The Fujifilm X100T's lens

Some cameras are equipped with a permanent fixed-focal-length lens like the Fujifilm X100T. Some photographers prefer simplicity.

Be aware that there are two types of zoom: optical and digital. Optical zoom is what the actual lens is capable of, while the latter digitally crops the photo and image quality is degraded significantly.

Some cameras like the Fujifilm X100T and the Sony RX1 are quality cameras which have permanently attached 35mm lenses. No changing lenses, no zoom. Some people love them, some people think it’s a stupid idea. In the end, it depends on your shooting style and your personal preference.

With DSLRs, the options for lenses are nearly endless. Original manufacturers make plenty, third party brands abound, and you can even get adapters to attach almost anything to almost anything else. Many DSLRs are offered as kits that come with the camera body and lens. Usually the lenses are of lower quality but can certainly produce good results.

canon-current-EF-lineup-2012

Image courtesy of Canon

Some lenses are big and expensive because they let in a lot of light and work better in low-light conditions, produce very sharp undistorted images, have long focal lengths allowing you to take pictures of far away subjects, and are built to more exacting and durable standards or any combination of these features.

The lens department is where mirrorless cameras fall a little short. For most casual photographers, there are enough good choices to fulfill your needs, but fewer choices for professionals, or those wanting to focus on niche genres like macro or sports.

The Other Stuff

I know you wish the things mentioned thus far were the only things to consider, but there is plenty more. With so much competition out there, even simple cameras keep getting more complex. On that note, if you find a camera you’re interested in, find out how long that model has been on the market as the manufacturer might be about release a new version.

Raymond Bryson

By Raymond Bryson

Other features to look for in a camera:

  • WiFi connectivity
  • Built-in flash
  • Hot shoe (for an external flash)
  • Touch screen
  • Articulating screen
  • Dual memory card slots
  • Image stabilization (in-camera or in-lens)
  • RAW file support (gives you more control in post-processing)
  • Video capabilities (HD, 4K, etc.)
  • External microphone support
  • Shooting speed (frames per second)
  • Minimum focus distance or macro mode
  • Shooting modes (for creative effects)
  • Weather sealing
  • Battery life
  • Weight

Conclusion

Of course this is not an exhaustive list, but it’s a good place to start. These days there are cameras as varied as the photographers using them so it will really pay off to do your research.

googletag.cmd.push(function() {
tablet_slots.push( googletag.defineSlot( “/1005424/_dPSv4_tab-all-article-bottom_(300×250)”, [300, 250], “pb-ad-78623” ).addService( googletag.pubads() ) ); } );

googletag.cmd.push(function() {
mobile_slots.push( googletag.defineSlot( “/1005424/_dPSv4_mob-all-article-bottom_(300×250)”, [300, 250], “pb-ad-78158” ).addService( googletag.pubads() ) ); } );

The post A Beginner’s Guide to Buying a Camera by Jeremie Schatz appeared first on Digital Photography School.


Digital Photography School

 
Comments Off on A Beginner’s Guide to Buying a Camera

Posted in Photography