RSS
 

Posts Tagged ‘Autofocus’

A visual history of Canon autofocus and how it works today

16 Jun

This short video does an excellent job explaining how autofocus systems work, without over-complicating the subject matter. It touches on the various types of autofocus systems in Canon cameras as well as specific features like subject tracking and Dual Pixel AF.

It starts with the dawn of autofocus and moves on to modern day from there. And though it is marketing material from Canon USA, it’s still worth a watch. In fact, it got us thinking about how incredibly far AF technologies have come in just about 30 years. Imagine where we’ll be in another 30.

Articles: Digital Photography Review (dpreview.com)

 
Comments Off on A visual history of Canon autofocus and how it works today

Posted in Uncategorized


Updated: A closer look at Sony a9 image quality and autofocus

27 Apr

While combing through our thousands of images from Sony’s a9 launch event last week, we’ve taken a critical look at the camera’s revamped JPEG engine and the effectiveness of its 653-point autofocus system. Read more

Articles: Digital Photography Review (dpreview.com)

 
Comments Off on Updated: A closer look at Sony a9 image quality and autofocus

Posted in Uncategorized


Updated: A look at the Panasonic DC-GH5’s autofocus system

16 Mar
Pushing forward – Panasonic’s improvements to the autofocus system on the GH5 are impressive, but a few quirks remain.
Out of camera JPEG cropped to taste | ISO 250 | 1/500 sec | F5.1
Photo by Carey Rose

Panasonic’s GH-series has always been a line of highly capable video-centric hybrid cameras, and the GH5 is no exception. Despite this, Panasonic’s work on the autofocus system has resulted in some impressive stills-shooting performance; the camera comes with with updated DFD technology, autofocus custom settings so you can tailor the camera to the movement of your subjects and 9fps shooting in Raw and JPEG with autofocus.

It sure sounds like a winning combination, but that doesn’t mean it’s perfect. Take a look at our updated first impressions review to learn more.

See how the Panasonic GH5 did in our autofocus tests

Check out the GH5 at a rugby match

Articles: Digital Photography Review (dpreview.com)

 
Comments Off on Updated: A look at the Panasonic DC-GH5’s autofocus system

Posted in Uncategorized


Samyang announces 14mm F2.8 and 50mm F1.4 autofocus FE lenses

04 May

Samyang Optics has announced its first autofocus lenses. The 14mm F2.8 ED AS IF UMC and 50mm F1.4 AS IF UMC will be offered in Sony’s E-mount and are designed to cover a full-frame sensor. With a robust metal housing, each lens will be able to utilize phase detection AF as well as contrast detection, and will offer 67mm filter threads.

The 14mm F2.8 and 50mm F1.4 will be available in July 2016; no price is given yet. Keep an eye on Samyang’s Facebook page and website for more information.


Press release:

May 3rd, 2016, Seoul, Korea – The global optics brand, Samyang Optics (http://www.samyanglensglobal.com) today announced the long-awaited launch of two autofocus lenses: 14mm F2.8 and 50mm F1.4 lenses for Sony E mount Mirrorless cameras with full frame sensor size. The new 14mm and 50mm are the widest and brightest lenses in their class and offer superb quality images to photographers. This launching expands the boundaries of Samyang Optics photo lens line-up from manual focus only, to now include autofocus lenses.

Optimised Optical Design as Full Frame Mirrorless Camera Lens

Both 14mm F2.8 ED AS IF UMC and 50mm F1.4 AS IF UMC are specifically designed to work in harmony with full frame mirrorless cameras in Sony E mount. The flow of light is devised based on the uniqueness of the distance from glass to sensor in mirrorless cameras to create optimal performance. Along with portability of mirrorless lenses, the 14mm F2.8 and 50mm F1.4 are compatible with full frame sensors to deliver the wideness and sharpness of image to photographers.

The 67mm filter diameter brings the maximum amount of light into the lens to create the best work of light in photography. The 14mm F2.8 is the widest angle available in the market and the F1.4 of 50mm and F2.8 of 14mm apertures are by far the brightest of full frame mirrorless lenses, offering a beautiful bokeh effect and the best quality images under various exposure conditions.

Based on Samyang Optics’ exceptional optical technology, aspherical lenses have been included in both lenses to minimise aberration and unnecessary light dispersion, delivering high resolution from the centre to the corners of the image.

AF Performance and Ergonomic Design Based on Class-Leading Technology

These new products will be the first autofocus lenses in over 40 years of Samyang’s class-leading core optics technologies. Samyang has captured the essence of world leading image technology with their manual focus lenses and reinterpreted it into autofocus lenses. Photographers now can enjoy the prime manual lens image quality and autofocus lens. These new 14mm F2.8 and 50mm F1.4 are compatible with both phase detect and contrast detect sensors to operate fast and accurate focus detection.

The 67mm filter diameter is also the result of years of R&D for best handling, by adding stability to the photo-taking experience. Also the minimal and sleek design and metal-housing solidify the build quality with the internal focus system.

These two new autofocus lenses from Samyang Optics will be exhibited at the Photo & Imaging 2016 Show in Seoul, South Korea. The lenses will be globally available from July 2016. Further details, pricing and availability will follow.

Articles: Digital Photography Review (dpreview.com)

 
Comments Off on Samyang announces 14mm F2.8 and 50mm F1.4 autofocus FE lenses

Posted in Uncategorized


5 Troubleshooting Steps for When Your Nikon’s Autofocus Stops Working

03 Apr

You’re in the middle of a photoshoot and suddenly you notice nothing in your viewfinder is in focus. Your shutter and AF-ON buttons (if using back-button focusing) do not seem to work. All eyes are on you, and the pressure is on to quickly fix the problem. Where do you start? Or perhaps you have just changed lenses and suddenly nothing works. Where might you have gone wrong?

This has happened to me one too many times, so I have now come up with a system of troubleshooting in the quickest time possible on the spot. It goes without saying, of course, that your camera needs to be switched to ON and the lens cap needs to be off.

nikon-autofocus-troubleshooting-photo-tips

#1 Autofocus not Manual

Check that both the lens and the camera switches are both pointing towards Autofocus. On the camera it must be set on AF, not M, and on the lens put it to M/A (A stands for Autofocus and M for Manual, M/A allows you to use both). Flicking the lens switch to Manual can be done unwittingly and fairly easily, especially if you are in a rush to change lenses.

nikon-autofocus-troubleshooting-photo-tips

nikon-autofocus-troubleshooting-photo-tips

#2 Back dial is not Locked

Check that the dial is pointed towards the camera icon and not the L, which stands for lock.  You can easily flick this dial, especially if you are back-button focusing and your dial sees so much action.

nikon-autofocus-troubleshooting-photo-tips

#3 AEL / AFL

Check your AEL/AFL button that you haven’t locked focus. Clicking it once locks focus so click it another time to unlock focus.

nikon-autofocus-troubleshooting-photo-tips

#4 Check the lens

Remove the lens. Inspect the front and rear lens aspects for smudges or dirt. Check also that no part of the lens is broken. If you have filters on your lens, check that they are clear and there are no cracks. When you re-attach the lens, make sure you hear a click once the lens is twisted in place.  If there are any smudges on the lens, make sure you clean it with a lens cloth, and do not blow on the lens.

Lens cloths are usually lint-free pieces of material, and should be used with a lens cleaning solution, rather than anything with solvents. Blowing on the lens can contribute to lens damage since a person’s breath can contain harmful acids. If you feel you have to blow, use a lens bulb blower and a brush.

nikon-autofocus-troubleshooting-photo-tips

#5 Viewfinder

Finally, check your viewfinder and make sure there are no oils, smudges or dirt covering your sight. You can clean the viewfinder the same way you clean your lens.

nikon-autofocus-troubleshooting-photo-tips

#6 Bonus

This applies to any camera, not just Nikons. If something is going on with your camera that is odd – turn it off for a few seconds, then turn it back on. It’s like a reboot for your camera, just like you do with your computer. If that doesn’t work you can also try removing the battery for a minute or more (remember to turn the camera off before removing the battery). As a last ditch effort you could try resetting all functions and settings on the camera to factory default. If it still isn’t working test the camera with another lens, if that one works you may need to take your lens in to get serviced. If the

I hope this little troubleshooting guide helps when you get stuck with focusing problems. Do you have any other quick focus troubleshooting tips to share?

googletag.cmd.push(function() {
tablet_slots.push( googletag.defineSlot( “/1005424/_dPSv4_tab-all-article-bottom_(300×250)”, [300, 250], “pb-ad-78623” ).addService( googletag.pubads() ) ); } );

googletag.cmd.push(function() {
mobile_slots.push( googletag.defineSlot( “/1005424/_dPSv4_mob-all-article-bottom_(300×250)”, [300, 250], “pb-ad-78158” ).addService( googletag.pubads() ) ); } );

The post 5 Troubleshooting Steps for When Your Nikon’s Autofocus Stops Working by Lily Sawyer appeared first on Digital Photography School.


Digital Photography School

 
Comments Off on 5 Troubleshooting Steps for When Your Nikon’s Autofocus Stops Working

Posted in Photography


Sigma Mount Converter MC-11 adapts Sigma lenses to E-mount cameras, supports autofocus

23 Feb

$ (document).ready(function() { SampleGalleryV2({“containerId”:”embeddedSampleGallery_5668726877″,”galleryId”:”5668726877″,”isEmbeddedWidget”:true,”standalone”:false,”selectedImageIndex”:0,”startInCommentsView”:false,”isMobile”:false}) });

Sigma has announced an adapter for Sony E-mount cameras, making it possible to use Sigma’s most recent lenses in Canon and Sigma mount on full-frame or APS-C E-mount bodies. The MC-11 adapter is able to use phase detection AF with adapted lenses, and makes use of both camera and lens stabilization when present. An LED display on the side of the mount provides compatibility information of attached lenses. The adapter also communicates EXIF data to the camera body, and retains profiles of compatible lenses – those included in Sigma’s Global Vision line – to optimize AF performance. 

Sigma has not announced pricing or availability at this time.

Press release:

New Sigma Global Vision Lens Mount Converter Expands High-Performance Lens Options for Sony Cameras

Brings Sigma’s Global Vision Lenses to the Sony E-Mount Camera Family

KANAGAWA, JAPAN — February 23, 2016 – Sigma Corporation of America, a leading DSLR lens, camera, flash and accessories manufacturer, today announced the release of its new high-performance Sigma Global Vision lens converter – the Mount Converter MC 11 – for Sony E-mount, full frame and APS-C sensor cameras. With the new MC-11, Sony camera users will be able to utilize 19 Global Vision lenses in Sigma Canon Mount (EOS) and Sigma Mount (SA).

“There are many challenges to designing high-quality mount converter and topping the list is aptly handling phase detection AF in newer cameras and this is where the Sigma MC-11 is groundbreaking in its support for the Sony E-mount systems,” states Mark Amir-Hamzeh, president of Sigma Corporation of America. “The new Sigma MC-11 mitigates complications with a purpose-built lens control data system engineered for maintaining superior AF functionality. So the growing number of Sony E-mount camera users who have been asking for more lens options, now have access to a large pool of lenses that fully embody Sigma’s signature quality and performance.” 

The Sigma MC-11’s sleek LED display lets Sony users know if the attached Sigma lens is compatible and whether or not the MC-11 needs to be updated for that specific lens. Its internal control data system keeps detailed information on each compatible Sigma lens, automatically optimizing performance of AF drive, aperture control and other critical lens functions. The MC-11’s internal control data system also maintains continuity with key camera functions that control brightness and correct transverse chromatic aberration, distortion, and more. The complete compatibility with both Sigma lens OS and Sony in-camera OS ensures correction of camera shake and other stability issues and when used with in-camera stabilization, MC-11 allows angle shake correction in the lens. The integrated flocking helps prevent internal reflections and reduction in lens performance. In addition, the MC-11 retains important EXIF data ensuring users can analyze every detail of their lens setting. 

The Sigma MC-11 converter can be updated with the latest compatible lens information from a workstation or laptop using the Sigma Optimization Pro software and Sigma USB Dock (sold separately).

For more information on the Sigma MC-11 converter please visit www.sigmaphoto.com/mount-converter-mc-11

Articles: Digital Photography Review (dpreview.com)

 
Comments Off on Sigma Mount Converter MC-11 adapts Sigma lenses to E-mount cameras, supports autofocus

Posted in Uncategorized


To the point: LensRentals shows how to use Autofocus Fine Tune

23 Jan

DSLR autofocus has been the Gold standard for decades but the higher accuracy and precision offered by some mirrorless cameras risks tarnishing this image. However, many modern DSLRs include an option to fine-tune the autofocus behavior to help optimize their performance. Guest writer Joey Miller has written a short guide to how to make use of this feature, over on the LensRentals blog.

You don’t necessarily need any specialist equipment to fine tune your lenses. But if you’re going to go to all this effort, it might be worth it. Photo: Joey Miller

The article builds on the work Roger Cicala has already done, looking at the reasons that fine tuning is needed, with one of the main reasons being to cancel-out the effect of the combined tolerances of your camera body interacting with the combined tolerances of the specific copy of the lens you’re using.

As we reach higher pixel counts, this imprecision is being highlighted in ever more detail (it was always there, but your camera wasn’t letting you examine the problem in such fine detail).

Miller uses a Canon setup as an example, with up to two corrections per lens being possible (a ‘Wide’ and ‘Tele’ value being available for zoom lenses). But even this is a rather blunt instrument when it comes to achieving perfect accuracy. Given the variation we encounter using off-center focus points, a more complete solution would require something more like the Olympus system for Four Thirds lenses, which allowed two values per lens, per focus point. The best correction value can also change with subject distance, which is why Sigma’s USB dock offers the ability to set four different values for four different subject distances.

Even if such control over calibration were possible for the end-user, it would be so arduous as to be nearly impossible. Products such as Reikan FoCal can help, but it’s still fairly involved, and the situation-to-situation, day-to-day variability we’ve noted with some systems means even these don’t completely solve the problem. Thankfully, the process looks as if it’s about to be made simpler, with Nikon’s D5 and D500 gaining something we’ve been proposing for several years now: an automated fine tune system that checks the results of its contrast-detect AF in live view mode to calculate the corrections needed to fine tune its secondary sensor phase-detection system. It’s rather rudimentary in that only one value can be entered for any lens and body combination, but it’s certainly a step in the right direction. 

Articles: Digital Photography Review (dpreview.com)

 
Comments Off on To the point: LensRentals shows how to use Autofocus Fine Tune

Posted in Uncategorized


How to do Autofocus Fine Tuning on Your Nikon DSLR

22 Oct

Most of the time your equipment does a great job, but every once in a while you may find that under certain circumstances, your photos may seem a little soft. Although there are no less than a million reasons why this might be, it may simply be that your lens isn’t focusing where it’s supposed to.

You may be thinking that if this is the case, isn’t something seriously wrong? Not necessarily.

Some cameras are equipped with a feature to tweak the accuracy of its autofocus – Nikon calls this autofocus fine tuning.

Depth of field

Autofocus fine tuning allows you to dial in the autofocus accuracy of a camera/lens combination.

What is autofocus fine tuning?

Camera lenses are built, and tuned, to fairly exacting standards and do what they are supposed to pretty well, even lower-end lenses. However, there is a window, albeit fairly minute, that focus tuning parameters fit into. If the lens’ tuning falls right in the middle of that window, the focus will be spot on, but it’s not uncommon for the focus to be at either end of that window while still meeting quality control standards.

What this means is that in the majority of shooting situations you are going to end up with sharp results. In some situations when you are pushing the accuracy limits of the lens, such as macro photography or shooting at wide apertures, you may discover that the lens focuses a little in front or behind the focus point you’ve chosen. Maybe you’ve seen this shooting a close-up portrait at a wide aperture – although you are trying to get the subject’s eyes in the focus plane, you keep getting their eyebrows or ears sharp instead.

Why use it?

This is where lens fine tuning comes into play. What this feature does is allow you to dial in the accuracy of the lens/camera focus point even more precisely than it already is. If you haven’t noticed any problems with your setup, or mostly shoot at smaller apertures, going through this process may be unnecessary.

This feature can be found on Nikon bodies from the D7000 up and Canon bodies from the 50D and up, as well as several Sony, Olympus, and Pentax cameras.

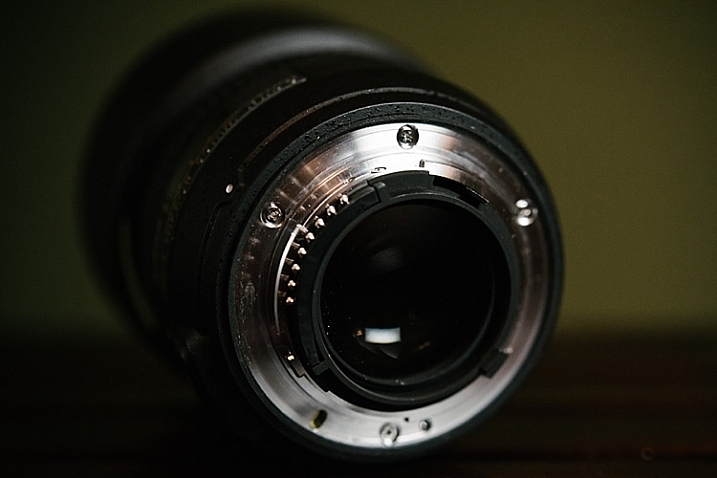
Fine tuning settings are specific to the lens/camera combination and once you tune a lens, the camera saves the setting, which it reverts to anytime you mount that lens. Although you need to use a CPU lens to reap the full benefits of autofocus fine tuning, older analog or third party lenses can be fine tuned, and the settings saved manually on Nikon DSLRs.

What you need

  • A tripod
  • A newspaper or magazine printed with a small font
  • A table
  • A well lit room

How to do it

Step 1 – Mount your camera on the tripod and adjust it so the lens is about two feet above table level. The idea is to have the lens pointed at the newspaper at about a 30-degree angle.

Set up for autofocus fine tuning.

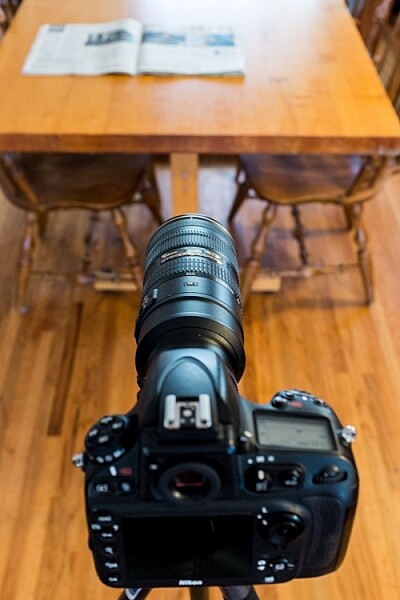
The setup to adjust autofocus fine tuning is fairly simple.

Step 2 – It is recommended to set the zoom (if using a zoom lens) to the focal length and distance which you use most often.

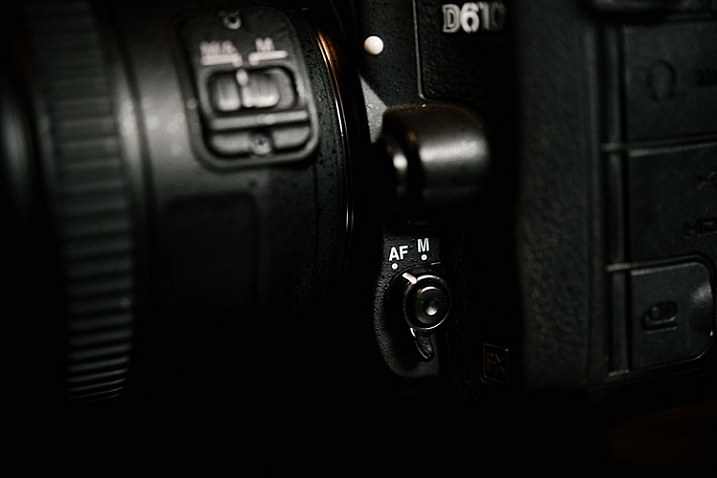
Step 3 – Set the camera to single-point, single-servo autofocus (AF-S for Nikon, One-Shot for Canon)

Step 4 – Open the lens to one stop down from its widest aperture (e.g. set an f/2.8 lens to f/4) and the middle of its zoom range (if it’s a zoom lens).

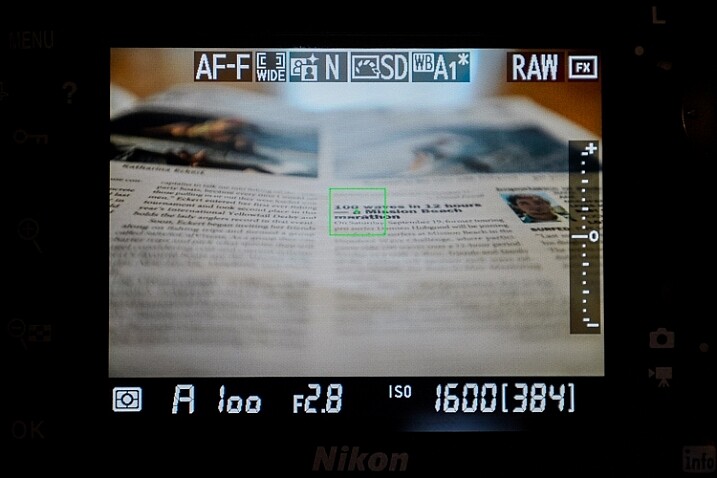
Step 5 – Place the focus point in the middle of the frame (center dot). I prefer to align the focus point with something recognizable like a letter of bold text among normal text.

Focus point in the center of the frame

With autofocus set to AF-S (one-shot), single-point, place the focus point in the center of the frame.

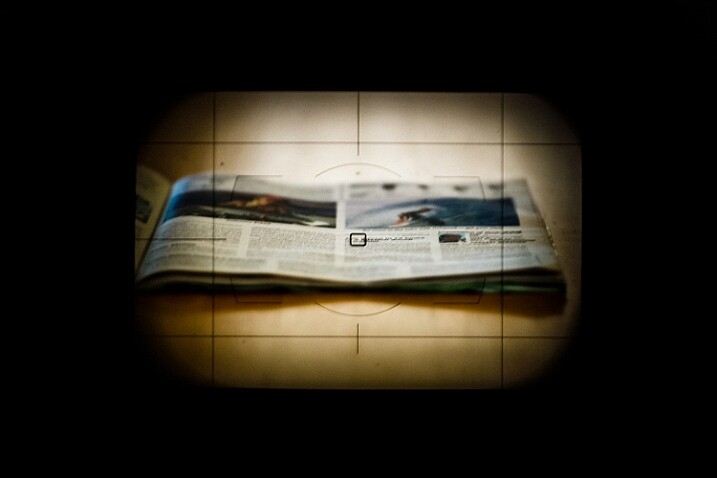
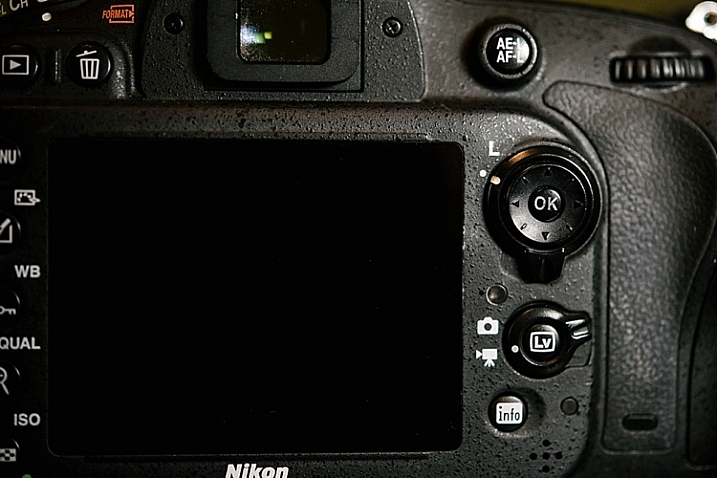
TIP: A helpful method is to turn on Live View and place the small dot in the middle of the focus box on a letter of text. Zoom in the view (NOT the lens) which gives you a more precise center point than the small box seen through the view finder. Turn off Live View to continue.

Using live view to align focus point

Using Live View helps to line up your focus point more precisely.

Step 6 – Set the self-timer on the camera to at least five seconds to allow the camera to stabilize after pressing the shutter button.

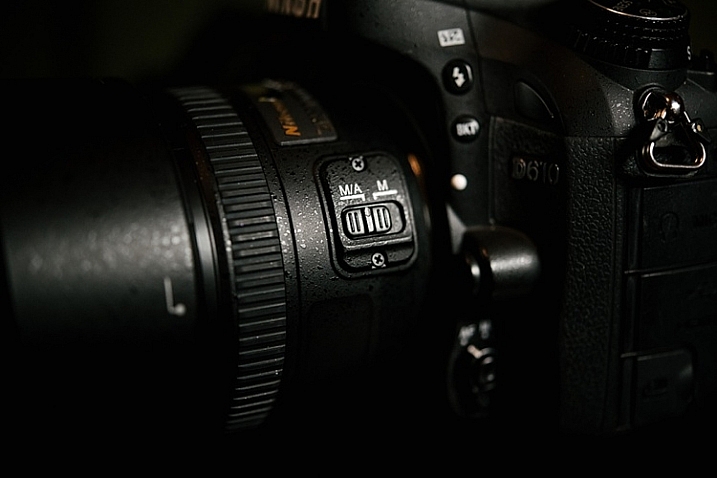
Step 7 – Turn off any stabilization either in-lens or in-camera.

Step 8 – Make sure focus points are enabled on playback: Menu>Playback Menu>Playback display options>Focus point>Done>OK

Focus point on preview

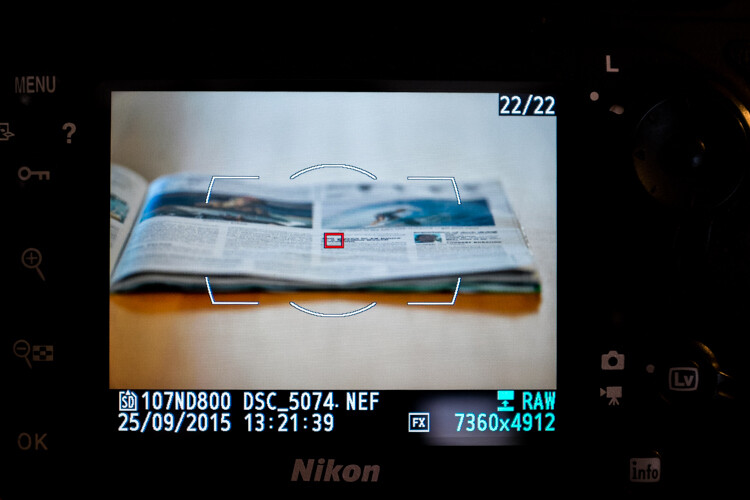
Enabling focus point on image preview allows you to see where the focus was set when the picture was taken.

Step 9 – Defocus the lens manually and then engage autofocus until it locks onto the focus point and press the shutter button.

Step 10 – Review the image and zoom in to check the accuracy of the focus point. Do this a few times for verification.

Checking focus point accuracy

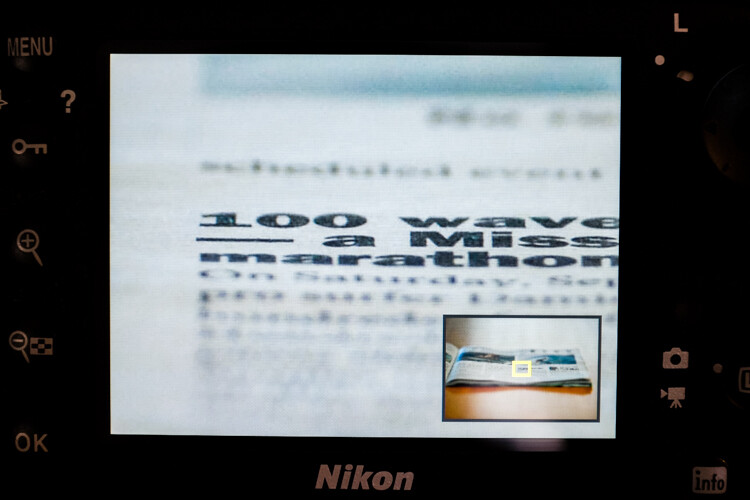
Preview the image and zoom in to check the accuracy of the focus point.

If it appears that sharpness is centered on the focus point, great, your lens’ focus is accurate and you’re good to go. If not, continue reading.

Step 11 – To adjust the autofocus fine tune go to: Menu>Setup menu>AF fine-tune>AF fine-tune (On/Off) and turn it on. Go back and select Saved value.

Fine tuning autofocus

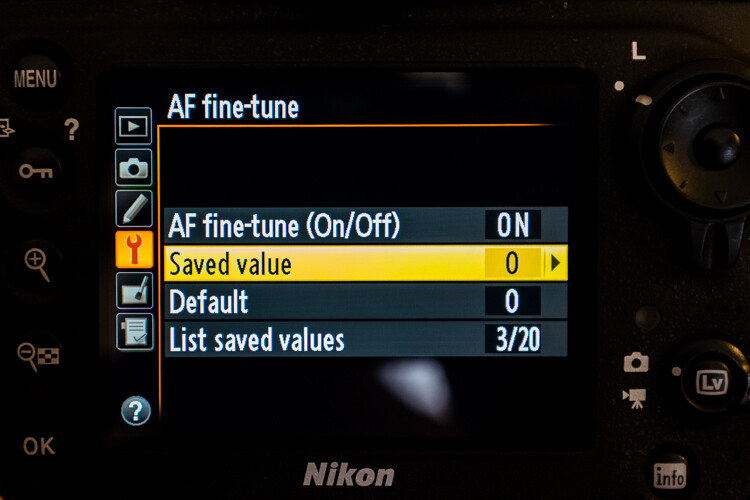
The menu location of autofocus fine tuning.

Your lens’ information should be displayed in the upper left corner and the fine-tune adjust on the right.

Step 12 – Positive numbers correct for back-focusing (focusing behind the focus point) and negative numbers correct for front-focusing.

Adjusting autofocus fine tuning

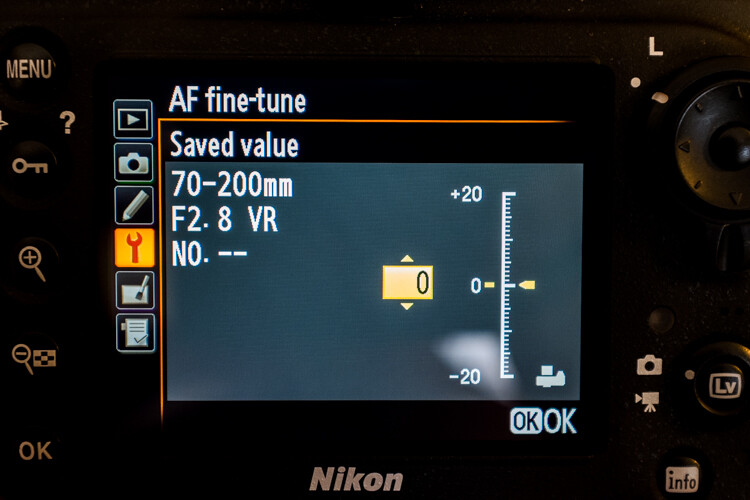
Positive values adjust the focus point away from the camera while negative values move it closer.

Remember, this is called “fine-tuning” so the increments are pretty small – a +1 is hardly noticeable.

Step 13 – After each adjustment, defocus the lens manually and repeat the steps above until you hit the sweet spot.

The settings you have applied to a specific CPU lens are saved, and are loaded automatically anytime that lens is mounted to your camera. With non-CPU lenses, you can create a profile for that lens which you can then save and revert to manually when that lens is used.

If your lens’ focus still fails to hit the mark after attempting autofocus fine-tuning, either go old-school and use manual focus if it’s practical, or you will need to send your lens in to have it calibrated with a special machine.

If you use a brand other than Nikon check your camera manual to see if your model has this feature and how to use it.

Good luck and may your images be as sharp as my witticisms – hopefully much sharper.

googletag.cmd.push(function() {
tablet_slots.push( googletag.defineSlot( “/1005424/_dPSv4_tab-all-article-bottom_(300×250)”, [300, 250], “pb-ad-78623” ).addService( googletag.pubads() ) ); } );

googletag.cmd.push(function() {
mobile_slots.push( googletag.defineSlot( “/1005424/_dPSv4_mob-all-article-bottom_(300×250)”, [300, 250], “pb-ad-78158” ).addService( googletag.pubads() ) ); } );

The post How to do Autofocus Fine Tuning on Your Nikon DSLR by Jeremie Schatz appeared first on Digital Photography School.


Digital Photography School

 
Comments Off on How to do Autofocus Fine Tuning on Your Nikon DSLR

Posted in Photography


Samsung NX500 firmware upgrade improves autofocus and enhances video features

25 Jun

Samsung has released a firmware update for its NX500 mirrorless camera. Among other things, the update enhances autofocus performance in several areas, increases the 4K video bit rate to 70Mbps, and reads out a larger areas of the sensor for improved 1080/60p video quality. More details

Articles: Digital Photography Review (dpreview.com)

 
Comments Off on Samsung NX500 firmware upgrade improves autofocus and enhances video features

Posted in Uncategorized


Fujifilm X-T1 users to get significant boost in autofocus performance and function

11 May

New firmware has been announced for the Fujifilm X-T1 mirrorless camera that promises to overhaul autofocusing performance and ‘introduces a new AF system’ to this X-series flagship body. Firmware version 4.00 will be available in late June, and seems to take significant steps towards solving issues with moving subjects and focusing in low contrast conditions. Read more

Articles: Digital Photography Review (dpreview.com)

 
Comments Off on Fujifilm X-T1 users to get significant boost in autofocus performance and function

Posted in Uncategorized