RSS
 

Posts Tagged ‘Abstract’

How to Make Use of Foggy Surfaces for Abstract Photography

12 Feb

When I mention that one of my favorite subjects to photograph is foggy surfaces, I get a few weird looks. To the uninitiated, the subject is an unusual one and most likely a boring one too. Photographers in-the-know furrow their brow, recalling the dreaded lens fog plaguing important shoot days and holidays photos.

Nevertheless, diffused glass is a beautiful and extremely diverse tool, great for adding an atmospheric layer to any image.

How to Make Use of Foggy Surfaces in Photography

How to Make Use of Foggy Surfaces in Photography

What is a foggy surface?

First of all, “foggy surfaces” (or fogged) is a term I use to encompass a whole wealth of surfaces that render softly focused images. Office partitions, shower doors, windows – there are hundreds of different sources of glass diffused organically by weather or intentionally by the manufacturer.

Frosted glass is an artificially diffused surface material. Created by sandblasting annealed glass, frosted glass is used to separate environments without sacrificing light. It suggests a sense of openness without sacrificing privacy. These surfaces diffuse and soften subjects to create dense, otherworldly subject matter that investigates form as much as they obscure.

How to Make Use of Foggy Surfaces in Photography

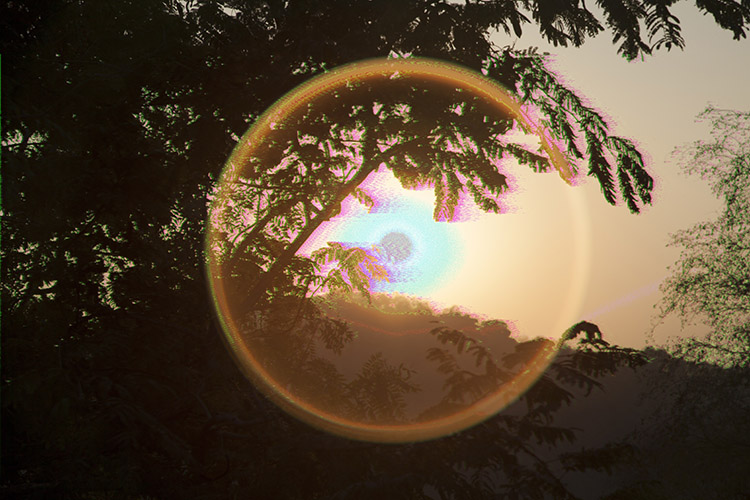
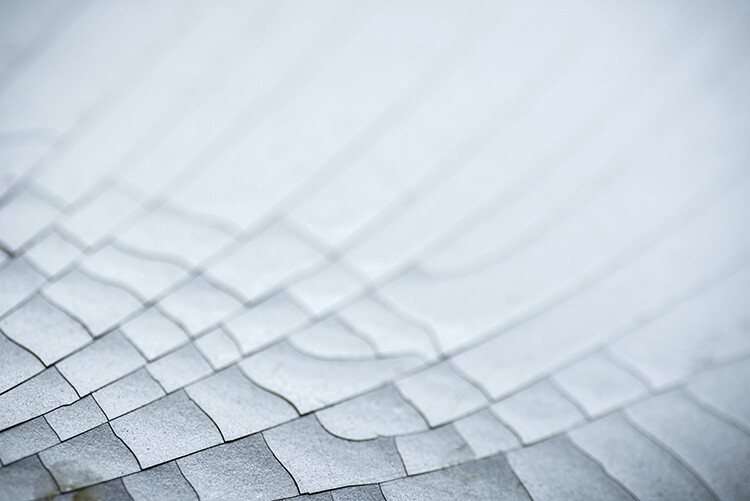
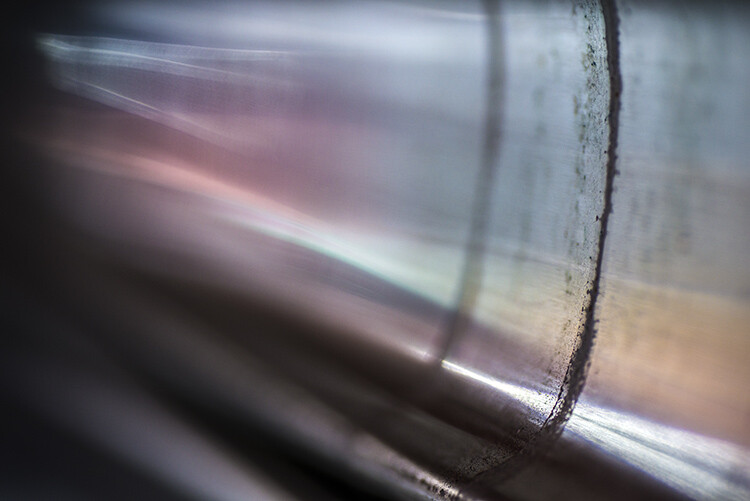
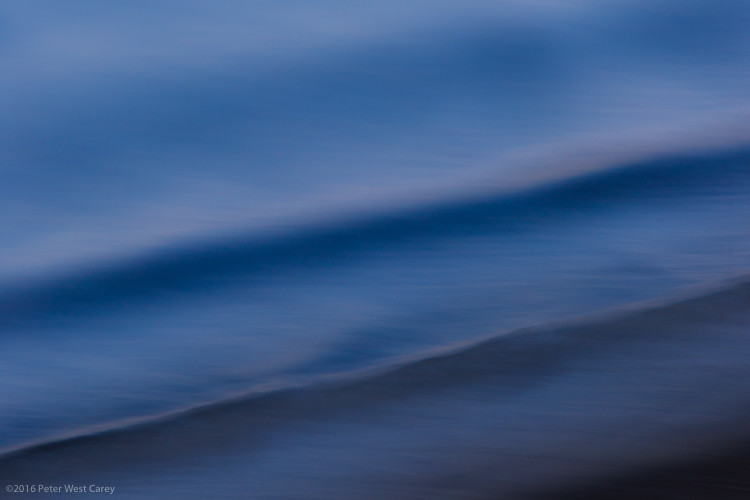
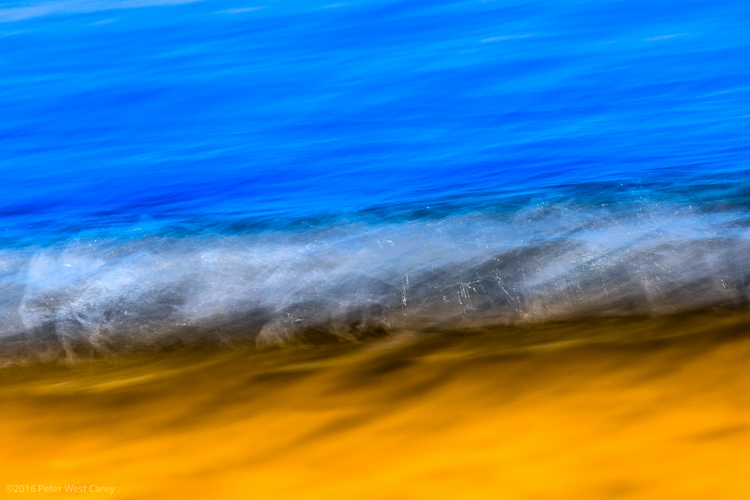
Due to scratches and reflections, this image has an extra layer of depth.

Where to find fogged surfaces

A great source of fogged glass is through your everyday exterior office window. Decorative or plain sheets of frosted glass are used as partitions, making use of natural light. Photographing objects through these types of glass creates beautiful, isolated studies of subjects matter.

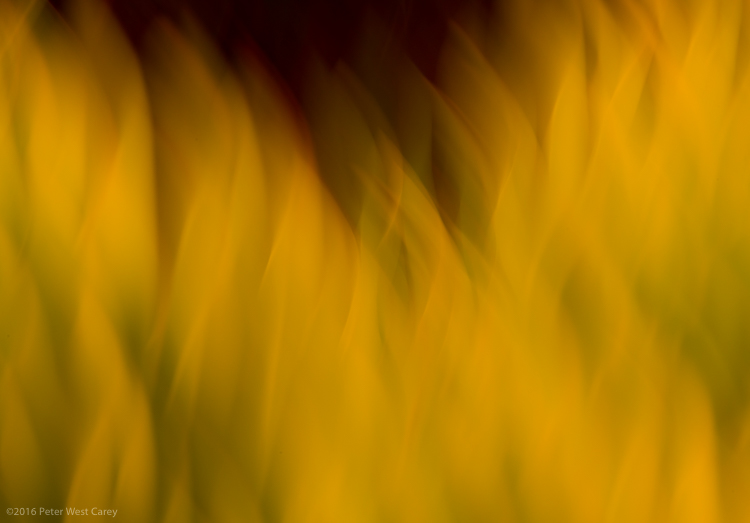
Plant leaves pressed against the glass plays with light and form, unusual office chairs take on a new life framed by a foggy canvas. It’s amazing how little it takes to re-imagine form in a whole new way with something as simple as a thin layer of glass.

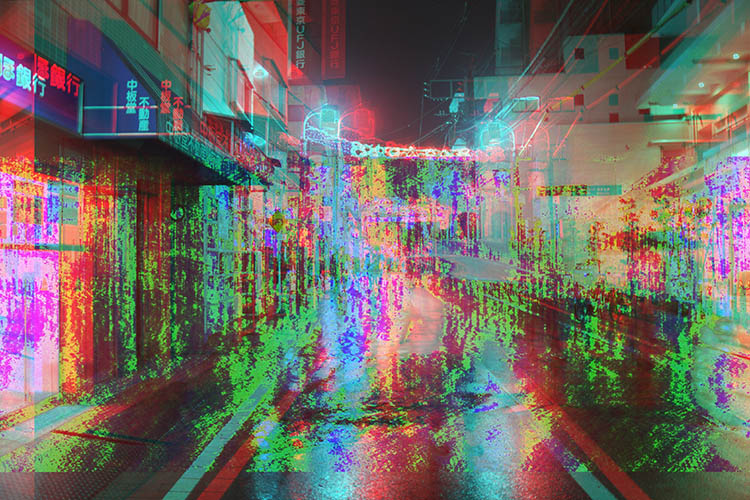
One of my favorite times for taking photographs is on a rainy day. The heavy atmosphere, the movement, the transformation of color and light – it’s all enticing to me and nothing illustrates this more than the view through a damp, slowly fogging window.

On a cold and wet day, warmer moisture in the air turns into condensation upon contact with cold air. Inside a vehicle, warm air brushes against the coldness of a window and this begin to collect as condensation on the glass. This fogs the window and the pane of glass frames and reflects the environment while housing the subject itself beyond the glass. It’s a bit of a mixture of art and science, and the results are really beautiful if you’re willing to brave the wet conditions.

How to Make Use of Foggy Surfaces in Photography

This photograph was taken through a tram window on a cold and rainy night. Commuter’s coats and the lights in the tram create a surreal landscape of color.

The bad type of fog

Seeking out subjects in the rain as can also lead to “camera fog”. This is a type of fog you want to avoid. Transferring a camera from a warmer environment to a cooler one causes condensation inside the camera too. While a few rounds of camera fog won’t destroy a camera, taking steps to acclimatize your camera will prevent extra wear.

Before heading out for a rainy day photography walk, minimize the issue by putting your camera inside a plastic zip-lock bag until the temperature inside the bag and out have equalized. Depending on the difference in temperatures, you may need to leave your gear in the bag for a few hours to acclimatize. While it’s a bit of a pain, but it’s better to keep the fog outside of the camera!

How to Make Use of Foggy Surfaces in Photography

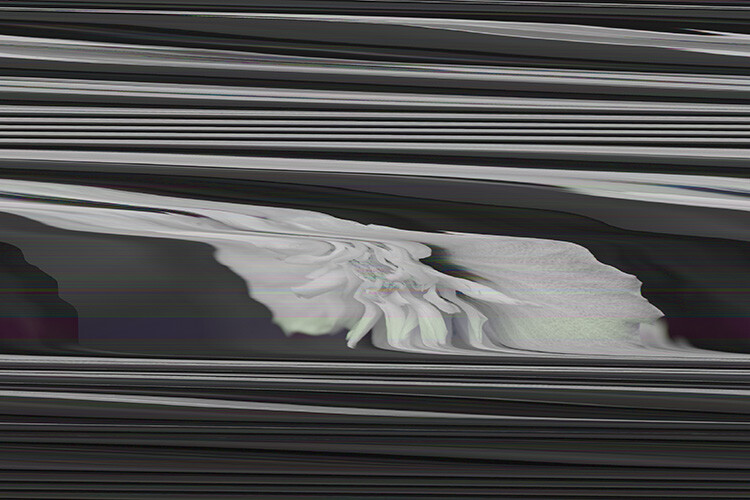
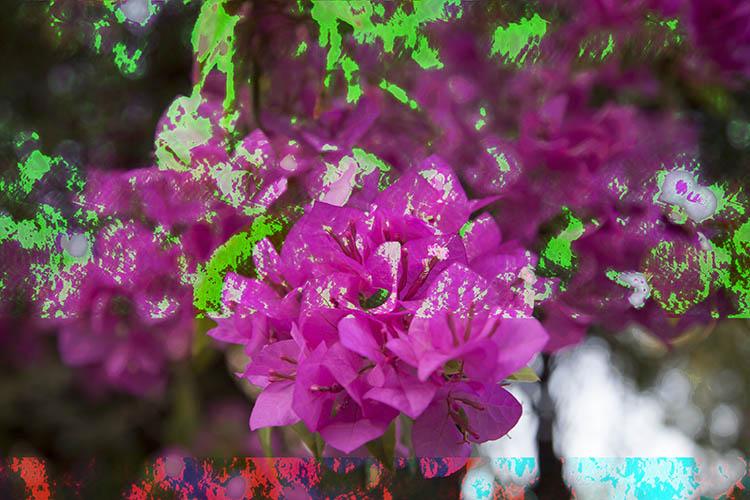
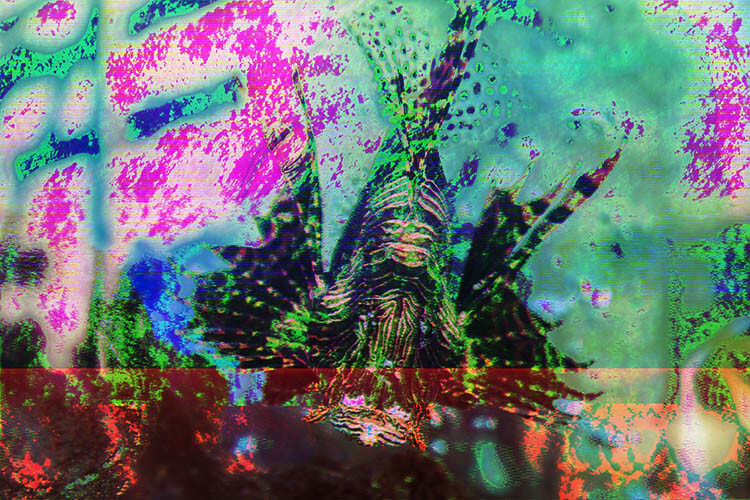
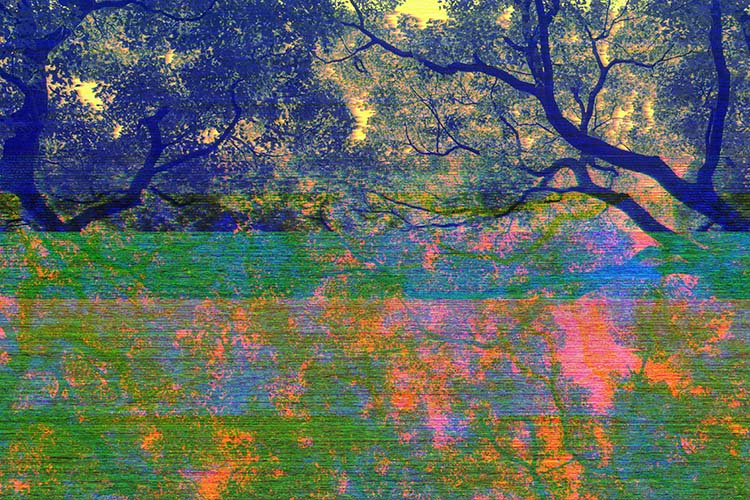
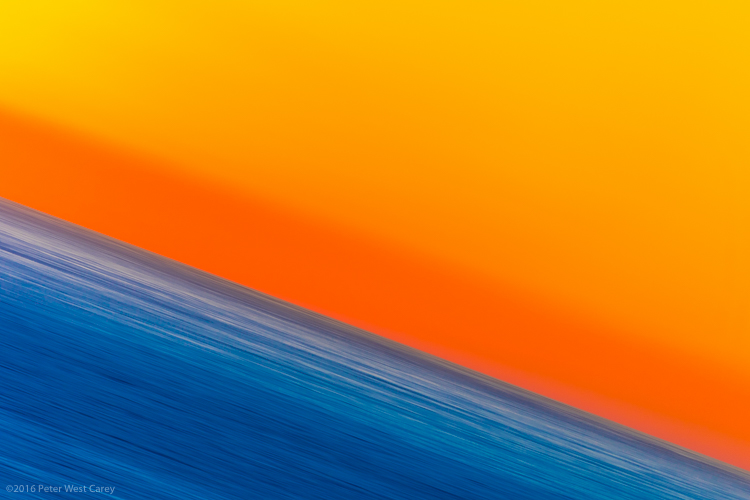
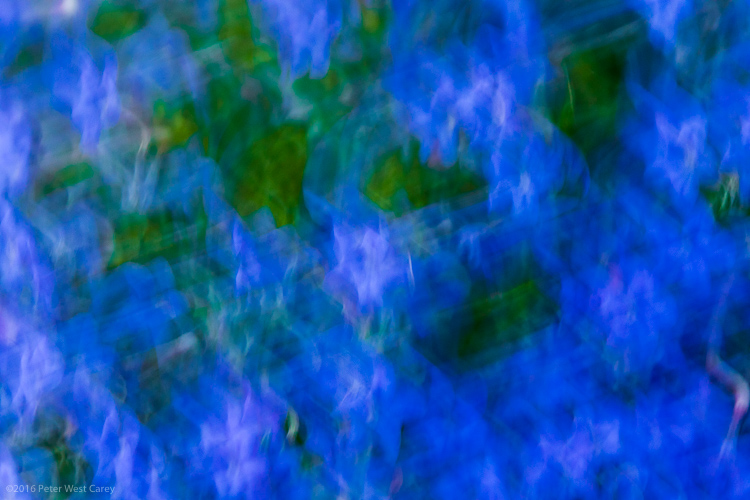
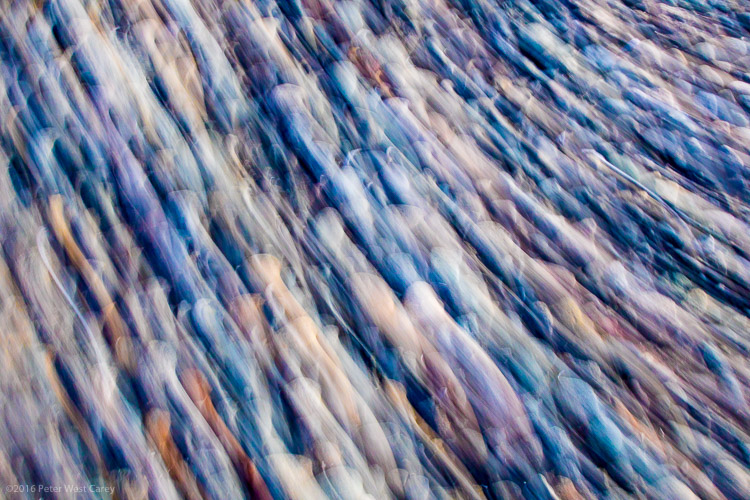
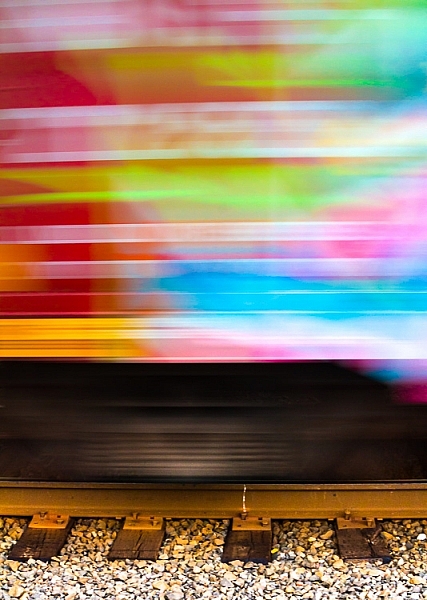
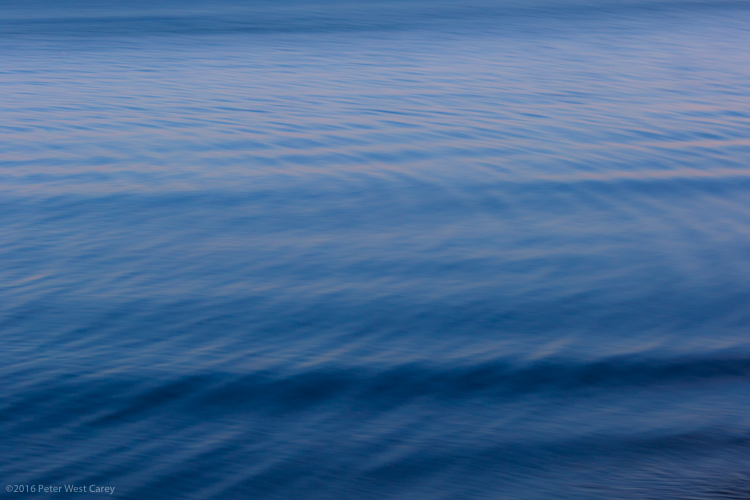
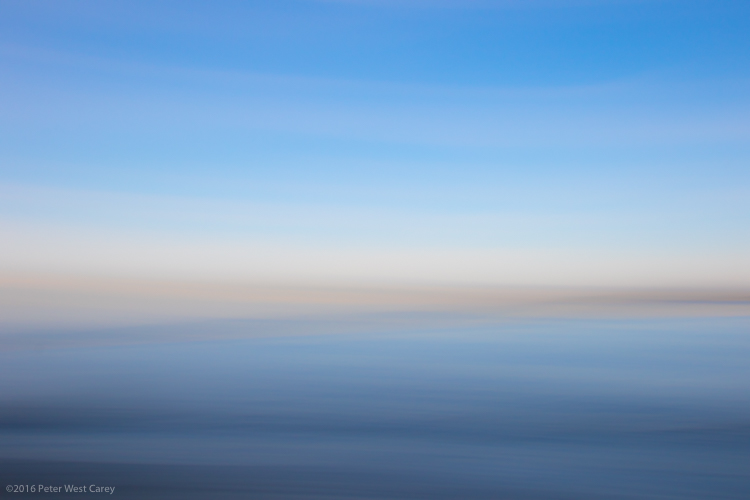
Fogged glass can create beautiful abstract effects.

How to Make Use of Foggy Surfaces in Photography

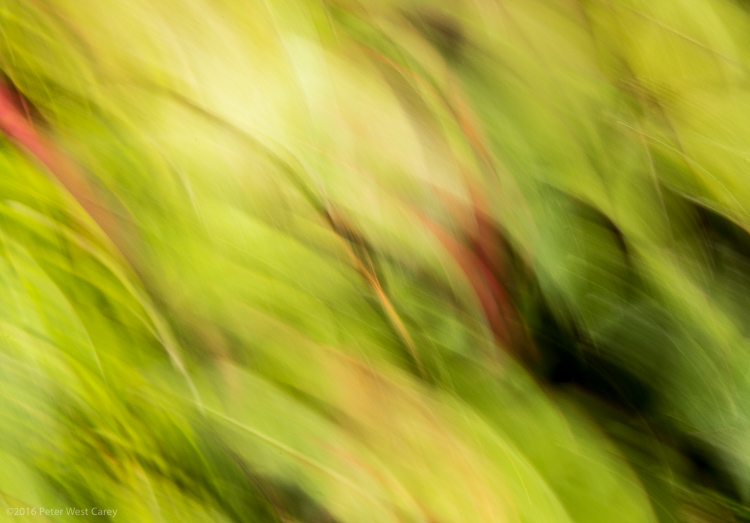
Photographing fogged surfaces rely on the light coming through the glass. Different times of the day can render completely different results.

How to photograph fogged surfaces

Photographing fogged surfaces is very similar to photographing transparent surfaces like glass. The strength of the light behind the subject will dictate how your subject will look. As you probably don’t have an opportunity to adjust the backlight, try taking photographs of subjects at different times of the day. The morning may depict an office plant in detail, but the light in the evening will lend more of a silhouette effect.

The result of an image taken through fogged glass also relies heavily on the proximity the subject to the glass itself. However, most subjects will be tucked behind a window or a building security system. Like street photography, this means that you’ll have to make the most of what you have.

From the exterior, closer objects, or even objects leaning against the glass will be the sharpest subjects. Distant subjects like faraway light sources are dispersed into the cloudy shades of the surface. It’s like having your focusing done for you. Try a few different angles and change your distance in relation to the subject.

Try to focus on detail rather than quantity, that way you will have a frame full of information rather than an empty frame of a faraway scene. If possible, try setting up a tripod so you’ll be able to use slower shutter speeds to capture the image. This isn’t ideal in every circumstance, however.

The post How to Make Use of Foggy Surfaces for Abstract Photography by Megan Kennedy appeared first on Digital Photography School.


Digital Photography School

 
Comments Off on How to Make Use of Foggy Surfaces for Abstract Photography

Posted in Photography


How to do Abstract Nature Photography

16 Oct

Photography, especially nature photography, is the art of capturing a scene to represent a slice – in space and time – of reality. Right? Well, not exactly, not always. That’s definitely part of it, but from very early on in the history of the art, photographers have experimented with the possibilities and limits of technique and imagination to create abstract art. Art that aims not to be accurate, but to let the imagination run free to create an effect disconnected from the obvious.

Abstract nature photography 01

So what exactly is abstract photography? And can nature photography be abstracted? Should it be?

What is abstract photography?

The word itself comes from the Latin abstractus, which means drawn away or detached, and is often used in opposition to concrete. In terms of art, the abstract is a space for impression and imagination, for the elusive, for fuzzy borders. That doesn’t mean abstract photography is blurry and dim – it can be bright, clear, and sharp. It just doesn’t aim at the common, concrete representation of the world that we’re used to. That’s why abstract nature photography is so intriguing.

Abstract nature photography 02

By creating a distance from form, abstract art opens up a space to explore associations, feelings, and reactions. Because it lacks an anchor for your interpretation, there is room for an uninhibited association. Through detachment from the concrete, you’re allowed to create your own way.

Abstract nature photography 03

Capturing nature with photography

In nature photography, most work tries to clearly capture an object, a scene, or a process – to the point where the photography might cross from artistic into scientific. Abstract nature photography is obviously different in that it doesn’t try to represent physical reality. Its potential is to create something ethereal from the ordinary, to find something unique in the mundane.

To create abstract nature photographs, you need to step beyond the obvious and try to capture a sensation, a mood, a movement – things that might not be part of physical reality, but are just as real to the artist and the viewer. Think of it as music, using very concrete instruments and elements to create a reaction beyond that of the individual notes and sounds.

Abstract nature photography 04

Getting started

To create something abstract, you need to begin with something concrete. Painters create abstract art using concrete tools: their paints, their substrate, brushes or other painting tools, and their imagination.

Photographers use different tools, but a more significant difference is that the artist is inescapably aware of the reality from which the abstraction in the finished work stems. However, the viewer’s vantage point is the same, whether the piece of art is an abstract painting or an abstract photograph.

Abstract nature photography 05

The camera and your imagination are the only limitations on how you create abstract art. Below I list some easy ideas to begin experimenting with because by now I hope you’re intrigued enough to try your hand at abstract nature photography. To be clear, all of these tips also work for abstract art that has nothing to do with nature photography, but they focus on abstract art rooted in nature photography.

1. Distance

Getting very close to something or far away from it are great ways to create abstractions. We don’t often get that view in our everyday life, so it’s easy to disconnect what’s captured from what’s immediately familiar.

Here is an example from the realm of macro photography:

Abstract nature photography 06

And an abstract photograph taking advantage of an unusually distant perspective:

Abstract nature photography 07

2. Focus

Just because something is abstract doesn’t mean it has to be blurry or unfocused, but playing with focus is certainly one way to make a scene abstract. This requires that you use manual focus.

By either squinting or defocusing your eyes, you can get an idea of what the scene might look like as an out-of-focus image. Use that to find an interesting scene – just because something is out of focus doesn’t mean it’s interesting! Play around, and also try combining it with movement (see next point).

Abstract nature photography 08

3. Time

Time is always of the essence when it comes to photography, and abstract photography is no exception. By combining a chosen exposure time with some movement you can create some really interesting abstract art. Your exposure time can be anything from a tiny fraction of a second to several minutes (or even longer), and in terms of movement, it can either come from the subject moving (e.g., light painting), or from the camera moving (e.g., intentional camera movement).

Abstract nature photography 09

A bonus for advanced (and daring) photographers

Early photographic attempts at abstract art were based on the medium itself: the metallic or glass plates or sensitized paper in combination with the necessary chemicals used to create photographs, and light (without a lens). This kind of extreme back-to-basics experimentation also works with a digital camera.

For instance, through something called refractography, where a naked sensor is exposed to light reflected from a refractive object. It’s both beyond the scope of this article and my photographic experience, so I won’t talk more about it, but I thought it was worth mentioning. A quick warning, though: removing your lens from your camera always exposes the sensor to dust, so doing photography without a lens is obviously not healthy for your sensor. You’ve been warned.

Abstract nature photography 10

Conclusion

For photography newbies, trying your hand at abstract photography is a great way to get to know your camera and try out different photography techniques: using manual focus, light painting, intentional camera movement, and so much more. For more advanced photographers, it’s a fun way to explore and expand your art and to try something new.

Abstract nature photography 11

What do you think of abstract nature photography? Have you tried it? Please share your photos and thoughts in the comments below.

The post How to do Abstract Nature Photography by Hannele Luhtasela-el Showk appeared first on Digital Photography School.


Digital Photography School

 
Comments Off on How to do Abstract Nature Photography

Posted in Photography


How to Create Abstract Photos with Fruit and Veggies

20 Aug

In this article, I’ll show you a fun way to make abstract photos using stuff you have in your house already – fruit and vegetables.

How to Create Abstract Photos with Fruit and Veggies

Produce and photography

They feature in renaissance paintings, religious symbolism, fine art photography and advertisements for your local supermarket. It’s your everyday fruit and veggies! Not only do they keep you full, fruits and vegetables have some remarkable detail, making for great photographic subjects.

As demonstrated by masters like Edward Weston, produce and photography work really well together. The matter that makes up organic material has a natural and sometimes surprising ingenuity. That’s why, with very little prep time, creating abstract photos with fruit and vegetables is a such a simple and fun project with surprisingly beautiful results.

How to Create Abstract Photos with Fruit and Veggies

As diverse as they are tasty, fruit and veggies make for some of the best subjects you can point a camera at!

Supplies you will need include:

  • Camera
  • Tripod
  • A selection of fruits and veggies
  • Hand towel or wipes (to remove any juice off of your hands)
How to Create Abstract Photos with Fruit and Veggies

I placed a clear glass sheet over the top of these strawberries and pressed down a little. The juice from the fruit started to spread, creating this liquid effect.

How to Create Abstract Photos with Fruit and Veggies

They can make you cry, but the intricate layers of onions can make beautiful abstract photographs.

Gathering your produce

So what fruit and veggies should you use? The answer is, any and all of them! One of the best things about abstract photography is the variety of subject matter available. Check your fridge, your fruit bowl, and failing that, check out your local grocer. All varieties of fruit and vegetables have their own artistic properties, let alone every individual piece. If you stick with produce, you’ll never be short on subject matter for abstract photos.

Personally, I enjoy focusing on the textures and layers that make up organic material. That’s why I often concentrate on photographing vegetables like leeks and onions. The intricate swirls you can see when you cut an onion in half are as unique as a thumbprint, so you will never photograph the same thing twice.  Fruits like strawberries and oranges that have a very distinct pattern are great for incorporating leading lines and pattern into your photography.

Opposite on the spectrum in terms of texture and softness, the curving lines in an onion peel and the texture of a rock melon’s skin are beautiful and intriguing at the same time. Just grab whatever catches your eye. If you decide you don’t want to photograph a fruit or vegetable later, just eat it instead!

How to Create Abstract Photos with Fruit and Veggies

Once you’ve selected a nice range of fruit and vegetables, it helps to pre-cut a few slices so they will be ready to photograph. Cut nice thin slices, making as level cuts as possible so they will sit square with the camera lens. Don’t cut all your fruit and vegetables up at once though, as they will brown when exposed to the air for too long.

Setting up

If you have your fruit and camera at the ready, you’re halfway there. To truly capture the detail in your fruit and veggies I recommend using a macro lens or extension tubes. For these images, I used my set of Kenko extension tubes with my EF 24-105mm Canon f/4 lens. Set up your tripod and camera near a good light source to illuminate your subjects. A window with natural light coming through should be plenty. Lay out your fruit on a plain, flat surface and arrange them how you like.

Start by focusing your camera on areas that appeal to you the most. The texture or the pattern on a potato might catch your eye, or you might want to focus on the delicate gradients of color in a peach. You’ll find that the more you investigate your produce, the more you’ll have to photograph. Training your eye to recognize these subtle intricacies will prove invaluable in developing your inner photographer’s compass.

How to Create Abstract Photos with Fruit and Veggies

The delicate colors and lines in this image of an onion and onion skin complement each other and highlight similarities and differences

How to Create Abstract Photos with Fruit and Veggies

Conclusion

One you begin to investigate the visual qualities of fruits and veggies, you’ll never look at the grocery store quite the same. And that’s great! Photography is about opening yourself up to new visual experiences. The more you explore, the more you’ll want to see. That’s what makes us photographers tick.

Not only will photographing fruits and vegetables broaden your critical eye for detail, it might broaden your pallet too, bon appetite!

How to Create Abstract Photos with Fruit and Veggies

How to Create Abstract Photos with Fruit and Veggies

The layers in a leek can be gently sprung open to reveal a shell-like structure.

How to Create Abstract Photos with Fruit and Veggies

The loose rings of a leek settle gently against a white backdrop. Photographing vegetables and fruits in new ways will draw a viewer’s attention to the unusual perspective.

How to Create Abstract Photos with Fruit and Veggies

Arranging vegetables and fruits in a pattern can bring out the intricacies and details often left unexplored.

How to Create Abstract Photos with Fruit and Veggies

How to Create Abstract Photos with Fruit and Veggies

Converting an image to black and white can isolate your subject, lending a surrealistic effect to the photograph.

The post How to Create Abstract Photos with Fruit and Veggies by Megan Kennedy appeared first on Digital Photography School.


Digital Photography School

 
Comments Off on How to Create Abstract Photos with Fruit and Veggies

Posted in Photography


How to Create Abstract Photos with Oil and Water and a Little Dish Soap

03 Aug

Oil and water are like chalk and cheese. They just aren’t the same are they? But despite their seeming incompatibility, each brings out the qualities of the other. As photographers, we love a good juxtaposition. There’s nothing that creates balance better than imbalance – well, it’s definitely the case here, at least. So in this article we’re going to use that to create some abstract photos.

For this project, we are going to create a body of images that look as if they come straight out of a chemistry class instructional… or a 60s liquid light show. With two philosophically opposed house hold items, several more amicable components, and a camera. The process is simple and the results are abstractedly beautiful and a little trippy too. Intrigued? Check it out below.

How to Create Abstract Photos with Oil and Water and a Little Dish Soap

How to Create Abstract Photos with Oil and Water and a Little Dish Soap

Things you will need to do this:

  • Camera
  • Sheet of glass
  • Two objects to set your glass on (I used milk crates but chairs and even stacked books work too)
  • A macro lens or extension tubes (I used my Kenko extension tubes)
  • Tripod
  • Towel
  • Some colorful materials
  • Oil (it doesn’t really matter what type, I used vegetable oil)
  • Dishwashing liquid soap
  • Water
  • Eyedropper or spoon

Find a background material

First, you’ll need to gather a few materials for the background of your image. You are looking for colored cardboard, magazines, posters, cloth, scraps – anything with a bit of color that won’t be missed if it gets coated in a little oil or dish washing liquid. Duller toned materials like brown or black won’t reflect light as readily, so aim for brighter colors to begin with.

Don’t worry too much about intricate patterns or details as they wont show in the final image. While you are scouting for materials, grab an old towel too, it’ll come in handy later.

How to Create Abstract Photos with Oil and Water and a Little Dish Soap

For my abstract oil project I selected a cardboard gift bag I had around the house and a reflective folder I flattened out. The bright color combinations of the bag will create smooth, vibrant gradients. The reflective sheen of the folder will guide a greater amount of light up through the image, but the holographic flowers can yield surprisingly subtle results.

How to Create Abstract Photos with Oil and Water and a Little Dish Soap

The reflective cardboard I used for this image directs small speckles of light up into the splotches of oil. The overall grey tone of the cardboard contrasts with the flecks of colors to create a surrealistic, rainy atmosphere.

How to Create Abstract Photos with Oil and Water and a Little Dish Soap

This is an image with the Happy Birthday bag as a backdrop. None of the details are discernible, but a soft gradient separates the image into soft hues

Setting up

One you’ve assembled a neat pile of colorful bits and pieces, it’s time to set up. The aim here is to construct a bridge of sorts for your sheet of glass to sit on. To reduce the impact of a potential oil-spill, I set my rig up outside. Wherever you choose to setup just make sure you work on flat, even ground. Grab your milk crates (or chairs, etc.), set them down a little distance apart and set the glass between the two. Now take a few of the colorful materials you’ve selected, and position them on the ground, directly under the sheet of glass.

To set up your camera, I strongly recommend using a tripod. Because macro lenses and extension tubes can reduce the amount of light reaching your camera’s sensor, the tripod will steady the camera for longer exposures. A tripod will also cut down the handling of your camera with oily fingers. Once your camera is locked into the tripod, turn it on, select Live View Mode and focus the camera on an area directly in front of the lens. You’ll need to be able to watch what you are doing on the LCD screen in the next step.

How to Create Abstract Photos with Oil and Water and a Little Dish Soap

Positioning my pane of glass between two milk crates, I then set my cardboard birthday bag in the space underneath. Using a tripod is highly recommended as this project requires a fair bit of hands-on adjusting and fiddling both behind and in front of the camera. The lemon tree is not mandatory

Time to start cooking

Gather your water, dish washing soap, oil, spoon (or eyedropper), and towel and place them within reach. Begin by adding a small spot of oil to the glass. Keeping an eye on your LCD screen will help you position your drops within the camera’s field of view. To build up layers of liquid, add dots of water or dishwasher liquid to the center of the oil. As the liquids span out over the glass, add in new droplets of the different ingredients. Alternating between ingredients takes advantage of their natural resistance to each other, delineating shapes and patterns more readily. If you like, you can use the tip of your spoon or eyedropper to manipulate the shape of the growing bubble.

That’s about it really! The rest is totally up to you. You can’t mess up, so don’t worry if you aren’t getting perfect circular bubbles or patterns. Allow the medium to take shape as you cycle through your three ingredients. Try running a spoon through the middle of the concoction to create smaller clusters of bubbles. Or use a greater ratio of dishwasher liquid to oil to enhance the spiderweb look of the cleaning chemicals. Even spritzing mists of water over the glass can make fascinating reflections.

Experiment with the background and elements

While you are watching the details unfurl beneath the camera lens, don’t forget to experiment with your background too! Add or remove materials, layer new colors, add materials which have a greater or lesser reflective surface. Use a flashlight (torch) to illuminate different areas in the image or shine the light up into the bubbles suspended on the glass.

There are no hard and fast rules – the more you experiment the more you’ll discover. And, once all your liquids have inevitably pooled in a messy, semi-clear river of goo, grab your towel, wipe down the glass and start again! A word of caution, however, this project can become an addition in itself, not only because it looks good, but because each result is so illusive and unpredictable.

Have fun and share your abstract photos made from oil, water and dish soap in the comments below.

This smooth effect was created as the oil and dish washing liquid slowly spread over the surface of the glass

The delicate strands in this image is a result of the dish washing liquid being spread across the glass surface with a spoon


This image was photographed with a single color background. The consistent color illuminates the beads of oil and water in the light

The post How to Create Abstract Photos with Oil and Water and a Little Dish Soap by Megan Kennedy appeared first on Digital Photography School.


Digital Photography School

 
Comments Off on How to Create Abstract Photos with Oil and Water and a Little Dish Soap

Posted in Photography


How to Create Abstract Images With a Soft-Focus Look Using Vaseline

09 May

As a rule, sticky substances and photography don’t mix. For a beloved camera, any liquid substance is a cause for concern. So naturally, I was surprised when I stumbled upon a neat trick used by glamor photographers back in the day. Actresses of the 1920s and 30s were photographed in the soft-focus style that photographers like Alfred Stieglitz and Edward Steichen developed.

Arnold Grethe and Victor Georg, photographers of Vanity Fair used hazy focus, diffusion filters, and other techniques to soften the portraits of actors, particularly women. This stylized softness was adopted by American filmmakers who before then had stuck to the sharpest focus possible. Doris Day, queen of romantic glamor portraiture was rumored to have insisted that photographers use diffusion filters to soften the focus of her photographs. And sometimes, in a pinch, photographers applied Vaseline or petroleum jelly to the lenses.

How to Create a Soft-Focus Look With Vaseline

An abstract photograph of yellow flowers, taken with Vaseline or petroleum jelly applied to a clear filter. The waves in the image reflect the density of the petroleum jelly applied to the lens.

How to make a soft-focus look with petroleum jelly

Creating a diffusion filter with petroleum jelly is actually quite simple, and a lot less messy than it sounds. First, raid your bathroom cupboard for some Vaseline. If you don’t already have a supply, you can purchase a tub from your local pharmacy.

Next, you’ll need to apply the jelly to your lens. There are two ways to go about this. One method is to first stretch a layer or two of cling wrap over the front of your lens, forming a barrier between the jelly and the lens. Fix the cling wrap with a rubber band and double check for holes in the plastic before you start applying the jelly. The potential risk of this method is that the plastic might rupture, causing the jelly to ooze all over your lens instead.

How to Create a Soft-Focus Look With Vaseline

Alternatively, if you have a spare clear filter handy, you could smear petroleum jelly all over that instead. This is a little simpler and you can remove the jelly with alcohol wipes later. Either way, DO NOT apply the petroleum jelly directly to your camera lens – it won’t end well.

How to Create a Soft-Focus Look With Vaseline

This abstract photograph of water was taken with only a thin level of petroleum jelly applied to the center of the lens filter.

Method of application

Start off by adding very small amounts of petroleum jelly to your lens or cling-wrap rig. You can apply the petroleum jelly with your finger, a brush, or some additional plastic for varying results. I’ve found that if you use your finger to apply the jelly, it can leave abrupt areas that affect the softness of the resulting image. Even in very small amounts, the softening effect of the petroleum jelly is quite pronounced. The more you add, the more abstracted the resulting photograph will be.

How to Create a Soft-Focus Look With Vaseline

The direction in which you apply the petroleum jelly also has a significant impact on the outcome of your photograph. Swiping the petroleum jelly in one direction could result in a completely different effect to that of jelly applied in the opposite direction. Experiment with different application methods by tracing different shapes into the lens with your finger.

I also pack some alcohol or glass wipes in case I want to remove a portion of the Vaseline for artistic purposes.

How to Create a Soft-Focus Look With Vaseline

How to Create a Soft-Focus Look With Vaseline

The direction that the petroleum jelly is applied impacts how the resulting photograph will look. For this image, I applied streaks of petroleum jelly around the outer edges of the filter. I then used a tissue to clear the center area. This resulted in a clearer view of the subject in the center of the photograph, and streaks of color on the edges.

How to Create a Soft-Focus Look With Vaseline

A balance between abstraction and soft-focus, this effect was achieved with different densities of petroleum jelly distributed over the lens filter.

How to Create a Soft-Focus Look With Vaseline

For this effect I used my finger to draw zig-zag patterns in the layer of petroleum jelly on my filter. The resulting image is clearly shaped by the sharp edges I traced.

How to Create a Soft-Focus Look With Vaseline

An abstracted image of tree branches with diffused light peaking through the leaves.

When finished, carefully remove the cling wrap or filter. You can wipe the filter down with some alcohol wipes before stowing it away for later use.

Try it

Give this fun abstract soft-focus technique a try and share your results in the comments section below.

The post How to Create Abstract Images With a Soft-Focus Look Using Vaseline by Megan Kennedy appeared first on Digital Photography School.


Digital Photography School

 
Comments Off on How to Create Abstract Images With a Soft-Focus Look Using Vaseline

Posted in Photography


How to Create a Kaleidoscope and Make Unique Abstract Images

22 Apr

Struggling to remain creative

I’ve recently been struggling to shoot creative images and found myself in a rut battling to see things with fresh eyes. As I needed to come up with a topic for my next article (this one!), I decided to take this as an opportunity to experiment and come up with some new ways to shoot abstract images.

How to Create a Kaleidoscope and Make Unique Abstract Images

Here’s one of the images I took using the kaleidoscope I made. I processed this image in Analog Efex.

Inspiration can come from anywhere

I decided to focus on abstract images since they seem to be speaking to me lately. The challenge became to create unique abstracts and have fun at the same time. Well, I happened to come across this video on the web. I was looking for a craft to create with my son, and the idea sprang from there.

The Construction Details

How to Create a Kaleidoscope and Make Unique Abstract Images

Here’s the finished Kaleidoscope. It’s a pretty simple design.

I decided to adapt this idea and create something I could use with my DSLR. I went to my local home renovation store purchased a mirror and had them cut it into three sections. My mirrors are 16cm wide by 31cm long. I chose this size so that my wide angle lens could fit inside the kaleidoscope opening. I didn’t want any of the outer edge included in my images.

Clear packing tape was used to attach the mirrors forming a triangle. I then taped three pieces of cardboard around the outside of the mirrors. This was done to protect my hands from the sharp edges of the glass.

How to Create a Kaleidoscope and Make Unique Abstract Images

Here’s a top view. You can see that it was a pretty rough tape job.

You could certainly choose to attach more mirrors together if you want. The important thing to remember is that you always want to use an uneven number of mirrors so that the shape is more conducive to creating abstracts. The look of the image you shoot will change with the size and number the mirrors you use. Have fun and experiment.

How to Create a Kaleidoscope and Make Unique Abstract Images

I used both my Canon 5D with a wide angle lens and my phone. Note that this technique doesn’t work with a telephoto lens.

Now it’s time to have fun and play

After constructing my kaleidoscope, it was time to start experimenting. I immediately thought of trying to photograph some flowers. My idea was to place a bright bloom on a black background. I was curious about what types of images I could create.

Unfortunately, Mother Nature wouldn’t cooperate. We had a massive snowstorm, and I was stuck in my house with no chance to purchase some flowers. So it was time to experiment with other items. I found some square pieces of felt sitting around my house and decided to try using them. Here are the results.

How to Create a Kaleidoscope and Make Unique Abstract Images

Here you can see how I set up the kaleidoscope with some pieces of felt underneath it.

How to Create a Kaleidoscope and Make Unique Abstract Images

I again took this image into Analog Efex for editing.

As you can see, my kaleidoscope created some rather interesting designs and shapes. It was a lot of fun to see what types of designs could be created. I used several different items in front of the mirrors. I tried fabric, tinfoil, camera lenses and even Lego toys.

People photos

After experimenting with so many different materials, it was time to try it with people. My son was willing to have his photo taken. Here are the results. He spent a few minutes giggling at the images. It would be interesting to see what a larger kaleidoscope and mirrors might do to portraits like this.

How to Create a Kaleidoscope and Make Unique Abstract Images

It’s an interesting effect. My son loved messing around with it.

I then experimented with photos of a good friend. These images were shot through the kaleidoscope from images projected on my computer screen. They were taken from different Facebook photos. It was a lot of fun, and he was certainly entertained by the results as much as I was. I truly appreciate him allowing me to post the results here on the web. Thanks, Ali.

How to Create a Kaleidoscope and Make Unique Abstract Images

He was hesitant at first to let me post this but we had a lot of fun messing around with the image. There’s a little bit of banding from the computer screen but oh well we were just having fun.

Drawbacks of the experiment

One of the things I noticed as I shot was the very fuzzy and slightly darker reflections. That bothers me. Parts of the image that contained the original piece of fabric were much brighter and sharper than the reflections. I found the effect to be quite displeasing. So, I need to experiment more with the kaleidoscope to try and alleviate that.

Perhaps a light shining from above might change this effect, it is something I will consider for the future. As you can see from this experiment, I used a very rough and simple set up. It was put together quite quickly. In the future, it would be beneficial to try several different methods for positioning the kaleidoscope and my camera. You will note that I used both my DSLR and my cell phone for these shots. I used the Lightroom mobile App as it allowed me to use some pretty specific manual controls.

How to Create a Kaleidoscope and Make Unique Abstract Images

I used my phone for several of the shots.

Things learned from this experiment

This whole activity was very insightful. It was well worth the afternoon I spent creating and shooting. It has sparked my curiosity. As a result, I created a list of questions that can be used to further the project and inspire more creative shooting.

  1. What types of objects look best when shot with a kaleidoscope?
  2. How can post-processing change the look and feel of these abstract images?
  3. What would be the effect of a larger kaleidoscope?
  4. What would happen if I added much smaller sections of mirrors to a kaleidoscope?

There’s so much more that I can learn from this exercise. It feels like just the surface has been scratched. The use of mirrors for creating interesting abstracts is now on my list of projects. If you’ve experimented with different techniques, tell us about it. Share your experiments good or bad. There’s so much to learn. There’s also a lot of fun to be had during that experimentation. Perhaps as I perfect this technique, I will produce a further article that will contain my lessons learned. But for now, I hope my afternoon of tinkering will inspire you to try new ways of creating images.

How to Create a Kaleidoscope and Make Unique Abstract Images

This is a shot taken from my computer screen through the kaleidoscope.

How to Create a Kaleidoscope and Make Unique Abstract Images

I used black velvet and an old lens from my film camera for this shot. I think this one is my favorite images.

There’s so much to learn. There’s also a lot of fun to be had during the experimentation phase. Perhaps as I perfect this technique, I will produce a further article that will contain my lessons learned. But for now, I hope my afternoon of tinkering will inspire you to try new ways of creating images.

The post How to Create a Kaleidoscope and Make Unique Abstract Images by Erin Fitzgibbon appeared first on Digital Photography School.


Digital Photography School

 
Comments Off on How to Create a Kaleidoscope and Make Unique Abstract Images

Posted in Photography


How to Make Abstract Glitch Art Photographs

29 Jan

Have you ever watched a television system receiving a corrupted signal – misplaced squares, static, jagged frames, freezing, misplaced or inverted colors – and thought “hey, that actually looks pretty neat?” Being eager to get your favorite show going again, the answer might well be no. Yet, these corruptions or glitches can be exploited to add a unique dimension to your photography.

What is glitch art?

Glitch art is a fairly recent phenomenon that has developed from the fast-paced evolution of digital technology. Technically, a glitch is the temporary and slight malfunctioning of a system. Due to the limitations of current technology, time, funding, and human error, glitches run the whole gamut of the digital landscape and can be difficult to pinpoint due to their transient nature. From software and games to sound files, automated systems and phones, there is an endless number of glitches that we encounter, often unknowingly, during day to day life.

Glitch art is an art form that harnesses the visual effects of data corruption. By applying certain encoding or actions to an image, a photograph can become visually corrupted while retaining a usable file. Glitch art is generally an experimental process, with glitch artists walking the fine line between a usable file and a completely broken one.

glitch-art-photography-01

Even the dreaded CF card malfunction can produce intriguing results

Controlled glitching

In analogue photography, glitches came in the form of negative scratches, light leaks, dust, finger prints, and chemical residue. Some problems were solved with a trip back to the enlarger or a re-inspection of chemicals. Other incidences, like exposed negatives and light leaks could be an unmitigated disaster. Nowadays, it’s the defective memory card that could spell certain doom – so the very notion of intentionally breaking an image may well send chills up a photographer’s spine. This is where glitch art comes in, to explore the flaws of our temperamental digital landscape, under controlled circumstances with carefully backed up files.

Glitching with the internet

There are many complex methods of glitching photography, including short-circuiting cameras, applying code, and creating automated programs. Fortunately, there are some less complicated methods too. If you google “glitch art maker” you will see numerous hits for various automated glitching programs. These programs allow you to upload an image and the program will apply a glitch art effect to the file in real time.

Some programs are more in-depth than others, allowing you to adjust the parameters of the effect or emulate several glitch aesthetics at once. Programs that can apply glitch effects to photographs are also available as apps for smartphones, making for easy uploading to social media sites. While quick and easy, the downside of using an online program is that it can produce some generic or bland results, but they are great for an initial induction into the world of glitch art.

glitch-art-photography-17

glitch-art-photography-21

Image file vs text editor

One of the methods of glitching digital image files is called databending. This involves manipulating an image file by opening it in a program designed for another purpose. Be sure to make duplicates of the images you decide to use, as you will not be able to undo the databend later.

For Windows users

If you use Windows – select a BMP, TIF, or RAW image file. Open the image using WordPad (which comes with almost all versions of Microsoft Windows from Windows 95 onward). After loading, you will be met with a wall of seemingly random text. Click File > Save and then close WordPad. Open the saved file in Paint or Photo Viewer to see the result. You can also experiment with entering text from the middle of the document, but doing so can increase the likelihood of an unreadable file.

For Mac users

If you use Mac, select any image. Mac users can use any file type. Open the image in Text Edit (a default program with Mac operating systems). After loading, a document with a wealth of text will appear. The first few lines of text are important and contain information that tells the image how to open. Scroll down to about midway through the text file and select and copy a few lines of text. Paste the copied text into other areas around the middle of the file. Click File > Save and open the glitched image in Preview to view the result.

glitch-art-photography-02

glitch-art-photography-03

This is the result of a .bmp file having been opened in WordPad and saved.

glitch-art-photography-04

This glitched flower image was saved as a .tif file is slightly different in appearance

If the image you’ve saved won’t open, the glitch may have rendered the file unusable. Persevere with a new image or a different file type and make conservative interventions while you get used to the process.

Databending with an audio editor

Audacity is a free audio editing software available for both PC and Mac platforms. Databending with Audacity is a technical process, with a high degree of trial and error involved. As with any databend, files can become corrupt, so make numerous copies of any image you choose to databend. I’m using a PC for this tutorial, but the process is similar on a Mac.

Prepare your file

First, you will need to prepare a file for databending. Open an image in Photoshop and save it as a TIF. Select “per channel” as the pixel order in the TIFF Options prompt. Be sure that “none” is selected for image compression.

glitch-art-photo-08

glitch-art-photo-07

TIF saving settings

Open Audacity and select File > Import > Raw Data and select your file.
glitch-art-photo-09

You will need to input some parameters so that Audacity reads the image as a sound file. Copy the settings in the image below.

glitch-art-photography-10

Drag your mouse over the middle portion of the timeline. Leave the first 5 seconds un-selected as it contains important file data.

glitch-art-photography-11

With the middle portion of the timeline selected, click Effect and choose an effect. Reverb is a good starting point.

glitch-art-photography-12

A window with options to fine-tune the effect will appear, click ok. Once you have applied the effect, click on File > Export Audio.

glitch-art-photography-19

Name the image and enter a .jpg extension at the end. In the “Save as type” menu, select “Other uncompressed files”. Select “Options…”  and copy the specifications in the image below. Click Save. Select OK for the various prompts.

glitch-art-photography-13

Open the file in Paint, Preview, or Camera Raw to view the results of the databend. Save the file as a JPG under a new name if you want to open the file in Photoshop. If you discover that the file has been rendered completely unreadable, try a different image or file formats.

glitch-art-photography-14

Conclusion

The experimental nature of glitch art makes it an intriguing undertaking. As photographers, glitch art allows us the freedom to create visually engaging imagery by deferring to the idiosyncrasies of technology. Databending explores themes of creativity and destruction, control, and unpredictability by exploiting the digital systems with which we surround ourselves.

Visually, glitch art creates unusual, surrealistic, and even abstract imagery via a set of interventions that may likely never be repeated again. Whether you experiment with an automated program or try your hand at data bending – when you leave your images to the whims of digital devices, the results will always surprise you.

glitch-art-photography-16

The repeated effect of the rabbit’s face was achieved with the “Echo” effect

glitch-art-photography-20

I used the “Fade in” and the “reverb” effect for this photograph of a Lion Fish.

glitch-art-photography-23

glitch-art-photography-15

glitch-art-photography-24

googletag.cmd.push(function() {
tablet_slots.push( googletag.defineSlot( “/1005424/_dPSv4_tab-all-article-bottom_(300×250)”, [300, 250], “pb-ad-78623” ).addService( googletag.pubads() ) ); } );

googletag.cmd.push(function() {
mobile_slots.push( googletag.defineSlot( “/1005424/_dPSv4_mob-all-article-bottom_(300×250)”, [300, 250], “pb-ad-78158” ).addService( googletag.pubads() ) ); } );

The post How to Make Abstract Glitch Art Photographs by Megan Kennedy appeared first on Digital Photography School.


Digital Photography School

 
Comments Off on How to Make Abstract Glitch Art Photographs

Posted in Photography


Tips for Abstract Macro Photography – Using Texture and Light

21 Aug

Macro photography opens up a whole new world to those who are willing to get up close. There is no shortage of subject matter to photograph, but in this article we’ll look at the abstract world of texture and light.

Rusted paintwork of a Dodge Campervan

Rusted paintwork of a Dodge Campervan

The beauty about these subjects is that they can be shot anywhere; in your backyard, on your street, or in any part of your city. Textures are everywhere. They are really easy to find, and working with the light properly will help you to highlight the grittiness and tactile effect of textures. Ideally, a macro lens would be perfect to use for this type of photography, but a good 50mm or 85mm can work too. A macro lens gives you the bonus of being able to focus really close, normal lenses may not be able to get as close as you want.

My view is that even if you don’t have a macro lens, give this a try anyway, a new tiny world of wonder awaits you!

What is Abstract Macro Photography?

Abstract photography, in general, is about representing a subject in a non-literal way. The focus of abstract photography is more about colour, shape, and texture, as opposed to the literal representation of the subject. Abstract macro photography, takes this to the next level by enabling you to get even closer to your subject, and therefore also able to be more abstract in a sense. In this article, we are concerned with texture and showing that in our images.

The same guidelines around composition apply, you can use the rule of thirds, curves, and lines, to draw the viewer into your image. The difference is that the subject may not be immediately recognizable, your centre of interest might be a colour, or the curve of a flower. So for abstract macro photography, you will need to think a little differently.

Cracked paint on a car bumper

Cracked paint on a car bumper

What will I need to do abstract macro photography?

A macro lens will work best. A 50mm or 85mm lens will work pretty well too, you may not be able to get as close to your subject though, so be aware of that (or you can try close-up filters). You will need a tripod too, or some sort of support for your camera, as shooting macro images handheld is really difficult and can be frustrating.

What can I photograph?

Textures are all around you. Think of the rusted lamppost at the corner of your street, the peeling paint on the wall of the shed, or even the cracked paint on the bumper of a car. They are everywhere.

You need to spend time looking at all the surfaces around you, then take some test shots to see if they work. The key thing to be aware of when shooting textures is how the light is affecting the scene. Macro photography is like a micro landscape image. It has a foreground, middle-ground and background. There are colours, shapes, and of course textures in the image.

When you look at the texture, take some time to study where the light is coming from, and how it is affecting the image. Try a few different angles to see what works best in the scene. Using side light (i.e. light some from the left or the right) will accentuate the texture in your image. Side light will give your image a three dimensional quality, so try and get some directional light on your scene if possible.

Reflections from a security gate

Reflections from a security gate

Find your texture, and use this as a workflow

  • Work on building your composition – is there a particular part of the texture you want to emphasize, try and get some side light if possible?
  • Use manual focus to bring even a small part of your image into sharp focus, this sharp area will be the natural focal point for your viewer.
  • As an abstract image, you don’t need a subject as such, but the texture and the colours will be the reason for the image, so make sure the subject matter is interesting.
  • Check the histogram to make sure that you are exposing your scene correctly.
  • Capture the shot.
  • Try shooting the same subject from different angles, and maybe even with a different centre of interest.
  • Take as many images as possible, from different angles, with different focal points.

The beauty about this type of photography is that you have an infinite number of subjects. It is really easy to get going once you start looking around you, at what there is to photograph.

The beauty of cracked window putty

The beauty of cracked window putty

Have you tried abstract macro photography before? If not give it a go and share some of your images in the comments below. See if we can guess what you photographed.

googletag.cmd.push(function() {
tablet_slots.push( googletag.defineSlot( “/1005424/_dPSv4_tab-all-article-bottom_(300×250)”, [300, 250], “pb-ad-78623” ).addService( googletag.pubads() ) ); } );

googletag.cmd.push(function() {
mobile_slots.push( googletag.defineSlot( “/1005424/_dPSv4_mob-all-article-bottom_(300×250)”, [300, 250], “pb-ad-78158” ).addService( googletag.pubads() ) ); } );

The post Tips for Abstract Macro Photography – Using Texture and Light by Barry J Brady appeared first on Digital Photography School.


Digital Photography School

 
Comments Off on Tips for Abstract Macro Photography – Using Texture and Light

Posted in Photography


6 Tips on How to Create Abstract Photos

29 May

It’s time to have some fun with your camera, and pop you out of the realistic rut you may not even know you’re in. It’s time to create some images based on color, light, emotion, and a lack of concern for sharpness or details.

It’s time to play around with abstract photography!

PWC-Travel2015-1229-0212

Abstract | ab-stract | adjective | of art : Expressing ideas and emotions by using elements such as colors and lines without attempting to create a realistic picture.

You already have all the tools you need (a camera or even a smartphone),  so let’s take a look at some methods of creating emotive and abstracted images.

Techniques

1 – Move Your Camera

The simplest method for creating images filled with color and lines, is to blur the snot out of everything. This is a liberating concept for most of us. “I get to move my camera and not worry about staying super steady? Heaven!” I can hear you shout.

All of these techniques are paths of self discovery, but I can give some tips on where to start.

PWC-Travel2016-0323-3539

First, slow your shutter speed down to 1/10th of a second or slower. As with panning blur, this is where things get interesting. You can do this in Shutter Priority mode, or if you know how to adjust your camera in Aperture or Program modes, you can use those to get the same shutter speed. You’ll also be helped with a low ISO, such as 100 or lower.

Second, look for things in the shade. That slow shutter speed needs a lack of light to work well, otherwise your shots will be blown out (overexposed).

Third, take some sample shots moving your camera in one direction, then another. I know, this sounds like lame advice, and is simplistic, but it starts out that way. You have to start seeing what the scene in front of you does when you move one way or the other. Then start moving in circles or random wiggles.

PWC-Abstract2016-0420-4743

Sometimes straight lined objects look best when you go with their grain and direction. Sometimes circular items (flowers being an easy target) look best with some random wiggle. This is your official “Get out of photography-jail free card” to experiment and make some ugly images. But you may also make some that pique your interest.

PWC-Abstract2016-0419-4286

2 – Move the Subject

I used to hate see tags on train cars, until I realized the magic of all those random colors screaming by at 40 miles per hour (65 km/h).

Now I often look for all kinds of colorful items, just for their color alone. The shape, subject, or intent may not be what I want, but if I can use that color and get it to move just the way I want…I can capture the colorful essence.

PWC-Oregon2012-0630-8954

This can be a lot like light painting, but without the subject emitting the light. Think of other things that can be moved around, and go for bold colors.

WARNING: Watch out for white, yellow and other super bright colors. Their properties mean they will fill your sensor with too much data too fast, and they will washout/cover over any other colors you may have in your shot.

3 – Remove Reference

A zoom lens will be your best friend here. Wide angle shots, even with ample blur, often allow us to ground ourselves in the scene, not the colors or emotion. It’s breaking out of what we can recognize, and can relate to, that helps the abstract images.

Let me show you an example. What do you see here (below)?

PWC-Abstract2016-0419-4328

Now let me show you the larger context.

PWC-Abstract2016-0419-4309

The more you zoom in and pick apart details, the more you can play with abstraction.

4 – Shoot Through Things

I have yet to experiment heavily with shooting through objects, but there is much fun to be had here too. Having a way to hold the object helps, and a clamp on a light stand would be handy. Otherwise, start with everyday objects and work your way through colored glass, a glass block, or even smear various gels and liquids (Vaseline, olive oil, etc.) on a clear sheet of glass or plexiglass.

PWC-Abstract2016-0428-4858

5 – Multiple Exposure

Using in-camera multiple exposure techniques can sometimes leave too much of the original, recognizable subject, for some photographers’ tastes. I have found the Average setting on my Canon to work well in combining shots. If you want to get funky, go for the Dark setting, and prepare to shoot a lot of tests.

My method is to take one shot, mostly in focus. Then I shoot two more in varying degrees of out of focus. This sometimes ends up with more of a soft focus look, and that’s where the argument can be made that these images are not abstract enough. That’s why I’ll choose to zoom way in, to hopefully make the subject a little more out of context.

PWC-Travel2016-0323-3621

6 – Post-Processing as a Playground

You know how people tend to complain about too much post-processing of some artists’ work? Now’s the time to cast off those bonds and have some fun. You can soften scenes to make them even more ethereal.

PWC-Abstract2016-0419-4585

Or you can try on different versions of the same image, but with vastly different color renditions (in this case, I simple moved the White Balance Temperature and Tint sliders in Lightroom).

PWC-Travel2016-0323-3463-3

PWC-Travel2016-0323-3463

PWC-Travel2016-0323-3463-2

Once your images are in the computer, let your impulses go wild!

Conclusion

PWC-Abstract2016-0419-4467

The thing I like most about abstract photography is that it plays on the “This is something I really like, but I’m not sure why” nerve inside all of us. I can possibly breakdown each of these images and tell you why I picked them, but in the end, it doesn’t really matter. It’s about creating art for art’s sake. It’s about getting back to the basics of attraction to art. It’s about being surprised by what you see on your LCD while breaking a few of the rules you used to hold so dear.

Now go experiment and show me what you can create!

googletag.cmd.push(function() {
tablet_slots.push( googletag.defineSlot( “/1005424/_dPSv4_tab-all-article-bottom_(300×250)”, [300, 250], “pb-ad-78623” ).addService( googletag.pubads() ) ); } );

googletag.cmd.push(function() {
mobile_slots.push( googletag.defineSlot( “/1005424/_dPSv4_mob-all-article-bottom_(300×250)”, [300, 250], “pb-ad-78158” ).addService( googletag.pubads() ) ); } );

The post 6 Tips on How to Create Abstract Photos by Peter West Carey appeared first on Digital Photography School.


Digital Photography School

 
Comments Off on 6 Tips on How to Create Abstract Photos

Posted in Photography


Five Techniques for Creating Impressionist or Abstract Photography

25 Oct

Whether you are new to photography, or have been photographing for a while, I’m sure you’ve gone through times when the ideas weren’t flowing, and inspiration was nowhere to be found. This happens to all of us. So how do you find ways to stay inspired and get the creative juices flowing again? Try abstract or impressionist photography. Finding inspiration isn’t about stepping outside of your box, it’s about stretching your limits, and abstract photography is the best way to learn to see things in a completely new and different way.

1 Look for shapes Irys by Eva Polak

Abstract and impressionist photography leave things to the imagination and help you concentrate on texture, form, and colour. Instead of making everything look real, I invite you to use bold colours, shapes, and lines to make exciting images.

So let’s start exploring the creative process of abstract photography. Here are five easy techniques that will help you to learn new skills and get your creative juices flowing.

1. Look for shapes, patterns and textures

As you go about your daily activities, notice the shapes around you. Your house is full of interesting shapes, patterns and textures that can be used to make abstract photos. Look closely at different objects around you and consider whether there are any reoccurring shapes or themes within the object – then use them to your advantage. Lines can be used very effectively in a photograph, as the eye will tend to follow a line through a shot. Look at the undulating pattern the wave makes (see below), as it breaks into shore. In the city, look for patterns formed by the buildings. Discover different textures in flowers arrangements in the park (see photo above).

1 Look for shapes Waves by Eva Polak

2. Look for reflections

Reflections are one of the best ways to create abstract and impressionist photography. If you look carefully, you’ll see they are everywhere. As you walk around, look for smooth surfaces. Think about how you can use reflections to capture a viewpoint that you simply couldn’t have shot otherwise. Pay attention for colourful reflections in rain-soaked streets, they will create shimmering images with an impressionistic quality. Also, still lakes and rivers can create some wonderful reflective surfaces. When a surface is textured or shaped, unusual and interesting reflections can appear.

2 Reflection Seagull by Eva Polak

2 Reflections Rainy streets by Eva Polak

3. Defocus

Pulling the lens out of focus is a quick way to give a scene an impressionistic look. Use Aperture Priority mode that allows you to set your lens to the widest aperture (small numbers such as f/2.4 or f/4). This is critical because you want a very shallow depth of field. Switch your lens to manual focus and start looking at things through the camera. Turn the focus ring until everything is blurry. Try varying the focus on the same scene to find out how much blur suits your subject best.

3 Defocus Lonly  by Eva Polak

3 Defocus Swimmers by Eva Polak

4. Pan your camera

Panning is a fun technique to learn, and although it takes some practice, it is relatively easy to get started. You can pan running people, bicycles, cars, or just about anything that is moving. Once you have your subject, set the camera to shutter priority with the shutter speed between 1/10th and 1/60th of a second. As your subject approaches, focus on it and start tracking with your camera until you are confident that you are moving in sync with the subject.

4 Pan your camera Flight by Eva Polak

The trick to a successful camera-panning image is in finding a suitable subject. Strong vibrant colours are ideal, and lines through the frame will keep the colours distinct and separated. Apart from panning moving subjects you can use this technique to create beautiful seascapes and landscapes. The subject distortion will emphasize horizontal lines when panning horizontally, and vertical lines when panning vertically.

4 Pan you Camera  Wattle Bay  Eva Polak

5. Zoom

A zoom burst, or zoom blur, is another technique which is simple, fun, and easy to achieve. It involves changing the focal length of your lens (zooming in or out) while you take a photo, causing the shot to blur from the centre outwards, as if the scene is bursting towards you.

5 Zoom Water lily by Eva polak

To use this technique you’ll need a DSLR (or mirrorless camera) with a zoom lens. Set your camera to Shutter Priority. A shutter speed of 1/10th of a second is a good starting point. Compose your photo as you normally would, then just zoom the lens as you press the shutter. The key to success with this technique is to get the amount of zoom burst right. Experiment with zooming speed and direction.

5 Zoom Autumn Leaves by Eva Polak

Spend some time with each technique to discover its full potential. Photograph a lot and often. Don’t judge what you do. Analyze your images and try to improve upon them. But, most of all, have fun!

Tips to remember:

  • Keep an open mind; abstract photography is about seeing the potential in things that other people miss.
  • Spend time exploring everyday subjects and scenes; it’s surprising how many interesting abstracts you will find.
  • Look at familiar things from unfamiliar angles, and you will see them in a completely different light.
  • Forget about what something really is and concentrate on its shape and colour.

googletag.cmd.push(function() {
tablet_slots.push( googletag.defineSlot( “/1005424/_dPSv4_tab-all-article-bottom_(300×250)”, [300, 250], “pb-ad-78623” ).addService( googletag.pubads() ) ); } );

googletag.cmd.push(function() {
mobile_slots.push( googletag.defineSlot( “/1005424/_dPSv4_mob-all-article-bottom_(300×250)”, [300, 250], “pb-ad-78158” ).addService( googletag.pubads() ) ); } );

The post Five Techniques for Creating Impressionist or Abstract Photography by Eva Polak appeared first on Digital Photography School.


Digital Photography School

 
Comments Off on Five Techniques for Creating Impressionist or Abstract Photography

Posted in Photography