RSS
 

Archive for June, 2019

Sigma issues product advisory for its 60-600mm F4.5-6.3 and 70-200mm F2.8 Sports lenses

10 Jun

Sigma has issued a lens product advisory for its 60-600mm F4.5-6.3 DG OS HSM and 70-200mm F2.8 DG OS HSM lenses.

According to the advisory, posted below in its entirety, Sigma has ‘found a phenomenon whereby when pressing the shutter button on the camera body, it may occasionally stop operating and not respond to the reoperation.’

Due to this ‘phenomenon’ (someone’s been looking at Canon’s product advisories), Sigma says it will offer free lens firmware updates free of charge to customers with affected products within the following serial number ranges:

Sigma 60-600mm F4.5-6.3 DG OS HSM | Sports for Sigma, Canon EF and Nikon F Mount

Serial No.53824160 or earlier

Sigma 70-200mm F2.8 DG OS HSM | Sports for Sigma, Canon EF and Nikon F Mount

Serial No.53846990 or earlier

Sigma notes its USB Dock can’t be used for this firmware update ‘as it requires an adjustment to optimize each lens individually.’ So, if you’re noticing your lens having this issue and it falls within the serial numbers, Sigma requests you contact an authorized Sigma subsidiary/distributor who will then direct you to take the proper steps to get the issue fixed. You can find a full list on Sigma’s World Network webpage.

We spoke with a technician at Sigma America who said lenses that aren’t experiencing the issue don’t need to be sent in at the time and in the event a lens still under warranty does have the issue occur down the road, Sigma will still provide the firmware update free of charge.

Sigma has also noted that some products within the serial number ranges provided have already had their firmware updated. As shown in the above graphic, units with a black dot sticker above the barcode of the box have already been updated.

Articles: Digital Photography Review (dpreview.com)

 
Comments Off on Sigma issues product advisory for its 60-600mm F4.5-6.3 and 70-200mm F2.8 Sports lenses

Posted in Uncategorized


Sony World Photography Awards adds new 2020 category, reveals grant recipients

10 Jun

The Sony World Photography Awards has a new ‘Environment’ category under its Professional competition, the World Photography Organization has announced. Under this category, photographers are challenged to ‘address environmental concerns affecting the world today.’ Additionally, the 2020 Awards will also feature a new Youth competition that allows photographers ages 12 to 19 to submit up to three images per months through December 2019.

The 2020 Sony World Photography Awards kicked off its Youth competition this month; its deadlines are the last day of each month from June to December. Under the competition, photographers as young as 12 and as old as 19 can submit up to three single images each month. Every month has its own theme and will result in one winner and a shortlist.

In addition to the new Youth competition, the 2020 Awards will feature a new ‘Environment’ category in the Professional competition, which has a January 11, 2020 deadline. According to the organization, winning and shortlisted photographers will get a ‘global platform’ for showcasing their work.

The 2020 Awards will also include the Open competition with a January 7, 2020, deadline and the Student competition with a November 29 deadline.

In addition to revealing the new Environment category and Youth competition details, the organization has announced the 2019 Sony Grant recipients. In the Professional competition, 2019 Sony Grant recipients get $ 7,000 each alongside Sony photography gear. Recipients of the Student grant receive $ 3,500 each and will work together as a team to provide commissioned images.

The 2019 Sony Grant recipients are:

Professional category:

– Yan Wang Preston (UK)
– Ed Thompson (UK)
– Kohei Ueno (Japan)
– Thomas Uusheimo (Finland)

Student category:

– Joel Davies (Central St Martins, UK)
– Sam Delaware (Pacific Union College, USA)
– Tobias Kristensen (Danish School of Media & Journalism, Denmark)

You can find a gallery of the 2018 Sony World Photography Awards competition in our previous coverage.

Press Release:

Sony World Photography Awards reveals new categories for 2020 and latest Sony Grant recipients

?Photography’s power to capture environmental issues recognized in new dedicated category
?Sony Grants awarded to four exceptional professional artists and three student talents
?Youth competition restructured to give young photographers more opportunity
?Exhibition tours to Japan, Italy, Germany and beyond in 2019

June 4, 2019, London: Submissions for the 13th edition of the internationally acclaimed Sony World Photography Awards are now open and free for all to enter at www.worldphoto.org.

The 2020 Awards are marked by the introduction of an Environment category to its Professional competition, recognizing the importance of the subject for contemporary artists, and a new format for the Youth competition, to engage and reward young photographers working worldwide.

The Awards also announced today the recipients of the 2019 Sony Grant. Chosen from the winners and shortlist of the 2019 Sony World Photography Awards, the Sony Grant give artists the freedom to create new bodies of work or develop long-term projects. In clear demonstration of this, a new film by 2018 Photographer of the Year Alys Tomlinson funded by her Sony Grant will be premiered at Rencontres d’Arles, France, this summer. The film is an extension of the artist’s 2018 award-winning series Ex-Voto.

Having been seen by 25,000 people in London, the exhibition of winning and shortlisted works from across the 2019 Awards will now tour internationally. Opening in Japan on June 1, the exhibition will travel to Germany, Italy, India, and Mexico giving audiences worldwide the opportunity to see the very best in contemporary photography from the past year.

Environmental issues highlighted in new Professional category

The Professional competition seeks serious bodies of work across ten diverse categories by artists working across fine art photography and photojournalism, and rewards those pushing the boundaries of what photography can do. The new Environment category will challenge artists to address environmental concerns affecting the world today and winning and shortlisted photographers are given a global platform upon which to showcase their work.

Speaking about the direct results of winning, Italian artist Federico Borella states: “Winning the 2019 Photographer of the Year title is one of the most important things for my career and my life. This kind of visibility is amazing because it allows me and my work to reach a global audience. My phone started ringing straight after the announcement and it hasn’t stopped ringing since! People want to listen to the story I want to tell. How can I ask for more?”S

Judges selected Borella as the overall winner in 2019 for a powerful photographic essay on the human effects of climate change in Tamil Nadu, India.A

New opportunity for young emerging photographers

The new Youth competition will give young photographers aged 12-19 the opportunity to enter up to three single images per month from June – December 2019. Each month will have a different theme and judges will select one winner and a shortlist per month. The seven monthly winners will then compete to be named Youth Photographer of the Year.

The monthly structure has been implemented to give emerging photographic talent more opportunity to be discovered and will be accompanied by expert advice on the monthly theme to help those entering.

In addition to the Professional and Youth competitions, the 2020 Awards includes the Open competition, rewarding outstanding single images across ten categories and the Student competition, for photography students worldwide. The National Awards program also runs in 60+ countries and celebrate local photographic talent.

The Awards are judged anonymously, giving all photographers across the world equal opportunity to be seen by juries of industry leading experts and win.

A total prize fund of $ 60,000 (USD) plus Sony digital imaging equipment is shared between winning photographers, with many also being flown to London to attend the annual awards ceremony. All shortlisted photographers are given exposure via the Sony World Photography Awards Exhibition which opens in London before touring globally. The 2019 Awards saw 327,000 entries from 195 countries. For more details about all the competitions and categories please go to www.worldphoto.org/swpa

2019 Sony Grant recipients
The World Photography Organisation and Sony are committed to supporting contemporary photographers and contributing to the further development of photographic culture worldwide.

The Sony Grants program, introduced in 2016, is open to winning and shortlisted photographers of the Awards’ Professional and Student competition. Recipients of the 2019 Professional grant are Yan Wang Preston (UK), Ed Thompson (UK), Kohei Ueno (Japan) and Thomas Uusheimo (Finland). Each receive $ 7,000 (USD) and Sony digital imaging equipment to create work of their choice.

The 2019 Student grant was awarded to Joel Davies (Central St Martins, UK), Sam Delaware (Pacific Union College, USA) and Tobias Kristensen (Danish School of Media & Journalism, Denmark). Each receive $ 3.500 (USD) and have been commissioned to create a new body of images, working as a team.

The results of all grant recipients work will be shown at the 2020 Sony World Photography Awards Exhibition. Find out more about the Sony Grant at www.worldphoto.org/sony-grant

2020 Competition deadlines
?Youth competition: Last day of each month from June – December, 2019
?Student competition: November 29, 2019
?Open competition / National Awards: January 7, 2020
?Professional competition: January 11, 2020

About World Photography Organisation
The World Photography Organisation is a global platform for photography initiatives. Working across up to 180 countries, our aim is to raise the level of conversation around photography by celebrating the best imagery and photographers on the planet. We pride ourselves on building lasting relationships with both individual photographers as well as our industry-leading partners around the world. The World Photography Organisation hosts a year-round portfolio of events including the Sony World Photography Awards, one of the world’s leading photography competitions, and PHOTOFAIRS, leading international art fairs dedicated to photography. For more details see www.worldphoto.org

Articles: Digital Photography Review (dpreview.com)

 
Comments Off on Sony World Photography Awards adds new 2020 category, reveals grant recipients

Posted in Uncategorized


An Interesting Subject Does Not Make An Interesting Photograph

10 Jun

The post An Interesting Subject Does Not Make An Interesting Photograph appeared first on Digital Photography School. It was authored by Kevin Landwer-Johan.

Many beginner photographers, and some more experienced ones, fall into the trap of thinking a good subject will make a good photo. It’s not true. I’ve seen loads of terrible photos of fabulous subjects.

A good photographer makes good photos, no matter what the subject. I like how British photographer Martin Parr describes his work. He says his aim is to make the ordinary look extraordinary.

An Interesting Subject Does Not Make An Interesting Photograph

The late afternoon light makes this landscape more interesting. © Kevin Landwer-Johan

To make the best photo, whether or not your subject is impressive, you need to:

  • Expose it well.
  • Time it right.
  • Choose the best lighting.
  • Compose it carefully.
  • Connect on some level.

Achieving all these five aspects of interesting photographs in a single frame is challenging. It takes skill, practice, and patience.

Being mindful of these pillars of good photography will lead you away from the snapshot trap when you see something interesting. Learning to keep these things in mind, you will gradually improve and be able to make the most mundane object look great when you photograph it.

An Interesting Subject Does Not Make An Interesting Photograph

Without the interesting cloud formation, this landscape would be rather dull. © Kevin Landwer-Johan

Master your camera technique

Confidence in managing your camera is essential. Using your camera without understanding much of how it works will frustrate your creative growth. Learning what each of the main settings does on your camera is not difficult.

Control of the exposure is made using the aperture, shutter speed, and ISO settings. Focus is either automatic or manual. None of these are hard to master when you put your mind to it and spend some time practicing. Figuring out what part of your composition needs to be exposed well and where the focus point needs to be are part of your creative choice.

Mastering the basic technical aspects of using your camera will free you up to become more creative with your photography.

An Interesting Subject Does Not Make An Interesting Photograph

Careful exposure makes this winter tree more interesting. © Kevin Landwer-Johan

Press your shutter at the right time

Choose the optimum moment to take your photo. Consider the action happening in front of you. Look at the colors as they change when the sun is rising and setting. Watch a flower blooming in your garden. Each instance you take a photo, make sure it’s the optimum one.

What determines the decisive moment for when you take a photo depends on many things. Each circumstance is different, so it’s important for you to observe what’s happening carefully.

Sometimes you’ll need to respond quickly. Other times you’d best be patient and wait, or come back another time. This is so for landscape and architecture photography where the right light and weather conditions are so vital.

Anticipating when the best time is will help you nail it more often. Think about what will happen next. What is the sequence of events that will unfold? How are clouds moving in the sky? Will they cover the sun before it sets?

In situations where you have some control over your subject and the action, timing is not so difficult to predict. You can ask the model to flick her hair back on the count of three. You could ask your kids to run and jump over the sleeping dog and be ready for them.

Timing is one of the key elements which influence good photos. Each picture you take is a short moment in time. Making sure you capture the right moment can often make or break your photographs.

An Interesting Subject Does Not Make An Interesting Photograph

The day I took this photo it was raining – all day. The sun came out in the evening and it was worth waiting for. © Kevin Landwer-Johan

Craft your compositions

Relying on your subject to make your photo interesting means you may not compose it well. Don’t just plonk it central in your viewfinder, focus and click. Everyone with a camera can do that.

Move around. Look for a better background without distractions. Take a little time to think through some rules of composition. Are there strong lines you could incorporate? Will using the rule of thirds make the photo stronger? What else is in the frame and is it relevant to your photo?

Use different focal length lenses to incorporate more or less background. With a wide lens, you’ll see more background. Using a longer lens will cut more of the background and help isolate your subject. Longer lenses also give the impression of compressed distance where wide lenses do the opposite.

Lots of the best street photography looks as if it’s been made in a hurry. People rushing past, glancing at the camera. Or absorbed in what they are doing. Mostly these photos are not snapshots. The photographer has planned well and anticipated the action. Then waited.

Action is more easily caught and composed well when patience and observation are applied.

An Interesting Subject Does Not Make An Interesting Photograph

The whole dam was interesting, but it was too hard to find an interesting angle for the whole structure, so I cropped in tight. © Kevin Landwer-Johan

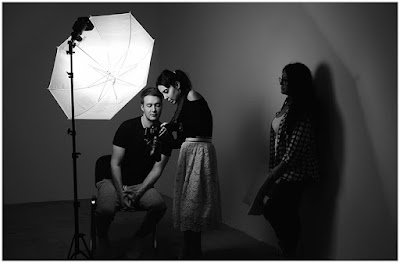
Lighting for feeling

Hard light or soft light will create different moods.

Strong contrast when you have hard light is more dramatic. If you want a softer, more romantic feeling, hard light is not the best. Even with an interesting subject, such as a newborn baby or a flower, harsh lighting will not provide a gentle feeling in your photograph.

Matching the lighting to the mood you wish to create in your photograph will make the photo feel right. There are no fixed rules. You must decide for yourself with each photo. This is part of your creative expression as a photographer.

Think about the direction the light’s coming from. It is hard or soft? How is it affecting your subject? Is there too much shadow or contrast for the mood you want?

An Interesting Subject Does Not Make An Interesting Photograph

© Kevin Landwer-Johan

Connect with your subject

No matter what you choose to photograph, the more you connect with your subject the better photos you will make of it.

I always thought this applied only to people, and maybe animals. I’ve changed my perspective, and now think it can apply to anything you photograph.

I love flowers. My wife loves them more and loves to grow them. She takes much better photographs of flowers than I do because she has that passion. It shows in her pictures.

If you love the location you live in, or maybe where you grew up, you will photograph it more intimately than a stranger to it probably will.

How you connect with people you’re photographing will certainly make a huge difference in your photos.

An Interesting Subject Does Not Make An Interesting Photograph

© Kevin Landwer-Johan

Conclusion

Take your time. Be more observant. When you find your next alluring subject, consider how you can make the best photo of it. Don’t rely on its interest value alone.

Travel photography is prone to snap-shooting. When you travel, you always see new and interesting things to photograph. This is part of what makes travel so interesting. I often encourage people who take our photography workshops not to be travel snapshooters.

Ansel Adams said, “The most important component of a camera is the twelve inches behind it.” Think about your subject and how you can treat it.

Remember, it’s the photographer who makes the picture interesting, not the subject.


The post An Interesting Subject Does Not Make An Interesting Photograph appeared first on Digital Photography School. It was authored by Kevin Landwer-Johan.


Digital Photography School

 
Comments Off on An Interesting Subject Does Not Make An Interesting Photograph

Posted in Photography


DJI teases new release for June 11th with new video posted to social channels

09 Jun

DJI released a 21-second teaser video ahead of their latest product release titled ‘Learn to Win.’ An official announcement will be made this Tuesday, June 11th. The world’s top drone manufacturer released the Osmo Action camera less than a month ago.

Naturally, the Internet has offered up numerous theories on the next move for DJI, who hasn’t released a consumer-grade drone since the Mavic 2 Pro and Zoom at the end of August last year. One possibility is their official entry into the lucrative and growing FPV racing market with a compact, agile drone. Another potential release could be a Software Development Kit (SDK) aimed at developers and tinkerers for custom applications.

The caption on the video, first posted to YouTube, hints at the latter SDK possibility as it reads ‘DJI was built by tiredless engineers who never stopped looking for answers and pushing boundaries. Now, get ready to push yours. If you’re ready to win, be prepared to learn.’

‘DJI was built by tiredless engineers who never stopped looking for answers and pushing boundaries. Now, get ready to push yours. If you’re ready to win, be prepared to learn.’

Rumors of a Spark 2 drone, slated for summer, have also circulated and are covered in detail by DroneDJ. The Phantom 4 series is still out of stock at DJI’s official online store, though representatives for the company have gone on record stating that a logical Phantom 5 follow-up is either on hold or, alternately, there was nothing to cancel in the first place.

Articles: Digital Photography Review (dpreview.com)

 
Comments Off on DJI teases new release for June 11th with new video posted to social channels

Posted in Uncategorized


Sony Xperia 1 sample gallery

09 Jun

$ (document).ready(function() { SampleGalleryV2({“containerId”:”embeddedSampleGallery_0695176262″,”galleryId”:”0695176262″,”isEmbeddedWidget”:true,”selectedImageIndex”:0,”isMobile”:false}) });

Sony’s flagship mobile device packs some powerful imaging features, including a rear triple-cam, Eye AF and 4K HDR video recording. It seems like a natural place to find sophisticated autofocus and video capture features given its pedigree, and we were eager to take it for a spin when it arrived in the office. Take a look at how we got along.

See our Sony Xperia 1 sample gallery

Articles: Digital Photography Review (dpreview.com)

 
Comments Off on Sony Xperia 1 sample gallery

Posted in Uncategorized


Landscape Photography Accessories You Need to Own

09 Jun

The post Landscape Photography Accessories You Need to Own appeared first on Digital Photography School. It was authored by Nisha Ramroop.

Every photo genre has its arsenal of accessories. Portrait photographers choose light modifiers; macro photographers have extension tubes and sports photographers walk with monopods to support heavy telephoto lenses out in the field. Similarly, landscape photographers pack a few accessories to help them work with the natural environment, time of day and elements to maximize their time. Here are a few key accessories that you will want to leave in your camera bag.

1. Filters (Polariser, ND, GND, UV)

Filters are a great way to shape your available natural light and there are many different kinds. The most common ones used for landscape are the polarizer and the graduated neutral density filters.

Polarizer / Circular Polarizing filter (CPL)

Some landscape photographers never leave home without this accessory. The major pros of CPLs include the way they enhance your colors (think blue skies) and also cut glare/reflection. In contrast, there are situations when you will not want to use a polarizer.

Adding a polarizer to the previous scene cuts the glare on the water and enhances the colors of the ocean

Neutral Density (ND)

This filter is basically a darkened piece of resin/glass that reduces the amount of light that enters your lens. Furthermore, in a proper ND filter, the color of the light is not affected (neutral). It is most useful in bright conditions, where you want to use a longer/lower shutter speed or wider aperture. ND filters come in different increments, which vary the amount of light that you block.

Graduated Neutral Density (GND)

Also known as a split neutral-density filter, GNDs selectively transmit light. Therefore it is essentially an ND where only part of the filter is darker, which allows you to reduce the brightness in part of your image. As a result, it is particularly useful in a contrasty scene with a bright sky.

A Graduated Neutral Density filter helps balance the sky

Ultraviolet (UV)/Haze/Clear

While these filters do little to affect your image, their main purpose is to protect the front element of the lens from dust and scratches. That being said, compromising on the quality of a UV filter may degrade the quality of your images. The best reason to add a UV filter would be for lenses that need a filter in place to complete its weather sealing.

2. Remote shutter/Intervalometer

So by now, you know that when capturing an image, minimizing vibrations goes a long way towards the eventual sharpness. It is one of the reasons that most cameras have a built-in delayed shutter function (usually 2 or 10 seconds). A remote shutter release gives you even more control over this functionality and comes in wireless/wired options. Some remote shutter releases (or cable releases) have basic or expanded options.

One of these options, available in advanced remote shutters, is interval timing. An interval timer (interval meter or intervalometer) gives you the option of automatically taking images at preset intervals for a defined period. Hence the intervals can be small (seconds) or long (hours). This feature allows you to capture light as it changes over a period of time and is more commonly known as time-lapse photography. Consequently, the lines between advanced remote shutter controls and intervalometers became blurred over the years, as each now has similar functions. Most of the recent ones are now easier to use as they are integrated into phone apps.

Fun with an Interval Timer

Some camera models come with built-in interval timers. If your camera already has this, you need an intervalometer only when the more advanced features are required. This includes setting the timer to wait more than 10 seconds before shooting or more time options before/between each image. Another good reason is if you want to tweak your settings between your images. When using the built-in function, the interval timer locks your camera for too long before you can make adjustments.

3. Rain protection

Even if you have a weather-sealed camera, large amounts of water can still damage it. As a landscape photographer, you have to be prepared for weather changes. Alternatively, it may be your choice to shoot in the rain or snow. If either is the case, you are better off playing it safe and protecting your camera body, lenses and any connected electronic accessories.

Protection can be a simple or expensive solution, which ranges from shower caps or plastic/garbage bags with holes cut out or a purchase option. Camera rain protection (ponchos, sleeves, jackets, raincoats) are all variations of customized plastic solutions, tailored for shooting easier in inclement weather. Therefore, they are usually heavy duty or thin enough to maintain access to your controls, but more durable than your everyday plastic bags.

A Neutral Density filter allows you to shoot longer exposures during the day.

Ponchos/Sleeves are thicker plastic capes that fit snugly over your camera and usually have a drawstring to securely cover the lens body. Jackets are made from a similar weatherproof material as raincoats, which are usually more breathable material. These have cinch straps for medium and larger sizes and slip on and off quite easily. Thus jackets and raincoats for your camera are more durable (and pricier) than ponchos and sleeves. Whichever solution works for you, most take up very little space and should own a place in your camera bag.

4. Flashlight

Considered an essential pack for night photographers, this small tool comes in handy when you least expect, so keep one in your bag. If you are a sunset chaser, a small reminder that night follows closely. A flashlight can be useful to do a quick sweep of the area to ensure you do not leave anything behind. Furthermore, if you are a night shooter, these come in handy to focus or light paint a subject in the dark.

Pro Tip: Choose a tough and lightweight flashlight and store it in an easy to reach outer pocket of your camera bag.

5. Tripod feet

Chances are you already know the importance of having a good tripod. In some conditions, such as mud, snow, uneven terrain or wet sand, adding tripod feet elevates your stability. Additionally, you can buy a one fit for all, although most of the top-rated tripods customize their tripod feet by terrain.

Conclusion

Some of the accessories you take with you can make the difference between a successful expedition and an average one. Choose what you pack wisely or customize it based on location. Either way, some accessories should just be part of your everyday bag, just in case.

Which accessories do you always have with you?

The post Landscape Photography Accessories You Need to Own appeared first on Digital Photography School. It was authored by Nisha Ramroop.


Digital Photography School

 
Comments Off on Landscape Photography Accessories You Need to Own

Posted in Photography


The FAA devises a new strategy for Remote ID

09 Jun

Remote identification (Remote ID) is the concept that drones need to be equipped with a digital license plate. Knowing who is flying an unmanned aerial system (UAS) where, and when, is imperative for increasing safety and security. Two senators on opposite sides of the political spectrum even urged U.S. Transportation Secretary Elaine Chao to take action recently.

This Thursday, the Federal Aviation Administration (FAA) informed its Drone Advisory Committee (DAC) that a final rule on remote identification of drones could take up to two years to implement. This latest development also finds them looking to the committee for alternate strategies including how to get operators to voluntarily use remote ID.

‘We realize that there’s no schedule I can give you or anyone else can give you that will be quick enough to get to remote ID, from a regulatory standpoint,’ said Jay Merkle, executive director of the FAA’s drone integration office. ‘So we think working with industry to get early adoption of [technical] standards and voluntary compliance is a good way to start enabling and unlocking’ flights over people and beyond line of sight.

Remote ID for UAS has been a long time in the making. The process was introduced over two years ago. Rulemaking was supposed to begin on May 1st but was pushed back to July 21st. The newly-formed DAC hasn’t been neglecting it, however. ‘The reason for delay is not because people haven’t been working on it,’ Merkle said, describing the rulemaking as ‘very complex.’

Articles: Digital Photography Review (dpreview.com)

 
Comments Off on The FAA devises a new strategy for Remote ID

Posted in Uncategorized


Teaching at Porto Photo Fest this October

09 Jun

Just a quick heads-up for anyone based in Europe that I’ll be teaching several classes at the Porto Photo Fest on October 12-13 this fall. This is the only time I’ll be teaching in a public event this year.

The folks at PFF gave us a lot of control in structuring the classes (which they may live to regret!) But we think we have come up with some really cool stuff.

PLEASE NOTE: There is currently early bird pricing in effect. So if you might be interested, it’s worth acting in a timely manner.

Co-Teaching with Sara Lando

I’m stoked to once be again collaborating with Sara Lando, one of the most creative people (and brilliant photographers) that I know. We will be co-teaching a class, something we last did together in Ireland in 2017.

This Sunday, October 13 class will be on photographing people. It will be taught from two different perspectives. Sara and I will essentially be representing the right and left sides of your brain respectively.

We’ll be flipping back and forth from between the lighting/technical side and the interpersonal/creative side. This is a class designed both to enhance your strengths and, more important, to really go after your weaknesses. At some point Sara and I will probably get into an argument. (Not to worry, she’s Italian, so this is perfectly normal.)

This setup is probably my very favorite approach to teaching lighting, because it interweaves some more organic/human/creative layers with f/stops and lighting techniques.

The course description is not very detailed, so here is what you should know. We’ll be a class of (max) 20 people, usually split into two groups of ten. We’ll work all day progressively hitting both the interpersonal stuff (with Sara) and the technical stuff (with me.)

We will further separate into smaller groups of 3-4 people, and you’ll be shooting all day. Lighting equipment will be provided. If time permits, we may bust out a little Iron Chef-style competition at the end of the day. We’ll have to see. No matter what, this class will be both fast-paced and fun.

Portrait Class details and signup

In the Fish Bowl

Later Sunday evening, Sara and I will transition from our co-class to an onstage event where we’ll be putting some of these yin-yang principles to the test in front of an audience, real-time, mistakes and all. Think of it as a tag-team portrait session between two brains that think nothing alike.

If you are in the day class, you are automatically included in the evening event. But you can also attend separately.

(Way) Outside the Box

On Saturday morning (October 12) I’ll be doing a 3-hour talk on some of the things we usually don’t think about as photographers. But these are things that, in retrospect, probably should have been obvious. This is an evolution of a talk I have given in Seattle, Berlin and London.

This class is designed to help you to integrate your photography with the rest of your non-photo life skills and expertises; to learn to think of photography not as an end-all but as a catalyst for creating more powerful and unique other things.

We’ll look at how other photographers have quietly applied this approach to great ends, and I’ll help you to roadmap how you can learn to adapt this thought process to your own situation.

In short, the key to being able to compete effectively with the bajillion other image makers out there is to create, and then own, a very un-level playing field. Because if life is not going to be fair anyway, it should at least be unfair in your favor.

Class details and signup


Strobist

 
Comments Off on Teaching at Porto Photo Fest this October

Posted in Photography


Food Photography – When to Use Natural Light (and When Not To)

09 Jun

The post Food Photography – When to Use Natural Light (and When Not To) appeared first on Digital Photography School. It was authored by Suzi Pratt.

Food photographers, professionals and amateurs alike, know that natural lighting is among the best tools to take drool-worthy photos. However, there’s a time and a place to use natural lighting, and times when you won’t want to. In this article, we’ll discuss what natural lighting is and how it affects your photos – for better or for worse.

What is natural lighting?

Simply put, natural lighting is light produced by the sun. Another related term is ambient light, which refers to the available light in an environment. Ambient light could also be considered natural light if the photographer’s equipment is not producing it. In most parts of the world, natural light is abundant and can be used at no charge. This is one of many reasons why it is preferred by many photographers.

Two types of natural lighting

Generally speaking, there are two different kinds of natural lighting that you might want to utilize for photography. If you plan to utilize natural light for photography, it’s wise to learn about the different patterns of sunlight. Depending on where you live, you might have more of one than the other. You may have to adjust your style accordingly.

Direct light

Natural light - direct light

Direct sunlight that results in a look with harsher shadows.

A cloudless environment with full sunlight in the middle of the day produces direct light. This light is very intense, resulting in high contrast and very sharp shadows. The color of the light will vary depending on the time of day. In midday, it will be a neutral white color and a warmer tone of gold in the late afternoon. Depending on your photography style, you may prefer direct light if you wish to emphasize dramatic shadows and high contrast.

Diffused light

In a cloudy or overcast environment, natural light will appear diffused. This results in a soft, low contrast look with little to no shadows. Most photographers tend to prefer this lighting as you can make just about anything look good with it. If you have lots of direct light, you can also turn it into diffused light by using something like a shoot-through reflector.

Natural light_Food Photography 01

Natural sunlight that has been softened with a diffuser.

What about artificial lighting?

The opposite of natural lighting, artificial lighting is produced by gear such as speed lights or strobes. If the idea of flash photography intimidates you, consider this. Most forms of artificial lighting strive to recreate natural lighting. For example, a bare flash with no diffuser is akin to direct light, while a flash with a softbox results in diffused light. Even if you plan to use artificial light, it helps to understand natural light and how it affects your creative style.

Natural light_Food Photography 01

Natural light or artificial light? This is natural…

Natural light_Food Photography 01

…this is artificial light. It adds some dimension to the background but isn’t drastically different than the naturally lit image.

When to use natural light for food photography

Before determining what kind of lighting to use, consider your intended creative output. Do you want food photos with punchy colors and clearly defined shadows? If so, you want direct light and a cloudless, full-sun day is what you want. But if you want soft, diffused light for an evenly lit photo, a cloudy day will suit you best (or a sunny day with a reflector).

After you figure out your preferred creative style, take a look a the weather. You may have to plan your photo shoot around weather patterns if you want a particular quality of natural light. Alternatively, you’ll have to bring extra gear with you to compensate for it.

Natural light_Food Photography 01

Food photographed in natural light during the daytime, when the light is neutral in color.

When you may not want to use natural light

There are two times of the day when natural lighting may not be your best friend. Those are the blue hour and golden hours of the day. These times of day are cherished by landscape photographers as they provide the most dramatic lighting in the sky. However, this may not be ideal for food photography. That’s because both blue and golden hours emit different colored light. A dish shot at blue hour may have more blue tinges to it, while the golden hour will cast it in a warmer tone. Some of this can be fixed in post-production, but most food photographers prefer shooting with neutral daylight so that the food retains its natural color.

Natural light_Food Photography 01

Food photographed in natural light during blue hour, just after sunset. Natural light at this time of day distorts colors all around. Great for landscapes, not for food.

In Conclusion

Generally speaking, using natural light is the simplest solution for photographers. It’s rather straightforward to use natural lighting, although adding tools to your kit such as reflectors and diffusers will help you take it to the next level. Also helpful is a general knowledge of lighting patterns throughout the day so that you don’t end up planning a natural light shoot during golden or blue hours (unless you want that colored light!).

What do you think? Are you a natural light photographer, or do you prefer artificial light? Let me know in the comments below!

Food Photography Light

The post Food Photography – When to Use Natural Light (and When Not To) appeared first on Digital Photography School. It was authored by Suzi Pratt.


Digital Photography School

 
Comments Off on Food Photography – When to Use Natural Light (and When Not To)

Posted in Photography


DPReview TV: Panasonic DFD vs. Canon dual-pixel autofocus

08 Jun

To DFD or not to DFD, that is the question.

Panasonic’s proprietary DFD (Depth from Defocus) autofocus system has both critics and fans, but Chris and Jordan think the system might have received a bad rap. In this episode they compare DFD to Canon’s Dual-Pixel autofocus system. Might the results surprise you?

Get new episodes of DPReview TV every week by subscribing to our YouTube channel!

  • Introduction
  • How the autofocus systems work
  • Face detect C-AF
  • Single point C-AF
  • Tracking C-AF
  • Video C-AF
  • Shooting experience
  • Panasonic GH5 comparison
  • Wrap-up

Articles: Digital Photography Review (dpreview.com)

 
Comments Off on DPReview TV: Panasonic DFD vs. Canon dual-pixel autofocus

Posted in Uncategorized