RSS
 

Archive for September, 2017

Bookmark this HEIC to JPEG converter if you’re upgrading to iOS 11 tomorrow

19 Sep

iOS 11 will launch officially tomorrow—it’s been in beta for months—and one of the most relevant photo-centric features coming to Apple’s new mobile OS is the introduction of a high efficiency image file format (HEIF) called HEIC. This format should, in theory, make images smaller without sacrificing quality, in addition to a bunch of other useful features.

There’s just one problem: Windows users can’t natively view HEIC files on their computers. Enter JPEGmini creator Beamr and their new HEIC to JPEG converter.

Beamr says they created the Web tool in response to user feedback—ever since the new format was announced people have been asking for a way to convert HEIC to JPEG. Well, now they can by simply following this link and uploading up to 30 photos at a time. And since this is made by the same folks behind JPEGmini, HEIC images converted using the tool are then further optimized using the JPEGmini technology to spit out more manageable JPEGs.

We’re not sure for how long this tool will be needed. There are a lot of advantages to the HEIC format—the ability to store single images or sequences, the ability to store audio/text alongside the image, the ability to store image editing operations, and both lossy and lossless compression, to name a few—so it would make sense for the format to gain wide-spread integration quickly.

But until then, if you’re upgrading to iOS 11 tomorrow and need/want a way to convert those images to JPEGs, there’s on option waiting for you.

Articles: Digital Photography Review (dpreview.com)

 
Comments Off on Bookmark this HEIC to JPEG converter if you’re upgrading to iOS 11 tomorrow

Posted in Uncategorized


Using Lightroom Alongside Photoshop: Working with Smart Objects

19 Sep

What software do you use to process your digital images? As of the writing of this article, Adobe Lightroom sports over 1.4 million Likes on their official Facebook page. And Photoshop? That Facebook page is pushing 7.7 million Likes. If those numbers are any indication of the overall use of the editing software, then it’s safe to say that you are likely using one of the two programs right now (you’re reading this after all). Lightroom and Photoshop arguably set the standard for all other post-processing software platforms.

If you’re like me you use both of them, in tandem, to edit and process your photos. There are literally limitless possibilities when it comes to using Lightroom and Photoshop together. Out of those possibilities comes the idea of “Smart Objects”.

Do you know about Smart Objects? Have you ever used them before in your workflow? If not, I’m going to show you exactly how useful (or not) working with Smart Objects between Lightroom and Photoshop can be. Don’t worry, it’s all easy to understand. Let’s have a look at what Smart Objects can do for you and your photography when it comes to working with both Lightroom and Photoshop.

What are Smart Objects?

Think of Smart Objects as being a larger suitcase. All your edits in Lightroom are non-destructive. This is because you aren’t actually editing your original file in Lightroom. Rather, you are working with a virtual copy of your image. When you go from Lightroom to Photoshop, like this…

Using Lightroom Alongside Photoshop: Working with Smart Objects

You package everything into the suitcase and send it off to Photoshop Land. What do you put in your suitcase? You might put your Lightroom edits, the original file information, or a mix of the two. The key is that you don’t want to do anything to your photos that you can’t take back. While you can edit your images between Lightroom and Photoshop non-destructively, there are ways to remain more flexible than others. One of these is by using smart objects.

While you can edit your images between Lightroom and Photoshop non-destructively, there are ways to remain more flexible than others. One of these is by using smart objects.

Using Lightroom Alongside Photoshop: Working with Smart Objects

Smart Objects pack more into the suitcase when you move your editing between Lightroom and Photoshop. When your image opens as a Smart Object in Photoshop, you’ll notice a special little icon on the layer thumbnail.

Using Lightroom Alongside Photoshop: Working with Smart Objects

This lets you know that you are now working with a Smart Object layer. From here, work with your image in Photoshop as you do normally.

The benefits of using Smart Objects

The great thing about using Smart Objects when jumping from Lightroom to Photoshop is that you are taking an original version of your image with you so that editing becomes much more versatile once in Photoshop. Not only can you change the edits you made in Lightroom but you can also work more effectively when transforming or resizing your photo.

This all sounds a little complicated, but I can assure you it’s not. Let me show you some of the perks of using Smart Objects when working between Lightroom and Photoshop.

Real-time edits of Lightroom adjustments

Using Smart Objects, you can make dynamic changes to your Lightroom edits using Adobe Camera Raw just as you would in Lightroom itself. This lets you augment your Lightroom edits on the fly and when you save your image back to Lightroom there will be less need to make those final tweaks. Double click the Smart Object thumbnail and your photo will open in ACR.

Using Lightroom Alongside Photoshop: Working with Smart Objects

Apply any edits you want while in ACR and they will go back with you if/when you bring your photo back into Lightroom.

Smarter resizing and transforming

There’s a problem that plagues editors when it comes to downsizing and upsizing images in Photoshop. It’s pixelization. Because, spoiler alert, digital images are made up of pixels (except vector images). When you scale an image down in Photoshop, the program removes pixels to make the image smaller. This is all well and good until you decide you want to make the image larger again. Since you’re missing pixels, the photo can lose a lot of quality and look pixelated. Let me show you what I mean.

Here we have that same photo that we imported to Photoshop. I’ve duplicated the image with the one on the left being our regular “Pixel Image” and the one on the right is the same photo only converted to a Smart Object (select layer>layer menu>convert to Smart Object.).

Using Lightroom Alongside Photoshop: Working with Smart Objects

I scale both photos down to 10% of their original size.

Using Lightroom Alongside Photoshop: Working with Smart Objects

Then, being the hypothetical indecisive photographer that I am, I decide to then bring the photo back to its original 100% size. Which gives us this.

Using Lightroom Alongside Photoshop: Working with Smart Objects

Not much difference, right? Wrong. Let’s take a closer look. Here’s the regular image after scaling it back to its larger size.

And now look at our Smart Object…

The smart object image has kept its clarity and sharpness because Photoshop didn’t touch the pixels when it was downsized and used the additional information in the Smart Object to edit non-destructively. This is the power of working with Smart Objects when using Lightroom and Photoshop together.

The Downside

No, it’s not all sunshine and rainbows when working with Smart Objects. The biggest problem is that since you are including the RAW file information when you jump from Lightroom, the final file sizes can become rather large after you edit your image in Photoshop. Depending on the size of your original image file this can make for a lot of hard drive real estate being consumed resulting in poor performance during your processing.

Final thoughts on Smart Objects

Using Lightroom alongside Photoshop essentially gives you the best of both editing worlds. You have the simplistic adjustment capacity Lightroom while being able to perform more intricate edits using Photoshop. Smart Objects simply sweeten the pot. Using Smart Objects allows you to edit your images more efficiently and completely non-destructively.

Resizing images from Smart Objects means no loss of quality when you upscale or downscale. Throw in the fact that you have the fluidity of accessing and changing your Lightroom edits while in Photoshop using ACR and you quickly begin to run out of reasons not to incorporate this into your editing workflow. The increased file size, in my opinion, will be well worth the added benefits Smart Objects will bring you.

Have some of your own processing tricks while using Lightroom and Photoshop together? Please share them in the comments below.

The post Using Lightroom Alongside Photoshop: Working with Smart Objects by Adam Welch appeared first on Digital Photography School.


Digital Photography School

 
Comments Off on Using Lightroom Alongside Photoshop: Working with Smart Objects

Posted in Photography


5 Non-Gear Related Ways to Improve Your Work and Take Better Photos

19 Sep

I have lost track of the number of times I have heard complete strangers compliment me on having a great fancy camera that takes “great pictures”. Initially, I used to be quick to the defense and try and get a word in on how I am a professional photographer and hence have some level of skill in my craft. But now I just nod, smile and quickly move away. Unfortunately, the reality is that a lot of photographers (and others) think that by having the latest and greatest fancy camera, they have the ability to take better photos.

The truth of the matter is that you don’t need the latest equipment or fancy qualifications to be a good photographer. Photography is a creative art form and like any art form, it takes a lot of hard work, practice, and perseverance to get really good at taking great pictures. Sure, you need to really understand your gear and what it can and cannot do. But there are loads of simple, non-technical stuff you can do to improve your photography as well.

Here are some non-gear related tips that will help you take better photographs.

#1 Take your camera everywhere

You never know what might be around the corner, be it close to home or on your far away travels. Life is unpredictable and things change in a split second. There’s always something interesting to photograph. You just need to open your eyes, look around and be ready to snap that shot. And additionally, make sure your phone or camera of choice is within easy reach ready for that shot.

5 Simple Non-Gear Related Ways to Improve Your Work and Take Better Photos

Cows hitching a ride inside trucks is quite a sight especially on narrow streets in India!

5 Simple Non-Gear Related Ways to Improve Your Work and Take Better Photos

These migrating pelicans found the most electric resting places…hopefully, they got re-charged for their next flight.

#2 Take pictures every day

Overnight success is a myth. The sooner you realize that the more at peace you will have on your photographic journey. We all know that to get really good at anything, we need to practice and practice a lot. After all, practice makes perfect. The more pictures you take, the better you will become.

Don’t get hung up on what you’re using to take the pictures, either. Many times I only have my iPhone with me and take a shot if it catches my eye. Be confident that if done correctly, you can make good pictures with any camera.

5 Simple Non-Gear Related Ways to Improve Your Work and Take Better Photos

Cupcakes and coffee = great food editorials shots.

5 Simple Non-Gear Related Ways to Improve Your Work and Take Better Photos

Other times it is just a bowl of fresh fruit that can spark an inspiring photo. Don’t get hung up on the perfect scenery – let your imagination be your guide for your everyday shots.

#3 Analyze other photographs

Seek inspiration in other photos. Look at pictures you like and ask yourself what you like about those pictures. What makes it interesting to you and why? Also question how you could make it better or do it differently.

Don’t be afraid to try something similar and put your own creative spin on it. Take an old idea and make it your own. That makes it different, new and in turn, you just might make it better than the original.

5 Simple Non-Gear Related Ways to Improve Your Work and Take Better Photos

A recent obsession in the study of effectively capturing movement in photographs led to a multi-exposure frame – one of my personal favorites to showcase my creative journey.

#4 Study your images

Become your own best critic. Question everything. Look at your pictures and ask yourself what you like and what you don’t like. Be completely honest with yourself as this will really help you improve your craft. Sometimes it is also beneficial to repeat the shot and change it up to make it better than your own original.

And when something works, celebrate your success. It is very important in your creative journey to celebrate your own milestones – it makes the journey that much more fun.

5 Simple Non-Gear Related Ways to Improve Your Work and Take Better Photos

This is the view from my home in Bombay and I love photographing the sea bridge – one of the technological marvels of the modern world – at different times of the day and in different weather conditions. It is amazing to analyze how light and color changes the whole perspective of an image.

5 Simple Non-Gear Related Ways to Improve Your Work and Take Better Photos

Of course, night shots have their own charm. Next time I shall remember to take my tripod along for some car trails!

#5 Stop, look and then click

Most of today’s fancy cameras have a continuous shooting mode where you can fire away at six to eight frames per second. But I find that this tends to make us lazy as photographers. We take on the mentality of the “spray and pray” theory that if we take 20 shots of something, chances are at least a couple will be worthwhile.

Yes, taking loads of pictures is great. But if you pause and take a few seconds to really observe your surroundings, you will be able to visualize your shot. Think about how you want your picture to look and do what you need to do to achieve that look. It might mean moving position, waiting for the light to change or the crowds to dissipate, but it could be the difference between a good photo and a great one.

5 Simple Non-Gear Related Ways to Improve Your Work and Take Better Photos

We were walking along the narrow street of Vridhavan in India and this cow was ahead of us. We just stopped to see what he was doing and also to give him a wide berth as he was a very big bull. He calmly walked into this abandoned house and just made himself at home. It’s not every day that you find cows lounging inside your house.

Conclusion

I hope these simple yet powerful tips help you take better photos and improve at your skill and craft. Remember it is not the camera that takes a great picture but the skill of the person behind the camera that gets the money shot.

The post 5 Non-Gear Related Ways to Improve Your Work and Take Better Photos by Karthika Gupta appeared first on Digital Photography School.


Digital Photography School

 
Comments Off on 5 Non-Gear Related Ways to Improve Your Work and Take Better Photos

Posted in Photography


Like a Music Festival, Minus the Dirt: Social Hostel Offers Indoor Camping

19 Sep

[ By SA Rogers in Boutique & Art Hotels & Travel. ]

If you love the sense of community at multi-day outdoor music festivals like Glastonbury, Coachella and Bonnaroo but hate the mud, dust, noise and filthy porta-potties, this hostel was designed just for you. Cao Pu Studio designed ‘Together Hostel’ as an indoor camping experience, with guests staying in translucent individual ‘tents’ under a common roof. The experience emphasizes socializing, with lots of shared interactive spaces, but provides a tad more privacy than the average hostel bunk room.

The tents are organized in groups of four or five, making the hostel ideal for small groups traveling together, or for travelers prioritizing making new connections with strangers. Each tent is equipped with power sockets, extension cords and reading lights. Each of the timber-framed structures is finished in frosted polycarbonate, which doesn’t offer total privacy, but at least gives occupants a sense of their own personal space within the larger hostel without shutting them off altogether. If you’re backpacking, you can even roll out your sleeping pad in the theater area at night instead of sleeping in a ‘tent’ for a lower rate.

There’s a food court with lots of seating, a shop, a bar, a small theater space, a kitchen, offices and plenty of private showers and restrooms in addition to the tents, which come in single or double sizes. Modular tables in the central hall fit together like puzzle pieces, creating larger or smaller surfaces depending on whether you want to sit with a big group or dine alone.

The concept capitalizes on growing trends (voluntary or not) toward living in smaller spaces and in closer quarters with others rather than spreading out in suburban-style homes. People who travel on the cheap are accustomed to giving up space and privacy in exchange for a good deal, and this design makes the experience feel cleaner and more intentional. Would you stay at the ‘Together Hostel?’

Share on Facebook


[ By SA Rogers in Boutique & Art Hotels & Travel. ]

[ WebUrbanist | Archives | Galleries | Privacy | TOS ]


WebUrbanist

 
Comments Off on Like a Music Festival, Minus the Dirt: Social Hostel Offers Indoor Camping

Posted in Creativity


How to do a Themed Photo Walk to Break out of a Photography Rut

19 Sep

In simple terms, the more photographs you take, the more experience you gain. As they say, “the more the clicks, the better the pics”. It seems like an inevitable formula, right? But like many things, it’s easier said than done. Maintaining a constant flow of photographic material, let alone inspiration is hard work.

The dreaded photographer’s block means you can find yourself shooting one minute and stuck in a creative lull the next. Fortunately, there are plenty of small tasks you can set for yourself to break out of a rut. Doing a themed photo walk is a great way to get those creative juices flowing, with the added bonus of getting your daily step-count up in the process as well.

What is a themed photo walk?

A themed walk is just that. First, you select a theme. Then, armed with a camera, allow yourself to be guided by wherever your photography legs may take you. When you see a subject that fits your theme, take a quick snap and move on. The goal is to accumulate a body of photographs pertaining to the theme you preselected before you set off.

While taking a few random shots to shrug off a creative lull works well. But pot-shots make it hard to build up a series to revisit later. By taking on a themed photography outing, you’ll quickly fall back into the habit of actively seeking details and subjects, focusing your creative energies into a body of work with greater substance.

How to do Themed Photo Walks to Break out of a Photography Rut

Themed projects are a great excuse to document the world around you. Under the theme “desire paths” I photographed this series of pebbles – unearthed on a well-worn trail I take home.

Choosing a theme

The first step in this exercise can prove to be the hardest. Selecting a theme will define what you’ll be photographing on your walk. There are so many options to choose from, it can be hard to settle on a single one. Good themes are built on a strong idea of the target subject. A single color, shape, or pattern are simple yet effective choices, as are subjects that you’ll encounter frequently on your walk.

You may be tempted to choose a few themes at once, but focusing on a single idea will help construct your series with much greater detail. Plus, this project is about easing back into photography, not racing around madly trying to photograph as much as you can in a day.

Themes I’ve chosen in the past include dumpsters, traffic lines on roads (look out for traffic if you choose this one), spent cigarette packets, and squashed aluminum cans. As long as you don’t choose subjects like rain on a sunny day, you can’t go wrong. Once you make your selection and set off, you’ll be amazed how quickly you develop a discerning eye for your topic.

How to do Themed Photo Walks to Break out of a Photography Rut

For this photo walk I initially planned to photograph trees, though I let the theme evolve into a study of tree trunks instead. To draw greater attention to the form in each unique profile, I converted the images to black and white. Having the images arranged in a grid highlights the subtle differences in the subjects photographed.

Setting Off

Once you’ve settled on a theme, you’re ready to go. Start by having a good look at your surroundings. Depending on your theme, you may encounter photographic subjects as soon as you step out the door. Others may take a little more searching. Take your time and enjoy the process.

There are no hard and fast rules here. If you realize you’ve chosen a difficult subject, select a different one and start on that instead. This process is for easing creativity-fatigue and taking the time to see detail in your environment. Although this exercise is rewarding when used to create a series, the action of taking some downtime to work on your personal photography is what matters most.

How to do Themed Photo Walks to Break out of a Photography Rut

If, like me, you often find yourself time-short, try taking just a few snaps over the course of the day. I put this brief “yellow” themed series together while getting some fresh air on a lunch break. Once I had decided on my theme, it was a lot easier to pick out subjects to photograph.

Pulling it together

After you feel satisfied you’ve taken a solid amount of photographs, you’re ready to head home. Once you get back to your computer, it’s time to check out your handy work. So far, this project may have seemed a little sporadic, especially if you’ve chosen a broad theme. But this part of the project involves pulling all the images together to form a cohesive body of work.

Upload your images to the computer as you would normally and have a look over them with your preferred viewing software. Open a new document in Photoshop, select a few of your favorite images from your themed photo walk and drag them onto your canvas. Carefully resize each image so that they fit together in a neat grid. Make sure you hold down the Shift key while resizing images to maintain the aspect ratio of your photograph.

How to do Themed Photo Walks to Break out of a Photography Rut

Select your favorite images from your themed photo walk and drag them onto a new document in Photoshop. Remember to hold the Shift key down to maintain the image’s proportions.

As you build up the images in your grid you’ll start to see how easily your hard work comes together in a series. Although you may want to experiment with the order of your photographs, your overreaching theme will make a big difference in tying your series together. It doesn’t have to be perfect, and you don’t have to use every image you took on your walk. Just pick whatever you feel works. Once you have your images sorted into the one canvas, you are ready to share and can post the results in the comments below for us to see.

How to do Themed Photo Walks to Break out of a Photography Rut

Experimenting with the order that your images are arranged highlights the subtlety involved in creating a successful series of images. Working on a particular theme simplifies this process, leaving you to focus on the details that make the layout work.

How to do Themed Photo Walks to Break out of a Photography Rut

Another variation of my road signage themed walk. Don’t be afraid to change up your layout and experiment until it feels right.

The benefits

Aside from the exercise, themed photo walks help channel your photographic energy into a body of work. No matter how broad or focused, taking photographs within a specific theme widens your photographic experience and enhances your eye for detail. Hunting down subjects within a deliberately selected theme will help you create images you might never have considered before.

This will also help you to visualize future projects and help you pick out elements in photographs that work cohesively in a series. It’s a great way to improve your practice and get your head back into the photography zone.

How to do Themed Photo Walks to Break out of a Photography Rut

I took these images under the theme “looking down”. I plodded around with my camera pointed toward the ground for a few hours just to see what I could find. The results made a unique series built upon an unusual perspective.

How to do Themed Photo Walks to Break out of a Photography Rut

Another themed walk collage.

The post How to do a Themed Photo Walk to Break out of a Photography Rut by Megan Kennedy appeared first on Digital Photography School.


Digital Photography School

 
Comments Off on How to do a Themed Photo Walk to Break out of a Photography Rut

Posted in Photography


Video: Four common composition mistakes and what to do instead

19 Sep

When you’re first starting out, the great big world of photography composition can seem like a long list of rules and a bunch of videos where photographers paste grids on top of iconic photos. It’s all a bit abstract. So if you’re looking for concrete advice, this video by photographer Evan Ranft is a much better place to start.

In the video, Evan discusses four common composition mistakes many photographers make, and then shows you how to fix them. Each tip is accompanied by a very useful “do this not that” before and after, and the advice is genuinely a lot more helpful than slapping a bunch of grids and golden ratio spirals on top of famous photos.

You can check out the video up top for a full rundown with before and after images, but the tips (in short) are:

  1. Double Subject – Don’t place your main subject side-by-side with an interesting background feature, it will split your viewer’s focus. Emphasize a single subject instead.
  2. The Look Out – If your subject is on one side of your photograph, have them look into, not out of, the frame. A subject looking out of the frame divides your photo in half, leaving a bunch of confusing negative space. If they’re looking into the frame, their gaze will balance out your composition.
  3. Tangent Lines – Avoid having anything in your background draw lines through your subject and scene. Use the lines of your photo to lead your viewer’s eye TO your subject instead.
  4. Being Lazy – Not the most obvious composition tip, but it counts: don’t be lazy. Once you’ve picked a subject, find an interesting composition. Don’t just take the easiest, most convenient photo in that moment

There you go: a few simple but effective tips that help create photos that emphasize your subject and lead your viewer where you want them to go. As Ranft says in the video, these are easy mistakes to correct, you just have to be aware you’re doing them.

To see more tips and how-tos from Evan, head over to his YouTube channel. And if you have your own simple composition tip (or common mistake) to share, drop it in the comments!

Articles: Digital Photography Review (dpreview.com)

 
Comments Off on Video: Four common composition mistakes and what to do instead

Posted in Uncategorized


Enter to Win Corel PaintShop Pro 2018 Ultimate

19 Sep

Win a $ 500 gift card and a Corel software package – PaintShop Pro 2018 Ultimate, AfterShot Pro 3, VideoStudio Ultimate X10 and ParticleShop. Boom!

Enter the Corel “Colors of Fall” photography contest today!

Over the last few years here at dPS, we’ve run very some very popular competitions with our partners to give away some of their great photographic products to lucky dPS readers.

We are lucky enough to be able to do it again now.

Three Prizes

For this competition, Corel is giving away, as the grand prize, a $ 500 gift card and a Corel Software Package. The second place winner will receive a full Corel software package and the third place winner will win a copy of PaintShop Pro 2018 Ultimate.

The software package includes PaintShop Pro 2018 Ultimate, AfterShot Pro 3, VideoStudio Ultimate X10 and ParticleShop.

These prizes are designed to help every level of photographer create BETTER pictures. Since 1989, with the introduction of CorelDRAW, Corel boasts a range of award-winning products that includes graphics, painting, photo, video and office software with a community of over 100 million strong. Each prize will be won by a different dPS reader.

Enter to Win Corel PaintShop Pro 2018 Ultimate

All three prize winners will receive the full version of Corel’s leading photo editing and graphic design software – A $ 99.99 value!

* Special Offer – All dPS readers will receive 10% discount on PaintShop Pro 2018 Ultimate

Get Photoshop-like results for less with PaintShop® Pro 2018 Ultimate including a faster, easier PaintShop Pro and an exclusive bonus collection of premium software you won’t find in Photoshop. Turn photos into works of art with Painter® Essentials™ 5, automatically correct images with Perfectly Clear 3 SE, and edit RAW photos quickly with Corel® AfterShot™ 3.

  • Edit photos like a professional
  • Create unique graphic design projects
  • Turn your photos into works of art
  • Enhance your photos instantly
  • Work with RAW images
  • Simplified user interface

Enter to Win Corel PaintShop Pro 2018 Ultimate

Enter to Win Corel PaintShop Pro 2018 Ultimate

Learn a little more about PaintShop Pro 2018 Ultimate here.

How to Win

To win this competition you’ll need to:

  1. Download a free trial of PaintShop Pro 2018
  2. Edit your favorite “Colors of Fall” photo, using PaintShop Pro 2018
  3. Post your “Colors of Fall” photo, along with a few words on how you feel PaintShop Pro 2018 Ultimate would help your photography and, of course, a few words about your “Colors of Fall” photo. It’s as easy as that!

Do this in the next 21 days and on October 9, 2017, the team at Corel will choose the three best photos and comments, and we will announce the winners in the following days.

The deadline to enter is October 8, 2017, Midnight PDT. Photos and comments left after the deadline will not be considered.

Note: By entering the “Colors of Fall” photo competition, the Entrant is providing permission to Corel to publish their photo, if it is chosen as a winner, to be utilized within media post/s by Corel announcing the winners and promoting. Entrants will be provided a full photo credit if a photo is used, and will retain their copyright.

Please click HERE for full contest rules, terms and conditions.

By best – we’re looking for people who understand photography post-processing, and how PaintShop Pro 2018 Ultimate may best suit your needs. So you’ll need to check out the product page to put yourself in the best position to win. Don’t forget that to grab a free trial download.

There’s no need to write essay length comments to win – but we’re looking to hear what you like about the software and how it would help your development as a photographer. Don’t forget to include your “Colors of Fall” photo that you edited with PaintShop Pro 2018. We encourage you to have fun and be creative!

This competition is open to everyone, no matter where you live – but there is only one entry per person. To enter – simply leave your photo and comment below.

Note: By entering the “Colors of Fall” photo competition, the Entrant is providing permission to Corel to publish their photo, if it is chosen as a winner, to be utilized within media post/s by Corel announcing the winners and promoting. Entrants will be provided a full photo credit if a photo is used, and will retain their copyright.

Enter to Win Corel PaintShop Pro 2018 Ultimate

Disclaimer: Corel is a paid partner of dPS.

The post Enter to Win Corel PaintShop Pro 2018 Ultimate by Darlene Hildebrandt appeared first on Digital Photography School.


Digital Photography School

 
Comments Off on Enter to Win Corel PaintShop Pro 2018 Ultimate

Posted in Photography


How to Plan a Street Photography Shoot When Traveling

19 Sep

Street photography is normally a very open and free-form photography genre, but sometimes because we are traveling it’s better to plan a shoot rather than relying on luck.

Fortune, they say, favors the prepared, and when all you have is a few hours in a new land, better get ready to make the most of what you’ve got. Makes sense, no? Here’s how I prepare a street photography shoot when I know time will be limited.

What to do a few days before

A few days before your shoot you will need a few apps and tools.

The first is an offline map, Google Maps allows you to save chunks of the map but some areas are off limits (I tried to save a map of Osaka and wasn’t allowed). You need to find apps that have offline maps from the get-go and download the map of the area where you are going. It sounds stupid and you might be tempted to skip this part, but when I went to Hong Kong, I wasted an hour and a half trying to get out of the subway area into the main roads.

How to Plan a Street Photography Shoot When Traveling

The second app you need is called the Photographers Ephemeris (iOS / Android). It’s designed for landscape shooters but it’s also useful for street photographers because it allows you to know where and when the sun will rise and set. It tells you what to expect in terms of light. It is a paid app, but alternatively, you can get that information for free online.

This is very useful information that you can use to predict what camera/lens you may require also. No need to get your high ISO camera if you plan to leave before the sun sets, for example.

How to Plan a Street Photography Shoot When Traveling

Planning your shoot

Here’s the deal, if you had all the time in the world, you would stroll and go wherever you feel images are calling you. But you don’t, probably one or two days is all you have while traveling. So you need an idea of where to go while leaving things open to opportunity and chance as well.

1- Check the weather

Don’t miss this step! It may sound stupid but this not only allows you to plan ahead and might tell you to bring extra protective gear. I usually check the day before because the weather is very unreliable and the forecast can change quickly.

How to Plan a Street Photography Shoot When Traveling

2- What are your numbers?

You need to know when you are arriving and leaving. For example, imagine you are arriving at 8 pm and leaving at 4 pm the next day. What I recommend first of all is to set an alarm that tells you when to start and stop shooting, it usually takes an hour to get situated so I would set an alarm for 9 pm and 3 pm the following day. You need to figure out the amount of time it takes to get from the airport to where you are staying and to return again. I personally have an alarm for when to eat too.

While this might sound tedious, it gives you the freedom to shoot because it will tell you exactly when to start and when to stop, and you do not have to worry about it. When traveling you have no familiar bearings so the alarms get you grounded.

How to Plan a Street Photography Shoot When Traveling

Consider your arrival time

The other reason for knowing your numbers is knowing what you can expect. Remember the information you got from Photographer’s ephemeris or online. When are the sunrise, midday, and sunset?

Let’s say sunset is at  7 pm and sunrise at 7 am. If you are arriving at 8 pm you would know that you will arrive at night. So if you want to shoot the morning light, you need to wake up before 7 am and you know that you will miss the sunset. This kind of information will tell you what kind of light you can anticipate. But you also need to know where you are going.

How to Plan a Street Photography Shoot When Traveling

Where to go

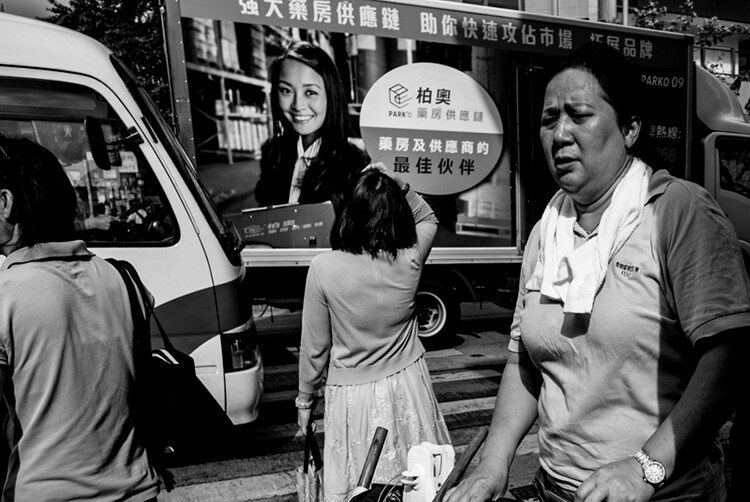
When going somewhere new, I try to find the population centers and busy streets. So I google “[city name here] busy street” look at the results, and try to find the names of the busiest streets. It’s not magical, it’s probably overshot but where there are more people, usually there are interesting shots. Here are my results using Hong Kong as an example.

How to Plan a Street Photography Shoot When Traveling

Note: This is where you want to google according to your project and style. If you have a project with businessmen, you want to find out where the central business district is for example.

When looking for populated areas, there is usually a long stretch of road that is popular that provides great opportunities. For example:

  • Market Street in Philadelphia
  • Times Square in New York
  • Dotonbori in Osaka
  • Ocean Drive in Miami
  • Gangnam in Seoul
  • Nathan road in Hong Kong

Then I map out how to go there from the airport. When you know your times and where to go, you have a clearer idea of what you can expect. All of your energy is saved for shooting and not figuring things out when you arrive. Like I said above, after sweating like a pig trying to get out of the subway area in Kowloon, Hong Kong, it zapped my energy levels greatly. I doubled down on coffee.

How to Plan a Street Photography Shoot When Traveling

Use your gathered information wisely

It takes some experience but after a while, you start to know what to expect with all the information gathered. In the morning, you know what direction to be in to shoot the sun or have it at your back. You know when stores will start opening and people go to work. Knowing where you are going will help with your expectations. For example, if there are a lot of high-rises that will create shadow areas.

Knowing what time night falls will tell you when street vendors will start to close, the light from stores will create a new light source, or when to pull out a flash if that’s your thing.

How to Plan a Street Photography Shoot When Traveling

Protection

You have to be careful. What you believe is a camera is someone else’s next meal for a month. Population centers and busy streets are opportunities for street photographers but also for street thieves. It depends on where you are going, some places are safer than others. I like the anti-theft Pacsafe brand, but you can make yourself less pick-pocket friendly if you turn your backpack and hold it against your belly.

Also, don’t flaunt your camera if you know you are going somewhere there are lots of pick-pockets. You have to be careful not to damage the camera, but some tape is perfect to uglify the camera. And as much as you can, avoid backpacks and bags that scream “camera bag”. It immediately flags you as having a camera.

How to Plan a Street Photography Shoot When Traveling

Conclusion

There you have my system for how to prepare for a travel street photography shoot. I would be the first to say that it’s better to go somewhere and leave things open, but sometimes that’s just not a good use of your time when you only have a few hours or days to shoot somewhere. It’s better to prepare and then leave things open. Be yourself, stay focused and keep on shooting.

The post How to Plan a Street Photography Shoot When Traveling by Olivier Duong appeared first on Digital Photography School.


Digital Photography School

 
Comments Off on How to Plan a Street Photography Shoot When Traveling

Posted in Photography


Kodak PixPro Orbit360 4K VR camera now on sale in the US

19 Sep

The 360-degree camera Kodak unveiled at Photokina 2016 is now available to buy in the US. The PixPro Orbit360 is a rugged, compact action camera with a pair of 20MP sensors, one on the front and the other on the back, joining by two curved 155-degree and 235-degree lenses, a microSD slot for storage, a 1″ LCD, and an included selfie stick (depending on bundle).

JK Imaging, the company behind the camera, designed the PixPro Orbit360 to be rugged for outdoor use. The camera has an IP6X dustproof equivalency, an IPX5 splashproof equivalency, a shockproof design able to withstand drops from 2m / 6.6ft when using the lens cover, and the camera is also freeze-proof to temperatures as low as -10C / 14F.

The PixPro offers users three recording modes: a fully 360-degree spherical mode, a 235-degree ‘dome’ mode, and a 197-degree 4K Ultra-Wide mode. It works with a related mobile app (Android | iOS) that makes it possible to directly upload the PixPro’s videos to YouTube and Facebook.

The camera’s full specs sheet is available here.

The Orbit360 is being sold in the US through the Kodak PixPro website and through Amazon.com. It $ 500 USD in the “Adventure Pack” (arriving later this year) and $ 550 USD for the “Satellite Pack” (available now). The Satellite Pack includes some accessories not included with the Adventure Pack, such as the aforementioned selfie stick.

Articles: Digital Photography Review (dpreview.com)

 
Comments Off on Kodak PixPro Orbit360 4K VR camera now on sale in the US

Posted in Uncategorized


Pop-Up Pavilions: 15 Playful Temporary Architecture Installations

19 Sep

[ By SA Rogers in Architecture & Cities & Urbanism. ]

Pavilions are like playgrounds for architects and designers, allowing them to show off what they can do when they really set their imaginations free. Unfettered by the typical limitations of a permanent structure, they can experiment with new materials and processes, potentially producing innovations they can apply to other structures. These pavilions are often subversive in the urban environment, too, taking over public spaces and giving them back to the people or creating micro housing that falls within grey areas of the law.

Transforming Street Cinema in Venice by Omri Revesz


Created for a V-A-C Russian contemporary art foundation exhibition at the Venice Film Festival 2017, this pop-up cinema celebrated the 100th anniversary of the start of the Soviet Revolution. The modular wooden structure is collapsible, its design inspired by the logic of Russian constructivism. Its wooden frame is on wheels set into rails so it can expand to make more space for performances, or contract to create a darker, more intimate setting.

Algae Dome in Denmark by SPACE10

IKEA’s ‘Future living lab,’ known as SPACE10, debuted its ‘Algae Dome’ in Denmark a couple weeks ago, demonstrating how we might be able to grow “the supercrop of the future.” Designed by a team of engineers, the dome-shaped structure supports a network of transparent hoses, regulating their sun exposure so algae grows in the water inside them. The dome produced 450 liters of microalgae in just three days of its demonstration, which SPACE10’s chef crafted into such foods as ‘spiraling chips.’

Super Hot Pavilion in Bucharest by Morag Myerscough

Designed for the 7th edition of the ‘Summer Well Festival’ in Bucharest, Romania by artist Morag Myerscough, the ‘Super Hot’ pavilion is envisioned as a fun and whimsical place to stage and take in performances. There’s space within the structure to hang out, dance, play or zoom down a slide.

Wave of Buckets in Mexico City by Factor Eficiencia

Hundreds of painter’s buckets are connected into a walkable structure that curls up into a wave at either end, occupying the central Alameda Park in Mexico City. Designed by Factor Eficiencia and 5468796 Architecture, the installation uses the bucket as a symbol of liberation of public spaces. In Mexico, it’s common for entrepreneurs to use buckets to block off certain areas of the city so they can aggressively charge for parking.

Urban Camouflage Pavilion in London by PUP Architects

PUP Architects wanted to disguise their pop-up, entitled ‘H-VAC,’ as ordinary rooftop mechanical equipment. Do you think they pulled it off? The designers are taking advantage of UK building legislation that makes it legal to install rooftop equipment without planning permission; they believe that if you can sufficiently disguise rooftop addition as infrastructure, thousands of new micro dwellings could be added to London and other cities. The temporary structure is clad in waterproof tetra-pak shingles and includes two rooms.

Next Page – Click Below to Read More:
Pop Up Pavilions 15 Playful Temporary Architecture Installations

Share on Facebook


[ By SA Rogers in Architecture & Cities & Urbanism. ]

[ WebUrbanist | Archives | Galleries | Privacy | TOS ]


WebUrbanist

 
Comments Off on Pop-Up Pavilions: 15 Playful Temporary Architecture Installations

Posted in Creativity