RSS
 

Archive for February, 2017

Crash drones over and over again with Microsoft’s open source simulator

17 Feb

Microsoft has released a free, open source simulator to help engineers test drones in a photo-realistic environment. The AirSim, as it’s called, offers a space for developers to run simulated flights again and again, gathering data and seeing how a drone’s onboard perception systems react to a complex environment. Naturally, that’s a lot cheaper and less time-consuming than studying repeated real-world drone crashes.

The cross-platform software supports manual or programmatically controlled flights, and thanks to its open source nature, data gathered from test flights can be easily used to create new algorithms to guide drone operation. There you have it – hundreds of simulated drone crashes aren’t just amusing to watch, they may be actually useful.

The code is available for download via GitHub.

Articles: Digital Photography Review (dpreview.com)

 
Comments Off on Crash drones over and over again with Microsoft’s open source simulator

Posted in Uncategorized


How to Develop a Unique Style for Your Photography

17 Feb

In today’s world, everyone has a camera. It may be as simple as the camera on their phones, but they still have one. This means that millions, maybe billions of people are taking photos every day. What does that mean for you? It means you have to compete with all those to make your images stand out. You have to find a way to be different, but how? The best way is to develop a style that is uniquely yours.

When people look at your work they instantly know it is yours, or someone trying to copy it. Your style is how you become known and how you make yourself stand apart.

How to Develop a Unique Style for Your Photography

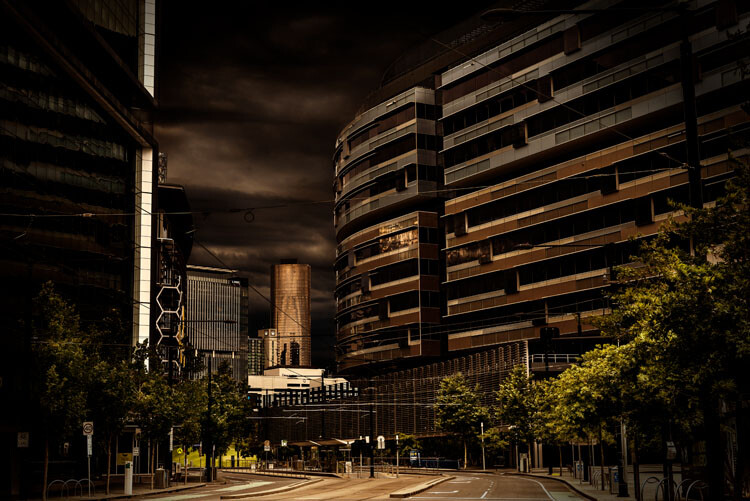
Looking north along the Harbour Esplanade.

What does having a photographic style mean?

Basically, that you do something to your images that make them different, whether it is done when the shot is taken or in post-processing, or maybe both. Whatever it is that you do, you want people to know straight away that the image is yours before they see the name. There should be a similarity between all your images and they look like they belong together.

It almost goes against the grain of what humans are like and our need to conform. If you want your images to stand out you have to find a way to make them different to what everyone else is doing. Think about how you can work that is not the same. It can be about photographing the same thing, but you do it your way.

When I was in art school we were told over and over again that nothing was original anymore. Anything that you wanted to do had already been done. It is true in most cases, but that doesn’t mean you shouldn’t try to find a way to work that could be different.

How do you develop a style?

Ask any artist or photographer that has their own distinct style and they will give you a different answer. For most, there will be something that drives them to create work in a particular way.

There are four main things to consider when developing your own unique style; why you are doing the work, the subject matter, the technical process, and post-processing. Let’s look at these individually and see some artists who work that way.

How to Develop a Unique Style for Your Photography

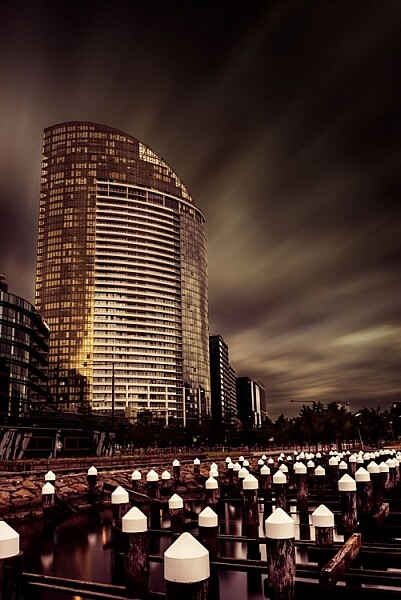
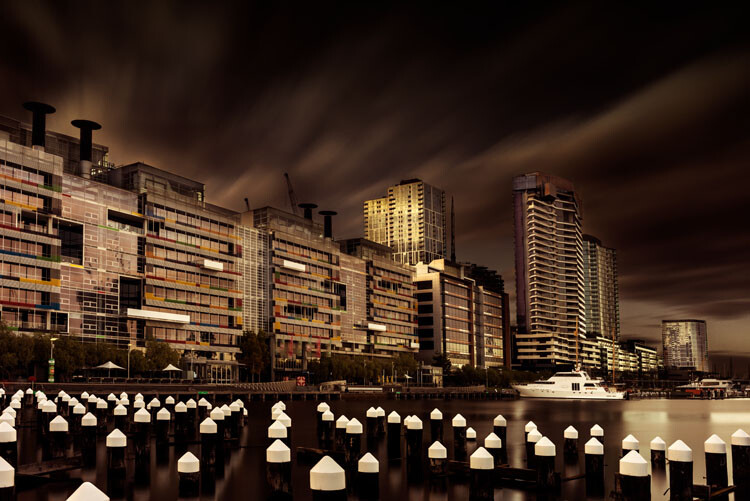
A long exposure of a building in the Docklands.

Why are you doing it

This is a bit like an artist’s statement in that you know what you are trying to do with your images. Many artists work this way. They understand what they are trying to achieve and have a look or story they are trying to get.

Australian artist/photographer Tracey Moffat looks at indigenous people and culture, and how they are understood culturally and socially. She says she is more interested in creating her own realities than dealing with reality. From the start, Moffat has an idea of what it is she is striving for.

My own work starts with the idea of what would the world be like without humans. I find places like Pripyat, the worker’s town that was evacuated after the Chernobyl nuclear disaster in 1986, fascinating. It has not been lived in since, and there is a quietness in the images that I find quite appealing. I try to photograph places with no people in them to see if I can imitate that silence. At the same time, I like to create a world in my images that doesn’t seem quite real.

How to Develop a Unique Style for Your Photography

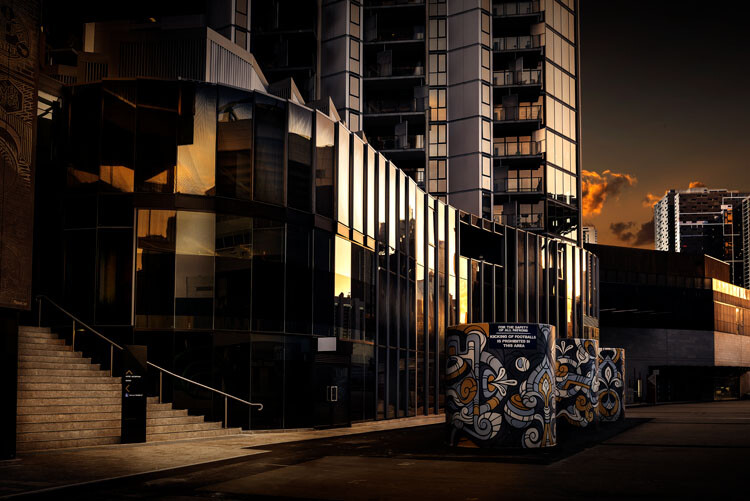
Off the street at the entrance of a building.

The subject matter

Usually, someone who is developing a style, or has one, will have a certain subject matter that they stick to – it might be mountains, the night sky, or waterfalls. It will be what they want to photograph and they tend to only do that thing. While some can be that strict with themselves, most photographers have a few things they like to photograph. However, that doesn’t mean that all the images will fit within that same style.

One of my favorite painters, Rick Amor, does a lot of architectural paintings. He creates his own realities in fictional cities, but he also likes to paint scenes from the beach and he does a lot of self-portraits. There is variety in his work, and each has its own style.

It could be said that I like architecture the most, but really, what interests me is the hand of man. I find anything that man has built or destroyed interesting. I tend to concentrate on cities, perhaps because I live in one, and it is easy to get there to take photos. However, if you were to look at my Instagram page you would see that I also like to photograph anything with water in it. Many images do not fit my subject, but you can’t always do art images and I do like photographing other things from time to time.

How to Develop a Unique Style for Your Photography

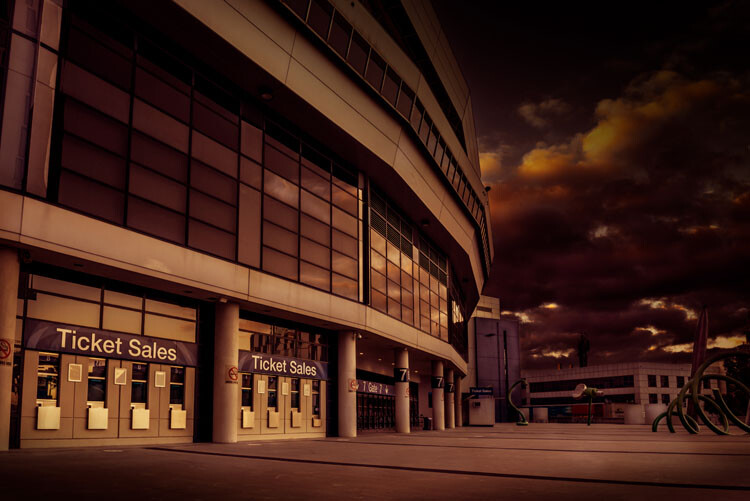
Etihad Stadium closed.

The technical process of taking images

The best way to get your images is knowing how to use your camera and getting the best out of it. There are photographers that rely on their cameras to give them what they want and the technical details become very important. The art of photography comes from the technical aspects.

If you are a technical photographer then you would be looking for a specific technique that you can use that will help give all your images the same feel. What that technical aspect will be is completely up to you. There are a lot of photographers that are striving for an image that is very technical, and the creative part isn’t necessarily that important.

You will find that many landscape and nature photographers are more technically driven. Matty Smith, an Australian underwater photographer, does his best to get everything in camera. He likes to reduce how much post-processing he has to do, therefore it is very important to him that he gets what he wants while out in the field, or under the water.

I am not a technical photographer. I don’t let the technical aspects of photography dictate my image. That doesn’t mean I don’t know them, they just don’t mean as much to me.

Using Post-processing

You will find that technical photographers don’t do a lot of post-processing, while others will use it a lot. There are no rules about what you should use, but you will find that many photographers that have really distinctive styles get their look through photo editing.

Brooke Shaden is primarily an artist who uses photography to create her own look. She does portraits in different settings and often uses costumes for them. The thing that sets her apart is her post-processing. She has a distinctive style that is hers. You will see lots of images that are similar, but they are usually people who are trying to imitate what she does.

My work is mostly created with post-processing. I have things I like to do to images, and playing in Adobe Photoshop is as much fun to me as taking the photos. I spend far more time processing than I do taking the images. I like to play with the light to see what I can do with it and for me, an image is complete when it looks almost like a movie still, not quite real.

How to Develop a Unique Style for Your Photography

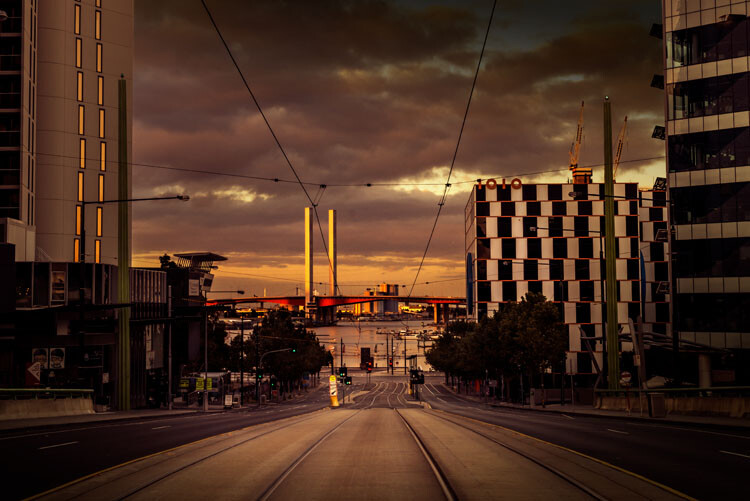
La Trobe Street looking to the Bolte Bridge.

Artists who have their own style

There are so many photographers that have very distinctive styles and if you want to develop your own style you should look at their work to see what they do. See if you can find inspiration.

Here is a list of photographers that have, at some stage, influenced my photography and helped me to develop my own style.

  • Joel Grimes
  • Peter Eastway – see also: The Magic of Antarctica with Special Guest Peter Eastway
  • Kristy Mitchell
  • Joel Tjintjelaar
  • Julia Anna Gospodarou
  • Art Wolfe

There are a few for you to start with.

How to Develop a Unique Style for Your Photography

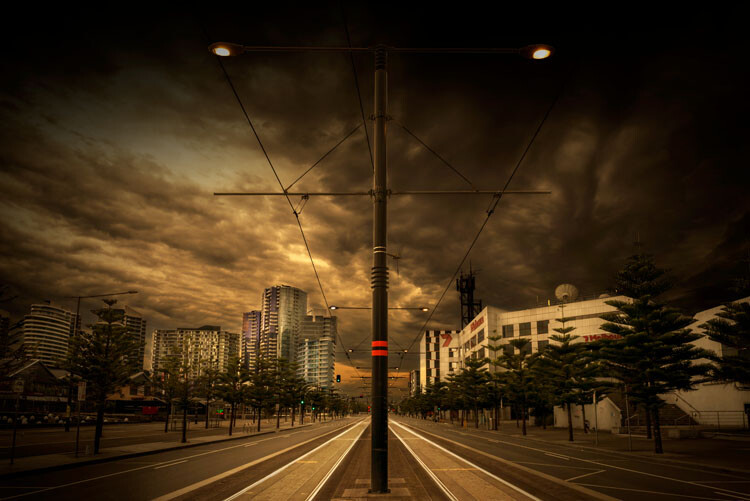
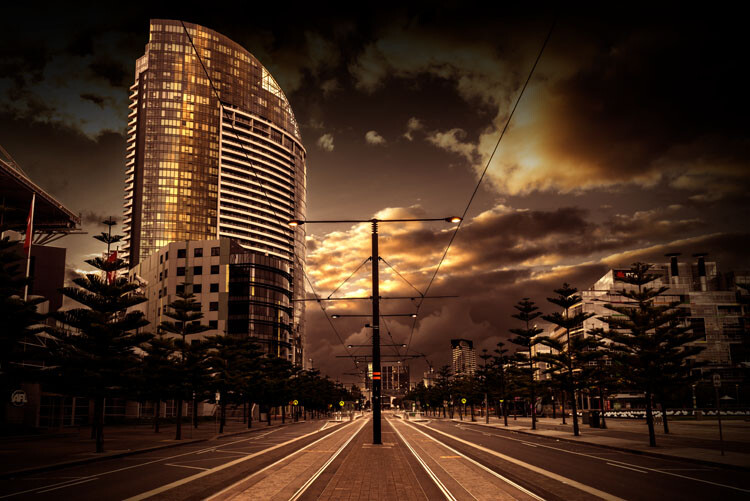
The Harbour Esplanade looking down the tram tracks.

Should you copy

It is so easy to copy what another photographer does, especially if they teach somewhere, but should you really copy what they do? There have been photographers who have done that and everyone just says, “Oh they are copying so and so.”

It is okay to copy what a photographer does to learn some new skills, but ultimately if you want your own style, one that is uniquely yours, then you need to work out what to do with your own images.

I learned a lot about developing a style and working as an artist through my fine arts degree. I also watched a lot of videos on how other photographers created their work. I would pick up tips and then see if I could apply them to my own work. I experimented with what they did so I could use it, but also so it would look different.

How to Develop a Unique Style for Your Photography

Near the end of Collins Street.

How to develop your own style

Go through all the steps here and see which apply to you. Work out what you want your work to be about and how you can get a look that is you, or so others know it is yours without having to look for a name.

Remember, that for your style to be uniquely yours, it needs to be different to what others are doing. It can be something simple, or perhaps more complicated. It won’t happen straight away and may take you quite a while to develop your own look.

You might find that you start one thing, and then change. It is normal, and in the beginning, it will change quite a bit. It will also evolve over time. What I am doing now is quite different to what I was doing 20 years ago, or even 10 years ago. Some might say that it is has changed a lot in the last two to three years.

As you start thinking about it, you may also find that you already have a style and are not even be aware of it, which is what happened to me. It took me a while to see what my style was, though many others could see it before I did. However, I know it now and understand it better.

To see how you progress places like Instagram can be perfect. You see all the work there and it is easy to look at the images together and over time.

Finally

Just experiment and try things. You never know where it will end up. Also, don’t always listen to others, especially for approval, do your own thing and eventually others will come around to it.

Have you developed a unique style for your photography? How did you do it? Please share your comments and thoughts below.

leannecole-developing-your-style-44

A long exposure over the water at Docklands.

googletag.cmd.push(function() {
tablet_slots.push( googletag.defineSlot( “/1005424/_dPSv4_tab-all-article-bottom_(300×250)”, [300, 250], “pb-ad-78623” ).addService( googletag.pubads() ) ); } );

googletag.cmd.push(function() {
mobile_slots.push( googletag.defineSlot( “/1005424/_dPSv4_mob-all-article-bottom_(300×250)”, [300, 250], “pb-ad-78158” ).addService( googletag.pubads() ) ); } );

The post How to Develop a Unique Style for Your Photography by Leanne Cole appeared first on Digital Photography School.


Digital Photography School

 
Comments Off on How to Develop a Unique Style for Your Photography

Posted in Photography


Silkypix Development Studio Pro8 released with new clarity slider and B&W controls

17 Feb

Japanese software developer Ichikawa Soft Laboratory Co. has released a new version of its Silkypix Development Studio Pro application that introduces a number of new tools and functions. Version 8 of the Raw adjustment and conversion program adds a clarity slider to the tool-set, that can be used to emphasize or smooth-out differences in neighboring tones to deliver more or less tonal impact in an image.

Users can also now take more control of black and white conversions using the Monochrome Controller Function that allows a range of colors to be lightened or darkened to simulate the use of colored optical filters over the lens of a camera loaded with black and white film. For selective enhancements a brush tool has been added to the Partial correction tool kit which the company says will make it easier to create rounder selection areas for adjustment.

Those who like to shoot underwater will be glad of a dedicated tool for correcting the color of images recorded in a range of sub-aqua conditions which reduces the impact of color-loss and shift at various selectable depths. Silkypix also now allows a single license to cover three computers and the company says it has cleaned up the user interface to make it more straightforward to use.

The program, and variations on it, is favored by a number of camera brands as an in-the-box raw converter given away with their cameras, but the full version can be purchased on-line from the manufacturer for 22464 JPY (approx. $ 200/£160). A 30-day free trial is also available. The program supports raw files from 613 cameras, it is claimed. For more information see the Silkypix website.

Press release

Product release announcement, high quality RAW development software high-end version “SILKYPIX Developer Studio Pro8 download version”

The product concept of SILKYPIX Developer Studio Pro8

“SILKYPIX Developer Studio Pro8” is the latest development in the SILKYPIX series, aiming at “enhancement of functions for finishing photographs that meet the photographer’s expectations” and “a comfortable and enjoyable RAW development software.” In this version, we have added “Clarity” and a “Brush” to the “Partial correction tool,” which have been requested by many customers. In addition, it has been equipped with a “Monochrome controller” specialized for monochrome adjustments and a “Underwater photo controller” specific for underwater photography. This RAW development software will be a strong support so you can create your own works.

SILKYPIX Developer Studio Pro8 major features

Clarity adjustment
A “Clarity” parameter has been added to the “Tone” adjustment item to adjust the luminance level of each pixel based on information from surrounding pixels. Increasing the effects of “Clarity” will make it possible to finish the details of the subject in a bold picture, so it is effective when you want to finish bold scenes with a hazy surrounding. In contrast, by lowering the “Clarity” you can finish with a soft ambience like with a soft focus, so you can use it to effect with women and children’s photography.

A Brush added to the Partial correction tools
A “Brush” that makes it possible to select correction areas more freely to “Partial corrections” was added in “SILKYPIX Developer Studio Pro7.” Using the “Brush” makes corrections easier even in difficult areas of “circular correction filter” and “gradual correction filter.” More creative adjustments have become possible by making partial corrections that do not take the form of the subject.

Strengthening the Monochrome Controller Function
A Monochrome Controller function has been installed specialized for adjusting monochrome pictures. Eight kinds of “Color filters” can be selected, and it is possible to reproduce filters when shooting monochrome photographs on your screen. In addition, since the “Lightness” can be adjusted for each hue, you can make a thorough finish to your black and white photographs. Even beginners of black and white photography can easily switch between color and monochrome images after applying parameters in the preview display, so you will be able to intensify the understanding of effects on monochrome photographs due to changes in color.

Underwater Photo Controller Installed as a Function for Correcting Dedicated to Underwater Photography
A function from “SILKYPIX Marine Photography” for RAW development software dedicated to underwater photography has been installed into “SILKYPIX Developer Studio Pro8” called Underwater photo controller. With this Underwater photo controller, you can correct the bluishness that is difficult to adjust with the normal white balance by using “White balance for underwater.” It also features “Color restoration,” which actually reproduces colors lost in water, as well as “Muddy reduction” to eliminate murkiness in water.

Focus Peaking Function Installed
A Focus peaking function has been installed to detect the parts focused on from adjacent pixels in the image, and to display them with colors added to those parts. With this function, you can clearly check the area of focus.

Improved User Interface
We have improved the design to be clean and simple to make it possible to concentrate on adjusting images. In addition, the layout has been changed to make it easier to understand for those using adjustment functions for the first time. Also, you can now change the background color of the preview display according to your preference.

One License Can Be Used on Three Computers
In recent years, more and more people own multiple computers, such as desktops, laptops, tablets, etc., sometimes using both Windows and macOS. With such changes in the industry, “SILKYPIX Developer Studio Pro8” is now available for use on three computers with one license.

New function / Improvement list

  • Tone – Clarity slider addition
  • Partial correction tool – brush addition
  • Monochrome controller
  • Underwater photo controller
  • Warning indication – Focus peaking addition
  • Preview display Select background color
  • Choose Rating Display / Non-display under the thumbnail display
  • Improved User Interface
  • One License Can Be Used on Three Computers

SILKYPIX Developer Studio Pro8 download version (Win/Mac) license price

Regular list price
New license
28080 JPY (tax included)

Upgrade license
Customer who already has following license can purchase one license for your one product license.
Upgrade target products:
SILKYPIX Developer Studio Pro, Pro5, Pro5 for Panasonic, Pro6, Pro7, Pro7 for Panasonic
11232 JPY (tax included)
Upgrade target products:
SILKYPIX Developer Studio 3.0, 4.0, 6, 7
16848 JPY (tax included)

Special price for bundle products
Customers for (bundle version) SILKYPIX series which were shipped with the cameras and lenses
22464 JPY (tax included)
[Target products]
SILKYPIX Developer Studio SE version
SILKYPIX Developer Studio 4.0 for TAMRON
SILKYPIX Developer Studio 4.0 for CASIO
FUJIFILM RAW FILE CONVERTER powered by SILKYPIX
SILKYPIX Developer Studio 3.0 for PENTAX or LE
SAMSUNG RAW Converter

Articles: Digital Photography Review (dpreview.com)

 
Comments Off on Silkypix Development Studio Pro8 released with new clarity slider and B&W controls

Posted in Uncategorized


Archos to make Kodak-branded Android tablets

17 Feb

It appears that the Kodak brand name is about to appear on more mediocre consumer electronics products. Ever since the company went bankrupt, what is left of the legendary imaging powerhouse is making at least some money by licensing the iconic brand name to anyone who wants it. A little while back, the Bullit Group launched the Kodak-branded camera-centric Ektra smartphone, and the Kodak website lists a whole bunch of other consumer electronics items that are manufactured by various companies under license.

“We are very proud to become one of Kodak’s licensees to jointly develop their brand into the tablet world. We truly look forward to putting these devices into people’s hands”, said ARCHOS CEO, Loïc Poirier.

Now Kodak and French electronics maker Archos have announced that the latter will launch a line of Kodak-branded tablets bound for the European market. Archos is best known for its budget and entry-level devices, so we should not get our hopes up of seeing Kodak-branded high-end tablets, but according to the joint statement the tablets will combine “chic design” and the “latest technologies” with pre-loaded photo and video apps for creative users. There will also be 8MP rear cameras and 3G connectivity for easy sharing on the go.

The new tablets will be available in summer 2017 and, although no pricing information has been released, we’d expect them at the budget end of the market.

Articles: Digital Photography Review (dpreview.com)

 
Comments Off on Archos to make Kodak-branded Android tablets

Posted in Uncategorized


An Apple a Day Keeps Creativity Awake

17 Feb

Do you find yourself lacking inspiration? Without new ideas? Or just unsatisfied with your average looking images? Pablo Picasso – the famous and talented artist – once said, “Inspiration exists, but it has to find you working.” This exercise is designed to help you achieve exactly that, and awaken your creativity.

An old English proverb says, “An apple a day keeps the doctor away”. So following this principle I came up with a routine for your photographic health. Something to keep you busy so that inspiration can find you working, as Picasso suggested.

Step 1: Photograph an apple

An Apple a Day Keeps Creativity Awake

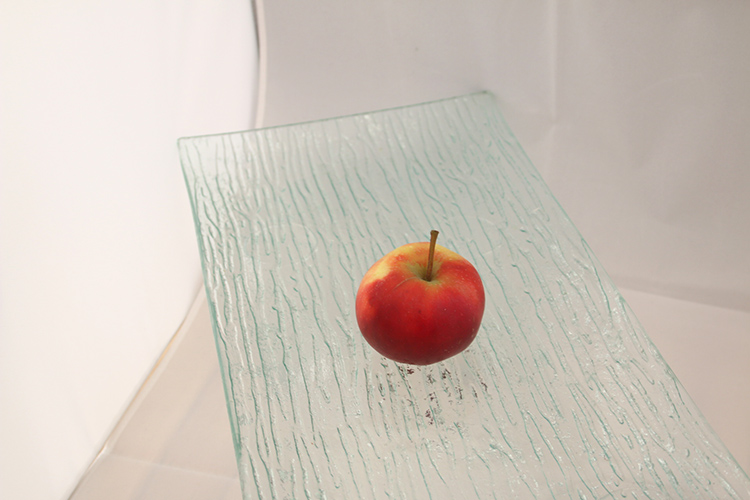
Why an apple? Well, because I found that many times the excuses that we use are linked to the idea that we don’t have an interesting subject, or a nice-looking one, or an expensive one, in other words something worthy of photographing. So don’t procrastinate at the market looking for the perfect red shiny apple that looks like one from a fairy tale, just get an apple. An apple is something we all have access to. It’s not particularly expensive, and as you will see, also very versatile.

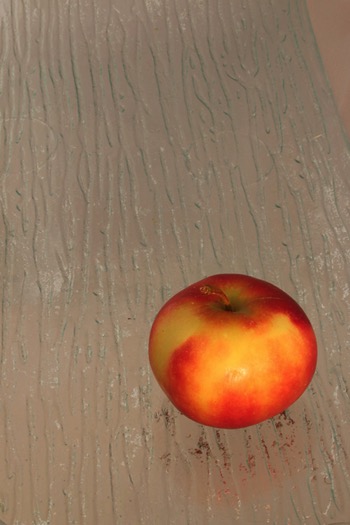
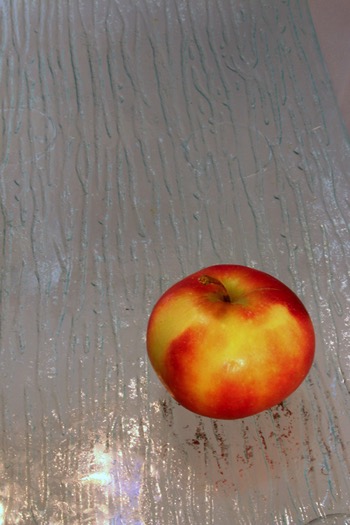
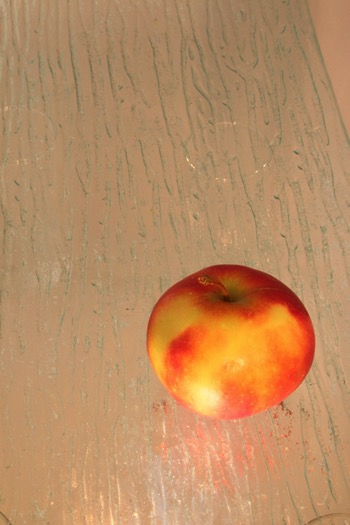
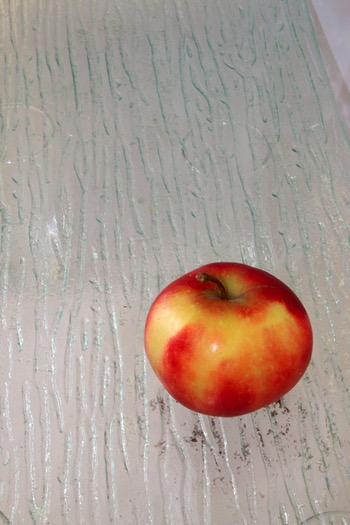
The first part of the exercise is to photograph your subject, in this case the apple without altering it. In other words, you are the one who is going to adapt in order to get the most out of it. For now you don’t have to worry about the technical part, so you can just leave your camera on automatic mode and shoot away. Photograph your apple from the top and from the bottom; from afar and in macro; with a wide-angle lens and a telephoto – anything you can think of.

Once you have done this and you can’t think of any other ways to photograph the apple, push yourself to do at least two more. Yes, it may take some time to come up with them, but trust me, those will be the best ones! Why? Because photograph has been around for almost two centuries, and lately thousands of images are done everyday, so most likely the first images you can come up with, are also the same ones everybody thinks about. That is why you need to come out of your comfort zone and exercise your photographic mind and eye.

An Apple a Day Keeps Creativity Awake

An Apple a Day Keeps Creativity Awake

An Apple a Day Keeps Creativity Awake

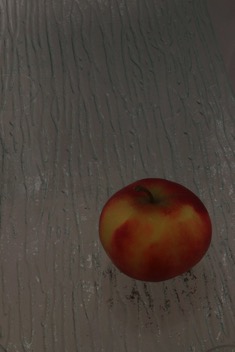
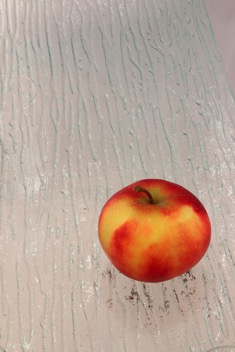
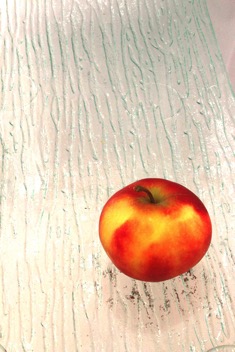
As you can see, the color and exposure on each one is different. This is because the camera was set on automatic mode. This way the settings adjust to the information it’s receiving. If most of the frame is covered by the warm colors of the apple it sends different information than a frame mostly covered by the white background. This is why the next step is very important.

Step 2: Put your technique to good use

Now that you have found the best angle for photographing your apple, you can move on to the next level – make it professional!

When you had your camera on auto mode it made the decisions by itself. Let’s be honest, with the cameras that exist on the market today, it’s very easy to get a well-exposed photo. However, what I always say to my students is, “We learn photography not to make it good, but to make it our own.”

If you use the automatic mode of your camera, it might come out a good photo, but it won’t be your photo, because you didn’t make any of the decisions. In this part of the exercise you need to put your photographic knowledge – no matter how much that is – to good use.

If you know about bracketing (the process of making the same photo with different exposures) then do that.

An Apple a Day Keeps Creativity Awake

Underexposed

An Apple a Day Keeps Creativity Awake

Correctly exposed

An Apple a Day Keeps Creativity Awake

Overexposed

If you know about lighting, then play with your lights. Use a direct flash to create a hard shadow for one image, then use a flash and a reflector to soften the shadow, and so on. Even if you don’t have a professional set of lighting gear you can always play with artificial light from lamps and natural light from windows. The point is to use your tools and techniques to make your photo the way you want it to be and not just another snapshot.

An Apple a Day Keeps Creativity Awake An Apple a Day Keeps Creativity Awake

Step 3: Get creative

Now it’s all about the finishing touches. It’s always important that you are able to produce a technically good and unique photo of an object/subject. But how about getting a bit more creative? Try to tell a story, to set a mood, or to use the apple as a metaphor, anything goes! (Image basket.jpg)

An Apple a Day Keeps Creativity Awake

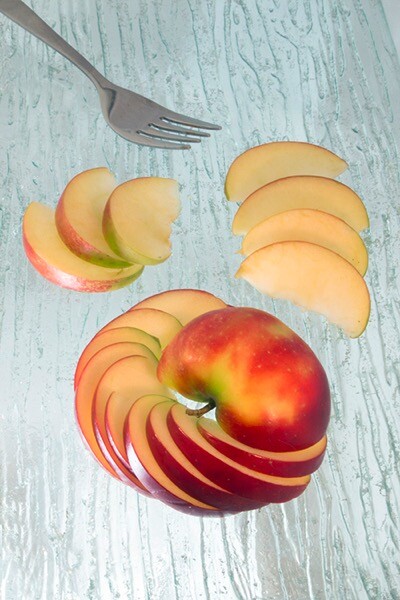
Once you have your best angle and your light and settings selected, it’s time to decide what you want to say with your photo. Do you want your photo to be yummy and inviting? Maybe cut the apple and plate it on a beautiful table. Do you want it to be about health and nutrition? Maybe add some other fruits to the set.

If you want to push yourself a little bit more then try to tell a story, maybe make a photographic series. Think about Snow White or Adam and Eve, in both cases the apple plays an important role. Do you want it to be conceptual? Think about life and death for example using a fresh and a rotten apple. You can do anything you want just by adding some elements, add some context, and get creative!

Today for me it was a healthy, ready-to-eat snack!

An Apple a Day Keeps Creativity Awake

Conclusion and what’s next

Great work! I hope you enjoyed your apple for today. Tomorrow maybe go with an orange, or a dog, or a self-portrait. You can apply this three steps to everything, or stay with the apples and see how far you can get, the important thing is to exercise every day.

googletag.cmd.push(function() {
tablet_slots.push( googletag.defineSlot( “/1005424/_dPSv4_tab-all-article-bottom_(300×250)”, [300, 250], “pb-ad-78623” ).addService( googletag.pubads() ) ); } );

googletag.cmd.push(function() {
mobile_slots.push( googletag.defineSlot( “/1005424/_dPSv4_mob-all-article-bottom_(300×250)”, [300, 250], “pb-ad-78158” ).addService( googletag.pubads() ) ); } );

The post An Apple a Day Keeps Creativity Awake by Ana Mireles appeared first on Digital Photography School.


Digital Photography School

 
Comments Off on An Apple a Day Keeps Creativity Awake

Posted in Photography


7 Tips for Overcoming Nerves When Doing Street Photography

17 Feb

Good street photography can sometimes look deceptively easy to do yourself. All you have to do is be in the right place at the right time, get a little lucky, and bam – you have an incredible, one-of-a-kind photograph.

Astor Place Newsman, New York Street Photography

However, the reality is much more difficult than that, and it’s something that can surprise photographers when they try it. Suddenly, everything is moving so fast. You look around, but you don’t actually see any amazing moments. Then when you do capture something that you thought looked good, it didn’t turn out anything like you imagined.

These are all things that take time and practice to improve at, but the hardest obstacle for people to overcome with street photography is fear. Suddenly, you’re in the middle of it all. People are looking at you. Even the people who you aren’t photographing are watching from the side. You freeze, you have trouble putting the camera to your eye, and it doesn’t feel as fun as it should because you are so nervous! Fear stops too many people before they start, and this is a shame because it’s a very enjoyable type of photography.

Here are some tips to help you get over those street photography fears so you can enjoy yourself out there.

1. Think about what you will say if someone stops you

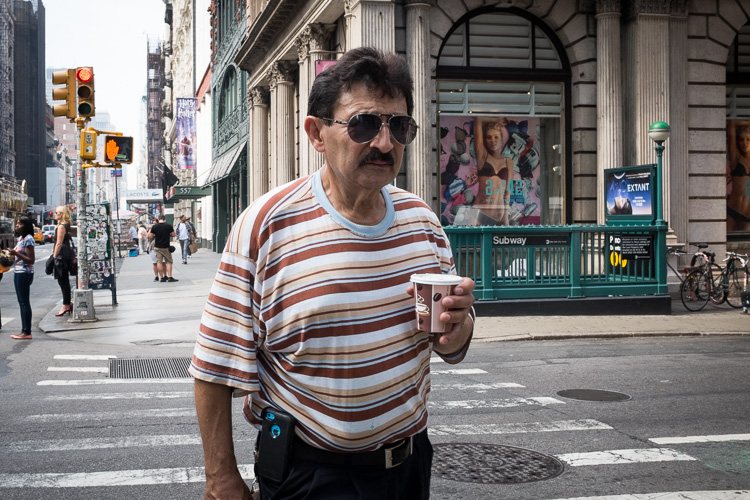
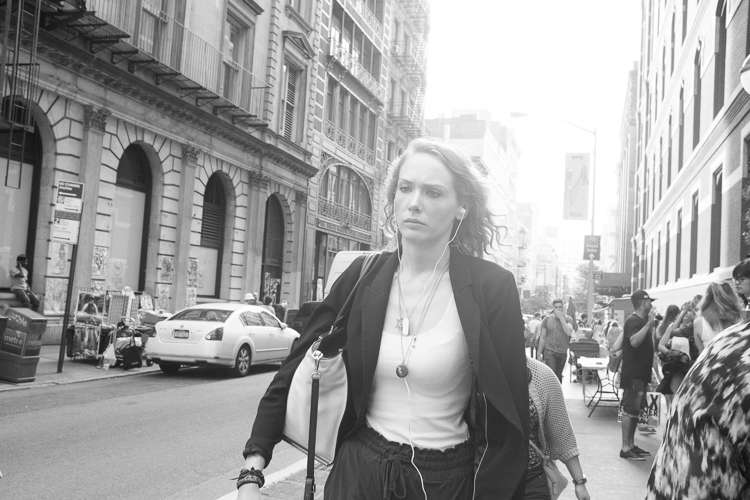
SoHo, New York Street Photography

The thing that will make you the most comfortable out there is knowing that you have a plan if someone stops you after you have taken their photograph. This rarely ever happens to me, but when it does, I feel confident in how I can handle myself.

First of all, if someone notices me, I always smile. Acting confident and like you’re not doing anything wrong will make the subject more comfortable. If you’re sneaky and look sheepish, they will see that you look guilty and be much more inquisitive.

Then if someone asks you why you took their photograph, tell them the truth. I say that I am a photographer doing a cultural project on the people and streets of New York, and I thought they looked fabulous. Flattery will help you get out of most situations. Or tell them you are a student. Offer to email them the photograph. Explain that you find people and fashion and things of that nature just as interesting as the buildings. If the person then continues to seem uncomfortable or angry, apologize and say that you didn’t mean to make them uncomfortable and you are happy to delete the photograph. That will diffuse most situations.

2. Choose your subjects wisely

SoHo, New York Street Photography

If someone looks angry, stressed, scary, or in any way that makes you uncomfortable, you are NOT to photograph them. More subjects will come soon after. By picking the right people, you will make things much easier for yourself, and that will also make you feel more comfortable.

3. Go to a busy place and let people come to you

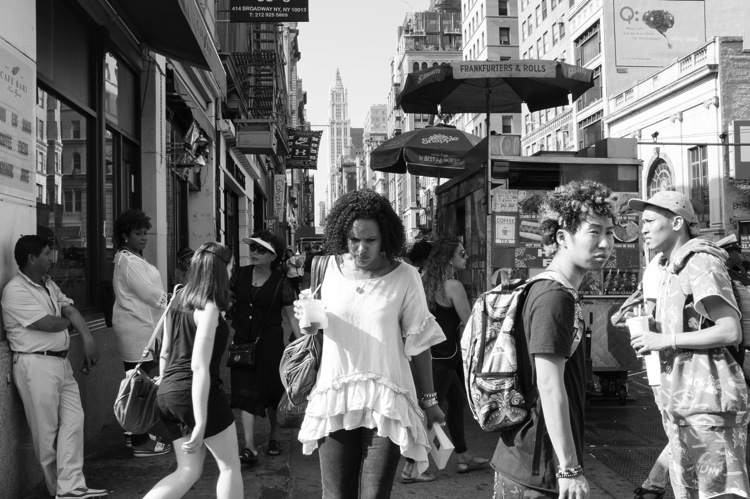
Canal Street, New York Street Photography

This is one of my favorite tips. While street photography can and should be done in areas without many people, one of the best things you can do is to photograph where a lot is going on. Go to busy street corners, markets, or festivals. Go at times when things are happening. Follow the action.

This will immediately ease your fears somewhat. In those areas, people will be too busy to notice you and will be used to people with cameras. It will give you time to practice and to get comfortable with the act of shooting street photography.

Take this a step further, by picking a spot and letting things happen around you. You do not always have to walk around to search for a photograph. By staying in the same location, you will be quicker to notice moments as they occur, you will already be in position, and people will be entering your personal space instead of you entering theirs. This will help to make you feel a lot more comfortable.

4. Try some street portraiture

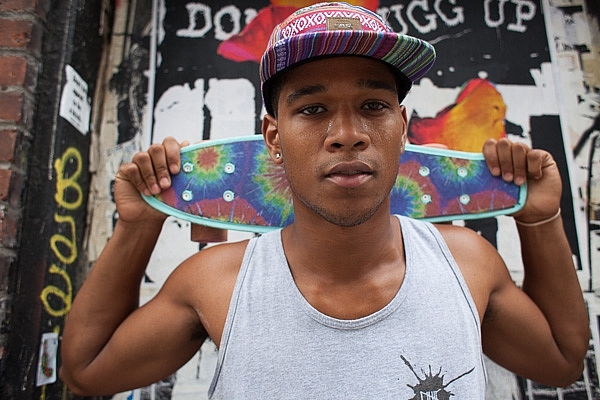
Skater, Street Portrait, New York Street Photography

Start out the day with some street portraits. Stop someone, tell them they look great and that you’re doing a project on people in the area, and ask if you can take a few quick photographs. Some photographers will then just capture a couple quick photographs, mumble a thank you, and run off, but I want you to interact with them.

Make conversation as you photograph and capture them from a couple angles. Compliment them and make their day. Doing this will make both you and the subject happier, and it will help remove the creepy feeling that can happen when shooting street photography.

5. Learn to be candid

No matter how comfortable you become shooting in these environments, it is important to learn to act candidly. If everyone stops you to ask if you took their photograph or if everyone notices you right away to ruin the moment, you will not get anywhere. Learning to act candidly will make you feel much more comfortable.

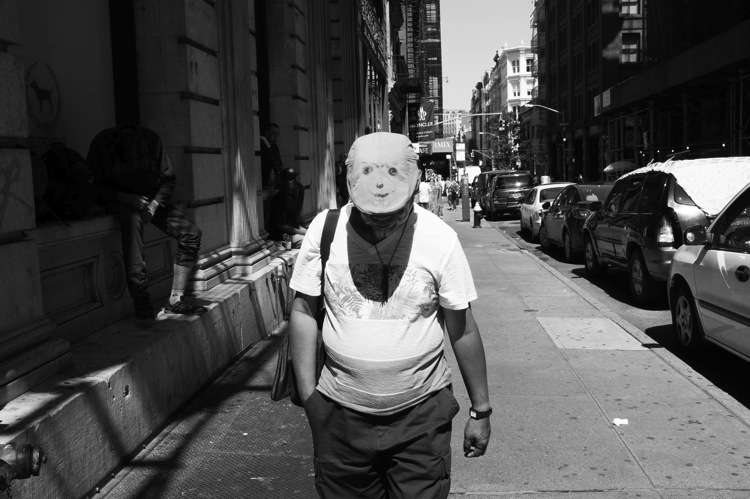
SoHo, New York Street Photography

The camera snap

The most important tip, probably in this whole article, is what I call the camera snap. As photographers, one of our instincts is to slightly take the camera away from our eye right after we take a picture. Everyone does this, and this is how people notice that you have taken their photograph – it’s the main thing that tips them off. So instead, take the photograph and keep the camera to your eye as they pass completely by. This will make them think that you are just photographing the background and that they got in your way.

This way of shooting works fantastically well in busy areas, but in areas with fewer people, it can help to change it up a bit. Instead of aiming the camera at a subject right away, this time, aim the camera at a building above or a scene to the side of them. Then at the last second, act like you took the photograph and are moving your camera down, take the picture of them, and move on.

It cannot hurt to play a role as well. Some of the best street photographers are fantastic actors; they have a way of looking the dumbest with their cameras. They furrow their brow and act like they don’t know how to use the camera at all, are testing it out, and don’t even notice that the person is right where they are photographing. Some even act like tourists. It’s hilarious and it works.

6. Don’t shoot from the hip

SoHo, New York Street Photography

Shooting from the hip is an important practice in street photography. I do it about 30-40% of the time, but I do it with my camera right below my eyes, looking like I’m standing there waiting for something to happen instead of putting the camera very low down. If you are just starting out with street photography, particularly with a large DSLR and zoom lens, this will be your first instinct.

It can be important to learn to shoot from the hip, particularly for the moments that you really want to keep candid, but I suggest staying away from it at first. It can become too much of a crutch and it can make you more uncomfortable in the long-run as you will always feel like you are sneaking around. You need to learn to put the camera to your eye at first to both get good photographs and to improve your confidence. Force yourself to shoot with your camera to your eye as much as possible, and as you get more experienced, then you can experiment with shooting from the hip some of the time.

7. Repetition

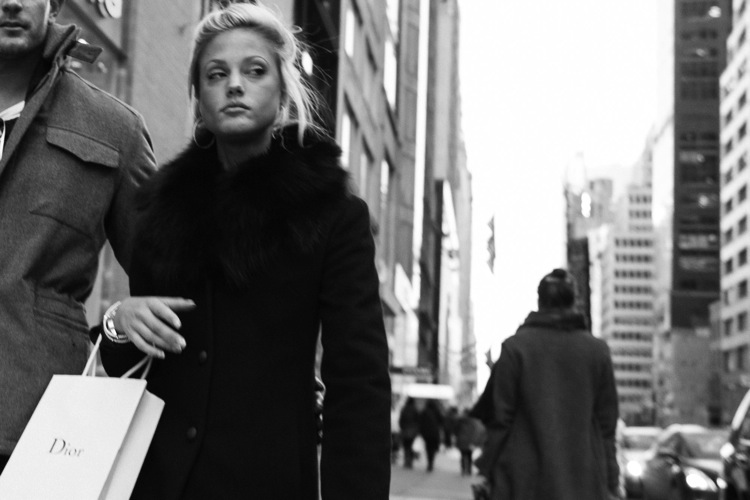
5th Avenue, New York Street Photography

Nothing will get you more comfortable out there than shooting frequently. Even if it is only ten minutes here or there, try to not go too long without photographing. These skills are like any other in that you will quickly get rusty, and this will make you feel more self-conscious. Turn your photography into a routine, even if it is only once every two weeks, and you will become much better.

Now that you’ve read all of this, just get out there and go for it. Put a smile on your face, enjoy the walk, and have fun with it!

googletag.cmd.push(function() {
tablet_slots.push( googletag.defineSlot( “/1005424/_dPSv4_tab-all-article-bottom_(300×250)”, [300, 250], “pb-ad-78623” ).addService( googletag.pubads() ) ); } );

googletag.cmd.push(function() {
mobile_slots.push( googletag.defineSlot( “/1005424/_dPSv4_mob-all-article-bottom_(300×250)”, [300, 250], “pb-ad-78158” ).addService( googletag.pubads() ) ); } );

The post 7 Tips for Overcoming Nerves When Doing Street Photography by James Maher appeared first on Digital Photography School.


Digital Photography School

 
Comments Off on 7 Tips for Overcoming Nerves When Doing Street Photography

Posted in Photography


Build & Unbuild in 1 Day: Deconstructable Prefab House Moves with its Residents

17 Feb

[ By WebUrbanist in Architecture & Houses & Residential. ]

mobile prefab

No stakes to pull up or new foundation to pour for owners of his prefabricated dwelling, an open-plan home designed to be built, taken apart, moved and reconstructed on demand. Its factory-made components can be shipped between sites, assembled in under eight hours and taken apart just as quickly. Disassemble, reassemble — it’s that easy.

detail prefab

Most campers and other mobile micro-homes come with a built-in problem: they can only be so large and still move easily from one site to the next. Designed by Kodasema, an Estonian collective, this house aims to bridge the gap between conventional domiciles and portable retreats.

prefab forest

The so-called KODA features a lofted bedroom, open-plan living space and requires only a 270-square-foot site for deployment. “When choosing where to live however,” note the architects, “we may take risks. It can be difficult to make major changes to a conventional home as inconvenient and extensive repairs are often involved, or even full demolition and reconstruction.” In short: their solution is efficient, economic and also ecological, optimizing use of time and materials while allowing for flexibility.

box home

“In our minds KODA can become whatever you want – a city-center home, a lakeside summer house, a cosy café, an office, workshop or studio or even a classroom.” Like any home, water, sewer, internet and electrical connections will depend on the site, though it can generate its own power through rooftop solar (and his minimal energy requirements thanks to quadruple-paned glass).

prefab front

The design puts communal spaces (living room and kitchen) out front and private areas (bathrooms and bedrooms) toward the back. It also can be tweaked to an individual needs.

prefab night

“Its clever design provides the inspiration to make best use of every square inch of space and envisage how the built-in components, even the walls, can be adjusted to meet their purpose most effectively.” (Photos is by Paul Kuimet)

Share on Facebook


[ By WebUrbanist in Architecture & Houses & Residential. ]

[ WebUrbanist | Archives | Galleries | Privacy | TOS ]


WebUrbanist

 
Comments Off on Build & Unbuild in 1 Day: Deconstructable Prefab House Moves with its Residents

Posted in Creativity


Overview of the Vanguard VEO 235AB Aluminum Travel Tripod

16 Feb

If you’re constantly on the go like me, carrying a tripod is always an exercise in endurance and determination. As primarily a wilderness and adventure shooter, I’m constantly working from a backpack where space and weight come at a premium. Lately, I’ve been looking for ways to carry less weight but certainly not at the cost of sacrificing the quality of my gear, and not spending a small fortune in the process.

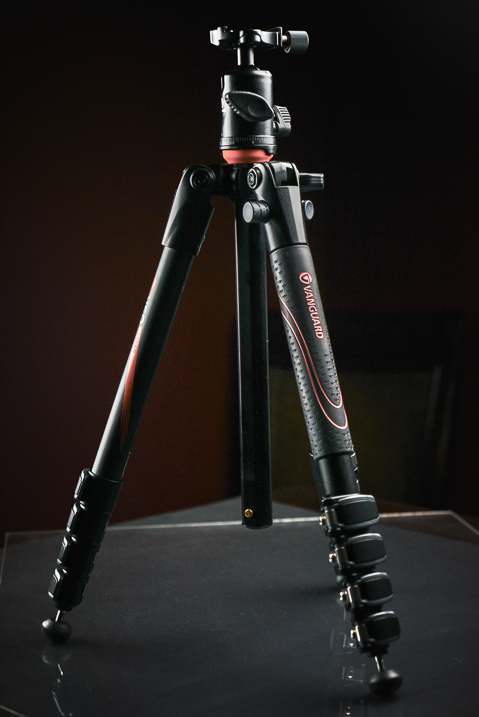
When it came time to downsize my tripod, my research pointed me to this – the Vanguard VEO 235AB Aluminum Travel Tripod with TBH-50 Ball Head. It looked great on paper, small, light, and more than capable of supporting my mirrorless (Sony A7R) camera setup. Being a long-time user of more robust tripods, I was skeptical when the Vanguard arrived due to its conspicuously small size.

Vanguard VEO 235AB tripod

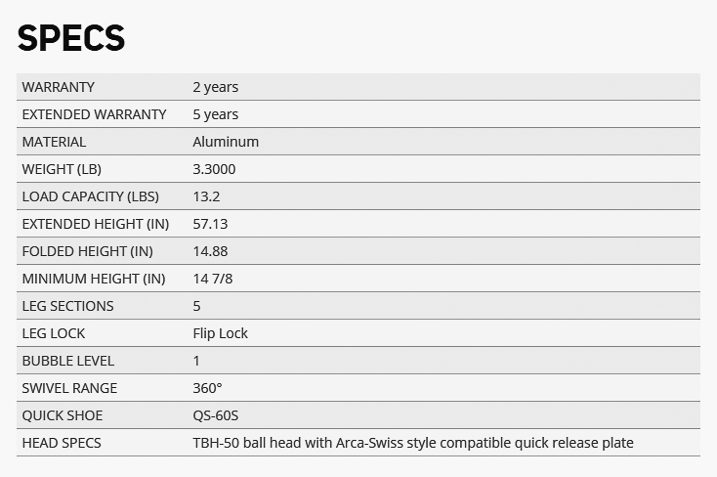
Here are the specifics of the Vanguard 235AB Tripod:

Vanguard VEO 235AB tripod specs

First Impressions

Right out of the box the tripod was delightfully attractive. The look of the entire contraption was clean and professional. The color is a nice matte black with blaze orange accents. Simply put, the tripod has great visual appeal if that is important to you. Also included was a fairly nice storage and travel bag, which was of surprisingly good quality as well.

Vanguard VEO 235AB wide

Load capacity and sturdiness

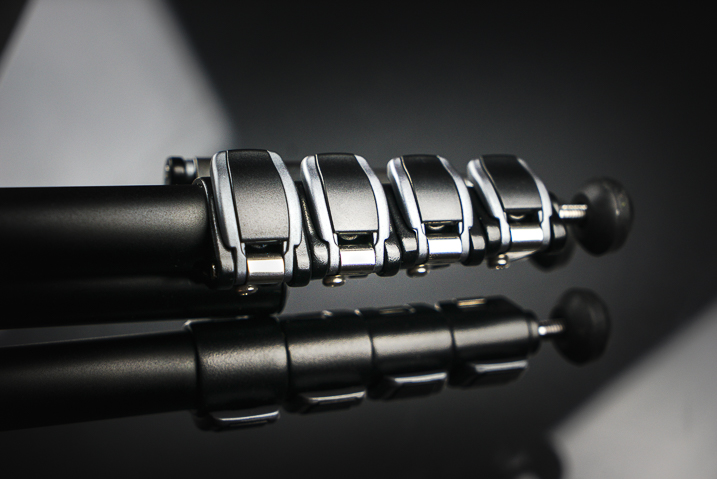
The Vanguard is capable of supporting just over 13 pounds (13.3 or 6kg). All the flip locks clamp smoothly, and lock firmly into place to secure the leg sections.

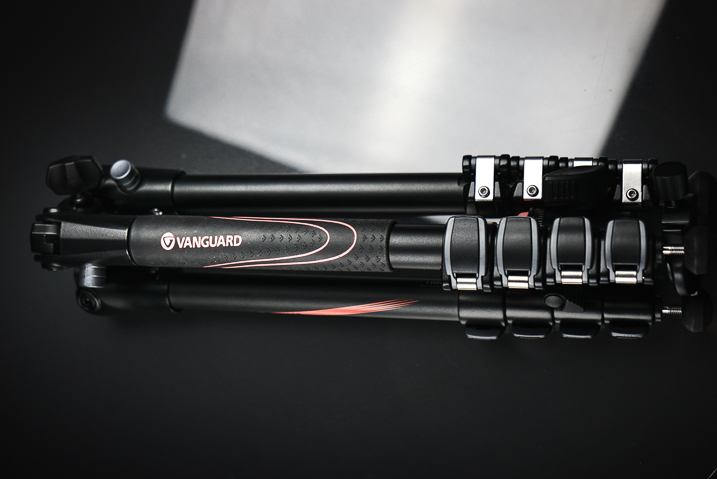
Vanguard VEO 235AB folded

Vanguard VEO 235AB clamps

Ball head

The ball head included with the tripod looks small but locks in place extremely securely. The base plate incorporates a safety pin so that even if the clamp loosens the camera will not slide off the tripod laterally.

Vanguard VEO 235AB ballhead

Vanguard VEO 235AB ballhead 2

Maximum and minimum height

The overall height with the center column extended is nearly 57 inches (145 cm), which works great for the majority of scenes with minimal stooping over, even at my 6’4” height. Also, the ball head features a bullseye-style bubble level for aid with levelling the camera.

The folks at Vanguard have even included an additional “low angle” angle adapter which allows you to achieve very low perspective shots close to the ground. It should also be noted that the included ball head can be replaced with another of your own choosing if you see fit.

Vanguard VEO 235AB 2

The tripod folds down small enough to fit into carry-on luggage and the weight makes it feel extremely portable. Even without practice the set up time for the Vanguard VEO 235AB is lightning fast. The center column swings up into position and is variable in height. This is an interesting design concept which helps make the entire package very compact while maintaining ease of set up.

Vanguard VEO 235AB base

The legs

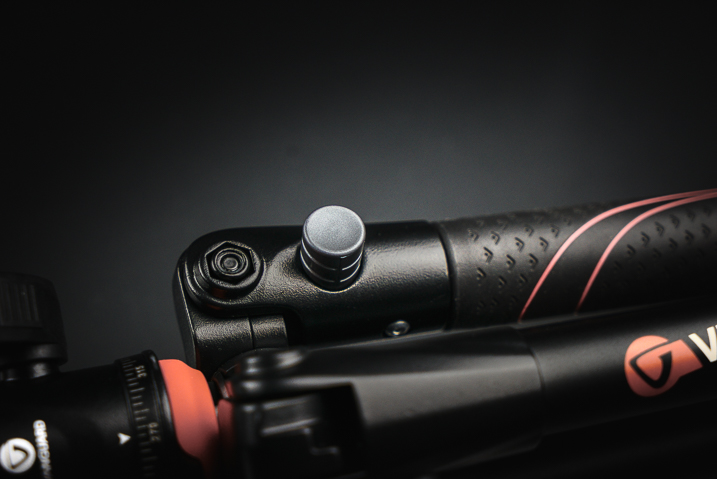
The legs of the tripod itself are able to be positioned at independent angles depending on the situation by depressing the lock buttons for each leg.

Vanguard VEo 235AB 3

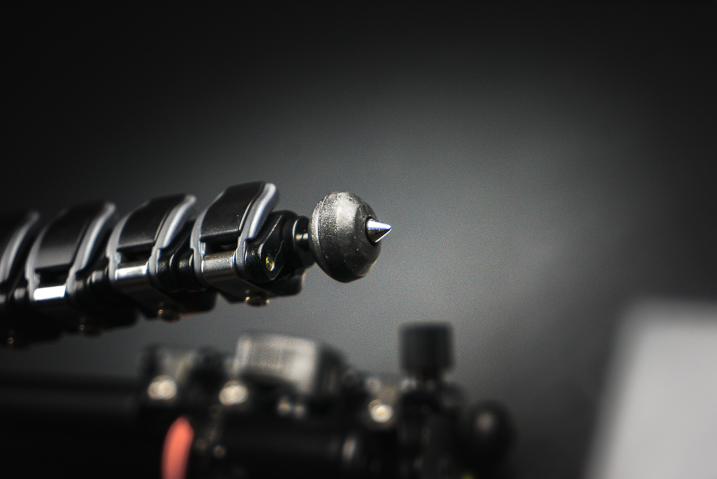
When locked, the legs feel extremely sturdy. One of the three legs is equipped with a rubber wrap to aid gripping during wet or exceedingly cold conditions. To top it off, the rubber feet of the tripod retract to reveal traction spikes should you really find yourself shooting in difficult terrain.

Vanguard VEO 235AB feet

Some final thoughts

So far I haven’t found any situation where the tripod would not suffice for a multitude of uses. Outdoor photographers will love its compact size for hiking, and photographers on the go will dig its stashability.

The 235AB appears to be a fantastic little workhorse that strikes a keen balance between strength, style, and portability. I’m excited to put it to work out in the field and judging by the first impressions it shouldn’t disappoint.

At under $ 150 USD the Vanguard VEO 235AB is one of the better bargains to be had in the lightweight tripod market. Users of smaller DSLRs or mirrorless camera systems should strongly consider the Vanguard VEO 235AB as an option when searching for a sturdy option for a versatile, lightweight travel tripod.

googletag.cmd.push(function() {
tablet_slots.push( googletag.defineSlot( “/1005424/_dPSv4_tab-all-article-bottom_(300×250)”, [300, 250], “pb-ad-78623” ).addService( googletag.pubads() ) ); } );

googletag.cmd.push(function() {
mobile_slots.push( googletag.defineSlot( “/1005424/_dPSv4_mob-all-article-bottom_(300×250)”, [300, 250], “pb-ad-78158” ).addService( googletag.pubads() ) ); } );

The post Overview of the Vanguard VEO 235AB Aluminum Travel Tripod by Adam Welch appeared first on Digital Photography School.


Digital Photography School

 
Comments Off on Overview of the Vanguard VEO 235AB Aluminum Travel Tripod

Posted in Photography


Making the Switch from Phoneographer to PRO-tographer

16 Feb

Your Instagram feed is looking incredible these days. You’ve mastered VSCO and your point of view is strong.

But now what? Ready to go from Insta to pro? We’ve got a few pointers to help you make the change.

We chatted with Jackie Barr, a New York based photographer who has gradually made the switch from Instagram-only to full-time professional.

She shared a few tips with us for getting feedback, finding a starter camera and more.

(…)
Read the rest of Making the Switch from Phoneographer to PRO-tographer (856 words)


© Meg for Photojojo, 2017. |
Permalink |
No comment |
Add to
del.icio.us

Post tags:


Photojojo

 
Comments Off on Making the Switch from Phoneographer to PRO-tographer

Posted in Equipment


Overview and Impressions of the new Macphun Luminar Software

16 Feb
Macphun Luminar

An image edited using Macphun Luminar image editing software.

At some point, after you pick up your first digital camera, the question of image editing arises. For years, the leader has been Adobe with their package that includes Lightroom and Photoshop. However, lately, other software companies have been dipping their toes in the waters of image editing applications. One of the latest is MacPhun, makers of the Macphun Creative Kit.  Their entry into image editing, available for Mac OS X based computers only, is called Macphun Luminar.

Luminar is a standalone application for nondestructive RAW processing and image editing, but can also be used as a plugin for Lightroom, Photoshop, Aperture, and Apple Photos. The application window and tools available are identical whether it runs as a standalone or as a plugin.

Overview

When opening Luminar, you’ll be presented with a window that gives you two options; Load Image or Batch Processing.
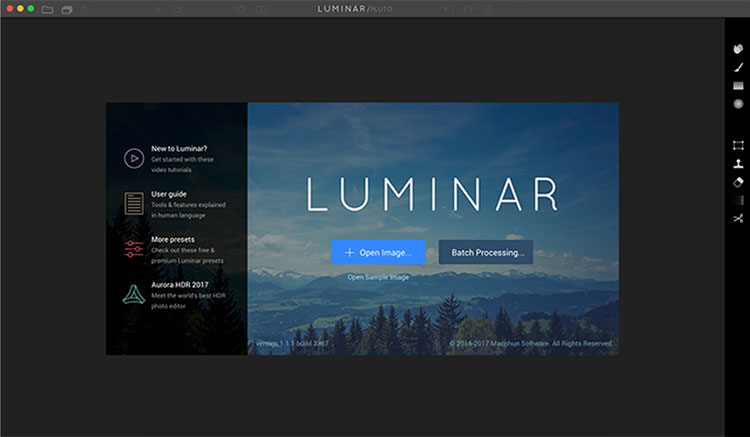
Luminar opening screen
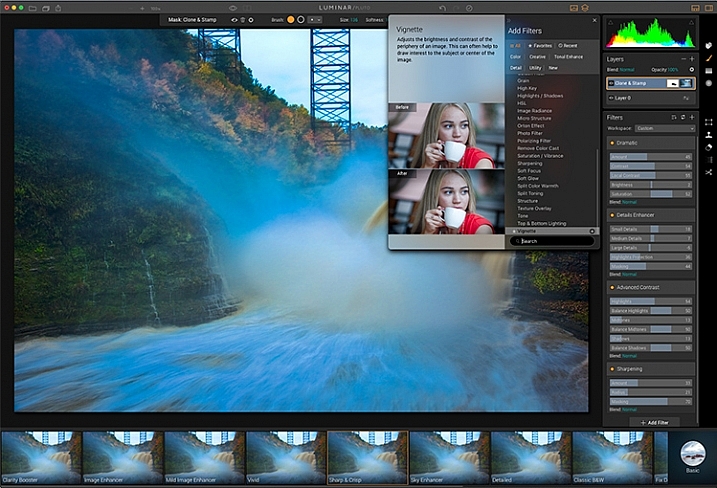
Macphun Luminar workspace

Luminar’s workspace is clean and easy to navigate.

Selecting Batch Processing allows you to drag and drop images, or load them from folders on your computer. You’ll then be prompted to choose certain settings such as a preset to apply (more on the presets later), as well as where you would like the images saved, what type of file to save as, resizing, and file naming. In addition to the opening dialog, Batch Processing is also available from the File menu within the application.

I’m a little disappointed that I can’t see a preview of the preset I’m applying to the batch, but overall, the process is easy to understand and runs pretty efficiently.  I processed a batch of 24 RAW images in just under three minutes on my late 2013 iMac.

The other option you see when starting up Luminar is “Load Image”. This allows you to open a single file and edit it to your liking, and then export it in any number of ways. I kind of wish Luminar had a file browser to allow me to view thumbnails, rather than just the “Load Image” dialog.

Workspaces
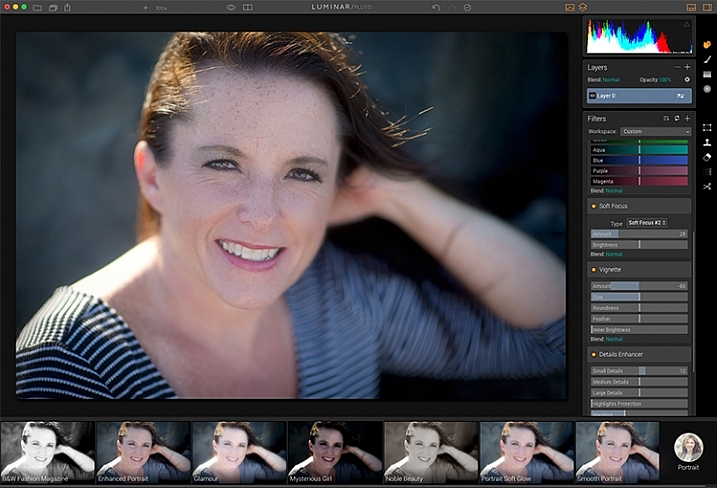
Macphun Luminar Portrait Workspace

You can change the workspace according to your subject matter. For instance, selecting Portrait brings up a different set of tools than does Landscape, or Street.

You can customize the application by using one of the workspaces available, which automatically brings up a set of filters appropriate for the subject matter.  The preset workspaces include Black and White, Landscape, Street, and Portrait. You can also create your own workspace based on the filters you find yourself using the most (see above).

Editing window
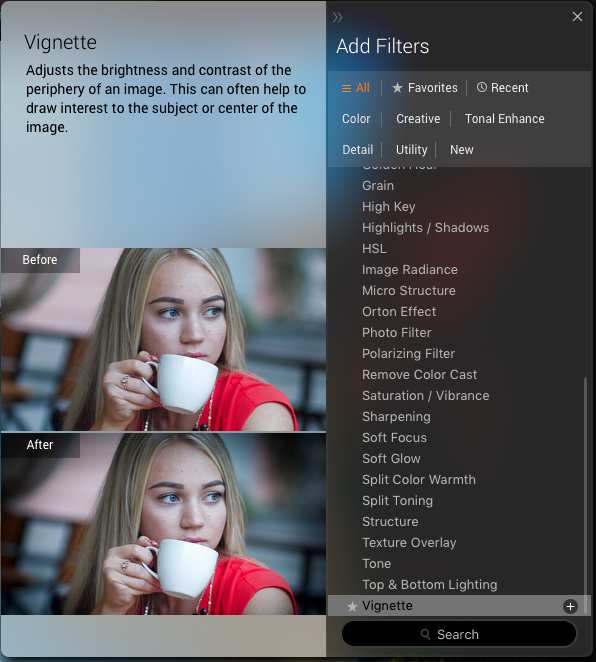
Macphun Luminar

When selecting Add Filter, this window listing available filters appears, allowing you to select from dozens of filters to apply to your image.

Once you have a file opened, you’ll be presented with the editing screen. The main window will show your image. Across the bottom, you’ll see the Preset Panel. This shows various presets that can be applied to your image. In addition to the default presets, Macphun has a selection of preset packs available for download on their website (some are free, some are for purchase). The presets are separated into various workspaces, including Outdoors, Portrait, Street, Dramatic, Basic, and Travel.
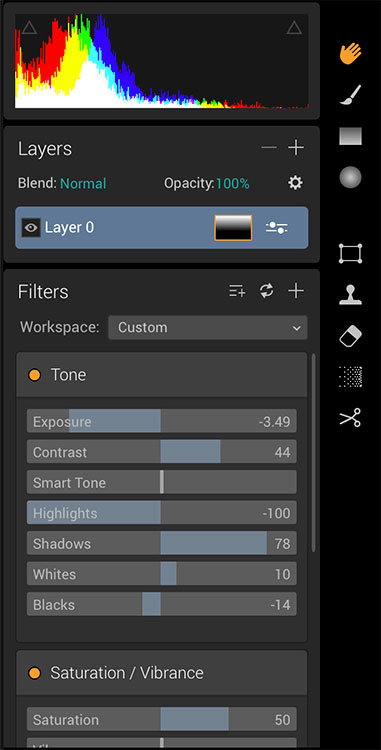
Luminar sliders

On the right side of the screen, you’re presented with the layers panel which shows the different layers you have in your current image. Similar to Photoshop, layers can use different blending modes, and the opacity of each one can be adjusted to give you exactly the look you want. A Transform tool is also available to work with the layers if needed.

Beneath the Layers palette, you’ll find the sliders to adjust the filters currently in use. Each preset uses various filters that can be adjusted using these sliders. You can also create your own look simply by adding the filter or filters of your choice from over 40 available. In addition, each filter has a separate blend mode that can be changed to adjust the look as well.
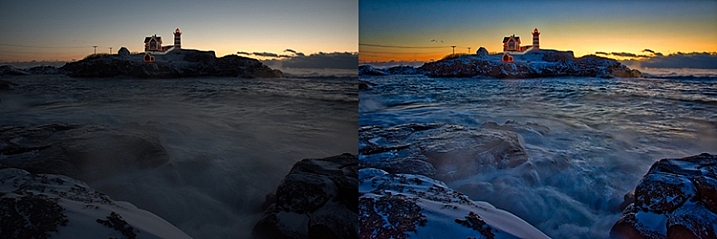
Macphun Luminar

A RAW image before processing with Luminar on the left, and after on the right.

Toolbars and palettes

On the right edge of the screen sits a toolbar, which houses various tools including Move, Masking Brush, Gradient Mask, Radial Mask, Transform, Clone Stamp, Eraser, Denoise, and Crop.

Any of the panels and palettes within Luminar can be shown or hidden with a click of the mouse, making it easy to customize the workspace to your liking.
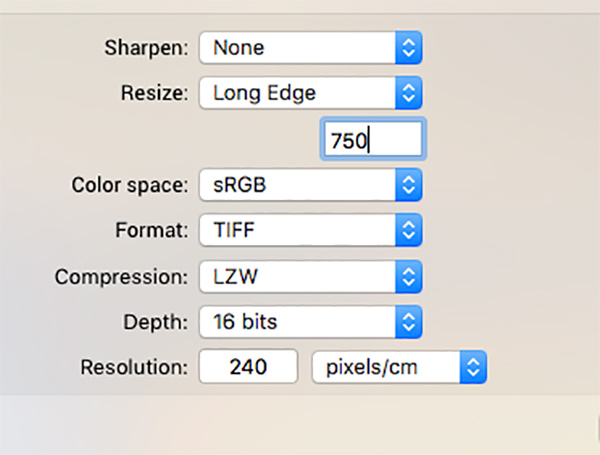
Luminar-Export-Dialog

The Luminar Export Dialog

Once you’re done making your edits, Luminar offers an easy interface to share your images to various photo sharing and social media sites, including Facebook, Twitter, 500px, Smugmug, Flickr, Messages, and Mail.
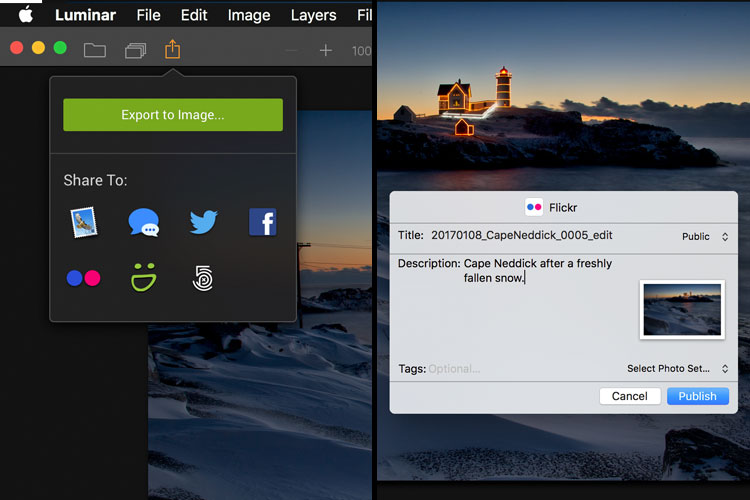
Luminar sharing options.
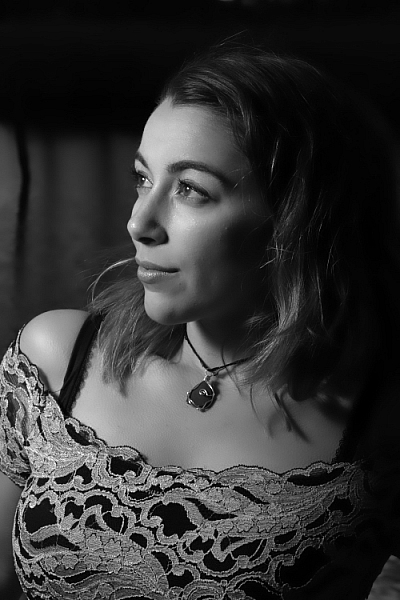
Macphun Luminar portrait preset

A portrait edited using the Black and White Fashion Magazine preset under the Portrait presets in Luminar.

Pros of Luminar

Macphun’s Luminar, as a standalone application, offers an excellent option for those who don’t want to get involved in a subscription service. Luminar is currently available from Macphun for $ 69, making it an easy way to get started editing RAW photos with a powerful image editor. For those already using Photoshop or Lightroom for their editing, Luminar works as a plugin that provides all of the powerful editing options of the standalone.

Luminar is easy to use, with a multitude of sliders that are pretty self-explanatory and provide for fine control over image effects. In a very short amount of time, you can be editing your RAW files and exporting finished images in a variety of formats, including TIFF, JPEG, PNG, GIF and PSD. If you’re familiar with MacPhun’s interface in the Creative Kit, Luminar will be easy to figure out.

I found the quality of the images edited in Luminar to be excellent, but as in Creative Kit, I thought some of the presets needed to be dialed back a bit for the best results. The variety of effects and options available really lets you customize the look of your images as well. I found some presets to be excellent starting points, but then by adding another filter or two, I was able to get exactly the style I wanted for my image.
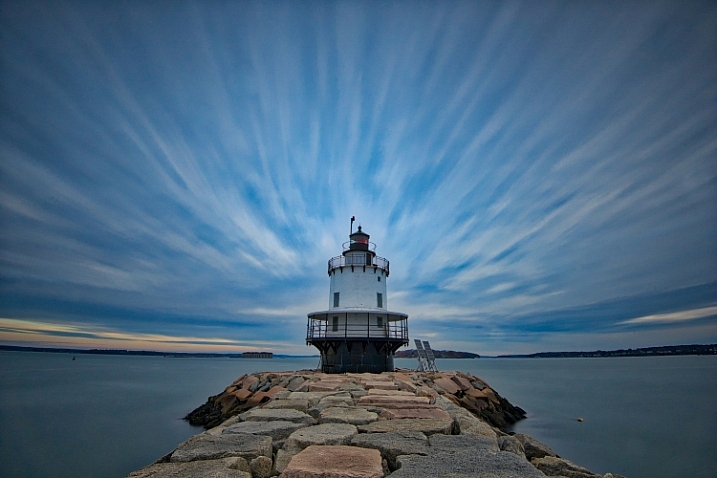
Macphun Luminar

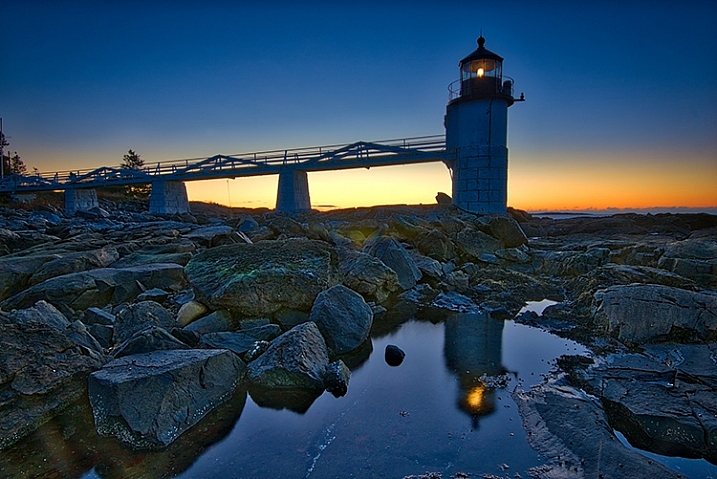
An image edited using MacPhun Luminar.
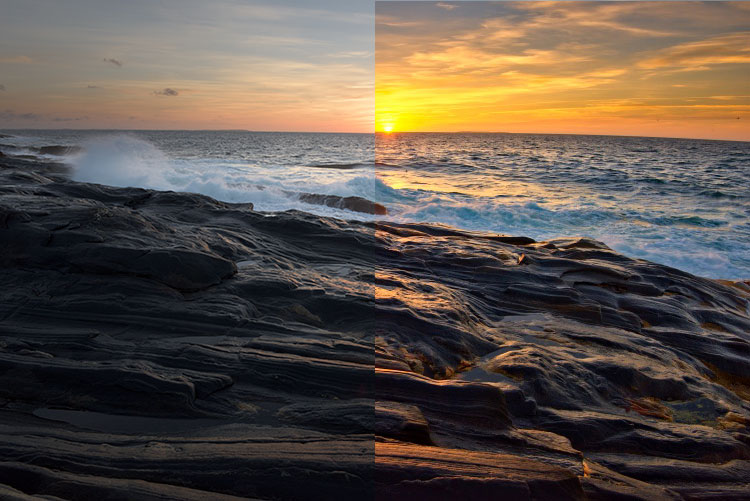
Before/after

Layered files

As of a recent update to the program, there is now the ability to save images as .lmnr files, which will save the layers and work done on an image, so you can come back to it later. A nice feature similar to saving as a layered PSD file. 

Cons of Luminar

As someone who’s used Photoshop for years, I found that some of the tools, such as the clone stamp, worked differently than I expected. This is easily overcome as familiarity with Luminar grows, but it took a little while before I got results I liked.

One other puzzling question is, why isn’t there native support for Macphun’s Creative Kit? MacPhun indicates in their product FAQ that there will be support for plugins eventually, but it would seem to make sense to have that powerful suite of plugins available from Day 1. Once support for plugins is available, Luminar becomes an even better value, in my opinion.
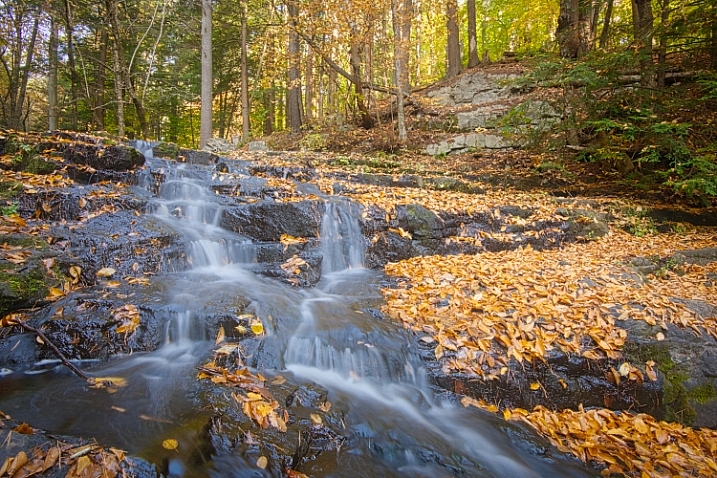
Macphun Luminar

Landscape image edited using Macphun Luminar.

Luminar, while an excellent photo editor and RAW processor, lacks certain tools available in Photoshop, such as the ability to output to CMYK, have multiple print layout options, or add text to an image. While many will never have a need to do any of that, it is a distinction that should be made, especially for those who like to add a watermark to their images being shared online.

Finally, Luminar lacks an asset management component like Lightroom, so for those who like to create catalogs, collections, and add keywords and descriptions to images, you’ll still need to use Lightroom while using Luminar as a plugin.
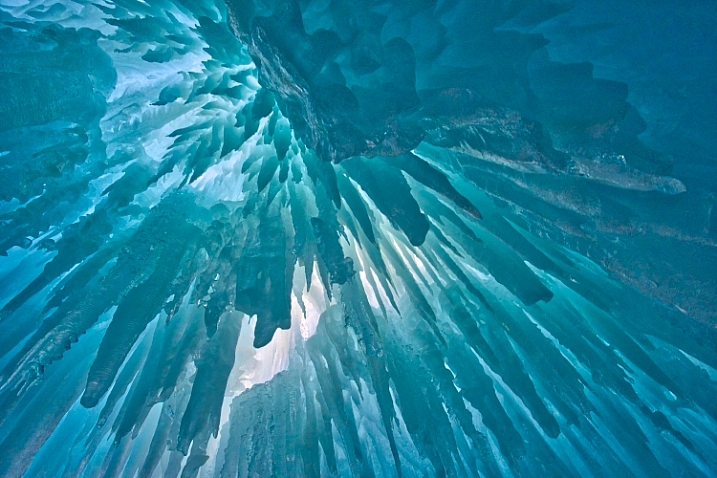
Macphun Luminar

Edited and exported using Macphun Luminar.

Final Verdict

Macphun Luminar has a simple to understand interface and a lot of great features that make it an excellent RAW processing application. Its flexibility to work as either a standalone application or a plugin for Photoshop, Lightroom, and other photo applications means that Luminar will be easy to integrate into your current workflow. My first thought, however, is that its primary market is people who want a powerful photo editor that is simpler to use than Photoshop, without paying a subscription fee every month.

Luminar offers some excellent editing tools, and with over 50 presets, it’s easy to get started towards the look you want. The interface is easy to understand, with self-explanatory sliders clearly marked to allow you to adjust the effect to your liking. If you’re just getting started with processing RAW files and photo editing in general, Luminar is a great choice.

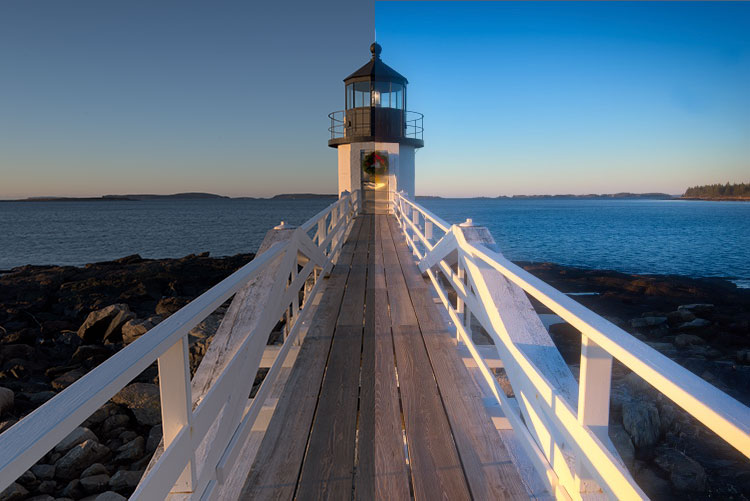
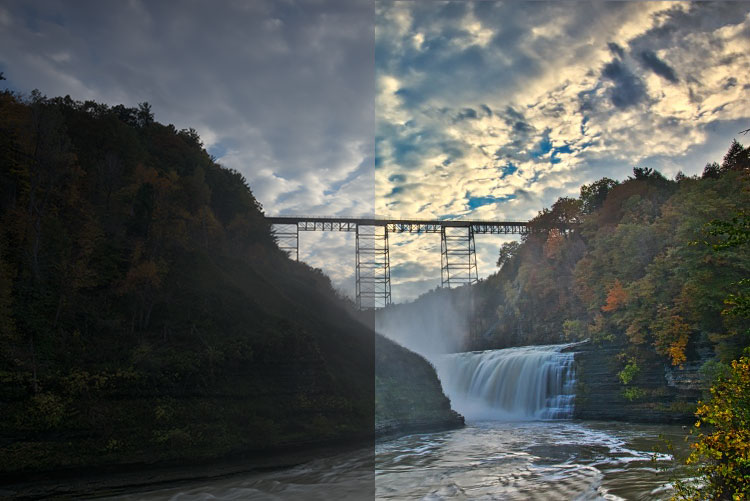
Luminar is available from Macphun’s website for $ 69, for Apple computers only (currently, supposedly a PC version is coming in the future tbd). Here are a couple more before and after images of what you can do with Luminar. Have you tried it? What are your thoughts?
googletag.cmd.push(function() {
tablet_slots.push( googletag.defineSlot( “/1005424/_dPSv4_tab-all-article-bottom_(300×250)”, [300, 250], “pb-ad-78623” ).addService( googletag.pubads() ) ); } );

googletag.cmd.push(function() {
mobile_slots.push( googletag.defineSlot( “/1005424/_dPSv4_mob-all-article-bottom_(300×250)”, [300, 250], “pb-ad-78158” ).addService( googletag.pubads() ) ); } );

The post Overview and Impressions of the new Macphun Luminar Software by Rick Berk appeared first on Digital Photography School.


Digital Photography School

 
Comments Off on Overview and Impressions of the new Macphun Luminar Software

Posted in Photography