RSS
 

Archive for January, 2017

19 New Beginning Images for a Fresh Start to the Year

11 Jan

Well, a new year is yet again upon us. It’s a time for a new start, fresh beginnings.

That can make many things to different people. Let’s see what new or beginning means to these 19 photographers with their fresh “new” images.

Smilla4

By smilla4

Robert Voors

By robert voors

Darlene Hildebrandt

By Darlene Hildebrandt

Nico Cavallotto

By Nico Cavallotto

Mark Gunn

By Mark Gunn

Christian Siedler

By Christian Siedler

Zeitfaenger.at

By zeitfaenger.at

Incase

By Incase

Oregon Ducatisti

By oregon ducatisti

?eagan

By ?eagan

Brookhaven National Laboratory

By Brookhaven National Laboratory

Margus Kulden

By Margus Kulden

U.S. Geological Survey

By U.S. Geological Survey

Kala Bernier

By Kala Bernier

Mikael T

By Mikael T

MFer Photography

By MFer Photography

Kylie_Jaxxon

By Kylie_Jaxxon

Samuel John

By Samuel John

Johan Neven

By Johan Neven

googletag.cmd.push(function() {
tablet_slots.push( googletag.defineSlot( “/1005424/_dPSv4_tab-all-article-bottom_(300×250)”, [300, 250], “pb-ad-78623” ).addService( googletag.pubads() ) ); } );

googletag.cmd.push(function() {
mobile_slots.push( googletag.defineSlot( “/1005424/_dPSv4_mob-all-article-bottom_(300×250)”, [300, 250], “pb-ad-78158” ).addService( googletag.pubads() ) ); } );

The post 19 New Beginning Images for a Fresh Start to the Year by Darlene Hildebrandt appeared first on Digital Photography School.


Digital Photography School

 
Comments Off on 19 New Beginning Images for a Fresh Start to the Year

Posted in Photography


Weekly Photography Challenge – New Beginning

11 Jan

As the first photography challenge of 2017, I thought it would be fitting if we go with a theme for new beginnings. Like these 19 images show – there are many ways to interpret that theme.

Francisca Ulloa

By Francisca Ulloa

Shellie

By Shellie

Weekly Photography Challenge – New Beginning

So, however you want to run with this idea is up to you. It could be about babies, kittens, or eggs. Or it could be around a new beginning you want for yourself this year. Maybe even a goal or resolution you want to achieve.

Share your images below:

Simply upload your shot into the comment field (look for the little camera icon in the Disqus comments section) and they’ll get embedded for us all to see or if you’d prefer, upload them to your favorite photo-sharing site and leave the link to them. Show me your best images in this week’s challenge. Sometimes it takes a while for an image to appear so be patient and try not to post the same image twice.

Micolo J

By Micolo J

Andy Reago

By Andy Reago & Chrissy McClarren

Craig Sunter

By Craig Sunter

Elycefeliz

By elycefeliz

Share in the dPS Facebook Group

You can also share your images on the dPS Facebook group as the challenge is posted there each week as well.

googletag.cmd.push(function() {
tablet_slots.push( googletag.defineSlot( “/1005424/_dPSv4_tab-all-article-bottom_(300×250)”, [300, 250], “pb-ad-78623” ).addService( googletag.pubads() ) ); } );

googletag.cmd.push(function() {
mobile_slots.push( googletag.defineSlot( “/1005424/_dPSv4_mob-all-article-bottom_(300×250)”, [300, 250], “pb-ad-78158” ).addService( googletag.pubads() ) ); } );

The post Weekly Photography Challenge – New Beginning by Darlene Hildebrandt appeared first on Digital Photography School.


Digital Photography School

 
Comments Off on Weekly Photography Challenge – New Beginning

Posted in Photography


How to Create and Use Smart Collections in Lightroom

11 Jan

Collections are one of Lightroom’s most powerful features, giving you a way to bring images from many folders together. Generally speaking, they’re just like boxes you sort your physical stuff into. Nothing goes in unless you put it there, and nothing comes out unless you take it out. What if I told you there was another far more powerful type of collection that can sift through all your photo information and build a collection automatically based on a subset of that information? Well, there is, it’s called a Smart Collection.

Using Smart Collections

You’ll find the easiest way to get to grips with Smart Collections is to begin with a few simple ones and then expand to more complex ones. Let’s start with a couple simple ones.

Creating a Smart Collection

You can create a Smart Collection in a number of ways. First, you can click on the little ‘+’ in the Collections panel header, situated in the Left Panel of the Library Module.

Creating and using smart collections in lightroom

From the flyout menu, choose Create Smart Collection.

Creating and using smart collections in lightroom png 2

This brings up the default Smart Collection panel (below).

Creating and using smart collections in lightroom 3

Begin by giving the Smart Collection a name. If you don’t, you’ll end up with a list with Smart Collection, Smart Collection 1, Smart Collection 2, and so forth. Use a name that describes what the collection will contain. For example, you could call this one “3 Stars or Above”. Below this you can choose to add the Smart Collection to a Collection Set (which needs to be created in advance). You could add it to the Smart Collections set, which is a default set created by Lightroom.

Adding the rules

The next part is the key to creating the Smart Collection. It’s the rules section that defines what will be in the collection. In the Match flyout, you’ve three options:

  1. All: Every rule must match for a photo to be included.
  2. Any: As long as a photo matches one of the rules, it’s included in the collection.
  3. None: As long as a photo doesn’t match a rule, it’s included.

If you’re trying to narrow down to a limited set of photos, you’ll most likely be using the All option. As your first Smart Collection is a simple one, set the Rating to 3 stars, with “is greater than or equal to” applied in the pull-down menu. There are other options in the list including; is, is not, is greater than, is less than, is less than or equal to, is in the range. These all allow you to refine what appears in the collection. Click Create to make the collection.

Creating and using smart collections in lightroom 4

The newly created collection will appear in the Smart Collections set, already selected, and the Grid View will show all matching photos. If you change the rating of one of the images visible to be a 2-star photo, it would automatically drop out of the collection. Why? Because it no longer matches the collection rules (3 or more stars).

Creating and using smart collections in lightroom 5

Adding more criteria

Let’s start to narrow down the images you’re seeing. You can either double click on the collection to edit it or create a new one. I’ve double clicked for this example to edit. At the end of the Rating line is a + icon (outlined in red below) which you can click to add another rule. As soon as you do, a minus (-) icon appears, allowing you to remove this rule at any stage. There must always be at least one rule, though.

Creating and using smart collections in lightroom 6

Let’s narrow down the collection to show only more recent 3-star images.

The new rule has Rating selected by default. You can change this by clicking Rating and choosing from the possible rule options in the pull-down menu. To get recent images, you need to choose Capture Date from the Date menu.

You’ll notice there’s a different set of options for dates in the figure below. As you want recent dates, choose “in the last” from the list. Next, you enter a number, then choose from days, weeks, months and years. For speed, enter 30 with the default “days” option. See below:

Creating and using smart collections in lightroom 7

Next, change the name to reflect the new options and click Save. The collection will now display only the most recent photos (taken in the last 30 days) with 3 stars.

Creating and using smart collections in lightroom 8

Smart Collection uses

Right now, what you’ve just created could be done using the Filter Bar, so what use is a Smart Collection? Well, they’re great for helping you complete workflow tasks such as:

  • Add Copyright:  Create a Smart Collection with the rule “Copyright Status”, the option “is” and the choice ‘”unknown”. If you use Metadata Presets, generally you’ll have one that sets the copyright information and sets the Copyright Status to “copyrighted”. Add this preset to the files in the Smart Collection to add that information.
  • Add Keywords:  To sort images not keyworded. From the Other Metadata menu, choose Keywords, then set the option to “are empty”. Use this to add keywords to an image. Just remember that as soon as you hit enter in the keywords panel, the image will drop out of the Smart Collection.
  • Event work:  For event work, you’re generally delivering most of the image, except blinks or out of focus shots. Usually, this work is edited quickly. Create a Smart Collection with the rules; Capture Date, is in the last, 1 days, and Pick Flag, is, unflagged. Now run through and reject the duds using the shortcut key X. Export the rest for your client.
  • Labels for workflow stages:  Labels can be used to imply a status with your photos. For example, you could use red to mean “selected, but needs editing”, yellow to mean “processing” and green for “final image”. By creating smart collections for each stage, you can see what needs to be done with each image. Combined with setting a date, you can keep on top on what needs doing!
  • Adding Captions:  Coupled with a recent date range, you can create a Smart Collection with “Other Metadata>Caption” and “is empty”. This shows recent images in need of a caption. Couple with ratings, etc., to narrow down which images need to be worked on.

Advanced Rules

The Any, All and None route does allow a great selection of options, but it’s missing a trick. What if you need 4-5 rules for sure (All), but also need one or two rules that are more like an Any set? That can’t be done using the method you’ve seen so far.

Rejoice . . . There is a way! It’s a little bit hidden, but if you hold down the Alt/Option key, the + icon turns into a number (#) sign. You can click the # to create a subset of new rules. These allow; Any of the Following, All of the Following and None of the Following – so you can mix in options as well.

Creating and using smart collections in lightroom 9

For example, you could specify an “Any of the following” are true and have two options for File Type, one for JPEG, and one for TIFF. This means all the other rules must apply, but either JPEG or TIFF will also apply. (note I’ve changed to 60 days here for a better set of photos to match for the example).

Creating and using smart collections in lightroom 10

The Smart Collection now shows both TIFF and JPEG images with 2-star or higher ratings, taken in the last 60 days.

Creating and using smart collections in lightroom 11

Other options you could use are red or yellow labels, or even non-continuous date ranges. Alternatively you could use the option to exclude information. For instance, you could have a date range of “in the last 1 year” and using “None of the following” could have “in the last 1 month” to exclude the most recent month. Combined with ratings/flags or stars, this could help locate older material still in need of editing.

Finally

As you can see, Smart Collections are a great tool in your file management arsenal, helping you drill down to specific sets of photos easily.

googletag.cmd.push(function() {
tablet_slots.push( googletag.defineSlot( “/1005424/_dPSv4_tab-all-article-bottom_(300×250)”, [300, 250], “pb-ad-78623” ).addService( googletag.pubads() ) ); } );

googletag.cmd.push(function() {
mobile_slots.push( googletag.defineSlot( “/1005424/_dPSv4_mob-all-article-bottom_(300×250)”, [300, 250], “pb-ad-78158” ).addService( googletag.pubads() ) ); } );

The post How to Create and Use Smart Collections in Lightroom by Sean McCormack appeared first on Digital Photography School.


Digital Photography School

 
Comments Off on How to Create and Use Smart Collections in Lightroom

Posted in Photography


KitSplit acquires CameraLends, becomes largest peer-to-peer camera rental platform

11 Jan

Peer-to-peer camera equipment rental platform KitSplit has acquired its rival CameraLends to form the world’s largest peer-to-peer gear rental community. The combined entity will be managed under the KitSplit brand from headquarters in New York and CameraLends founder Adam Derewecki will join KitSplit as an advisor. 

“There are more content creators today than ever before and they all need access to top quality, affordable gear. Since launching a little over a year ago, KitSplit has made huge improvements in gear rentals, making creative work and connecting with creators even easier and more affordable. The CameraLends acquisition will further our goals of democratizing access to great gear and empowering creators,” says KitSplit cofounder and CEO Lisbeth Kaufman.

CameraLends user accounts including gear information have already been integrated into the Kitsplit web platform to smooth the transition for existing CameraLends users. In addition to individuals, KitSplit also works with rental houses and production companies to expand its gear pool. More information is available on the KitSplit website.  

Articles: Digital Photography Review (dpreview.com)

 
Comments Off on KitSplit acquires CameraLends, becomes largest peer-to-peer camera rental platform

Posted in Uncategorized


4 Reasons Why You Should Photograph Concrete

11 Jan

When people ask me if I have a favorite subject to photograph, they are often surprised by my response. See, I really enjoy photographing abstract urban environments, and most of all, I love photographing concrete. Yep, that’s right! Plain old concrete.

As the most common urban material, concrete shapes buildings, lines pathways, forms pipes, columns, bridges, and driveways. Anywhere you look you’ll see concrete, it’s as endless in variety as the reasons I love photographing it. You could say that car parks are a wonderland for me.

concrete-photography-03

This slab of concrete takes on the appearance of a Rorschach test.

However, concrete is often overlooked for more obvious or eye-catching subjects. If you google “urban photography” there are thousands of beautiful photographs of skyscrapers and streets, urban patterns, and underground train lines. But rarely do you see photographs of just concrete itself.

And why would you bother? A photograph of a concrete bollard sounds pretty boring, right? Wrong! Here are a few reasons why concrete can be a photographic wonderland if you simply take the time to look.

concrete-photography-14

The strikingly bold mark on this slab of concrete is the remnant of a red car that got a bit too close.

concrete-photography-01

1 – Concrete is a time capsule

Concrete is popular in construction because it builds durable, long-lasting structures that will not rust, rot or burn. In short, it stands the test of time. This means that concrete construction will invariably wear the markings of the surrounding environment and the people who consciously or unconsciously interact with it.

It is a time capsule and photographing it means documenting the story of what makes up an urban environment. From the freshly laid feature wall, to the roughly poured foundations of an underground car park, or names etched into pathways and paint scratches from cars, it all tells a story.

concrete-photography-13

concrete-photography-15

concrete-photography-11

concrete-photography-16

concrete-photography-17

2 – Abstract expressionism

If  photography is like painting with light, then concrete is a sturdy urban canvas. Another reason I enjoy photographing concrete so much is it has parallels to abstract expressionism. Abstract art, mostly characterized by painting, focuses on the process, the medium, the shape and the color within the frame of the canvas. Through their paintings, abstract expressionists create a visual arena documenting an artist’s movements, thinking and process without relying on the depiction of figurative imagery. Like abstract art, concrete lays bare the visual results of spontaneity, time and the limitations of physics. The lack of figurative references also allows the viewer to explore the image in greater depth, lending their own meaning to the work – which creates a deeper connection with the audience.

Like abstract art, concrete lays bare the visual results of spontaneity, time and the limitations of physics. The lack of figurative references also allows the viewer to explore the image in greater depth, lending their own meaning to the work – which creates a deeper connection with the audience.

concrete-photography-08

concrete-photography-05

concrete-photography-18

The lack of figurative references creates the appearance of an almost alien landscape

3 – Minimalist beauty

Concrete itself is like an abstract expressionist’s canvas, but the act of photographing such a bold subject is actually very minimalist. Photography, when you drill down to the basics, is about light, shade, surface, tone and line. Photographing concrete surfaces doesn’t seek to depart from this, but rather, emphasize it.

Photographing a seemingly menial subject like concrete not only draws attention to its beauty but hearkens back to the simple elegance of photography by documenting the incidental and intentional brushstrokes of the urban environment.

concrete-photography-09

concrete-photography-02

4 – Variety!

No two panels of concrete are the same. Concrete acts as a canvas for a myriad of air bubbles, paint, scratches, graffiti, wear, watermarks, leftover adhesive, etc. Concrete itself forms waves and arches as it is poured. Finishing effects vary too, depending on the type of concrete and the pouring technique. Any portion of concrete maps out the history of that particular time and place with hypnotizing whorls and abrasive texture.

The familiarity of the subject is no deterrent either. Often, as I’m photographing a wall or pathway, passers-by do a double-take, trying to see what it is that I’m photographing. It’s something they may never have considered photograph-worthy before, and it interests them. The beauty is already there, waiting for someone to draw attention to it. Viewers often remark that they never knew concrete could be so beautiful until now!

concrete-photography-10

concrete-photography-12

Conclusion

Concrete is an incredibly variable and dynamic subject, and whats more, it keeps still! As an almost constant presence in history, the use of concrete has evolved with humans to shape our environment. Concrete is a time capsule of intricate details and hidden stories that illustrate the way we interact with the world.

It’s an often overlooked, but delightfully accessible subject, always ready for a photographer to take notice. Next time you are out and about with a camera, take time to look at what concrete has to offer. You may surprise yourself with how fascinating the canvas of the urban landscape can be!

concrete-photography-04

googletag.cmd.push(function() {
tablet_slots.push( googletag.defineSlot( “/1005424/_dPSv4_tab-all-article-bottom_(300×250)”, [300, 250], “pb-ad-78623” ).addService( googletag.pubads() ) ); } );

googletag.cmd.push(function() {
mobile_slots.push( googletag.defineSlot( “/1005424/_dPSv4_mob-all-article-bottom_(300×250)”, [300, 250], “pb-ad-78158” ).addService( googletag.pubads() ) ); } );

The post 4 Reasons Why You Should Photograph Concrete by Megan Kennedy appeared first on Digital Photography School.


Digital Photography School

 
Comments Off on 4 Reasons Why You Should Photograph Concrete

Posted in Photography


Nikon’s 100 year anniversary video is both amazing and ridiculous

11 Jan

Nikon has been around for 100 years, which is pretty cool, and to celebrate the anniversary it has launched a dedicated anniversary site alongside a pretty amazing movie that traces Nikon’s history.

The video features an epic intro from outer space and a catchy song with the lyrics ‘I can see the light, oh yes I can see the light,’ repeated. It’s the kind of song where if I lived in say, Berlin and enjoyed underground dance parties, I wouldn’t bat an eyelash if it came on in the club. There’s also cameos by famous photographers, recreations of historic moments, famous magazine and newspaper covers and a narrator with a Hollywood blockbuster-style voice.

In all seriousness it’s a very cool, albeit over the top, video. And Nikon is certainly a company with a rich and important history worth celebrating. The anniversary site also features a really cool timeline of the company’s achievements. Here’s hoping they’ll be around for another 100 years.

Articles: Digital Photography Review (dpreview.com)

 
Comments Off on Nikon’s 100 year anniversary video is both amazing and ridiculous

Posted in Uncategorized


Electroads: Wireless Vehicle-Charging Roads Rolling Out in Tel Aviv

11 Jan

[ By WebUrbanist in Conceptual & Futuristic & Technology. ]

electroads

A series of roads and public buses in Israel are being retrofitted to test an electromagnetic induction system designed to recharge vehicles on the go, eliminating the cost, time, emissions and waste associated with conventional fuel and refueling stops.

smart-inverter

Electroad, an Israeli startup, boasts a relatively straightforward and fast-deploying system compared to competitors. Their copper and rubber chargers can be rolled out at a rate of a close to a half a mile per day into shallow trenches just a few inches deep. The ease of retrofitting is one of the striking advantages of the system — more involved variants can require ripping up substantial sections of pavement, taking longer and costing more to implement.

air-gap

Their technology has already been tested in controlled settings (small sections of test track outside Electroad’s lab) but will now be demonstrated at scale under real-world conditions along public transit routes. Like other induction technologies, no connection is needed between the vehicle and the road — a radiation-shielded coil simply picks up energy from the lines below, tied into the grid at intervals along the way.

eletric-bus-wireless-charging

To deploy the system, an asphalt scraper digs a trench while a second vehicle unrolls the the rubber-and-plastic strips. Electric buses following the revamped route will be able to store a charge for any jumps off the invisible grid. That may not sound like much, but the reduced storage capacity means the bus can travel lighter, using less energy and requiring a cheaper battery. Ultimately, the cost and power saved upfront will help pay back for the system installation more rapidly.

Share on Facebook


[ By WebUrbanist in Conceptual & Futuristic & Technology. ]

[ WebUrbanist | Archives | Galleries | Privacy | TOS ]


WebUrbanist

 
Comments Off on Electroads: Wireless Vehicle-Charging Roads Rolling Out in Tel Aviv

Posted in Creativity


5 Tips for Creating Romantic Portraits of Couples

11 Jan

When I hear the word romantic, what comes to mind is a dreamy, poetic, passionate image, full of unspoken affection and sometimes, a touch of mystery. However, when it comes to romantic portraits of couples, I don’t want romantic to translate as cheesy or cliche. I think I would want something a little bit more artistic but definitely leaning more on the natural side.

romantic photography of couples

I photograph weddings and often do an engagement shoot with the couple beforehand. For many of my couples, it’s their first time being photographed together in an intimate way where they are expected to be super affectionate and loving towards each other in public. I would feel very awkward if I were in their places. As part of my job, I aim to make the whole experience pain-free for them, hopefully, fun too, and still end up with some super romantic shots without being too corny, cliche or cheesy.

The warm-up

The first 15-20 minutes of the shoot is always a warm-up. I do give them some suggestions which you can find here; Tips for Taking More Natural Engagement Portraits. I then tell the couple I’m just going to start taking photos and that there is no pressure for anything to be perfect. Instead, we will have a warm-up to get used to the camera, to feeling really silly about it all and that they can laugh as much as they like at themselves and how silly they may feel.

They are given permission to feel awkward and laugh at themselves. I encourage them to be themselves and help them throw off any self-conscious feelings. I tell them to just laugh it all off, not to mind passers-by, and to ignore any stares. After all, they will never see those people again.

romantic portraits of couples

I take plenty of shots during the warm-up for them to get used to me but I’m always intentional in what I’m looking for – that fleeting glance at each other, the split-second expression, a warm squeeze and cuddle they allow themselves to have. It’s the in-between moments that are crucial to capture. It’s that moment when they start to relax into each other’s arms after the first few seconds of feeling rather tense or self-conscious.

I also talk to them a lot and give them directions as clearly as I possibly can. Reminding them that on the wedding day they will hardly see me at all so for the engagement shoot I ask them to indulge the camera. I thank them for being very amenable having me pretty much in their face during the entire photo session.

Here are my five tips for creating romantic portraits of couples.

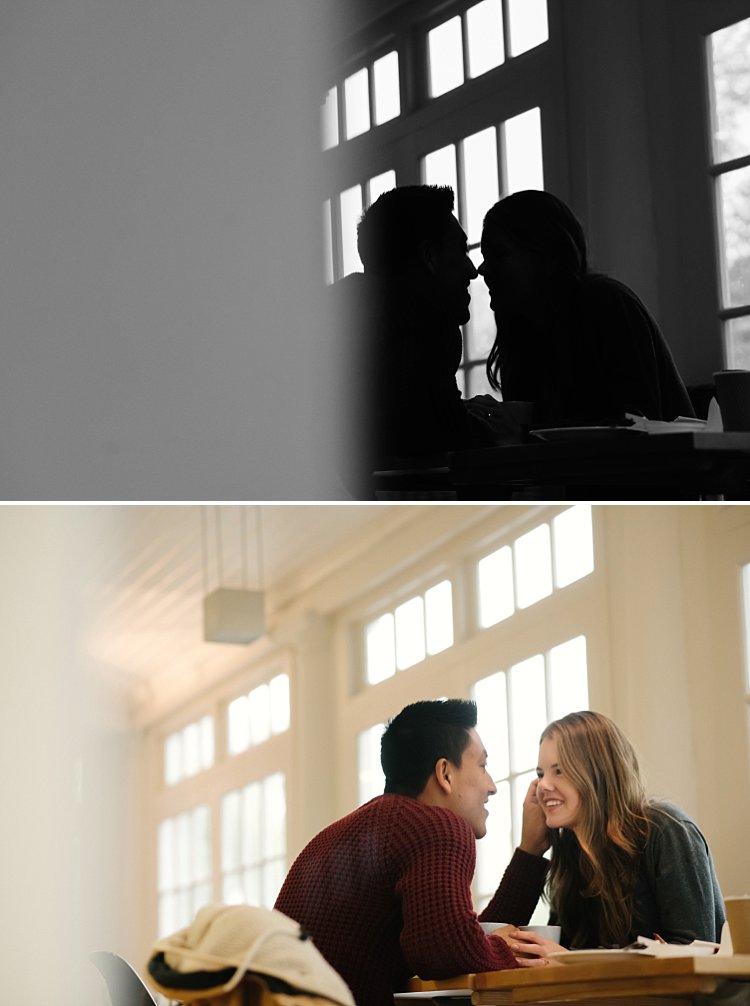
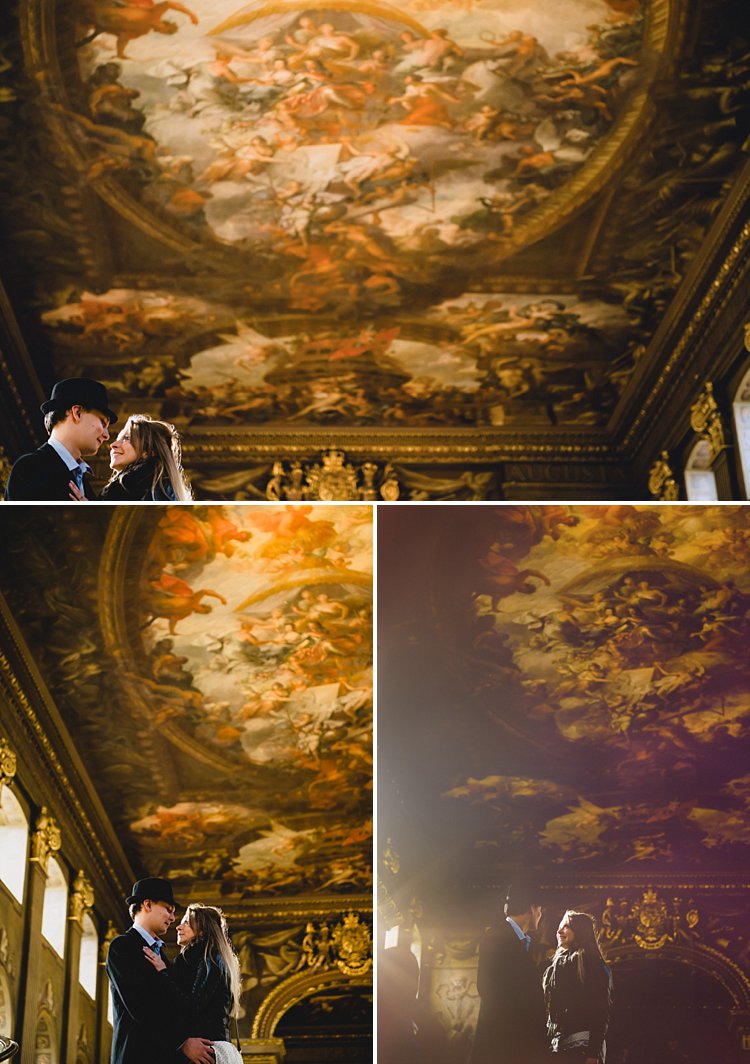
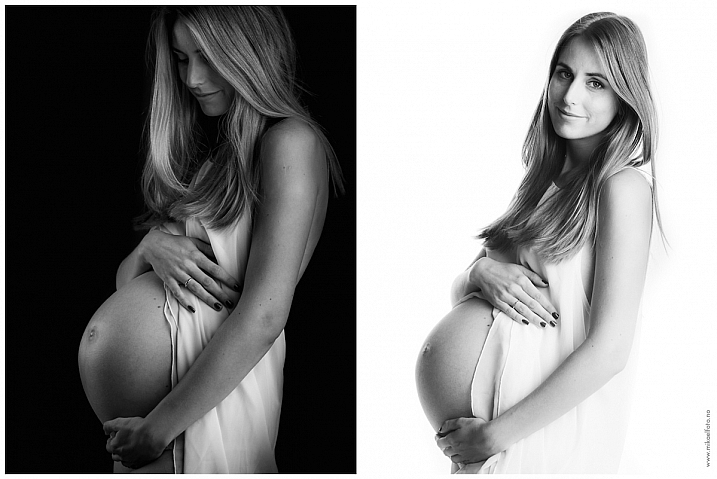
#1 – Find or make the perfect light

romantic portraits of couples

romantic portraits of couples

Romantic light is a poetic light that evokes that cocooning feeling. Early morning and late afternoon light is soft and dream,y so if possible schedule your shoot during those windows. I try and avoid flat light or harsh overhead light which tends to kill any romantic ambience.

By flat light, I mean a light source which is directly in front of them so that it eliminates gradations of shadows and tones of light fall-off on the sides of their faces. Look for directional light, usually coming from the side or at an angle. To achieve this, position your couple in relation to the light, or move around yourself so that you are in the best place to capture the directional light.

romantic portraits of couples

If there is no such light, especially if the location is quite dark or the lights are all overhead, I tend to use my flash. Remember to bounce it so that there is directional light coming from the flash.  The important thing is to avoid flatness and create an atmosphere of light and shadow.

Window light is one of the best natural directional light sources available. However, don’t make your couple face the window as that becomes flat light on their faces. Instead, position them at an angle or sideways where there is some light on one side of their face and the other side has shadows.

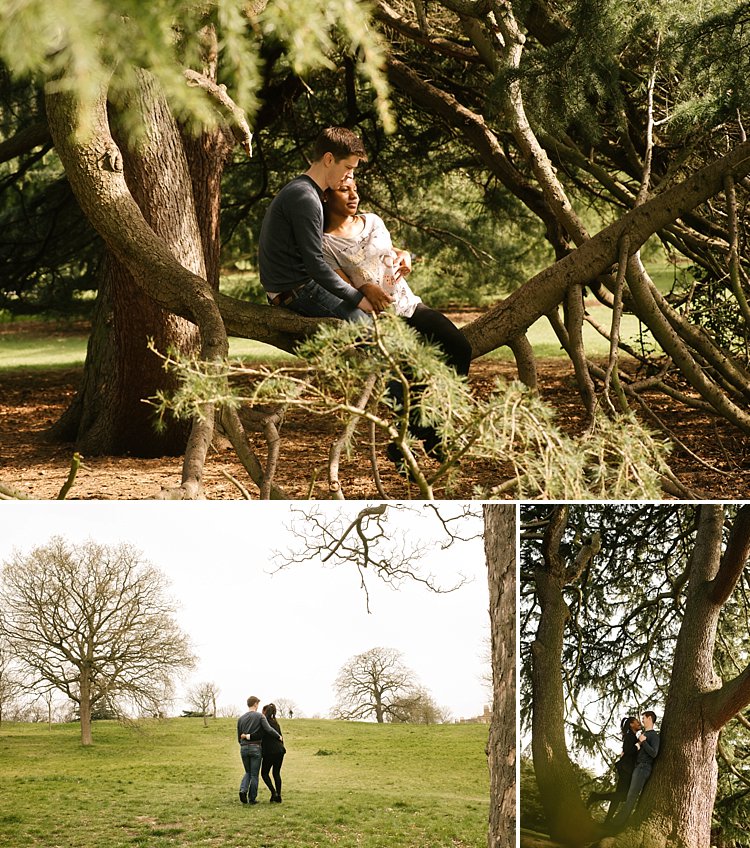
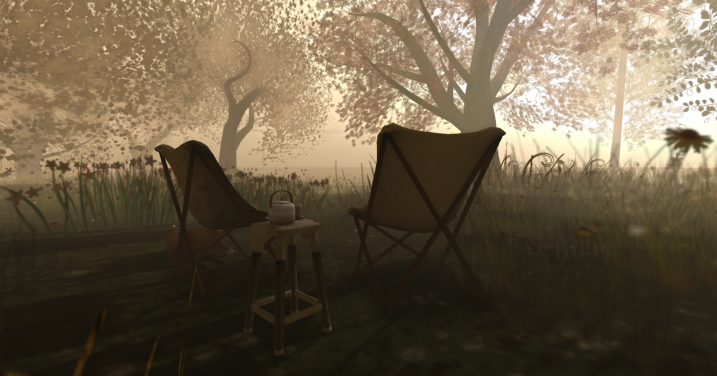
#2 – Consider the location, background, or scenery

romantic portraits of couples

The location or setting has a lot to do with how romantic a picture turns out. Sunsets, although in danger of being cliche, especially sunset silhouettes, produce strong and striking images.

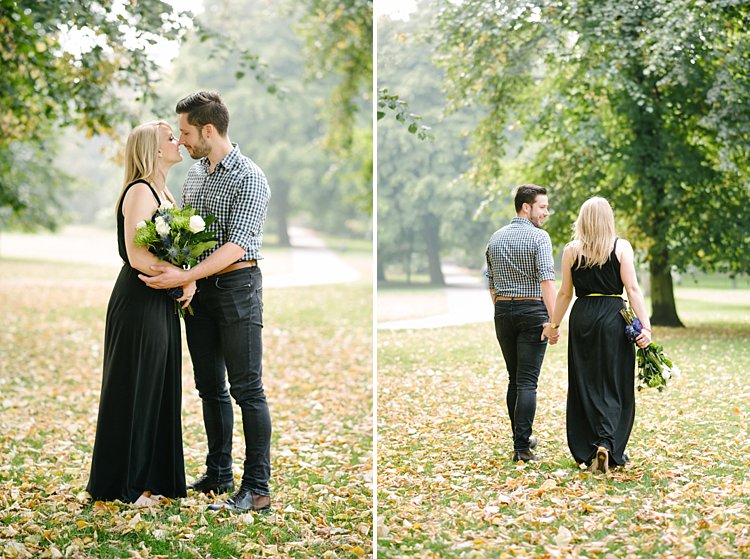
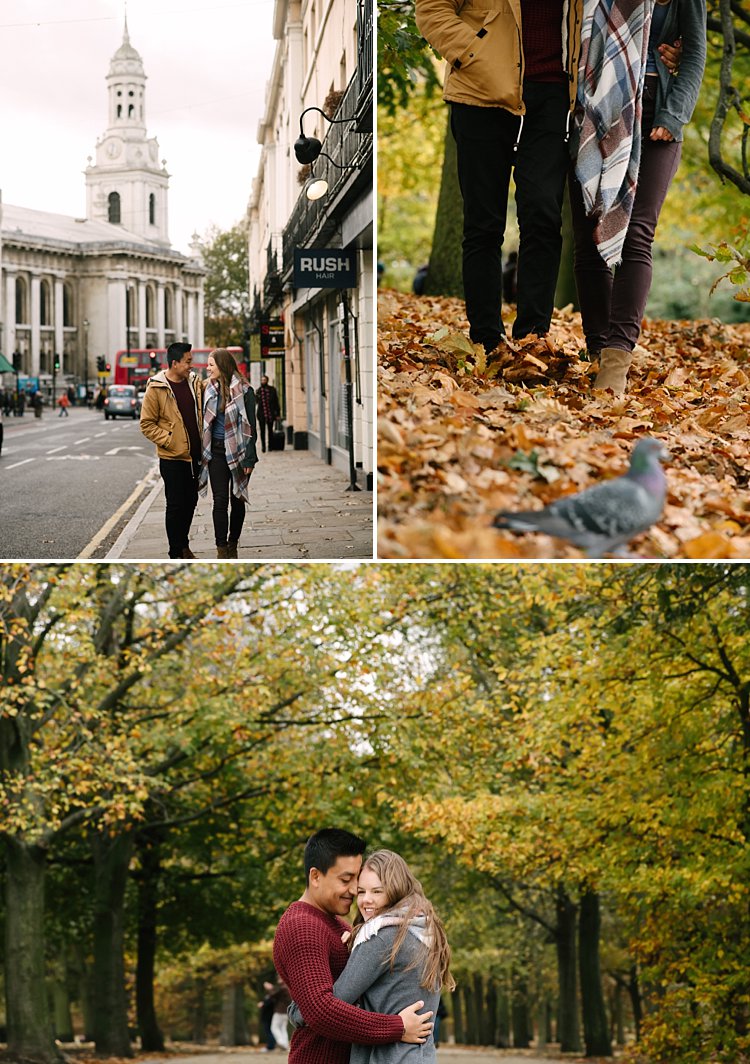
Don’t forget that you can leverage location and all the elements within the setting and not completely rely on light alone. For example, what season of the year is it? If it’s autumn, take advantage of the changing colors of the leaves, use the outfits of the season that make your couple feel warm and cozy – long boots, scarfs, hats.

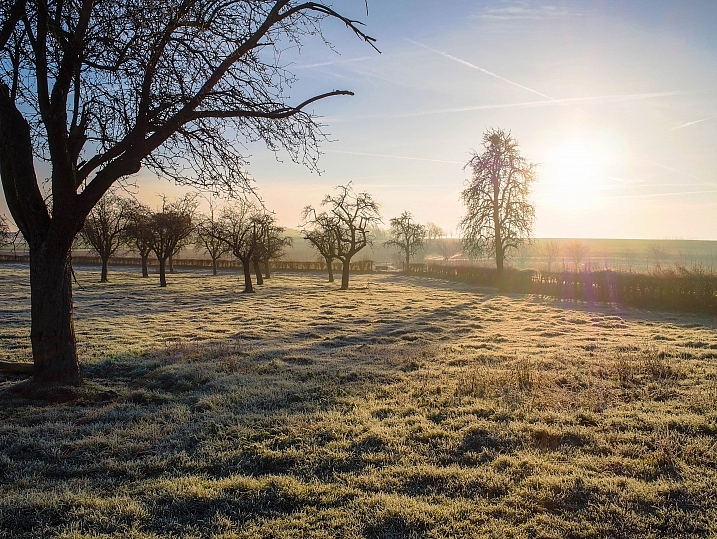
If it’s winter use the whiteness of the snow or the bleak bare branches of the trees to create a romantic story for your couple. Go to a cafe and take pictures of your couple having a nice hot chocolate with marshmallows by the crackling fire to keep warm. If it’s summer, find the early and late light to avoid the harshness of the midday sun or use props such as parasols, flowers, balloons, kites to celebrate the warmth of the sunshine.

romantic portraits of couples

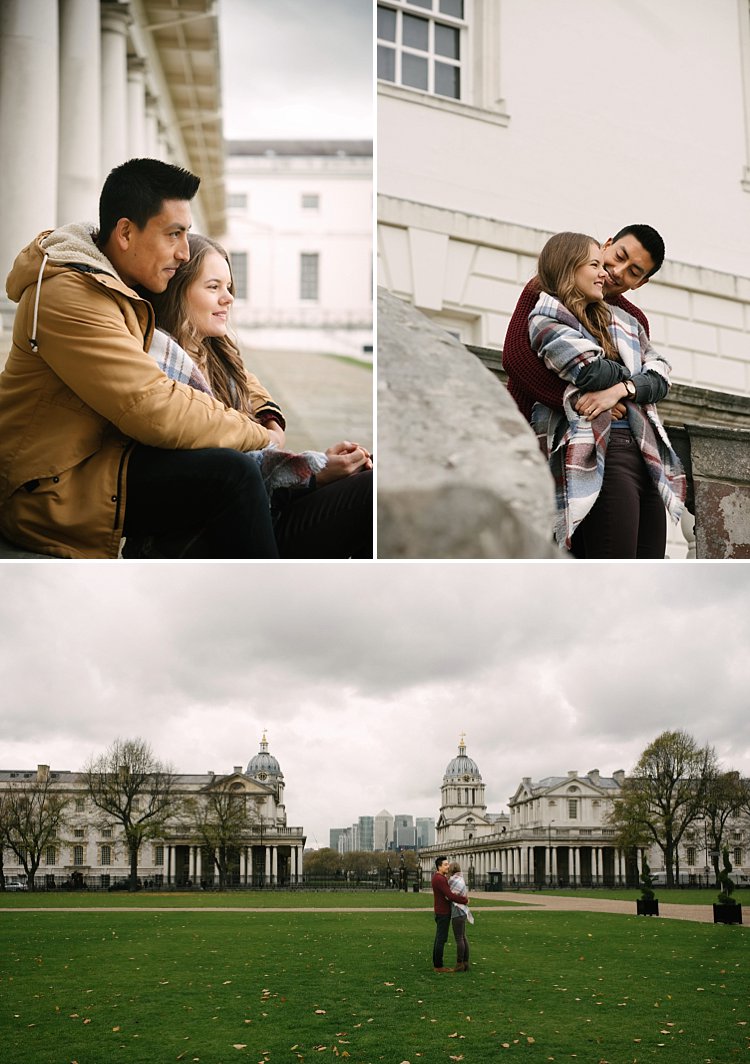
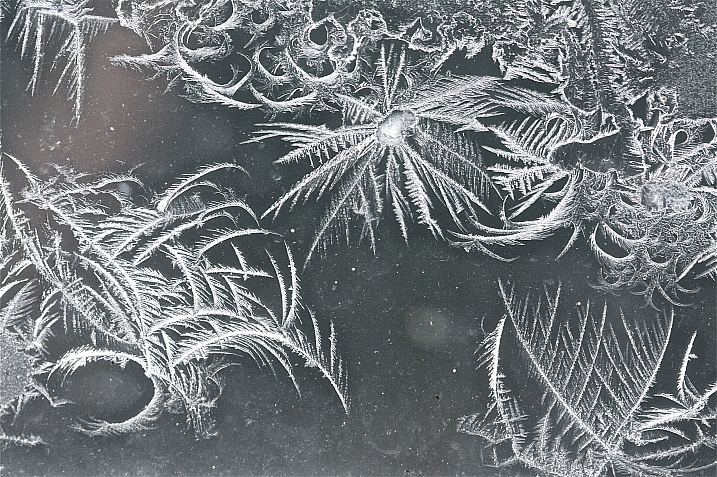
When you are shooting in the city, wait until that light hits the buildings or some iconic landmarks, or in the country, feature the soft rolling hills or vastness of the landscape. If you are shooting in the spring, look for cherry blossoms, maybe the first bud of the season, the first crack of ice or the last of the frost. The goal is to put your couples in context and leverage that to create their romantic story.

romantic portraits of couples

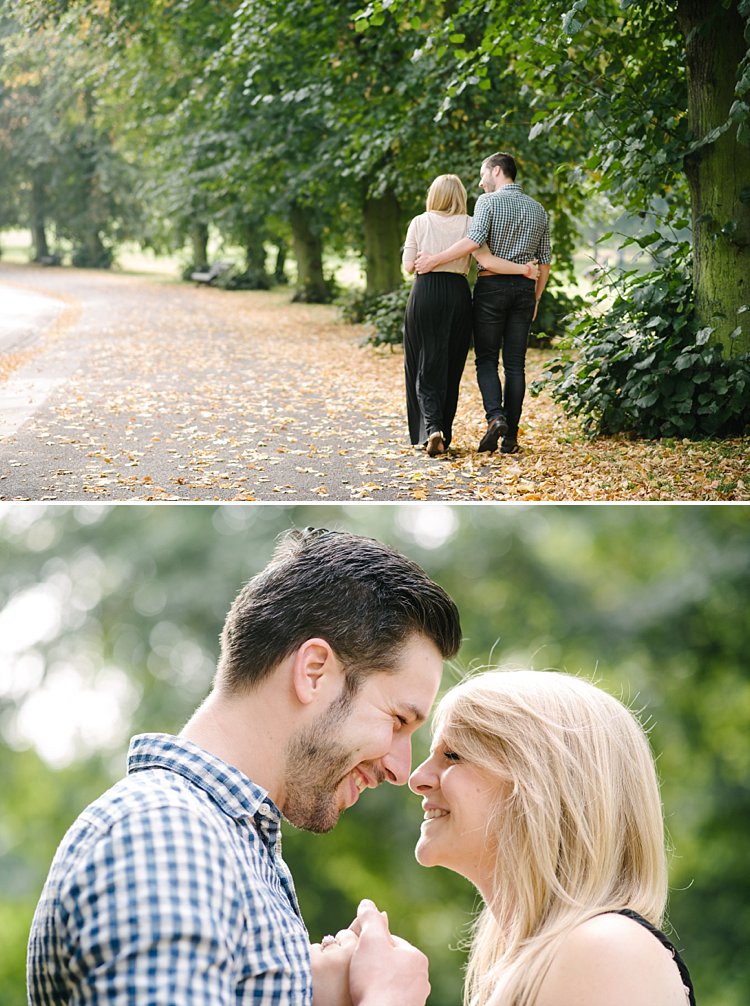
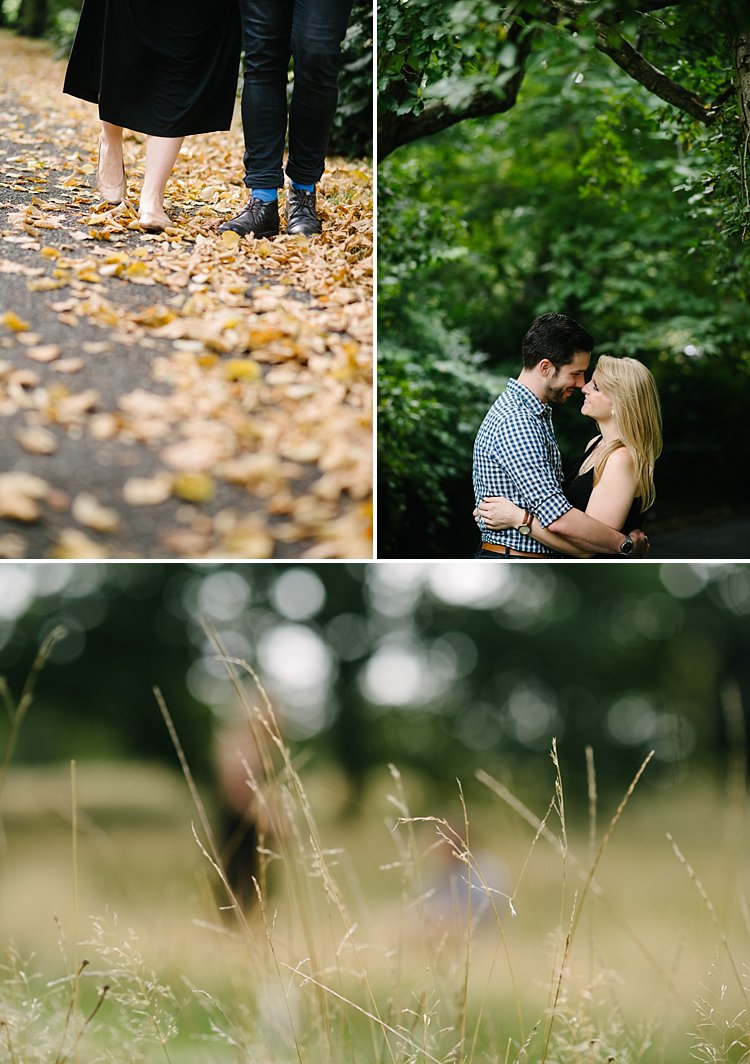
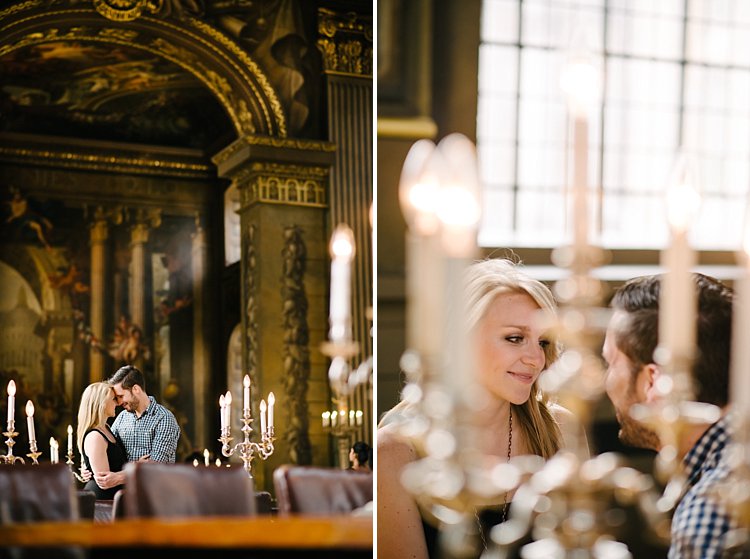
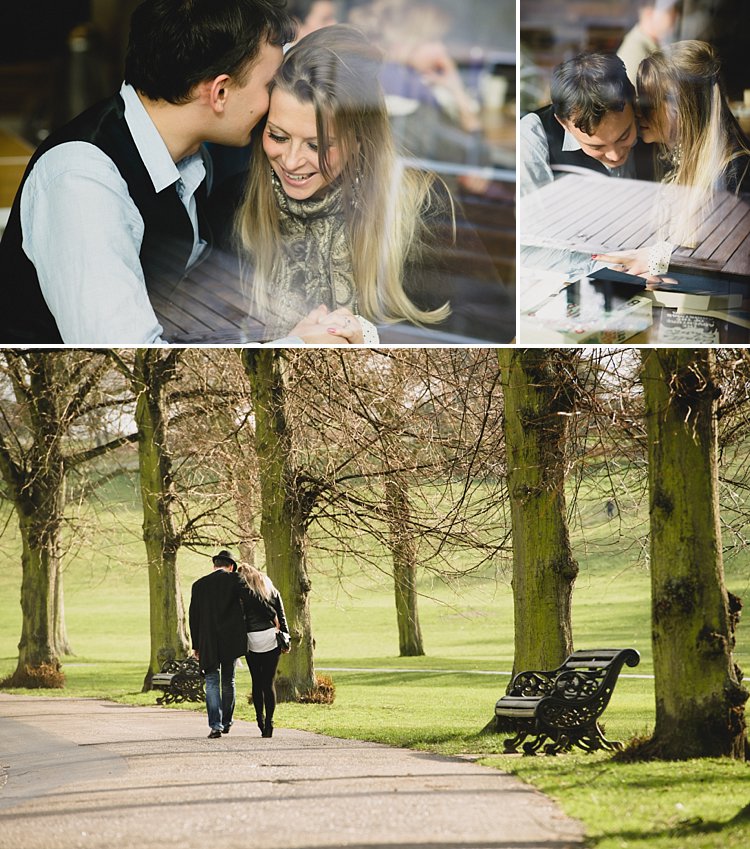
#3 – Hide and use layering in your shots

romantic portraits of couples

In this article on creative ways to improve your photography, I have written about layering. Layering is a great tool for romantic images. It lets you hide behind something and makes you invisible. The great thing about it is that it puts the viewer of the photo in your place as if they are just passing by and happen to catch a glimpse of the couple.

Layering is one of my favorite tricks and can even be done without you hiding from the couple. You can shoot in a completely open space and still utilize layering. Just grab something, put it in front of your lens and pretend that the camera is peeking through a gap. Layering can be as simple as that. I often pick up a leaf and use it as a layer between the camera and the couple. A bit of fabric, cellophane wrapped around the lens, a prism dangled in front of the lens to create a sun flare all add layers…the possibilities are endless.

romantic portraits of couples

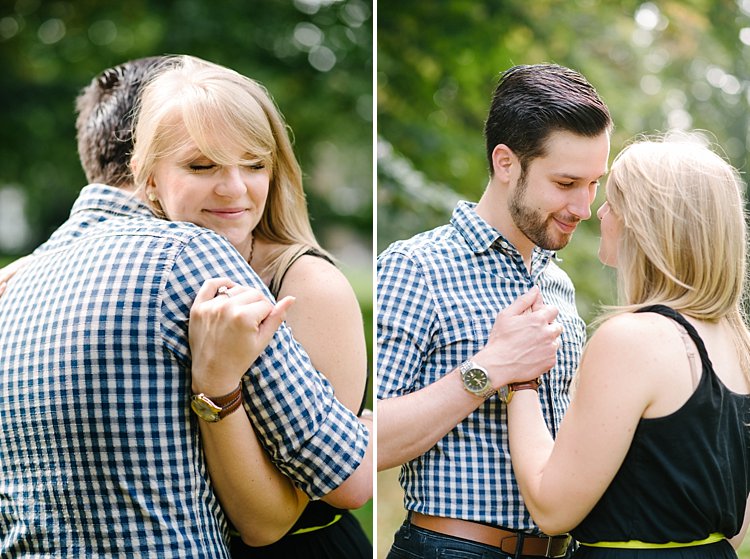
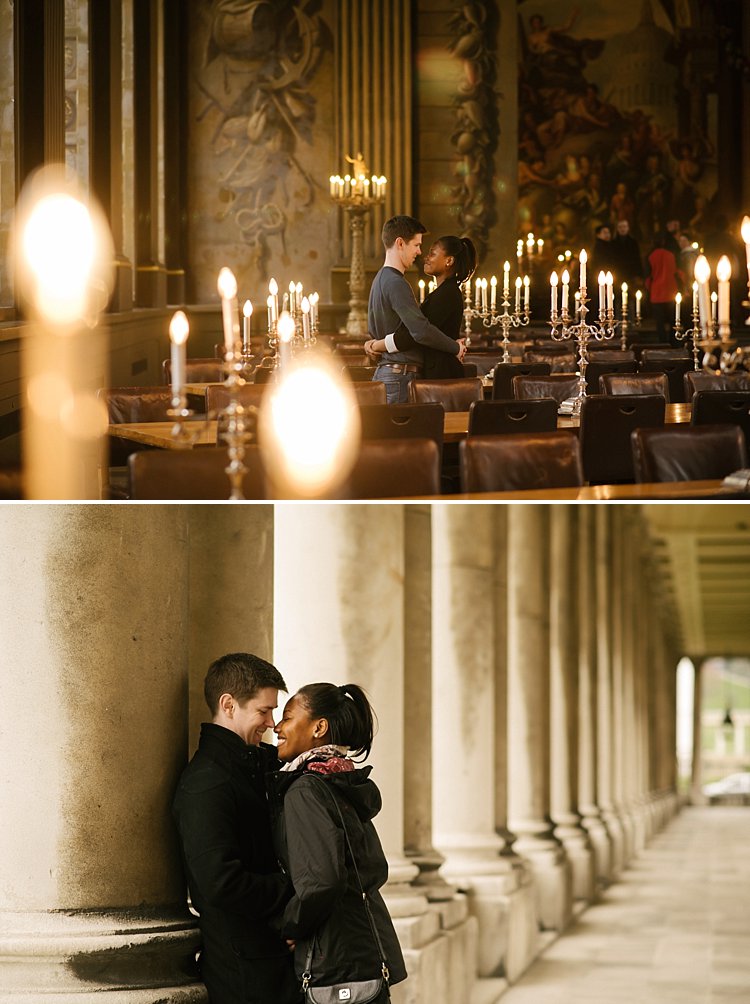
#4 – Encourage contact between the couple

romantic portraits of couples

romantic portraits of couples

To me, the epitome of romantic photographs is when it evokes total privacy – there is no one there other than the couple. In normal portrait situations, I would want a connection between the viewer and the subject. Eye contact with the camera is great for that. It draws the viewer in and invites them to have a conversation with the image. However, for romantic portraits, I prefer no eye contact, except between the couple alone.

There is no one there sharing the moment with them; it is their very own special private time. The goal is to capture the scene as if it were true and real. There must be a strong connection between the couple, whether that be looking directly into each other’s eyes, hands touching, or whispering in each other’s ears, but absolutely no contact with anyone else. This is my personal opinion of course and I’m sure it’s different for other photographers.

romantic portraits of couples

#5 – Write a story in pictures

A picture that tells no story has no soul. With practically a limitless number of photos you can take with a digital camera, you can write a novel. Go to a session with a story in mind – a beginning, a middle, and an end. That is the way I approach every engagement shoot and wedding that I photograph.

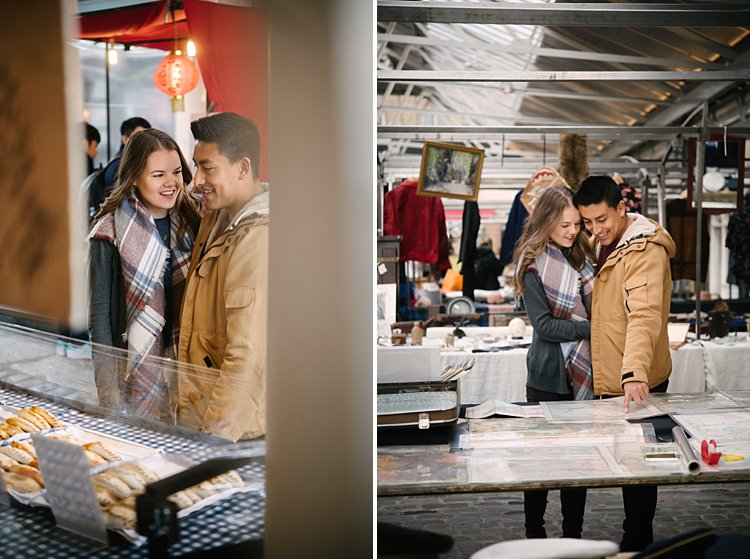
These don’t have to be very specific pictures, that would depend on where you are. Rather, it’s more of a mindset. What would be your opening scene in a novel? Is your couple walking hand in hand, having a coffee, whispering sweet nothings, or reading a book? What happens in the middle of the story? Are they shopping in a market, admiring some landmarks, doing an activity they both love?

romantic portraits of couples

How does the story end? Do they walk away from you into a tunnel or cinema? Or do they sit and relax, put their feet up on a bench after a long day? Do they kiss? Or do they have a dramatic ending like a silhouette or looking out into the horizon with the sun fading or the moon rising?

Each couple has their own unique story. When you meet them you will get a feel of their personalities, their likes, and dislikes. Soon, you will be able to piece that story together and it will be like no other.

romantic portraits of couples

I hope you find the above tips helpful. Do share other tips for capturing romantic portraits of couples in the comment section below.

googletag.cmd.push(function() {
tablet_slots.push( googletag.defineSlot( “/1005424/_dPSv4_tab-all-article-bottom_(300×250)”, [300, 250], “pb-ad-78623” ).addService( googletag.pubads() ) ); } );

googletag.cmd.push(function() {
mobile_slots.push( googletag.defineSlot( “/1005424/_dPSv4_mob-all-article-bottom_(300×250)”, [300, 250], “pb-ad-78158” ).addService( googletag.pubads() ) ); } );

The post 5 Tips for Creating Romantic Portraits of Couples by Lily Sawyer appeared first on Digital Photography School.


Digital Photography School

 
Comments Off on 5 Tips for Creating Romantic Portraits of Couples

Posted in Photography


Toy Photography Lets Hobbyists Work While They Play

11 Jan

Chris McVeigh didn’t reach paid photography through any of the usual routes. He didn’t study photography, didn’t work as an assistant and he didn’t even have photography as a goal. His background was in writing for technology magazines and providing illustrations and animation for online advertising. It was only when the economic downturn left him with less demand from his regular employers, and more free time for creative experimentation, that he turned towards picture-taking. His images have since become regular additions to Gizmodo, they’re sold on RedBubble and Society6, and Lucasfilms has even put one of his photos on the front page of StarWars.com.

His success has been helped by the fact that Chris skirted around the competition for landscape photographs and wedding shoots. He produces a nearly unique set of pictures that he calls “toy photography.” He creates sets out of Lego figures and uses them to illustrate scenes.

Chris’s interest in Lego started as suddenly as his interest in photography. Like most people, Chris had left playing with plastic bricks in his childhood. Some friends, though, bought him some Star Wars Lego sets for Christmas… which he then ignored for about a year before assembling them.

“When I did finally break open the boxes and put them together, it was like a spark ignited within me,” Chris recalls. “However, it would be another few years and a dozen Star Wars sets before I was really hooked again.”

At the same time, Chris was playing around on Flickr, creating a series of comical self-portraits as part of a daily photo challenge. That series built an audience, won plaudits and gave him the confidence to buy his first DSLR.

breakfast

Photography: Chris McVeigh

Each Set Takes Two to Three Weeks to Build

It wasn’t long before his growing interest in photography met the fun he was then having with Hasbro Star Wars figures. Lego, though, offered a more flexible platform, with parts that were interchangeable, allowing Chris to reuse pieces from any Lego theme from Batman to Harry Potter.

The props might be toys but creating the images isn’t child’s play. Chris usually has plenty of ideas but he starts designing using a Lego CAD app called Lego Digital Designer. That allows him to experiment with the build without spreading all the bricks in front of him. Once he’s happy with the design, he creates a test build in the real world then works to optimize the parts usage.

Some designs, he says, take as little as 24 hours but most require a development of two to three weeks before they’re ready to be photographed.

The shoot is a whole different challenge. Legos’s bricks are highly reflective, especially the darker colors, says Chris, so he has to be very careful about how he uses light and where he positions his panels. It’s no surprise that he typically builds and photographs new models just once a month at the moment, although he might produce a number of models concurrently and photograph them at the same time.

The result is a mixture of whimsy and smart photography. Scenes include a version of American Gothic, a reconstruction of Michael Jackson’s Thriller video (complete with dancing zombies) and a bowl of milk filled with floating stormtrooper heads. Reconstructions of early technology, including a Leica M9-P Hermes and a (sort of) working Polaroid Land Camera are popular too.

Chris’s intention when he began creating and photographing his models was little more than to enjoy some creative experimentation. But when he uploaded them to Flickr, the pictures continued to win attention, including from buyers.

“One of Gizmodo’s editors was a contact of mine on Flickr, and was impressed both with my capacity to design my own models and my ability to present those models with my photography,” Chris said. “So he contacted me through Flickr to see if I’d be interested in contributing to Gizmodo.”

From Lego to Kozik’s Mongers Menthols

The technology website has published dozens of Chris’s pictures using them to illustrate articles about water pressure as well as explanations of the difference between GSM and CDMA. The site made a point of linking to Chris’s Web pages and even mentioned that he was able for commissioned work.

His work for Lucasfilms also came about as a result of his presence on Yahoo’s photo sharing site. Bonnie Burton, formally of the Official Star Wars blog, contacted Chris on Flickr after seeing his Star Wars action figure/chipmunk photography on Digg.

Chris isn’t the only photographer who has managed to make money setting up toys and taking their picture. Ryan Roberts paints with a slightly different canvas, using collectible figures from Japan and China’s urban vinyl toy culture that was popular in the 1990s. They might include the Kozik’s Mongers Menthols series that contained a smoking pile of poop, Domo’s Acid Sweeties, or Pete Fowler’s Monsterism.

“These figures went way beyond my childhood toys with so much color and attitude,” says Ryan on his website. “They were already tiny works of art by giant artists from other genres such as painting, illustration, silk screening, and street art.”

Ryan’s broader choice of figures gives his scenes a greater freedom of expression even if the models themselves are less familiar than the Lego characters used by Chris McVeigh. He sells his prints from his websites, has a DVD of toy-based shorts and markets a calendar of his images that costs $ 45.

What both these photographers have in common is the combination of a passion for a hobby — in this case a particular kind of children’s toy — and a knowledge of photography. Bring those two together and add the kind of photography-loving networking that can still be found on sites like Flickr and while you might not find yourself traveling down the usual route taken by professional photographers, you could well find yourself winning commissions, landing sales making some money doing a photo-based activity you love.


Photopreneur – Make Money Selling Your Photos

 
Comments Off on Toy Photography Lets Hobbyists Work While They Play

Posted in Equipment


Instagram terms and conditions rewritten in simple language for teens

10 Jan

Law firm Schillings was recently tapped by the UK’s Children’s Commission to rewrite Instagram’s Terms and Conditions in simplified, child-friendly language. The simplified terms of service were included in the Commission’s newly published ‘Growing Up Digital’ report detailing, among other things, ways in which the Internet can help young users become better informed about the websites and apps they use.

At the heart of the report is a concern that children (and many adults) are unable to make informed decisions about the digital services they use due to the difficulty of understanding a service’s terms and conditions. The report cites Instagram’s Terms and Conditions as one example, finding that it contains 5,000 words across 17 pages ‘with language and sentence structure only a postgraduate could be expected to understand.’

Teenagers tasked with reading original Instagram Terms and Conditions report trouble understanding the information and frustration at its length. When given the rewritten TAC, however, which are condensed down to only a couple pages, the teenagers are able to explain the rules, what rights they have, and what rights Instagram reserves.

The full rewritten Instagram Terms and Conditions can be found on page 10 of the Commission’s report.

Via: PetaPixel

Articles: Digital Photography Review (dpreview.com)

 
Comments Off on Instagram terms and conditions rewritten in simple language for teens

Posted in Uncategorized