RSS
 

Archive for September, 2016

Leica-branded instant camera rumored to launch soon

15 Sep
via Leica Rumors

Leica might be set to announce its own version of one of Fuji’s instant print cameras in what looks like another re-badging exercise. The Leica Sofort (‘instant’ in German) camera was unofficially announced in the company’s Leica Fotografie International magazine, but isn’t due to be formally released until tomorrow – according to Leica Rumors. The camera appears to be a redesigned Fujifilm Instax mini 90 as it shares the same basic shape and lens, and it takes Fujifilm’s Instax mini film. Leica looks to have slightly altered the buttons and added some minor details, and has named the 34mm equivalent lens Automatik-Hektor 1:12.7/60mm.

via Leica Rumors

Leica will also reportedly introduce its own range of color and black and white films to go with the camera, which will almost certainly be repackaged Fujifilm materials. Fuji’s own film will also fit the Sofort.

Leica rumors expects the camera to cost €279 (approx. $ 310) with a choice of three colors. The Fuji Instax mini 90 costs €150/$ 150.

Articles: Digital Photography Review (dpreview.com)

 
Comments Off on Leica-branded instant camera rumored to launch soon

Posted in Uncategorized


6 Tips for Planning the Perfect Landscape Photo Shoot

15 Sep

How many times have you shown your pictures to someone and said, ”You should have seen that sunset in person to understand how magic it was!” We can make many excuses as to why the photo doesn’t look the same, complaining about our equipment, settings or post-production, but let’s face reality, maybe there was something wrong with our landscape photo!

Before you open Photoshop, and even before you press the shutter button, you need to plan the kind of image you want to create. Planning plays a key role in landscape photography. Here are some things that are useful to think about if you want to capture the perfect light and transmit some feelings with your images.

Tip 1: Check the weather forecast

landscape photography

Calton Hill – Edinburgh, Scotland

Landscape photography is one of the most difficult genres, or at least among the most unpredictable, as you don’t have any control over the weather at the scene.

What kind of atmosphere do you want to create with your image? The weather can completely transform a landscape, so think carefully about what mood you want to evoke. If you want to create a bright, cheerful image you might already know that a blue sky with fluffy white clouds would be better than a flat blue sky, or even worse a grey one.

So, before you drive for two hours and you arrive to see is a dull landscape, use the only weapon at your disposal: the weather forecast.

Tip 2: Choose the right time of the day and year

The perfect weather condition alone is useless without proper light. In landscape photography, the light is given by the position of the sun in the sky in relation to your subject. Fortunately, this is something more predictable than the weather. Calculate where the sun will be at particular times of day, and it will be easier for you to foresee how the scene will be illuminated. Again, think about the atmosphere you want to create. Light and peaceful? Dark and moody? Are there any particular landmarks you want to highlight? The answer to these questions will inform where you want your light to be, and consequently what time of day to shoot.

landscape photograph Groningen, Netherlands

Groningen, Netherlands

Bear in mind that the sun’s position doesn’t change only during the day, but also throughout the year. As a result, in one year there are many different lighting conditions for the same place. It would be a shame not to use them to your advantage. You can use many websites and apps for this; the one that I use the most is PhotoPills, which is very well outlined in this article.

Tip 3: Be inspired by other photographers

When you plan your holiday, after booking the tickets and the hotel, you may buy a travel guide with detailed information about the location. Like where to go and what to eat, to make sure you won’t miss anything. Or you might just ask some friends who have been there before. In both cases, you’re relying on someone who went there before you, and who therefore knows what’s worthwhile to visit, or what’s a good typical (local) dish to try.

Even if you can’t do exactly the same thing with photography, you can get pretty close, thanks to the multitude of photography websites and social networks full of pictures from all over the world. The ones I personally use most of the time are; Google Images, 500px, Instagram, Flickr, and Pinterest. Obviously, the list doesn’t end here.

Feel free to use whatever sites you want, as long as you do it. It doesn’t matter if the picture isn’t the best quality, after all, you don’t want to copy it, but you’re just looking for some inspiration

landscape photograph Zaanse Schaans, Netherlands

Zaanse Schaans, Netherlands

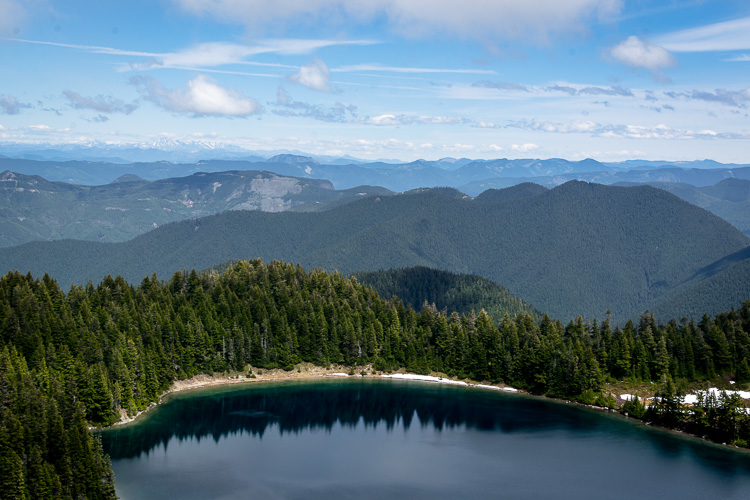
Tip 4: Enjoy the place and get familiar with it

When arriving somewhere, especially if it’s for the first time, it’s really tempting to take your camera and shoot whatever you see! This isn’t wrong in itself, but remember you’ll probably take dozens of nice pictures and lose the opportunity to take that single outstanding one. Because when the moment comes you’ll be tired of taking other pictures, or even worse, the battery is dead. (By the way, do you have a spare battery, don’t you?)

It’s better to be patient and spend more time exploring your location and the surrounding area. This way you are more likely to discover some interesting spots, hopefully different from the classic ones. You can use your smartphone for your normal tourist pictures, so don’t worry about anything but composition. This way, you can enjoy the place where you are, instead of spending all the time behind your camera. After all, landscape photography should be the happy ending of a good day outside, not the only reason for being there.

landscape photograph Land’s end - Cornwall, England

Land’s end – Cornwall, England

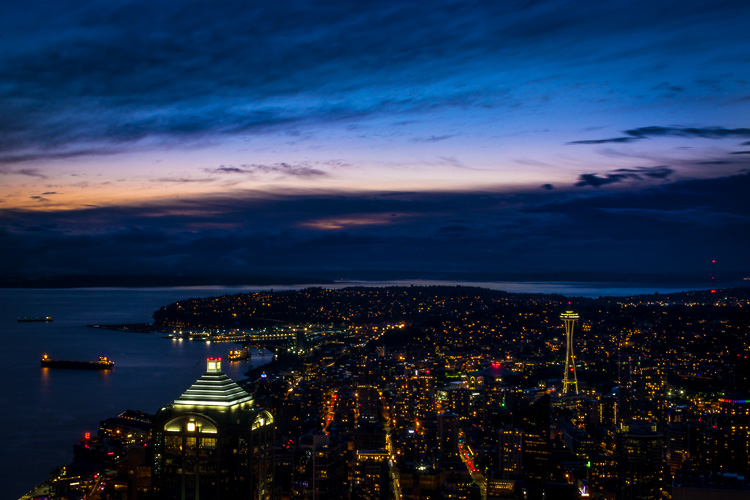
Tip 5: Use both golden and blue hours wisely

I’m sure you already know what the golden hour is: the time of the day around dawn and dusk when the sun gives its best warm light and long soft shadows. Hence the adjective golden. Many photographers, including me for a while, consider it as solely the right moment for obtaining good photos. This is wrong, because there is another one, called blue hour, which occurs just before the golden hour at sunrise, and just after sunset.

As you can imagine from the name, its particularity is in the blue colour of the sky, not warm anymore and not totally dark like in the middle of the night. It is very effective for urban landscapes, because it emphasizes artificial lights that wouldn’t be as visible during the golden hour. Furthermore, since the sky is not totally dark, you’ll have a better contrast with the warmer colours of the city, which will add drama to your picture.

landscape photography Manarola - Liguria, Italy

Manarola – Liguria, Italy

Tip 6: Take location related issues into account

So, you’ve planned your shoot by choosing the right day, with good weather and explored the place properly. Is that all?

Almost… There’s still something to be considered and it depends on the place. For example, in the case that you want to photograph a coastline, you will need to consider tides. It can be useful for composition purposes, but most importantly it’s for your personal safety. Tides in the ocean are really rapid and wide, and in some cases, it could be difficult (if not impossible) to escape from the waves if you decided to shoot from the rocks along the shore, with a rocky wall behind you.

In the case of very famous landmarks, a common issue is that it will be full of other photographers and tourists that want the same shot as you. This can obviously create problems for your composition, or you won’t have enough space for your tripod. So, try to be in that place before it gets too busy. This not only reduces the risk of finding other photographers who have decided to photograph from your same spot, it also permits you to slow down and avoid making mistakes.

landscape photography London, England

London, England

Conclusions

When I started taking pictures several years ago, I didn’t have anything in my mind other than to take pictures of what I liked. But looking at other photographer’s work I realized that I was missing something. In my opinion, proper planning is the most important thing that I could have learned.

Obviously learning new techniques is useful, but it’s the most obvious. Planning is often underestimated, but it can really help you to go somewhere already having a picture in mind. If this isn’t the case, remember again: landscape photography is just the happy ending, you can still enjoy the place!

Do you have any other tips for planning your landscape photography shoots? I’d love if you shared them in the comments below as well as your images.

googletag.cmd.push(function() {
tablet_slots.push( googletag.defineSlot( “/1005424/_dPSv4_tab-all-article-bottom_(300×250)”, [300, 250], “pb-ad-78623” ).addService( googletag.pubads() ) ); } );

googletag.cmd.push(function() {
mobile_slots.push( googletag.defineSlot( “/1005424/_dPSv4_mob-all-article-bottom_(300×250)”, [300, 250], “pb-ad-78158” ).addService( googletag.pubads() ) ); } );

The post 6 Tips for Planning the Perfect Landscape Photo Shoot by Luigi Trevisi appeared first on Digital Photography School.


Digital Photography School

 
Comments Off on 6 Tips for Planning the Perfect Landscape Photo Shoot

Posted in Photography


Striding Forth: Canon EOS 5D Mark IV Review

15 Sep

Introduction

The Canon EOS 5D series is arguably one of the most recognizable camera lines of the digital age and the Mark IV is designed to appeal to the same wide range of enthusiasts and professionals. Nearly identical-looking to its predecessor, it receives substantial upgrades under the hood, including: a higher-resolution sensor with Dual Pixel autofocus, 4K video capture, an upgraded AF system, a touchscreen, improved weather-sealing, built-in Wi-Fi/NFC, an interval timer and GPS. All this adds up to a camera that fits into Canon’s product line nicely as the all-around full-frame option.

It is built around a new 30.4MP CMOS sensor and uses the Digic 6+ processor. The AF system is from the flagship 1D X Mark II and contains 61 AF points (41 of which are cross-type) with up to 24% expanded vertical coverage compared with the system in the Mark III. The center point is sensitive to -3EV in One Shot (AF-S) mode (in Live View the sensor is sensitive to -4EV with a fast lens).

4K video capture is a welcome addition to this camera and users can record in either 24 or 30p, albeit with a 1.64x crop. All footage is captured as Motion JPEG. Additionally, the camera allows for 4K Frame Grabs, effectively giving users 30 fps stills shooting with (Dual Pixel) AF. We’ve seen that the camera suffers from some rolling shutter, but it may still have some merit for capturing the decisive moment when 7fps just isn’t enough.

While developing the IV, Canon says it sought feedback from 5D-series users and found that dynamic range, resolution, AF precision and AF speed were the four most important areas improvements were requested. On paper, the Mark IV seems to address these aspects nicely.

Canon 5D Mark IV Key Specifications

  • New 30.4MP CMOS full-frame sensor with Dual Pixel AF
  • DCI 4K 30/24p video using Motion JPEG + 4K Frame Grab
  • 61-point AF system with 41 cross-type sensors (center point sensitive to -3 EV)
  • Dual Pixel AF (sensitive to -4EV) for continuous Servo AF in stills (first for a full-frame Canon camera) and video
  • ISO 100-32000 (expandable to 102400)
  • 7 fps continuous shooting
  • Dual Pixel Raw (image microadjustment, bokeh shift, ghosting reduction)
  • 150,000-pixel RGB+IR metering sensor
  • 1.62M-dot 3.2″ full-time touchscreen
  • Wi-Fi w/ NFC + GPS
  • Built-in bulb timer interval timers
  • Improved weather-sealing

In terms of AF, the increased coverage area is definitely a big deal: after all, it’s the exact same AF system found in the company’s flagship sports camera. The 150,000-pixel RGB-IR metering sensor, which feeds scene information to the AF system, is borrowed from the original 1D X, bringing enhanced subject identification (including faces) and tracking (‘iTR’), as well as improved metering and flicker detection.

The 5D Mark IV is Canon’s first full-framer that can continuously focus in Live View during stills capture, and because of the way Dual Pixel AF works, focus is generally very accurate, even with fast lenses. It’s surprisingly good at sticking to the original subject (or face) you initiated focus on, and it’s easy to specify your subject by tappping on it on the touchscreen in ‘Face Detect+Tracking’ mode.

The 5D Mark IV also has some new tricks up its sleeve including Dual Pixel Raw, a nifty option that can prove useful in specific shooting scenarios. It works by recording two 30MP images, one from each of the ‘left-looking’ and ‘right-looking’ photodiodes at each pixel. Previous Canons have combined these two signals at each pixel, but Dual Pixel Raw gives you the option of keeping them separate. This results in a file that’s twice as large, but one that allows for ‘image micro-adjustment,’ ‘bokeh shift’ and ghosting reduction (more on this on our Features page) in Canon’s supplied Digital Photo Professional software.

Compared to its peers

Canon now offers a range of full-frame models. On the high end you have the Canon’s sports and action-oriented 1D X Mark II, with its 20.2MP sensor and 14 fps continuous shooting (with AF). The 5DS (and ‘R’ variant), with their 50.6MP sensors, are the company’s high resolution options. The 5D Mark IV splits the difference in terms of resolution and is positioned as Canon’s all-rounder. For those on a budget, the EOS 6D soldiers on, four years after its introduction.

So how does the 5D Mark IV stack up against its closest sibling and predecessor? Take a look for yourself:

  Canon EOS 5D IV
Canon EOS 5D III
Canon EOS 5DS
MSRP $ 3499 $ 3499 $ 3699
Sensor 30.4MP 22.3MP 50.6MP
ISO range
(expanded)
100 – 32000
(expandable 50-102400)
100 – 25600
(expandable 50-102400)
100 – 6400
(expandable 50-12800)
AF points 61 (41 cross-type)
over expanded region
61 (41 cross-type) 61 (41 cross-type)

Live view/video AF ‘Dual Pixel’ phase detection Contrast detection Contrast detection
RGB metering sensor resolution 150k pixels 63-zone dual-layer 150k pixels
LCD 3.2″ 1.62M-dot touchscreen 3.2″ 1.04M-dot 3.2″ 1.04M-dot
Burst rate 7 fps 6 fps 5 fps

Video DCI 4K/30/24p 1080/30p 1080/30p
Headphone socket Yes Yes No
Card format 1x Compact Flash
1x SD

1x Compact Flash
1x SD

1x Compact Flash
1x SD
Built-in Wi-Fi/NFC Yes No No
GPS Yes No No

Obviously if you need the resolution, the Canon EOS 5DS is the more sensible choice. But in just about every other regard, the Canon EOS 5D Mark IV is the far more versatile camera and a worthy upgrade from the 5D Mark III.

Pricing and availability

The Canon EOS 5D Mark IV ships this September and will cost $ 3499 body only, $ 4399 with the 24-70mm F4L IS USM lens and $ 4599 with the 24-105mm F4L IS II USM lens.

Articles: Digital Photography Review (dpreview.com)

 
Comments Off on Striding Forth: Canon EOS 5D Mark IV Review

Posted in Uncategorized


Staggering Statues: 7 Monumental Wonders of the Former Soviet Union

14 Sep

[ By SA Rogers in 7 Wonders Series & Travel. ]

motherland calls statue

Nobody could ever accuse the Soviets of being too modest in the scale of their monuments and colossal sculptures, and they left no shortage of absolutely bonkers concrete and stone creations all over their former territories. In addition to their strange yet beautiful sculptural rural bus stops and all of abstract alien-like monuments they constructed in what was once Yugoslavia, the Soviets took pride in erecting colossal figurative statues that range from awe-inspiring to downright scary.

The Motherland Calls, Volgograd, Russia

motherland calls statue 2

motherland calls statue 3
The tallest statue of a woman in the world when pedestals aren’t counted in total height, The Motherland Calls stands 279 feet from the top of its plinth to the tip of its sword, positioned on a hill near Mamayev Kurgan, Volgograd. In 1967, when it was dedicated, it was the tallest statue in the world, period. Built to commemorate the Battle of Stalingrad, one of the bloodiest clashes in human history, the statue is quite beautiful, but that elegant pose and the jaunty angle of the sword have proven to be a structural concern thanks to shifts in groundwater beneath it. Conservation work began in 2010 to ensure that the 7,900-ton creation remains upright despite not being fixed to its plinth.

Monument of the Bulgarian-Soviet Friendship, Turna Hill, Bulgaria

monument bulgarian friendship

monument bulgarian friendship 2
The blocky, cubist style of the figures on The Monument of the Bulgarian-Soviet Friendship is certainly distinctive, shared by a number of other Bulgarian monuments built in the same era (including the strikingly beautiful and bizarrely Transformer-like Shumen Monument). Unsurprisingly, the Russian soldiers on the right half of the monument stand taller than those of Bulgaria. Erected on Turna Hill, a historic battleground and the mass grave of soldiers lost to the Russian-Ottoman War, the monument was once covered in bronze elements that were quickly stripped and scrapped when the Soviet Union disbanded, and it’s been abandoned ever since. It’s made of over 10,000 tons of concrete and 1,000 tons of armature wire and was intended to be the end of a grand Communist boulevard that was never built.

Colossal Courage, Belarus

belarus courage

belarus courage 2
A stern stone soldier seemingly pops his colossal head out of a mound of stone to frown down at passersby visiting the ruins of Brest Fortress in Belarus, where the Red Army stubbornly held for days against a surprise Nazi attack in 1941 despite being dramatically outnumbered. A writer at CNN called the statue ugly and said it looked constipated back in 2010, and the nation of Belarus responded with outrage, noting that ‘Courage’ is a memorial to those who died. While most monuments in former Soviet territories are disused and sometimes disowned at this point, ‘Courage’ and Brest Fortress are a major point of pride for Belarus and remain a significant tourist attraction.

Superhero-Style Astronaut Sculpture, Moscow, Russia

yuri gagarin statue

yuri gagarin statue 2

Yuri Gagarin, Soviet cosmonaut and the first man in space, gets a superhero-style commemoration in the form of a 40-foot-tall titanium statue seemingly ready to shoot off into the sky. Erected on Moscow’s Leninsky Avenue in 1980, not far from Lenin’s own mausoleum, the statue features a 90-foot granite pedestal. Gagarin’s first-ever trip to outer space lasted only 108 minutes, and though he escaped death as a backup cosmonaut for the ill-fated Soyuz-1 in 1967, he ultimately died during a routine training flight in 1968. His ashes are embedded into the wall of the Kremlin of Red Square in Moscow.

Next Page – Click Below to Read More:
Staggering Statues 7 Monumental Wonders Of The Former Soviet Union

Share on Facebook


[ By SA Rogers in 7 Wonders Series & Travel. ]

[ WebUrbanist | Archives | Galleries | Privacy | TOS ]


WebUrbanist

 
Comments Off on Staggering Statues: 7 Monumental Wonders of the Former Soviet Union

Posted in Creativity


Adobe Lightroom Mobile for iOS 2.5 brings Raw DNG capture

14 Sep
In order to capture shadow detail, this image was metered from the shadows, resulting in blown out highlights. The DNG version on the right enabled the highlights to be recaptured without issue. Photo and caption courtesy of Adobe.

Adobe has released an update for the iOS version of its Lightroom Mobile app, taking advantage of iOS 10’s DNG support. Version 2.5 offers Raw capture and editing within the app, provided that you’re running Apple’s newest OS version on an iPhone 6s, 6s Plus, SE or iPad Pro 9.7.

Apple snuck a mention of iOS 10’s Raw capabilities into its WWDC keynote in June. Available for download today, iOS 10 brings DNG raw capture and editing to Apple devices. Today’s Lightroom Mobile update for iOS brings the app’s feature set into line with the Android version, which has been able to capture and edit Raw since February. 

Version 2.5 also brings support for the wide gamut P3 color space offered by the iPad Pro 9.7 and the forthcoming iPhone 7 and 7 Plus. 

Adobe Lightroom for iOS 2.5 is available for download now from the App Store.

Articles: Digital Photography Review (dpreview.com)

 
Comments Off on Adobe Lightroom Mobile for iOS 2.5 brings Raw DNG capture

Posted in Uncategorized


Venus Optics unveils Laowa 7.5mm F2 for MFT and 15mm F2 FE Zero-D

14 Sep

Venus Optics has announced a pair of manual focus lenses – a 7.5mm F2 for Micro Four Thirds and a 15mm F2 FE Zero-D designed with full-frame Sony mirrorless cameras in mind. Both of these 15mm equivalent lenses are rectilinear. 

Venus calls the Laowa 15mm F2 the ‘world’s fastest 15mm rectilinear lens for full-frame’ and includes it in its ‘Close-to-Zero Distortion’ series along with the 12mm F2.8 Zero-D. It offers a 72mm filter thread. Claiming another ‘world’s first’ achievement, Venus calls the Laowa 7.5mm F2 the widest F2 rectilinear lens for Micro Four Thirds.  

The Laowa 15mm F2 FE and 7.5mm F2 will be available in early 2017 – no pricing is given yet.

Anhui China, Sept 14, 2016 – Venus Optics, the camera lenses manufacturer who had previously launched a number of quality lenses with ‘World’s First’ specifications, is proud to unveil two premium lenses with extreme specifications and impressive performance, the Laowa 15mm f/2 FE Zero-D & the Laowa 7.5mm f/2 MFT.

Laowa 15mm f/2 FE Zero-D

Featuring a 110° Angle of View, Ultra-fast f/2 aperture and 72mm filter thread, LAOWA 15mm f/2 becomes another member in their ‘Close-to-Zero Distortion’ lineup.

Laowa 15mm f/2 FE is currently the World’s Fastest 15mm rectilinear lens for Full Frame cameras. It features a close-to-zero optical distortion, allowing photographers to take landscape or architecture shots with straight lines retained.

Dedicated to fulfill the need of photographers, Venus Optics have managed to add a 72mm filter thread onto the 15mm f/2 lens. Photographers can easily install standard screw-in filters without paying for an expensive yet bulky filter holder system.

Designed specially for the Sony Full Frame Mirrorless cameras, Venus Optics has successfully controlled the size and weight of the lens to the minimal. Weighing less than 1.1 pounds (500g) and 82mm in length, the portability and compactness of the Sony E-mount Mirrorless cameras can be maintained when used with the Laowa 15mm f/2 FE Lens.

Featuring the fastest f/2 aperture ever built with a 15mm lens, the new Full Frame E-mount lens is engineered for professionals to shoot impressive landscape, architecture and primary astro photos with great details. This is an every-day and must-buy lens that every Sony Full Frame Mirrorless camera user should have one in his bag.

Laowa 7.5mm f/2 MFT

The Laowa 7.5mm f/2 MFT is the Widest f/2 rectilinear lens ever designed for Micro Four Thirds Cameras. Despite the extreme specifications, Venus Optics has successfully minimized the weight of the lens to a merely 0.37 pounds (170g) and 55mm long. The extreme 110 angle of view, ultra-fast f/2 aperture and featherweight make this lens an ideal option to pair up with drones for aerial photography. It also gives photographers a fast and wide-angle option for low-light shooting as well as landscape photography.

Availability

The Laowa 15mm f/2 FE Zero-D and the Laowa 7.5mm f/2 MFT will be available to the market in early 2017. Engineering prototype will be available to test in Venus Optics’ Photokina debut. Venus Optics’ booth is in Hall 2.1, Booth A-045.

Articles: Digital Photography Review (dpreview.com)

 
Comments Off on Venus Optics unveils Laowa 7.5mm F2 for MFT and 15mm F2 FE Zero-D

Posted in Uncategorized


Leica S firmware update improves top LCD panel info, adds Adobe-compatible image rating

14 Sep

Leica has released new firmware for its S and S-E medium format cameras that improves the quality of information displayed on the top plate and in the viewfinder. Firmware versions 4.0.0.0 for the S (Typ 007) and 2.5.0 for the S-E (Typ 006) also allows users to mark images with a rating that can be displayed in Adobe’s Lightroom and Bridge applications. With the firmware loaded the cameras will also remember the degree of magnification last used in review mode and automatically default to that next time the magnify button is pressed.

The information panels now provide more icons to indicate what modes the camera is using, and critically offer a measure of how much time capacity is left on the memory card when shooting video and how many more shots are left in the buffer for high-drive shooting in stills mode.

The new firmware is available for download now for customers who like to update for themselves, while others can take their camera to their nearest Leica store or service center.

The firmware can be downloaded from the support section of the Leica website.

Press release

Firmware updates for Leica S cameras now available

New firmware updates are available today for the Leica S-System. Registered owners can log in to the Leica Owners’ Area and download the new firmware version 4.0.0.0 for the Leica S (Typ 007) and 2.5.0 for the Leica S/S-E (Typ 006) medium format cameras, or take their camera to a Leica Store or Leica Customer Care in the UK for a complimentary update service.

Leica works in close collaboration with users on the continuous development and optimisation of its products. As a result, a number of improvements in this latest firmware update are based on the direct recommendations and suggestions of professional photographers.

The new features of Firmware Update 4.0.0.0 include a revised layout for the top plate display panel, which now provides even more information for the user. The new ‘Rating Function’ is supported by Adobe Photoshop Lightroom CC, Photoshop CC and Bridge CC software, and improves the workflow of selecting images – giving users much faster access to the images they have tagged.

With this firmware update, the most recently used zoom setting in review mode is now saved, enabling faster assessment of image sharpness/focus when reviewing a specific part of a picture. Distances displayed on the top panel can also be shown in feet, and it is now possible to see the remaining recording time when shooting video. Also new in this update is the ‘PC’ symbol, which indicates when the camera is connected to a computer. In addition to the above, the first resistance point of the shutter release now displays the number of exposures remaining for sequential shooting (maximum buffer memory) in the viewfinder, and the new ‘mirror-up’ icon appears on the camera monitor screen.

Articles: Digital Photography Review (dpreview.com)

 
Comments Off on Leica S firmware update improves top LCD panel info, adds Adobe-compatible image rating

Posted in Uncategorized


dPS Writer’s Favorite Lens: Nikon 35mm f/1.8G

14 Sep

A few years ago Nikon started revamping their lens lineup to include faster focusing, better coatings on the glass elements, and for the first time, no manual control over the size of the aperture. This series of lenses was given the “G” moniker, and one of the earliest that went into production is still one of the best: the 35mm f/1.8G.

This inexpensive little workhorse is not only supremely versatile but performs well beyond its price range in almost any shooting situation. It was designed to work for crop-sensor cameras, which Nikon refers to as DX models, but in many circumstances, it works just fine on full-frame FX cameras as well. I enjoy shooting mostly portraits and nature photography and there’s hardly a situation in which this 35mm lens doesn’t give me good results. It’s by far my favorite lens, and I’d like to share a little bit more to let you know why.

favorite-lens-nikon-35mm-seattle-skyline

Seattle skyline, photographed with the 35mm f/1.8G DX on a Nikon D7100.

One of the best features of the 35mm 1.8G lens is something that could also be seen as a significant limitation: it does not zoom in and out. It’s a prime lens which means it has a fixed focal length. So if you are used to twisting your lens to get a close-up view of your subject, you will have to train your mind to think about things a bit differently when using this lens. Since it is permanently stuck at 35mm you have to use your feet and get creative when shooting pictures. But once you get past this limitation you will start to notice that it pales in comparison to one of its most important strengths: a super wide aperture.

Fixed focal length, amazing results

If you’re not entirely familiar with what the term aperture means, it’s basically the opening in your lens that lets light pass through. This is an f/1.8 lens which means it has a huge maximum aperture, or opening, compared to some other lenses, especially most zooms. This feature allows the lens to capture much more light so you rarely have to use the flash, and also helps you get the kind of smooth blurry backgrounds you see in professional-style portraits. The f/1.8 aperture is the one key factor that makes this lens so incredibly useful and versatile. Even though it lacks the ability to zoom in and out it’s a tradeoff well worth making, in my opinion.

I took this quick snapshot of my niece while she was playing with her cousins, but the wide f/1.8 aperture on the 35mm lens gave me a nice blurry background.

I took this quick snapshot of my niece while she was playing with her cousins. The wide f/1.8 aperture on the 35mm lens gave me a nice blurry background.

Avoid dreaded pop-up flash issues

Before I got into more advanced photography several years ago I owned a decent pocket camera. While it did take good pictures in broad daylight, any time the sun even started to get low on the horizon it would fire the flash and bathe everything in a weird artificial light. I noticed the same thing happening to my friends with DSLR cameras too, and couldn’t figure out why even the more expensive cameras were always turning on the pop-up flash when the lighting was dim.

If you have wondered about this yourself, the answer almost certainly relates to the aperture of your lens. Smaller apertures let in less light, which therefore require the use of an additional light source like a flash in order to take a picture. The 35mm f/1.8 lens almost never has that problem because it lets in so much light (when you shoot at f/1.8), which can seem like a miracle from heaven if you are tired of shooting so many of your photos with the flash turned on.

The lighting in this church was very poor, but thanks to the f/1.8 aperture I got several photos of this baby at his baptism without using the a flash.

The lighting in this church was very poor, but thanks to the wide f/1.8 aperture I got several photos of this baby at his baptism without using the flash.

Whether you are out taking photos of nature and wildlife, doing paid portrait sessions, or just snapping photos of your kids playing around the house, the f/1.8 aperture is going to give you outstanding results if you are used to a lens with a smaller aperture. I was blown away when I first started shooting with this and other prime lenses and began realizing that I could use the natural light all around me to get the photos I was really trying to shoot. That, instead of constantly relying on a tiny little pop-up flash.

No zoom, no problem

Many years ago when some of my photographer friends first recommended a prime lens to me I thought they were joking. Why on earth would anyone want a lens that doesn’t zoom in and out? The fixed focal length of a prime lens, I soon realized, forces you to be more creative and puts you in a different frame of mind than a zooming lens by making you work around a limitation. In the years since, as my collection of lenses has grown to include several prime lenses, I keep coming back to this specific 35mm f/1.8 lens as a workhorse not just for daily pictures of my family but for professional photo sessions too. 35mm is somewhere between a wide angle and telephoto lens, which makes it ideally suited for a variety of types of photography. It’s not too zoomed out and not too zoomed in, so it’s kind of like the Goldilocks of camera lenses. It’s just right.

In the years since, as my collection of lenses has grown to include several prime lenses, I keep coming back to this specific 35mm f/1.8 lens as a workhorse. It’s not just for daily pictures of my family but for professional photo sessions too. 35mm is somewhere between a wide angle and telephoto lens, which makes it ideally suited for a variety of genres of photography. It’s not too zoomed out and not too zoomed in, so it’s kind of like the Goldilocks of camera lenses. It’s just right.

favorite-lens-nikon-35mm-olympic-mountains

The Cascade Mountains: shot with the 35mm 1.8G DX on a Nikon D7100

Is like “normal”

On a crop-sensor camera like the Nikon D3300 or D7200 the focal length of this lens is multiplied 1.5x which puts it right about 50mm, or very close to what the human eye naturally perceives. This means that the image you see when you hold your camera up to compose a shot is very similar to that which you would see without any camera at all. There is very little distortion, and everything just tends to look…well…

There is very little distortion, and everything just tends to look…well…normal. I know some people are put off by this type of lens because it’s so pedestrian that it borders on boring, and because it does so many things well it also excels at nothing in particular. However I happen to like the 35mm focal length precisely because of the photos I can get with it, and also because it’s wide enough that I can take pictures at relatively slow shutter speeds like 1/45 second and not worry too much about motion blur.

favorite-lens-nikon-35mm-kansas

Hay bales in Kansas: shot with the 35mm 1.8G DX on a Nikon D7100

Works on full frame too

One bonus feature, of this lens in particular, is that, unlike some other lenses that are designed for crop-sensor cameras, this one performs quite well on full-frame models too. If I put it on my D750 I can get outstanding results provided I shoot around f/4. If I use an aperture much smaller than that, however, it starts to exhibit some pretty bad vignetting on the corners.

This makes the lens ideal for situations where you want to get a little closer to your subjects for pictures that are a little more personal and intimate, and also for landscapes where you want to take in a much broader view of the scene. All this for a lens that costs about $ 200 and you can hopefully see why it is, without question, my favorite lens.

favorite-lens-nikon-35mm-hairless-cat

Even though this lens is designed for crop-sensor cameras, it works fine on full-frame cameras like the D750 if you can put up with some vignetting around the corners. This allowed me to get right in the middle of the action while having a wide enough angle to get several people in the shot.

I recommend this lens often

I often have people ask me for recommendations when it comes to camera lenses, and if they are Nikon shooters my advice is always the same: The 35mm f/1.8G DX. I recently followed up with about a dozen friends and family members to see if my recommendation was to their liking after using the lens for several months. Every single one of them said that yes, the lens was great and did just what they were hoping it would do. Some said that it helped them explore new aspects of photography and while a few had since augmented their collection with zoom lenses or other primes, they all agreed that this particular lens worked like a charm.

favorite-lens-nikon-35mm-fountains

Theta Pond: shot with the 35mm 1.8G DX lens on a Nikon D7100

At this point, it probably sounds like I’m some kind of paid shill for Nikon, but I promise you that is not the case. I buy all my gear the same as anyone else and have never gotten any lenses, cameras, or other gear from Nikon or any other company. I just like this lens so much, and I think you would too, that I can’t help but gush about how it’s by far the favorite one in my kit and the one that gets used more often than anything else. But what about you? Do you have this lens and if so, what do you think of it? What other lenses do you like that you wish other people would learn about? Leave your thoughts in the comments below!

But what about you? Do you have the Nikon 35mm f/1.8G lens? If so, what do you think of it? What other lenses do you like that you wish other people would learn about? Please leave your thoughts in the comments below!

googletag.cmd.push(function() {
tablet_slots.push( googletag.defineSlot( “/1005424/_dPSv4_tab-all-article-bottom_(300×250)”, [300, 250], “pb-ad-78623” ).addService( googletag.pubads() ) ); } );

googletag.cmd.push(function() {
mobile_slots.push( googletag.defineSlot( “/1005424/_dPSv4_mob-all-article-bottom_(300×250)”, [300, 250], “pb-ad-78158” ).addService( googletag.pubads() ) ); } );

The post dPS Writer’s Favorite Lens: Nikon 35mm f/1.8G by Simon Ringsmuth appeared first on Digital Photography School.


Digital Photography School

 
Comments Off on dPS Writer’s Favorite Lens: Nikon 35mm f/1.8G

Posted in Photography


3 Ways to Make a Sky Selection Using Photoshop

14 Sep

There are many reasons why you would like to select the sky in your image using Photoshop. Maybe you would like to replace it, to add details, change the contrast, etc. Selections give you a precise contour of your subject and facilitate local adjustments, without altering the other elements in your images.

In landscape and architectural photography, the sky is a really important element. It has to be an exciting part of the image. Boring skies translate into boring images, and amazing skies can also translate into solid images because it will make the viewer forget about the foreground or middle ground if they are not that beautiful.

Three different methods for selecting the sky

Depending on the image and the subject, making precise selections of the sky can be quite difficult. That is why is this tutorial, I will show you three different ways to select the sky in three different situations

Select sky image1

I replaced the sky in this image, and I love the results.

I personally love to play around with my skies and most of the time it is a fake one. Sometimes I am able to be at one location just for a day and if I get a solid image with no clouds, I will not hesitate to replace it.

Do not hesitate to try crazy things with your images, photo manipulation is really fun

Select sky image2

I wanted to get some crazy result, so I added an image of the Milky Way behind the Eiffel Tower.

Be careful to use royalty free images with no copyrights, there are so many websites where you can pick images of skies without having any problems afterward.

Method #1 – Using the quick mask tool

This is the easiest of the three ways, and the most used. We will be working on an image with a blown out sky and a subject with easy contours.

Select sky image3

The sky in this image will be easy to select because of the simple contours of the monument.

The first thing you need to do is open your image in Photoshop and duplicate the layer to avoid any destructive editing. You can always go back to the original layer if you make any mistakes. Do this all the time, it will save you a lot of time and hassle if you make a mistake.

Start by selecting the Quick Selection Tool on the tool’s panel, make sure to increase the size to facilitate the selection.

Select sky image4

Then simply click on the sky starting at one end. In this case, I started from the bottom left and dragged all the way to the other end (bottom right). With these kinds of images, the selection will work 90% of the time on the first try and it should be pretty accurate. Do not forget to select the other parts of the sky, pay attention to your image and look where there is some sky left that is unselected.

Select sky image5

Select sky image6

Once you have your selection, you want to click on refine edge to make it more precise (Refine Edge is located on top of the Photoshop window). You will have multiple viewing options, a good one to use is On Black.

Select sky image7

On the edge detection section, click on Smart Radius, then play around with cursor until you find the right radius. This will vary from image to image.

Select sky image8

When you are satisfied with your selection, press on OK and you will go back to your image with your selection. Make sure you are still using the quick mask tool. To save your selection, simply right click and pick save selection. You just need to name it and press OK to confirm. Your selection will be saved and you can use it whenever you want by clicking on select on the top of the Photoshop window then choosing load selection at the bottom

Select sky image9

Method #2 – Using Color Range

This selection is also quite easy to do, but it is very precise. We will basically select the sky while sampling a color. So logically your sky has to be uniform, these types of selections work really well during the blue hour or on clear days, with a vivid blue sky.

Select sky image10

We will be working on this image, the sky is completely blue and easy to select. It would be much more difficult to do this selection with the quick mask (Quick Selection) tool because the image is quite dark and the contours of the building are quite difficult to separate from the sky.

Start the same way as the first image by duplicating the layer. You then want to go to select on the top of your window and select color range.

Select sky image11

A small window will pop up, and the only thing you need to do is click on the sky in the main layer (not the pop up window) with the eye dropper tool (it will be set automatically as your cursor). Once you have selected your color, you will see a mask being created on the small color range window. Remember that white reveals and black conceals, so whatever is white is being selected: That will be your selection.

Play around with the fuzziness cursor on top of your selection in the color range window to decide how much you want of the sampled color to be selected.

Select sky image12

Select sky image13

Once you are satisfied with your color range selection, press OK. Redo the same thing as the first image with the refine edge tool, then finish off by saving your image.

Select sky image14

Select sky image15

This is the final result with the sky replaced.

Method #3 – Using a Levels Layer to Create a Luminosity Mask

This kind of selection is a bit more difficult to do. Use it when you don’t have only one color in the sky or subject has complex contours that will be difficult to separate from the sky.

This is quite advanced but it’s very easy once you understand how it works. It always works, and if it doesn’t do 100% of the job it will at least do about 90% of the work need. The rest can be completed with a brush and adjusting your mask after you are done with the first selection.

We will be working with this image and as you can see, the sky is quite dark just like the buildings so it will be difficult to use the quick mask tool. The colors in the sky are mixed between blue, orange and white (yes these are blown out highlights).

Select sky image16

What we are going to do is quite simple. We’re going to create a luminosity mask selecting only the highlights, in other words, the brightest pixels of the images. The highlights correspond to the sky so that’s exactly what we want.

To make the selection easier we’re going to convert the image to black and white so we have an easier visual. We’re basically going to crush our whites and blacks to have a nice separation between the shadows and the highlights. We’ll be doing this using the levels layer adjustment, we are also going to remove all the mid tones from our image. Don’t forget to duplicate the layer first.

Select sky image17

Select sky image18

After converting your image to black and white and creating a levels layer, you’re going to play around with the three sliders to have a white sky and everything else black. White reveals and black conceals so your selection will be in white.

The three cursors should all meet at one point, you have to play around and see which selection works best for your image. You’re basically creating a luminosity mask.

Select sky image19

Select sky image20

After finding the sweet spot, you just need to close your levels layer and go to channels. Pick any channel, click on it, and type Command/CTRL + A to create the selection from the levels layer you just created.

Once you have done that you can delete the levels and black and white layers to go back to your original image. Your selection is still going to be there. After that it is pretty much the same thing, click on refine edge on top of the Photoshop window and play around with your radius until you get the perfect selection.

Select sky image21

Select sky image22

This is the final image after some adjustments, I used the sky selection to add colors without affecting the rest of the image.

Select sky image23

Whether you want to just edit or completely replace the sky is up to you. But, I hope that gives you some techniques that you can apply to your landscape and cityscape photography to perk up the sky.

Do you have any other methods you use for making a sky selection?

googletag.cmd.push(function() {
tablet_slots.push( googletag.defineSlot( “/1005424/_dPSv4_tab-all-article-bottom_(300×250)”, [300, 250], “pb-ad-78623” ).addService( googletag.pubads() ) ); } );

googletag.cmd.push(function() {
mobile_slots.push( googletag.defineSlot( “/1005424/_dPSv4_mob-all-article-bottom_(300×250)”, [300, 250], “pb-ad-78158” ).addService( googletag.pubads() ) ); } );

The post 3 Ways to Make a Sky Selection Using Photoshop by Yacine Bessekhouad appeared first on Digital Photography School.


Digital Photography School

 
Comments Off on 3 Ways to Make a Sky Selection Using Photoshop

Posted in Photography


Getty Images asks court to throw out $1B lawsuit

14 Sep

Getty Images has responded to the $ 1 billion lawsuit filed against it by photographer Carol Highsmith, arguing that she can no longer make copyright claims about the photos because they have been entered into the public domain. According to reports from the AP, the company further argues that it has done nothing wrong by offering licenses of the images because ‘public domain works are routinely commercialized…’ Getty points toward Shakespeare plays and Dickens novels sold by publishers as examples.

The issue revolves around the lawsuit filed in late July alleging that a Getty subsidiary has been issuing notices that demand licensing fees for Highsmith’s images. Those notices are at odds with the public domain status of the works and, according to the lawsuit, have caused damage to Highsmith’s reputation. Highsmith’s lawsuit also alleges that Getty and its subsidiaries falsely represented themselves as the copyright owners, which Highsmith’s lawyers argue violates provisions of the Digital Millennium Copyright Act.

In its response to the lawsuit’s DMCA claims, Getty says it has committed no such violations, because doing so would have required ‘intent to induce, enable, facilitate, or conceal infringement.’ Because the photos are in the public domain, Getty argues that it ‘could not have acted with the requisite intent or knowledge of infringement.’

Ultimately, Getty has asked the court to dismiss Highsmith’s lawsuit against it, also stating that it has not violated the state laws alleged in the lawsuit and that other other legal claims are unfounded. 

Articles: Digital Photography Review (dpreview.com)

 
Comments Off on Getty Images asks court to throw out $1B lawsuit

Posted in Uncategorized