Jagged peaks, precipitous drops, deep and sweeping valleys: mountainous landscapes are unquestionably some of the most photogenic places on the planet. It shows too – take a look at any photo magazine or website, and you are likely to find not just one or two, but dozens of images of mountains.
Mountains are a landscape torn apart by the steady pressure of plate tectonics and erosion, and in that drama is the potential for spectacular photography. Why then are so many images of mountains boring? Because landscape drama does not always translate well into photographic drama, without the right combination of factors. Though there are really too many of these to name, I think five are particularly important: foreground, light, color (or lack of it), juxtaposition, and perspective.
Before we dive in, I want to make it very clear that there are as many different methods for making successful images of mountains as there are mountains themselves. Not every image has to have a compelling foreground, nor does of every image have to contain dramatic color or light. These five points are suggestions and starting places, not a formula. That noted, let’s get started:
1. Foreground
Foreground serves a number of purposes in a landscape; among these are depth and scale, setting details, and to provide a starting point for the path through the image. Foregrounds are tricky, done wrong they can make an image confusing, misleading, or unbalanced.
I’m a sucker for a good foreground. I love the way a well placed element can echo and balance features in the background, provide detail to a larger scene, and lead the viewer’s eye neatly into the photograph.
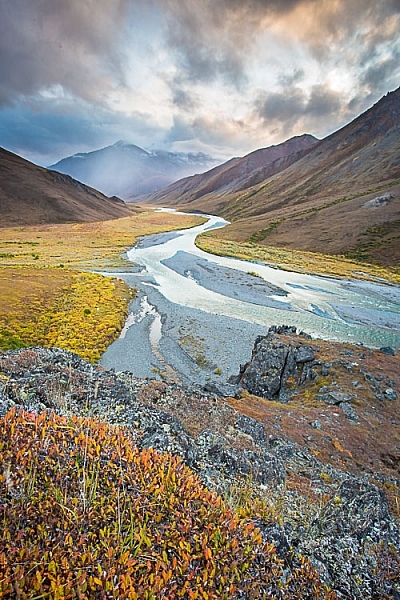
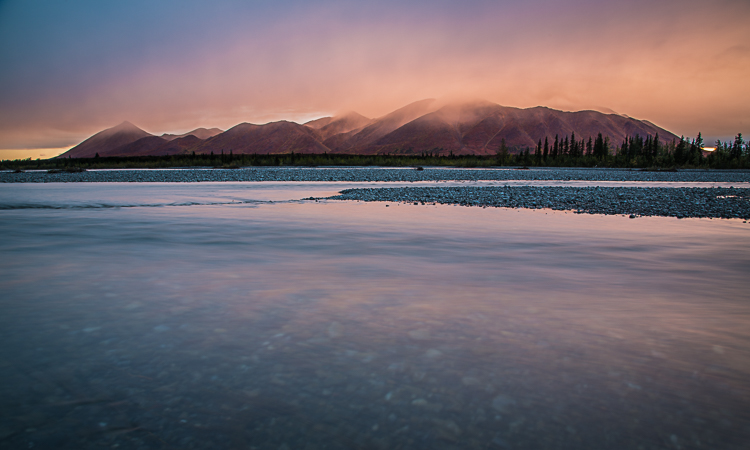
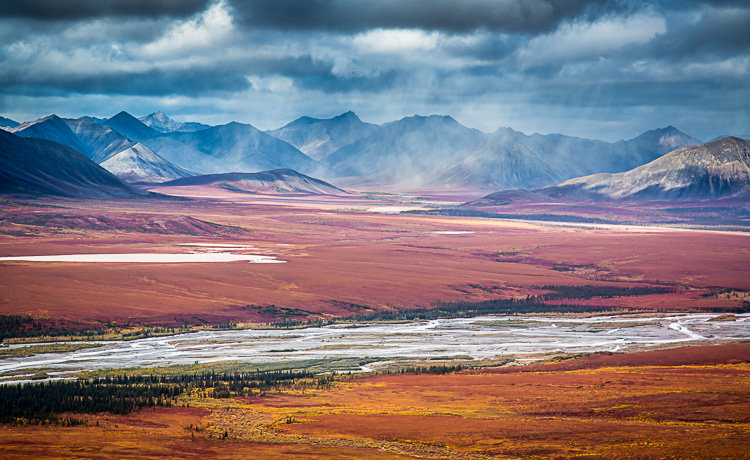
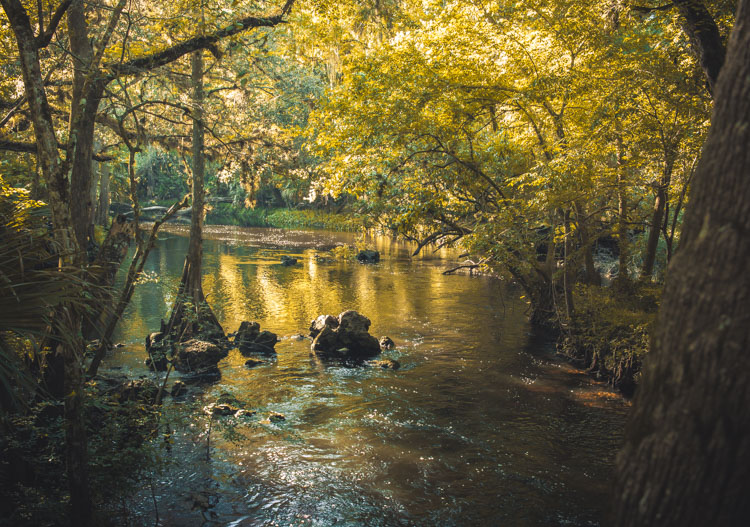
The autumn colors in the close foreground provide a good starting place for this image, guiding the eye to the winding river and then onto the stormy mountains beyond.
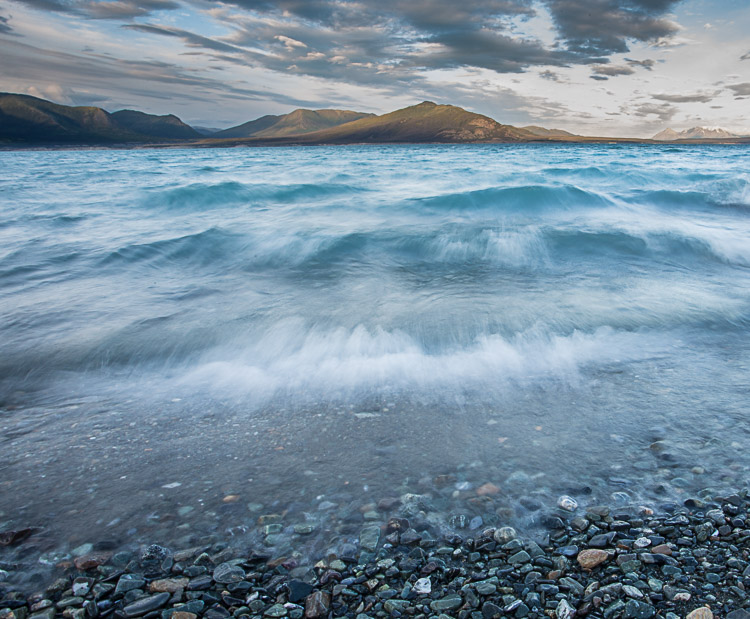
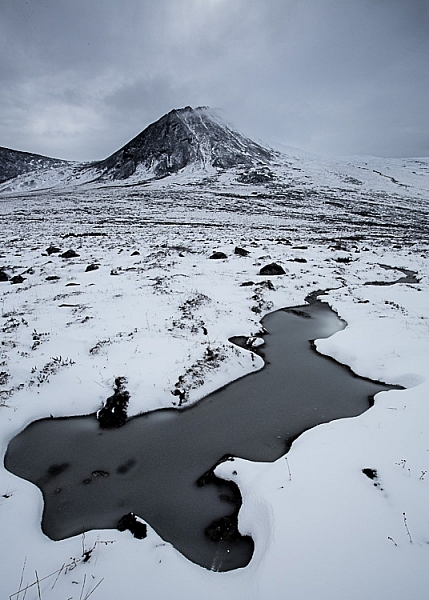
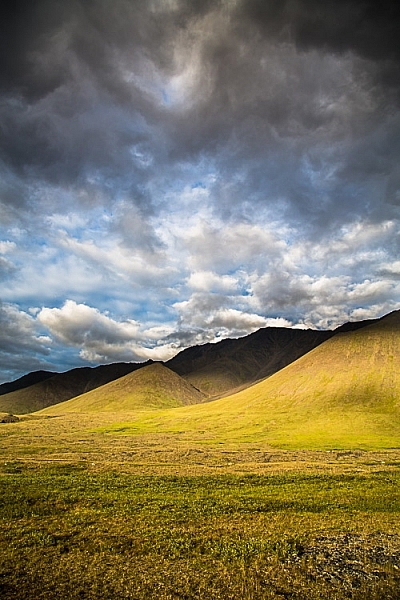
Water is a great foreground subject, and in this image of a wind-tossed lake, the water plays double duty, providing color and interest, while the texture is reminiscent of the mountains in the background.
2. Light
Lighting may be the single most important aspect of a successful image. While backlight, and front light can work under some circumstances, mountains thrive in side-light. Light from the side brings out the shadows, and detail in the ridges, cliffs, and rolling slopes. It provides contrast and drama.
Images of big landscapes, like mountains, rely on natural light to for illumination, so you are really at the whim of the weather. Cloudy days can flatten the light, while midday sun will drown out shadows and turn pleasing contrast into an eye-squinting mass off whites and blacks. Successful images can arise from these challenging scenarios, but low-angle side-light makes our lives as photographers so much easier.
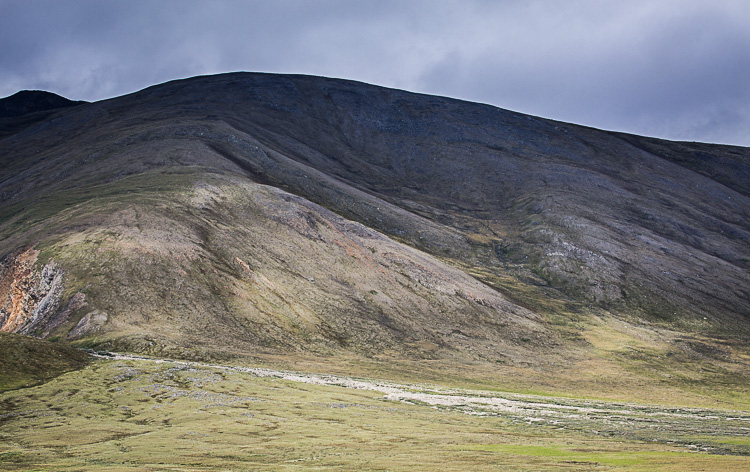
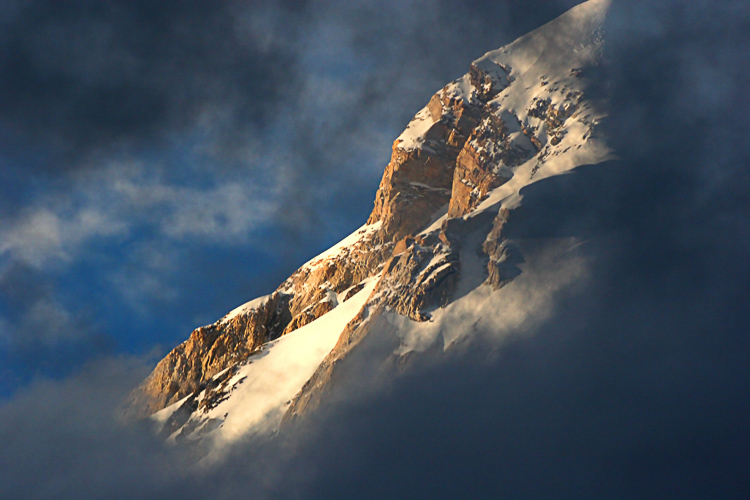
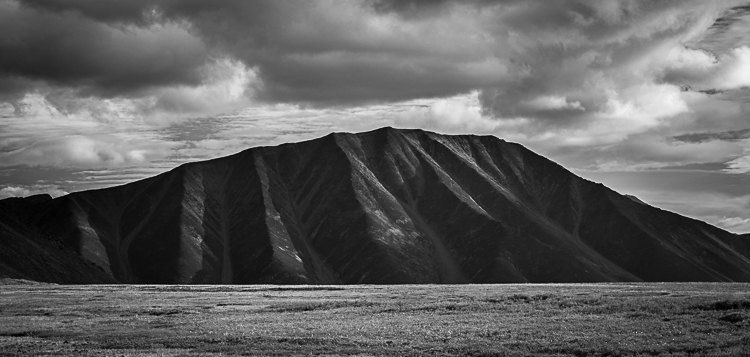
This detail shot of a mountainside in Alaska’s Brooks Range, despite being front-lit, retains some drama thanks to the patchy sunlight.
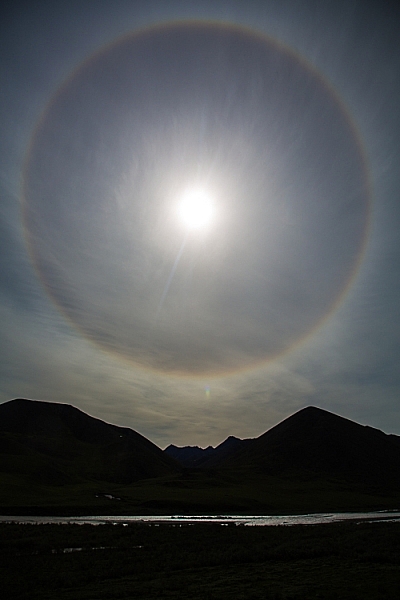
A case where backlight worked to my advantage was when the mountains, darkened to silhouette, appeared to cradle this ring around the sun (caused by high elevation clouds).
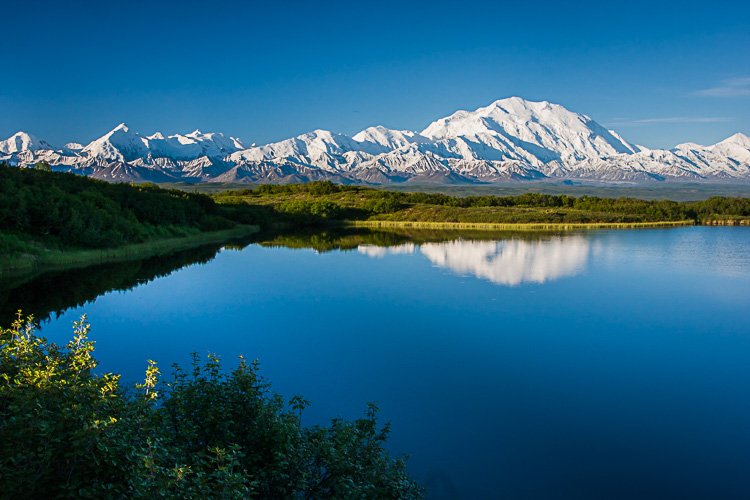
Classic side light on Denali peaks of the Alaska Range, from Reflection Pond in Denali National Park, Alaska.
3. Color (or lack of it)
Bright colors (not artificially saturated) attract the eye. This is particularly true in images of mountains. Sunset and sunrise, colorful foregrounds, and bright blue alpine skies, will help catch and hold the gaze of a viewer.
As I think about it, this goes very tidily with #2 (Light). Good light very often equates to good color. The better the light quality, the more vivid the colors of the scene become. Get one, and you often get the other.
None of this is to say that an image has to have bright colors to be successful. Low-saturation images can be moody and brooding. Storms and winter images are two examples where colors may not be rich, but do not hurt the final image. These photos thrive on the drama of the scene, rather than their colors.
In black and white images, color is absent, and yet can result in a rich portrayal of the mountains. In such images, contrast and mood play an even more important role.
A note on Black and White: when factors like light and color are not in your favor, a black and white conversion can often be a great tool. I’ve made numerous images on flat-light days that converted well to black and white, when a true-color image would have been dull and muted.

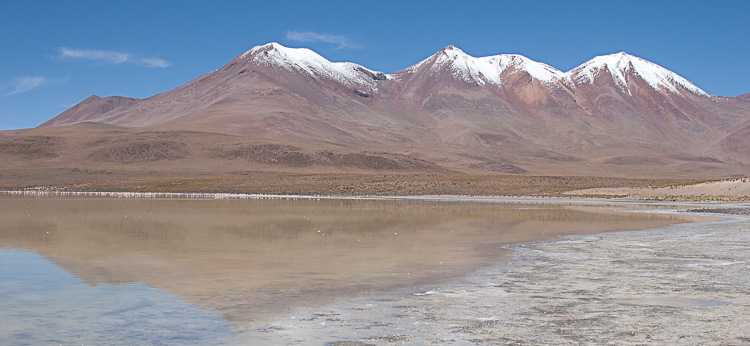
I made this image of peaks in the Bolivian Altiplano at mid-morning when the near-equitorial sunlight was hot and bright. It doesn’t look particularly good in color.
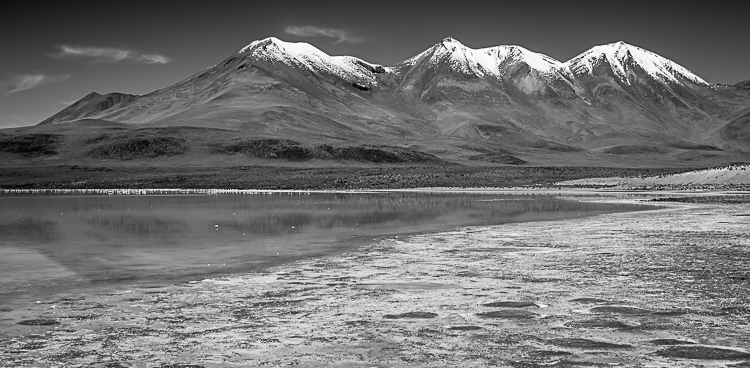
Convert the above image to black and white, however, and the photo comes alive in a way it wouldn’t otherwise be able.
4. Juxtaposition
Juxtaposition is defined as: “two things placed together with contrasting effect”. In photography, that contrast can be literal; light versus dark contrast, colors (bright versus subtle), tonality (hot or cool), or, perhaps most effectively, the subject matter.
All of these are important parts of mountain photography. Contrast, I noted earlier in this article, but tonality and subject matter both warrant some attention.
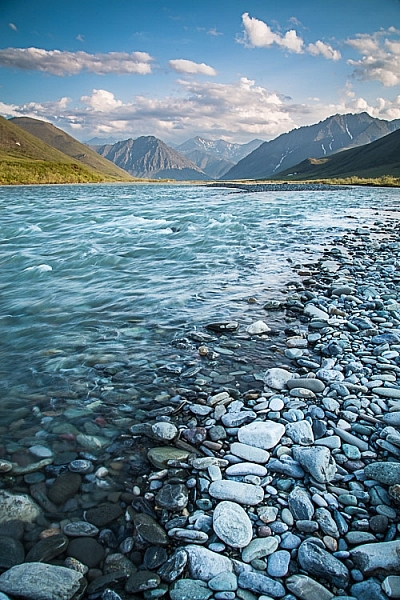
Juxtaposed color tones combine in interesting ways. Mountain scenes, particularly from places like the Rockies, Cascades, or Alaska, tend to be dominated by cool tones; blue skies, green tundra and forest, glacial streams, or clear blue lakes. These cool-colored scenes often benefit when warm tones, like yellow, red, or pink, are integrated into the scene. Often that warm tone is best presented as a flash of color, a setting sun, a wildflower, the bright jacket of a hiker, rather than as an equal to the cool tones. When the two are equivalent, your brain has a hard time sorting out which to pay attention to, and the pleasing juxtaposition becomes a tangle of clashing color.
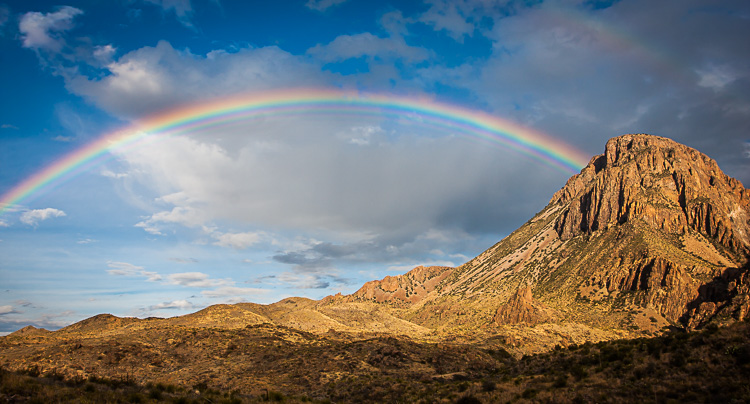
Subject juxtaposition is where a landscape images comes alive. When it comes to mountains, the potential for such contrasts are many. So many in fact, that it’s hard to mention just a few. Some, like the image below of the rainbow over the desert mountains of Big Bend National Park, have obvious subject juxtaposition (rain and dry desert rock). But the same image also has contrasts in shapes and texture (the jagged rocks and and smooth curve of the rainbow for example). All of these combine nicely to provide interest.
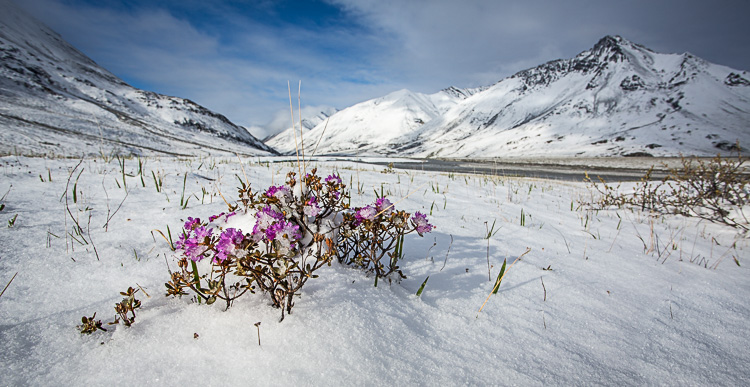
Snow and flowers is an obvious juxtaposition in this image of the aftermath of a June snowstorm in the Arctic National Wildlife Refuge, Alaska.
5. Perspective
The final aspect of mountain photography I want to discuss is perspective. Which is to say, the perspective from which you make the image. For simplicity sake, I’ll break this down into three divisions: bottom, middle, and top. Each of these greatly impacts not just the appearance of the final image, but also its mood and feel.
Photographs of mountains made from a valley bottom looking up, make the mountains appear large and imposing. These low shots provide space for an interesting foreground, and many classic landscapes have been made from this perspective. Though effective, there are drawbacks to shooting from the valley bottom. The low perspective means that the view is limited; there are no seas of mountain peaks spreading to the horizon. Light too is often difficult. The bottom of the valley is the last place to gain sunlight in the morning, and the first to lose it in the evening, so balancing light makes exposure tricky, and by the time the landscape is evenly lit, the sweet light of dawn or dusk is long past.

Exposure was tricky as I tried to capture the storm light on the Red Wall of the Grand Canyon high above my camp along the Colorado River.
Mid-mountain shots can be spectacular, providing views both below and above. This perspective is one of my favorites, allowing for a lot of depth in the landscape, while maintaining the size and drama of the mountains.

Mountaintops are tricky. Images made from the summit of peaks tend to make the surrounding landscape look small. I’ve taken photographs from peaks in which all the mountains look like rocky waves, rather than the towering summits they are. You can make up for this by adding a human to the shot, which provides scale. You remove the focus from the mountains, and place it on the human experience within them. It changes the image, making it less of a landscape, and more of a portrait or action shot, but the results can be effective.
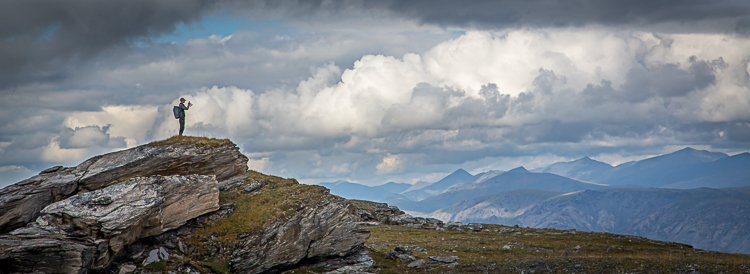
A hiker atop a mountaintop in Gates of the Arctic National Park, Alaska becomes the subject in this image.
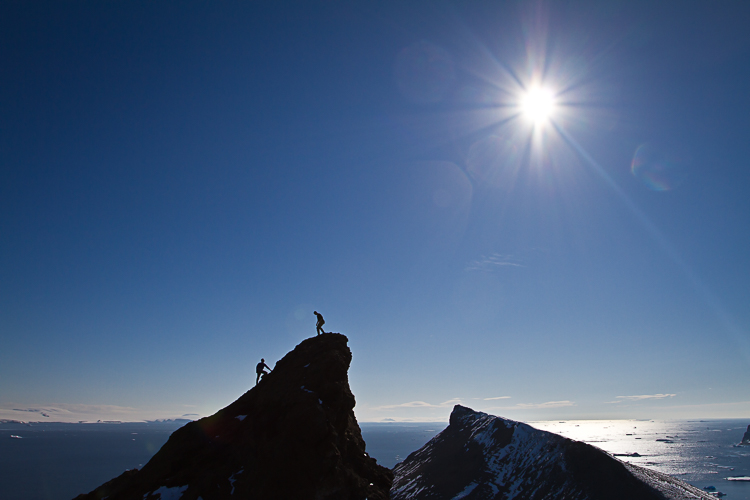
Without the climbers nearing the top of this peak in Antarctica, there wouldn’t be much to look at in this image.
Conclusion
One of the great joys of photographing mountains, is simply being in the mountains. A camera is great excuse to go for a hike, or float a mountain river. But, the camera can also be a tool for experiencing the place more deeply. It can make you appreciate how the mountains look in various light and seasons, and from different angles. In turn that appreciation can lead to better images. Now go out and explore.
This week we are doing a series of articles to help you do better nature photography. See previous articles here:
- 3 Habits Every Outdoor Photographer Should Develop to Avoid Missing Shots
- 5 Tips for Better Nature Photography
- 27 Serene Images of the Natural World
- Weekly Photography Challenge – Nature
- 10 Ideas for Photographing Nature in your Backyard
- 6 Tips for Capturing Character and Personality in Wildlife Photography
- 5 Tips for Setting the Focus in Your Landscape Photography
- 7 Tips for Better Marine Wildlife Photography
- Tips for Processing Landscape Photos – from Basic Edits to Artistic Interpretation
googletag.cmd.push(function() {
tablet_slots.push( googletag.defineSlot( “/1005424/_dPSv4_tab-all-article-bottom_(300×250)”, [300, 250], “pb-ad-78623” ).addService( googletag.pubads() ) ); } );
googletag.cmd.push(function() {
mobile_slots.push( googletag.defineSlot( “/1005424/_dPSv4_mob-all-article-bottom_(300×250)”, [300, 250], “pb-ad-78158” ).addService( googletag.pubads() ) ); } );
The post 5 Tips for Avoiding Boring Photos of Mountains by David Shaw appeared first on Digital Photography School.

Digital Photography School


You must be logged in to post a comment.