Although even lighting, and perfect exposure are your biggest allies when it comes to making people look their best in headshots, there are many small adjustments you can make in the editing process, that will make your shots (and your clients) look that much more professional.

To begin, a lot of things on the day of the shoot will be out of your control. Take a booking I had recently, for example, it was scheduled on a Friday afternoon after a full week of the Annual Meeting. All the head honchos were dead tired and this was the last thing on their to-do list. After a week of deciding the future of their company, a lot of them looked a little, let’s say, less than fresh. Dehydration, bags under the eyes, and coffee-stained teeth began to rear their ugly heads. Because we’re human, and that’s what happens. Although soft light helps, our wonderfully designed cameras tend to be rather unforgiving of the under-slept.
Although most of my corporate headshot clients know that post-production doesn’t mean they’ll end up as Heidi Klum, they do appreciate just a smidge of help once the photos are loaded up.
Corporate touch-ups are about making the subject look as fresh as can be. I like to keep my post-processing efficient, effective, and easy, so I can get the photos off my desk and onto theirs as quickly as possible. Here’s how I tackle it.
My Lightroom Workflow
Let’s start with the shot straight out of camera.
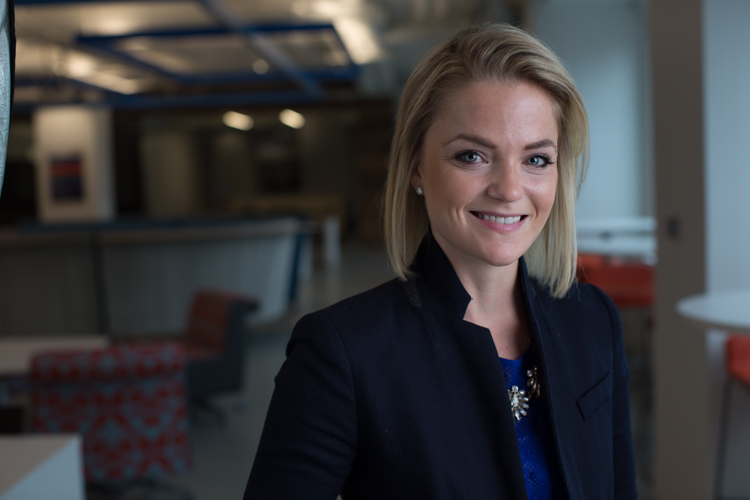
This particular company wanted to feature their employees in their native work environment, so the office became the background, which eliminated the need to bring a backdrop. I lit the subject with window light, an octabox, and a reflector. You’ll notice I shot these with 50mm lens as well. Normally, I’d grab my 85mm for corporate work, but we were out of town and didn’t have our full complement of gear with us. The 50mm did the job just fine.
My first step is to adjust the Cropping, Exposure, and White Balance. I need to crop the reflector out of the frame for starters, apply a lens correction to get the side wall to line up. I’m happy with the way the White Balance is on this, but I’d like to take the exposure up slightly and take the overall highlights down slightly.
We end up with this:

Local Adjustments
The local (in one area of the image only) adjustments I use are subtle. The best way to get some of these adjustments is to have the client get a great night’s rest and stay hydrated, but those are mostly out of our control. These adjustments aren’t meant to turn anyone into an airbrushed masterpiece, just to give them a little nudge.
Before we dive in, let’s review some Local Adjustment Quick Keys to help you in the process.
Adjustment Brush Quick Keys
- Press H to hide or show the pin you’re using. This is helpful when the pin is in the way and you want it to disappear.
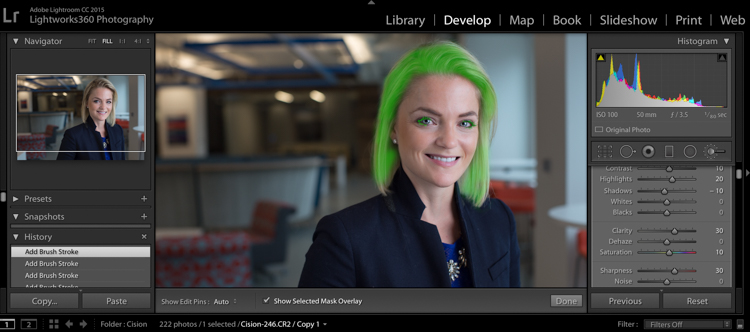
- Press O to hide or show a mask overlay of the Adjustment Brush tool effect, or use the Show Selected Mask Overlay option in the toolbar. This is helpful so you can see exactly what areas you’re affecting. It also makes editing at a coffeeshop or plane pretty funny because whoever peeks over your shoulder thinks you’re turning all your subjects into the Incredible Hulk. (Shift+O will tile through the overlay colors: white, black, red, green).
- Press Ctrl+Z (Windows) or Command+Z (Mac OS) to undo your adjustment history.
- Hold Alt to take away any mask you’ve put in (holding Alt while you use the paintbrush turns it into an eraser to paint away). This is helpful just to clean up any minor mistakes you made while adding adjustments.
Okay, here are the adjustments I make (in this order too):
#1 Soften Skin
This helps just to clear up pores and generally be forgiving of any blemishes.
- Clarity -50
- Sharpness -10
- Contrast +5
- Highlights +15 (to counteract the highlights being muddied by lowering clarity)
I take my brush over the entire face except for the eyes, eyebrows, and lips, so the face is fully Hulkified.
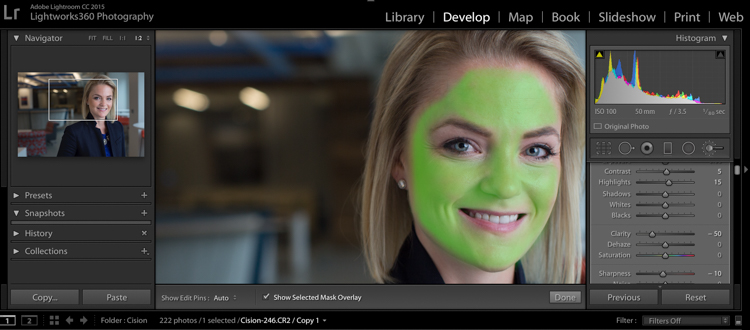
Note that you can change the color of the Mask Overlay (Shift+O), but I just stick with green as it’s nice and easy to see. If you make a mistake and go over any of the areas you want unaffected, just use the Alt key to turn the brush into an eraser and paint them away.
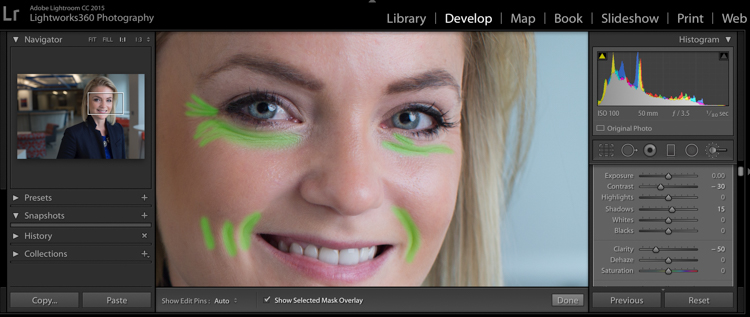
#2 Diminish Lines
I put this in to give an overall softening of shadows created with any kind of wrinkle or smile line.
- Contrast -30
- Shadows +15
- Clarity -50
- Sharpness -10
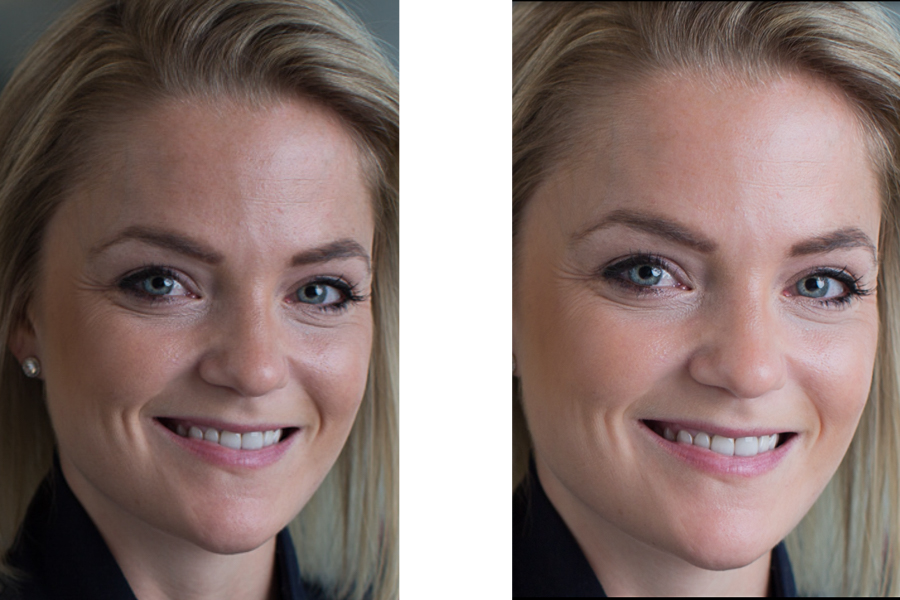
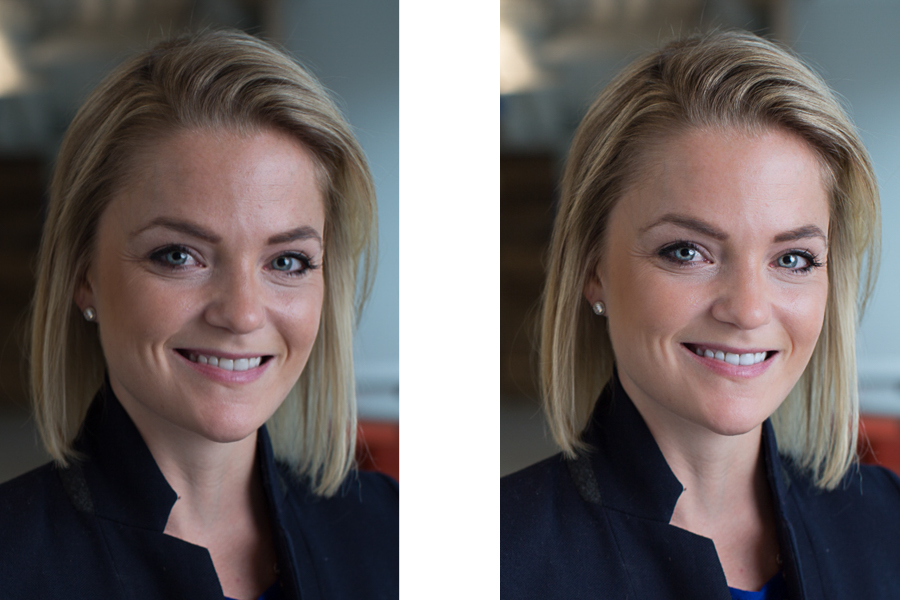
So let’s look at the before and after of what we have so far. You’ll see that the the skin is more even throughout, and the deep shadows of the lines are reduced and softened, but not removed completely. The goal is to freshen, not make them look like a plastic doll.
Next up, let’s get those eyes popping a little more. This is easy to overdo, so be judicious with this step.
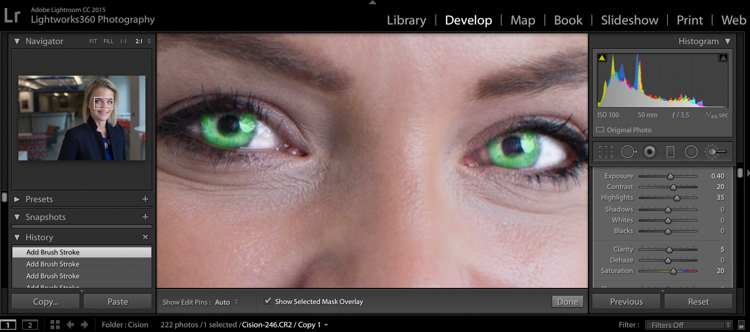
#3 Brigthen Eyes
Get the whole eye in this first adjustment:
- Exposure +0.2
- Contrast +10
- Clarity +10
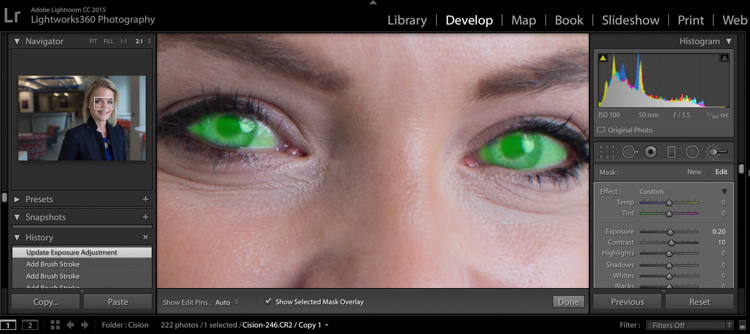
#4 Enhance the Iris
Now we’ll focus on just the colorful part of the eye, the iris. We’ll add a little more exposure and a touch of saturation:
- Exposure +0.40
- Contrast +20
- Highlights +35
- Clarity +5
- Saturation +20
Let’s check back in with a before and after comparison:
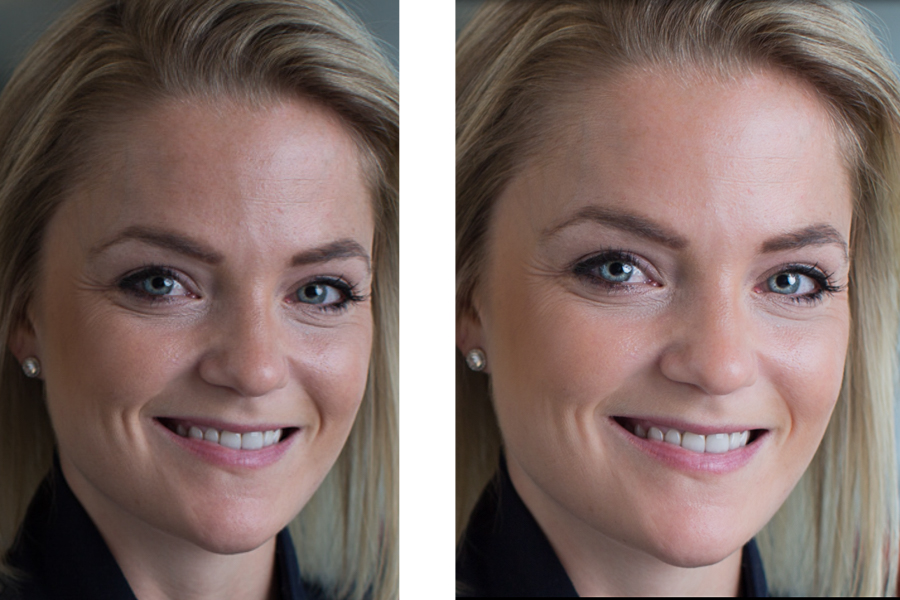
It’s subtle, but there’s just enough pop around the eyes, without it being overdone.
#5 Whiten the Teeth
Let’s make their dentist proud:
- Temp -25 (adding blue takes out any yellow in the teeth)
- Exposure +0.25
- Saturation -20

#6 Hair and Eyelashes
For this final touch, it’s nice to give a little definition to the hair and eyelashes.
- Contrast +10
- Highlights +20
- Shadows -10
- Clarity +30
- Saturation +10
- Sharpness +30
Cute wig, right?
Let’s look at the final before and after now:
And here’s the photo that was delivered to the client:
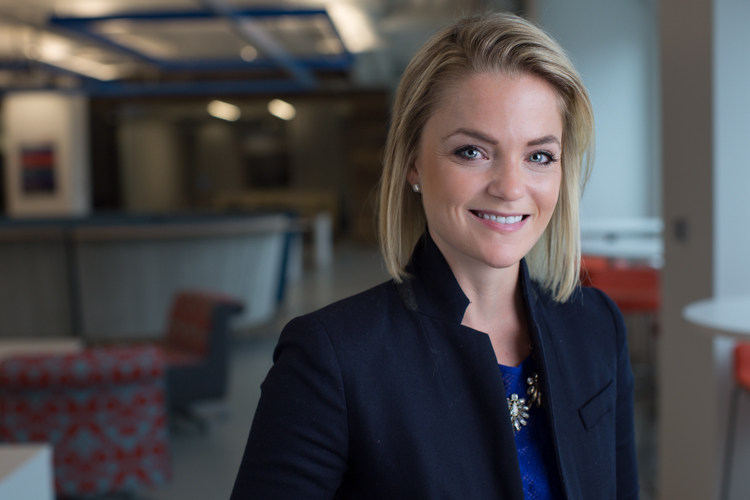
All of these changes are delicate. Done right, and they’re almost imperceptible. Retouching your corporate headshots doesn’t need to be an hours-long endeavor. Your clients don’t need to be on the cover of Vogue– they need a no-fuss photo that’s Linkedin ready, and shows them at their best.
googletag.cmd.push(function() {
tablet_slots.push( googletag.defineSlot( “/1005424/_dPSv4_tab-all-article-bottom_(300×250)”, [300, 250], “pb-ad-78623” ).addService( googletag.pubads() ) ); } );
googletag.cmd.push(function() {
mobile_slots.push( googletag.defineSlot( “/1005424/_dPSv4_mob-all-article-bottom_(300×250)”, [300, 250], “pb-ad-78158” ).addService( googletag.pubads() ) ); } );
The post How to Edit Corporate Headshots in Lightroom by Tim Sullivan appeared first on Digital Photography School.

Digital Photography School


 It’s day 2 of our Summer Sale and today we have a special Adobe Lightroom Presets Travel pack* for you with a 72% Saving.
You must be logged in to post a comment.