I’m an ocean girl. To me, there is no better way to spend a summer day than to get out on the water and explore the mystery that is the deep blue sea, and hopefully experience some of the majestic creatures that live in it and on it.
Whether you are photographing on shore or from a boat, there are a few tips that will help you improve your marine wildlife photography. Underwater photography, though, is an entirely different thing, with a different set of techniques, that are not covered in this article.
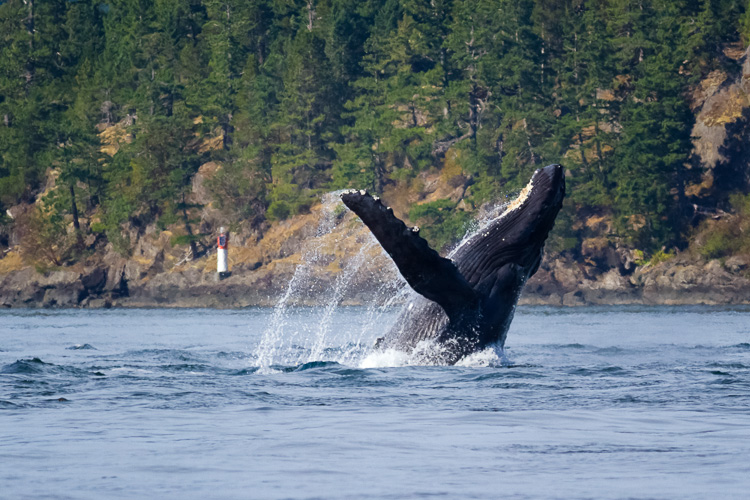
Humpback whale breaching near Campbell River, British Columbia
The photos in this article were all made in the cool waters off the west coast of North America, but the same tips apply to marine photography all over the world.
1 – Explore the Shore
Let’s start with the shore where you’ll find all sorts of sea creatures. Check the tide tables, and if you can find a rocky beach at low tide. You’ll discover all the animals that live in the shallow tide pools such as urchins, sea anemones, starfish, mollusks and crabs.
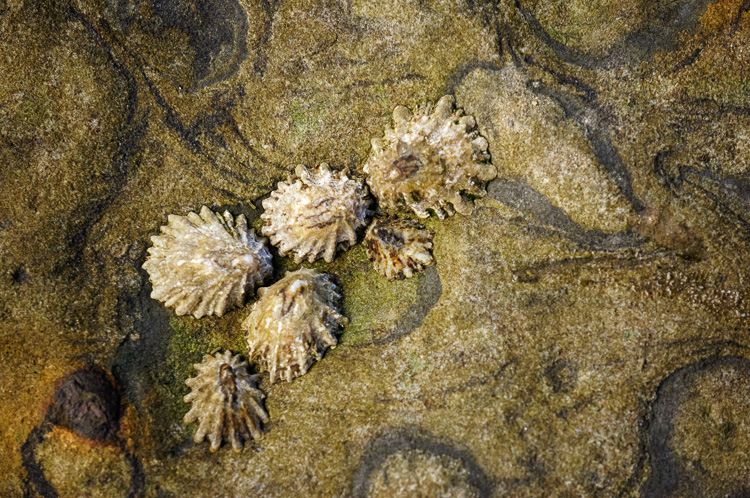
Mollusks in a Tide Pool in Big Sur, California
Except for the crabs, they don’t seem to mind your presence one bit, so you can get some practice photographing the creatures that don’t notice you. Crabs sometimes pay attention, but if you don’t get too close, you may find they come out of the tide pools, and out from under rocks, and sometimes put on a bit of a show. I photographed this crab in Big Sur, California, where it came out from a crack in the rocks, and proceeded to make all sorts of bubbles as it began molting.
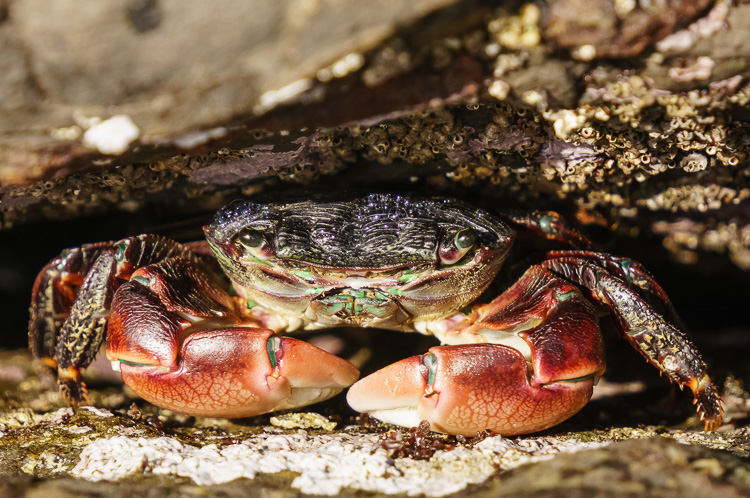
Crab at Big Sur, California
Close to shore, you may also be able to photograph sea otters and river otters (which are also found in salt water). Like other animals, given enough space and time to get used to you, they will go about their daily tasks in your presence, even looking directly at you (and your camera) allowing you to make images that feel intimate.
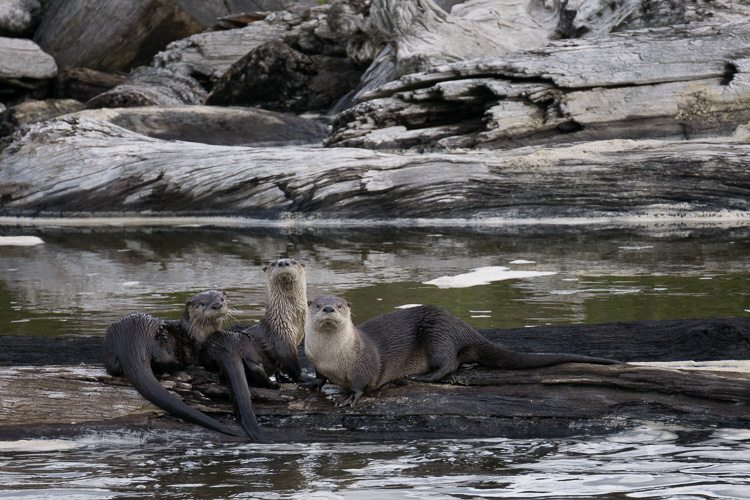
River Otters, Redwood National Park, California
You’ll also find all kinds of sea birds to photograph such as gulls, geese, ducks, cormorants, and eagles.
2 – Get Out in the Deep
My favourite way to photograph marine wildlife is to get out in a boat. Whether you kayak, row, paddle, sail or use a power boat, there’s nothing like the freedom a boat gives you when it comes to exploring the ocean and finding wildlife. If you don’t have access to a boat, consider renting one. Or, try a whale watching tour, which are well worth the money for the photo opportunities they provide including whales, dolphins, seals, and sea lions.
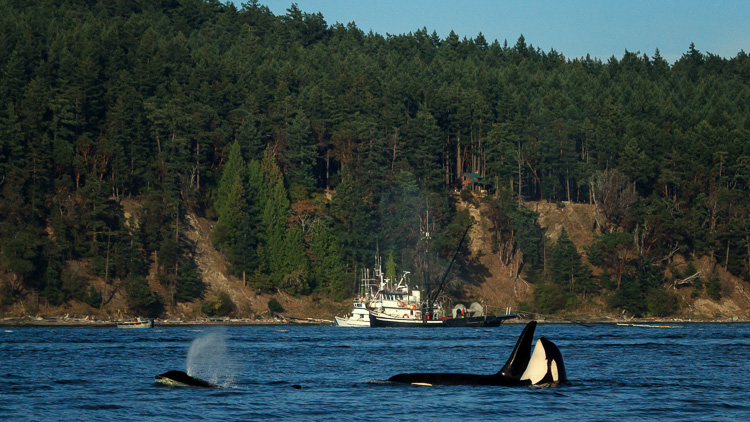
Orcas and commercial fishing boats near San Juan Island, Washington.
Weather makes all the difference between an enjoyable day on the water, and those days that make you feel a little on the green side. Check the weather forecast before choosing your day, and once you are out there, keep an eye on changing conditions to stay safe.
If you are driving the boat yourself, and you expect some choppy seas, you should keep your camera safe and dry while underway. I store mine in a Pelican case, which is shockproof and waterproof, so I don’t have to worry about my camera while driving the boat. When shooting, try not to get splashed because salt water can do a lot of damage to your camera.
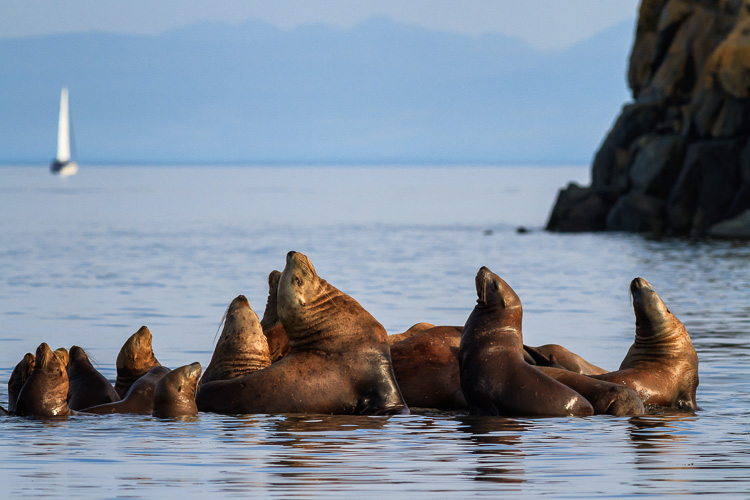
Sea lions basking on rocks near Vancouver Island, British Columbia.
3 – Shoot Handheld
For marine wildlife photography, shooting handheld gives you the freedom to move quickly, as the animals do. Unless you are photographing animals that don’t move very much in the tide pools, a tripod or monopod can slow you down and you’ll likely miss the shot. They are also not very practical on boats.
Instead, use a high ISO, a fast shutter speed, and shoot handheld. Remember to turn your image stabilization on to prevent any camera shake blur. I usually start out with ISO 400 and a shutter speed of 1/1,000th of a second, then make changes based on lighting conditions and the speed the animals are moving. For dolphins and whales, an even faster shutter speed may be required.
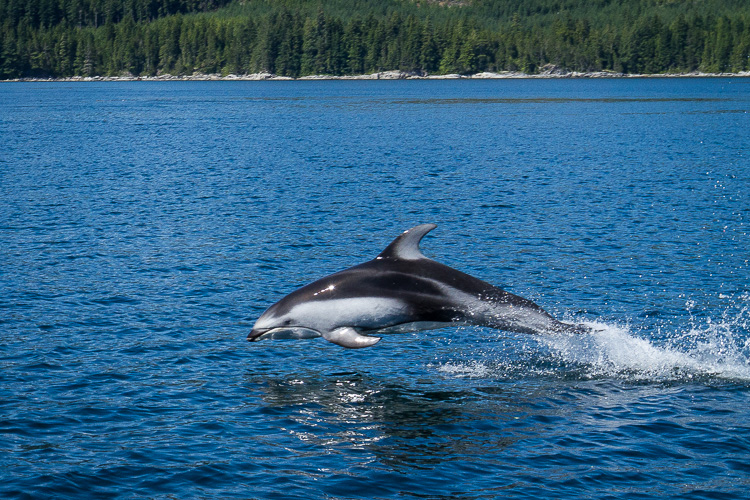
Pacific White Sided Dolphin in Johnstone Strait, British Columbia
4 – To Polarize or Not?
When shooting in tide pools, a polarizing filter can be helpful to cut through the glare of light reflecting off the surface of the water, and allow you to see through to the creatures that are underwater. Aside from that however, I don’t generally use a polarizing filter because the cost of doing so is about one stop of light. If I’m not trying to see through the water, I would rather have that stop of light for a faster shutter speed, or a lower ISO for better image quality.
5 – Lenses
You’ll need a variety of lenses for shooting marine wildlife. If you are shooting birds and whales, you’ll need a long telephoto lens to get you close enough to make an image with impact. I like to use a 70-300mm zoom lens or a 400mm prime lens for most of my marine wildlife photography.
Dolphins, on the other hand, will require a wide angle lens because they tend to get very close to the boat. My favourite lens for dolphins is my 11-35mm. So bring a variety of lenses along, and just make there is no salt water spraying around when you switch lenses.
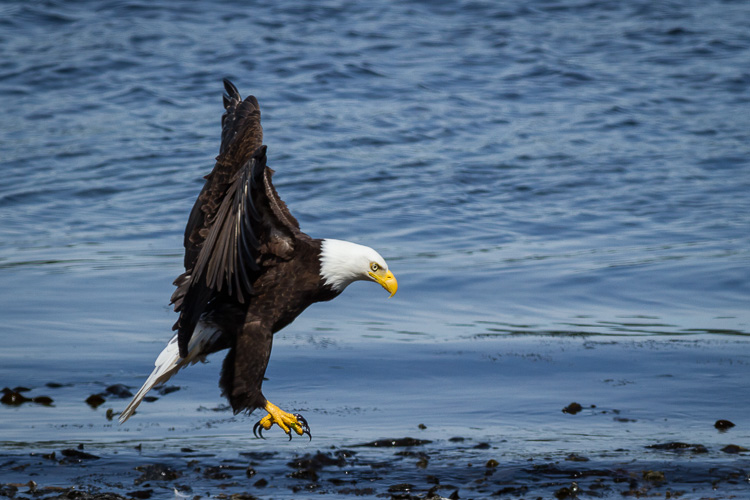
Bald Eagle in Campbell River, British Columbia.
6 – Focus Modes
When photographing the creatures that don’t move too much, one shot auto focus or even manual focus is fine. But when shooting animals that move fast, you’re better off using continuous autofocus mode because it locks on to your subject and tracks its movement, increasing your chances of getting a sharp image. It’s not easy though. Getting focus fast enough to capture the moment is probably the biggest challenge in this type of photography.
7 – Respect the Animals
When you are so close that your presence changes the animal’s behaviour, you are too close. Respect their space by using a longer lens, instead of getting too close. Don’t forget, in most areas there are rules about how close you can get to marine wildlife, especially whales. Usually it is around 100 meters or 100 yards, so check the rules (laws) in your area before heading out.
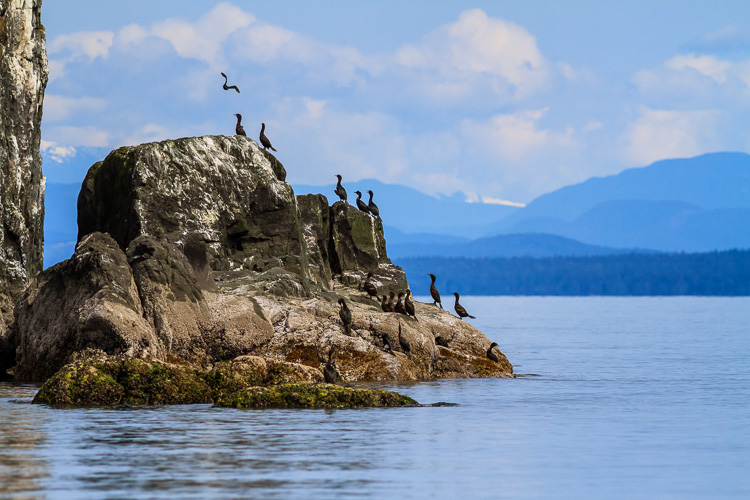
Cormorants on Middlenatch Island, British Columbia.
I hope these tips help you capture the sometimes elusive, but majestic creatures of the sea, the next time you explore the shoreline or go on a boating adventure.
This week we are doing a series of articles to help you do better nature photography. See previous articles here:
- 3 Habits Every Outdoor Photographer Should Develop to Avoid Missing Shots
- 5 Tips for Better Nature Photography
- 27 Serene Images of the Natural World
- Weekly Photography Challenge – Nature
- 10 Ideas for Photographing Nature in your Backyard
- 6 Tips for Capturing Character and Personality in Wildlife Photography
- 5 Tips for Setting the Focus in Your Landscape Photography
googletag.cmd.push(function() {
tablet_slots.push( googletag.defineSlot( “/1005424/_dPSv4_tab-all-article-bottom_(300×250)”, [300, 250], “pb-ad-78623” ).addService( googletag.pubads() ) ); } );
googletag.cmd.push(function() {
mobile_slots.push( googletag.defineSlot( “/1005424/_dPSv4_mob-all-article-bottom_(300×250)”, [300, 250], “pb-ad-78158” ).addService( googletag.pubads() ) ); } );
The post 7 Tips for Better Marine Wildlife Photography by Anne McKinnell appeared first on Digital Photography School.

Digital Photography School


 Marcin Tyszka
 Greg Kadel
 Mood Boards: Communicate Your Ideas To Your Creative Team
 Shooting With Your Creative Team & Post Production
 Working With A Creative Team
 Reaching Out To Modeling Agencies
 Concept To Creation: Turn Inspiration Into Concept
 Concept To Creation: How Professional Photographers Do It
 Vapour With Greg Cunningham
 Concept To Creation: Finding Inspiration

 Planning A Shoot With A Creative Team
 The 1920s Shoot With Celeste Van Rooyen
 Tips For Working with Agency Models
 Diego Angarita – The Freelance Retoucher
 Mastering The Digital Workflow

 Make Your Online Portfolio Stand Out
 Mastering The Photographic Workflow
 Top 6 Interview Tips For Making It In The Photography Industry
 Vinpix Meets Trina Turk & Jonathan Skow
 Trina Turk On Growing A Fashion Business
 7 Tips For Creating A Standout Photography Portfolio
 Do You Love What You Do?


 Sarah DeAnna On Working With Photographers
 Lesson In Photoshop With Katie Nattrass
 Learnings Of A Model With Sarah DeAnna
 Urban Siren With Clayton Gornichec
You must be logged in to post a comment.