RSS
 

Archive for April, 2016

Review: Lastolite 6×4 Foot Panelite Collapsible Reflector with Translucent Diffuser

12 Apr

review-lastolite-panelite-diffuser-0803

How many times have you heard that there are certain times of day you shouldn’t photograph people? For example, at midday in harsh sunlight. The logic is pretty sound. Direct, hard light can lead to unflattering shadows and ultra high contrast, which can result in unsatisfactory portraiture. However, if you follow this advice blindly, and only wait for the golden hours each day, you’re missing out on an enormous amount of time that could be spent photographing people.

There are several options to combat this problem, but one of the easiest and most effective, is a piece of gear called a diffusion panel.

What is a diffusion panel?

At its most basic, a diffusion panel is a piece of translucent material that allows harsh direct light to pass through it, so it effectively becomes a light source of its own. This softens the light and can allow you to obtain great, flattering, natural light portraits, in unfavorable conditions.

review-lastolite-panelite-diffuser-2745

There are many types of diffusion panels available ranging from very small, handheld ones, to giant ones that are many meters across and require dedicated stands.

When size matters

Small diffusion panels are useful, and if you happen to have a 5-in-1 reflector, you probably already have one. These are indispensable for still-life and tabletop work; however, in terms of portraiture, their small size often limits them to closely cropped images and headshots.

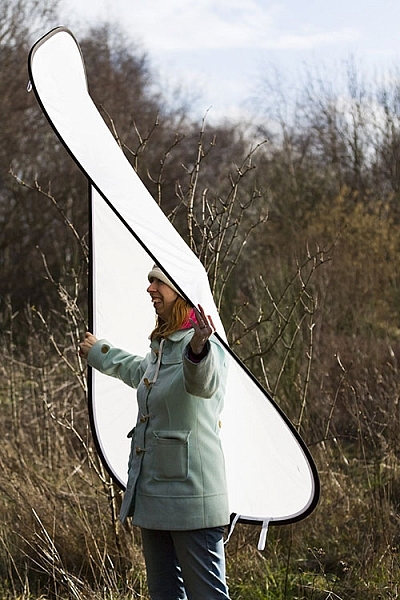
This is where the Lastolite Panelite Reflector comes in. At 6×4 feet (1.8m x 1.2m) it’s large enough to cover enough area for full length portraits. At $ 128 retail, its price also means that it isn’t way out of reach for the serious portrait photographer.

Putting it through its paces

To test it out, I took the Lastolite Panelite Reflector out on location, at mid-afternoon on clear days. The sun was low at this point, but still very harsh, and the high contrast would have been difficult, if not impossible, to manage without a modifier.

review-lastolite-panelite-diffuser-0385

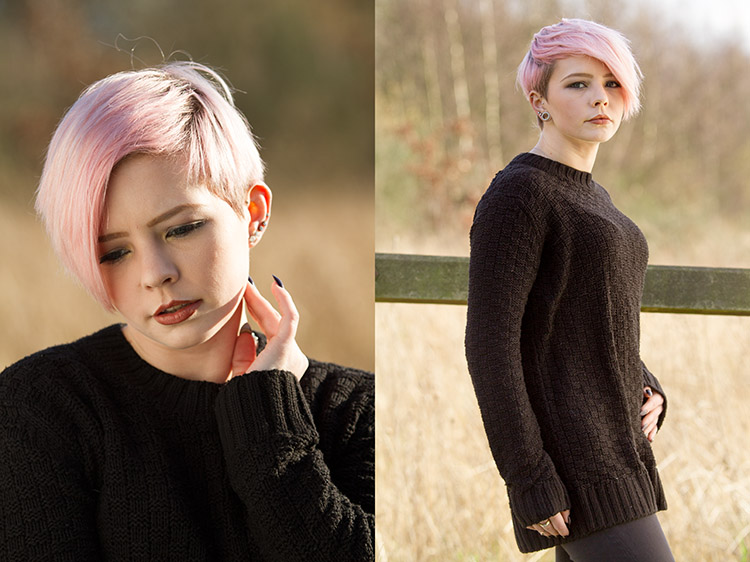
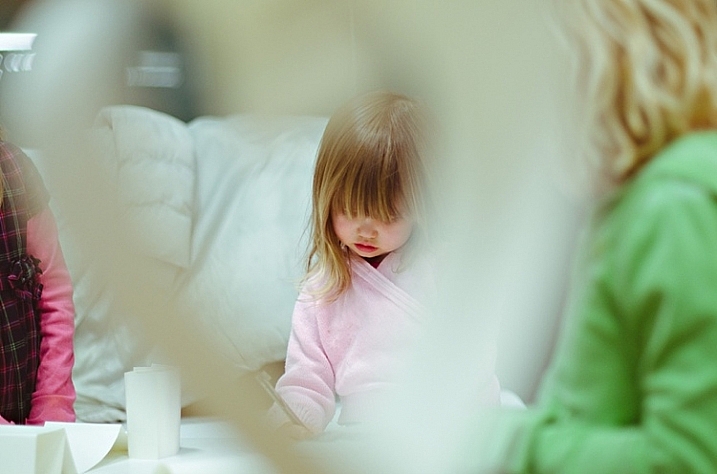
By Diffusing the sun back lighting the scene, you can even out the exposure of the highlights and shadows which is far more pleasing for portraits.

review-lastolite-panelite-diffuser-0569

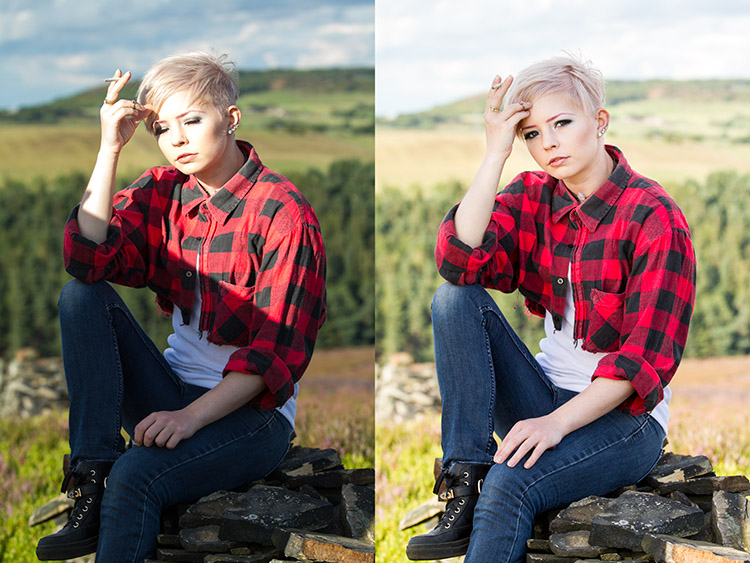
On the left, the bottom half of the image is shaded by the diffuser. You can see the two stop difference in exposure. In the image on the right, you can see how the hard directional sunlight has been softened (note that more exposure was needed overall so the background was also brightened in the process).

review-lastolite-panelite-diffuser-2621

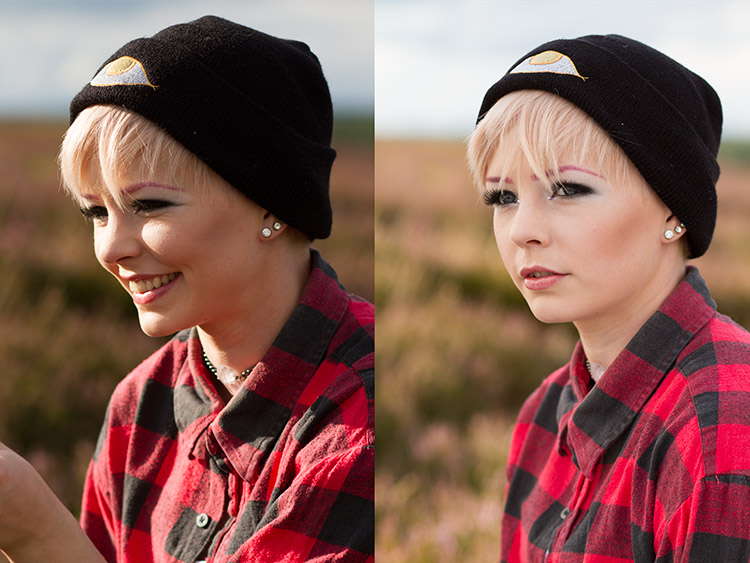
Apart from the unflattering shadows in the left hand image, the direct sun made it painful for the model to look into the camera. With the diffusion panel (right image), her eyes were shielded from the harsh light.

review-lastolite-panelite-diffuser-2734

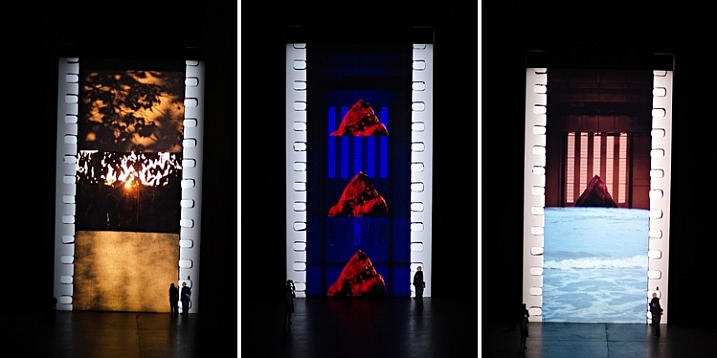
In the left hand image, the extreme contrast from the back lighting made exposing for the rest of the image a nightmare. By diffusing the back light, the exposure was evened out, but still allowed for a pleasing rim light (image above right).

Let’s look at some of the pros and cons of using this light panel.

PRO: Two stop diffusion

review-lastolite-panelite-diffuser-2737

By reducing contrast, the loss of two stops of light can be a huge help in some scenarios.

When working with the extremes of bright sunlight, it can be difficult to get away from small apertures like f/16. This is a problem because these settings won’t allow for a shallow depth of field. By reducing the light on your subject by two stops with the diffuser, that hypothetical aperture of f/16 becomes f/8 and makes background blur much easier to control.

PRO: Size

review-lastolite-panelite-diffuser-2656

This thing is huge. It’s not the biggest on the market, but it’s big enough for full length portraits, which is a major plus. I did not yet have the opportunity to test it on groups of people, but I believe it should work well for up to four people, with careful control.

review-lastolite-panelite-diffuser-0734

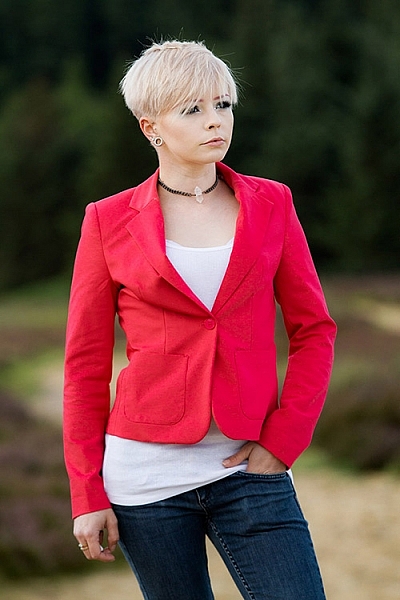
The ability to diffuse a large enough area for 3/4 and full length portraits is a big plus.

PRO: Portable

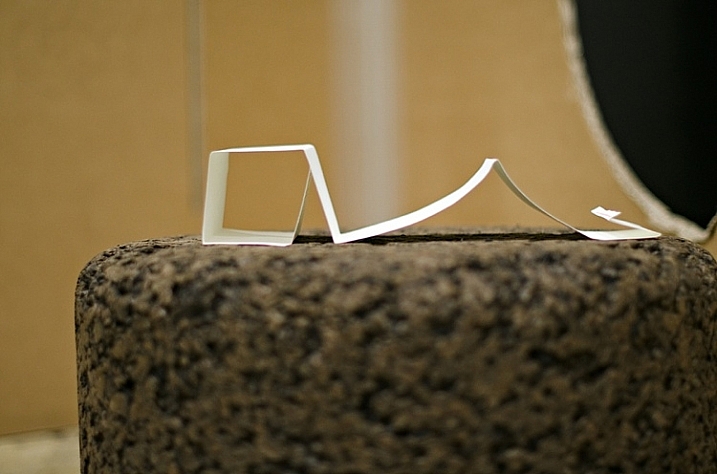
Like a lot of Lastolite’s product, the diffusion panel is collapsible, and folds up to a tiny fraction of its size. Packed in its case, I would compare it to the surface of a medium sized cafe table. Combined with its light weight, it’s easy enough to throw in the back of a car, and carry along on location with you, without strain.

PRO: Price

At $ 128, this is not a budget tool. However, for photographers serious about location based portraiture, the Lastolite Panelite Reflector comes in cheaper than lighting modifiers of moderate quality and unlike those, this doesn’t require lights to go with it.
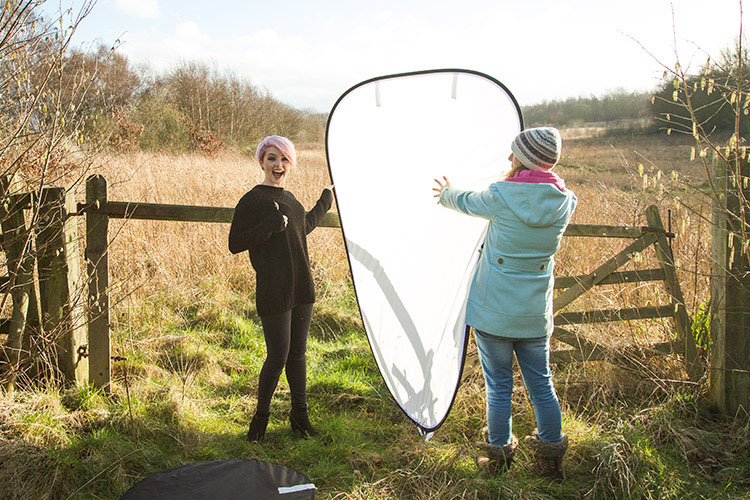
CON: Extra hands

The Lastolite Panelite Reflector is large, and you will find it very difficult to manage without an assistant to hold it for you. If it needs to be held much higher than ground level, you may well need two people. It may be possible to rig it to some stands, but this leads into the next point.

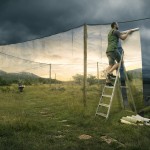
CON: Be wary of wind

review-lastolite-panelite-diffuser-2695

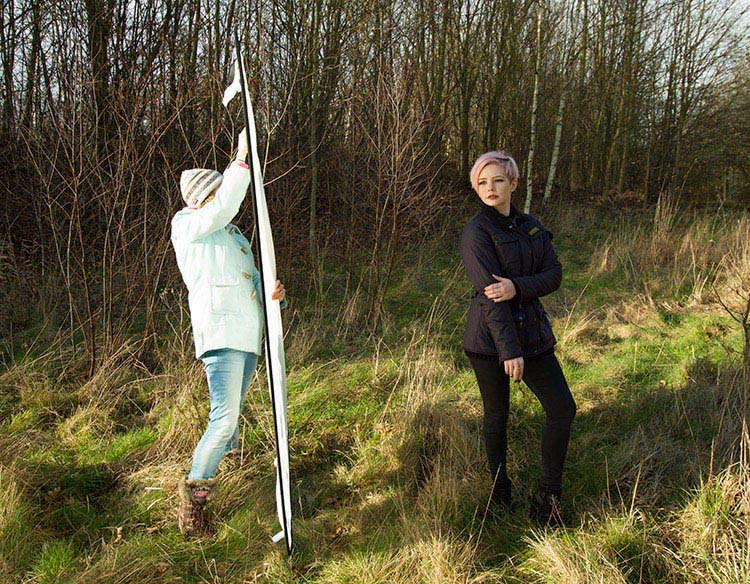
A small gust of wind sparked a several minute struggle to regain control over the panel.

The only real problem I came across while testing the Lastolite Panelite Reflector was that the slightest gust of wind will send it flying, and folding in on itself. Whoever is holding it for you needs to have a sure grip on it, and even then the whole process is still irksome.

If you’re into slapstick, this can be hilarious to watch, but any time spent trying to get the diffusion panel to play along, is time not spent taking photographs.

CON: Dirt

Like white reflectors, softboxes and white umbrellas, the Lastolite Panelite Reflector is really, really white and will be hard to clean when it inevitably gets dirty.

Overall thoughts

review-lastolite-panelite-diffuser-0640

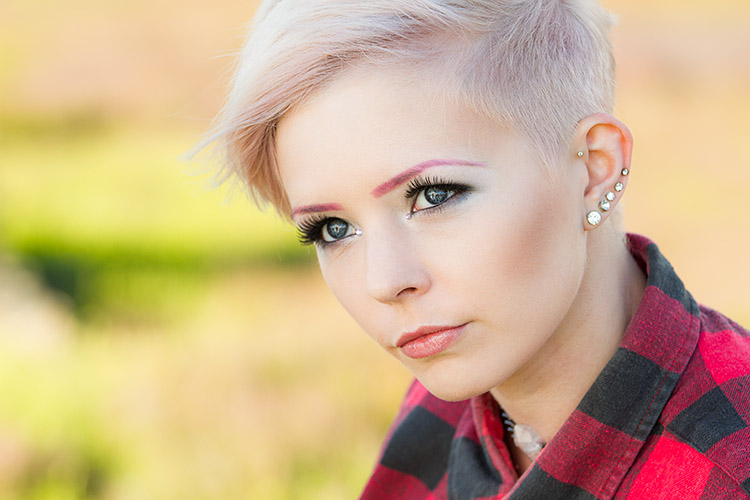
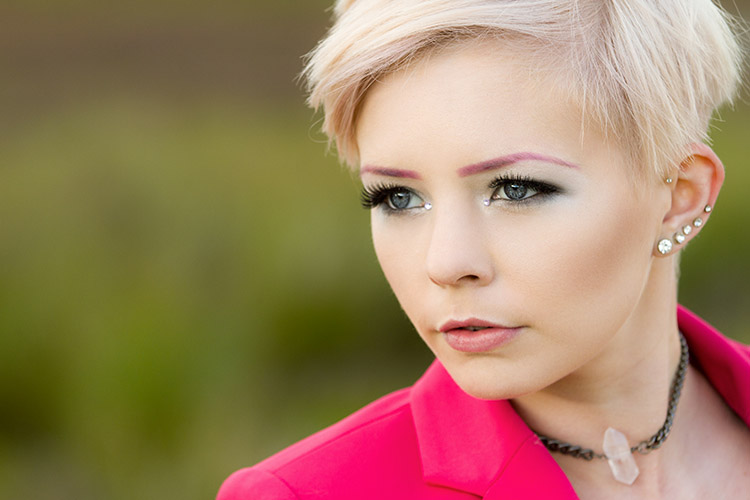
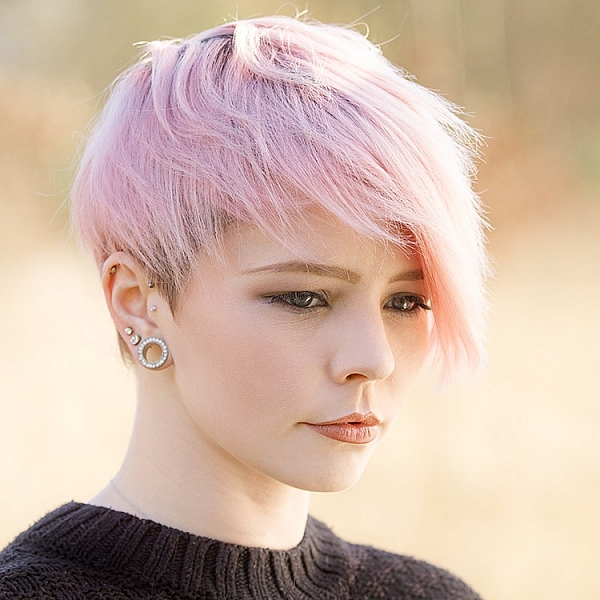
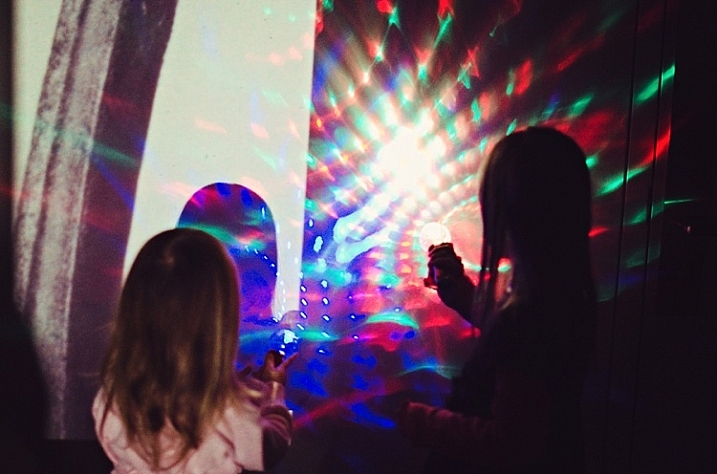
If nothing else, when used head on, the Panelite Reflector creates some interesting catch-lights.

To sum it up easily, the Lastolite Panelite Reflector does exactly what it says on the tin. It’s portable, creates a beautiful diffused light, and is relatively affordable. Although, it can prove tricky to handle under some conditions, I found the results to be well worth the extra logistics and effort, and I am looking forward to a long an extended relationship with it in my photographic arsenal.

googletag.cmd.push(function() {
tablet_slots.push( googletag.defineSlot( “/1005424/_dPSv4_tab-all-article-bottom_(300×250)”, [300, 250], “pb-ad-78623” ).addService( googletag.pubads() ) ); } );

googletag.cmd.push(function() {
mobile_slots.push( googletag.defineSlot( “/1005424/_dPSv4_mob-all-article-bottom_(300×250)”, [300, 250], “pb-ad-78158” ).addService( googletag.pubads() ) ); } );

The post Review: Lastolite 6×4 Foot Panelite Collapsible Reflector with Translucent Diffuser by John McIntire appeared first on Digital Photography School.


Digital Photography School

 
Comments Off on Review: Lastolite 6×4 Foot Panelite Collapsible Reflector with Translucent Diffuser

Posted in Photography


Impossible Photography: 15 Reality-Bending Images Defy Logic

12 Apr

[ By Steph in Art & Photography & Video. ]

erik johansson 1

A floor is a ceiling, a lake is made of shattered glass, carpets of grass cascade over the edge of the world and buildings sprout wheels and wander away in the fantastically surreal world of Erik Johansson. The photographer has spent much of the last decade refining his reality-bending image manipulation techniques, combining dozens of real photos to create effects that are often hyperrealistic yet physically impossible. As unlikely as it may seem, Johansson uses no CGI, stock photos or digital illustrations in his work – each image is a complex collage of his own photographs, captured on his Hasselblad HD5-40 camera.

erik johansson 12

erik johansson 13

erik johansson 14

On his YouTube channel, the artist offers behind-the-scenes videos for many of his works so we can see just how each one is assembled. For his newest piece, ‘Impact,’ Johansson carefully cut four massive mirrors into fragments, arranged them in a field and photographed his model standing among them in a kayak. Photos from this shoot are ultimately blended with images of a lake and additional studio photos of cracked mirror shards.

erik johansson 2

erik johansson 3

erik johansson 4

erik johansson 5

erik johansson 6

Depicting just about every step the artist takes during the process, the videos are just as impressive as the final images and make it clear that the arduous process requires many hours of retouching. Johansson even leaves in the parts where he experiments with various effects and ideas that don’t make it to the final version.

erik johansson 7

erik johansson 8

erik johansson 9

erik johansson 10

As he explains on his website, Johansson is interested in capturing ideas rather than moments, but with the goal of making each one look as realistic as possible, saying “The only thing that limits us is our imagination.”

Share on Facebook


[ By Steph in Art & Photography & Video. ]

[ WebUrbanist | Archives | Galleries | Privacy | TOS ]


WebUrbanist

 
Comments Off on Impossible Photography: 15 Reality-Bending Images Defy Logic

Posted in Creativity


Mid-Century Modern America: 10 Classic Houses for the Ages

12 Apr

[ By Steph in Design & Products & Packaging. ]

midcentury modern stahl house 4

Icons of midcentury modern design by the likes of Ludwig Mies van der Rohe, Frank Lloyd Wright, Eero Saarinen and Marcel Breuer still stand across America, showing off the simplicity, clean lines and extensive use of glass the style is known for. Many are so perfectly preserved they’ve become actual museum exhibits, while others have been well-loved and lived in over the decades or restored after falling into ruin. These 10 examples represent some of the most famous midcentury modern homes in the country, as well as a few hidden gems.

Farnsworth House by Mies van der Rohe, Plano, Illinois (1951)
midcentury modern farnsworth house

midcentury modern farnsworth house 2

midcentury modern farnsworth house 3

midcentury modern farnsworth house 4
Renowned architect and designer Mies van der Rohe created the most beautiful example of a glass midcentury house for Dr. Edith Farnsworth as a place to play violin, translate poetry and enjoy the landscape on the edge of the Fox River. About 1500 square feet, the house features floor-to-ceiling glass with exposed steel structural members in white. Elevating it 5.3 feet above the flood plain didn’t prevent it from being inundated after Hurricane Ike in 2008, but most of the home’s original midcentury furniture was saved, and it re-opened to visitors by 2009.

Fallingwater by Frank Lloyd Wright, Mill Run, Pennsylvania (1935)
midcentury modern fallingwater 1

midcentury modern fallingwater 2

midcentury modern fallingwater 3

midcentury modern fallingwater 4

midcentury modern fallingwater 5

The most famous creation of America’s most well-known architect, Fallingwater (or the Kaufmann Residence) is also one of the nation’s most-visited homes. Fallingwater was built right on top of a series of cascading waterfalls on Bear Run in the Allegheny Mountains, which might be a beautiful choice stylistically, but led to a series of architectural challenges and some extensive mold problems. The fact that the location on the bank of the river was not large enough to support the foundation of a typical Wright house is what prompted the cantilevered design. The original owners used it as a weekend home until 1963, when it donated to the Western Pennsylvania Conservancy, and it’s been open to the public as a museum since 1964.

Eames House by Charles and Ray Eames, Los Angeles, California (1949)
midcentury modern eames house 1

midcentury modern eames house 2

midcentury modern eames house 3

midcentury modern eames house 4

midcentury modern eames house 6

One of about two dozen homes built as part of the Case Study House Program, an experimental architecture project sponsored by Arts & Architecture Magazine after World War II, the avant-garde Eames House resembles a Mondrian painting with its panels of white, blue and red separated by stark black beams. While many iconic midcentury modern houses have been preserved as they were originally decorated, the Eames House has a thoroughly lived-in feel because it has actually functioned as a comfortable and functional home for decades rather than a museum exhibit. It consists of a main residence and studio separated by a courtyard.

Hooper House II by Marcel Breuer, Baltimore, Maryland (1959)

midcentury modern hooper house 1

midcentury modern hooper house 2

midcentury modern hooper house 4

midcentury modern hooper house 3

midcentury modern hooper house 5

Known for beautiful streamlined furniture designs as well as some of America’s most amazing Brutalist structures, Marcel Breuer showed an unusual restraint in designing the simple Hooper House II for philanthropist Edith Hooper. Two separate wings of the home, one containing the common spaces and the other the bedrooms, are connected by a glazed passageway to form a U-shape. Large segments of glass offer views of the courtyard as well as Lake Roland to the east, broken up by long walls of Maryland fieldstone.

Stahl House, Los Angeles, California (1959)

midcentury modern stahl 1

midcentury modern stahl house 2

midcentury modern stahl house 4

midcentury modern stahl house 5

Is this the quintessential Los Angeles house? The Stahl Residence is certainly one of the city’s most iconic, cantilevering out of the Hollywood Hills to gaze upon the urban skyline, and it’s magnificent at night. The glass and steel volume projects the common areas outward while maintaining privacy for the bedrooms in a separate wing. The swimming pool serves as an interstitial space between the two. The house serves as one big lookout taking in panoramic views of Los Angeles.

Next Page – Click Below to Read More:
Mid Century Modern America 10 Classic Houses For The Ages

Share on Facebook


[ By Steph in Design & Products & Packaging. ]

[ WebUrbanist | Archives | Galleries | Privacy | TOS ]


WebUrbanist

 
Comments Off on Mid-Century Modern America: 10 Classic Houses for the Ages

Posted in Creativity


Change of focus: 755 MP Lytro Cinema camera enables 300 fps light field video

12 Apr

Lytro is bringing its Light Field technology to the world of cinema and visual effects, shortly after its CEO announced in a blog post Lytro’s intention of abandoning the consumer stills camera space. Lytro Cinema turns every frame of live action into a 3D model, capturing intensity, color, and angular information of light rays. Coupling light field with a 755 MP sensor capable of capturing images at 300 fps, Lytro Cinema promises extensive post-production freedom, including adjustment of focus, depth-of-field, shutter speed and frame rate, as well as the elimination of green screens.

Although Lytro experienced some difficulty in adoption of light field technology in stills, the technology had, and continues to have, immense potential for imaging. Saving creative decisions for post-processing allows for more creative freedom, and allows a photographer or DP to focus on other elements during capture. Nowhere will this be more appreciated than in cinema, where the realities of production mean that any technology aimed at saving certain creative decisions, like focus, for post-capture are welcome.

Focus and aperture sliders in post-production. In video. No joke. I wish my Raw converter had this (Lytro’s Raw converter already does). Photo credit: Lytro

And that’s exactly what Lytro Cinema aims to do. By capturing directional information about light rays and essentially sampling multiple perspectives behind the aperture, Lytro Cinema allows for adjustment of focus placement, depth-of-field (via aperture adjustment), perspective, and more in post-processing. And since a depth map is rendered for every frame of video, Lytro claims Cinema will make it easier to combine CGI with live footage, no longer requiring green screens to extract elements or subjects from a scene. You’ll be able to just extract a subject based on its depth, which Lytro shows in a convincing example below:

Since light field cameras effectively sample multiple perspectives from behind the lens, you can even simulate camera movement as if it were moved on-set. The degree of motion is of course limited, but the technique can be very effective, as demonstrated in this haunting music video shot entirely on the stills-focused Lytro Illum. As Lead Engineer for Light Field Video Brendan Bevensee explains: “You have a virtual camera that can be controlled in post-production.” That means there’s also nothing stopping one from simulating short dolly motion or perspective shifts in post, with nothing but a static camera at the time of capture. “You can shift the camera to the left… [or] to the right, as if you had made that exact decision on set. It can even move your camera in and out” says Head of Light Field Video, Jon Karafin.

Imagine small, smooth, meditative camera movements that don’t even require a complicated motion rig to set up.

Furthermore, by precisely recording X, Y, Z, pitch, roll, and yaw, Lytro Cinema even offers automated camera tracking, which makes it easier to composite and mat CGI elements. And just as the Illum paired with Lytro Desktop software allowed one to select various objects and depths to throw them in and out of focus for selective depth-of-field and background blur, one can do the same in video with the Cinema, choosing, for example, to marry live footage from minimum focus to, say, 10m with different footage, or CGI, for everything beyond those distances. In other words, control over not just single planes, but ranges of planes.

Beyond just light field benefits, Lytro is also addressing another common headache: the selection of shutter angle (or shutter speed). Often, this is a decision made at the time of capture, dictating the level of blur or stuttering (a la action scenes in ‘Saving Private Ryan’ or ‘Gladiator’) in your footage. At high frame rates of capture, though, high shutter angles are required, removing some of the flexibility of how much motion blur you can or can’t have (e.g. 300 fps cannot be shot with shutter speeds longer than 1/300s, which inevitably freezes action). By decoupling the shutter angle of capture from the shutter angle required for artistic effect, a DP can creatively use motion blur, or lack thereof, to suit the story. The technology, which undoubtedly uses some form of interpolation and averaging in conjunction with the temporal oversampling, also means that you can extract stills with a desired level of motion blur. 

Lytro claims that by capturing at 300 fps, they can computationally allow for any of a number of shutter angles in post-production, allowing a cinematographer to decouple shutter angle required for capture from that required for artistic intent. Photo credit: Lytro

With every development over at Lytro, we’ve been excited by the implications for both stills and video. The implications for the latter, in particular, have always been compelling. Along with the announcement of the Lytro Immerge 360º virtual reality light field rig, we’re extremely excited to see light field video becoming a reality, and look forward to what creatives can produce with what is poised to be an unimaginably powerful filmmaking platform. Filmmakers can sign up for a demonstration and a personalized production package on Lytro’s site. For now, Lytro Cinema will be available on a subscription basis, understandable given the complexities involved (the immense data capture rates require servers on-set).

Head over to the Lytro Cinema page for more in-depth information. Lytro will be demo-ing “Life”, a short film shot using Lytro Cinema at NAB 2016.

Lytro Brings Revolutionary Light Field Technology to Film and TV Production with Lytro Cinema

  • World’s First Light Field Solution for Cinema Allows Breakthrough Creative Capabilities and Unparalleled Flexibility on Set and in Post-Production
  • First Short Produced with Academy Award Winners Robert Stromberg, DGA and David Stump, ASC in Association with The Virtual Reality Company (VRC) Will Premiere at NAB on April 19

Lytro unlocks a new level of creative freedom and flexibility for filmmakers with the introduction of Lytro Cinema, the world’s first Light Field solution for film and television. The breakthrough capture system enables the complete virtualization of the live action camera — transforming creative camera controls from fixed on set decisions to computational post-production processes — and allows for historically impossible shots.

“We are in the early innings of a generational shift from a legacy 2D video world to a 3D volumetric Light Field world,” said Jason Rosenthal, CEO of Lytro. “Lytro Cinema represents an important step in that evolution. We are excited to help usher in a new era of cinema technology that allows for a broader creative palette than has ever existed before.”

Designed for cutting edge visual effects (VFX), Lytro Cinema represents a complete paradigm shift in the integration of live action footage and computer generated (CG) visual effects. The rich dataset captured by the system produces a Light Field master that can be rendered in any format in post-production and enables a whole range of creative possibilities that have never before existed.

“Lytro Cinema defies traditional physics of on-set capture allowing filmmakers to capture shots that have been impossible up until now,” said Jon Karafin, Head of Light Field Video at Lytro. “Because of the rich data set and depth information, we’re able to virtualize creative camera controls, meaning that decisions that have traditionally been made on set, like focus position and depth of field, can now be made computationally. We’re on the cutting edge of what’s possible in film production.”

With Lytro Cinema, every frame of a live action scene becomes a 3D model: every pixel has color and directional and depth properties bringing the control and creative flexibility of computer generated VFX to real world capture. The system opens up new creative avenues for the integration of live action footage and visual effects with capabilities like Light Field Camera Tracking and Lytro Depth Screen — the ability to accurately key green screens for every object and space in the scene without the need for a green screen.

“Lytro has always been a company thinking about what the future of imaging will be,” said Ted Schilowitz, Futurist at FOX Studios. “There are a lot of companies that have been applying new technologies and finding better ways to create cinematic content, and they are all looking for better ways and better tools to achieve live action highly immersive content. Lytro is focusing on getting a much bigger, better and more sophisticated cinematography-level dataset that can then flow through the VFX pipeline and modernize that world.”

Lytro Cinema represents a step function increase in terms of raw data capture and optical performance:

  • The highest resolution video sensor ever designed, 755 RAW megapixels at up to 300 FPS
  • Up to 16 stops of dynamic range and wide color gamut
  • Integrated high resolution active scanning

By capturing the entire high resolution Light Field, Lytro Cinema is the first system able to produce a Light Field Master. The richest dataset in the history of the medium, the Light Field Master enables creators to render content in multiple formats — including IMAX®, RealD® and traditional cinema and broadcast at variable frame rates and shutter angles.

Lytro Cinema comprises a camera, server array for storage and processing, which can also be done in the cloud, and software to edit Light Field data. The entire system integrates into existing production and post-production workflows, working in tandem with popular industry standard tools. Watch a video about Lytro Cinema at www.lytro.com/cinema#video.

“Life” the first short produced with Lytro Cinema in association with The Virtual Reality Company (VRC) will premiere at the National Association of Broadcasters (NAB) conference on Tuesday, April 19 at 4 p.m. PT at the Las Vegas Convention Center in Room S222. “Life” was directed by Academy Award winner Robert Stromberg, Chief Creative Officer at VRC and shot by David Stump, Chief Imaging Scientist at VRC.

Learn more about Lytro Cinema activities during the 2016 NAB Show and get a behind-the-scenes look on the set of “Life” at www.lytro.com/nab2016.

Lytro Cinema will be available for production in Q3 2016 to exclusive partners on a subscription basis. For more information on Lytro Cinema, visit www.lytro.com/cinema.

Articles: Digital Photography Review (dpreview.com)

 
Comments Off on Change of focus: 755 MP Lytro Cinema camera enables 300 fps light field video

Posted in Uncategorized


Searching for Paddling Water in Southern Colorado – Part 2

12 Apr

I started my February trip to southern Colorado with visiting Paint Mine Interpretive Park at Calhan east of Colorado Springs. I spent there evening and next morning photographing fantastic clay and sandstone erosion formations. I added some pictures to my […]
paddling with a camera

 
Comments Off on Searching for Paddling Water in Southern Colorado – Part 2

Posted in Photography


How to Improve Your Photos Using Micro-Composition

12 Apr

One of the most fundamental elements of photography is that of composition, or how your subject, foreground, background, light, and other elements work together to produce a complete picture. While understanding how this works is fundamental to mastering the art of photography, the underlying principles behind composition go much deeper than just getting all the big things right so they look good in the frame. Masters of the medium are able to balance many different techniques of composition at the same time ,and put them together to launch their work into the upper echelon, and one rung on that ladder is a concept known as micro-composition.

microcomposition-engagement

This involves not just getting the big things in your picture set up and aligned properly, but making sure to capture your image in such a way that the smaller elements work together as part of the cohesive whole. It’s a technique that can be tricky to learn and take years to master, but through practice can elevate your photography to a whole new level.

To understand how micro-composition works it’s good to start with one of best examples of this technique which can be seen in National Geographic photographer Sam Abell’s image Cowboys Branding Cattle, Montana.

Photograph by Sam Abell, National Geographic

At first glance it seems like an ordinary picture of some ranchers in the western United States, but the reason it looks so perfect is because everything in it is masterfully composed. All the elements come together to form a complete picture that works at the foreground, subject, and background levels. It invites the viewer to linger, not just on the calf being branded, but on the cowboys wrangling cattle behind them, and the rider on his horse in the background. Even the red bucket helps add a sense of action and mystery to the picture, but what makes this image work so well is how each of the elements is composed, not just on a macro level but on a micro level as well. The heads and shoulders of every person are above the horizon line, the horse in the background is perfectly framed between the two ranch hands, and the red bucket occupies its own space and does not overlap the man’s hat or even break through the horizon line. This was not a lucky one-in-a-million shot, but one that was carefully composed by Abell as he positioned himself in the midst of the action, kept the various elements composed in his camera’s viewfinder, and waited until just the right moment when the red bucket was just past the cowboy’s hat to take the shot. It’s the result of a master micro-composer at work.

Micro-composition is all about focusing not on just the major elements of a picture, but the minor ones as well, and putting each element in its own space, while keeping it as a clear part of the whole. While I am certainly no Sam Abell, and probably couldn’t take photos like his if I practiced for a hundred years, there are many ways the techniques of micro-composition used by him and others, can be applied to even the most mundane photos. As a bit of a case study, the following image of a tulip is not composed well on a macro- or micro-level, but it can serve as a starting point for illustrating how these concepts work together.

microcomposition-tulip-1

What you see here is a good start but ultimately not a very pleasing image. The red tulip is in the center of the image, when it should be off to the side, and it has a green stalk protruding vertically which creates a jarring distraction. To fix some of these issues I re-framed the tulip with a better overall macro composition and the results, while not perfect, are certainly much better (see below).

microcomposition-tulip-2

From a macro sense the picture has improved, but look at the small details and you will notice several things that don’t work. The tulip itself no longer has a strange green growth on top but the flower now protrudes through the horizon line and into the steel bench in the background. The stalks on the left side don’t go quite to the corner which leaves a strange empty space between them and the edge of the picture. Finally, the yellow bulb on the right side is cut off. As you can see, even though the image seems fine at first glance, looking at these micro-level compositional elements reveals a host of problems that could easily be fixed, and would result in a much better picture.

microcomposition-tulip-3

Finally, a photo that works! Even though it’s not perfect (as I mentioned earlier, I’m no Sam Abell) we can see how micro-composing the photo has dramatically improved it over the original. The red tulip now occupies its own space, and does not break through the horizon line into the bench. The tips of the green stalks go almost to the corner, and the bulb on the right side is fully intact without being cut off at all. All this was completely intentional, not the result of some random photographic accident. I spent several minutes poring over the composition, and looking at the scene from different angles, in order to get as many elements as possible right where they should be. The result of this extra time is a picture that is much better than just a simple snapshot.

microcomposition-construction-site

It took a bit of work and patience to get this shot, but I wanted to make sure each worker was in his own space. The final shot is not ideal, but much better than others I took, in terms of micro-composition.

Learning the principles behind micro-composition takes time, observation, and lots and lots of practice. It also involves quite a bit of patience, so if you are used to snapping photos with your phone, throwing on a filter and some text, and tossing them up to a few social networks, you may find the idea of micro-compositing a bit frustrating. For another example take this photo of a sundial (below) which seems okay at first glance, but when I shot it I did not want to settle for something decent. There is nothing especially wrong with the overall composition, but on a micro-level there are several elements in need of fixing.

microcomposition-sundial-improper

I liked the idea of framing the sundial with a path and some greenery in the background, but studying the smaller elements and taking a new picture led to much better results. This required not only repositioning myself just a few inches over to the side, but also waiting about 15 minutes for the sun to move across the sky so I could get better shadows in the background. I could have just left this garden with the initial picture, but the next one, which is properly micro-composed, is far better.

microcomposition-sundial-proper


While this second image is not perfect it works far better for a few reasons:

  • The tip of the arrow stays within the path and does not intrude on other background elements like the stone borders on the side of the path.
  • The near side of the sundial arc does not overlap the far side.
  • The fletchings on the rear end of the arrow sit within the the shadow on the path, which leads to a nice sense of contrast.
  • The rear side of the sundial does not overlap the shadow of the stone ledge…except for the very tip of one arc. (Sometimes no matter how hard you try you just can’t quite get everything how you want it.)

Masters of the art like Sam Abell will sometimes sit for hours waiting for the ideal conditions to line up, such that the resulting shot is composed beautifully from virtually all possible angles. While I have years to go before I can even hope to come close to that level, this most certainly is a technique that has helped me improve my own photography.

microcomposition-guitar-pond-dog

Each element of this picture exists within its own space: the musician’s head is positioned between the branches, the bench is contained within the pond, and even the dog’s head does not overlap the bench.

If I had to distill my advice regarding micro-composition down to just one simple phrase, I would reiterate one thing I mentioned earlier – have patience. Take your time when preparing a shot. Consider all the elements in the frame, not just your subject and the light. Ask yourself if there is another angle, another position, or even another focal length you can use to get the various elements of the photo, from the major to the minor, to all work together. You don’t need a fancy camera or expensive equipment to learn micro-composition, but once you start to get the hang of it, you will see a dramatic increase in the quality of your images.

Have you found the concept of micro-composition to be useful in your own photography? What other tips and tricks do you have up your sleeve when it comes to composing pleasing images? Share your thoughts in the comments below, and if you have any examples that we can learn from feel free to share your photos too!

googletag.cmd.push(function() {
tablet_slots.push( googletag.defineSlot( “/1005424/_dPSv4_tab-all-article-bottom_(300×250)”, [300, 250], “pb-ad-78623” ).addService( googletag.pubads() ) ); } );

googletag.cmd.push(function() {
mobile_slots.push( googletag.defineSlot( “/1005424/_dPSv4_mob-all-article-bottom_(300×250)”, [300, 250], “pb-ad-78158” ).addService( googletag.pubads() ) ); } );

The post How to Improve Your Photos Using Micro-Composition by Simon Ringsmuth appeared first on Digital Photography School.


Digital Photography School

 
Comments Off on How to Improve Your Photos Using Micro-Composition

Posted in Photography


10 Silly Mistakes Photographers Make

11 Apr

It’s OK to make mistakes. In fact, our experience is all about making mistakes and learning certain lessons out of them. So by listing these silly mistakes most photographers have probably made at least once, we’re by no means scoffing at anyone. Our goal is to draw your attention to some issues you can easily avoid if you approach your Continue Reading

The post 10 Silly Mistakes Photographers Make appeared first on Photodoto.


Photodoto

 
Comments Off on 10 Silly Mistakes Photographers Make

Posted in Photography


4 Steps for How to Make a Creative Photo Diary

11 Apr

If you are a visual learner like me, seeing images and written words reinforces your memory, and enhances your learning. Concepts, ideas, and experiences associated with images, colors, and action, stay longer in our memory, help us savour the moment, and relive the events more clearly.

Spring is in sight, the days are getting longer and lighter, let’s go out and make the most of the season and make some new memories. Here’s a fun personal photography project for you: write a creative diary in pictures!

component-creative-photo-diary_0000

A diary or a journal is a record of your day to day life and experiences. Entries report both mundane and unusual goings-on, your emotions, thoughts and feelings, your actions and reactions, including opinions that may even be outside your immediate experience. Diaries and journals tend to be written in a chronological sequence.

Let’s apply this definition to a photo diary and see how well you can record a point in your life using pictures alone. The challenge is whether you can piece together a coherent and complete story, just by looking at the pictures alone.

Here are four basic components of  a creative photo diary. When making yours, feel free to be as exhaustive as you like. In this example, I will show photos under each component and hope that you will try and piece together the entire story. That way we can gauge just how strongly and effectively the photos alone were able to recount the narrative.

component-creative-photo-diary_0000

#1 Set the context – lay out the plan

Think of this like a prologue or an introduction in a book. Include photos of the locality and vary the angles; wide scenes, close ups, details, panoramas. Don’t forget to take photos of preparation, getting ready for the trip, or some action en-route to the destination.

Set the mood. If it’s a gloomy and rainy day, take pictures of the rain or the storm clouds. If it’s a sunny day, snap photos of the sun, flare, and silhouettes included. Keep your eyes peeled and look around you. What do you see on the way to your destination? Any interesting sights? Anything out of the ordinary? Anything special or alluring? Anything new that you have never seen before? Or perhaps it has always been there but you just never bothered to look close enough until now.

component-creative-photo-diary_0000

component-creative-photo-diary_0000

component-creative-photo-diary_0000

component-creative-photo-diary_0000

component-creative-photo-diary_0000

#2 Have an opening chapter – a beginning

You have reached your destination and thus the narrative begins its ascent. So far you have only given glimpses of your main character, clues to the destination, snippets to the story. Now you are ready to introduce your characters and show more of their personalities. Make them shine and take center stage.

Vary your images by employing different angles; close up, far and wide, bird’s eye view, worm’s eye view. How about an inquisitive and questioning view? Be creative about it and think outside the box. There are many ways of presenting a person’s character like emphasizing color, favourite objects, unique accessories, action, identifying marks, etc., other than the ubiquitous frontal portrait. The obvious isn’t always the most interesting.

component-creative-photo-diary_0000

component-creative-photo-diary_0011

What happened when you reached your destination? Did the plans change? Were there distractions or unforeseen events that led you to switch gears, or take a different route? Or did you head straight on to what you wanted to do? Were there any curious twists to the plan, or some surprises – nice ones or otherwise?

component-creative-photo-diary_0000

component-creative-photo-diary_0008

component-creative-photo-diary_0000

component-creative-photo-diary_0000

#3 Inject some action or drama

It may be that nothing happens that is spectacular or which causes emotional upheaval. That doesn’t mean you can’t create something dramatic or notable. You can focus on particular emotions, or something pretty mundane, and make a choice to celebrate life’s simple pleasures. If on the other hand there was plenty of action, choose a few main actions shots of defining moments from the day, especially those that elicited the most impressive reaction, or the quietest but most precious twinkle of an eye.

component-creative-photo-diary_0000

component-creative-photo-diary_0014

component-creative-photo-diary_0014

component-creative-photo-diary_0014

component-creative-photo-diary_0014

Adopt a photojournalistic stance, and record what happens without thinking too much about meaning or composition. Photograph what catches your eye, or that which you get drawn to instinctively. Trust your eyes to lead you to interesting contrasts and juxtapositions – light and shade, silence and noise, darkness and light. Aim to capture and savour every highlight. Don’t rush, but linger and indulge in the moment. The more you focus on something, no matter how small, the bigger its effects on you will be. Find an experience in the simplest of things; you are writing a story. Writers emphasize, exaggerate, infer, and aim for a climax. Don’t be afraid to do the same with your pictures. Be pro-active and creative.

component-creative-photo-diary_0012

component-creative-photo-diary_0000

component-creative-photo-diary_0000

component-creative-photo-diary_0000

#4 Start the closing chapter

In a book, this part is usually referred to as falling action. It comes after all the excitement and drama happen. It’s like a letting out a big sigh and things start to gather at a much slower pace. Prepare your audience for the conclusion, and end of the story. Unlike the conclusion in a book where the plot is usually unravelled, this part could plainly be writing the last paragraph to the entry of your diary for the day. It could be as simple as taking your shoes off after a long and tiring walk, drinking a well deserved cup of tea after a day full of challenges, or the sun slowly setting or the moon rising.

Remember the purpose of a diary is to record, preferably in detail, what transpired during your day; the running of events, emotions, actions, thoughts, ideas, changes, differences, transformations. So many elements to capture in a few photos. But perhaps in and amongst all the snapshots from the day, there could be one photo that somehow encapsulates how you may be feeling at the end. Use that photo to close your diary entry, and end your story.

component-creative-photo-diary_0000

component-creative-photo-diary_0000

component-creative-photo-diary_0000

component-creative-photo-diary_0000

Have you attempted a creative photo diary in the past? If not, I hope you try it one of these days and enjoy the experience. What do you think is the story in this example above? Please share your thoughts in the comments below.

googletag.cmd.push(function() {
tablet_slots.push( googletag.defineSlot( “/1005424/_dPSv4_tab-all-article-bottom_(300×250)”, [300, 250], “pb-ad-78623” ).addService( googletag.pubads() ) ); } );

googletag.cmd.push(function() {
mobile_slots.push( googletag.defineSlot( “/1005424/_dPSv4_mob-all-article-bottom_(300×250)”, [300, 250], “pb-ad-78158” ).addService( googletag.pubads() ) ); } );

The post 4 Steps for How to Make a Creative Photo Diary by Lily Sawyer appeared first on Digital Photography School.


Digital Photography School

 
Comments Off on 4 Steps for How to Make a Creative Photo Diary

Posted in Photography


Field Test: Claire Bangser and the Olympus PEN-F hit the Mississippi Blues Trail

11 Apr

DPReview’s Wenmei Hill and New Orleans-based photographer Claire Bangser recently hit the road with the Olympus PEN-F, visiting historic spots along the Mississippi Blues Trail. If you love the blues or want to learn more about the folks living in the small towns that dot the route, then you’ll enjoy our latest field test. 


This is sponsored content, created with the support of Olympus. What does this mean?

Articles: Digital Photography Review (dpreview.com)

 
Comments Off on Field Test: Claire Bangser and the Olympus PEN-F hit the Mississippi Blues Trail

Posted in Uncategorized


Pinned Down: 10 More Abandoned Bowling Alleys

11 Apr

[ By Steve in Abandoned Places & Architecture. ]

abandoned-bowling-alleys-1a
Abandoned bowling alleys lie scattered across the landscape as if the gods of recreational sports had laid ’em low with a single thunderous strike.

abandoned-bowling-alleys-1c

abandoned-bowling-alleys-1b

Shoeless Hoes? You’ll find neither shoes nor hoes (a type of gardening tool, for the uninformed) at the long-abandoned and unfortunately named Hoe Bowl in Hyde Park, New York. Flickr user Edward Blake (edwardhblake) snapped the stricken state of the once-stylish bowling alley in November of 2014.

abandoned-bowling-alleys-1e

abandoned-bowling-alleys-1f

HoeBowl Family Recreation Centers, founded in 1958 and led by current CEO Diane Hoe, is a chain of bowling alleys centered in New York’s Hudson Valley. The Hyde Park location closed just after the turn of the millennium. In September of 2013, the property was sold to James Rogers, who received approval to build a 76-resident assisted living center at the site. Recent images, however, show no sign of impending demolition. One might say… the Hoe must go on!

Gutter Check

abandoned-bowling-alleys-2a

abandoned-bowling-alleys-2b

Flickr user Corrine Klug checked out the abandoned bowling alley hidden deep within the deserted Scranton Lace Company’s factory in January of 2012. A decade earlier, the company’s vice president infamously told employees, in the middle of a working shift, that the facility was closing “effective immediately.” One presumes the stunned workers dropped everything – bowling balls included (ouch!) – and trudged out the doors, never to return.

Vicious Circle

abandoned-bowling-alleys-5

Remember those funky circular-ball-returns? This one’s funkier than most and the cheese-tastic carpeting only adds to the scene’s essential mustiness. Flickr user b lowe (vittelsandjuice) brings us this abandoned bowling alley still life dating from late 2011.

Next Page – Click Below to Read More:
Pinned Down 10 More Abandoned Bowling Alleys

Share on Facebook


[ By Steve in Abandoned Places & Architecture. ]

[ WebUrbanist | Archives | Galleries | Privacy | TOS ]


WebUrbanist

 
Comments Off on Pinned Down: 10 More Abandoned Bowling Alleys

Posted in Creativity