Even the most seasoned veteran photographer may use a pre-programmed mode occasionally in order to concentrate immediately on a shot rather than take the time to calculate exposure and miss the opportunity for the great image. But if you are a beginner at photography or want to advance your photography skills beyond the use of Auto mode, begin by adventuring away from the green box.
When you are setting up your camera to capture an image, there are four basic results to consider: wide depth of field, shallow depth of field, motion blur or freeze motion. How do you know which mode to use to control these basics of photography? Let’s take a look.
Auto (Green box)
In Auto mode, your camera will automatically set the shutter, aperture, ISO, white balance, and even the pop-up flash for you.
Advantages: This is a great option for beginners with a digital camera – but don’t become dependent on it! Only use it until you learn to take control of your camera.
Disadvantages: In certain lighting conditions the auto settings may produce undesirable images. For instance, a portrait that is heavily back-lit might just produce a silhouette. In low-light, you may end up with blurry and grainy images; also in low-light, the camera may choose to fire the flash to give more light and many camera models don’t provide a way to disable the flash if you don’t want it.
When to use: Any time you want to use your camera just as a point and shoot camera, this is your mode.
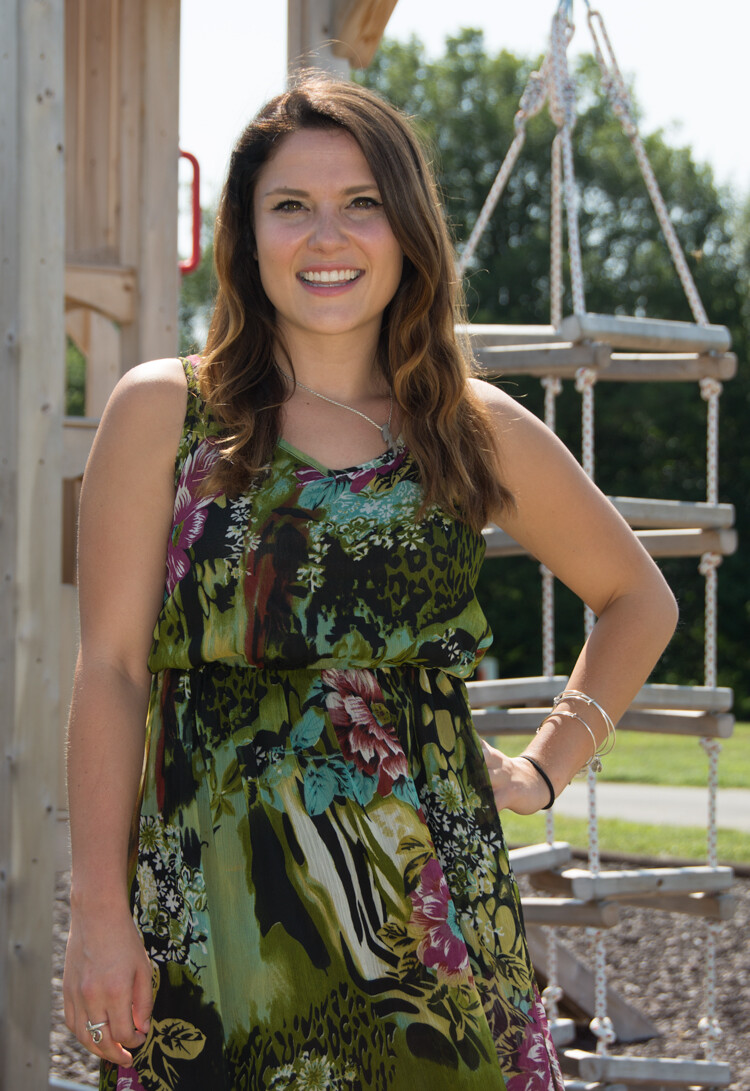
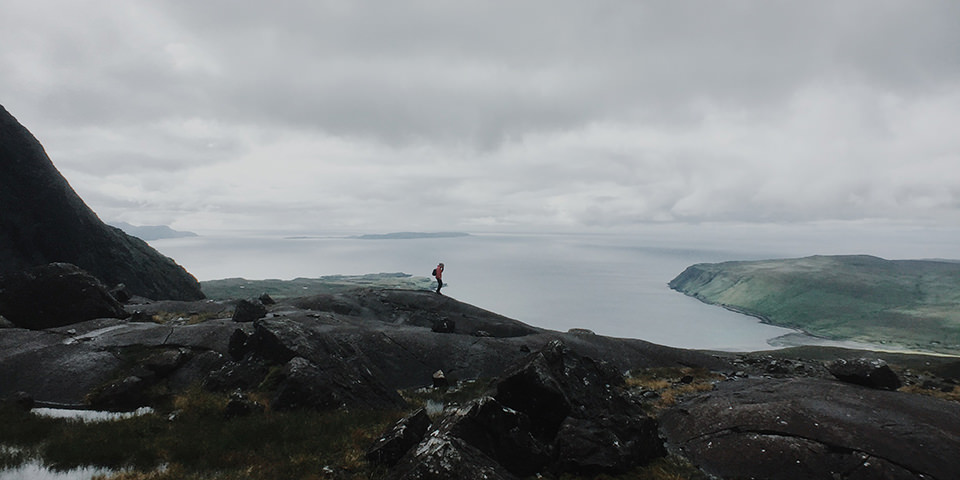
This portrait was an intentional shot into the sun in Auto mode. While the camera did a decent job with exposure, it is a 1/2 stop under-exposed. The auto exposure settings chosen are 1/250th of a second at f/6.3 with ISO of 100. While the shutter speed and ISO are acceptable, a wider aperture would have lessened the DOF and made the background less distracting.
Program (P)
In Program mode, your camera will automatically set the shutter speed and aperture, but will allow you to choose ISO, white balance, exposure compensation and flash options.
Advantages: This is a great next step for a beginner who wants to take a little more control of their camera and improve their images.
Disadvantages: As in Auto mode, certain lighting conditions may lead to unpredictable results, due to the partial automatic settings which leave some results to chance.
When to use: Use this mode if you want to take a good first step to ultimately taking complete control of your camera’s options.
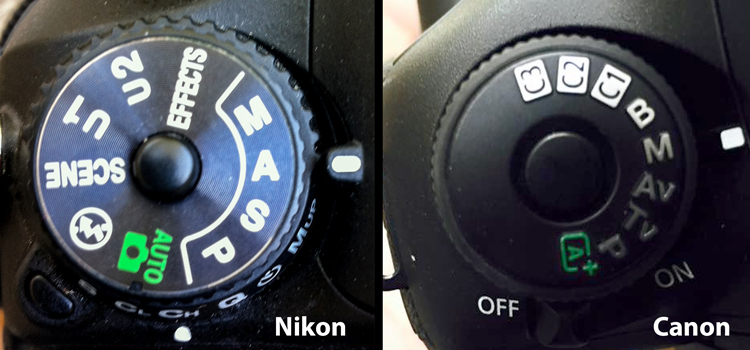
Shutter Priority (TV – Canon) (S – Nikon)
In Shutter Priority mode, you select the shutter speed and ISO and the camera will automatically choose the proper f-stop for what it determines to be the correct exposure.
Advantages: Great for controlling freeze action and motion blurring of moving objects.
Disadvantages: In this mode you have control of your shutter speed, so you must be careful that your camera can choose an f-stop to give you a proper exposure. The type of lens you have available to use comes into play here. Most cameras can shoot at a very fast shutter speeds, but if your lens doesn’t have a large enough aperture to match that shutter speed the resulting image will be under-exposed. For example, if you are shooting with a shutter speed of 1/4000th of a second, and the proper exposure for the speed of the subject requires an f-stop of f/2.8, but the widest opening on your lens is f/3.5, the image will be under-exposed.
When to use: Use this mode when you want to control the motion of the object you are photographing. Use a fast shutter speed if you want to freeze the motion or use a slow shutter speed if you want to blur the motion. This mode is also useful when using large mm lenses where you need to set a fast shutter speed to avoid blurred images due to camera shake.
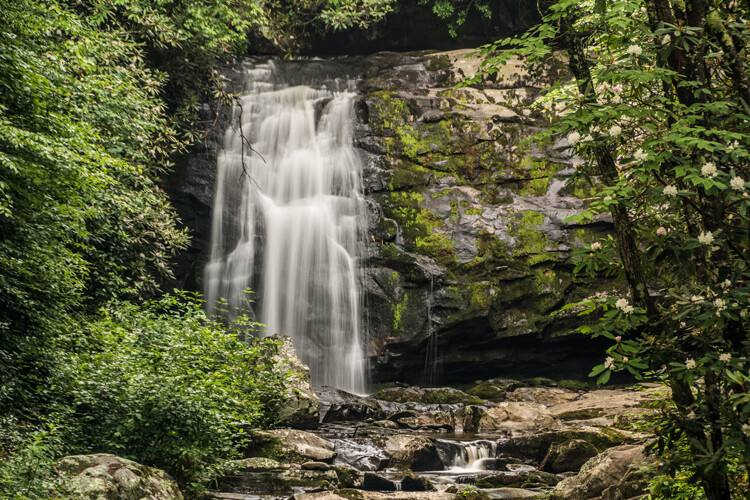
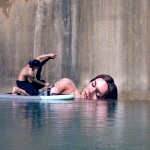
Shutter priority with a shutter to 1/8th of a second was used to blur the fast moving water.
Here are some suggested shutter speeds for Shutter Priority:
- Freeze very fast motion – 1/3000th of a second
- Athletes in motion – 1/500th to 1/1000th of a second
- Birds in flight – 1/1000th to 1/2000th of a second
- People walking – 1/250th of a second
- Panning moving objects – 1/30th to 125th of a second
- Blurring fast moving water – 1/8th of a second
- Blurring slow moving water – 1/2 to 1 second

Aperture Priority (AV – Canon) (A – Nikon)
In Aperture Priority mode, you select the aperture and ISO and the camera will automatically choose the proper shutter speed for what it determines to be the correct exposure.
Advantages: Other than Manual mode (next paragraph), Aperture Priority is the most popular shooting mode photographers use, mainly because it controls what is in focus in your image. And in most cases the item you have in focus is the element that will make or break the success of your image.
Disadvantages: In low-light situations your camera may choose a very slow shutter speed that will produce a blurry image, either because of movement by the subject or camera shake.
When to use: Use this mode when you want to control the Depth of Field (DOF) of your image. The larger the aperture the more light reaches your camera’s sensor and the shallower the DOF. Reversely, the smaller the aperture the less light reaches your camera sensor and the deeper the DOF. Beware that changing your aperture will also affect your shutter speed. More light from large apertures requires a faster shutter speed and less light from small apertures requires a slower shutter speed.

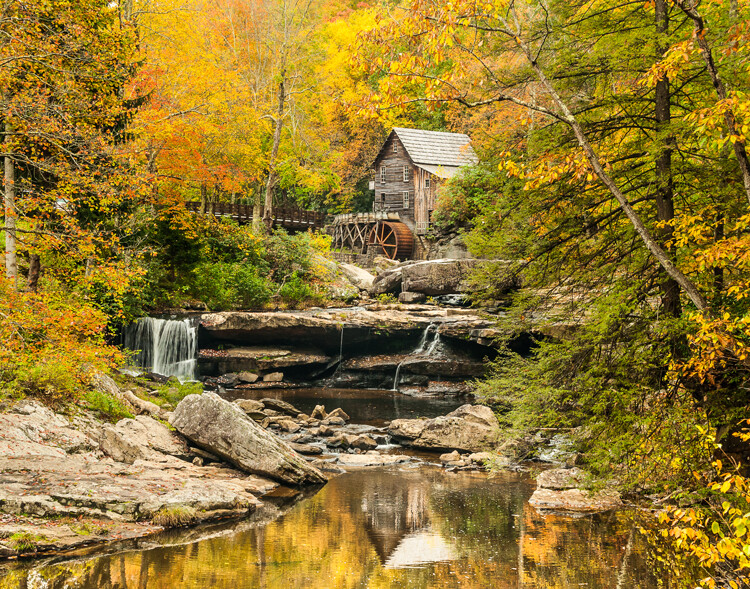
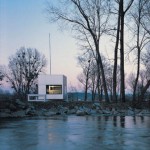
Aperture Priority to set a larger aperture to increase DOF.
Here are some suggested f-stops for Aperture Priority:
- Landscapes -f/8 or higher for more DOF
- Portraits – Large aperture (f/2.8) for shallow DOF to blur the background
- Macro – f/8 or higher for more DOF

Manual (M)
Manual mode allows you to change both the shutter speed and aperture settings independently from each other. No settings will be automatically set by the camera. Your camera’s built-in light meter will guide you on the exposure it determines to be correct, but you have complete control to adjust the shutter and aperture separately to get the exposure you determine to be correct for the image you are creating. Before you use the manual mode it is recommended that you have an understanding of the exposure triangle (shutter speed, aperture and ISO) and how each will affect your final image.
Advantages: This mode gives you complete creative control of the image you are capturing.
Disadvantages: While this mode has many creative advantages, you must be careful to always check the exposure with every image, especially when shooting in fast changing lighting conditions.
When to use: After you have learned to use this mode and learned the effects and results of the settings and how they work together, you will use this mode almost every time.
In Manual mode, a small aperture was used to control the DOF while also setting a slow shutter speed to blur the motion of the waterfall.
Scene Modes
Scene mode is very similar to Auto mode. You choose the scene you are shooting and the camera will choose settings for you optimized for that scenario. Different camera models may have different scene modes, but listed here are some of the most popular:
- Sports – Camera will increase ISO and use a fast shutter speed to capture fast action.
- Landscape – Camera will use a small aperture to maximize the DOF; flash may also be disabled.
- Portrait – Camera will use a large aperture to throw the background out of focus. Some models of cameras will also use face recognition in this mode.
- Macro – Camera will choose small aperture to give as much DOF as possible.
Advantages: As with the Program mode, these Scene modes are a beneficial starting point for beginners and will often give a better result than shooting in Auto mode.
Disadvantages: While these settings can produce desirable images at times, the results may vary and will not be reliable.
When to use: While these scene modes may be a step up from Auto mode for beginners, use these options as a starting point to learn your camera, understand its workings, and upgrade your photography skills.

So which mode is the best?
It is completely up to you which mode you feel most comfortable using. But if you are using the Auto, Scene or Program modes and you want to improve your photography, learning how to set exposures using the exposure triangle of shutter, aperture and ISO will help you make the best possible choices to create better images. The two most popular modes used by professional photographers are Manual and Aperture Priority. Remember, professionals were once beginners too. Enjoy your camera experiences, no matter which mode you choose!
googletag.cmd.push(function() {
tablet_slots.push( googletag.defineSlot( “/1005424/_dPSv4_tab-all-article-bottom_(300×250)”, [300, 250], “pb-ad-78623” ).addService( googletag.pubads() ) ); } );
googletag.cmd.push(function() {
mobile_slots.push( googletag.defineSlot( “/1005424/_dPSv4_mob-all-article-bottom_(300×250)”, [300, 250], “pb-ad-78158” ).addService( googletag.pubads() ) ); } );
The post A Beginner’s Guide to Choosing Shooting Mode by Bruce Wunderlich appeared first on Digital Photography School.

Digital Photography School


You must be logged in to post a comment.