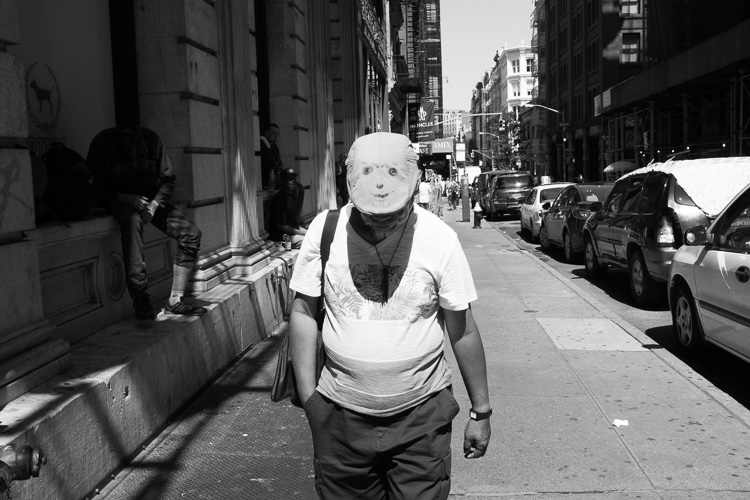
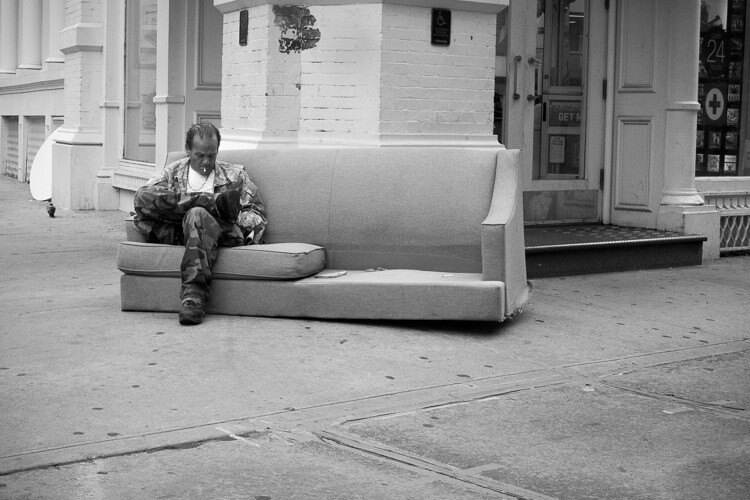
Smiley Face, SoHo, NYC.
Street photography and New York City are terms that often go hand in hand. New York is a diverse city of nearly 8.5 million eclectic and vibrant souls, all packed into a tiny island and its surrounding boroughs. Each area of the city has its own unique character and flavor, and there are so many interesting, unique moments that you can see here on a daily basis. It is one of the great locations in the world for this genre of photography.
As a lifelong New Yorker, let me state that it can also be very easy to overrate this city. Street Photography can, and should, be done everywhere and the fact that an image has been taken in New York does not make it any more interesting than an image taken anywhere else. The fact that millions of images are taken here each day makes it that much more difficult to create an one that stands out from the rest, but that is also part of the appeal.
If you live in a less populated place, or are tentative about trying street photography, New York is one of the best places to come to get over those fears. The streets are packed with people who are all in a rush, tourists are constantly photographing so you will not stand out, and most importantly, a lot of people move to, or visit this city, to be noticed. It is an environment ripe to practice and improve street photography.
Here are nine suggestions to keep in mind for doing street photograph in New York City (keep in mind these tip can be applied elsewhere as well).
1. Slow down and don’t try to photograph it all at once

Red Flower, East Village, NYC.
Up, down, left, right, tall buildings everywhere – it is so easy to become trigger happy here. You should experiment and take a lot of images, however, that is also one of the easiest ways to miss the most interesting moments. Sometimes the best moments will be subtle, or they will come upon you in an instant. Look with your eyes first and locate something of interest, then capture it with the camera. Don’t just stick your head in the viewfinder and start shooting away.
Watch your surroundings and take it all in. Explore. Find interesting compositions, look at the light, and get a feel for the people walking around. Try to go beyond only capturing the grand or iconic aspects of the city. Go beyond the images that you have seen in books. Seek out the little details and let the streets surprise you.
2. Put yourself in the middle of the commotion and take what comes to you
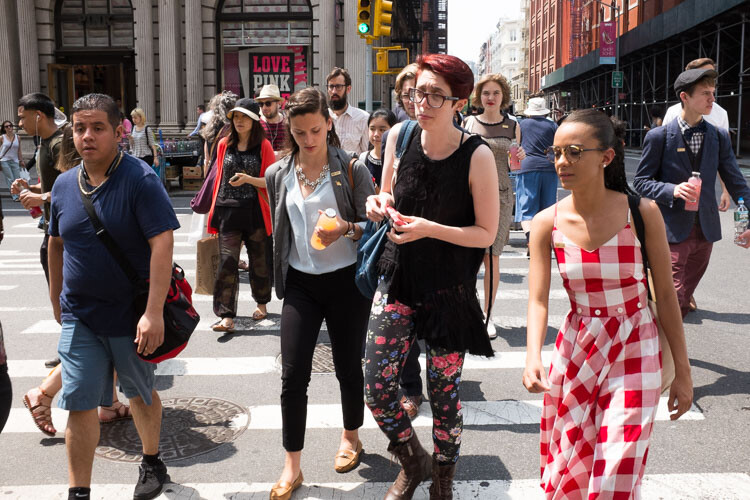
The corner of Prince and Broadway, SoHo.
Busy street corners are a beautiful thing. Head to one, pick a spot, and suddenly people will start coming at you from every direction. They will start intersecting and interacting with each other. It is what Jane Jacobs referred to as a ballet,
“The ballet of the good city sidewalk never repeats itself from place to place, and in any once place is always replete with new improvisations.”
It you are tentative, choosing a spot in this manner will allow your subjects to enter your personal space, instead of you entering theirs. Since you will not be walking, and your camera will be ready in your hands, it will also make you more able to notice interesting moments and able capture them before they disappear.
Each street corner has a different flavor to it. If you go to SoHo, you will find the trendier crowd. If you go to Wall Street, you will get businessmen. If you go to Times Square, you will get the tourists and people in cartoon costumes harassing young children. Usually, you will get a mix of all types of people, but each corner will have its own identity. Spend a little time each day on a few corners capturing what happens around you.
3. Cut out the preconceived notions of what the city should look like
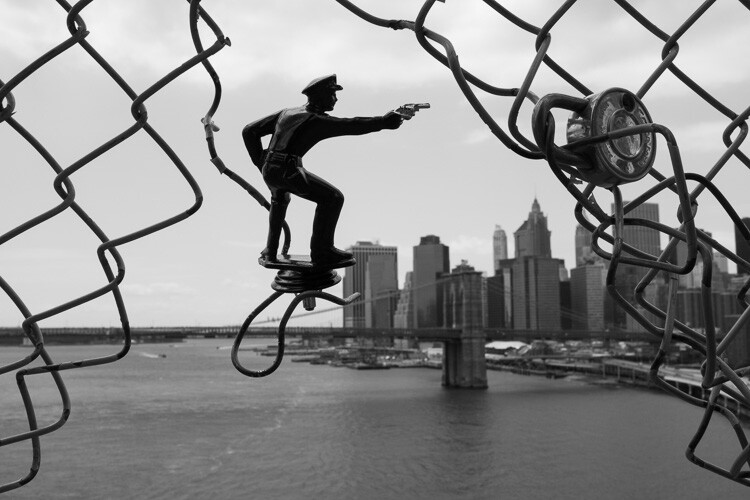
Police, Manhattan Bridge.
You’ve probably seen movies and read books about the city, and have expectations for how it is supposed to look and act. The TV shows Friends and Sex and the City are just not realistic interpretations of what New York is actually like.
It can be a good idea to scout images ahead of time, to have an idea how an area looks. It’s also fun to try and recreate images that you love. But on a day to day basis, try to also get those images out of your head. A once in a lifetime image is one that will surprise you, it will be different in some way from all the rest. Allow yourself to notice those serendipitous moments.
There is so much to see here. No matter how much time you have, you can’t see it all. But you haven’t truly seen New York City until you’ve spent at least half a day wandering around, with no end point. Carve out some time, pick a direction or a location, and just walk.
4. Rent a small camera or a prime lens
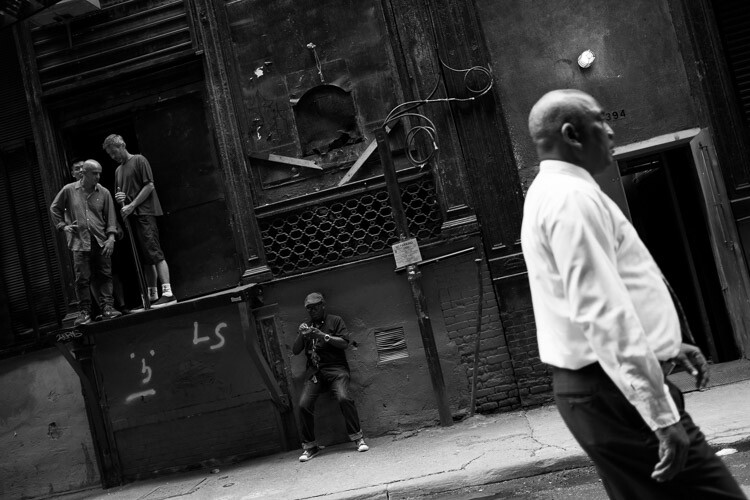
Cortlandt Alley, NYC.
Note: If you have a larger DSLR and a zoom lens, I shot street photography for a long time this way, and it is very possible to do so successfully. However, larger cameras can make it more difficult and cumbersome, and can make things more uncomfortable for your subjects.
New York has an array of great camera shops where you can rent either a light prime lens for your DSLR or am entirely different smaller camera. A light 35mm lens is my favorite tool for street photography. Go for the f/2.8 version over the f/1.8, since it is much smaller and lighter. If you are very nervous about getting close to your subjects, rent a 50mm so you can shoot from a little further away. (Note: If you’re using a cropped or APS-C sensor a 50mm f/1.8 and an 85mm f/1.8 would be equivalent).
Consider trying a mirrorless or micro four thirds camera. See how you like it, and you may never go back. I suggest the Fuji X100 line, but there are a variety of cameras that will do the trick.
Some recommended camera rental shops in NYC are: Foto Care, CSI, and Adorama.
5. Set up your camera to catch fast moving scenes
The streets of New York move quickly. Interesting moments will appear, and disappear, all around you that is why it is important to set up your camera so that it can freeze scenes successfully. You want to set it up in such a way that you no longer have to worry about the settings, and can just shoot with ease.
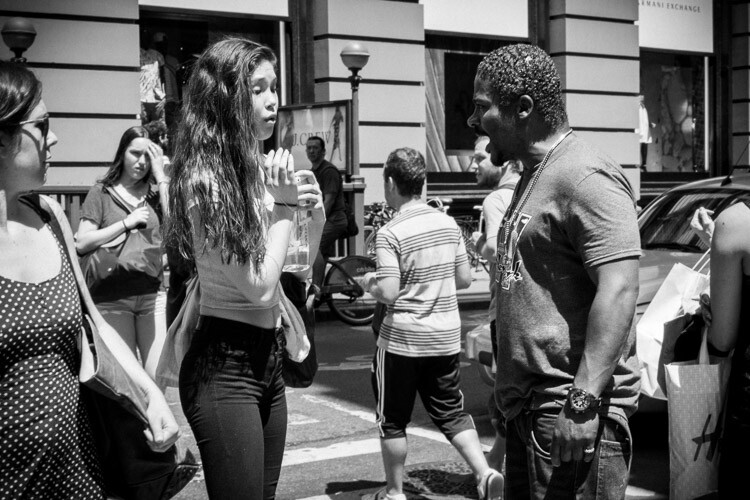
Encounter, SoHo.
I prefer using shutter priority for street photography. Many people prefer aperture priority, but the reason for shooting in shutter priority is to have the most control over your aperture. I know that sounds counter-intuitive, but hear me out. To freeze motion, I will usually set the camera to 1/320th or 1/250th of a second. In the bright sun of summer my shutter speed is usually at 1/320th or 1/400th, otherwise I am usually at 1/250th. At dusk and into the night I will go all the way down to 1/125th if it is absolutely necessary. The next step is to raise your ISO. I usually shoot anywhere from ISO 800 to ISO 3200 (and ISO 6400 outside at night). In bright summer sunlight, I am usually around ISO 400.
The goal is to be able to use the smallest possible aperture, while still having a shutter speed that is fast enough to freeze the scene. The smaller the aperture, the more depth of field you will have. This will give you a lot of flexibility if you happen to miss focusing on the subject, which happens frequently. In addition, if you are combining multiple subjects or complex scenes with interesting elements all over the frame, it will make sure that as much of the scene as possible is sharp. Whenever the light is strong enough, I prefer to be at least at f/8, and ideally between f/11 and f/16.
When you become comfortable with all of this, the next step is to try zone focusing. I would suggest that you start with your normal method of focusing until you get comfortable, then give zone focusing a try. When I walk out the door with my Fuji X100S I usually turn the autofocus off and have the camera pre-focused to 2.7 or 3 meters (8.75-9.75 feet). I will then adjust with the focusing ring accordingly (closer or further away) as I come across images, or turn on autofocus to capture scenes where nothing is moving.
6. Try street portraiture
Did I mention that New Yorkers like to be noticed? Find people that catch your eye, and tell them you are creating a photo project of the city. You will be surprised at how many people will allow you to photograph them. This is a great way to get more comfortable on the street, and with portraiture in general. Once you get a couple people to say yes, you will find yourself feeling so much better.
Flattery is always a good idea when asking to take a portrait, and I usually try to spend about 30 seconds getting my shots. Don’t take just one quick photo and run away, but don’t take too long either. Take a quick look at the lighting and the background to make sure that you get a complete image, and try to capture them with an interesting expression if possible.
7. Photograph at night
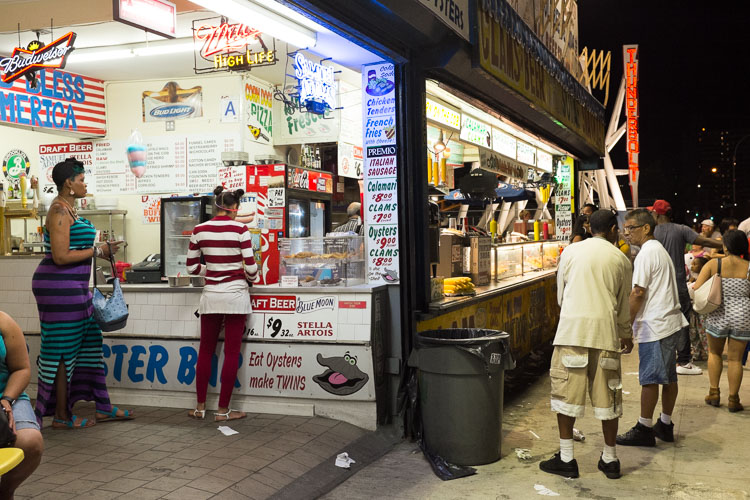
Coney Island at Night.
Set your camera on 1/160th of a second and ISO 3200 or 6400 and wander. The city glows at night and everything looks more interesting. Forget the heavy tripod unless you are doing architecture images. Instead, find areas that are lit by store signs or street lights, and create your images that way.
New York is extremely safe these days and I photograph at night by myself all the time, but be smart about it. Particularly if you do not know where you are going, it can’t hurt to take a friend along or to stick to high traffic areas. But the areas where most people visit in Manhattan are all very safe at night.
8. Some areas to explore
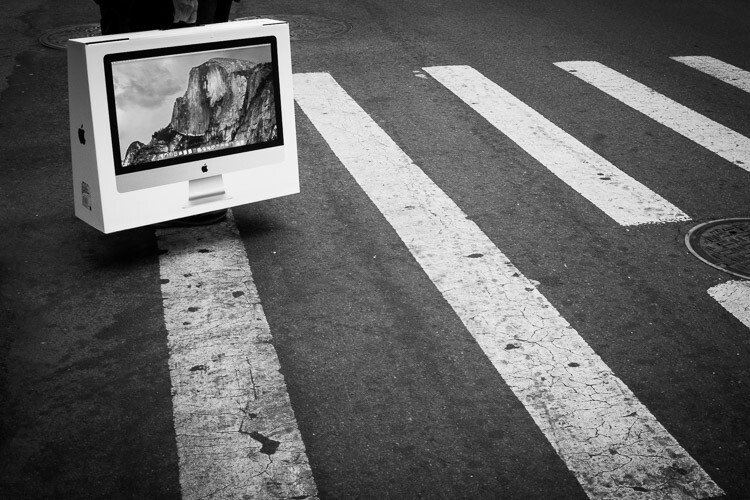
Yosemite, Corner of Prince and Broadway, SoHo.
My favorite locations in NYC are:
- SoHo: Stop on the corner of Prince and Broadway, one of the busiest and most fashionable corners in the city, and then walk over to Greene Street and head south to see some gorgeous cast-iron architecture.
- 5th Avenue below Central Park: Stop on each corner from 58th Street to 53rd Street for some of the busiest and most interesting corners in the city. You might bump into the famous fashion street photographer, Bill Cunnigham.
- The East Village and Lower East Side: Young hipsters, old punk rockers, and about a hundred other demographics gel together in these vibrant neighborhoods. The buildings are old and beautiful, and the streets are interesting and weird. Some great street art is there as well. Stop at VolaVida gallery on 4th Street and Avenue B to purchase an affordable and authentic street art piece.
East Village, NYC.
- Anywhere on Broadway: Literally anywhere. Start at Columbus Circle and walk all the way down Broadway until your feet hurt.
- Chinatown and Columbus Park: Chinatown has some of the most beautiful streets in New York. Eat dumplings while you photograph and visit Columbus Park, where people go to gamble. Be respectful while you photograph there. Afterward, visit Pell Street and Doyer’s street (nicknamed The Bloody Alley for its nefarious past). These are two of the most beautiful streets in all of New York.
- Coney Island: One of the most vibrant places in the city, particularly in the warmer months. Photograph the boardwalk and beach, eat a hotdog, and go on a few rides.
- Grand Central and the 42nd Street subway station: Photograph in Grand Central, then take the shuttle to the 42nd Street station. Walk back, stopping to photograph at Bryant Park and on the steps of the New York Public Library. Pop into the lobby of the Chrysler Building while you are there.
- Bushwick (Brooklyn): This is one of the centers of street art in New York. Take the L train to Morgan Avenue and explore a handful of blocks in every direction. When you get hungry, stop at Roberta’s for some pizza.
9. Take the typical tourist photos
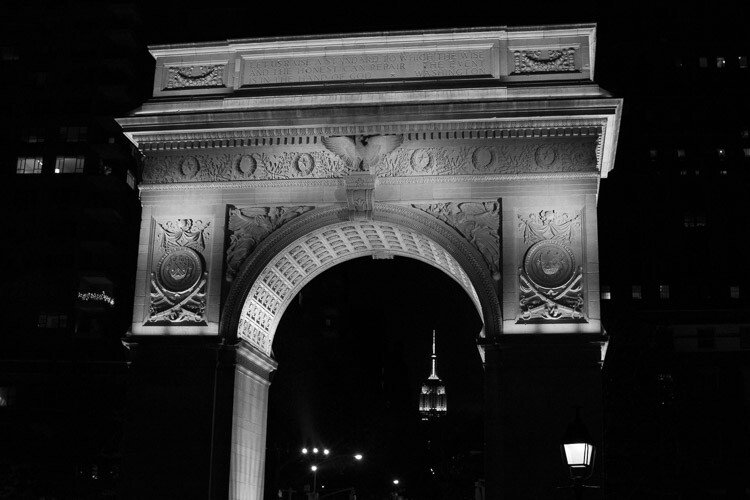
Arch and Empire State Building, Washington Square Park.
You are visiting the city for a reason. The architecture and the sites are awe-inspiring, beautiful, and they deserve to be photographed well. History is around every corner. Do not apologize or feel bad, for taking the typical tourist and architecture images of the city. However, whenever possible, try to think of a way to make them stand out in some way. This is not always possible, but occasionally it is, and when you are able to figure out how to take an image like that, it is a special moment.
Just don’t take a selective color photo of a yellow taxi with a black and white background. I beg you. Please, please don’t do that!
googletag.cmd.push(function() {
tablet_slots.push( googletag.defineSlot( “/1005424/_dPSv4_tab-all-article-bottom_(300×250)”, [300, 250], “pb-ad-78623” ).addService( googletag.pubads() ) ); } );
googletag.cmd.push(function() {
mobile_slots.push( googletag.defineSlot( “/1005424/_dPSv4_mob-all-article-bottom_(300×250)”, [300, 250], “pb-ad-78158” ).addService( googletag.pubads() ) ); } );
The post A Street Photographer’s Guide to New York City by James Maher appeared first on Digital Photography School.

Digital Photography School


You must be logged in to post a comment.