RSS
 

Archive for June, 2015

Mobile, Modern & Modular: 15 Capsules for Off-Grid Living

04 Jun

[ By Steph in Architecture & Houses & Residential. ]

off grid open roof 5

Why stay tethered to the grid in a fixed location when you could live in a compact mobile pod that can be transported to the location of your choice? These modern capsules are what 21st-century off-grid dreams are made of, ranging from spacious self-sustaining retreats to accordion-like expanding shelters that are lightweight enough to tow behind a bicycle.

Tricycle House

off grid tricycle house

off grid tricycle house 2

off grid tricycle house 3

off grid tricycle house 4

off grid tricycle house 5

Made mostly out of folded polypropylene, ‘Tricycle House’ by People’s Industrial Design Office is lightweight enough to be towed around like a bike trailer. The house can be expanded like an accordion to increase the space inside or make it more compact for travel. Translucent walls let in daylight and all amenities within – including a sink, stove, bath tub, water tank and transforming furniture – is manually powered. The firm also makes ‘tricycle gardens’ to tow alongside the house.

Egg-Like Ecocapsule

off grid ecocapsule 5

off grid ecocapsule 1

off grid ecocapsule 3

off grid ecocapsule 2

off grid ecocapsule 4

Shaped like a massive egg, the Ecocapsule by Nice Architects is a tiny off-grid living pod that’s equipped with all the comforts of home, including a bed, hot showers, flushing toilets and the capability to cook. Powered by solar panels and a built-in turbine, with a back-up battery for cloudy and still days, it can be shipped, air-lifted or towed and fits into a standard shipping container.

Diogene Hut by Renzo Piano

off grid diogene 3

off grid diogene 2

off grid diogene 1

Designed by architect Renzo Piano for the Vitra campus in Weil-am-Rhein, Germany, the Diogene cabin offers 80 square feet for an individual occupant as a “voluntary place of retreat.” Photovoltaic panels and a rainwater retention tank make it self-sufficient, and it’s highly portable. There’s just enough room inside for a bed, table and chair.

Portable Retreat with a Roof Hatch

off grid open roof 1

off grid open roof 2

off grid open roof 3

Three hinged panels open this two-level off-grid retreat to the sky on both the top and bottom floors, enhancing the occupant’s connection to whatever environment they’ve chosen. This mobile wooden shelter by Allergutendinge features a bunch of fold-down elements, hidden storage and a bed that doubles as a staircase to the loft.

Camouflage Stacked Wood Cabin

off grid yeta log cabin 1

off grid yeta log cabin 2

off grid yeta log cabin 3

This ‘invisible hut’ looks like no more than a stack of logs when it’s all closed up, but a hatch on one side drops down to become the terrace for a rustic cabin. The Yeta Log Cabin by Lab Zero can be set up virtually anywhere, and as small and minimal as it is, it comes complete with a kitchen, shower, toilet and solar panels.

Next Page – Click Below to Read More:
Mobile Modern Modular 15 Capsules For Off Grid Living

Share on Facebook


[ By Steph in Architecture & Houses & Residential. ]

[ WebUrbanist | Archives | Galleries | Privacy | TOS ]


WebUrbanist

 
Comments Off on Mobile, Modern & Modular: 15 Capsules for Off-Grid Living

Posted in Creativity


The Most Under-Valued Editing Tool for Architectural Photos

04 Jun

Gradient-header

Nothing catches the eye of a potential home buyer or design client quite like a beautiful set of photos. Whether it’s for real estate agents, designers, or homeowners, expectations are high, and restrictions are often many. It’s not uncommon to have to deal with extremely short notice, very short windows of time in which to work, or to be asked for almost immediate turnaround. We, as photographers, become torn between meeting all the needs while still producing work we are proud of… and all while still making a profit! In real estate, especially, this often leads to photos that are “good enough”. But does it have to be this way?

While most are aware of the basics of editing images for interior spaces, there is one tool that is often undervalued – the Gradient Filter. This can be a tremendous tool for helping to balance out fading light on the edges of a frame when you are limited on gear and are not able to balance out the light on location. Adding a few Gradient Filters onto an image can make your mundane interior photos go from acceptable to impressive, with minimal time invested. The Gradient tool is also excellent in helping to sharpen up towards the edges of the frame, helping to compensate slightly for lens distortion.

The Gradient Gilter can be found just below the histogram in Lightroom. Once applied, you can move it around by grabbing the central node, you can change the angle of it by placing cursor over center line and clicking to spin it, and you can also spread or tighten the gradient by grabbing the outermost line and moving it inward or outward. The flexibility of positioning alone is a great benefit when trying to keep editing time to a minimum.

Gradient filter tool can be found under the histogram in Lightroom

Gradient filter tool can be found under the histogram in Lightroom

Another great quality about the gradient filter is that, unlike the lens vignetting correction (under the Lens Correction module) or the post-crop vignetting effect, the Gradient Filter can adjust many factors of the image. You can adjust exposure, temperature, tint, sharpness, clarity, and several others. This makes it a very handy tool for making subtle adjustments that would otherwise be tougher to blend in with a brush filter. In this before-and-after example, the gradient filter has been used to adjust for the blue tint in the shadows on the floor due to the bed cover. It’s a subtle adjustment that helps to elevate the quality of work.

Gradient4

Let’s look at a few more before and after photos so you can see the effect of the gradient filter. In the series below, the only change that has been done to the After photos is the addition of Gradient Filters. While the Before photos are acceptable to most, adding the Gradient Filters helps to add extra polish to the photos. It helps to bring it up another notch, and will help to impress your clients even more than usual!

Gradient3

Gradient2

Gradient1

Note that in most cases, you will want to add several gradient filters, not just one. Each space will be a bit different, but the need tends to toward adding a bit of subtle light onto the sides of the frame, along with some clarity and possible slight temperature adjustments depending on light sources.

Exterior photos can benefit just as much from the Gradient Filter as interiors! Not all scenes will need this type of adjustment, but below is an example of a common setup that benefitted greatly from gradient filter adjustments. The shadows in the lower left corner of the frame are too dark, and a gradient filter adjusting the brightness of shadows is ideal for balancing them out.

Gradient-ext

As a final point, it’s worth noting that the Gradient Filter tool is one that should finish off your editing, and should not be the main editing technique used on an image. In nearly all cases, it will be a perfect tool for some finessing of highlights/shadows or temperature so that your image will have that extra bit of polish. Before exporting your final files and sharing with your client, be sure to consider if a Gradient Filter should be added into your arsenal of editing tools.

Do you have a different tool that you feel is undervalued for photo editing? Please share your thoughts in the comments below!

googletag.cmd.push(function() {
tablet_slots.push( googletag.defineSlot( “/1005424/_dPSv4_tab-all-article-bottom_(300×250)”, [300, 250], “pb-ad-78623” ).addService( googletag.pubads() ) ); } );

googletag.cmd.push(function() {
mobile_slots.push( googletag.defineSlot( “/1005424/_dPSv4_mob-all-article-bottom_(300×250)”, [300, 250], “pb-ad-78158” ).addService( googletag.pubads() ) ); } );

The post The Most Under-Valued Editing Tool for Architectural Photos by Natalia Robert appeared first on Digital Photography School.


Digital Photography School

 
Comments Off on The Most Under-Valued Editing Tool for Architectural Photos

Posted in Photography


3. Juni 2015

04 Jun

Das Bild des Tages von: Geronimo Schmidt

Ein Junge, von oben auf einer Wiese stehend, gesehen, in schwarzweiß.

Im Ausblick: Eine neuseeländische Gang, weinende Soldaten und eine Frage zum Fotobuchtrend.
kwerfeldein – Fotografie Magazin | Fotocommunity

 
Comments Off on 3. Juni 2015

Posted in Equipment


Enthusiast stalwart: Nikon D7200 in-depth review

04 Jun

Following up the success of Nikon’s D7100 is no easy task, but the D7200 promises some notable feature upgrades. Its 24.2MP APS-C sensor is complemented by an updated 51-point AF system that claims sensitivity down to -3EV. Other enhancements include an increased buffer depth, 1080/60p video, built-in Wi-Fi with NFC and improved battery life. We’ve put Nikon’s claims to the test in our in-depth review. Read more

Articles: Digital Photography Review (dpreview.com)

 
Comments Off on Enthusiast stalwart: Nikon D7200 in-depth review

Posted in Uncategorized


Your Guide to Understanding Program Mode on Your Camera

03 Jun

Almost every DSLR or Mirrorless camera has a mode dial with a variety of letters and icons on it, some of which might seem cryptic or confusing. Usually you’ll find a green icon for Full Auto mode (usually a green A or rectangle), Full Manual mode (M), as well as Aperture Priority (A or Av) and Shutter Priority (S or Tv). Your camera might also feature scene modes such as portrait, night, or macro, and even some user-configurable modes indicated with a U1 or U2 (or C1/C2, etc.).

Somewhere on that dial is a letter that’s often left neglected, and unused by many people, even though it can be quite powerful – Program Auto (P). In my experience most people don’t use it because they don’t understand it. Is it Auto? Is it Manual? What can it do that the other modes can’t? The answer is a bit strange at first, but once you wrap your head around what the humble little P mode can do, you might find yourself using it much more than you thought.

DSC_2475

The camera mode dial operates on somewhat of a continuum. On one end you have Full Manual mode, which gives you complete control over the three elements of exposure: shutter speed, lens aperture, and ISO sensitivity. On the other end you have Full Auto mode which gives you almost no control over exposure except whether the flash turns on or not (and on some cameras, not even that much). On most cameras Full Auto will not even let you choose basic parameters like white balance and focus mode, which is fine if you just want to shoot some pictures and not worry about all the technical aspects of photography.

The other modes exist in the middle of the spectrum and give you some degree of control, while your camera handles the rest. For instance, in Aperture Priority you control the aperture and ISO, and let your camera figure out what shutter speed to use for a good overall exposure. In Shutter Priority things are reversed; you control the shutter speed and ISO, while your camera figures out what aperture to use.

program-auto-diagram

Program mode exists on the same continuum somewhere between Aperture/Shutter Priority and Full Automatic. When you initially put your camera in P mode you might notice that things look similar to Full Auto; your camera sets the aperture and shutter speed in order to get a proper exposure. One benefit you might not immediately realize is that you can set the ISO which will then remain unchanged by the camera. This is quite useful in situations where you want to intentionally use a lower ISO, such as outdoors or in bright light, or a high ISO when things are a bit darker and you prefer to not activate the flash. If nothing else, think of the Program Auto mode as an ISO Priority mode; you set the ISO and your camera figures out the shutter speed and the aperture. If that’s all you want to do, you’re set. Change the ISO (or not) and worry only about composing and framing your shots, then let your camera figure out the rest.

DSC_2624

Program Auto gave me a well-exposed picture but the result was not what I was hoping for. I wanted a smoother look for the fountain…

fountain-motion-blur

…so I quickly adjusted my shutter speed to 1/20 using the dial on my camera. Program mode kept a nice exposure while giving me the motion blur I was looking for.

If you’re willing to dig a little deeper you will find many more useful features to unlock in Program mode – far more than just giving you the ability to control the ISO. It’s kind of like the familiar Auto mode on steroids. There are many options available to you in Program that you won’t get in Full Auto, and many of these can help you get the shot you want, instead of the shot your camera thinks you want. However, as you start changing settings your camera will do its best to maintain a proper exposure. In this way Program is like the late-night infomercial version of Auto; it handles all the nitty-gritty complicated stuff for you…but wait, there’s more!

For example: if you are using Program mode while taking pictures at an indoor birthday party you can set a high ISO so you don’t need to use the flash, and your camera will choose a combination of aperture and shutter speed to get a properly-exposed photo. You can then rotate the command dial (on some cameras it might be pressing a button) to change these values if you decide you want a wider aperture or slower shutter. Essentially your camera says “Here’s what I think will be good,” and then you take over and say “Thanks bro, I’ll take it from here” as you shift the values of your shutter and aperture using the dial on your camera.

I shot this using Program Auto mode which was a great way to tweak my exposure settings on the fly with very little time to waste.

I shot this using Program Auto mode which was a great way to tweak my exposure settings on the fly with very little time to waste.

Or you might be outdoors doing some nature photography but aren’t quite sure what settings to use. So, you put your camera in Program and set the ISO to 100 in order to get as little noise as possible. Soon you might notice that your camera has selected a small aperture, and you’d like to get a bit of background blur so you quickly rotate the dial on your camera until your aperture is much wider. Your camera then automatically adjusts the shutter speed accordingly, in order to maintain a good exposure.

You can also set parameters within Program like white balance, metering mode (full/center/spot), select which focus point to use, and even tell your camera to use the flash or not. Contrast this to the Full Auto mode and you start to see the usefulness of the humble little P marker on your camera’s mode dial. At this point you might be wondering why you would want to use Program Auto instead of Aperture or Shutter Priority because those will also allow you to set the ISO, aperture, and shutter speed. Program Auto sort of functions like the best of all worlds: you can change various options if you want to, or you can just leave everything alone and let your camera figure it all out.

DSC_2641

Shooting in Program mode gave me a good overall exposure but I was not happy with the results…

microphone-spot-meter

…so I switched to spot metering, re-took the shot, and got what I wanted. Program allows for this flexibility, whereas Full Auto does not.

I must admit that even though Program mode can be quite useful I spend most of my time in Shutter or Aperture Priority along with Manual. For me Program is great to have in a pinch, but I generally prefer to make more of the decisions when shooting, instead of having my camera do the heavy lifting.

Still, it’s good to be aware of what it is, and what it can do, in case you find yourself in a situation where you don’t want to give up all control to your camera but also don’t want to do everything yourself. What’s your preferred method of shooting, and what do you like (or dislike) about using the Program Auto mode? Leave your thoughts in the comment section below.

googletag.cmd.push(function() {
tablet_slots.push( googletag.defineSlot( “/1005424/_dPSv4_tab-all-article-bottom_(300×250)”, [300, 250], “pb-ad-78623” ).addService( googletag.pubads() ) ); } );

googletag.cmd.push(function() {
mobile_slots.push( googletag.defineSlot( “/1005424/_dPSv4_mob-all-article-bottom_(300×250)”, [300, 250], “pb-ad-78158” ).addService( googletag.pubads() ) ); } );

The post Your Guide to Understanding Program Mode on Your Camera by Simon Ringsmuth appeared first on Digital Photography School.


Digital Photography School

 
Comments Off on Your Guide to Understanding Program Mode on Your Camera

Posted in Photography


Selbstportrait mit meiner Mutter

03 Jun

© Karolina Jonderko

Ein Beitrag von: Karolina Jonderko

Ich erinnere mich an die Freude, als ich Haribo Fruchtgelees, Nutella und Margarine zwischen bunter Kleidung entdeckte, die zusammen in schweren 15-kg-Paketen verpackt waren. Früher haben wir große Pakete von Verwandten aus Westdeutschland bekommen, als in Polen vielen die grundlegenden Dinge fehlten. Das Öffnen der Pakete war ein Fest, bei dem die ganze Familie anwesend war.
kwerfeldein – Fotografie Magazin | Fotocommunity

 
Comments Off on Selbstportrait mit meiner Mutter

Posted in Equipment


Converted Cockpit: Cockfighting Arena Turned into Sunken Garden

03 Jun

[ By WebUrbanist in Architecture & Public & Institutional. ]

converted cockpit terraces greenery

Traditionally legal in Peru, many citizens nonetheless find cockfights a morbid and gruesome affair and are thus celebrating the transformation of this sunken coliseum into a meditative and memorial public green space.

memorial terraces trees water

Paths, greenery and water features were added in part to lend the sensibilities of monuments and memorials to the place, commemorating the animals who suffered and died within the ring.

convertd cockpit side stairs

Remade by 2.8x Architects, this coliseum in Lima, Peru, has many preserved and reused elements, including large stones and cast concrete either left in place or redeployed on the property with new purposes in mind.

fighting pit ring memorail

Since cockfighting has been historically seen a sport in the region (and heavily bet upon), bird fighting pits (aka “cockpits”) in the country have been correspondingly prominent and well-constructed places, not the seedy sideshows one may imagine in locations where it is illegal. The driving idea was to reflect the history of the space in the form of preserved ruins while also providing a new experience in this unusually enclosed, semi-subterranean space.

convertd sunken cockpit

One can still imagine the historical horrors that took place before the conversion – armed with spurs for battle, cocks set about slashing and scraping one another, often resulting in the death of one or both combatants. At the same time, an abstracted yin-and-yang symbol at the center of the sunken circle and lush vegetation on all sides (filling the former stands and seats) conjure fresh and more optimistic feelings and associations among neighbors and visitors.

converted cockfighting arena

From the designers: “So the curved lines of the terraces contemplated in the project go on top of the remaining concrete stands, and the levels of these terraces try to maintain the original levels of some of the stands. This way the proportions of the coliseum continue. In the same way, the central space of the garden keeps the same dimensions and characteristics of the arena where the birds used to fight. The project has as background the hills of the residential area. It is because of the surroundings where the project is located, with hills all around, that we chose irregular “talamolle” stone as the main building material.”

memorial garden at night

“We also used terrazzo, concrete, and green painted iron for some details like the fountain, the circular bench, the wire net, and the ramp at the entry among others. To reinforce the idea of a memorial garden and a place suitable for meditation, elements such as water, a circular ramp all around, and a curved path of stone crossing the central space were included. The path together with the central circular garden form the ying yang, that is the equilibrium center of the whole space. At night the diffused illumination has an important role too.”

Share on Facebook


[ By WebUrbanist in Architecture & Public & Institutional. ]

[ WebUrbanist | Archives | Galleries | Privacy | TOS ]


WebUrbanist

 
Comments Off on Converted Cockpit: Cockfighting Arena Turned into Sunken Garden

Posted in Creativity


Opinion: Is the M Monochrom Typ 246 an anachronism or a modern marvel?

03 Jun

Before the popularization of color film, most cameras shot exclusively in black and white. Leica’s M Monochrom (Typ 246) and its predecessor, the M Monochrom, are remarkable not only because they shoot in black and white, but because they offer no option for recording in color. Is the black-and-white-only digital camera a radical concept, or a costly novelty? We ponder its existence. Read more

Articles: Digital Photography Review (dpreview.com)

 
Comments Off on Opinion: Is the M Monochrom Typ 246 an anachronism or a modern marvel?

Posted in Uncategorized


World’s highest resolution panoramic photo is stitched from 70,000 images

03 Jun

A team of five photographers has created what they describe as the world’s highest resolution panoramic photograph by stitching 70,000 digital images together to create a 365 gigapixel photograph. Recorded using a Canon EOS 70D with the EF 400mm f/2.8L IS II USM lens on a 2x converter, the picture took 35 hours of shooting over the course of 15 days just to capture. Read more

Articles: Digital Photography Review (dpreview.com)

 
Comments Off on World’s highest resolution panoramic photo is stitched from 70,000 images

Posted in Uncategorized


How to Shoot in Low Light – 9 Commonly Asked Questions

03 Jun
DSC_4289-Edit-Edit

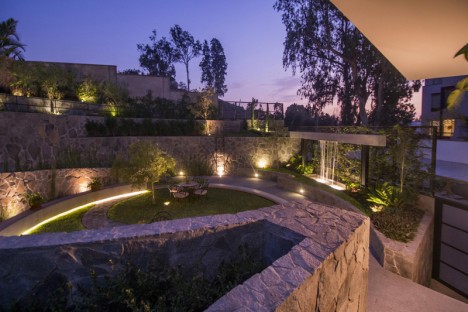
This image of Moon Rise over Marietta, Ohio was taken 20 minutes after sunset during the Blue Hour when the sun had set and the sky was a dark blue. Here the city lights make a great warm glow over the city.

According to British photojournalist Donald McCullin, “There is no such thing as bad light, just misunderstood light.” Many photographers consider low light to be bad light. The purpose of this article is to encourage you to not consider low light as inferior or unusable, but rather to look for subjects to photograph that react well to the available light.

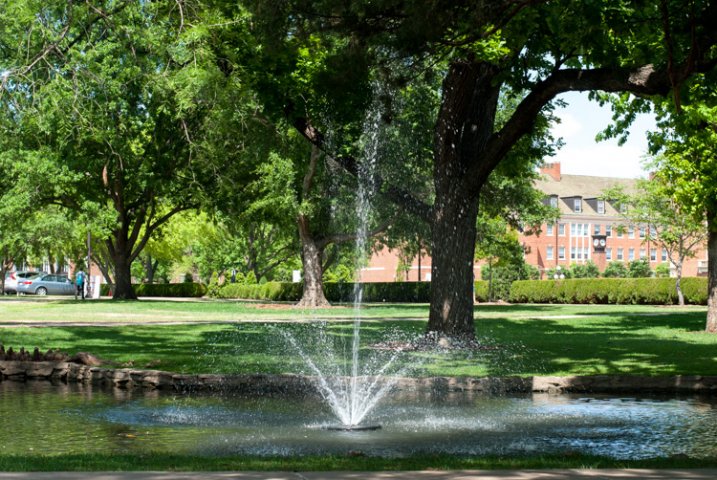
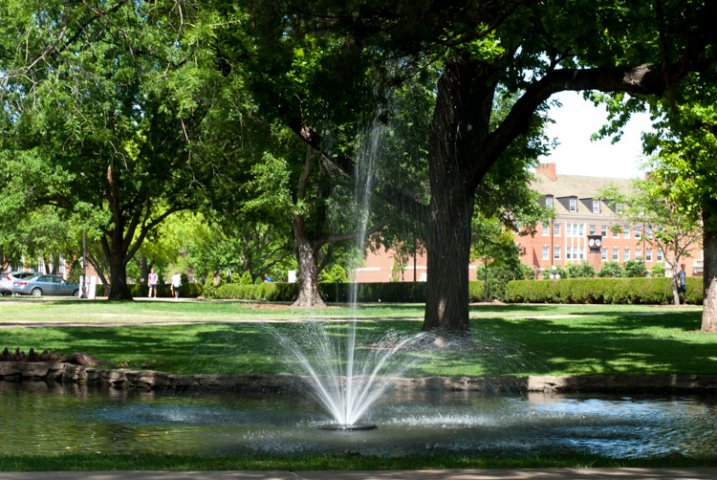
Keep in mind that low light photography is not exclusively night photography. Low light photography opportunities may appear any time of the day as well. For instance, shooting waterfalls in low light allows you to shoot with a slow shutter speed, prevents over-exposure of the white water of the falls, and thereby creates a beautiful silky effect capturing the moving water. Using a flash will light up any subject, of course, but let’s take a look at how to improve your photography in naturally occurring low light. Some frequently asked questions about low light photography are addressed below.

Low Light Photography FAQs

14595250669_30c342a792_o

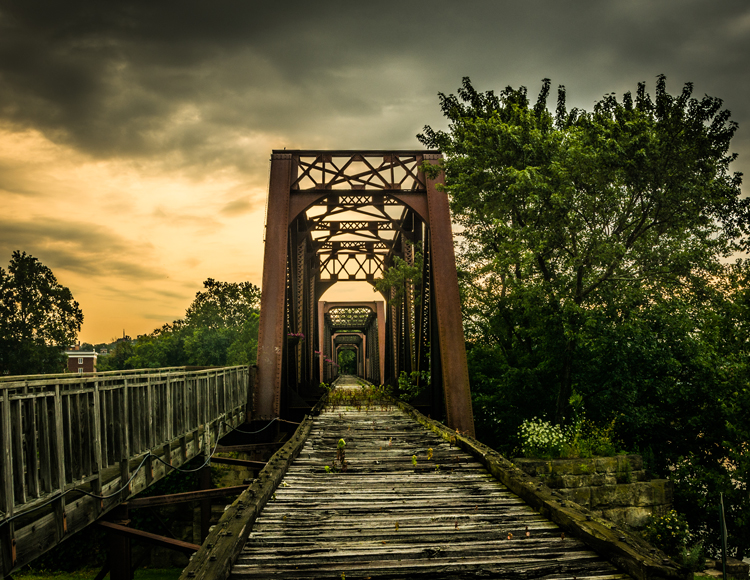
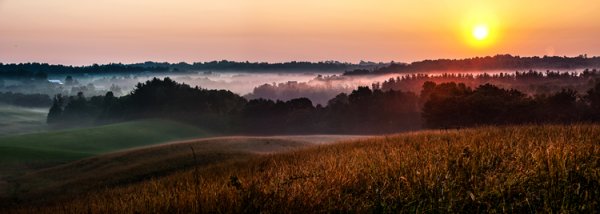
Low light create very dramatic scenes. Dark storm clouds turned this potential sunrise into a great low light opportunity

My low light images are blurry. Would a better lens alleviate the blur?

The short answer to this question is YES, a fast lens with maximum f-stop of 1.8 for instance, will give you better results than a kit lens with a maximum f-stop of 3.5 or 5.6. But even the faster, more expensive lens, will give you undesired results with the wrong settings. The wider aperture opening will allow you to use a faster shutter speed resulting in a sharper image. These lenses with larger maximum apertures are called “fast” because they allow you to shoot with faster shutter speeds, due to more light that is entering your camera through the bigger opening.

What are the best camera settings for shooting in low light?
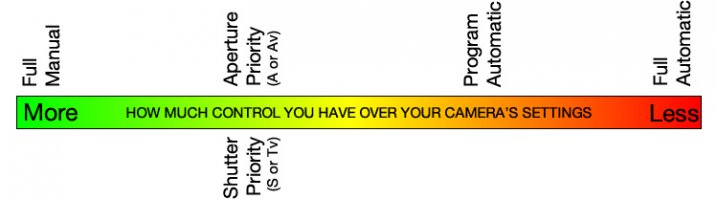
Manual Mode

Shooting in manual mode is paramount to successful low light photography as it allows you to control every functional aspect of your camera. You basically have three ways to get more light on your camera sensor: Shutter speed, Aperture and ISO. These three controls are called The Exposure Triangle, and each of these can have a positive or negative result to your image’s exposure. Therefore, learning how to use them for the best result is the key to low light photography. Your in-camera light meter will reveal where adjustments should be made to the camera settings, and well-exposed images will be the result.

Shutter Speed

If you are shooting handheld, a good rule of thumb is to set your shutter speed to match your focal length. For example, if you are shooting at 50mm your shutter speed shouldn’t be any slower than 1/50th of a second. Of course, if the subject of your photo is moving, then you will need to increase your shutter speed to be fast enough to freeze the action. Therefore, choosing a slower shutter speed will allow more light into your camera, but with that setting, the possibility of a blurry picture occurs.

Great Blue Heron in Fight was the subject of this low light image. Exposure 1/250 of a second, f/5.6, ISO 1250. Here using the combination of slower shutter speed and a higher ISO to create the blur of the wings and panning to match the speed of the fight of the heron.

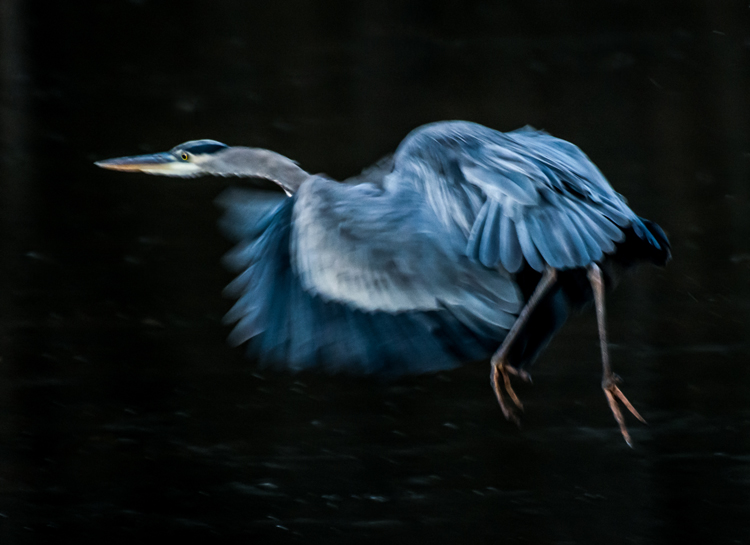
Great Blue Heron in fight was the subject of this low light image. Exposure 1/250 of a second, f/5.6, ISO 1250. Using the combination of slower shutter speed and a higher ISO to create the blur of the wings and panning to match the speed of the fight of the heron.

Aperture

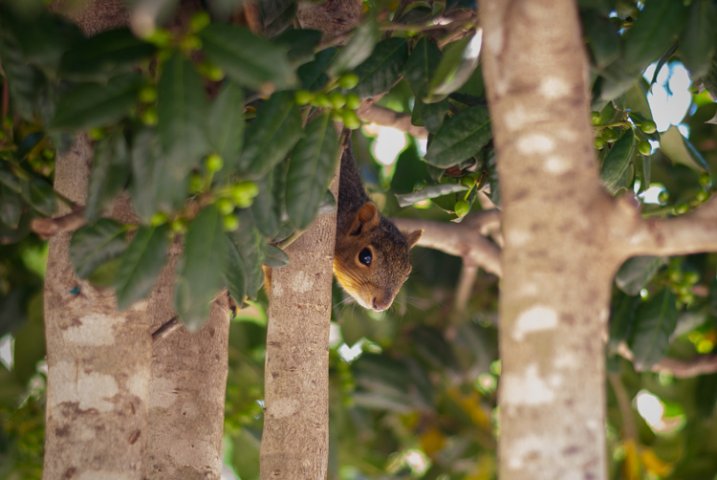
In most low light situations you will probably need to shoot with your aperture wide open. But if there is enough light to allow you to shoot with a smaller f-stop, it will increase your depth of field. The principle to consider: choosing a wider aperture will let more light into your camera, but will decrease your depth of field, which could lead to an important portion of your image being out of focus.

ISO

The higher the ISO number the more light your camera will record. The trade-off here is, the higher the ISO, the more digital noise you are adding to your image. Keep your ISO as low as possible and only increase your ISO after you have maxed out your shutter speed and aperture.

Shoot in RAW

For best results, shooting in RAW is recommended, for the simple reason that your camera will save more shadow detail in RAW format compared to the compressed format of jpg.

It is very helpful to learn how to check your histogram, and not just rely of what you see on your camera’s LCD screen. Use the histogram to check your exposure, and avoid clipping the highlights and shadows.

11943436386_0912d70961_o

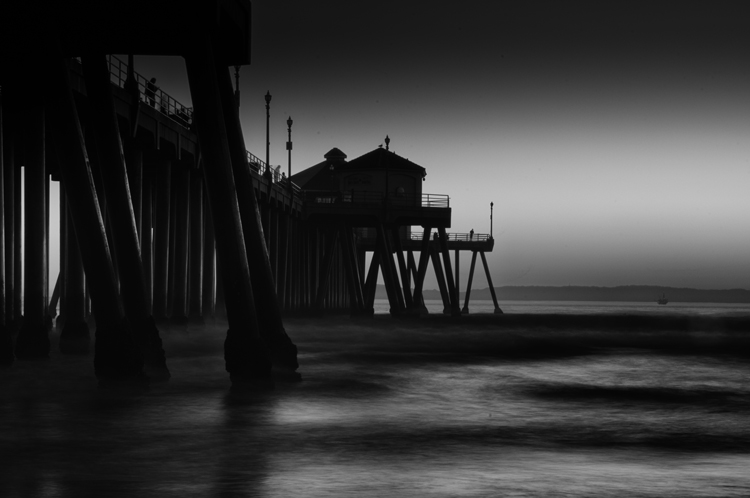
Using the low light at Huntington Beach California to create this black and white image with a five second exposure.

How do I take low light action shots?

Shooting action in low light can be very challenging and is almost always going to require you to shoot with your aperture at its widest setting. When your aperture is set, then your shutter speed should be adjusted to match the action that you are trying to freeze. Of course, depending on how low of a light situation you are shooting within, there may simply not be enough light. If this is the case, adjust the ISO to a higher setting until a good exposure is set. If your ISO setting is so high that you are getting an unacceptable amount of digital noise, you have two options: either add light with a flash or some other source, or live with the noise and try to remove some of it in post processing. Sometimes with the noise issue, it comes down to getting the shot with noise, or not taking the shot at all.

How do I reduce the digital noise level in low light images?

The simple answer to this question is to shoot at the lowest ISO that you can. But it is also a good idea to know the ISO at which your camera produces noise that you consider unacceptable. Always make sure that your exposure is correct. Even at a low ISO, if your image is underexposed you will have some noise in the shadowed areas.

4016735972_59e71999ac_o

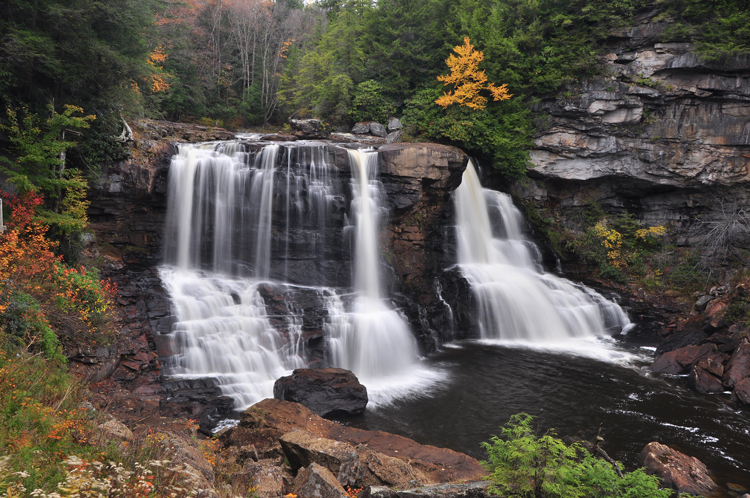
An over casted  cloudy day at Blackwater Falls West Virginia allowed for this long exposure without blowing out the highlight.

How do I focus in low light?

Another reason for blurry images in low light is the fact that some cameras just aren’t manufactured to focus properly with less light. Try shining a light on your subject to give your camera enough light to focus. You also may use you manual focus ring to fine-tune your focus. Using the center focus dot may also help as it is usually a cross-point type which focus faster and more accurately than others.

How can I take pro-like images in low light?

Four things that most pros are going to do in low light:

  1. Use a tripod
  2. Shoot in RAW
  3. Shoot in Manual Mode
  4. Use the histogram
8038775792_361ab83c88_o

Low light makes great silhouettes.

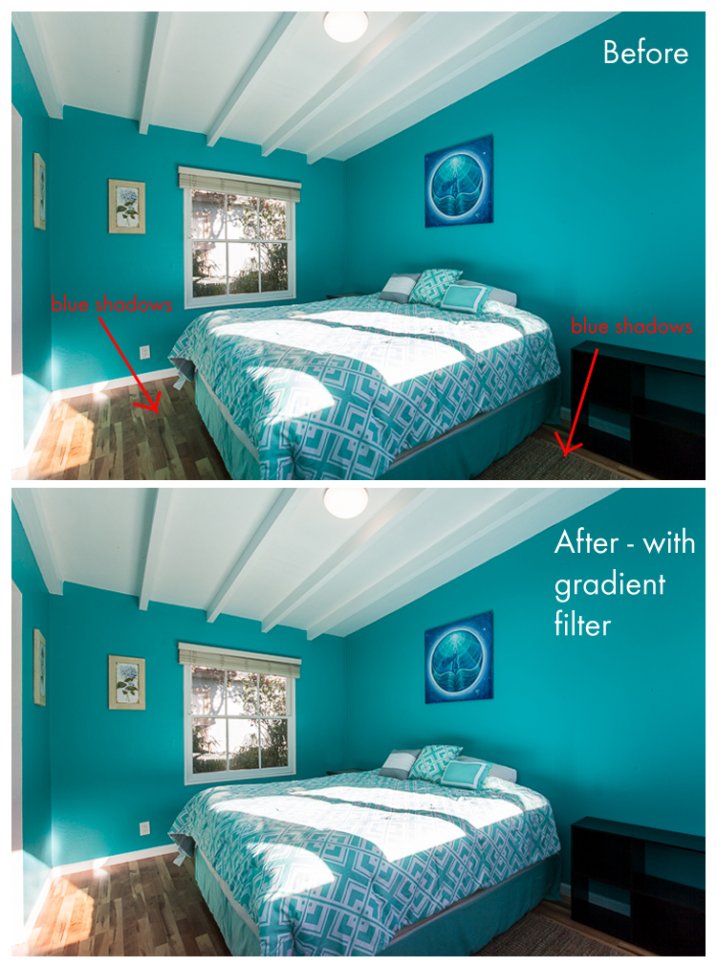
How do I choose the best white balance for low light?

Set your white balance to match you environment –  Tungsten for indoors with light from a regular lightbulb, Fluorescent for light from fluorescent bulbs, Cloudy for low light created by an overcast day, and Shade for shooting in a shaded or shadowy area. But, one thing to remember if you are shooting in RAW format is that you can adjust your white balance later in post-processing. But if you are shooting JPGs it is very important to get your white balance correct in-camera. For this reason you should not shoot Auto white balance, it’s very hard, sometimes impossible, to correct later from a JPG.

Should I raise my ISO or lower my shutter speed in low-light?

Assuming that you are shooting with your aperture wide open, in most situations this is an easy one to answer. Adjust your shutter speed and raise your ISO as a last resort. Remember that raising your ISO is going to add more noise into the image. Most new DSLRs do a much better job with the noise levels in their higher ISO settings, but as mentioned earlier, it is a good idea to know at what noise level you are unwilling to accept, and what ISO that is for your camera. In situations where your subject is moving, it may become necessary to adjust the ISO to keep your shutter speed fast enough to freeze the action.

DSC_0101-Edit

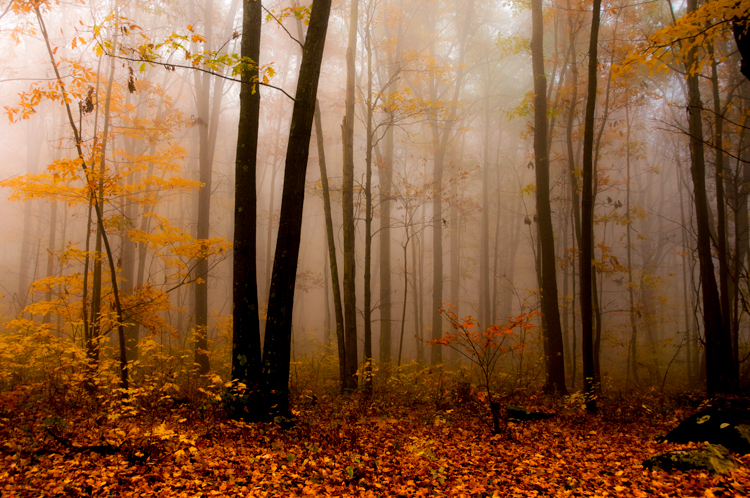
Fog created the low light in this fall image.

Why aren’t my low light shots sharp even when I shoot using a tripod?

Remember in most low light you will be shooting with your aperture wide open (or nearly so), hence your depth of field will be very shallow. Be extra careful to lock your focus (even try back-button focus) on the part of your image that needs to be in sharp focus. Case in point: when shooting a low light portrait, it is important to have the subject’s eyes in focus. If your subject is in motion, increase your shutter speed until it freezes the motion of the image. Also, make sure your camera’s vibration reduction is turned off, as this can actually create blur in your image even if shooting with a tripod.

Bonus tip

In low light the LCD screen on the back of your camera is going to look much brighter than the actual conditions. So, if your camera has an adjustment for the brightness of your LCD screen, turn it down so that your image will not appear to be overly bright when you view it, even if it is underexposed.

7496092624_15c8de2ffe_o

Conclusion

The trick to low light photography is to take control of your camera, and know that every action or setting will have a reaction. So, how is that different than photography in any light? It’s not, really. Just consider photography in low light as an opportunity to be creative. What subjects do you like to shoot in low light?

googletag.cmd.push(function() {
tablet_slots.push( googletag.defineSlot( “/1005424/_dPSv4_tab-all-article-bottom_(300×250)”, [300, 250], “pb-ad-78623” ).addService( googletag.pubads() ) ); } );

googletag.cmd.push(function() {
mobile_slots.push( googletag.defineSlot( “/1005424/_dPSv4_mob-all-article-bottom_(300×250)”, [300, 250], “pb-ad-78158” ).addService( googletag.pubads() ) ); } );

The post How to Shoot in Low Light – 9 Commonly Asked Questions by Bruce Wunderlich appeared first on Digital Photography School.


Digital Photography School

 
Comments Off on How to Shoot in Low Light – 9 Commonly Asked Questions

Posted in Photography