Das Bild des Tages von: Jens Klettenheimer

Im Ausblick: Dunkelkammermagie, Touristen und Selfies auf dem Mars.
kwerfeldein – Fotografie Magazin | Fotocommunity
Das Bild des Tages von: Jens Klettenheimer
Im Ausblick: Dunkelkammermagie, Touristen und Selfies auf dem Mars.
kwerfeldein – Fotografie Magazin | Fotocommunity
[ By WebUrbanist in Art & Photography & Video. ]

Capturing the cacophony of urban life, this series of superimposed photographs renders local phenomena, regional monuments and international architecture in a strangely compelling style.


Alessio Trerotoli‘s work has taken him to Rome, Paris, Berlin, Buenos Aires, New York and other world cities, sometimes shooting in subways or side streets and other times photographing iconic settings.


Each image is comprised of multiple exposures in the same location, creating a layered effect that reflects a sense of movement despite the images themselves remaining technically static.

When photographers intentionally capture more than one image per frame, surreal, complex layered images like these 33 eye-catching multiple exposures can …
Click Here to Read More »»

While photo shoots can be meticulously staged, sometimes the best shots come with an element of surprise – particularly in the chaotic context of cities.
Click Here to Read More »»

The tiny figures of Slinkachu play out surreal scenarios ranging from dramatic to comedic, all against the backdrop of life-sized props that seem giant by …
Click Here to Read More »»
![]()


[ By WebUrbanist in Art & Photography & Video. ]
[ WebUrbanist | Archives | Galleries | Privacy | TOS ]
30 years ago, we used slides, prints and albums to share photos with family and friends. Now, between Facebook, Instagram, Flickr, Google+ and 500px, you have more options than ever to share your photos. The problem is, how do you connect to this much larger audience?
Sharing a story alongside your photo will help you connect with your followers, and often turn a great photo into something spectacular.
When you share a photo, people may wonder where it was taken, why you were there, what made you photograph the scene, or what was going through your head the moment you snapped the shutter. These are all questions that can be spun into a narrative and shared along with your photo.
Here’s an example. Which of the following captions draws you in and makes the photo more interesting for you?

Caption 1: Kayakers on the Hudson River
Caption 2: Springtime in upstate New York is full of variable weather. The changing temperatures coupled with different types of precipitation can make for beautiful and unpredictable landscapes. On this particular morning, the Hudson River was covered in a thick fog and knowing how fleeting that can be, I hurried down to the waterfront hoping to capture some shots. Out of nowhere, two colorful kayakers appeared, adding life to my scene as they cut their way down the river and disappeared into the abyss.
I may be biased, but for me it’s Caption 2. Seeing a beautiful photo with a story attached to it pulls me in. It puts me in the same space that the photographer was in when they took the photo, enriches my experience, and ultimately makes the photo, which was good in the first place, a great one.
If you went to a yard sale and and saw a beautiful glass bowl for $ 20 you may think, “Well, that’s a bit steep for a simple bowl at a yard sale.” But, I bet your mindset would change if the owner told you a story about the bowl — how she acquired it at a glass blowing factory in Halifax back in the 1950s, how it was one of just a handful made and how the bowl moved around the United States with her and family for the past 60 years. Now $ 20 seems like a bargain!
Nothing changed, you just got some more information. A story enriched your understanding, and in turn, completely changed how you experienced something.

Caption 1: The Mohonk Mountain House after an ice storm
Caption 2: It was early December and an ice storm had just ripped through the Hudson Valley leaving debris, destruction, and a clear blue sky in its wake. My wife and I began our hike that day at a lower elevation, and realized as we got higher that the entire forest was encased in ice. It was a winter wonderland that was both beautiful and dangerous. Limbs of trees were scattered everywhere, boulders were slick with ice and in some spots, five foot long icicles hung like stalactites above our heads. As we made our way to the top of the mountain, I stepped into a small gazebo overlook and focused on the Mohonk Mountain House and surrounding landscape, letting the icicles in the foreground frame my shot.
There’s nothing wrong with the first caption, but the second caption really paints a picture in the viewer’s mind and places them there with you.
Here’s another shot I took this winter. In the past I would have shared it with Caption 1 below, but instead I shared it with Caption 2, and found that it really resonated with my audience.

Caption 1: Winter Sunset
Caption 2: It was a Friday night and I rushed out of work wanting to photograph something. I made a quick stop at home, put on boots, and grabbed my snowshoes just in case. With so much snow on the ground I racked my brain for a spot that I could easily get to with the potential for a decent sunset shot. Luckily, this incredible vista is just down the street from me. I got there when the sky was beginning to turn all sorts of colors, hurriedly set up my tripod, and captured this winter sunset. I stayed for a little while, watching blues give way to pinks, yellows and oranges until all the color in the sky was gone and my frozen hands signalled to me that it was time to go home.
Not every photo needs a page of text written alongside it, but it’s been my experience that adding a couple of sentences, rather than just a few words (or none at all), greatly enhances the experience of the viewer. It helps them to connect to your photo and ultimately with you as a photographer.

Caption 1: The Space Needle in Seattle
Caption 2: After an afternoon touring Seattle and Pike Place Market, my wife and I headed over to the Olympic Sculpture Park but found it was closing just when we arrived. Disappointed that I wasn’t able to capture any images of the park, I turned my camera around towards the city as we left and captured this unique view of the iconic Space Needle.
When I share a photo, I want people to respond to it. I want them to share in the moment and feel what I was feeling when I took the photo. Your story might seem mundane to you, but to your audience it gives them a closer look at who you are and how you think — as a person and a photographer.
googletag.cmd.push(function() {
tablet_slots.push( googletag.defineSlot( “/1005424/_dPSv4_tab-all-article-bottom_(300×250)”, [300, 250], “pb-ad-78623” ).addService( googletag.pubads() ) ); } );
googletag.cmd.push(function() {
mobile_slots.push( googletag.defineSlot( “/1005424/_dPSv4_mob-all-article-bottom_(300×250)”, [300, 250], “pb-ad-78158” ).addService( googletag.pubads() ) ); } );
The post How to Use the Right Captions on Your Photos to Better Connect With Viewers by Joe Turic appeared first on Digital Photography School.
Phase One has announced its new modular medium format XF camera system. The body features a new ‘Honeybee’ autofocus platform (created ‘in-house’), touchscreen interface, and your choice of optical viewfinders. It supports the company’s IQ1 and new IQ3 digital backs, with the latter supporting resolutions of up to 80MP. Also announced today are a pair of Schneider lenses and an updated version of Capture One software. Read more
Articles: Digital Photography Review (dpreview.com)

I seldom review gadgets these days, but sometimes something is so useful that it's worth telling people about. Such is the case with the SD card-enabled Western Digital My Passport Wireless hard drive.
Read more »
Strobist
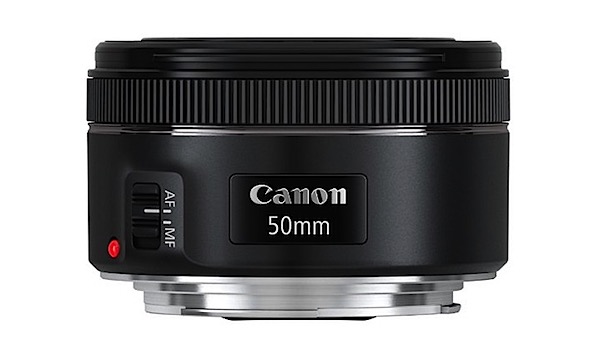
The EF 50mm F1.8 STM is Canon’s newest iteration of its classic ‘nifty fifty’ lens. It’s a fast, inexpensive normal lens on a full frame DSLR, but also functions as an 80mm equivalent lens on Canon’s APS-C bodies. How does it perform in real-world use? We’ve been using the lens for a few days and put together a gallery of samples. We took quite a few shots at wide apertures to see how the lens performed, but have also included photos taken at smaller apertures. See photos
Articles: Digital Photography Review (dpreview.com)
Children’s expressions are genuine; they love to live life with passion and abound in energy. When they are happy, their laughter and joy is infectious. They can be the best subjects of all – busy, happy, playful and real. If you’ve ever tried to take photos of kids who were not so crazy about having a camera in their face, you also know that while they are all these wonderful qualities, they can also be difficult and may require a little more planning for a smooth session.

These organizational tips for photographing children will help you prepare yourself for some extended camera time with a child – whether you are a professional photographer prepping for a session with an advanced DSLR, or a parent with a simple point-and-shoot wanting to get some nice shots of your young children.
Time of day is really important. A photo session generally works best after a nap and snack when the child is the happiest. Also something to keep in mind is harsh light. Outdoors at midday when the sun is bright and strong is not ideal for photography.
A close second for importance is location. Outside is optimal and allows for lots of space to move around, but if you would prefer indoors (or it’s -40), make sure you have adequate space.

This family found some lovely outdoor locations, and we chose to do the session in the evening. We found the sweet spot between hungry, tired, sleepy kids and soft, flattering natural light.
Both you and the little ones want this to go as fast as possible. If you waste too much time floundering around when you could be shooting, children get bored, antsy and quickly lose interest. Make a flexible plan and be prepared before you bring in the child. Have your camera (charged battery, lots of room on a memory card, check your settings) and props ready (hide any toys where they can be easily accessed and only bring them out if or when they are needed). If you are using various backgrounds, know ahead of time the order you would like them in, and make sure they are ready to go.
Make yourself a list of potential non-posed shots such as: sitting, standing, laying down, playing, running, etc. – your child will not pose the same as the kids in Pinterest photos – and you don’t want them to. Look for ideas and themes, but don’t expect those exact poses. You want the picture to express who they are. Include activities that you have ready, as well as some back-ups such as snacks or a phone. Get any electronics you use to entertain them ready beforehand – their favorite Netflix episode ready-to-go, or an upbeat song already opened in iTunes just waiting for you to click play – however, these should only be options when you are desperate and have tried everything else. Be flexible with your list and ready to throw it out if needed.

If possible, get some help. Ask your helper to stand directly behind you at first, not to the side – you want to try and get some pictures where the child’s eyes connect with the camera. For little ones your helper can plop them on a chair and quickly move away, while you wait ready with your finger on the shutter – you might only have two seconds to get the shot. Choose someone who can get them smiling and laughing. They will also help you keep your sanity when photographing your own kids.
Take the most posed, formal, look-at-the-camera pictures first. For example, a sibling shot where you want them all looking at the camera and smiling. You still might not get it, but this is where you have a chance.

This posed shot was taken at the beginning of their session.
Limit their movement at the start: A chair, stool, couch, basket, swing, etc. Just be flexible and don’t force it – a picture somewhere else is better than a red, blotchy, crying face. I will sometimes keep a chair or prop hidden until it’s time to use it. Stick a fun chair down where you want them to be, and see if they naturally head over there to explore. You might get lucky and have them crawl up there on their own. But they might not want to sit on the chair at all – move on, or let them stand holding onto it, or sit on the floor next to it. Come back later if you feel they are not ready. If not, just ditch it. You might have lots of ideas and only actually use a few of them.

Near the beginning of a session is a great time to limit movement using props, chairs, etc. After a while they will want to run around instead of sitting. This little guy wasn’t going for conventional, but that’s okay too – just go with it.
Let them play after you have tried the formal, posed shots. Don’t try too much posing or force them to sit still; you are in for a battle, and they will likely win. Consider centering the rest of the session around an activity they enjoy, or a new one that you think might be a hit – in the yard with the sprinkler, at the park on the slides, walking along the beach to collect shells and go adventuring, tea party outside, flying a kite, jumping on the trampoline, bucket full of soapy water on the grass, etc. Music can also be helpful – a fun little dance party, maybe? Unless you have a kid that really likes to run far away, outside is an excellent option – kids love to have room to move around, and a big space affords more options.

We were nearing the end of this session and sitting still wasn’t an option anymore. This little guy loved feeding the cows, so over to the cows we went. It was also a way of telling the story of who he is, and what he loves. Sometimes the most cherished pictures don’t have a smile or eyes facing the camera.
Take a deep breath and relax! Kids can sense your stress, and it transfers onto them (and usually makes them do the opposite of what you want).
Do you have any other tips for photography children? Please share in the comments below.
googletag.cmd.push(function() {
tablet_slots.push( googletag.defineSlot( “/1005424/_dPSv4_tab-all-article-bottom_(300×250)”, [300, 250], “pb-ad-78623” ).addService( googletag.pubads() ) ); } );
googletag.cmd.push(function() {
mobile_slots.push( googletag.defineSlot( “/1005424/_dPSv4_mob-all-article-bottom_(300×250)”, [300, 250], “pb-ad-78158” ).addService( googletag.pubads() ) ); } );
The post 8 Tips for Photographing Children by Dawn Bell appeared first on Digital Photography School.
 |
|||
We’re feeling super inspired by this photograph by Eirik Solheim.
Eirik set up an SLR in a window and snapped a pic every half hour for one year. This left him with 16,000 images. Whoa. He picked out 3,888 of ‘em and used a bit of code to stitch them into a single image.
You may not have a spare SLR that could be set up in a window for a year, but this idea can totally be taken in other directions.
Photo by Eirik Solheim
© Erin for Photojojo, 2015. |
Permalink |
No comment |
Add to
of an Entire Year”>del.icio.us
Post tags:
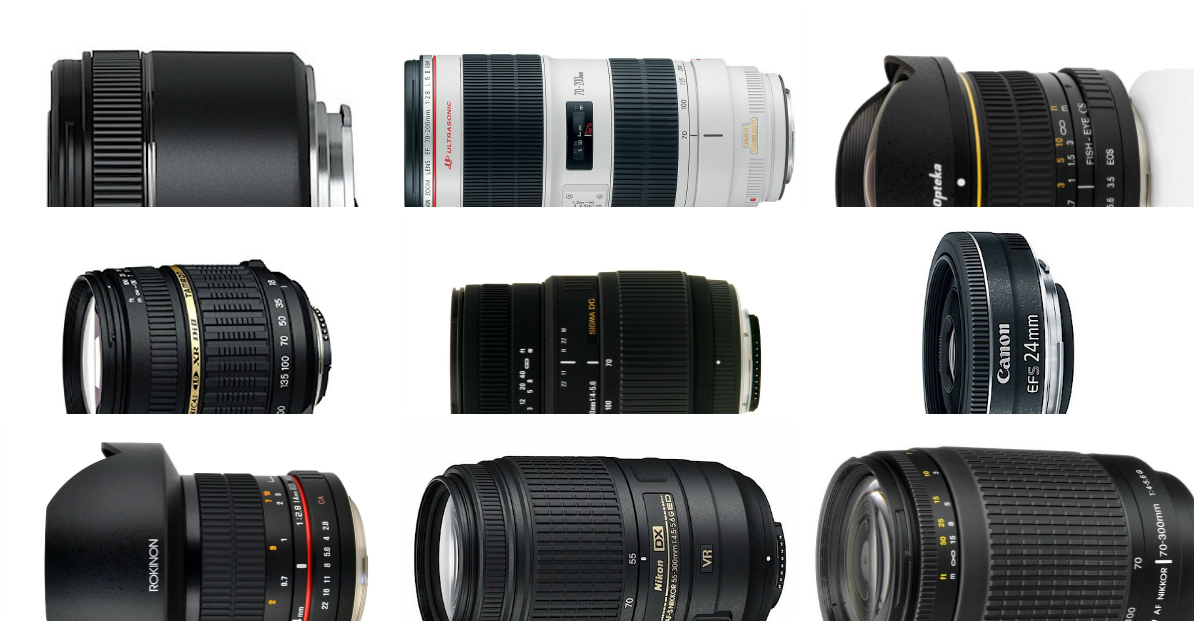
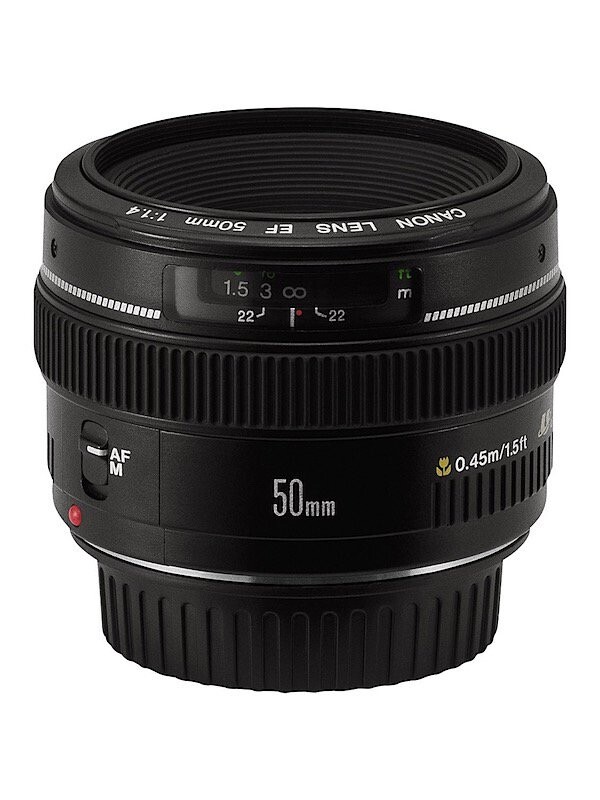
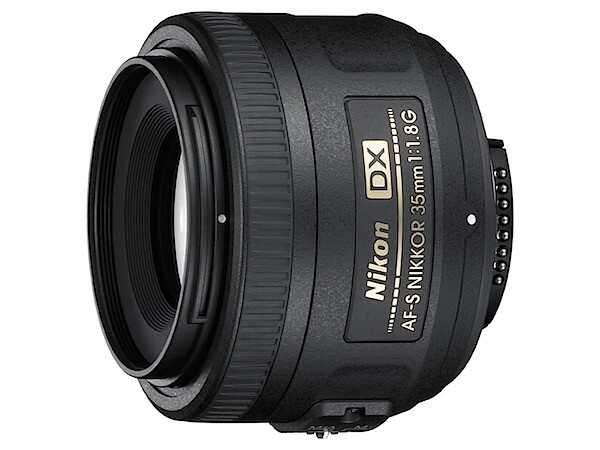
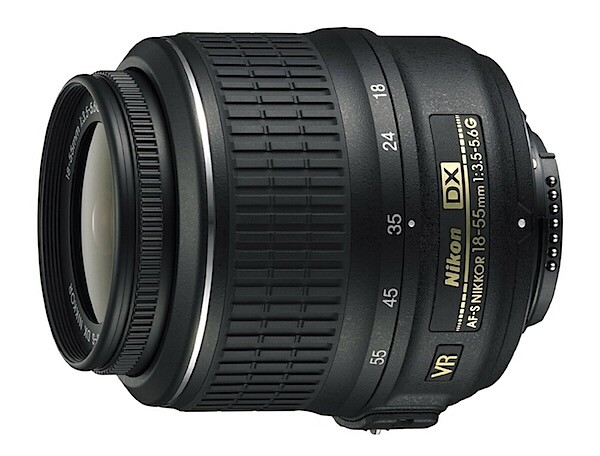
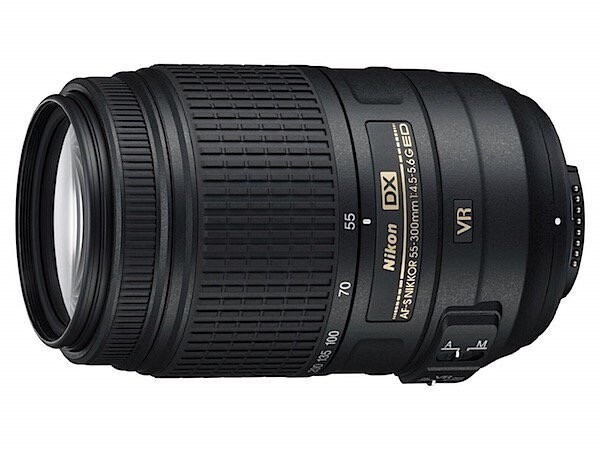
Today we did some analysis of the Best Selling DSLR Lenses with our readers among dPS readers – based upon purchases made in the last 3 months.*
As usual this list is dominated by Canon and Nikon lenses so we’ve again broken those two brands out into two separate lists of lenses and then have put the other best selling lenses from other brands into a third list.
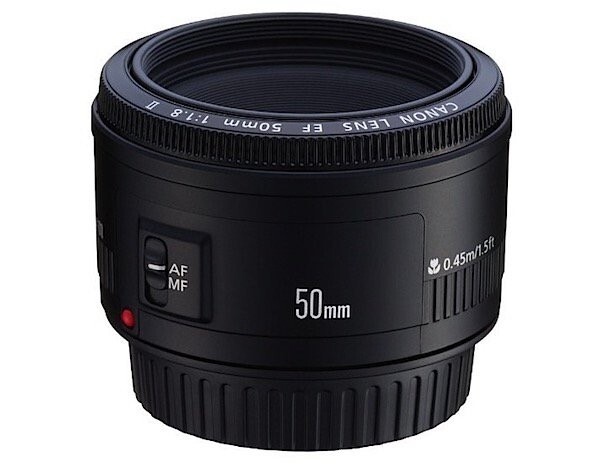
Interestingly by far the #1 lens in the last 3 months has been the Canon EF 50mm f/1.8 STM lens which was released just this last month as a successor to their old Canon EF 50mm f/1.8 Mark II which was released back in 1990 but which has always previously topped our best selling lens lists (it is #2 for the first time ever this month).
Note: at this stage we didn’t see any major trends in lenses for compact camera systems which is why we’ve not featured any hear. We expect this market to grow as the mirroless/compact system cameras continue to grow in popularity.


*Note: as with our previous best seller lists this list was compiled from reports supplied to us from Amazon.com where we are affiliates. One of the ways dPS is able to cover its costs and be a sustainable business is that we earn a small commission when readers make a purchase from Amazon after clicking on our links (including those above). While no personal details are passed on we do get an overall report from Amazon about what was bought and are able to create this list.
googletag.cmd.push(function() {
tablet_slots.push( googletag.defineSlot( “/1005424/_dPSv4_tab-all-article-bottom_(300×250)”, [300, 250], “pb-ad-78623” ).addService( googletag.pubads() ) ); } );
googletag.cmd.push(function() {
mobile_slots.push( googletag.defineSlot( “/1005424/_dPSv4_mob-all-article-bottom_(300×250)”, [300, 250], “pb-ad-78158” ).addService( googletag.pubads() ) ); } );
The post The Best Selling DSLR Lenses With Our Readers by Darren Rowse appeared first on Digital Photography School.
You must be logged in to post a comment.