Right off the bat, this is not an article about what background colors to use, what plugins to install, or other shallow web design fashion trends. Focusing blindly on bells and whistles (flat design, parallax scrolling, full-width page layouts) won’t actually make your photo website better. Sure, it might make it pretty, but it won’t necessarily be effective.
Getting the bigger picture and understanding the WHY behind web design trends will make you better equipped to build a successful photography business.
Having worked on over two hundred photography websites in the past few years, I’ve developed an eye for all the details that make up a great photo website and have recognized some important mindset shifts. My aim with this article is to give you a good overview of where the web design industry is heading (as it relates to photography websites), and how you can stay ahead of the curve.
Focusing on trends that truly matter allows you to then provide real value to your audience.
Change is inevitable
Web design trends are just a result of an ever-changing landscape. That’s why building your photography website should not be considered a one-time effort. It’s your responsibility to keep an eye on the industry and adapt as you go along.
So, what is driving all the web design changes in the photography industry, and what can you do about it?
#1 – The sheer number of online users
The web design world is rapidly evolving in order to manage the Internet boom:
There were more than 3 billion (with a “b”) Internet users in 2014, representing 43% of the world’s population.
So if you think the Internet has grown in recent years, we have yet to reach the tipping point. Not to mention how fast and easy it is to create a new basic photo website these days, instead of just being a content consumer. Everybody is getting online, which is the obvious cause of many web design changes.
Let’s explore some strategies to differentiate your photo website and rise above the surface:
a) Choose a niche
When the market becomes over-saturated, you’re somewhat forced to specialize in a smaller niche and become an expert in it. Your target audience will be smaller, but you’ll also be a better fit for their needs.

Niching down can usually be done through:
- The type of photography you specialize in (instead of being a jack-of-all-trades).
- The physical area you cover (only accepting clients from a certain city).
- How you promote yourself online (blogging, publications, events etc.)
This also has a great impact on how you structure your website. Having a clear target audience in mind, allows you to craft your message and tailor your site’s landing pages better.
If a first-time visitor comes to your site and is greeted with 10+ galleries from completely separate photography domains, (s)he might start exploring some of them, but will surely be a little confused and ask “What is this photographer actually good at?”.
b) Differentiate yourself and show your personality
Besides having great images (which should be a constant focus in your career), your website is an important way to showcase your personality. Just like you’re trying to craft a unique style in your photos, you should also infuse your style into the way you build your website.
How do you do that?
Your words have a lot of power. What you write (and the tone you write in) can make a lot of difference:
- Using your sense of humor in blog posts and your About page (within reason).
- Having a good self-portrait (did you nail the right facial expression?).
- Describe your work/services in a friendly manner.
- Write about your experiences in your own words, as if you’re talking to a friend using natural language. Forget about SEO for now.

Furthermore, it’s obviously not enough to use a great website template, thousands of other photographers might use the same one. The branding and design of your website are also important differentiators:
- Defining who/what your audience is (to inform what site structure, colors and fonts to use).
- Choosing whether to brand the site under your personal name or a business name.
- The general mood created by the site (minimalist, strict and professional, very joyful, retro, dark and intriguing etc.)
To dive deeper into how you can infuse personality into your website, look no further than this excellent article from Smashing Magazine: The Personality Layer.
c) Use quality platforms and themes/templates
Using free blogging platforms like blogger.com or wordpress.com (not to be confused with the self-hosted software from wordpress.org), you get what you pay for. I don’t want to sound harsh, because they’re useful to many people, but they’re targeted at beginners, so you also let out that impression when using them.
Using the right platform (like wordpress.org for your blog and/or PhotoShelter, Smugmug, or Zenfolio for your portfolio or archive, to give a few examples) allows you to build your site under your own terms, with SEO advantages and more design flexibility. But then you also have to pay attention to the theme or template you’re using on these platforms. Choosing a weak one (and not even customizing it in any way) makes your site very similar to many other ones out there.
Even if you’re not in the position to hire a professional web designer or developer, or you’re just starting out, it’s important to do a little research first and choose a strong theme as the foundation for your site.

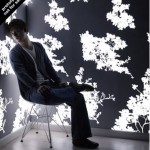
Website of our own Gina Milica – dPS writer and ebook author
If using WordPress, one of the best places to look for quality themes is ThemeForest (this link automatically filters for the term “photography” in the WordPress category, sorted by bestsellers and does not use any referral code).
Once you have a theme, it’s worth browsing the theme demo, reading its documentation, and getting acquainted with all the various layouts and options it has – they’re building blocks from which you can build your own WordPress-based website.
d) Learn to prioritize and simplify your website
You can tell a lot about a photographer’s personality from his website layout. Cluttered headers and overwhelming navigation can leave users confused and make them abandon the site (or at least browse to less important pages).
By letting go of clutter and focusing on quality over quantity, you can provide a better browsing experience for your users:
- Provide simpler (and fewer) navigation options. Try to keep menu items around five to seven choice at most.
- Any new piece of content should replace an older one, instead of just being crammed in there with all the existing content.
- Leave the header area distraction free (that means: no big blocks of text, client logos or obtrusive subscribe boxes). Just your logo (linking to the homepage), main navigation items and maybe a couple of social media links.
- Forget about only placing content above the fold (in the first few hundred pixels from the top). People scroll a lot these days (if the content is worth it). So leave some breathing room (whitespace) between elements – it adds legibility and creates a more modern and elegant look.
- Choose one or two accent colors for the site and go with them, consistently, throughout the site.
- Question the purpose of every element on your site: Is it distracting people from the main content? Would it be better placed somewhere else? Do you enjoy seeing/using similar elements on other websites?
Notice I did not mention minimalism in particular, or using the now-popular flat design elements. Prioritizing your content and focusing on a clean design are key ingredients to being more successful with your site.
e) Focus on your audience
Your photo website should obviously showcase your work and let your personality shine, but it shouldn’t be built around what YOU like (as the website owner). Instead, you should embark on the long process of defining your target audience and figuring out their likes and needs:
- Read industry blogs (What shifts are there in the industry? What tools are popular these days?).
- Get inspiration from other successful sites in your niche (How are other photographers writing to their audience?)
- Continually get feedback from your readers/clients (Can you see some patterns in the contact messages you get from readers? Can you ask a few clients why they chose you?)
- Understand the process a client goes through to find a photographer like you, and draw conclusions to inform your website copy and marketing efforts (Where do my target clients go looking for photographers? What are their most common questions and concerns?).
- Think about what visitors on a page are most likely looking for, and make sure that’s front and center (Does a reader come to your About page to vaguely see if you’re passionate about photography, or in fact to quickly view your experience and location?)
Answering questions like this should, in time, create a strong new mindset for building a site that’s useful and appealing to your audience. What a great place to mention this quote from marketing expert Seth Godin:
“The only reason to build a website is to change someone. If you can’t tell me the change and you can’t tell me the someone, then you’re wasting your time.” – Seth Godin

2. High-speed internet is becoming the norm
The spread of broadband connections and mobile networks are changing the way we browse websites. No longer are people expecting to wait too long for a page to load, or to sit and read very long texts (except maybe for long-form articles like this one).
High-speed connections bring many benefits, but also impatience and superficiality (users not staying long enough on a site to dive deeper into a topic). This has a few important affects on the way you should build your online presence:
a) Make your website fast, people expect that
Google expects that too. Photography websites usually have a problem with site speed, due to the nature of the image-heavy pages which require more bandwidth and are slower to load. While using a quality hosting provider is obviously important, the three main performance factors are:
- The quality of your theme or template (see notes above on this topic).
- The content you add to the site – unless you’re selling prints or licenses, you should only upload lower-resolution images (at the size displayed by the template, usually no more than 800-1000 pixels on the longest side, maybe larger for home pages or slideshows). With some exceptions, JPG files at a 60-70% quality level is a good compromise (in order to keep file sizes low while maintaining acceptable image quality).
- Page caching – using performance plugins like W3 Total Cache (and integrating with a CDN (Content Delivery Network) or enabling similar caching features on your platform) can greatly improve your site’s load speed.
Quality content comes first, but a big chunk of users leave your site if it takes too long to load. As technologies advance, this performance expectation will only get stronger.

b) Make your pages easy to skim through
Make no mistake – with faster websites, users’ patience is also stretched thin. In this era of distractions and (false) multi-tasking, rarely do people sit for long periods of time on a single page. Even if they’re fond of your work, the social media feed in the other browser tab pulls them away from your site and back to their notifications. It is, therefore, important to create a smooth browsing experience:
- Be brief – when writing blog posts or your biography text, try to stick to what matters and get to the point. Quality over quantity, again.
- Showcase only your best images – having tens or hundreds of images in a slideshow will only dilute the visual impact, and you can’t really expect people to sit through all of it. Especially annoying are very similar variations of certain images. Unless it’s for a client project, show visitors a different thing, not the same subject shot from three different angles.
- If you have many galleries, try grouping them into collections/categories. A user is more likely to choose from five categories and dive deeper into sub-galleries, instead of choosing from 30 galleries right from the start. It’s the jam experiment all over again.
- Properly format your text – you can increase legibility by breaking texts into paragraphs with spacing, highlighting important sentences/words and using headlines and sub-headlines. Notice how this article is quite long, yet (hopefully) easy to skim through with all the sub-headlines and bullet points.
c) Have a clear site navigation, people want to quickly jump from one thing to another
Since people are so distracted these days, you might be thinking of grabbing their attention and making them stay on your site longer. But this can be done in both good and bad ways. You can either use annoying pop-ups and write bombastic words to trick them into staying, or you can instead create a clean and simple website that’s a joy to use.
When you visit a website and can quickly find what you’re looking for, you’re a happy reader and more likely to go there again. Don’t you also feel the same way when shopping in a neatly organized store? Whereas on websites where you’re wasting time searching or navigating, your frustration level might prevent you from ever going there again.
What are the main ways to create a great website experience, you ask?
- Once again, simplify your navigation – I’m not saying to just have three or four menu items, because that might actually create even more work for the reader to dig out your other pages. Just try to place your important site areas in the navigation, and remove the rest. You can always link to your other less-important pages in other places.
- Position the navigation consistently – people expect to find the menu in the same spot throughout the site. This is especially important for people with multiple/separate websites. When a visitor reaches your blog, can (s)he see the same menu items and in the same position? Or do they have to learn a new layout again? It’s not difficult, but it’s a hindrance.
- Provide clear calls-to-action – when users reach the end of the page, where should they go next? Depending on the page, you can let them explore the main menu on their own, or you can guide their actions by having buttons linking to where you want them to browse next (or subscribe to something, or leave you a contact message).

Conclusion
The web design industry is evolving. It’s heading towards clarity and simplification, forced by the expanding number of websites out there.
There are many other aspects to take into consideration (the rise of mobile devices, higher content consumption rates, new browsing habits, SEO and social media implications, and many more), but they’re the topic of a future article here on dPS.
If you closely read all the points above, you’ll spot the common thread; helping your readers and always asking yourself how to make things better for them.
Focusing more on the quality of your work and on providing an honest and friendly browsing experience to your readers can go a long way.
googletag.cmd.push(function() {
tablet_slots.push( googletag.defineSlot( “/1005424/_dPSv4_tab-all-article-bottom_(300×250)”, [300, 250], “pb-ad-78623” ).addService( googletag.pubads() ) ); } );
googletag.cmd.push(function() {
mobile_slots.push( googletag.defineSlot( “/1005424/_dPSv4_mob-all-article-bottom_(300×250)”, [300, 250], “pb-ad-78158” ).addService( googletag.pubads() ) ); } );
The post The Future of Photography Websites – Understanding and Adapting to Trends by Alex Vita appeared first on Digital Photography School.

Digital Photography School


You must be logged in to post a comment.