RSS
 

Archive for April, 2015

Jet Set: The travel photography and photojournalism of Mark Edward Harris

12 Apr

With nearly thirty years of photography as well as almost ninety countries under his belt, travel, editorial and reportage photographer Mark Edward Harris has dedicated his eye to capturing life. His career in photography began as a still shooter for the Merv Griffin Show, but it was a four month trek through Asia when the show ended that first ignited his true love; travel photography. Read more about Harris’ photography as well as his tips on traveling light in our Q+A. See gallery

Articles: Digital Photography Review (dpreview.com)

 
Comments Off on Jet Set: The travel photography and photojournalism of Mark Edward Harris

Posted in Uncategorized


Die 5 Videos des Monats

12 Apr

Video © Aileen Wessely

Wie ein roter Faden ziehen sich Fragen nach der Wahrnehmung von Realität durch unsere April-Ausgabe der Videos des Monats: Wie verhält sich das, was das menschliche Auge sieht eigentlich zu dem, was ein Fotoapparat sehen kann oder zu dem, was eine Filmkamera sieht? Was ist eigentlich die objektive Realität? Film ab für fünf ganz unterschiedliche Perspektiven auf Kameras, auf das, was existiert und auf das, was mit Hilfe eines technischen Blicks entsteht.
kwerfeldein – Fotografie Magazin | Fotocommunity

 
Comments Off on Die 5 Videos des Monats

Posted in Equipment


IKEA to Produce & Ship 10,000 Flat-Pack Emergency Shelters

12 Apr

[ By WebUrbanist in Architecture & Houses & Residential. ]

ikea shanty village

With 40 test units created and deployed since 2013, IKEA is now ready to begin mass-producing its $ 1,000-per-unit temporary flat-pack house to destinations in need around the world. Much like IKEA’s everyday products, these shelters are ready to use right out of the box – some assembly required but all assembly tools included.

ikea flat pack home

ikea emergency housing

Recognizing the need for more robust shelters in refugee camps and disaster areas, where temporary housing often has to hold up to severe weather and longer-than-expected durations, IKEA developed Better Shelter as a low-cost alternative to conventional equivalents.

ikea modular solution

Supplied to the United Nations Refugee Agency (UNHCR) by the Ikea Foundation, these new units will find homes in places they are currently used (like Ethiopia and Iraq) as well as other destinations.

ikea emergency shelter design

ikea house interior

At close to 200 square feet per unit, these are perhaps not spacious but some standards but are much larger than most emergency housing solutions. Panels, pipes, connectors, wires as well as solar power panels for the roof are all packed flat in boxes for easy shipping. While standardized, the modules are also designed to be adapted to regional climate conditions.

ikea house parts

ikea flat pack house

Shaun Scales, UNHCR’s chief of shelter and settlement, said in a statement: “The refugee housing unit (RHU) is an exciting new development in humanitarian shelter and represents a much needed addition to the palette of sheltering options mobilised to assist those in need. Its deployment will ensure dramatic improvement to the lives of many people affected by crises.”

Share on Facebook


[ By WebUrbanist in Architecture & Houses & Residential. ]

[ WebUrbanist | Archives | Galleries | Privacy | TOS ]


WebUrbanist

 
Comments Off on IKEA to Produce & Ship 10,000 Flat-Pack Emergency Shelters

Posted in Creativity


5 Ways to Use a Beauty Dish Light for Portraits

12 Apr

The beauty dish. It’s one of my favorite light modifiers, which is why I’m so excited to share some techniques you can try with your beauty dish. Don’t have one? Not to worry. There are plenty of DIY beauty dish project plans online. I’ve actually made them out of aluminum turkey pans. When you decide to step up to a more professional beauty dish, however, they are usually not as expensive as most light modifiers and you can get them for speedlights or studio strobes.

Beautydish 2

Beauty dishes are a niche modifier usually reserved for beauty shots. These tend to be head and shoulder portraits that highlight makeup and hair, and are commonly used in the fashion industry. So why should you try it? Well, it’s fun to see if you can make images like you see in the fashion magazines, it’s also very creative. You really have to plan and construct the entire image. This may include everything from your choice of background, lighting setup, and hair and makeup.

The quality of light produced by a beauty dish is not as soft as a softbox, but it is softer than an umbrella, and not as hard as just using a 7 inch reflector. The light falloff is quite rapid, which helps to sculpt the subject’s face and to show texture in their skin. Beauty dishes often produce nice catch lights in the eyes and shadows under the jaw line. They are versatile modifiers because you can change the quality of light by choosing a dish with a silver, or white, inner surface. The white surface will produce slightly less specular highlights on the subject’s face. You can also control the spill of light by using a grid and even further soften the light by adding a sock over the front.

Beautydish 3

When you plan a shoot using a beauty dish, only use it on clients or models with very good skin because the light pattern it produces can show off imperfections like wrinkles and blemishes. It’s also helpful to find a good makeup and hair artist because you will be showing off the subject’s face in detail. If you’re not ready to pay a makeup artist for this service, you can offer them a trade for images so they can expand their portfolios; or, if you’re really lucky sometimes you can find a model that is skilled at doing her own makeup.

When setting up your camera, I recommend a lens in the 85-200mm range. I use studio strobes and an aperture around f/8 or f/11. I would also recommend using a boom arm because it will help you put the beauty dish in just the right spot, without getting in the way of your shot. The beauty dish will give you very nice light on the subject’s face. Keep in mind you often need to spice up the image with a rim (or accent) light, hair light or a background light.

Beautydish 3 2

Let’s get started with five ways to use your beauty dish:

1. One light with a reflector: Clam shell lighting)

This is the typical way you will see a beauty shot set up. The dish is positioned right above the subject’s face, pointed down slightly, so the center of the dish is aimed at the subject’s forehead, right between the eyes. The dish should be close to your subject to produce soft light, usually within two to four feet. When you set this up, make sure you can see catchlights in the top of subject’s eyes. Then add a reflector under the beauty dish to bounce light back up on to their face. This will help minimize the shadows under chin, and add a catch light at the bottom of the eyes. You will have to put your camera between the beauty dish and the reflector. Some photographers also like to add black cards on either side of the subject to help create shadows on the sides of the face.

Beautydish 1 2 Beautydish 2 2

2. Two light setup: Clam shell lighting

This is basically the same as number one above, except you use a strobe in place of the reflector. This allows you control of the power output of the fill light. I prefer to use a strip box for this purpose, set one or two stops darker (lower) than the main light.

Beautydish 7b Beautydish 8

3. Add a sock over the beauty dish

The sock is a piece of diffusion material, that looks like a shower cap, which you put over the beauty dish. This softens the light on the subject’s face, and if you are getting shiny spots it will reduce the specularity of the light. Using a sock will produce a creamy look, with less skin texture.

Beautydish 9

4. Add a grid to the beauty dish

The grid will focus the light into more of a spotlight type pattern, which can be used to create some interesting effects. Just make sure the grid is pointed directly at the subject or the light pattern will not strike the face correctly. The easiest way to check this is to make sure the subject can see directly through the grid to the light source.

Beautydish 4

5. Take it outdoors

The beauty dish is a great light modifier for outdoors because it’s more compact than a softbox, but can be used like one. The light quality will be softer than an umbrella, and won’t catch the wind as much as an umbrella or a softbox. It can be used as the main light source or as a fill light. If you use it as a main or fill light you can set it up at a 45 degree angle like you might use a softbox. When the light conditions are warm in tone such as sunrise or sunset, you may want to add a color temperature orange gel over the beauty dish to help blend the strobe’s light with the sunlight.

Beautydish 6

The beauty dish is a bit of a specialist tool that can produce wonderful lighting patterns when used correctly. However, it can also be used in many creative ways to produce interesting shots. I hope you have fun giving the beauty dish a try.

Beautydish 5

googletag.cmd.push(function() {
tablet_slots.push( googletag.defineSlot( “/1005424/_dPSv4_tab-all-article-bottom_(300×250)”, [300, 250], “pb-ad-78623” ).addService( googletag.pubads() ) ); } );

googletag.cmd.push(function() {
mobile_slots.push( googletag.defineSlot( “/1005424/_dPSv4_mob-all-article-bottom_(300×250)”, [300, 250], “pb-ad-78158” ).addService( googletag.pubads() ) ); } );

The post 5 Ways to Use a Beauty Dish Light for Portraits by Gary Detonnancourt appeared first on Digital Photography School.


Digital Photography School

 
Comments Off on 5 Ways to Use a Beauty Dish Light for Portraits

Posted in Photography


Lensbaby Velvet 56mm f/1.6 real-world sample gallery posted

12 Apr

The latest from Lensbaby, the Velvet 56mm f/1.6, is designed to bring soft, dream-like effects to portraiture. It also provides a minimum focus distance of 5 inches for macro work. It’s by no means cheap for what it offers at $ 499.95, but for some photographers will offer the ability to capture soft focus effects in-camera rather than through processing. We took the Velvet 56 out for a spin. See gallery

Articles: Digital Photography Review (dpreview.com)

 
Comments Off on Lensbaby Velvet 56mm f/1.6 real-world sample gallery posted

Posted in Uncategorized


11. April 2015

11 Apr

Das Bild des Tages von: Charlotte Grimm

Ein Gesicht, von Lichtreflexen angeleuchtet.

Nehmt Euch einen Augenblick Zeit und schaut dieser Frau in die Augen.
kwerfeldein – Fotografie Magazin | Fotocommunity

 
Comments Off on 11. April 2015

Posted in Equipment


3 Valid Reasons it Might be Time to Upgrade Your Camera Equipment

11 Apr
Ludovic Hirlimann

By Ludovic Hirlimann

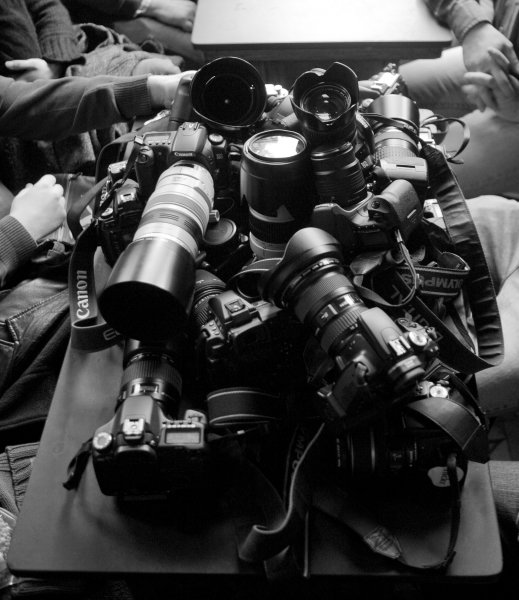
For all of you camera enthusiasts, lens aficionados and gear fetishists, hearts race and palms sweat when broaching the subject of camera equipment upgrades. Camera companies keep a constant flow of equipment releases coming to quench the insatiable appetite of those who are convinced they need the latest and greatest.

It’s important to keep in mind that just because the new iteration of your camera body or a new lens with an even longer list of acronyms outlining its features is released, it doesn’t instantly make your equipment obsolete.

All you savvy consumers should strive to be honest with yourselves and carefully consider the tangible benefits that you will enjoy from that upgrade. Certainly most of you will legitimately grow out of that point-and-shoot or entry-level DSLR, however, many make the jump too soon before you’re able to fully exploit the capabilities of your equipment.

Some good reasons to to upgrade:

If you are reading this, you have likely purchased a camera (and possibly additional lenses and other accessories), in which case you are familiar with what could be called the Christmas morning feeling.

#1 Renew your enthusiasm or spark creativity

For photographers, an upgraded body or a new lens can be an important catalyst to revive waning enthusiasm. Many certainly see this as a thinly veiled excuse for coughing up the cash for some new equipment, but it can provide a needed boost to drag you out of the dreaded photographers-block.

For example, adding a large aperture lens – with an f-stop of f/2.8 or greater – to your stable reveals a whole new perspective, enabling you to further blur out backgrounds and isolate your subject.

Depth of field 1

Depth of field 2

Similarly, a telephoto lens will enable you to compose tighter shots from farther away, or experiment with closely cropped shots from a short distance. As focal length increases (and with it the distance to the subject), depth of field decreases and background objects appear closer to the subject opening up new compositional opportunities.

Telephoto by Jeremie Schatz 1

If you are already shooting with a DSLR, depending on the lenses you are using, adding a teleconverter to your bag can be a less expensive option for increasing lens focal length. Teleconverters fit between the lens and camera, and add a certain level of magnification such as 1.5x or 2x. Many lenses are compatible with teleconverters, but not all, so be sure to check with the manufacturer before buying one.

Teleconverter by Jeremie Schatz 1

While some photographers can continue to produce compelling images with a basic body and a 50mm lens, many will discover a new realm of possibilities which unfold with the addition of new equipment.

#2 Your gear is limiting your progress as a photographer

Another way to legitimize an upgrade is if you recognize that your evolution as a photographer is being hindered by your equipment’s limitations.

One advancement which can be gained with a camera or lens upgrade is improved low-light performance. If you find yourself shooting fast-moving kids in your dimly lit house or indoor sporting events, you will quickly discover that shooting at high ISO settings at maximum aperture results in less sharp images riddled with color noise. Color rendition and saturation levels can also suffer greatly in these situations, especially in shadowed areas and with skin tones.

Unfortunately, other than the limited corrections you can make with editing software, an equipment upgrade may be a necessity if you want to get great looking photos in low-light conditions. Point-and-shoot and entry-level DSLR cameras sport better high-ISO performance than just a few years ago, but more advanced models show a drastic improvement in this regard and large aperture lenses can enable you to shoot at lower ISO settings.

In addition to better low-light performance, upgrading your camera body can put a bunch of useful features in your hands such as: a self-cleaning sensor, wireless uploading, increased pixel count, more accurate auto-focusing, faster shooting rates, dual memory-card slots, and more. Be sure to compare your current camera’s specifications with that of a potential upgrade and ask yourself if the added features will have a significant impact on your photography.

Memory card slots

Although it doesn’t go in your camera bag, upgrading your editing software can be a game changer for your photographic pursuits. Making the leap from using free editing software, to purchasing and learning Lightroom or Photoshop, can make drastic changes to your final images. These programs open up new avenues for stylizing your images, and countless plugins are available which can enable you to have even more control over the look and feel of your work.

Even if you have the software already, an upgrade in your understanding and ability to use it, can go a long way. Investing time in knowing how to use the software properly, may help boost the quality of your images.

Lightroom by Jeremie Schatz 1

#3 The equipment is no longer usable

A more utilitarian reason to upgrade equipment is that it is simply reaching the end of its usable life. Camera shutters are rated for a certain number of actuations, at which point the risk of failure and inaccurate shutter speeds increase.

Even the best lenses have many plastic parts, and most modern ones have internal motors with a finite life span. Stiff or stuttering zoom and focus rings, loud or slow focusing and loose lens mounts are a few indications that a repair or replacement is imminent.

This may be a non-issue for many who live by the “if it’s not broken, don’t fix it” philosophy, however, if you use your equipment for paying gigs or to document important events, you may end up regretting a potentially preventable equipment failure.

There are many reasons to make equipment upgrades and most of you will make that leap at some point, but it is important not to set your expectations too high as to what new gear will do for your photographs. Think about your goals and consider which is the most accessible path to take in order to reach them.

Sergio

By Sergio

I’ll leave you to think about this quote:

“A lot of photographers think that if they buy a better camera they’ll be able to take better photographs. A better camera won’t do a thing for you if you don’t have anything in your head or in your heart.” – Arnold Newman

googletag.cmd.push(function() {
tablet_slots.push( googletag.defineSlot( “/1005424/_dPSv4_tab-all-article-bottom_(300×250)”, [300, 250], “pb-ad-78623” ).addService( googletag.pubads() ) ); } );

googletag.cmd.push(function() {
mobile_slots.push( googletag.defineSlot( “/1005424/_dPSv4_mob-all-article-bottom_(300×250)”, [300, 250], “pb-ad-78158” ).addService( googletag.pubads() ) ); } );

The post 3 Valid Reasons it Might be Time to Upgrade Your Camera Equipment by Jeremie Schatz appeared first on Digital Photography School.


Digital Photography School

 
Comments Off on 3 Valid Reasons it Might be Time to Upgrade Your Camera Equipment

Posted in Photography


Barry Falks Heterotopien

11 Apr

Eine orangene Mülltüte weht durch eine grasige Landschaft.

Ein Beitrag von: Barry Falk

Als Fotograf beschäftige ich mich künstlerisch mit den versteckten und vernachlässigten Teilen von Innenstädten und Vorstädten. Meine Fotografie beleuchtet dabei Aspekte der städtischen Umwelt, die entweder bewusst nicht anerkannt werden oder denen generell wenig Aufmerksamkeit geschenkt wird. Diese Ansichten aus dem Augenwinkel und die zufälligen Begegnungen kommunizieren den optischen Reiz und die Flüchtigkeit dieser vergessenen Orte besonders eindringlich.
kwerfeldein – Fotografie Magazin | Fotocommunity

 
Comments Off on Barry Falks Heterotopien

Posted in Equipment


Meet PJ:Christina Edition

11 Apr

Name: Christina Best (yes, it really is Best) Thomas

What Do You Do Here? I tell jokes and help folks with their Photojojo goodies!

Favorite Camera: The one that’s with me, which is either my iPhone or Canon 60D.

Learn Even More About Christina
(…)
Read the rest of Meet PJ:
Christina Edition (66 words)


© laurel for Photojojo, 2015. |
Permalink |
No comment |
Add to
Christina Edition”>del.icio.us

Post tags:


Photojojo

 
Comments Off on Meet PJ:Christina Edition

Posted in Equipment


Weekly Photography Challenge – Monochrome

11 Apr

Have a look at these 25 monochrome images. Get some ideas of color you can use because that is your challenge for this week.

Weekly Photography Challenge – Monochrome

André Mellagi

By André Mellagi

Darlene Hildebrandt

By Darlene Hildebrandt

Shooting in monochrome is an option on most cameras. If you also shoot in raw format you can still recover the color information in post-processing if you wish, but it will help you learn to see things in their simplest form – light and shape.

Here are a few more examples (even stuck a few of my own images in there):

Darlene Hildebrandt

By Darlene Hildebrandt

Darlene Hildebrandt

By Darlene Hildebrandt

Nana B Agyei

By Nana B Agyei

Rjabinnik And Rounien

By Rjabinnik and Rounien

Cat Burton

By Cat Burton

Cat Burton

By Cat Burton

Amira_a

By amira_a

Jasper Nance

By Jasper Nance

Thomas Hawk

By Thomas Hawk

Share your monochrome images here:

Simply upload your shot into the comment field (look for the little camera icon in the Disqus comments section) and they’ll get embedded for us all to see or if you’d prefer upload them to your favourite photo sharing site and leave the link to them. Show me your best images in this week’s challenge. Sometimes it takes a while for an image to appear so be patient and try not to post the same image twice.

googletag.cmd.push(function() {
tablet_slots.push( googletag.defineSlot( “/1005424/_dPSv4_tab-all-article-bottom_(300×250)”, [300, 250], “pb-ad-78623” ).addService( googletag.pubads() ) ); } );

googletag.cmd.push(function() {
mobile_slots.push( googletag.defineSlot( “/1005424/_dPSv4_mob-all-article-bottom_(300×250)”, [300, 250], “pb-ad-78158” ).addService( googletag.pubads() ) ); } );

The post Weekly Photography Challenge – Monochrome by Darlene Hildebrandt appeared first on Digital Photography School.


Digital Photography School

 
Comments Off on Weekly Photography Challenge – Monochrome

Posted in Photography