Nikon has announced that it will release new firmware for three of its DSLRs, improving their ability to communicate with the Atomos Shogun and Ninja-2 external video recording devices. The cameras concerned are the Nikon D4S, the D810 and the D750 and the update is slated to arrive this summer. Read more
Month: April 2015
-
CP+ 2015: Nikon Interview – ‘We learned from the D600 episode’
When we attended CP+ earlier this year in Yokohama, Japan we sat down with senior executives from several major camera and lens manufacturers. We were lucky enough to sit down with a number of Nikon engineers to ask them about their overall strategy with respect to FX vs DX, and DSLR vs mirrorless. We were also able to ask pointed technical questions regarding innovative technologies in Nikon cameras, and the answers were very enlightening. Click through to read the interview
-
Jungle in the City: Wild Urban Biome Skyscraper Design
[ By Steph in Architecture & Cities & Urbanism. ]
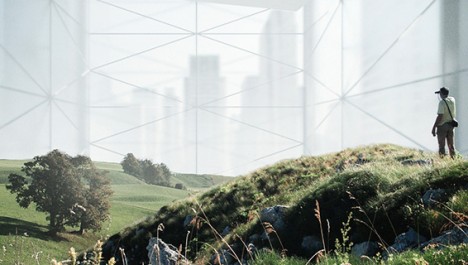
Suspended aquariums, snowy landscapes, jungles and caves can all be found in the heart of the city, steps away from dense urban housing, in the middle of this wild skyscraper concept. Winner of eVolo magazine’s 2015 skyscraper competition, ‘Essence’ by BOMP re-introduces nature to heavily developed areas with eleven diverse landscapes built right into its core.

The futuristic urban tower design aims to be a secret garden in the middle of the city, combining architecture and nature within an environment where wildlife and greenery are rarely found outside of parks. “The main goal of this project is to position non-architectural phenomena in an urban fabric,” say the designers.

The eleven natural landscapes overlap each other within the vertical structure, including a jungle, a cave, a waterfall and even an ‘ocean.’ The landscapes were chosen for their complex range of “visual, acoustic, thermal, olfactory and kinesthetic experiences.”

Open to the public, this series of natural spaces includes fish tanks lifted 30 meters above the floor and other natural features, with different paths offering different adventures. Each is positioned beside large glazed walls overlooking the city, offering a strange juxtaposition of environments. See the rest of the contest entries at eVolo.
Want More? Click for Great Related Content on WebUrbanist:
3D City Farms: 5 Urban Design Proposals for Green Towers
Here are five of these remarkable architectural designs for sustainable (and stylish) urban farm towers that may revolutionize agriculture as we know it.
Click Here to Read More »»
Endless City: Skyscraper Wraps Upward with Walkable Ramps
An urban pedestrian paradise, this conceptual design proposes to turn cities skyward with a system of flexible open spaces that gradually rise as floor plates …
Click Here to Read More »»

Wild Creatures in Urban Mexico: New Street Art by ROA
10-foot-tall wild animals spring to life in the streets of Mexico from the spray paint can of Belgian artist ROA, champion of the underdogs of nature.
Click Here to Read More »»


[ By Steph in Architecture & Cities & Urbanism. ]
[ WebUrbanist | Archives | Galleries | Privacy | TOS ]
-
10. April 2015
Das Bild des Tages von: Steffen Fischer

Im Ausblick: Frida Kahlo, Fotos als forensischen Beweisstücke und wie die rechte Szene Journalisten bedroht
kwerfeldein – Fotografie Magazin | Fotocommunity -
25 Magnificent Monochrome Images
Last week I shared 24 Powerful Images With Complementary Colors, ones that are opposite on the color wheel.
So it’s time for another opposite, images which use only one color. Yes that could mean black and white, but monochrome just means one color so it could be green, blue, red, anything. Have a look at the composition and light in these images. See what makes them work.
Snow Globe by Jeff Lewis on 500px
Shark Buddha by Ellen Cuylaerts on 500px
Green tea field by Jaewoon U on 500px
Dance of the Night by Marc Adamus on 500px
Hump Rock by Miles Morgan on 500px
Field of Dreams by Ashley Vincent on 500px
Day Break on the Li by Michael Steverson on 500px
Dancing on the Water by Teddy Winanda on 500px
Night bamboo by Ryusuke Komori on 500px
golden light by Yaman Ibrahim on 500px
Gold lines by MONEF AL-GAHITHI on 500px
SOFT PINK by Aina Apelthun on 500px
Pretty In Pink by Adrian on 500px
Cristal by Chris Marcel on 500px
Treasure chest by Sabino Parente on 500px
?????? by Natalia Lisovskaya on 500px
?????????? ? ????????? by Natalia Lisovskaya on 500px
Coffee Collection by Natasha Breen on 500px
A Slice of Lime by Andy Barrow (SnapHappyExpat) on 500px
Blue Easter Eggs by Sasha L'Estrange-Bell on 500px
Silent forest by Xavier Jamonet on 500px
Tramonto sulle rive del lago by Daniele Dainelli on 500px
Revival by Alessandra Piasecka on 500px
For St. Patrick's Day by Ursula Abresch on 500px
Huntington Castle by Alex Pieussergues on 500px
googletag.cmd.push(function() {
tablet_slots.push( googletag.defineSlot( “/1005424/_dPSv4_tab-all-article-bottom_(300×250)”, [300, 250], “pb-ad-78623” ).addService( googletag.pubads() ) ); } );googletag.cmd.push(function() {
mobile_slots.push( googletag.defineSlot( “/1005424/_dPSv4_mob-all-article-bottom_(300×250)”, [300, 250], “pb-ad-78158” ).addService( googletag.pubads() ) ); } );The post 25 Magnificent Monochrome Images by Darlene Hildebrandt appeared first on Digital Photography School.
-
Wedding Photography Infographic: Everything You Need to Know
Wedding Photography is one of the most important things to consider before your big day. Wedding photos are something you will cherish for the rest of your life so it’s vital that you are completely satisfied with them. Take the time to choose the right photographer for your needs as well as communicating effectively with them during the process is Continue Reading
The post Wedding Photography Infographic: Everything You Need to Know appeared first on Photodoto.
-
3 Tips for Getting Great Skin Tones Using Adobe Camera Raw
Skin tones can be one of the more difficult aspects of a photograph to master. Getting pleasing skin tones will make your image appear more eye-catching and attractive. If you know the right steps to take, skin can be pretty simple to master. Using these three simple tricks, using only Adobe Camera Raw (ACR), your skin tones will appear more balanced and pleasing to the eye.


Note: working in Lightroom you can do the this as well, because the sliders and options are the same!
White Balance
When trying to get great looking skin tones, the first thing you should pay attention to is the white balance. Correct white balance will set the stage for great skin tones. If the white balance is too cool, your skin will appear gray or bluish. On the other hand, if the white balance is too warm, the skin will look yellow or orange. Neither of these options are very pleasing to the eye, and make the skin more difficult to work with later on.
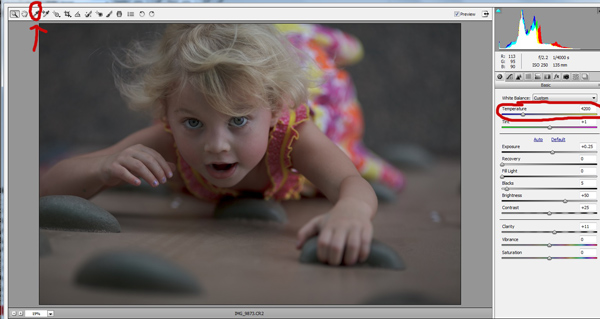
To see if your white balance is accurate, use the white balance targeted adjustment tool. It looks like an eye-dropper and is located at the top of the screen. It is the third tool over from the left. Click on the dropper, then click on an area of your photo that is white. The whites of the eyes are a good place to start. This should give you a good indication of where the white balance should be set. If your image still appears too warm or cool to your taste, use the temperature slider located to the right of your screen, it is the first one. Adjust this by sliding it to the right or left until your get a pleasing white balance. You may have to adjust Tint as well.
Exposure
Next, make sure your exposure is correct. Take a look at the histogram located in the upper right hand corner of the screen. Ideally, you want it to look like a smooth bell curve, with the high point of the curve right in the middle. Check to make sure that the curve does not go too far to the left or the right. This may indicate that your photo is over or underexposed, causing your skin tones to either be gray and dark, or too bright and blown-out in some spots.
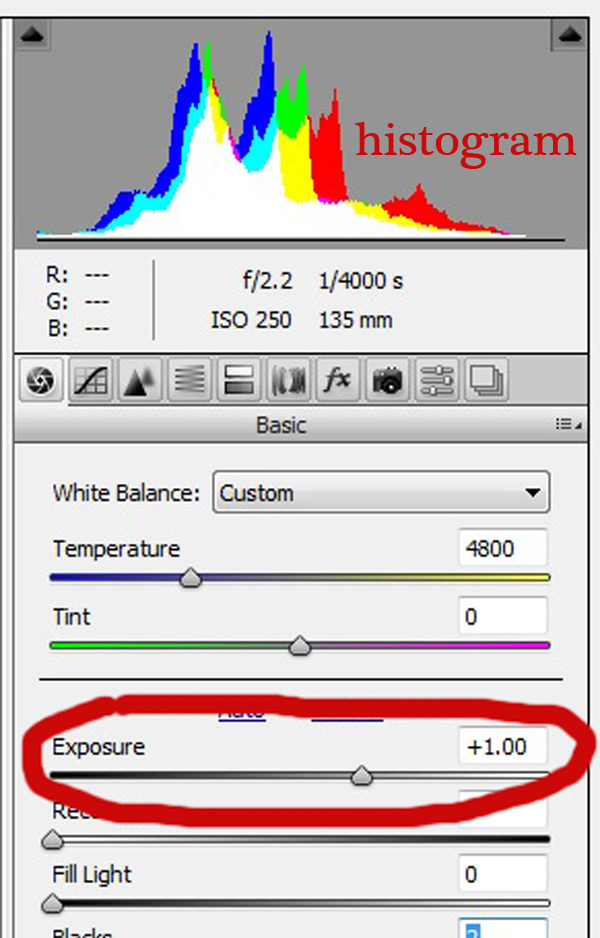
If your curve does fall too far to one side, use the exposure slider to fix it. Located three sliders down on the right hand side of your screen, move it either left or right. Watch your histogram. When the majority of the curve is in the middle, you’ve got it! In some photos, there will be parts of your image that are very bright or dark, and cause your histogram to spike on parts of the curve. This happens often when you have a bright sky in the background. If this is the case, your curve will be off the chart on the right edge of the histogram. In an image like this, you would look at where the majority of your curve lies and ignore the parts of the curve that are out of range.
For more information see: How to Read and Use Histograms
Luminance
Finally, to give your skin tones just a little more brightness you will want to locate the luminance sliders (look for the HSL panel, the L stands for Luminance). You will see a horizontal strip of buttons directly under the histogram on the right panel. The fourth one to the left is HSL/Grayscale, click on that button. After selecting that option, three tabs will appear. Click on the Luminance tab. Choose the orange slider, which is two down, and move it to the right. You will notice that this affects mainly the skin in your photo and leaves the other areas of the image untouched. The more you move it to the right, the brighter the skin will appear. Keep moving the orange slider back and forth until the skin is the brightness you prefer.
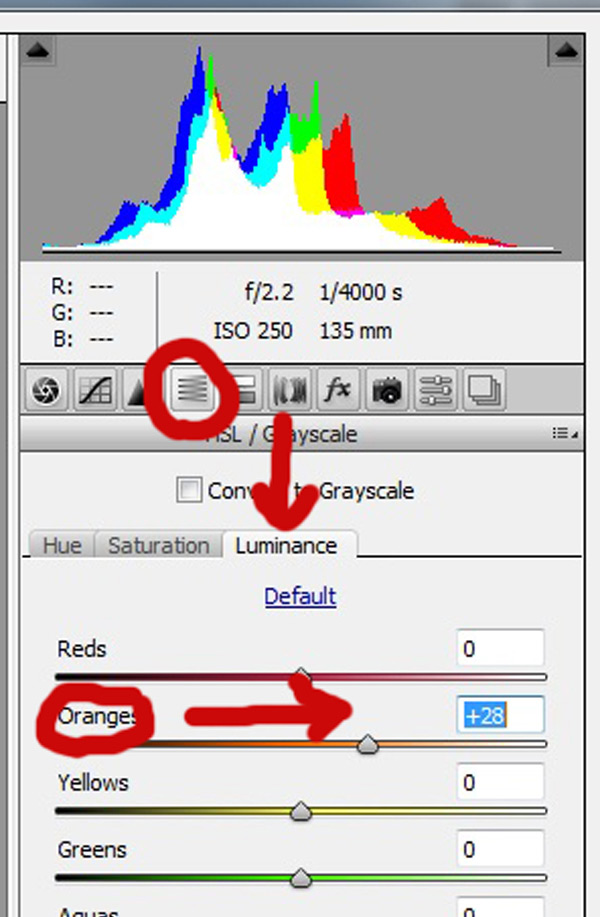


Once you have adjusted your RAW image using these three steps, you can open it up in Photoshop to do any fine tuning or adjustments on the remainder of your photo. Your skin tones, however, should already look great and need little, if any additional work.


Do you have any other tips for making great looking skin tones using ACR? Please share them in the comments below.
googletag.cmd.push(function() {
tablet_slots.push( googletag.defineSlot( “/1005424/_dPSv4_tab-all-article-bottom_(300×250)”, [300, 250], “pb-ad-78623” ).addService( googletag.pubads() ) ); } );googletag.cmd.push(function() {
mobile_slots.push( googletag.defineSlot( “/1005424/_dPSv4_mob-all-article-bottom_(300×250)”, [300, 250], “pb-ad-78158” ).addService( googletag.pubads() ) ); } );The post 3 Tips for Getting Great Skin Tones Using Adobe Camera Raw by Emily Supiot appeared first on Digital Photography School.
-
Buchtipp: One Day Young

Wie fühlt es sich an, wenn man gerade Mutter geworden ist? Die Fotografin Jenny Lewis hat das Gefühl in Bildern festgehalten. Sie portraitierte junge Mütter mit ihren Babys am ersten Tag ihres gemeinsamen Lebens.
kwerfeldein – Fotografie Magazin | Fotocommunity -
In a class of its own: Samsung NX1 review
Samsung’s NX1 seemed to offer pretty much every feature possible when we were first briefed about it last year. Its 28.2MP APS-C BSI sensor, hybrid AF system, 4K video and 15 fps continuous shooting with AF have continued to impress us throughout our extensive testing. Can such an innovative on-paper feature set make it a serious competitor to well-established brands in the DSLR and mirrorless worlds? Read review
-
Assembled in 3 Days: Biggest Cargo Container Restaurant in US
[ By WebUrbanist in Architecture & Offices & Commercial. ]
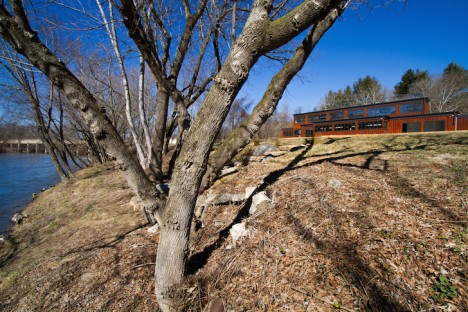
Comprised of 19 shipping containers, this record-breaking restaurant has reclaimed a riverside wasteland in the River Arts District of Asheville, North Carolina, turning a brownfield site into an eatery accessible by boats, buses, bikes, pedestrians and, of course, cars.

The Smoky Park Supper Club was put together in just a few days, its various modules modified offsite then shipped in by truck for assembly. The project’s architects boast that energy cost of melting down used containers is close to 20 times what it takes to simply adapt them for reuse.
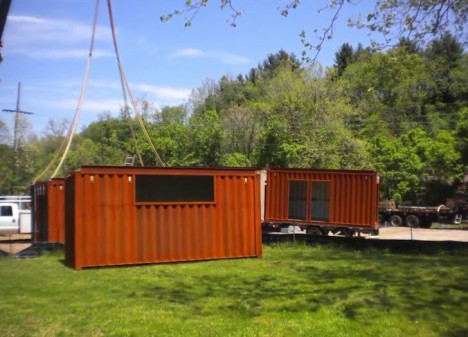
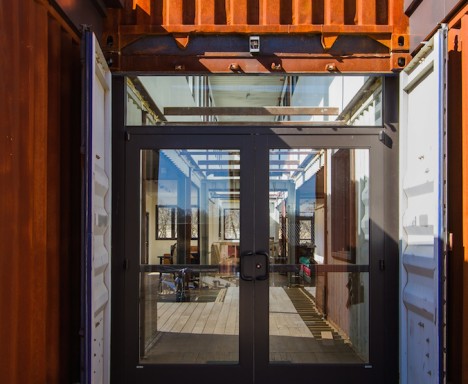
Aside from the cost and power savings, using cargo containers as building blocks makes them easy to transport and obviates the need for construction workers, material trucks and other traffic that can cause consternation in the neighborhoods through which the building pieces pass.
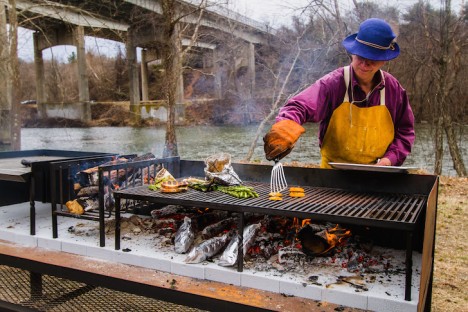
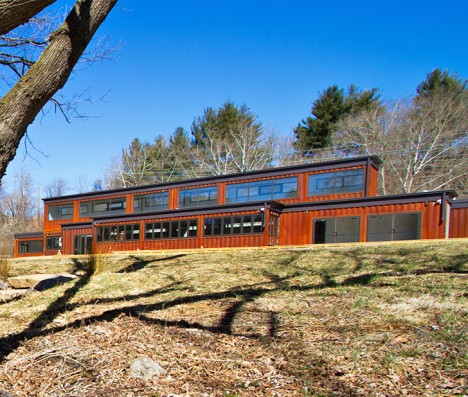
The restaurant itself features a “local farm-to-table menu built around wood-fired based cooking and classic American fare that chef Rosenstein describes as simple, direct, and live-fired.” It will also showcase local art.
Want More? Click for Great Related Content on WebUrbanist:
Crazy Cargo: 30 Steel Shipping Container Home Designs
Shipping container homes are the perfect blend of modern architecture and sensible green building. Buy your own used cargo container on sale and start building …
Click Here to Read More »»
10 Cargo Shipping Container Houses, Building Designs & Ideas
Shipping containers are becoming ever-more-popular sources of design inspiration in new architectural designs, from personal residences to big commercial …
Click Here to Read More »»
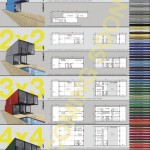
How To: Buy, Design or Build DIY Cargo Container Homes
A perfect example of thinking outside the box and living within one. – but what is really involved when buying, designing or building cargo container homes?
Click Here to Read More »»
[ By WebUrbanist in Architecture & Offices & Commercial. ]
[ WebUrbanist | Archives | Galleries | Privacy | TOS ]


