RSS
 

Archive for November, 2014

The Controversy Around Flickr Selling Creative Commons Licensed Photos

25 Nov

Douglas MacMillan has an article out in the Wall Street Journal today about the controversy surrounding Flickr selling prints of Creative Commons photos and not paying contributors for these images. It should be stressed that Flickr is only doing this on Creative Commons licensed photos where free commercial use is permitted by the license. If you license your photos Creative Commons Non-Commercial, this does not include you.

In the article he quotes Flickr founder Stewart Butterfield: “Yahoo’s plan to sell the images appears “a little shortsighted,” said Flickr co-founder Stewart Butterfield, who left the company in 2008. “It’s hard to imagine the revenue from selling the prints will cover the cost of lost goodwill.”

In addition to the Creative Commons photos that Flickr is selling and not paying photographers for use (legally), they are also handpicking other photos for this sales effort and here they are offering photographers 51% of the revenue on sales of these images who have agreed to participate.

My two cents:

I think it’s important that each photographer fully understand how the license that they are using with their photos online works. It is first and foremost the photographer’s responsibility to understand licensing. Creative Commons is a wonderful and liberal way to share your photos. It’s not for everyone though. You choose how your photos are licensed on Flickr though. By default Flickr licenses images “all rights reserved,” the most restrictive license available. So only photographers who have gone in and changed their license to a more liberal license would be affected by this.

I license my images Creative Commons Non-Commercial. This is one of several variations of the Creative Commons license. This means that people can use my images for personal use or non-profit organizations can use them, but folks like Yahoo/Flickr and others can’t sell them commercially without my permission.

If you are going to license your photos Creative Commons with no restriction, then you ought to be prepared for this type of use. If it’s not Flickr selling them, anyone else can, legally. If you are uncomfortable with this idea, then you should not use Creative Commons without any sort of restriction. If you like the idea of Creative Commons but are uncomfortable with commercial use without being compensated, then consider changing your license to Creative Commons Non-Commercial like I license mine.

I think a lot of people though don’t consider the full implications of the license that they choose and like Stewart I wonder if the revenue is worth potential lost goodwill in this case. Some people will inevitably be put off when they see that the community (and Flickr is as much a community as a company) that is hosting their photos for them is now selling them without sharing the profit or asking for permission. Reminding people to read the fine print of their photo license that they chose without really considering it thoughtfully might not be the best answer to that complaint. People on Flickr LOVE to complain about anything and everything.

I think Flickr does have to figure out how to pay for a free terabyte of storage for every user and maybe this is one way to do that.

I haven’t been asked to participate in the online print marketplace, but if I was and was offered a 51% payout, I’d probably say yes. Anything 50% or better feels pretty fair to me. I create the image, but Flickr is driving the traffic to it for sale and handling fulfillment, etc. If I were to have a physical gallery sell my works, I’d probably be looking for a similar cut.

The idea of selling Creative Commons images and getting to keep all of the money is interesting to Yahoo I’m sure, but maybe Flickr would be better off instead focusing on more of a total revenue share model for the entire effort and treating CC images like they treat CCNC and all rights reserved images. I bet people who license their work CC would be pleased if their images too were handpicked for inclusion and they got paid for use. Even if it were a small amount, it would be a positive affirmation to them about their photography and that would feel good.


Thomas Hawk Digital Connection

 
Comments Off on The Controversy Around Flickr Selling Creative Commons Licensed Photos

Posted in Photography


Abenteuer Island – in zwölf Tagen um die Insel

25 Nov

Ein Beitrag von: Julia Wengenroth

Am 10. Juni war es endlich soweit: Ich erfüllte mir einen großen Traum und flog mit meinem Freund nach Island. Schon der Anblick der Insel von oben während des Anflugs ließ meine Freude ins Unermessliche steigen. Zwischen dicken Wolken konnte man die Ringstraße erkennen, grüne Täler und erstarrte Lavafelder.

In Reykjavik angekommen, mieteten wir uns einen Camper, der uns die nächsten zwölf Tage einmal um die Insel bringen und gleichzeitig unser Schlafplatz werden sollte.

Eine Straße vor wolkigem Himmel

Wasserfall

Am ersten Tag nahmen wir uns den Golden Circle vor. Die drei bekanntesten Sehenswürdigkeiten dort sind der Nationalpark Pingvellir mit seinem breiten Grabenbruch, der durch die auseinanderdriftenden Kontinentalplatten entstanden ist, der Geysir, eine emporschießende heiße Quelle und der donnernde Wasserfall Gullfoss.

Nach den fantastischen und surrealen Eindrücken des ersten Tages schliefen wir im Camper wie zwei Steine, obwohl die Sonne nachts nicht unterging und ein magisches Licht über dem Land lag.

Am nächsten Tag hatten wir uns etwas ganz Besonderes vorgenommen: Wir fuhren zum Skógafoss, einem Wasserfall, der über zerklüftete Felsen rauscht. Hier kam dann auch mein Graufilter erstmals zum Einsatz. Ich hatte mir den Big Stopper von Lee extra für diese Reise gekauft und war direkt nach den ersten Testaufnahmen mehr als begeistert.

Ein weißes Häuschen in karger Landschaft

Wasserfall

Als ich genug Bilder im Kasten hatte, machten wir uns auf die Suche nach einem abgestürzten Flugzeug. Schon zu Hause hatte ich davon gehört und wollte dieses Flugzeugwrack unbedingt finden. Wir hatten lediglich eine ungefähre Beschreibung seiner Position.

Das Problem war nur, dass wir irgendwann die befestigte Straße verlassen mussten. Wir bogen also mit unserem Camper an irgendeiner Stelle ab und fuhren kilometerweit auf unbefestigtem Untergrund und ohne Orientierungspunkte ins Nirgendwo.

Nach einer gefühlten Ewigkeit, unzähligen Bodenwellen und Schlaglöchern sahen wir am Horizont etwas Weißes aufblitzen. Da war es, das Flugzeugwrack – die Douglas C117-D, ein Militärflugzeug der US Navy, das 1973 notlanden musste und seitdem einsam in dieser stürmischen Küstenlandschaft liegt.

Flugzeugwrack im schwarzen Sand.

Schwarzer Strand.

Dann ging unsere Reise weiter nach Dyrhólaey und Vík í Mýrdal. Als wir dort ankamen, hingen über dem Ort mit gerade mal 296 Einwohnern dunkle, schwere Wolken. Der heftige Wind peitschte uns den Regen ins Gesicht.

Obwohl ich ständig die Regentropfen von meinem Objektiv wischen musste, war die Stimmung perfekt für die Fotos, die ich machen wollte. Der schwarze Lavastrand mit den Reynisdrangur-Felsnadeln im Hintergrund war wunderschön und der Ausblick hoch oben vom Felsplateau atemberaubend.

Verlassenes Haus.

Ein weißes Häusschen auf schwarzem Strand.

Wir fuhren weiter die Ostküste entlang, vorbei an unwirklichen Mooslandschaften, riesigen Gletschern, versteckten Wasserfällen und wunderschönen Lupinenfeldern. Häufig sahen wir auch zurückgelassene Häuser, die ebenfalls wunderbare Motive darstellten.

Kurz vor der Stadt Seydisfjördur hielten wir am Wasserfall Gufufoss. Hier konnten wir in Ruhe einige Fotos schießen, denn der Ort war menschenleer.

Frau sitzt auf einem Stein vor einem Wasserfall.

Auf unserem Weg Richtung Norden machten wir noch einen Abstecher zum größten Wasserfall Europas, gemessen am Volumen – dem Dettifoss. Der Weg dorthin war so holprig, dass wir selbst bei 30 km/h das Gefühl hatten, dass unserem Camper jeden Moment das Fahrwerk wegbrechen würde.

Schmaler Wasserfall zwischen schwarzen hohen Felsen.

Mann mit roter Jacke vor einem Wasserfall.

Doch nicht nur der Dettifoss mit seinen gewaltigen Wassermassen war sehr beeindruckend. Auch der Selfoss, ein paar Kilometer oberhalb des Dettifoss, war die teils schwierige Wanderung dorthin absolut wert.

Breiter Wasserfall.

Einer der bizarrsten Orte war Mývatn und Krafla im Norden Islands. Krafla, eine aktive Vulkanzone, ist übersät mit Dampffontänen, brodelnden Schlammtöpfen, neonfarbenen Kratern und aquamarinblauen giftigen Seen. Die Gegend ist voll von Fliegen und Mücken, die der starke Schwefelgeruch anzieht.

Wanderer vor einem Berg aus rotem Sand.

Wir ließen es uns natürlich auch nicht nehmen, ein paar Stunden im milchig-blauen warmen Wasser des Naturbades Mývatn zu entspannen. Eine echte Alternative zur berühmten und sehr überfüllten Blauen Lagune in Reykjavík.

Mit dem Wetter hatten wir an diesem Tag großes Glück: Strahlender Sonnenschein mit Temperaturen um unglaubliche 26 Grad. In Island wahrscheinlich eine echte Seltenheit, da die Durchschnittstemperaturen im Juni eher bei zehn bis 14 Grad liegen. Das Wetter kann sich hier im Fünf-Minuten-Takt ändern.

Mann in milchigem Wasser.

Den letzten großen Wasserfall, den ich auf unserer Reise durch Island fotografieren wollte, war der Godafoss – der Wasserfall der Götter. Er trägt seinen Namen zu Recht und gehört zu den schönsten Wasserfällen des Landes.

Wasserfall

Unser Weg führte uns weiter zur Halbinsel Snaefellsnes. Dort besuchten wir in Búdir die älteste Holzkirche Islands. Die schwarz geteerte Kirche liegt neben dem Lavafeld Budahraun und wurde im Jahre 1703 erbaut.

Auch sonst hat Snaefellsnes viel zu bieten. Raketenartige Leuchttürme, dramatische Meeresklippen und grüne Fjorde bilden die faszinierende Landschaft der Halbinsel.

Schwarze Kirche

Felsige Küste

Die Reise nach Island war ein großartiges Erlebnis. Die Insel ist ein wundervoller Ort, um sich fotografisch auszutoben. Es war so beeindruckend, dass wir mit Sicherheit noch einmal nach Island reisen werden, um den Rest dieses Eilands zu erkunden.

Beim nächsten Mal nehmen wir uns das Hochland und die Westfjorde vor, denn auch dort gibt es sicher wieder fantastische Motive. Ich zähle schon jetzt die Tage.


kwerfeldein – Fotografie Magazin | Fotocommunity

 
Comments Off on Abenteuer Island – in zwölf Tagen um die Insel

Posted in Equipment


25. November 2014

25 Nov

Ein Beitrag von: Ronny Garcia

Portrait: Ein Mann wird von feuer-rotem Licht angeleuchtet.


kwerfeldein – Fotografie Magazin | Fotocommunity

 
Comments Off on 25. November 2014

Posted in Equipment


Tape Tunnels: Crawl Inside a Human-Sized Spiderweb in Paris

25 Nov

[ By Steph in Drawing & Digital. ]

Tape Paris 3

Stretching from one end of the Palais de Tokyo gallery in Paris to the other, these strange translucent tunnels look like human-sized versions of the funnel-shaped webs of grass spiders. Instead of helplessly trapped insects, you’ll find people crawling around inside, their weight supported by nothing more than layer after layer of sticky tape and plastic.

Tape Paris 2

Tape Paris 7

Tape Paris 9

Tape Paris is the latest interactive art installation by Croatian-Austrian design collective Numen/For Use, described as a “stretched biomorphic skin” suspended halfway between the floor and ceiling of the gallery’s main hall. The designers see it as a “site specific, parasitical structure invading an arbitrary location.”

Tape Paris 5

Tape Paris 1

Tape Paris 7

Visitors are invited to climb inside, navigating tunnels that vary in height to enable standing at some points but require crawling at others. Those inside can gaze down at the hazy shapes of onlookers below. The basis of the installation is criss-crossed Scotch tape which is reinforced on the outside with an elastic plastic sheeting.

numen:for use string installation

numen:for use bounce house

In addition to other tape structures, Numen/For Use is known for inhabitable string and net installations including a gridded ‘social sculpture’ modeled after dadaist collages and suspended nets inside a massive inflatable bubble forming a sort of adult-sized bounce house.

Share on Facebook


[ By Steph in Drawing & Digital. ]

[ WebUrbanist | Archives | Galleries | Privacy | TOS ]


WebUrbanist

 
Comments Off on Tape Tunnels: Crawl Inside a Human-Sized Spiderweb in Paris

Posted in Creativity


Getting to Know Your New Camera

25 Nov
Get to know your new camera

With my new camera I can set Film Simulation to black and white and the camera gives me a black and white view in the electronic viewfinder. I can also select the square format and see a square image. This is a great aid to composition. Finding and using helpful features like this is part of getting to know your new camera.

I recently purchased a new camera and the process of learning to use it has been a good reminder of just how long the process can take. My new Fujifilm X-Pro 1 is a very different machine from the Canon EOS digital SLRs I’m accustomed to using, and it’s taken me a while to find my way around the layout and menu.

Based on my experience, here are some tips for getting to know your new camera. Most of these will apply if your new camera is from the same manufacturer as one you already own.

Read the manual

This one’s fairly basic – you can learn a lot about your camera from its manual. Even if your approach is to learn by using the camera, there are still times when you need to look up things you can’t figure out yourself. You could also buy a book or ebook about your specific camera. These are usually written by photographers who know the camera well and give plenty of tips for getting the most from it, including things not mentioned in the manual.

Shoot at high ISOs

Newer cameras have fantastic high ISO performance and it’s worth spending some time shooting in low light at your new camera’s high ISO settings. Then look at the results on your computer to determine the highest ISO setting you are happy to use. Remember, the amount of noise you will see depends as much upon your subject as the camera. If your subject contains lots of textured surfaces or light tones you’ll see less noise than if it contains dark tones or large areas of sky.

Get to know your new camera

This photo was taken at dusk at ISO 6400 on my new camera.

Get to know your new camera

This is a 100% magnification view (taken from the bottom of the previous image). You should look at your high ISO photos at 100% magnification to see how noisy the image is. Only you can decide which settings have too much noise.

Shoot in tricky lighting situations

The aim of this exercise is to learn how your camera’s meter reacts in different lighting situations. While metering modes such as centre-weighted and spot metering should work in much the same way on most cameras, you may find a larger difference in the way that evaluative metering* modes work.

Evaluative metering is where your camera takes exposure readings from multiple areas of the frame (usually weighted in priority towards the active autofocus point) and then decides on the appropriate exposure according to a formula known only to the manufacturer. If the maker of your new camera uses a different formula to the maker of your old one, then both cameras may give different exposure readings for the same subject. Therefore it’s helpful to take some photos in tricky lighting situations to learn how your new camera copes with each of them.

*Evaluative metering is the term used by Canon and Sigma. The same mode is called Matrix metering by Nikon, Multi segment metering by Sony and Pentax, Multi metering by Fujifilm and digital ESP metering by Olympus.

There are three basic scenarios that can give your camera problems:

Backlighting: With backlit photos, you need to decide whether you want to expose for the subject (burning out the background), the background (turning the subject dark) or somewhere in between. Only you can decide, and your camera’s evaluative metering may be weighted towards one option or the other. Test your camera with some backlit subjects to see how it reacts. Another function of this test is to learn how well your camera’s sensor renders blown out highlights.

Subjects with predominantly light tones: Cameras tend to underexpose this type of subject. Experiment with exposure compensation to see how much you need to increase the exposure when taking photos of light toned subjects.

Subjects with predominantly dark tones: Cameras tend to overexpose this type of subject. While this type of subject isn’t as common as light toned subjects, if you come across one you can experiment to see just how much you need to adjust the exposure compensation dial to make up for the camera’s tendency to underexpose.

These last two concepts are explained in more detail in my article Why Your Camera’s Meter Gets Exposure Wrong.

Get to know your new camera

This is a good example of a dark toned subject that may fool your camera’s meter into overexposure. The only way to see how your camera responds is to test it.

Find the limits of your camera’s autofocus

One of the biggest differences between various cameras is autofocus. Every manufacturer approaches autofocus differently. Some cameras are designed to focus accurately on fast moving subjects, some are not. Some cameras have more autofocus points than others. Some cameras use phase detection autofocus, some use contrast autofocus, some use a combination of both.

The best way to learn about the autofocus system on your camera is to start by reading the manual, then searching online for good articles written by photographers using your specific model.

Then test your camera. How do you switch between autofocus modes? How do you move from one autofocus point to the other? How reliable is your camera when taking photos of moving subjects? You will only learn these things by testing and using your camera.

Get to know your camera’s menu

If your new camera is made by a different manufacturer than your old one, the menu system will be different. You need to spend time familiarizing yourself with the menu, and the functions that are relevant to the types of photography you do. Otherwise you may find yourself in the field searching for a certain setting and missing the opportunity to take a photo as a result.

Get to know your new camera

The menu on my new camera is completely different from that on the EOS cameras I’m accustomed to using. Until you’re familiar with a new menu system, it may take you much longer to find certain settings.

Familiarize yourself with your camera’s layout

Take some time to learn where all the buttons are on your camera. Do any of them have functions that are not immediately obvious? For example, on my X-Pro 1 it took me ages to work out how to activate Live View (there isn’t a button labelled Live View). Ideally, you should be able to find your way around all the important buttons and dials with your eyes closed, so you can use your camera without thinking when you take photos. Naturally, this level of familiarity takes time.

Get to know your new camera

The dials and buttons on my new camera are also very different from those on my EOS cameras.

By the way, if you bought a new lens with your new camera, you may also find my article Getting to Know Your Lenses useful.

Your turn

This is not an exhaustive list of ways to get to know a new camera, but it’s a good start. What other suggestions can you make, based on your own experience? Please let us know in the comments.


Mastering Photography

Composition and line
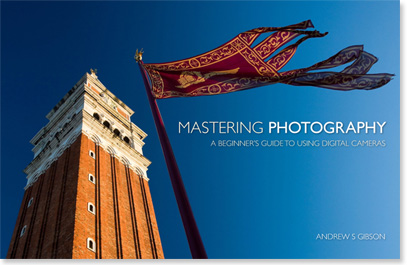
My latest ebook, Mastering Photography: A Beginner’s Guide to Using Digital Cameras introduces you to digital photography and helps you make the most out of your digital cameras. It covers concepts such as lighting and composition as well as the camera settings you need to master to take photos like the ones in this article.

The post Getting to Know Your New Camera by Andrew S. Gibson appeared first on Digital Photography School.


Digital Photography School

 
Comments Off on Getting to Know Your New Camera

Posted in Photography


Forbidden Islands, Part I: 7 Isolated and Abandoned Wonders

25 Nov

[ By Steph in 7 Wonders Series & Travel. ]

Strange Islands North Brother 1

From a mile-long strip of land packed with over one million corpses just off the shores of New York City to a floating fortress in England used by a developer to escape his creditors, these 7 islands are among the world’s strangest. While the exact histories of some can only be speculated upon, like Japan’s formerly top-secret chemical weapons facility and Mexico’s wildly creepy Island of the Dolls,  each of these mysterious islands has a fascinating story to share.

Poison Gas Island Now Overrun with Rabbits

strange islands rabbit 1 strange islands okunoshima strange islands okunoshima 2

Suspecting that the United States and Europe were producing chemical weapons despite signing the Geneva Protocol banning chemical warfare in 1925, Japan decided to move forward with developing some of its own, claiming a tiny isolated island that they subsequently removed from maps. Workers at the chemical weapon facility producing mustard gas and tear gas weren’t even clued in to what they were creating, and many of them suffered from toxic-exposure related illnesses. When the Russo-Japanese war ended in 1929, documents relating to the plant were destroyed, and the gas was dumped or buried.

Today, the island is home to the Okunoshima Poison Gas Museum – but that’s not what draws most of the tourists who visit the island, which is now part of the Inland Sea National Park system of Japan. It’s the thousands of rabbits that have multiplied there, leading to the nickname ‘Rabbit Island.’ Some people speculate that these rabbits are the descendants of animal testing subjects that were let loose after World War II, but as the rabbits have few natural predators to fear on the island and hunting them is forbidden, it may just be a case of stereotypical rabbit reproduction rates.

North Brother Island, New York
Strange Islands North Brother 1

Strange Islands North Brother 2

Strange Islands North Brother 3

Strange Islands North Brother 4

Visible to anyone who cares to notice from the windows of airplanes landing at LaGuardia Airport, the creepy abandoned North Brother Island is nonetheless unknown to most New Yorkers. The dilapidated remains of brick structures can be spotted through a tangle of vines in the overgrown forest that has sprouted around them since they were left to decay a half-century ago. The island was established as a New York City quarantine hospital in 1885, and was home to the infamous Typhoid Mary, the first American identified as a carrier of typhoid fever. Later, the island became a rehab center for teenage drug addicts before it was decommissioned in 1963. Invasive kudzu vines soon took over. Due to its proximity to Rikers and the fragility of its structures, the island is permanently closed to the public, but occasional visitors still get in. These incredible images were taken by photographer Christopher Payne for his book, North Brother Island: The Last Unknown Place in New York City.

New York Island is a Cemetery for Unknown Individuals

Strange Islands Hart 1

Strange Islands Hart 2

Strange Islands Hart 3

As beautiful and creepy as North Brother Island may be, it’s hardly the only isolated island with a sad story that can be found within a stone’s throw of America’s most populated city. Located in the Long Island Sound, Hart Island was used as a Civil War prison camp, with 235 prisoners dying there. Later, the island became the setting of a hospital, a women’s insane asylum, a tubercularium and a corrections facility for boys. But unlike many islands with such a past, this one has not been converted into a memorial, nor has it been entirely left to ruin: it is the final resting place of the city’s unknown or unclaimed dead. Used as New York’s Potter’s Field, the mile-long island holds the remains of more than one million individuals, with about 1,500 bodies (and many more amputated body parts) buried there each year. The historic buildings on the island are being torn down to make room for additional burials, which are conducted by Rikers Island inmates.

Isla de las Munecas: Mexico’s Creepy Doll Island
Strange Island Dolls 1

Strange Islands Dolls 2

Strange Islands Dolls 3

The eyes of decapitated dolls blink lazily from their perches in the trees on Mexico’s Isla de las Munecas – ‘Island of the Dolls.’ There’s something undeniably terrifying about seeing what look like naked infants – sometimes remarkably realistic – clinging to the branches or dangling from their necks. Legend has it that after a little girl drowned in Teshuilo Lake, island resident Don Julian Santana began collecting dolls and installing them in the trees. Eventually, their numbers grew into the hundreds. Santana often sourced the dolls from the trash or traded produce for them, taking them in any condition, no matter how dirty or worn. While many people viewed the doll-infested island as something out of a nightmare, to him it was a shrine. Tragically, in 2001, Santana was discovered drowned in the same area of the lake where he believed the little girl had perished.

Next Page – Click Below to Read More:
Forbidden Islands Part I 7 Isolated And Abandoned Wonders

Share on Facebook


[ By Steph in 7 Wonders Series & Travel. ]

[ WebUrbanist | Archives | Galleries | Privacy | TOS ]


WebUrbanist

 
Comments Off on Forbidden Islands, Part I: 7 Isolated and Abandoned Wonders

Posted in Creativity


Panasonic DMC-CM1 to go on sale in UK

25 Nov

Panasonic has announced that its DMC-CM1 ‘compact camera with smartphone technology’ will be sold in the UK. Originally the company had marked out France and Germany as the only countries to get the device, but citing ‘high demand’ it has included a limited number of UK stores to stock it. Read more

Articles: Digital Photography Review (dpreview.com)

 
Comments Off on Panasonic DMC-CM1 to go on sale in UK

Posted in Uncategorized


How to Make Freckles POP or Disappear using Lightroom

24 Nov

Editing Freckles in Lightroom

One photo, edited completely in Lightroom

One photo, edited completely in Lightroom

digitalphotographyschool-1-9

I recently photographed a model in New York City. As I was communicating with her leading up to the shoot I noticed in some of her pictures that she had freckles. I personally am a big fan of freckles and wanted to do a shoot that highlighted her skin rather than hide it behind makeup or photoshop tricks. One of my favorite photos that came out of the shoot was this one, cropped close to highlight her eyes and skin:

digitalphotographyschool-1-2

After I posted the photo above on Instagram I was emailed by someone asking me what process I used to get that gritty look. I’m here to share my secrets and show how you can achieve this look in less than 30 seconds with Lightroom, every time.

First off, here is what the original looked like, straight out of the camera:

digitalphotographyschool-1-3

I shoot in RAW to make sure I have enough information to work with. All the freckles are there in the skin, which you can see lightly showing up in the original photo.

Step One: Convert to Black and White

The first step is to convert your image to black and white by selecting “B&W” in the develop panel of Lightroom, or using the shortcut key “v.”

Now I have something that looks like this:

digitalphotographyschool-1-4

Step 2: Adjust Red and Orange Sliders

Still not seeing the freckles, right? Under B&W in the develop module in Lightroom you should see “Black and White Mix” and a column of sliders beneath it with all the colors of the rainbow. These allow you to control the original colors in the photo, within the black and white mode.

Knowing that freckles and skin blemishes are typically orange/red in nature, you will be playing with the orange and red sliders only. You get to decide how far you want to push them, making your subject more or less intense looking.

digitalphotographyschool-1-5

That’s about it, actually. You’ve just enhanced the freckles in your photo. Congratulations! If you want to give it even a little more pop, try this with your tone curve and exposure sliders:

editing_freckles_dps

The last thing I did to the picture was use the Adjustment Brush (k) to bring the highlights down on the hood of her sweater, which I felt was too bright for the photo. Then I used the Adjustment Brush to brighten the eyes a bit using the Dodge (Lighten) effect.

digitalphotographyschool-1-2

Voila! This is equally impressive in color. You just need to adjust the Color sliders Red and Orange:

digitalphotographyschool-1-7
I would love to see what you do with photos of your children or self-portraits using this technique. And if you are someone who really wants to get rid of freckles, you can basically reverse the the effect by pulling the same sliders to the right instead:

digitalphotographyschool-1-8

Please post your examples below!

The post How to Make Freckles POP or Disappear using Lightroom by Phillip VanNostrand appeared first on Digital Photography School.


Digital Photography School

 
Comments Off on How to Make Freckles POP or Disappear using Lightroom

Posted in Photography


F-Stop Tilopa BC Backpack Review

24 Nov

I have to shamelessly admit that I, as are many other photographers, am a camera bag junkie. Maybe the reason behind it is that I was never able to find the perfect fit for my needs. Granted, different situations or travel circumstances may require different type of bags. It’s not the same to go out for a walk in your neighborhood as it is to go on an overseas trip. As I mentioned in one of my prior posts, I am a big believer in going light. During the years I have purchased, used, tested, abused and torn apart all kinds of bags. But only up until now, as I believe I have found my perfect travel companion, the bag that will perfectly suit almost any kind of adventure: the Tilopa BC by F-Stop.

Tilopa_BC_Front_Profile

I have used F-Stop products before, specifically the Kenti Backpack, and their quality was excellent. As I was about to travel for three weeks in Southeast Asia, including heavy trekking portions in northern Vietnam, I needed something bigger than the Kenti, a bag capable of transporting my gear, including computer, chargers, and essential clothing for two to threee days at a time. I needed something versatile.

I went back to F-Stop because I was satisfied with my other bag. They have a different approach when it comes to building their products, which are rigorously tested by their team of pro photographers. It’s a concept that allows the company to permanently have field feedback straight from working hardcore users. One of the key elements for me is the flexibility available to build a system. The backpacks consist of two components: the backpack itself, and the Internal Camera Unit, called the ICU. In a nutshell, once you pick the backpack that suits you best, then you can configure the interior in several different ways depending on your needs. This is a big plus, as one bag can be used for different situations.

The Tilopa BC

I chose this bag because at 48 liters, it was big enough to carry all my gear and yet be very carry-on friendly. The dimensions are generous and can be configured in several ways. I have also picked up the Small Pro and Medium Slope ICU with the idea that if I needed a full bag of gear I could throw both in, and if I only needed a regular or small kit I could use just one of the ICUs.

techspecs-tilopa_03

The backpack is constructed with durable, water-resistant materials and features, double Ripstop Nylon with Polyurethane coating, YKK® heavy-gauge zippers, Duraflex® buckles, and Eva-padded shoulder straps and hip belts. There is also an internal aluminum frame support that helps to better distribute heavy loads.

Besides the internal ICU, there are several pockets and options to organize either accessories or essentials for a day out. The top lid features a separate pocket where you can store smart phones, extra batteries, headsets, travel documents, etc. There is also a mesh compartment in the interior side of the lid. A big front panel pocket can be used for extra layers or even a light jacket. The internal padded computer sleeve can fit a laptop up to 18”; there are also two smaller pockets (not padded) on the side that I’ve used to throw in hard drives.

If you carry a tripod, it can be mounted either on the front or the side of the bag using the multiple quick-release straps. These straps are very handy as the ones at the sides also allow for side compression, making it possible to adjust depth when the backpack is not full. Last, the pack also features the ability to attach multiple accessories as it is compatible with the MOLLE, an international standard used by other third-party add-ons companies and, of course, F-Stop itself. It also packs several bungee cords and two D-rings as additional mounting points for small accessories.

F-Stop Tilopa BC bag with tripod attached at the front and accessory attached to the side via the MOLLE system

F-Stop Tilopa BC bag with tripod attached at the front and accessory attached to the side via the MOLLE system

Tilopa BC Detail

In Practical Use

I put the backpack through its paces during the three-week trip and it didn’t disappoint me. Despite being loaded, it was very easy to carry and the weight was well distributed. Over 10-mile treks in the mountains? No problem. Carry on in international or regional jets? Not a problem.

One of things that I particularly like about the bag is that the camera gear is accessed via the back panel, so the equipment is secure, but you can also access the main compartment via the top opening as well, making it very practical.

20141012_untitled_0004-Edit

As I was taking my Fuji X kit, I outfitted the pack with just the Medium Slope ICU, and as you can see there was plenty of room left in the main compartment to carry other personal stuff. I put my cleaning stuff, extra caps, regular batteries and cables on the interior mesh pocket of the lid. My laptop (not shown here) and paper model releases were in the computer sleeve.

20141012_untitled_0005-Edit

20141012_untitled_0003-Edit

The gear goes into the ICU; depending on your liking, you can either carry the internal ICU with the lid closed or open. My choice was to have it closed as it felt more secure having an extra layer of protection. The zippers are easy to access anyway, and it takes no time to open it and close it once you are in the field.

20141012_untitled_0006-Edit

The Medium Slope ICU is roomy and can fit my kit very well. I have two camera bodies, six lenses, a flash, wireless triggers, grids, batteries, SD cards and a GPS tracker.

20141012_untitled_0008-Edit

This is a bag I’ll continue to use on my travels as it is versatile, can be configured in several ways, and it really looks great.
I have picked mine in Foliage Green, but you also have two more color options: Black and Malibu Blue. The price starts at $ 339 for the bag itself, a bit pricey, but when you consider the quality of the materials, construction, versatility, and the manufacturer’s 20-year warranty, the Tilopa BC becomes an excellent option for the hardcore photographer.

The post F-Stop Tilopa BC Backpack Review by Daniel Korzeniewski appeared first on Digital Photography School.


Digital Photography School

 
Comments Off on F-Stop Tilopa BC Backpack Review

Posted in Photography


It’s Here! Gift Guide 1Six NEW Photo Gifts

24 Nov

The holidays snuck up on you a bit last year resulting in some less than stellar “gifts”… a stocking stuffed with actual socks and canned fruit?

Get a jump on things now and grab the stuff your friends and fam really want!

Take a gander at these 6 six brand new photo goodies (and a few old faves) we hand-picked to maximize your gift giving glory this year.

See Photojojo’s Gift Guide #1 of 2014 (…)
Read the rest of It’s Here! Gift Guide 1
Six NEW Photo Gifts (0 words)


© laurel for Photojojo, 2014. |
Permalink |
No comment |
Add to
Six NEW Photo Gifts”>del.icio.us

Post tags:


Photojojo

 
Comments Off on It’s Here! Gift Guide 1Six NEW Photo Gifts

Posted in Equipment