
A stitched panorama in a city can make a great scene!
Many of us live in cities nowadays, in fact almost 80% of the world’s population lives in, or near, a large city. While it is fantastic to be out in nature, photographing the remote seascape scenes or the snow capped mountains, that is not possible for most photographers, everyday. That might mean that you don’t photograph for weeks at a time. As you probably know by now, to make big improvements in your photography you need to practice, practice, and practice some more.
Living in a city has its own scenes that are great to photograph, this is why street photography is such a popular genre of photography. These urban landscapes can not only be interesting, but you can make some very powerful images in an urban or city setting. Here are some pointers on how to create amazing urban landscape and street photography images.
1. Urban landscapes are the same as rural landscapes
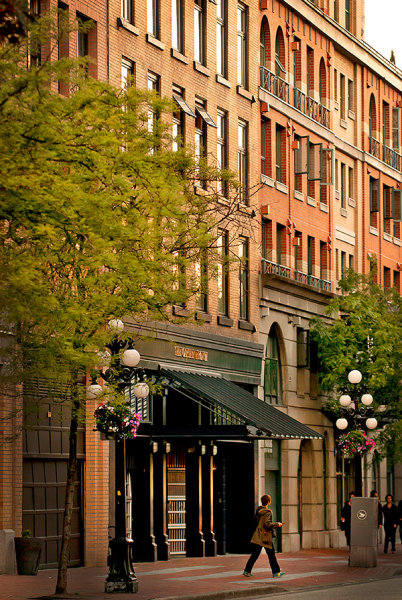
Ok, not visually maybe, but in the way you approach them. In traditional landscape photography you will use a leading line to draw the eye into the scene. You will make sure that there is foreground interest that holds the viewers eye. You will use composition guidelines to set up your shot. This is all true for urban landscapes too. Visually design your scene as you would when you photograph a landscape scene. Be sure that the scene has a good background, a strong mid ground and a compelling foreground. This is not a rule, but it will help when you set up your shot.
2. The mundane becomes unusual
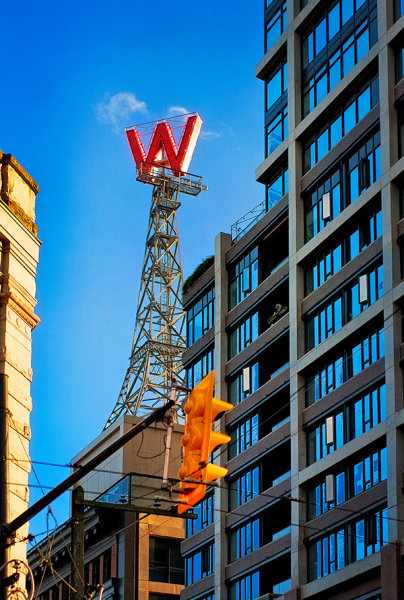
We have all seen pretty much all the objects in a city. The fire hydrants, the mailboxes and the scenes all look familiar to us city dwellers. In urban landscapes it’s not only about the architecture or the street scenes, it is about making those well know objects look different or interesting. Think of the time of day that you photograph. Late afternoon sunlight, warm light can make a fire hydrant or mailbox look somehow magical. Graffiti can look gritty, textured, and interesting in the soft light. Look at how you can change the angle or lines in a normal scene. Come from a different angle and see how that change makes all the difference to making mundane objects seem different.

Look for a way to make mundane scenes look different
3. Textures and close up
Every city has literally thousands of different textures, including: walls of buildings, cobbled streets, paved walkways, wooden walkways, benches, grass, the list goes on. Each of these surfaces has texture which are great for urban landscape photography. To emphasize texture, you will want to be shooting in side light conditions. The side light will emphasize the granularity of the surface of the street, or the grain in the wooden bench. Textures can be a whole theme on their own. Think of the textures on the sidewalks, the brick walls, the concrete buildings, the glass surfaces (reflections are amazing too).
Try this, go out into your city and try and shoot 24 photographs of different textures, at different times of the day. The range of different images will amaze you, and it will open up your eyes to what is possible when you focus on just one theme. Secondly, try and isolate some subjects in the scene. Get in closer to what you are shooting. By doing this, you will isolate part of the scene and make it look more intriguing.
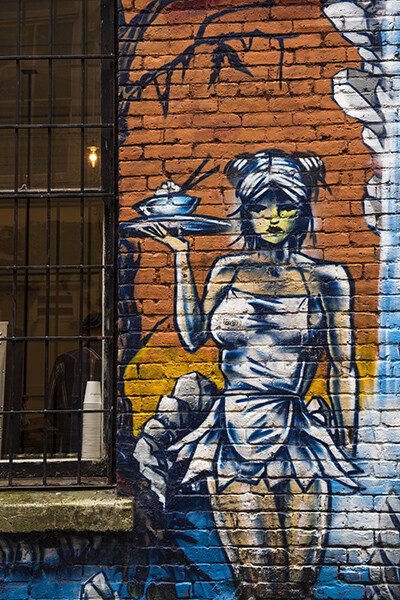
This graffiti art looks amazing, but the textures and grittiness make the image more impactful
4. Use colour
We all photograph in colour nowadays, and then convert that image to black and white (if you don’t, you should!) but shooting for colour in your city can be a lot of fun. Decide on a colour you want to photograph and go out and look for all the different scenes you can find that contain your colour. To make it more challenging, try and isolate that colour to make 80% of your image the chosen colour. This will help you see beyond subjects and look at colour in a whole new way. You can also try and get the different colours in a scene into a cohesive arrangement, your primary colours (reds, yellows and blues) will be immediately powerful in a shot. A fire hydrant can become more interesting because of the redness of it. A blue wall becomes an abstract image, colour is a good theme to use in your urban images.
Vibrant colours can make your image pop!
5. Photographing people
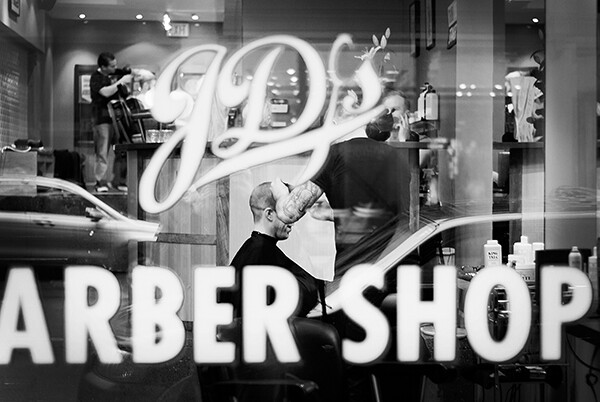
Cities are built for people, there are lots of them in any city. It is always fun to see how people interact with the city. Do they use the park benches, do they take time to look around them in the city or do they simply march on to work. Look for opportunities to capture photos of people doing everyday stuff, but try and find a great backdrop to shoot against. A graffiti wall or a moving bus can make the perfect setting, good architecture too! Always be aware of people’s reaction to being photographed. I generally try and photograph people when they are not camera aware. If they spot me taking the shot, I will walk over to them, show them the image and explain why I shot it. Sometimes, people are not happy to be photographed, be respectful of this and be friendly. It’s amazing what a smile and a relaxed attitude can do.
Use the city buildings as a backdrop to the people in the image
Your turn
Photographing in your city can be fun. Of course, always be aware of your surroundings. Be careful not to step off the sidewalk into the street without looking at the traffic (trust me, this happens). Also, be aware of where you are wandering. You may have innocently wandered into the “rough” neighbourhood which might be a bad idea with a large SLR around your neck.
Apart from being aware of your safety, photograph with abandon. Try and capture the essence of the city. Try and photograph the well known places in a new and fresh way. Above all, get out and photograph. As I said earlier, it may not always be possible to go out and shoot in some amazing natural setting, but you can get some really great images just outside your front door, in your home city.
Here is a fun exercise, choose a time to go out and get some urban shots. Select a theme and shoot five images, choose another theme and shoot another five, and so on. Once you have done this a few times, upload your favourite image to the comments below and let’s see how creative the shots are. I look forward to seeing your city through your eyes!
Look for refections, shapes and everyday life!
The post How to Create Amazing Urban Landscape and Street Photography Images by Barry J Brady appeared first on Digital Photography School.


 Extra photos for bloggers: 1, 2, 3


 When you purchase The Essential Guide To Black And White Photography you’ll also receive a free copy of 10 Recipes for Amazing Black And White Photography.
You must be logged in to post a comment.