RSS
 

Archive for August, 2014

Der geheime Garten

18 Aug

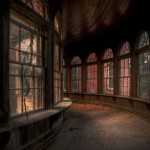
Miriam Wuttkes geheimer Garten ist eine ehemalige Kleingartenkolonie in Neukölln, die nach über siebzig Jahren für ein neues Bauvorhaben geschlossen wurde. Seitdem wird die Fläche von Pflanzen und Unkraut überwuchert.

Das Areal verwandelte sich in eine geheimnisvolle, verwunschene Idylle, die zum Schauplatz des Projekts „Secret Garden“ der Berliner Künstlerin unter Kooperation des Fotografen Petrov Ahner wurde. Die Vorstellung eines persönlichen und sozialkritischen Performancekonzepts als Beispiel für die Vielschichtigkeit von Kunst.

Eines der seltsamen Dinge über das Leben in der Welt ist, dass man nur ab und zu ganz sicher ist, für immer zu leben. […] Man weiß, dass es manchmal, wenn man bei sich ist, in einem Wald bei Sonnenuntergang, und sich die geheimnisvolle tiefe goldene Stille unter die Zweige schlägt. […] Und es war so mit Colin, als er zum ersten Mal den Frühling hinter den vier hohen Mauern des geheimen Garten sah und spürte.

(Der geheime Garten, Frances Hodgson Burnett, freie Übersetzung)

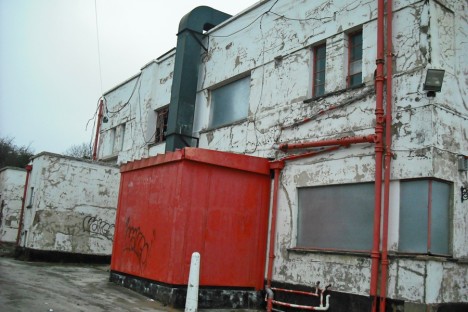
Seit fast 80 Jahren befand sich die Kleingartenkolonie „Hand in Hand“ im Berliner Stadtteil Neukölln direkt neben der Rütli-Schule. Im Zusammenhang mit der deutschlandweiten Berichterstattung um die Schule beschloss der Berliner Senat, dass die Kleingartenkolonie einem sozialverträglichen „Campus Rütli“ weichen muss. Trotz großem Protest der Kleingärtner wurde das Naturidyll im Jahr 2012 dem Erdboden gleichgemacht.

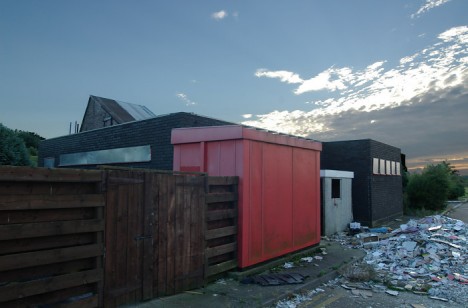
Fast drei Jahre danach ist noch nichts von einem „sozialen Erlebnisraum“ zu sehen – dem geplantem Jugendclub, Elternzentren sowie der Erschließung neuer Freizeitmöglichkeiten. Stattdessen hat sich die Natur ihr Territorium im Herzen des ansonsten eher betongepflasterten Weichselstraßenkiez zurückerobert und ist Schauplatz des Kunstprojekts „Secret Garden“ der Berliner Künstlerin Miriam Wuttke geworden.

Die Themen der Künstlerin kreisen (teilweise, aber nicht ausschließlich) um Heimat und Erinnerung; Entstehen und Vergehen. Eine Auseinandersetzung mit dem psychologischen Hintergrund der urbanen Gartenidylle scheint daher naheliegend. Wo man zunächst eine Diskussion der sozialpolitischen Thematik, der vieldiskutierte Umgang mit Berliner Freiräumen, vermutet, verbirgt sich weitaus mehr, denn „Secret Garden“ ist im Prinzip eine psychologisch-künstlerische Studie mit literarisch-historisch geprägten Querverweisen.

Ein Durchgang ist hell erleuchtet und grün und braun.

Ein grüner Baum leuchtet an einer weißen Wand.

Der hier vorliegende Beitrag über den geheimen Garten von Miriam Wuttke soll keine endgültige Interpretation bieten, sondern bestenfalls anregen, über eigene Gedanken und Gefühle im Zusammenhang mit dem hier vorgestellten Kunstprojekt zu reflektieren.

Das Gesamtkonzept des Kunstprojekts „Secret Garden“, einer im gewissen Sinne fotografischen Trilogie mit Performancebestandteilen, besteht aus drei zeitlich aneinandergereihten und miteinander verwebten Komponenten. Der Anfang war persönlich: Miriam Wuttke entdeckte die grüne Neuköllner Oase ursprünglich auf Spaziergängen und sie begann sich mit dort neu angesiedelten Guerillagärtnern zu unterhalten. Berührt von persönlichen Geschichten und von der Kraft der Natur in der ansonsten betonbepflanzten Neuköllner Großstadtlandschaft, entstand das Konzept zu „Secret Garden“.

Die Fotografien von Miriam Wuttke, die in dieser ersten Phase der Auseinandersetzung zu dokumentarischen Zwecken entstanden, erinnern an Polaroids. Ähnlich wie in Frances Hodgson Burnetts Buch „Der Geheime Garten“ wird beim Betrachten kindliche Neugier geweckt. Die Bilder erinnern an das Spielen an verborgenen Orten, als man noch klein war und die Zeit kein Uhrwerk kannte. Wie bei Burnett beschrieben, gestalten geheime Gärten Momente, in denen sich „Stille unter die Zweige schlägt“. Diese Mystik hat Miriam Wuttke in ihren quadratischen Arbeiten mit einer feinsilbigen Künstlerhandschrift eingefangen.

Es ist ein ziemliches bunten Durcheinander.

Ein Baum steht sehr sentimental in der Gegend rum.

Nach dieser ersten Erkundungsphase lud die Künstlerin den Fotografen Petrov Ahner ein, den Verlauf einer Performance im geheimen Garten fotografisch zu begleiten. Dies bildet die zweite Phase des Konzepts zu „Secret Garden“. Petrov Ahner ist ein derzeit in Berlin lebender freischaffender Fotograf, der lange Zeit in Paris und anderen Städten als bekannter Modefotograf tätig war, was in gewissem Sinne auch die Ästhetik der Bilder erklärt.

Entstanden ist eine an klassische Modefotografie erinnernde Serie, die zwischen Erotik und Zerfall verzaubernd entrückt wirkt. Auf einem Bild hängt Miriam Wuttke kopfüber an einer Schaukel, eine Pose, die eher Kindern vorbehalten ist und zum Durchatmen einlädt. Auf einem anderen Bild steht die Künstlerin felldrapiert mit ausgestreckten Armen und einer Maske vor dem Gesicht in einer Brachfläche – ein Bild, das an völkische Rituale erinnert.

Durch die dargestellte Körperlichkeit wird deutlich, dass sich die inhaltliche Auseinandersetzung mit dem geheimen Garten an dieser Stelle über kindliche Erinnerungen hinwegsetzt, denn in dieser zweiten Phase stellt Miriam Wuttke eine Referenz zu Nancy Fridays „My Secret Garden“ (1973) her.

Fridays Untersuchung weiblicher Sexualität (My Secret Garden, 1973) beinhaltet Interviews über sexuelle Fantasien von Frauen, deren Veröffentlichungen im Amerika der 70er Jahre einen flächenweiten Protest auslöste. Die Referenz auf den Übergang von kindlicher Neugier zur Erkundung und (Zurück-)Eroberung (weiblicher) Sexualität enthält somit auch implizite Botschaften über den Bruch mit normativen Grenzen. Die Metapher des geheimen Gartens könnte somit auch als geheimer Aufruf zum Ausbrechen aus gesellschaftlich vorgegebenen Schranken gedeutet werden.

Eine Frau hängt kopfüber von einem Kindergerüst.Eine Frau steht zwischen Grün und breitet die Arme aus.

Man sieht Efeu und das Gesicht einer Frau.

Eine Frau liegt vor einer Wand. Die Sonne erleuchtet ihren Körper.

Den vorläufigen Abschluss, und damit die dritte Phase des Projektes, bildet eine Performance mit dem Titel DELTA in der Berliner Galerie Emerson. In dieser dritten Phase fand eine Integration der beiden ersten Phasen statt. Abwechselnd lasen die Künstler Angelika Sikorska-Mazur und Tim van den Oudenhoven aus Nancy Fidays „My Secret Garden“* (1973) und Frances Hodgson Burnetts „The Secret Garden“* (1911).

DELTA, so heißt es im Ausstellungstext, „ist eine mystische Begegnung. Basierend auf Fantasien eines Kindes und Gedanken eines erwachsenen Menschen, findet ein Versuch satt, mit Zerstörung und Verlust umzugehen.“

Für die Ausstellung nahm Miriam Artefakte des Gartens mit – fast wie ein Kind, das den Traum hat, Archäologin zu werden. Die Besucher wurden eingeladen, an der Performance teilzunehmen, in dem sie sich im Raum bewegen oder Erinnerungen, Geheimnisse oder Wünsche auf ein Papier schreiben konnten, das anschließend verbrannt wurde. Im vernebelten Raum zauberte Wuttke eine ritualhafte, mystische Stimmung herbei, die die neugierige Sicht eines Kindes mit der erotischen Ausstrahlung einer erwachsenen Frau vereinte. Somit bildete DELTA eine Schnittstelle zwischen Vergangenheit und Gegenwart, Sehnsucht und Abschied, Verfall und Wiedergeburt.

Ein Raum mit Bildern und aufgeschichteten Bausteinen.

Draufsicht der aufgehäufelten Bausteine.

Eine Frau mit verbundenen Augen spielt mit kleinen Pferden.

Eine Frau mit langen Zöpfen sitzt auf dem Boden im Nebel.

Erst kürzlich wurde der geheime Garten versiegelt und die neuangesiedelten Bewohner vertrieben. Der Zugang zu einem der letzten grünen freien Oasen in Neukölln bleibt damit versperrt. Das finale Projekt zeigt, wie vielschichtig und feinfühlig Kunst sein kann, auf wie vielen Ebenen sie gelesen und verstanden werden kann, abhängig davon, was man darin lesen und verstehen möchte.

Der geheime Garten von Miriam Wuttke, eine künstlerische Trilogie, bleibt uns als goldenes Relikt erhalten und fordert gewissermaßen dazu auf, geheime innere Gärten zu erkunden. Sie selbst sagt dazu:

Wenn ich sehe, dass die Dinge so schnell verschwinden, verstehe ich, warum Menschen Angst vor Verdrängung und Verlust haben. Ich versuche, es zu verstehen. Aber mein eigener geheimer Garten dreht sich nicht im diese Angst, die Reflexion über seine psychologische Funktion ist eher ein Teil davon.

Es geht um Stärke und Wachstum einer ununterdrückbaren Kraft und darum, sich gegen Stagnation und Funktionalität zu stellen. Es geht auch um eine bewusste mutige Entscheidung, schmerzhafte Verlusterfahrungen zu akzeptieren, daran zu wachsen und Erinnerungen bewusst als Kraftquelle zu nutzen. In diesem Sinne hat jeder seinen eigenen geheimen inneren Garten, den es zu erobern gilt.

* Das ist ein Affiliate-Link zu Amazon. Wenn Ihr darüber etwas bestellt, erhält kwerfeldein eine kleine Provision, Ihr bezahlt aber keinen Cent mehr.


kwerfeldein – Fotografie Magazin | Fotocommunity

 
Comments Off on Der geheime Garten

Posted in Equipment


Sony announces Alpha a5100 compact mirrorless camera

18 Aug

Sony has announce its new Alpha a5100 mirrorless camera, which takes the ‘guts’ from the a6000 and puts it into the compact body inherited from the NEX-5 line. The a5100 offers the same 24.3MP sensor with on-chip phase detection as the a6000, along with a 3″ LCD that flips up 180 degrees for taking self-portraits. The a5100 has impressive video features for its price, including support for the XAVC S codec, which allows for 1080/60p/24p recording at 50Mbps.

Articles: Digital Photography Review (dpreview.com)

 
Comments Off on Sony announces Alpha a5100 compact mirrorless camera

Posted in Uncategorized


Hands-on with the Sony Alpha a5100

18 Aug

The Sony Alpha a5100 is a petite, compact mirrorless interchangeable lens camera with a lot to offer. We’ve had access to a pre-production sample for a few days, and as well as a full first impressions review we also got hands-on with Sony’s latest Alpha. Click through for a tour of the a5100’s major features.

Articles: Digital Photography Review (dpreview.com)

 
Comments Off on Hands-on with the Sony Alpha a5100

Posted in Uncategorized


What’s NEX? Sony Alpha a5100 first impressions review

18 Aug

As Sony introduces the Alpha a5100 interchangeable lens camera, it officially leaves behind the NEX moniker its mirrorless line originated with. The a5100 picks up where the NEX-5 series leaves off, combining the 24.3 megapixel APS-C CMOS sensor of the a6000 and the more compact footprint of the NEX-5T. The a5100 also inherits many of the a6000’s good qualities, including its impressive autofocus system. The a5100 also one-ups its big brother by offering 1080/60p video at 50Mbps. We took a hands-on, preliminary look at the a5100. Read more

Articles: Digital Photography Review (dpreview.com)

 
Comments Off on What’s NEX? Sony Alpha a5100 first impressions review

Posted in Uncategorized


‘RePack’ Name & Concept Copied, Repackaged by Design Student

18 Aug

[ By WebUrbanist in Design & Products & Packaging. ]

repack

The strange ongoing controversy around RePack has reached a conclusion, with Royal College of Art determining that the accused student is technically guilty of plagiarism and misconduct. While the subject is arguably a revolutionary innovation for the future of sustainable retail, RePack turned out to be repackaged (pardon the wordplay) copy of an existing brand’s idea, in all but name, which remained the same.

repack carrying under arm

repack original package design

RePack (as shown in the two images above) is a reusable packaging startup based in Finland, boasting a “sustainable system for online retailers and shoppers whereby delivery packages can be conveniently and easily returned, and then re-used.”

repack design packages plain

Meanwhile, design student Yu-Chang Chou developed a thesis project (pictures above and below) with not only the same name and concept but even some of the same descriptive text, which came to the attention of the RCA after its publication on Dezeen.

repack different sizes instructions

Similar to its Finnish counterpart, “The customer would opt for for the packaging when they make their purchase. Once they receive the product, they simply fold and reseal the Repack bag and post it back to a central address, in exchange for a refund of the deposit they paid when ordering.”

repack concept diagram

The oddest part of the whole affair is the school’s declaration that the plagiarism was inadvertent, which seems a stretch in this situation. One could imagine that a brand name and concept could be accidentally duplicated, but additional text suggests that the student must have had some knowledge of the original project. Regardless, the institution has reached its conclusion and removed the project from their website, declaring the investigation at an end – the student, meanwhile, has already graduated.

repack post box return

The Finnish RePack seems to have reluctantly accepted the situation, and affirms that, regardless of the specifics of this case, they are glad that students are exploring sustainable packaging designs along similar (if not exactly the same) lines. Either way, wherever one weighs in on the plagiarism part, these ideas could give rise to a renewed usefulness of post boxes turned into de facto recycling centers, and may allow packages to be reused up to hundreds of times without having to be discarded. And, in the end, ideas get recycled a lot – perhaps it is the execution that matters.

Share on Facebook


[ By WebUrbanist in Design & Products & Packaging. ]

[ WebUrbanist | Archives | Galleries | Privacy | TOS ]


WebUrbanist

 
Comments Off on ‘RePack’ Name & Concept Copied, Repackaged by Design Student

Posted in Creativity


8 Tips for Photographing the Perfect Headshot – for Yourself

18 Aug

Having an awesome headshot is a great way to express yourself to your potential clients. You want your headshot to show a bit of your personality or something else special about you. The great thing about being a photographer is that you can create your own headshot. This article will give you some tips to create a headshot that’s perfect for you!

MonicaDayDPS 01

You want to approach creating your own headshot like you would approach any shoot. You need to make sure you have great lighting and great focus.

I created this headshot on my own. You can do this too. Here are my top tips for photographing the perfect headshot for yourself:

Tip #1 – Look great

Just because you’re your own photographer doesn’t mean you shouldn’t take this shoot seriously. Prepare for your headshot by making sure your hair is fabulous and that your makeup is done.

Tip #2 – Have great lighting

Whether you’re using available light or studio lighting, make sure you light your space well. If using available light, look for the light first. Find the best light in your home and make it work. Go outside if you need to. If you have strobes, flashes, or other light sources then make sure you’re set up with the most flattering light for your face.

MonicaDayDPS 02

Tip #3 – Shoot with a higher f-stop number

Getting sharp focus will be the most difficult part of photographing yourself. Instead of shooting at f/2.8 try shooting with a smaller aperture say, at f/11. This will give you a greater plane of focus to work with, and a greater chance of having sharp focus on you.

Tip #4 – Practice your posing

As a photographer, part of your job is to guide your subjects into the most flattering positions. Now it’s time to learn how to pose yourself. Get in front of the mirror and find the position that works best.

MonicaDayDPS 03

Tip #5 – Shoot tethered

Shooting tethered is great for self portraits. This allows you to easily see what your camera is picking up without moving from your spot. Make sure your screen can be easily seen from where you’re standing. Here’s a diagram of my setup.

MonicaDayDPS 04

Tip #6 – Bracket your poses

Just like when bracketing for exposure, slightly alter your angles in a series of three to four shots at a time. If you’re shooting tethered, you can easily see what needs to be changed.

MonicaDayDPS 05

Tip #7 – Make it interesting

You’re a photographer so that means you know how to get creative. Make your headshot a representation of your personality. Include your hobbies, your favorite place, things you like to do or even your name. Your headshot is an extension of your brand. Make it great.

MonicaDayDPS 06

Tip #8 – Edit it

Make sure you edit your photo. Don’t forget this important step. Treat this photo like any other shoot. Take it from a snapshot to a professional photograph by adding your special touch.

Remember, shooting your own headshot gives you complete control over your shoot while saving you a few bucks in the process. Don’t worry about making a mistake. You can take as many shots as you need to get the perfect photograph.

The post 8 Tips for Photographing the Perfect Headshot – for Yourself by Monica Day appeared first on Digital Photography School.


Digital Photography School

 
Comments Off on 8 Tips for Photographing the Perfect Headshot – for Yourself

Posted in Photography


Readers’ Showcase: Astrophotography

18 Aug

In all the talk about new gear, it’s easy to overlook the end result of our shared passion – the pursuit of stunning images. Among our large community there are some incredibly talented photographers who share their work in our forums, galleries and photo challenges, and from time to time we like to showcase some of the best work on our homepage. Recently we asked users of our astrophotography forum to submit their favorite shots and as usual, the images were excellent. See gallery

Articles: Digital Photography Review (dpreview.com)

 
Comments Off on Readers’ Showcase: Astrophotography

Posted in Uncategorized


Gruel Britannia: 10 Abandoned Little Chef Restaurants

17 Aug

[ By Steve in Abandoned Places & Architecture. ]

abandoned Little Chef restaurant Wansford 1a
Serving up American style with British flavor, hundreds of Little Chef roadside restaurants once warmed up the UK‘s motorways but less than 80 remain today.

abandoned Little Chef restaurant Wansford 1b

abandoned Little Chef restaurant Wansford 1c

abandoned Little Chef restaurant Wansford 1d

“Once a familiar site by the roadside for greasy grub and indifferent service!,” according to Flickr user mad jeff, Little Chef was to the British Isles what Howard Johnson’s was to the USA – less the hotel rooms, swimming pools and fried clams. Founded in 1958 by Sam Alper, an entrepreneur admittedly influenced by America’s diners in the golden age of postwar road travel, Little Chef ballooned to 439 locations by the turn of the century… and you know what happens to balloons. The store above, located off the A1 motorway near Wansford, was one of the first Little Chef locations and stands (barely) today as a symbol of the once-robust chain’s astonishing slide into dereliction.

Kent Found On Roadside Dead

abandoned Little Chef restaurant Kentford 1a

abandoned Little Chef restaurant Kentford 1b

abandoned Little Chef restaurant Kentford 1c

abandoned Little Chef restaurant Kentford 1d

abandoned Little Chef restaurant Kentford 1e

According to the brazenly optimistic Little Chef website, “we’ve grown to become one of the UK’s favourite roadside restaurants with 78 Little Chef restaurants from Scotland down to Cornwall.” 78 and counting… downward. Most pundits blame Little Chef’s inexorable death spiral on inconsistent ownership looking only to squeeze a few more pounds sterling out of the business before flipping it; a scenario that’s played out a jaw-dropping SEVEN times since the mid-1970s. The dreary images of an abandoned Little Chef located just off the A14 in Kentford, eastern England, come to us courtesy of Nosher.net who states, “discarded cassette tapes litter the area”. Nice.

Bypassed

abandoned Little Chef restaurant A46 Binley Woods 1a

abandoned Little Chef restaurant A46 Binley Woods 1b

abandoned Little Chef restaurant A46 Binley Woods 1c

Here’s a rather rough-looking abandoned Little Chef situated by the A46 Coventry by-pass near Binley Woods in Warwickshire. This store was one of a group of restaurants closed following the sale of the Little Chef chain to RCapital, a UK private equity group, in January of 2007. Kudos to Geograph member David Lally for documenting the state of the store in July of 2007 – one can only imagine what it looks like now assuming it hasn’t been bulldozed.

Sufferin’ In Suffolk

abandoned Little Chef restaurant Suffolk 1a

abandoned Little Chef restaurant Suffolk 1b

abandoned Little Chef restaurant Suffolk 1c

These evocative images of an abandoned Little Chef somewhere in Suffolk, eastern England were taken by Flickr user will2988 in May and June of 2013. Though originally modeled after classic diners and burger stands over the pond, Little Chef made efforts to appeal to the unique taste of domestic travelers with all-day breakfasts and traditional British fare such as bangers & beans with chips (fried potatoes) and even Ox Cheeks. Sorry, no Spam Eggs Sausage & Spam.

Next Page – Click Below to Read More:
Gruel Britannia 10 Abandoned Little Chef Restaurants

Share on Facebook


[ By Steve in Abandoned Places & Architecture. ]

[ WebUrbanist | Archives | Galleries | Privacy | TOS ]


WebUrbanist

 
Comments Off on Gruel Britannia: 10 Abandoned Little Chef Restaurants

Posted in Creativity


Directing your Viewer’s Eyes with Lightroom to Make a More Powerful Image

17 Aug

One key to a successful photograph is that it directs the viewer’s attention towards the subject in question. There are many ways that this can be achieved through composition and lightning in the field, but did you know, you can also direct the attention of your viewer’s eyes through post-production?

truck edit-2

You still need an interesting subject for this to work, as directing your viewer’s eyes to a boring location within a frame is still going to result in a boring photograph. For the sake of this tutorial I’ll be using this photograph of an abandoned utility truck, but you could use anything from an interesting tree, to a model, to your pet, and achieve similar results.

First a few basic edits to bring the photo to life

Before we can work on drawing the attention of the viewer this photograph needs a bit of life pumped back into it. Having shot this photograph into the sun, the foreground and front of the truck are going to require some basic recovery techniques. I’ll be using the Basic Tab in Lightroom 5 to recover the detail and add some interest to the shot.

Step One: Highlights and Shadows

direct-viewers-attention-11

Shooting into the sun can be tricky as it often will cause your sky to turn white. Reducing the highlights slider will help to counteract this. It does so by targeting the brightest areas of your photograph without effecting the overall white point of the image. The shadows slider has a similar effect on the darker areas of the image, allowing detail to be brought out in the grill of the truck and along some of the trees.

Step Two: Add contrast with the Blacks and Whites sliders

direct-viewers-attention-10

One of the problems with the highlights and shadow recovery technique above is that it often will reduce the contrast of the image and create a sort of muddled and dull look. To counteract this you can use the whites and blacks sliders to effectively set your white and black points, as well as bring a bit of contrast back into the image. This allows you to have a bit more control over the contrast of your image as opposed to the more global Contrast slider adjustment.

Do this by dragging your White slider to the right until your histogram touches the right edge of the graph. Make sure not to go too far and clip any highlights. Holding down the Alt (Option) key while you drag the slider will show any areas that are clipped – so drag to the right until you see some, then bring it back to the left just until they are no longer visible. Do the same with the Blacks slider by pulling it to the left. The Alt (Option) key works with this one too, but in the case of Blacks you actually do want a little clipping. Having a good black in your image will add that contrast you’re looking for.

Step Three: Even out the exposure

direct-viewers-attention-9

Now that the highlights, shadows, whites and blacks are set –  a quick bump up on the exposure slider will even out the rest of the scene and get us close to something we’re ready to work on.

Step 4 (optional): Saturation and Vibrance

direct-viewers-attention-8

For this particular shot I wanted to add a bit more saturation to the trees and the floor of the forest. It’s going to depend on the shot that you’re working on, and the look that you are trying to achieve, as to whether this step is necessary. But it doesn’t hurt to play around with it before you move on to the next steps.

For more on Lightroom’s Basic Tab read: Master These Five Lightroom Sliders and Your Photos Will Pop

Now to draw the attention of the viewer

While the truck itself is a strong subject, and one that does capture the viewer’s attention on its own, there are a few tools that Lightroom has to offer which will allow for even more attention grabbing goodness.

Cropping for better positioning

direct-viewers-attention-7

The crop tool allows you to have more control over the positioning of your subjects within the frame. In this shot the truck was a bit too centred and there was a little too much dead space in the forest so by cropping in a bit closer the shot becomes a bit more balanced, allowing the viewer’s eyes to stay focused on the truck.

The Graduated Filter tool

direct-viewers-attention-6

By adding a graduated filter to the bottom right of the image more detail can be recovered from the front of the truck without effecting the rest of the exposure. This allows for a more compelling focal point for the viewer to rest their eyes on. When you go about placing graduated filters in your own images be sure to think about how it’s effecting the overall light of the scene and ask yourself if it looks natural.

Getting creative with graduated filters can allow you to have some really interesting results read 4 Fun Tricks to Enhance Your Photos With Lightroom’s Graduated Filter Tool for more creative uses of the graduated filter tool.

The Radial Filter tool

direct-viewers-attention-4

The radial filter allows for a subtle vignette to be added to the image which helps to keep the viewer’s eye within the frame. It also has the added benefit of darkening the sky, without darkening the truck, allowing for deeper blues to come through. After I was happy with this first radial filter I dropped in a second one to increase the brightness and detail of the grill of the truck. To do this the radial filter was inverted and the exposure and clarity sliders were increased.

direct-viewers-attention

Removing distractions

direct-viewers-attention-2

Once you’ve gone through all the work of drawing attention to a particular area of a photograph you’ll want to go through with Lightroom’s clone/healing tool and remove anything that competes for that attention. Adobe has greatly improved this tool in Lightroom 5 allowing you to drag paths, making it possible to remove distracting branches with ease.

The Final Edit

With a few quick adjustments in the basic tab, a simple crop, and a few of Lightroom’s filters –  this utility truck really grabs the attention and is a vast improvement over the original straight out of camera shot. Go try this workflow for yourself and share your own before and after in the comments below!

truck-edit2

Watch this Edit Click for Click

For those who prefer to sit back and watch – here’s  a quick video of the edit above.

The post Directing your Viewer’s Eyes with Lightroom to Make a More Powerful Image by John Davenport appeared first on Digital Photography School.


Digital Photography School

 
Comments Off on Directing your Viewer’s Eyes with Lightroom to Make a More Powerful Image

Posted in Photography


17. August 2014

17 Aug

Ein Beitrag von: Marcus Rahm

Nebliger Blick übers Polenztal zum Lilienstein


kwerfeldein – Fotografie Magazin | Fotocommunity

 
Comments Off on 17. August 2014

Posted in Equipment