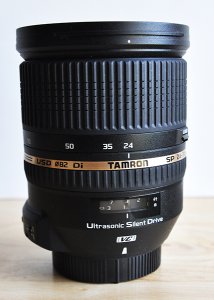
The Tamron 24-70mm f/2.8 Di VC USD is a great lens choice for both professionals and enthusiasts.
I won’t make you wait until the end of the review for the verdict– this lens absolutely rocks. Plain and simple. Despite what I consider to be a huge and unfortunate misconception among many professional photographers, there are some truly amazing, high-quality lenses being designed and produced by companies other than Nikon and Canon. Dismissing them as being somehow inferior simply because their logos don’t match up with those on the camera would be a big mistake. The Tamron SP 24-70mm f/2.8 Di VC USD is just such a lens. I recently had the opportunity to put it through its paces, and this is where the test drive took me.
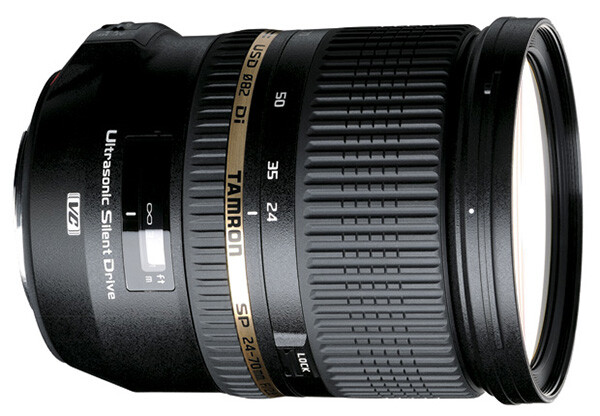
The Specs
Let me start with deciphering the alphabet soup. Designed for digital (Di), this lens includes Tamron’s proprietary Vibration Compensation (VC) for less camera shake and smoother image stabilization, as well as its Ultra Silent Drive (USD) motor, ensuring fast, virtually silent auto focusing. This Super Performance series (SP) lens includes 17 elements in 12 groups, which vastly reduces chromatic aberration.
- Focal Length: 24-70mm
- Maximum Aperture: f/2.8
- Lens Construction: 17 elements in 12 groups
- Minimum Focal Distance: 0.38m (15.0 inches)
- Maximum Magnification Ratio: 1.5 on APS-C sensor cameras
- Filter Size: ø82mm (3.2 inches)
- Length: 108.5mm (4.3 inches)
- Extended Length: 116.9mm (4.6 inches)
- Diameter: ø88.2mm (3.5 inches)
- Weight: 825g (29.1 oz)
- Diaphragm Blades: 9 (rounded diaphragm)
- Standard Accessories: Lens Hood
- Cost: $ 1,224 (USD), compared with $ 1,887 (Nikon) and $ 2,299 (Canon L Series)
- Compatible Mounts: Nikon, Canon, Sony (NOTE: The Sony version of this lens does not include the vibration compensation feature, since Sony DSLR bodies already have this functionality).
First Impressions
In some ways, I was sold on this lens before I even put it on a camera. Taking it out of the box for the first time, I was immediately impressed with the feel of it. It’s obvious that this lens was both designed and constructed with high-quality materials and great attention to detail. A common complaint among photographers about “off-brand lenses” (a term I hate, by the way), is that they just don’t have the same feel or build quality as lenses coming from Nikon or Canon. I’ve used several Tamron lenses over the years (the 28-75mm f/2.8 being among my favorites), and I can tell you that you’d be hard-pressed to find any flaws in the construction and build of this lens. As a matter of fact, this is Tamron’s first lens to include extra seals for moisture-resistant construction.
Lens Creep
Lens creep is a fairly common problem with zoom lenses of lower quality. If you have ever zoomed a lens all the way out, only to have it slowly slide back down on you when trying to shoot at a sharp, upward angle, you know what I’m talking about. The opposite can also happen, where a poorly crafted zoom can start sliding out all on its own when pointed at a downward angle. While lens creep usually manifests itself more readily with longer, heavier zooms, it can be an issue on shorter lenses also. I experienced no lens creep at all on this lens, regardless of where I was along the zoom range.
Focus
As noted in the specs above, this lens is equipped with Tamron’s Ultra Silent Drive (USD) motor, which is supposed to help ensure fast, virtually silent autofocus. This is particularly useful for wedding and event photographers who are trying to be as unobtrusive as possible. One of the things that helps me hide in plain sight is quiet autofocus. One word of caution is worth mentioning. While the USD is virtually silent on the outside of the camera, it is possible that additional noise might be picked up when shooting video.
Autofocus was fast, accurate, and, as mentioned, quiet. There might have been a slight bit of focus lag in extremely low light situations, but I would expect that from just about any lens in dark conditions. My only complaint regarding the manual focus on this lens is the size of the rubber focus ring. I think it’s a little too small, even for average hands. Add my big Chewbacca hands into the mix, and manual focus ends up taking a little more concentration that it should actually need. As far as the actual manual focus mechanics, however, I have no complaints at all. There was no lag whatsoever on the ring, making it smooth, accurate and responsive.
Chromatic Aberration
Forgive me for a minute or two while I geek out on the science end of things. Chromatic aberration is a type of distortion in which the lens fails to focus on all colors to the same convergence point. It is also a type of distortion which appears more frequently in lower quality lenses. It occurs because different lenses have different refractive indices for different wavelengths of light. Before your eyes glass over too much, let me just say that chromatic aberration becomes visible as fringes of color along boundaries separating light and dark parts of the image (i.e., contrast). As a general rule, chromatic aberration is mainly an issue at the combination of a lens’ shortest focal length and its widest aperture. This particular lens was designed specifically to minimize chromatic aberration and those efforts appear to be successful. While the laws of physics make it practically impossible to completely eliminate chromatic aberration, this lens exhibited it so slightly that I actually had trouble finding it. To that end, I’d say that any chromatic aberration actually created by this lens is inconsequential.
As long as we’re on the subject, let me offer one additional point regarding chromatic aberration that has nothing to do with this review. Colored fringes (often purple) around image highlights can be due to lens flare and have nothing at all to do with chromatic aberration.
Sharpness, Vignetting and Distortion
I found this lens to be very sharp in the center at all focal lengths and apertures. While stopping down a lens (moving to a smaller aperture) can sometimes result in an increase in sharpness and resolution, there was virtually no change in this lens between 24mm and 35mm. It wasn’t until I got between 50mm and 70mm that I think I might have noticed a very slight improvement by stopping down, but it was too slight to be of any real concern to me.
On a full frame Nikon D800, the corners are slightly less sharp than the center–a fairly common issue in lenses of this focal length. Having said that, however, corner image quality improves at all focal lengths as the lens is stopped down. I found the optimum aperture for the corners to be around f/8. Taking both center and corner sharpness into account, I’d put the “sweet spot” for this lens to be around f/5.6, but don’t let this keep you from capturing great “wide open” shots at f/2.8. The big surprise for me came when I compared corner sharpness on the Tamron with a Nikkor 24-70 f/2.8 and found corner sharpness on the Tamron to be better than the Nikkor.
While there is some visible distortion at the wider end of the lens, it does drop off quite quickly as you zoom in from 24mm. This is of most concern when shooting portraits. Making sure that faces are not distorted is an obviously valid concern, and is easily addressed by zooming the lens all the way in to 70mm.
Putting it to the Real Test
It’s easy to get passionate about lenses, regardless of brand name. It’s also easy, however, to get lost in the details. Look hard enough and you’ll find issues relating to chromatic aberration, sharpness, vignetting, and distortion in any, and every, lens you try. As pointed out earlier, we’re dealing with the laws of physics. That’s why the ultimate test of any lens has to be how it performs in everyday shooting conditions.
The first thing I want to know about any lens is what it’s going to do for me. Like many photographers, I make a living capturing a wide variety of subject matter. Since most of us don’t have unlimited gear budgets, the best purchases are those that are going to fill more than just one function. This is one of those lenses that does a great job, regardless of whether I am shooting portraits, food, or architecture. The fact that it does a great job as an all-around, everyday lens for personal photography is a bonus for the professional and a necessity for the enthusiast.
First came outdoor portraits. This first image was taken in the shade with no direct sunlight. There was a single off-camera strobe in a softbox to the left of the camera, approximately three feet from the subject. I was impressed with the speed of the autofocus, as well as how this lens captured the fine details. As noted, the wrong focal length can sometimes distort a subject. Zooming a 24-70mm all the way in to 70mm, like I did here can prevent that.

1/125, f/8, ISO 200, 70mm, off-camera flash.
I was in the middle of a cookbook shoot when this lens arrived, and I was curious to see how it would do in an all natural light scenario. When we shoot food in the studio, we generally use a single natural light source (big window) to backlight or sidelight the dish, along with a bounce card for fill. Shooting from the shadow side of the food can sometimes pose a challenge for auto-focus, but this lens had no problems at all, even when I selected a focus point in the darkest part of the frame.

1/80, f/5.6, ISO 400, 70mm, natural light.
But let’s take low light a step further. Really low light. In the images below, the photo on the right was taken with only ambient light in order to show how the autofocus performs in very low light situations. For purposes of the test, I placed my focal point on the subject’s left eye- the one in shadow. The photo on the left was taken at the same settings, with a single speedlight in a softbox to the left of the camera. The autofocus obviously had to work a little harder than it might have in broad daylight, but not so much that it became a problem on the shoot.

1/60, f/5.6, ISO 640, 70mm, off-camera flash.
If you read my article on How to Shoot Flowers, you know I spend a lot of time capturing flowers and their delicate details. Obviously, I was excited to see how the lens would perform with flowers. Other than the crop, this image is straight out of the camera. The edges and textures are all very sharp. While not specifically a macro lens, it’s nice to know it can still capture fine details with precision.

1/500, f/2.8, iSO 100, ambient light.
While attending Photoshop World in Atlanta last month, I stopped by the Westcott expo booth, where models and lights were set up for the Westcott Shootout Contest. Since studio lights were already set for optimal conditions, it seemed like a great opportunity to test the lens for indoor portraits. Other than the black and white conversion, this image is straight out of the camera. The lens performed really well while trying to capture the glam look of 1940s Hollywood.

1/200, f/5.6, ISO 1600, 70mm, constant LED studio lighting.
The lens had performed extremely well with portraits, food, and flowers, so I decided to see how it would do on an architectural interior shoot before I had to box it up and send it back. I was thrilled with how it captured the color and contrast.
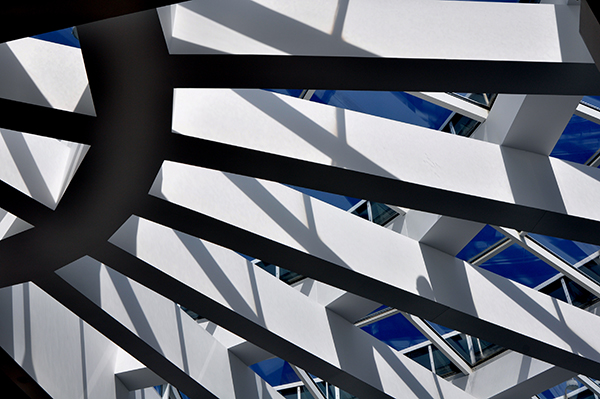
1/160, f/10, 28mm, ISO 200, ambient light.
Wrap-Up and Recommendations
Like I said at the very beginning — this lens rocks. It performed flawlessly in a variety of lighting and shooting situations. While I didn’t have time to take it out on a landscape shoot, there was absolutely nothing about my experience with this lens to indicate that nature and landscape results would have been any different. An excellent lens for either full-frame or APS-C sensor cameras, if you’re looking for a really great lens that can handle just about any assignment, the Tamron 24-70 f/2.8 should be at or near the top of your list of choices. The only down side to this lens was returning it to Tamron when I was done.
The post Lens Review Tamron 24-70 mm f/2.8 Di VC USD by Jeff Guyer appeared first on Digital Photography School.

Digital Photography School


You must be logged in to post a comment.