RSS
 

Archive for June, 2014

Levitation Photography 7 Tips for Getting a Great Image

11 Jun

Image1

Levitation images are magical! They draw the viewer in and make them think about what’s not quite right. If you search the internet for levitation photography, you will find amazing examples. However, levitation photography hasn’t become wildly popular yet. I assume it’s because levitation photography looks really difficult. I think most people would be surprised to learn that in its most basic form, it’s just compositing two or more images in editing software.

Like most portrait photographers, I shoot what I’m good at, and mostly stay inside my little portrait box. Recently, I decided I needed to get my creative juices flowing again and get out of my comfort zone. Levitation photography caught my eye. I learned the basics of how to create such images from posts like this: How to Shoot a Mysterious Levitation Photo.

My first levitation experiment was rough, to say the least. I knew the basics of how to accomplish a levitation photograph, but the images turned out mediocre. The best part though, was coming home after the shoot and writing down all the things I had learned to make my levitation images better for the next time. Below, you’ll see the lessons I learned, so you don’t have to learn the hard way.

Preparing for the Shoot

Tip #1 – Gather Your Equipment

In order to create a levitation photograph, you must have: a camera (that has manual focus capabilities), a tripod, a willing model, a strong fan (if your model has medium to long hair), and something to prop your model up (a stool, chair, or ladder). If you have a camera remote, bring that along too.

Tip #2 – Tell Your Model What to Wear

Clothing can make or break a levitation image.

  • Solid color clothing is best. Prints and patterns can make it difficult if you need to clone out certain parts of clothing or liquefy fabric.
  • Tell your model not to wear a jacket or sweater. Anytime the model lays upside-down, or sideways, the garment should be hanging down. But if he/she is laying on a stool, the jacket won’t be able to naturally hang leaving the image looking less realistic.
  • If you’re going for a feminine levitation shot, long dresses, skirts, or extra flowing fabric can help create the look you’re going for.

Tip #3 – Shoot on a Cloudy Day

Sun and harsh shadows have the potential to create a lot of extra work for you in post-production. Editing out the stools and ladders, yet keeping a realistic shadow of your subject can turn into a job for Photoshop experts.

During the Shoot

Tip #4 – Shoot from a Low Angle

You will want to shoot from a low perspective to give the illusion that your subject is high in the air. However, be mindful of how low you are. If you are lower than the prop your model is standing/laying on, the prop will block parts of his/her body. It is safest to shoot in line with the top of the prop your model is on. Having your model situated at the very front of the prop will also lessen the chance of cutting into the body.

Image2

When I erased the garbage can, parts of the model’s body looks like it went missing since it was hiding behind the garbage can.

Tip #5 – Always Photograph the Empty Background

When preparing to photograph the frames that will create your final levitation image, follow these steps.

  1. Set up your shot with your model in the frame.
  2. Plan the angle you are going to shoot from and set up your camera on the tripod.
  3. When your model is in place, choose the focus point on your subject.
  4. Set your camera to manual focus and don’t touch it!
  5. Take the different shots suggested below, in Tip #6, without moving your focus point or your camera.
  6. After you’re sure you’ve captured all the images you need with your model and props, remove EVERYTHING from the scene. Photograph ONLY the empty background. This is the most important image you will take.

Image3

Tip #6 – Take Multiple Shots to Create One Image

The most basic levitation image is a composition of two or more frames. At the bare minimum, you will need at least a shot of the background and one of the model in that background.

Most great levitation images use a few more frames to add interest and make the final image more provoking. Here is a list of some shots you might want to take all without changing the focus and position of the camera:

  1. Model on the prop(s) – the focus of this shot is on what the arms, legs, and body are doing.
  2. Hair and facial expression – the focus of this shot is to capture the models expression and hair moving like it would naturally if the model was really in that position (floating straight up, blowing behind her, etc.). *Hair dryers and small fans are not strong enough to propel hair in specific directions. The longer and heavier the hair, the more powerful the fan needs to be.
  3. Clothing – the focus of this shot is to capture the movement of the clothing (if needed). If your model is being pulled one direction, what direction should the loose fabric be moving?
  4. Additional props – the focus of this shot is to photograph any extra props you want in the picture (if desired).
  5. Empty background – see Tip #5 above to learn more about the importance of this shot.
Image4

Shot 2 is a perfect example of how a strong fan would have made the shot more realistic with her hair blowing behind her instead of being held up by an assistant. We did not need to photograph additional props for this image, therefore, we did not do a “Shot 4″ for this composition.

After the Shoot

Tip #7 – Putting the Images Together

Many levitation photographers use Adobe Lightroom and Photoshop to create their final images. Regardless of your software choice, it is recommended to first color correct the series of shots so they are all the same. Lightroom has a great “sync” feature to make sure the exact same settings are applied to the entire series of images.

Next, open the images in an editing software like Photoshop. Start with the empty background image. Next, add in the main image of your model as a layer with a “Reveal All” mask. Simply use a black paintbrush on the mask to remove the props supporting your model. The end of this article describes each step in more detail. Repeat those steps for each frame you’d like to add. Finally, you can merge your layers and put the finishing touches on your final image. Then voila, you have a gorgeous piece of levitation art.

Image5

1 – Empty background shot is the bottom layer, with the model image above it. 2 – Select the model image and go to “Layers”> “Layer Mask” > “Reveal All”. 3 – Select the paintbrush, make sure it is black. 4 – Simply brush over the props that you don’t want to show in the final image.

Creating levitation images lets your fantasies become “realities”. Don’t let the laws of physics prohibit you from creating true art For more inspiration, search 500px.com for levitation images. You’ll be amazed.

Your Turn

Have you tried creating a levitation photograph? What was your experience? Do you have any additional tips that would help those getting started? Let us know in the comments. Also, feel free to include a link in the comments to your levitation work. We’d love to see what you create!

The post Levitation Photography 7 Tips for Getting a Great Image by Danielle Ness appeared first on Digital Photography School.


Digital Photography School

 
Comments Off on Levitation Photography 7 Tips for Getting a Great Image

Posted in Photography


Auf der Suche nach dem ursprünglichen Afrika

11 Jun

Ein Beitrag von: Dennis Wehrmann

Als wir mit ein paar hundert Mann in unserer Boeing von Johannisburg zur Landung auf dem Windhoek International Airport ansetzen und ich verschlafen – mir die Augen reibend – aus dem Fenster schaue, kann ich es zuerst kaum glauben: Wir sind tatsächlich in der Wüste.

So weit das Auge reicht, nichts außer dem roten Sand der Kalahari-Wüste und ein wenig später ein aus der Luft nur als Bretterbude zu identifizierendes Gebäude am Boden nebst einer kleinen Landebahn. Das sieht mir ganz verdächtig nach einem Sportflughafen aus – definitiv nichts für Pauschalreisende. Ich atme beruhigt auf, denn wir sind auf der Suche nach einem möglichst ursprünglichen Afrika.

Die auf einem 1600 m hohen Plateau liegende Hauptstadt mit seinen etwa 200.000 Einwohnern bietet sich strategisch als Ausgangs- und insbesondere einem der wenigen Verpflegungspunkte an für die bevorstehenden Weiten Namibias mit seinen insgesamt nur ca. 2,1 Millionen Einwohner. Dabei ist Namibia mehr als doppelt so groß wie Deutschland und hat damit gerade einmal 2,6 Einwohner pro km². Im Vergleich zu den 227 Einwohner pro km² in Deutschland also Einsamkeit pur.

Blick über eine Stadt.

Die Arbeitslosenquote der seit 1950 unabhängigen Republik liegt bei sagenhaften 51%, dabei erscheinen die Einwohner dennoch zufrieden, besonders zuvorkommend, freundlich und aufgeschlossen. Immer wieder werden wir auf unserer Reise von Einheimischen nach unserer Herkunft und ob uns Namibia gefällt befragt. Insgesamt haben wir uns die gesamte Reisezeit über, selbst an den entlegensten und ärmsten Orten, sicher gefühlt.

Unsere erste Etappe führt uns in die Kalahari-Wüste. Diese Sandwüste verläuft in Süd- Nordrichtung durch Südafrika, Namibia, Botswana bis nach Angola und Sambia hinein. Der westliche Teil Namibias ist durchzogen von den roten Paralleldünen der Kalahari, in deren geschützten Senken zwischen zwei Dünenkämmen sich eine erstaunliche Vielfalt an Flora und Fauna findet.

Einzigartig ist der Moment, in dem der erste Dünenhügel mit dem Auto erklommen ist und den Blick in die leichte, sanft begrünte Senke freigibt, von der aus sich der feine rote Sandboden wieder bis zur darauffolgenden Dünenreihe anhebt – zwischen den Dünenkämmen eine Herde rennender Strauße.

Steppe in Gelb- und Rottönen mit Büschen und einigen Bäumen vor blauem Himmel.

Gerade in den Wüstenregionen sind die Temperaturschwankungen zwischen Tag und Nacht besonders extrem. Insbesondere in den Wintermonaten Juni bis August ist Nachfrost durchaus üblich. Ab Anfang September (unsere Reisezeit) beginnt der Frühling in Namibia und die Tagestemperaturen steigen deutlich.

Der frühe Frühling und der späte Herbst bieten sich als ideale Reisezeit an. Es ist besonders an den touristischen Attraktionen wesentlich einsamer und die Sonne steht tiefer, sodass das unglaublich helle Licht in den Morgen- und Abendstunden weich wird und die prächtigen Farb- und Schattenspiele noch imposanter und länger erscheinen.

Besonders leer und klar ist die Luft im Winter, doch leider sind die Tage dann auch am kürzesten und die Temperaturen empfindlich niedrig. Diese Nachtkälte der Wüste haben auch wir auf unserer ersten Tour in die Kalahari vor dem Sonnenaufgang erfahren dürfen – und dann geht die Sonne auf.

Sonnenaufgang über der Steppe in glühenden Rottönen.

Auf diese Schönheit in der Einsamkeit war ich nicht vorbereitet: Wie die Sonne sich langsam über die Savanne erhebt, das Gras in ein Farbenmeer aus Gelb-, Orange- und Rottönen taucht und die Baumkronen streichelt.

Dies ist definitiv einer der Momente im Leben, den ich nie vergessen werde: Wir allein mit unserem Guide auf dem Dünenkamm, halb erfroren, einen heißen Kakao in der Hand und dann dieses Licht in fast unberührter Natur.

Besonders haben es mir die Kameldornbäume, die zu den Gehölzen der Akazien gehören und hauptsächlich in den trockeneren Gebieten von Südafrika, Botswana, Angola, Zambia, Zimbabwe und natürlich Namibia vorkommen, angetan.

Baum mit einer großen Stadt aus Vogelnestern in den Zweigen.

Kameldornbäume haben extrem tiefe Wurzeln, die oftmals bis zum Grundwasser reichen und den Bäumen so eine durchgängige Wasserversorgung sichern. Die Dornen stellen einen effektiven Schutz vor Fressfeinden dar – nur Giraffen sind hartleibig genug, sich dieser Herausforderung zu stellen.

Diese „Wunderbäume“ haben eine eigene unglaubliche Art der Reaktion: Frisst eine Giraffe an den Blättern, so werden diese nach kurzer Zeit bitter und die Giraffe zieht weiter. Aber damit ist es noch nicht genug: Der Baum sendet Warn-Duftstoffe mit dem Wind aus. Gelangen diese zu einem benachbarten Kameldornbaum, so nimmt dieser die Duftstoffe wahr, ist gewarnt vor eventuellen Fressfeinden und reagiert mit ebenfalls bitter schmeckenden Blättern.

Für mich ist die Natur Namibias nur mit dem Wort unglaublich zu beschreiben. Teilweise staune ich mit offenem Mund angesichts der Schönheit und des Einfallsreichtums und ich komme gar nicht zum Fotografieren – miteinander kommunizierende Bäume!

Baum mit einer großen Stadt aus Vogelnestern in den Zweigen.

Aber noch nicht genug der Faszination Kameldornbaum: In ihren Ästen bauen Webervögel ihre Nester, die zu Beginn einzeln in der Krone hängen und im Laufe der Zeit zu einem einzigen riesigen Nest – einer Stadt – verschmelzen, je mehr Webervögel sich in der Baumkrone einnisten.

Der untere Teil eines „Stadt-Nestes“ ist optisch von unzähligen Löchern dominiert, den Nesteingängen, die der unglaublich schnelle und bewegliche Weber mühelos anfliegt.

Je weiter wir uns von Windhoek entfernen, umso wilder, unbekannter und unvorstellbarer wird die Landschaft. Ein erstes Anzeichen dafür ist die nicht mehr vorhandene Asphaltierung der Straße. Stattdessen fahren wir von nun an auf sogenannten Pads, die sich in Kategorien B bis D und Offroad einteilen lassen.

Staße durch eine karge Steppe vor leerem, blauem Himmel.

Straße durch eine karge Steppe, die auf einen Berg zuführt.

Zum Glück haben wir einen Geländewagen gemietet. Die Umstellung ist gewöhnungsbedürftig, aber nach kurzer Zeit hat uns die „Pad-Sucht“ voll in ihren Bann gezogen.

Langsam fühlen wir die Weite und Einsamkeit Namibias. Andere Fahrzeuge begegnen uns immer seltener, manchmal fahren wir stundenlang ohne jeglichen Kontakt zu anderen Autos, geschweige denn Menschen oder Häusern in der skurrilen „Mond-Landschaft“ im dünn besiedelten Süden Namibias.

Konstant ziehen wir eine Staubwolke hinter unserem Geländewagen her. Das einzige Zeichen von Bewegung und Leben, auch Tiere haben diese lebensfeindlich erscheinende Landschaft nur bedingt für sich erobert.

Jedes Aufeinandertreffen zweier Geländewagen wird mit freundlichem Winken respektvoll gewürdigt. So langsam realisieren wir, was es wirklich bedeutet, auf sich gestellt zu sein. Im Falle einer Reifen- oder schlimmeren Panne wird sich wirklich zeigen, wie sattelfest wir sind.

Verrostetes Auto in der Wüste vor blauem Himmel.

Sehr schnell wächst unsere Demut gegenüber der lebensfeindlichen und unglaublich beeindruckenden Naturlandschaft. Wir reduzieren uns sehr schnell auf unsere absolut essentiellen Bedürfnisse:

Die Bewältigung unserer Tagesstrecke vor Einbruch der Dunkelheit und somit der Sicherung eines Schlafplatzes und einem Abendessen, der ausreichenden Bevorratung mit Wasser und Benzin. Ist all dies sichergestellt und es gibt dann noch eine eiskalte Flasche „Windhoek Lager“ nach der Ankunft im Camp, bin ich absolut zufrieden und ausgeglichen.

Höhepunkt des Südens ist, neben der Fahrt entlang des Orangerivers, dem Grenzfluss zu Südafrika, der Fish River Canyon, dem zweitgrößten Canyon der Welt. Heute fließt hier nur noch ein armseliges Rinnsal im Vergleich zu den früheren Naturgewalten, die diesen Canyon geformt haben. Er zeugt jedoch von der ursprünglichen Fruchtbarkeit des Landes, die sich auch mit jedem Tropfen Wasser und insbesondere am Orange River besonders offenbart.

Canyonlandschaft vor blauem Himmel.

Fish River Canyon

Panorama eines Flusses mit grüner Umgebung in sonst trockener Steppe.

Grenzfluss Orange River

Auf unserer Weiterfahrt gen Norden an den Rand der Namib-Wüste erfahren wir, wie problematisch die Versorgungssituation sein kann: In unserem letzten Camp war der Diesel ausgegangen und wir haben nur noch einen halbvollen Tank! In Europa kein Problem, in Namibia schon, denn hier können es auch mal 700 km bis zur nächsten Zapfsäule sein – die dann hoffentlich nicht leer gelaufen ist.

So ertappe mich dabei, wie ich „Stoßgebete“ zum Himmel schicke und hoffe, dass wir unser Ziel Aus bald erreichen und es dort Diesel gibt, ansonsten sind wir geliefert, denn unser Tank ist mittlerweile definitiv auf dem Tiefstand.

An den Ausläufern der Namib-Wüste angekommen, haben wir eine Begegnung der besonderen Art: Wir haben das Glück, die äußert seltenen Namib-Pferde zu sehen, die sich perfekt an die lebensfeindlichen Bedingungen in der Wüste angepasst haben.

Es gibt diverse Theorien über die Herkunft der Namib-Wildpferde, insbesondere ist die genaue Zahl der Tiere unbekannt. Geschätzt wird die Population auf 250 bis 300 Tiere, die sich den Lebensbedingungen in der Namib-Wüste angepasst haben.

Der wahrscheinlichsten Theorie zufolge bildet den Ursprung der Namib-Wildpferde eine entlaufene Herde einer Pferdezucht der südafrikanischen Armee. Es wird vermutet, dass Namib-Pferde etwa sechs Tage ohne Wasser auskommen können, während ein nicht-adaptiertes Pferd maximal drei Tage ohne Wasser aushält.

Wüstenlandschaft mit einzelnen Plateaus vor blauem Himmel.

Wüstenlandschaft mit einzelnen Plateaus vor blauem Himmel.

In der Nähe unseres Nachtlagers in Aus mache ich eine weitere unvergessliche Erfahrung der unglaublich vielfältigen, beeindruckenden Landschaft Namibias: Der Campbesitzer fährt mit uns abseits jeglicher Wege querfeldein in die Steppe der Namib und steuert auf einen massiven Berg zu, der wie ein riesiges, halb in der Erde versenktes Ei aussieht und eine vollkommen glatte Steinoberfläche hat.

Wie sollte es anders sein, als dass er beginnt, dieses monströse Ei hochzufahren – mit dem lapidaren Kommentar, ein Namibianer versucht immer, so weit und hoch wie irgend möglich mit seinem Geländewagen zu kommen. Den anderen und mir rutscht das Herz währenddessen in die Hose, der Ausblick aber entschädigt uns für den Angstschweiß.

Sonnenaufgang über einer hügeligen Landschaft.

Der weitere Verlauf unserer Strecke führt uns weiter gen Norden, unweit der Atlantikküste in die Namib-Wüste mit dem Ziel der Sossusvlei-Dünen. Die Namib ist nicht die größte, aber mit ca. 5 Millionen Jahren die älteste Wüste und dehnt sich auf 700 km in Nord- und Südrichtung entlang des Atlantischen Ozeans aus. Dabei ist sie „nur“ maximal 160 km, oft aber auch nur 70 km breit.

Die Begründung dafür liegt in der Art der Namib-Wüste. Ws handelt sich um eine Küstenwüste, eine der ungewöhnlichsten Wüsten der Erde. Das Klischee der „Wüste“ erfüllt die Namib bei Leibe nicht, denn sie ist weder trocken noch heiß, viel mehr eher kalt und feucht und trotzdem fast niederschlagsfrei. Die Namib verdankt ihre Existenz der Aridität durch den kalten und küstenparallelen antarktischen Benguelastrom an der Atlantikküste Südafrikas.

Steppenlandschaft mit gelbem Gras vor einem Gebirge.

Steppenlandschaft mit gelbem Gras vor einem Gebirge.

Eine Herde Oryxe im hohen, gelben Gras vor einem Gebirge.

Die Felsformationen entstehen durch die Versteinerung von Wanderdünen, wenn die Bewegung der Dünen zum Erliegen kommt. Plötzlich erscheint eine Oryx-Herde vor einer atemberaubenden Kulisse aus dem Nichts.

Die Dünen der Sossusvlei-Wüste, die wir am folgenden Tag zum Sonnenaufgang zumindest teilweise erklimmen, sind eine der beeindruckendsten Landschaften, die ich je besuchen durfte. Der Aufstieg ist schweißtreibend aufgrund des feinen Sandes, in dem meine Stiefel mühelos versinken und der mich immer wieder abrutschen lässt. Außerdem gilt es, dem Wind und Sandkornflug zu trotzen.

Als sich schließlich die Sonne binnen Minuten am Horizont emporhebt, beginnt ein unglaubliches Farbspiel des gesamten vorstellbaren Rotspektrums, das die von der Nacht noch unberührten Dünen leuchten lässt. Dank der Morgensonne färbt sich der Horizont noch kurze Zeit blau, bevor er für den Rest des Tages infolge der immensen Helligkeit komplett weiß erscheint.

Dünenlandschaft mit Fußspuren im Vordergrund.

Dünenlandschaft mit einem Reiter am Horizont.

Mitten im Sossusvlei liegt das Deadvlei eingeschlossen als von roten Sanddünen umschlossene Ton-Pfanne. Berühmt geworden ist das Deadvlei aufgrund der abgestorbenen und sehr gut erhaltenen Akazienbäume, die vertrockneten, als der Tsauchab-Fluss seinen Flusslauf infolge der Versperrung des ursprünglichen Flussbetts durch Wanderdünen änderte. Einige der Akazienbäume im Dead Vlei sind bereits über 500 Jahre alt und verrotten nur sehr langsam.

Die Temperaturen hier im Deadvlei schwanken zwischen 50 °C am Mittag und 0 °C in der Nacht – unvorstellbar. Dem Oryx als Nationaltier der Namibier machen diese Temperaturschwankungen nicht so zu schaffen, da er seine Körpertemperatur über seine Nüstern reguliert und somit diesen extremen Temperaturen trotzen kann.

Rote Dünenlandschaft mit abgestorbenen Bäumen.

Das Deadvlei ist ein unglaublicher Ort, der mich persönlich auf der gesamten Reise am meisten berührt hat. Wenn diese Idylle und der Frieden doch nur den ganzen Tag anhalten könnten. Sobald die ersten Touristenscharen sich mit der Nationalparköffnung zum Sonnenaufgang bis hierher vorgearbeitet haben, gehört die Einsamkeit und Idylle der Vergangenheit an.

Das Sossusvlei ist eine von Dünen umschlossene Lehmsenke, in der sich äußerst selten (etwa alle sechs bis acht Jahre) ein See bildet, wenn sich Regenwasser stärkerer Regenfälle in der Senke sammelt oder der Tsauchab-Fluss Wasser bis in das Vlei hinein gespült hat. Glücklicherweise auch zu dem Zeitpunkt, an dem wir diesen Ort besucht haben.

Blick üder die Oberfläche eines Sees vor oranger Dünenlandschaft.

Flamingos in einem See vor roter Dünenlandschaft.

Der See in der Wüste wirkt absolut surreal, dicke Lehmplacken bilden das Ufer und in der Mitte vergnügen sich Flamingos. Ich kann diese Konstellation bis heute kaum fassen und jedes Mal, wenn ich diese Bilder betrachte, bin ich wieder restlos begeistert.

Unser nächstes Etappenziel ist das wesentlich kältere Swakobmund, die erste Stadt seit der Ankunft in Windhoek. Auf dem Weg machen wir noch einen Zwischenstopp an der legendären Namib-Tankstelle Solitaire, die mehr als den einen für Namibia üblichen Quoten-Oldtimer beherbergt.

Der Moment, als die vor Swakobmund beginnende Teerstraße durch den mittlerweile gelben Wüstensand der Namib über eine Hügelkuppe führt, die den Blick auf den Atlantik freigibt und dabei die Sandböen vor uns über die Straße wehen, ist beeindruckend.

Gelbe Wüste.

Die so karg erscheinende Wüste ist voller Leben, was sich jedoch nur bei genauerem Hinsehen zeigt. Dabei entdeckt man zum Beispiel das Chameleon, das für mich eines der interessantesten Tiere der Wüste ist.

Von Swakobmund geht es direkt am Atlantischen Ozean entlang weiter nach Norden zur Skeleton Coast bis nach Terrace Bay, der einzigen Übernachtungsmöglichkeit in diesem Naturschutzgebiet.

Die Skeleton Coast ist für mich einer der merkwürdigsten Orte, den ich jemals besucht habe. Der Sand der Namib-Wüste wird überdeckt von einer leichten, schwarz oxidierten Sanddecke. Dieser Park erscheint einem wirklich als das „Ende der Welt“, hier kommt Endzeitstimmung auf.

Einfahrt zu einem Hof in der Wüste, am Tor das große Bild eines Totenschädels.

Schon der Eingang zu diesem Park ist mit seinen Totenköpfen absolut filmreif. Die Skelette stammen übrigens überwiegend von Fischen, einige sind jedoch auch menschlich. Die Stürme und die Brandung an der Skeleton Coast sind bis heute berüchtigt, wovon die vielen Schiffswracks zeugen.

Überlebende Schiffbrüchige sind auf der Suche nach Wasser entweder nach Norden oder Süden gewandert, jedoch selten nach Westen – dies hätte ihre Überlebenschancen gesteigert, da der Wüstenstreifen hier nur etwa 60 km breit ist.

Am nächsten Morgen freuen wir uns, die trostlose Landschaft der Skeleton Coast zu verlassen. Auch, wenn wir hier die freundlichsten Menschen unserer Reise treffen durften. Das Damaraland mit seinen berühmten Steingravuren von Twylfontein ist unser Ziel und letzter Stopp vor Erreichen des Etosha-Nationalparks.

Steppenlandschaft, im Hintergrund mit Hügeln und Gebirge.

Damaraland

Im Etosha-Park angekommen, sind wir von der Landschaft, aber vor allem durch die Allgegenwart der wilden Tiere beeindruckt. Ähnlich wie der Krueger-Nationalpark in Südafrika ist auch der Etosha-Park eingezäunt und wird von vielen Touristen besucht, was das Erlebnis in der Hauptsaison definitiv wesentlich einschränkt.

In der Nebensaison ist der Etosha aber ein empfehlenswertes Ziel, insbesondere wegen der erreichbaren unerschlossenen Teile. Zentral im Etosha befindet sich eine riesige Salzpfanne. In der Mittagshitze wird es so warm, dass alle Tiere Schatten suchen, selbst den Vögeln ist es zu heiß.

Eine Giratte und eine Herde Oryxe stehen im Schatten eines Baumes, auf dessen Spitze ein Vogel sitzt.

Elefanten schützen sich vor der Hitze und der extremen Sonneneinstrahlung, indem sie sich selbst mit Schlamm bewerfen. Sie scheinen dieses Bad der besonderen Art wirklich zu genießen und nebenbei hilft es auch, lästige Moskitos fernzuhalten.

Zebraherden jeglicher Größe bis zu mehreren hundert Tieren durchstreifen die Steppe. Nur in der Herde haben sie eine Überlebenschance, wenn sie abwechselnd Ausschau nach Gefahren halten, während die anderen der Herde trinken oder fressen.

Giraffen sind die graziösesten und anmutigsten Tiere unter den Vegetariern, Körperhaltung und Gesichtsausdruck sprechen Bände. Auch sie leben in Herden, bei Einzeltieren handelt es sich überwiegend um Jungbullen.

Eine Giraffe schreitet durch die Steppe.

Besonders vorsichtig und wachsam sind Giraffen aufgrund ihrer Verletzlichkeit an Wasserlöchern. Zum Trinken müssen sie ihre Vorderbeine auseinanderspreizen, bis sie die Wasseroberfläche erreichen. Eine sehr verletzliche Lage, in die man sich am besten nur ohne Fressfeinde in der Nähe begibt.

Löwen sind ein besonderer Anziehungspunkt für die meisten Besucher. Natürlich sind auch wir beeindruckt von einem sich auf der Jagd befindendlichen Löwenrudel, bestehend aus sechs Löwinnen. Der Löwe lässt fagen und döst meistens faul in der Sonne.

Die Selbstverständlichkeit der Kommunikation, die alle Tiere zur richtigen Zeit an den richtigen Ort führt, um die Jagd zum Erfolg zu führen, ist sehr beeindruckend, ebenso wie ihre muskulösen, sehnigen und geschmeidigen Körper, der absolute Überlebenswille in den Augen funkelnd.

Eine Oryxantilope in der Steppe.

Eine Löwin der Steppe.

Unsere letzte Etappe führt uns zum Waterberg-Plateau, bevor es bereits wieder nach Windhoek geht und der Abschied von Namibia naht. Es war ein unglaublicher Urlaub, in dem ich mein Herz an diese vielfältigen und bezaubernden Landschaften Namibias, die Ursprünglichkeit, Freiheit und Einsamkeit verloren habe.


kwerfeldein – Fotografie Magazin | Fotocommunity

 
Comments Off on Auf der Suche nach dem ursprünglichen Afrika

Posted in Equipment


Unverpacked: Zero-Waste Grocery Store Packages No Products

11 Jun

[ By WebUrbanist in Design & Products & Packaging. ]

original unverpackt zero waste

The first of its kind in the country, this German supermarket strips away wasteful packaging and sells its goods in bulk to customers who bring or borrow recycled and reusable containers.

Set to open Berlin this summer, Original Unverpackt is to be the first of a series of stores using a sustainable model similar to co-ops but at a larger scale and aimed at mass market consumers.

no packaging all bulk

Nothing here comes in a disposable box, bag, jar – nothing is shrink-wrapped or tetra-packed. Bulk and gravity bins dot the isles and hang from the walls. Even beverage stations use refillable bottles.

sustainble german grocery store

Keeping the experience minimal and easy, creators Sara Wolf and Milena Glimbovski are offering just one variety of each product type, reducing choice fatigue and focusing on quality and simplicity.

gravity drop container design

Having crowdfunded over 100,000 Euros to start things out, the supermarket is tackling a 16-million-ton waste problem (just in Germany) but ultimately aims to make a global impact as well, changing the way consumers think about shopping and sustainability.

Share on Facebook


[ By WebUrbanist in Design & Products & Packaging. ]

[ WebUrbanist | Archives | Galleries | Privacy | TOS ]


WebUrbanist

 
Comments Off on Unverpacked: Zero-Waste Grocery Store Packages No Products

Posted in Creativity


Picquest wants to be the Uber for photography

11 Jun

Screen_Shot_2014-06-10_at_2.25.04_PM.png

Location-based search for restaurants, taxis or other services, as offered by Yelp, Uber and a multitude of other apps, have been around for a quite a while. Now, a new service called Picquest wants to apply the same concept to photography. The Android and iOS app allows you to find photographers on a map or get notified of photographers in your geographical proximity. It’s an interesting potential social networking and business tool for phtoographers. Learn more

News: Digital Photography Review (dpreview.com)

 
Comments Off on Picquest wants to be the Uber for photography

Posted in Uncategorized


Nikon Coolpix A firmware 1.11 available

11 Jun

shared:download-button.png

Nikon has issued a firmware update for the Coolpix A. Version 1.11 decreases minimum focus distance (in normal focus mode) and boasts improvements to autofocus acquisition. Other improvements are minor, including better battery performance during interval shooting. Get the update

News: Digital Photography Review (dpreview.com)

 
Comments Off on Nikon Coolpix A firmware 1.11 available

Posted in Uncategorized


Machine Cemetery: Diggers Bury Selves in Unmarked Graves

10 Jun

[ By WebUrbanist in Architecture & Cities & Urbanism. ]

london basement cave making

A surreal testimony to the excesses of underground construction in London, developers have been intentionally burying still-functioning digging machines used to excavate subterranean extensions below expensive city homes – an estimated 500 to 1000 to date.

london hidden depths

Property values coupled with height restrictions have driven ultra-rich clients underground in a search for ever-more space. Expanding beneath the surface, however, means using machines to tunnel – ones that are not always deemed worth the complexity and cost of retrieving.

london basement excavation process

london underground spa design

As Geoff Manaugh of BLDGBLOG describes the surreal situation, “London is thus becoming a machine cemetery, with upwards of £5 million worth of excavators now lying in state beneath the houses of the 1% …. [These] sacrificial JCBs have excavated the very holes they are then ritually entombed within, turning the city into a Celtic barrow for an age of heroic machinery.”

london basement dig article

In most cases, the spaces created by these machines are luxury additions, ranging from multistory wine cellars and climbing walls to pool halls and bowling alleys. When a machine’s cavern-creating tasks are completed, their masters give them one final suicide mission: carving out their own grave, to be filled with dirt, concrete and themselves, all becoming a permanent fixture of the site’s foundations.

london grated entry example

How does this strange set of circumstances come about? As Ed Smith of the New Statesment reports, The difficulty is in getting the digger out again. To construct a no-expense-spared new basement, the digger has to go so deep into the London earth. Initially, the developers would often use a large crane to scoop up the digger, which was by now nestled almost out of sight at the bottom of a deep hole.”

london floor skylight example

It was only a matter of time before the analysts took over: “Then they began to calculate the cost-benefit equation of this procedure. First, a crane would have to be hired; second, the entire street would need to be closed for a day while the crane was manoeuvred into place. Both of these stages were very expensive, not to mention unpopular among the distinguished local residents.”

london underground mansion excavation

london basement exterior entry

In the end, economics won out and developers concluded that rescuing a piece of a machinery worth thousands from a pit under a house worth millions was just not important. This practice has gone on long enough for a new problem to arise: diggers encountering their concrete-encased cousins on subsequent excavations. And as if that were not odd enough, imagine the reactions of future archaeologists, wondering at the strange burial practices of London urbanites in centuries yet to come. (Images via London Basement).

Share on Facebook


[ By WebUrbanist in Architecture & Cities & Urbanism. ]

[ WebUrbanist | Archives | Galleries | Privacy | TOS ]


WebUrbanist

 
Comments Off on Machine Cemetery: Diggers Bury Selves in Unmarked Graves

Posted in Creativity


10. Juni 2014

10 Jun

Ein Beitrag von: P!XELTREE

Hoher Kasten aerial tramway © P!XELTREE


kwerfeldein – Fotografie Magazin | Fotocommunity

 
Comments Off on 10. Juni 2014

Posted in Equipment


Everything you wanted to know covered in helpful Lightroom tutorial

10 Jun

shared:AdobeLogo.png

Adobe’s Lightroom 5 is a powerful program, but that power comes at the expense of a learning curve that some find pretty steep. In this excellent video shot at B&H, Photographer Robert Rodriguez, Jr. walks photographers through the functions and features of Lightroom’s Develop module in an hour-long hands-on tutorial as he covers just about every panel and slider in the Develop module. Learn more

News: Digital Photography Review (dpreview.com)

 
Comments Off on Everything you wanted to know covered in helpful Lightroom tutorial

Posted in Uncategorized


UPDATED: Sony Cybershot DSC-RX100 M3 sample images

10 Jun

Screen_Shot_2014-06-09_at_3.05.54_PM.png

As soon as it arrived we wasted no time getting out with the Sony Cyber-shot RX100 III, and in the past few days we’ve also added a lot to our first-impressions review, including a movie page, shooting experience and studio comparison images. This weekend presented an opportunity to update our gallery of real-world sample images too, bringing our gallery to 87 images, including a handful of raw conversions. See more.

News: Digital Photography Review (dpreview.com)

 
Comments Off on UPDATED: Sony Cybershot DSC-RX100 M3 sample images

Posted in Uncategorized


Top 10 Photo Shoot Tips Using UV Paints

10 Jun

Hong Linh Photography UV Paint Shoot inspired by African Tribes featured on Fashion Photography Blog (FashionPhotographyBlog.com)
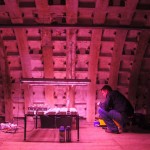
Last time FashionPhotographyBlog.com spoke to Linh Le from Hong Linh Photography she had informed us that she had finished a photo shoot over a weekend that involved UV paints. The results resulted in a beauty shoot inspired by African tribes. From the feedback that we received about that post, we asked Linh if she could tell us more about the technical aspects of putting a shoot together for our readers. Linh shares with us her top tips for photographers who are thinking about taking on a shoot with UV paints and the key things to look out for.

1) Control all lights, including the ambient light! Linh revealed that failure to do so can have unflattering results, as she explained “My rehearsal shoot was a complete disaster! I set everything up in my living room and it was quite late at night, so there was no light coming through the window blinds, doors etc. My plan was to use our dim light as the ambient light. But the results were just horrible. The skin looked extremely uneven and red. It was really frustrating; I tried all sorts of settings. But that was not the problem; the problem was the lighting, the colour temperature of the lights. They were too yellow. So, I changed the LED fairy lights, which I used as back light, to a different set and because the shoot was during the day, I was able to use the daylight coming through the thin curtains and the results were completely different.”

Hong Linh Photography UV Paint Shoot inspired by African Tribes featured on Fashion Photography Blog (FashionPhotographyBlog.com)

2) Use a tripod, Linh recommends, in order to get sharp images, it is essential to use a tripod here.

3) Use a fast shutter setting and a low ISO, the settings Linh used were 1/8 sec, f2 and ISO 200.

4) To help your camera focus in such low light, Linh also recommends that it is also helpful to use a torch.

5) Test the colors first – Linh advises that “Some of the colours such as gold and silver glow less than others, so make sure you test them out first and mix them if necessary.”

6) You don’t need to go all out on expenses. You can pretty much get all you need cheaply in one site as the photographer revealed that “Getting all the supplies for the UV shoot was easier than I expected. I ordered the colours and two UV light tubes on Amazon, which were about £60 altogether.”

7) Use low wattage for subtle effects as Linh explained “As I did not want the glowing effect to be too extreme, I only used 20W UV lights, so this will depend on your personal style and taste.”

8) Using fabric as backdrops has its advantages. You can play with the effects of different backgrounds simply by changing the color or pattern of fabrics. Linh shared that “For the background, I bought curtain fabric which was dark but had interesting patterns on them which I wanted to be visible on the image.”

9) To get some back light in order to separate the model from the background, you can use fairy lights as the photographer has done on her shoot.

10) When asked if she can give us one last secret, Linh shared that getting the balance of lighting right is essential, “I think the secret lies in finding the perfect balance between the UV light and the ambient light, which is a matter of trial and error.”

There you have it, according to Linh Le, that’s basically all you need to set up a shoot with UV paints. Of course, shoot requirements may vary, depending on the result you want to achieve.
According to the photographer, the biggest challenge with doing UV shoots is to find the best lighting setup and camera settings and finding the right balance for your shoot can only be figured out through experimentation.

I hope this anyone who is thinking of doing a UV shoot and don’t know where to start. We’d love to see and hear about your results! Once again, we’d like to thank Linh Le from Hong Linh Photography for sharing her top tips for doing a shoot using UV paints. Do you have another tip? Post them in the comment section below.

Hong Linh Photography UV Paint Shoot inspired by African Tribes featured on Fashion Photography Blog (FashionPhotographyBlog.com)

To find out more information and see all the images from Linh Le’s UV shoot as well as other shoots, you can check the blog on her website www.honglinhphotography.com

You can contact her via e-mail: mhlinh.le@gmail.com

message Linh on her website: www.honglinhphotography.com
or Facebook page (Hong Linh Photography).

Photo Credits:
Photographer: Hong Linh Photography
Make Up Artist: Sophie Le
Models: Wendy Ng & Ana Santos


Fashion Photography Blog

 
Comments Off on Top 10 Photo Shoot Tips Using UV Paints

Posted in Uncategorized