Photos made with invisible infrared light, rather than visible light, yield wildly strange and eerie photographs that always have the “WOW Factor.” For landscapes or scenic imagery, infrared (IR) photography is highly regarded as fine art. But back in the days of film photography, shooting infrared was complicated, expensive and the results were often not great. For those with determination though, that one image that did ‘work” was always worth the trouble.
But now the complexity of capturing infrared photos has changed – digital cameras have made the technique almost foolproof, inexpensive, and a lot of fun! All you’ll need is a tripod, a special infrared filter, and any camera that is sensitive to infrared light. With a few easy steps you’ll be shooting infrared photos in no time at all.
But before I get into the process, it’s not my intention in this article to delve into the physics of infrared light, and all the scientific mumbo jumbo that goes along with understanding WHY infrared light creates amazing images, but rather to give you some simple steps to get you started in this super creative technique.
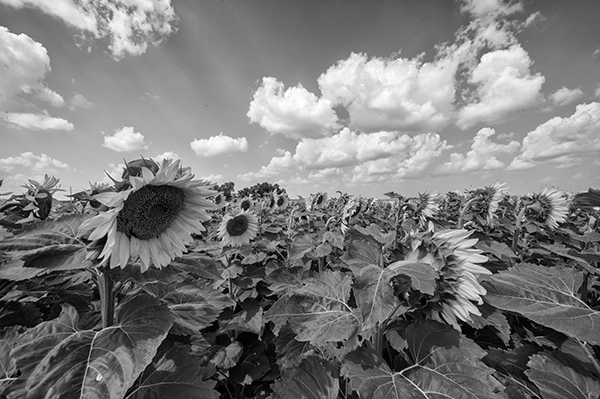
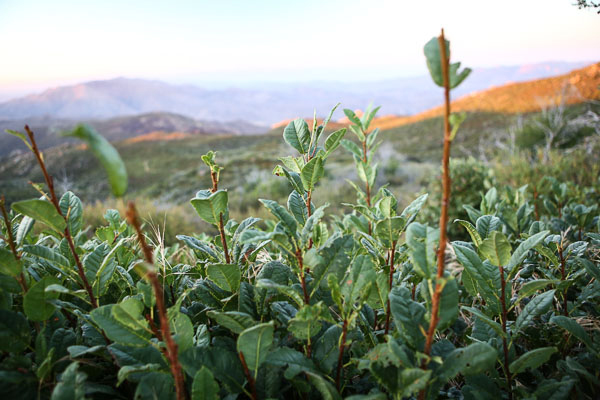
Visible Light Black and White Image
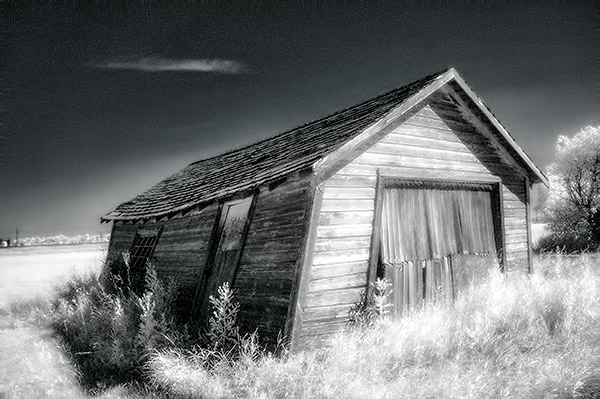
Just know that anything that is alive will reflect a greater amount of infrared light than inanimate objects. Leaves, foliage, and grass, along with skin, reflect the greatest amounts of infrared light, and so will be the whitest objects in your image. Stones, concrete, mountains, water and sky tend to absorb infrared light and so appear as darker objects in your images. The tonality is very different from that of visible light black and white photography though. Notice how the tones of the leaves, seeds and sky are quite different in the infrared image below.

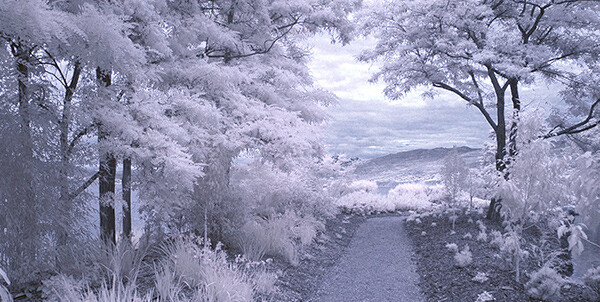
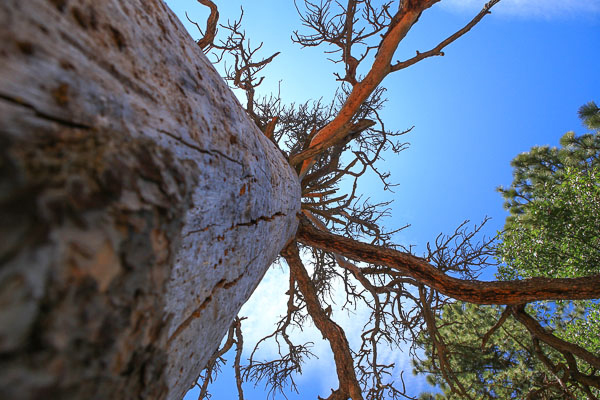
Digital Infrared Image
Okay, are you ready to give this a try? Here are the simple steps you need to follow so your images will turn out into hauntingly beautiful, surreal infrared photographs. The first steps deal with equipment and settings, and the last steps are all about how to best capture beautiful infrared light.
Step 1: Test your Camera
Before you go out and buy an infrared filter test your camera to make sure it’s sensitive to infrared light. Not all digital camera sensors are able to “see” infrared light. In fact the newer the camera, the less sensitive to infrared light it may be. Try this simple test to see if your camera will give you good results.
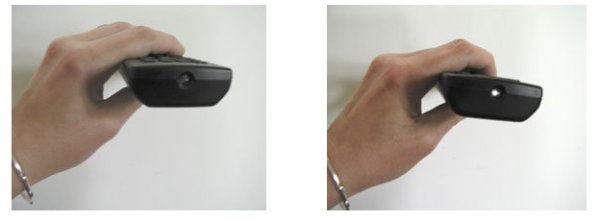
Testing your camera for infrared sensitivity.
Hunt down a TV, VCR or DVD player remote control. Look at the end that points to the TV (or VCR etc), and you’ll see a little bulb or flat back plastic window. This is the transmitter that sends the signal from the remote to your device. That signal usually uses infrared light. You can see that it is invisible light – i.e. when you look at the remote with your eye, you can’t see anything when you press the buttons. But just wait until you do this looking through your camera! You’ll be able to see invisible light – the infrared spectrum that makes such cool photos.
If you have a point & shoot camera look through your LCD viewer while pressing any button on the remote. If you see the bulb light up, your camera can see infrared light. If you have a DSLR you’ll have to take a photo to see the results, or if you camera has a live view feature, you will be able to see the the results on your LCD as well.
The whiter and brighter the light you see from the remote, the more sensitive your camera is to infrared. If the light is more purple or red your camera may not be a good candidate for shooting infrared photos.
Step 2: Equipment
If your camera passed the sensitivity test, you’ll need two more pieces of equipment before you can shoot infrared photos, a tripod and an infrared filter. The tripod will help you take a sharp shot, as your exposure times will be quite long. The filter will block most of the visible light from reaching your camera sensor, but will allow the beautiful infrared light to pass through.
When I first started shooting infrared images, I used a Hoya R72 screw-on infrared filter. B+W, Tiffen and other manufacturers also have equivalent infrared filters. If you are using a slide in filter system, such as Cokin or Lee, they also make infrared filters to work with their holders. If this is the filter you’ll be using, make sure to slide it into the slot closest to the camera to prevent unwanted visible light from sneaking in. The R72 refers to the amount and type of infrared light that passes through to your sensor and I recommend using this to start. It allows some visible light to pass to the sensor so it will allow you do to all sorts of creative post processing with your images.
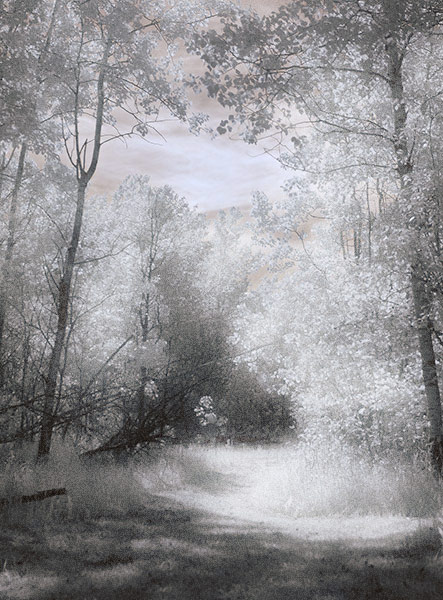
Infrared Image with creative post-processing
Step 3: Camera settings
Because the infrared filter blocks out most of the visible light, your exposures will be quite long. You’ll have to adjust your camera settings to ensure you get a good exposure, while keeping noise to a minimum. Set up your camera on your tripod and make these adjustments:
- Set your ISO between 200 and 400, keep it as low as you can
- Set your Long Exposure noise reduction to ON
- Set your camera to shoot in RAW mode
- Set your camera to Aperture Priority (Av mode on a Canon), and your aperture to around f/8 for maximum sharpness
- If your camera does auto bracketing (refer to your owner’s manual), set your bracketing to +/-1 EV. Your series should be -1 EV, 0 EV, good exposure, and + 1 EV. You can also bracket manually.
Shooting in RAW will give you a bit more latitude for processing and adjusting. Bracketing will help you find the sweet spot for exposure at your preferred aperture and ISO.
I’m not going to go deep into the White Balance setting, as this could be an entire article on its own. But for now set your White Balance to the Sunny or Daylight preset.
Step 4: Composition
Just as in regular light photography, composition is a critical component of infrared photography. However there are a few additional considerations to keep foremost in your mind when planning your infrared composition.
A variety of textures make the image more dynamic.
Infrared photography is similar to black and white photography, in that you are dealing with a limited number of tones. To add more dynamism and energy to your infrared shots, add contrasting elements. By this I mean using dark and light objects in close proximity to each other. But also use smooth and textured objects together. You can mix and match for artistic composition and design.
| COLUMN 1 |
COLUMN 2 |
- light
- white
- smooth
- large patterns
- light with fine textures
- light with large textures
|
- dark
- black
- textured
- small patterns
- dark with fine textures
- dark with large textures
|
In every infrared shot you make, include at least one element from Column 1 with the corresponding one from Column 2. You can add as many elements as you want, but it’s best to keep your composition simple. You can use light and small patterns, with dark and large patterns and so on. Foliage and clouds will always be a light element in your image; the sky, stones, bark, water and concrete will be darker. Leaves from a distance are a rough texture, with many small elements appearing rough and textured; while human skin is very smooth. This should give you a great starting point for infrared compositional considerations.
Step 5: Shooting Infrared
There is only one critical thing to remember when shooting infrared – you must shoot when there is lots of sunshine, and in the summer when there is lots of deciduous foliage. Overcast days won’t give you great results, and because living things reflect the most infrared light, snowy winter days are usually devoid of anything that reflects infrared. If there are clouds in the sky these can add an element of interest, but don’t make your capture until the sun is out, and shining on your subject.
Find a great place to shoot and adjust the settings on your camera. I like graveyards, parks, and old abandoned buildings. The contrast between the stones, the pathways, the old wood and leaves and grass provides outstanding tonality for infrared images. If you can get a few wisps of cloud in your sky all the better.
Put your camera on your tripod, and compose your image. Place the infrared filter on your camera, and use your autofocus as usual. Yes, it works just fine for infrared photos! Your light meter will work too but be sure to bracket on either end to make sure you have at least one usable exposure. Then click the shutter. You’ve just made an infrared photograph.
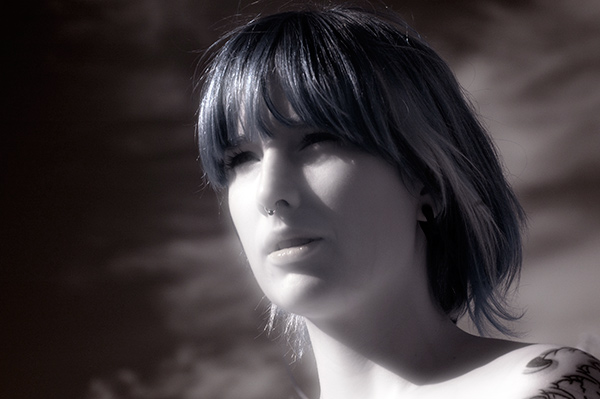
Skin looks like alabaster when shot using infrared light
For techniques and ideas for post-processing our infrared images, watch for my article on post processing infrared photos coming soon!
The post How to do Surreal Digital Infrared Photography Without Expensive Gear or Camera Conversions by Alex Morrison appeared first on Digital Photography School.

Digital Photography School


 Charles Quiles dropped by FashionPhotographyBlog.com recently and we were so glad to hear that his recent debut solo exhibition was a tremendous success. We posted an article about his exhibition, “Fais-Mois L’Amour” (translates to “Make Love To Me”) a couple of weeks ago, and since then Charles has been on fire. Charles shared with FPBlog his latest project, a series showcasing Nykhor Paul, from RED Model Management NYC titled “No Rest In The Kingdom”. We loved the series so much we had to ask the photographer how he creates his amazing images and what is his process. Fortunately, Charles was able to make time to chat with us as we did not get much of a chance to catch up last time with the lead up to his exhibition event.


 To find out more information about this photo series from Charles Quiles and other photos from his shoots you can find everything that you need on his website (www.charlesquiles.com), tumbler for all his outtakes (http://charlesquiles.tumblr.com) and Facebook for what he wants to show his loved ones. (https://www.facebook.com/charles.quiles.x). You can also check out works from his recent exhibition in our post here and email him via charles@charlesquiles.com


You must be logged in to post a comment.