A great deal of post processing can be done in Photoshop, more than most photographers realize actually. As a designer, I didn’t have Lightroom, and just wanted to adjust my photos to look a little nicer, little did I know the power behind Photoshop and its post processing capabilities.
Today I am going to give you some tips and tricks I learned that increased my efficiency within Photoshop.
1 – Photoshop Layout and Organization
The first way to increase efficiency before doing any photo editing, is to organize and optimize your Photoshop layout. Setting up and customizing your Photoshop layout is key to configuring exactly how you want your panels and canvas to look. It is also very easy to do, and can improve your workflow a lot.
Here are a few things to keep in mind when editing your Photoshop layout.
- Only keep the necessary, delete all panels that are superfluous to your photo editing process. They really just get in the way and clutter your workspace.
- Organize your panels based on your workflow. Keeping certain windows paired will help you work faster and make adjusting much easier.
- Adjust spacing and panels so you can have the largest size available for your image.
Here is a quick preview of my layout, in case you need some inspiration.
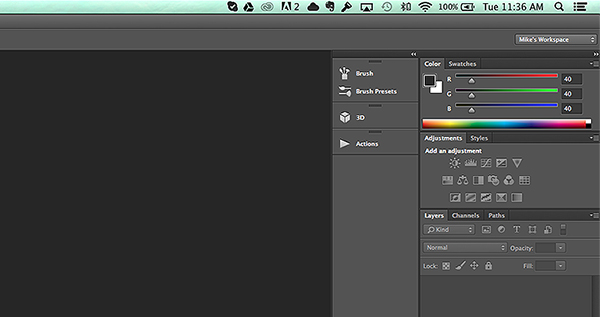
After you carefully adjust and tweak the panels to perfection, it is really simple to save your workspace. Simply go to the top right corner of your Photoshop Document, where is says Mike’s Workspace in the image above, and click to activate the drop-down menu. Then click new workspace and you can save it as your very own Photoshop layout. You can even save shortcuts and menus within the layout.
2 – The Basic Effects
Now that you’ve organized your layout, it’s time to start editing your photos. When I start editing any photo I have a few basic steps I do religiously. These don’t have to be the same for you, and it is totally ok to completely disregard them (or come up with your own), but it is sort of a habit that can help contribute to your photography style.
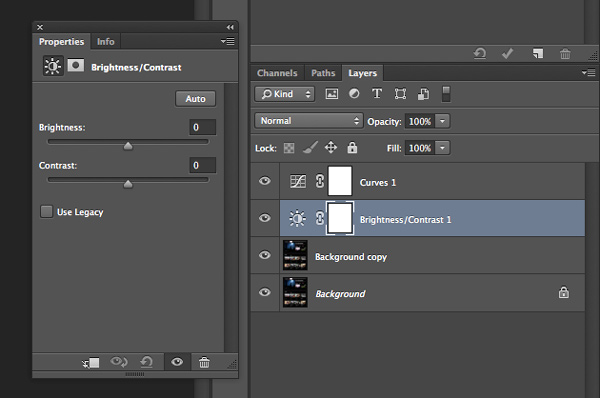
The first small task I complete is duplicating the image layer. To ensure I don’t damage my original photo. From there I add a few subtle Adjustment Layers to balance the light in the image. It looks something like the image below.
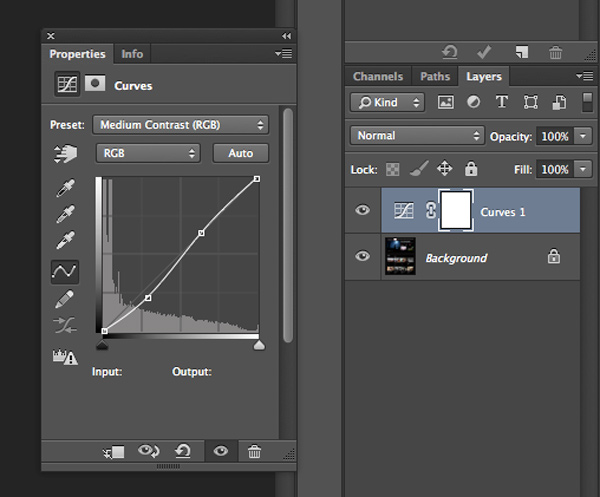
The above effect is a simple curves adjustment that helps balance light and tone down the colors in a subtle manner. After that I mess with the brightness and contrast just a little bit to get the image looking clean and balanced (as an Adjustment Layer as shown below).
Consider all the above steps as precursory steps to the actual photo editing process. These are simply done to balance light, prevent error, and it is like a little system I use to keep my style inline.
3 – Grouping and Organizing Layers
The next thing I do that really helps me work more efficiently is to organize and group my layers. It is really easy and not time consuming at all to rename layers so that you know exactly what effect they are applying to your photo. Then you don’t need to go through all your layers, switching them on and off, to find one you want to remove or readjust.
These are the key areas I group and label my adjustment layers and filters.
- Light and contrast adjustment groups
- Tints and color variations
- Strong filters such as HDR and blurs
- Gradients and vignettes
By labeling these I can easily go to certain effects and adjust them accordingly. This makes photo editing a much faster process, and makes re-editing a photo way simpler and fun.
4 – Subtle Adjustments that Make a Huge Difference
As a final tip for efficiency I am going to share a few subtle effects that work wonders for photo editing. The tools used include:
- Blend Modes
- The Levels adjustment tool
- Tints
Take a look at the difference a simple blend mode can do to an image, with just the click of one button. In the example below I’ve used the Overlay blend mode. Remember to duplicate your original layer and play with the blend modes on the top, copy layer. Blend modes dictate how the pixels in one layer behave and react with the layer below it. Try them all and see what they do.
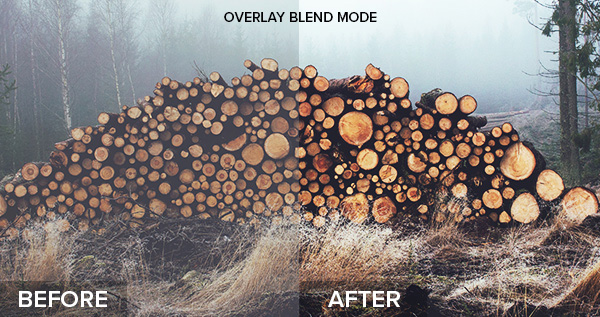
Blending modes can be applied in a few ways. The easiest way, and the way I achieved the above effect is to duplicate your image and select the blend modes drop-down by double clicking your layer (or selecting it right from the Layers panel)

Double click the layer to get this dialog box
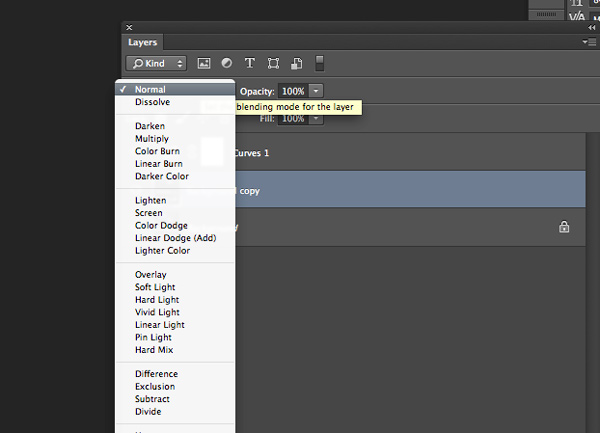
You can also find layer blend modes here on your layers panel
Simply pick the blend mode that looks best and adjust the opacity accordingly. Some of my favorite blend modes are – screen, overlay, soft light, and lighten.
I then use a Levels adjustment layer to adjust light and colors at the same time, adding a crisp and subtle tint. To add a new adjustment layer go to Layer > New Adjustment Layer > then choose the one you want. Or select it from the bottom of the layers panel as shown below.
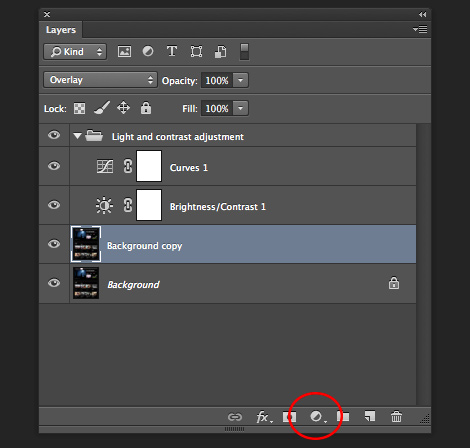
Adjustment layer icon location on the layers panel
|

Adjustment layer options
|
Adjust the various levels by clicking the drop-down and working on the red, green, and blue tones. It is very versatile and easy to use. Just remember – pulling top sliders the ones under the graph) to the left will darken, to the right will lighten. The bottom sliders under the black-white scale, do the opposite.
Summed Up
This is the process I used to create ultimate efficiency when I started editing my photos more frequently. These steps probably won’t apply to everyone, but they are helpful in getting organized when beginning. To wrap it up:
- Organize your Photoshop Layout to improve your workflow
- Use some basic effects for consistency
- Group and label your adjustments so you can easily find them for future reference
- Take advantage of the subtle, but highly effective adjustment layers such as photo tints, levels, and blend modes
Now it’s up to you
Got some interesting tips or tricks for efficiency? Share them in the comments and help other photographers improve the way they work and edit photos in Photoshop.
The post 4 Tips for Post Processing Efficiency in Photoshop by Mike Moloney appeared first on Digital Photography School.

Digital Photography School


You must be logged in to post a comment.