RSS
 

Archive for March, 2014

900MP portraits show human face in extreme detail

20 Mar

megaportrait.jpg

‘Facial cartography’ is an apt description of Swiss photographer Daniel Boschung’s portraits. Folds, crevices and pores that are often invisible under normal viewing conditions are shown in extreme detail in his 900MP images. Each of his photographs is comprised of about 600 images captured by an ABB robot with a Canon 5D Mark II and a 180mm macro lens. Learn more

News: Digital Photography Review (dpreview.com)

 
Comments Off on 900MP portraits show human face in extreme detail

Posted in Uncategorized


Reading Room (Dividers): 13 Creative Bookshelf Designs

20 Mar

[ By Steph in Design & Furniture & Decor. ]

Bookshelf Room Dividers Main

Books make everything better, especially when you’re looking to divide a large loft or studio apartment into smaller, more functional spaces. Bookshelf room dividers go far beyond the standard IKEA Expedit setup, as these 13 examples illustrate, with some offering built-in reading nooks or modular systems that can be expanded as your personal library grows.

Bookshelf Tower and Divider by Marica Vizzuso

Bookshelf Room Divider Vizzuso 2
Bookshelf Room Divider Vizzuso 1

This folding metal screen has slots for books of various sizes, and it can either close up into a columnar tower or be opened for use as a room divider. B-OK by Marica Vizzuso is not only multi-functional, it also turns books into art. Says the designer, “Why do you place books in a conventional way when you can have both an amusing and aesthetically interesting alternative?”

Charmingly Off-Kilter

Bookshelf Room Dividers Off Kilter

Open cubes and rectangles are packed together in a random and off-kilter fashion, resulting in a visually dynamic room divider with a built-in desk.

Hidden Chair and Footstool

Bookshelf Room Divider Viable Hidden Chair

The ‘Shelflife’ series by Charles Trevelyan for Viable London is a space-saving bookcase and room divider with a chair and footstool hidden within the structure of the shelves.

Modern Leaning Bookcase and Room Divider

Bookshelf Room Dividers Modern Leaning

Forget about bookends – you don’t need them with this modular bookcase and room divider system by Nitzan Cohen. The leaning shelves ensure that books stay put, and modules can be added as your collection grows.

Alphabet Room Divider Bookshelf

Bookshelf Room Divider Alphabet

So maybe it’s a little difficult to fit books into rounded letters like C and O, but but this room divider and storage system by modern Finnish designer Lincoln Kayiwa is still a fun way to organize small objects. It’s made of medium-density fiberboard and available in a range of colors.

Next Page – Click Below to Read More:
Reading Room Dividers 13 Creative Bookshelf Designs

Share on Facebook


[ By Steph in Design & Furniture & Decor. ]

[ WebUrbanist | Archives | Galleries | Privacy | TOS ]


WebUrbanist

 
Comments Off on Reading Room (Dividers): 13 Creative Bookshelf Designs

Posted in Creativity


19. März 2014

19 Mar

Ein Beitrag von: Maximilian Zimmermann

Architekturfotografie, Architektur, Weiß, Schwarz, Clean


kwerfeldein – Fotografie Magazin | Fotocommunity

 
Comments Off on 19. März 2014

Posted in Equipment


Firmware roundup: Updates for the Alpha 7/7R, Nikon D4, Canon EOS 6D

19 Mar

shared:download-button.png

This week camera manufacturers released a number of new firmware versions. Today Sony released the previously announced Sony Alpha 7/7R update that promises faster start-up speeds, improved image quality and better AF support. There are also updates for a host of other Sony NEX cameras. Meanwhile, Nikon and Canon released updates to the D4 and EOS 6D, respectively. Learn more

News: Digital Photography Review (dpreview.com)

 
Comments Off on Firmware roundup: Updates for the Alpha 7/7R, Nikon D4, Canon EOS 6D

Posted in Uncategorized


Remote Wildlife Photography From My Basement

19 Mar

A couple of weeks ago it was -30 Celsius (-22 Fahrenheit) and I was intent on photographing a pair of Red-backed Voles that seem to have established themselves in the backyard of my home in Edmonton, Alberta, Canada. Before I got myself a new gadget, I probably would have suited up in my heavy duty Canada Goose parka, some long underwear, snow pants and about four hand warmers and camped out for a morning to get a few shots of these cute little guys.

But now I’m a bit older and maybe even a bit wiser and I do so love my technology. And one of those technological gadgets allows me to get me shots without having to worry about freezing any of my favourite appendages right off. What’s the gadget I’m talking about? It’s called the CamRanger and it allows me to operate my camera anywhere that I’m within WiFi range (~35m indoors and ~100m outdoors).

CamRanger_SetupThe CamRanger itself is a little white plastic box measuring about 3.5” x 2” that you connect to the USB port of your camera via a USB cable. The device itself is powered by a rechargeable lithium battery. Once the CamRanger is plugged into your camera it sets up its own WiFi network. Connecting a device to that WiFi network (like an iPhone, iPad, Android device, Mac or Windows computer) allows you to wirelessly control your camera from that device.

In my case, I used my iPad to connect to the CamRanger attached to my camera. I set the camera up on a tripod with the lens pointing at the holes in the side of a snow bank that the voles were using to access the world outside their lair. Once set up, I could scurry into my own lair which in this case was my home office in our basement.

I activated the Live View feature to keep an eye on what the camera was seeing. I’d been watching these voles for a few days (they set up camp under one of our bird feeders) and I knew that they came out for about an hour each morning just after sunrise. Sure enough, not long after getting everything set up and waiting for my glasses to defrost, the voles started making their appearance.

From my position warmly tucked away in the basement I could consult the live histogram and make adjustments to the exposure (Shutter Speed, Aperture and ISO) to make sure that my exposure was perfect. I turned on a feature in the software app called “Focus Peaking” that allowed me to clearly see what was, and wasn’t in focus and I fine-tuned that focus via controls in the app.

With all that set up, it was just a matter of waiting for the voles to get themselves into a photogenic position and then I’d tap the remote shutter button on the CamRanger app and take a shot. The voles usually spend their time cautiously emerging from their lair, then darting out to find one seed or another, and quickly returning to the shelter of their tunnel entrance to safely eat the seed. If they got a particularly good seed, they’d retreat further within the tunnel, presumably to stash it away.

Northern Red-backed Vole - © Paul Burwell Photography

Northern Red-backed Vole – © Paul Burwell Photography

During these breaks in the action, I used another feature of the CamRanger to download the full resolution images to the iPad so that I could magnify them to check for critical sharpness. There is a bit of lag between what you see on the app’s Live View display and what is happening in the “real world” along with a slight delay between when you press the shutter button on the app and when the signal arrives at the camera to make the photograph. It isn’t long (think milliseconds) but it can be enough that by the time the photo is made the fast little critter isn’t where you thought it should be, and focus is off or the composition isn’t great.

I use my CamRanger a lot and love its ability to remotely initiate photography and video sessions. It also has a built in intervalometer to make time lapse photos and can do advanced bracketing of exposures for HDR type applications. Another favourite CamRanger feature of mine is its ability to provide very precise focus control for macro photography and it can even perform automatic focus stacking to provide enhanced depth-of-field images by running them through some third party software.

Northern Red-backed Vole - © Paul Burwell Photography

Northern Red-backed Vole – © Paul Burwell Photography

A few years ago I’d dreamed of the possibility of having remote operational control of my camera at a distance and now, with the help of the CamRanger, that’s a reality. My toes and fingers are eternally grateful! CamRanger is widely available and sells for about $ 300 US dollars.

More on wildlife photography here:

  • 5 Most Common Mistakes in Wildlife Photography – and How to Avoid Them
  • Manipulating Natural Light in Wildlife Photography
  • Making Sharper Wildlife Photographs – [Part 1 of 2]
  • Making Sharper Wildlife Photographs – [Part 1 of 2]

The post Remote Wildlife Photography From My Basement by Paul Burwell appeared first on Digital Photography School.


Digital Photography School

 
Comments Off on Remote Wildlife Photography From My Basement

Posted in Photography


Hungarian law bans photos taken without consent

19 Mar

13116302753_33730a629a_c.jpg

According The Guardian newspaper, a new law in Hungary that took effect on March 15th could have a potentially chilling effect on photographic freedoms in that country. It will make it illegal to take a photograph of someone without their express permission. This new civil code covers anyone in the frame, which means that photographers will have to seek permission from anyone in the foreground or background. Learn more

News: Digital Photography Review (dpreview.com)

 
Comments Off on Hungarian law bans photos taken without consent

Posted in Uncategorized


Understanding Flash Metering Modes

19 Mar

flash-metering-modes

Flash Metering Systems TTL, A-TTL,  E-TTL and E-TTL II

Terms used in this article are Canon specific but there are the same or similar terms for Nikon, Sony, Olympus and other camera manufacturers. _J6L0002-Edit-Edit

When you use your camera’s metering system, the meter will measure the reflected light from your subject (see Metering Modes and How Your Camera Meter Works).  This is not the case when you use your camera with a flash, either a pop-up or mounted on your camera’s hot shoe and set to one of the TTL modes. (TTL is an acronym for Through The Lens) Irrespective of which TTL flash mode you choose, the exposure is not based on reading the ambient light,  (see: Balancing Flash and Ambient Light with a Light Meter)  it is based on the flash output. Measuring flash output can be achieved by either measuring a fixed output pre-flash and evaluating the exposure, or by measuring the flash output as it is fired. This data is then used to calculate the flash output required to expose the scene correctly.

So on to understanding flash metering modes . . .

There are three flash metering modes

TTL or through the lens metering

This is the standard metering mode, typically used when your camera has a pop-up flash or a dedicated external flash heads. The exposure is based on the flash firing. The quantity of the flash output is monitored through the lens by a flash sensor that is mounted below the mirror.

Keep in mind, that when you use a flash the maximum (fastest) shutter speed is the sync speed of your camera (check your manual to check what your camera sync speed is, most are 1/200 or 1/250th). You must never attempt to use faster shutter speeds unless your flash supports “High Speed Sync”.  Since the shutter speed is fixed at the sync speed or slower (in Aperture priority mode: Av on Canon, A on Nikon) the camera will automatically set it at the sync speed.  In Manual (M) mode you must set the shutter speed to the sync speed or slower otherwise you will get black bands in your image.  This is because the shutter starts closing before the flash has had a chance to fully expose the sensor.

In TTL mode the flash will read the exposure from the light bouncing off your subject and the flash sensor will turn off the flash when it believes the image has been exposed correctly. In this TTL mode changes to the aperture setting will typically affect the exposure of the areas of your image that is lit with just the ambient light.

TTL Flash in modes other than Aperture Priority or Manual:

flash-metering-modes

P – is the Program mode  or Program auto mode.  In this mode the camera manages all the settings. Some cameras have an “A” or full Auto mode. Canon cameras may also have a “CA” setting for Creative Auto mode. In these modes the camera sets shutter speed at the sync speed, and the aperture based on the ambient light. When using TTL the flash fires and turns off when the auxiliary sensor tells it to based on the evaluated exposure of the flash.

For TTL the flash power and duration is based on the ISO and the aperture setting. In most cameras the ”through the lens“ flash exposure reading is taken from the same area as your focus point. For TTL flash metering there is no pre flash.

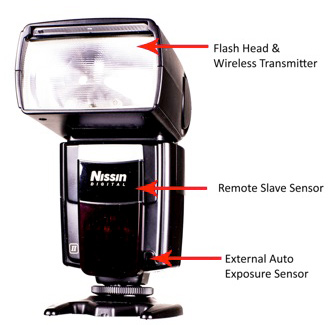
A-TTL (Advanced through the lens)

This metering mode performs in the same basic manner as TTL. It will read the exposure through the lens, from the area of focus and trigger the flash to turn off when the appropriate exposure is achieved. The main difference is that this method uses a pre-flash. This pre-flash is used to determine f-stop based on the distance to the subject that reflects the flash output. The pre-flash is fired when the camera’s shutter is half depressed, the camera evaluates the readings and sets the aperture. Now when the shutter is fully depressed the flash fires to correctly expose for the subject. Based on the model of your flash, the pre-flash can be an actual white light flash or an infrared flash.

nikon-flash

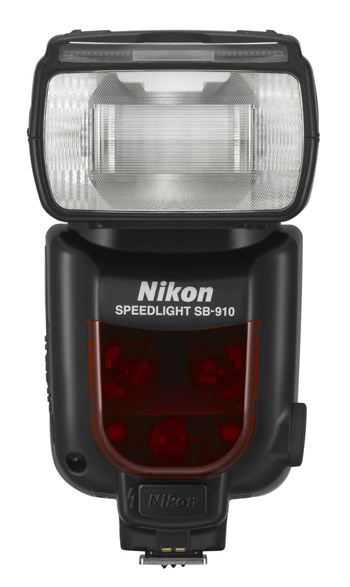
Nikon’s latest, the SB910

In all cases the main flash is fired as a pre-flash if the flash head is oriented in any position other than directly at the subject. This pre-flash can be an annoyance. The pre-flash is measured by the flash unit and the evaluated data is communicated back to the camera. If you use your camera in Program or Automatic mode with A-TTL, ambient light exposure and flash based exposure are collectively evaluated and the camera attempts to resolve the lighting to establish the f/stop (aperture) for the best exposure. Since the sensor that evaluates the pre-flash is located on the flash unit instead of the camera’s sensor, using a filter on the camera lens will cause inaccurate readings.  This is because the sensor on the flash is not covered with an equivalent filter.

E-TTL (evaluative through the lens)

As with A-TTL, E-TTL also uses a pre-flash. However, the flash exposure is not measured by the dedicated flash sensor but the main sensor that is used for ambient light exposure readings. This is similar to the exposure calculations and focus locking that occurs before the shutter opens.  This is true for images captured in ambient light when your camera is in Aperture, Shutter Priority or Program mode. E-TTL has far greater exposure accuracy than TTL or A-TTL modes. The pre-flash in E-TTL mode is not triggered when the shutter is half depressed but when the shutter is fully depressed. Since flash durations are very short the pre-flash is not visible to the naked eye. The pre-flash measures the distance and reflectivity, and calculates the appropriate flash output. All this is accomplished just before the shutter actually opens.  The pre-flash is fired immediately before the main flash except when your camera is set for 2nd curtain sync. In addition, if FEL (flash exposure lock) is used, the pre-flash is fired only when FEL is established.

41Dl+k0z0pL

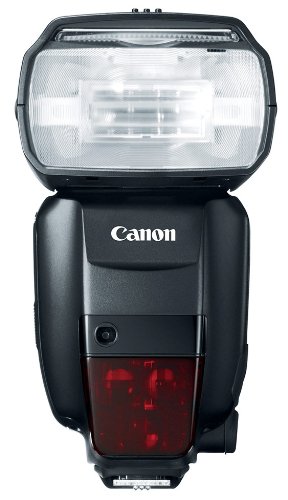
Canon’s newest speedlite the Canon 600EX-RT

E-TTL II

This is the new standard in Canon EOS systems.  It is a firmware enhancement that uses the camera and not the flash to do all the evaluation. Fortunately it is compatible with older E-TTL flash units.  E-TTL II uses the camera’s evaluative metering zones before and after the pre-flash. In this process, areas with small changes in brightness are then averaged for flash metering. This method prevents the issue where highly reflective materials result in specular highlights. With ETT-L II the  flash metering system is not linked to the selected focus area. This allows focus and recomposition without affecting correct flash exposure. Overall the E-TTL II system allows for much more natural exposures with out the harsh appearance typical of direct flash photography.

The post Understanding Flash Metering Modes by Shiv Verma appeared first on Digital Photography School.


Digital Photography School

 
Comments Off on Understanding Flash Metering Modes

Posted in Photography


Stellar Phoenix Mac Photo Recovery Software Review

19 Mar

The “click of death!”

I’m sure it’s happened to you at some point or other, a drive dies *click bzzt click bzzt click*  or a memory card stops working for some unknown, and entirely frustrating reason. I’ve used pretty much every memory card and hard disk on the market at some point or another, and have lost images to the “corruption demons” with a couple of them… Here’s how to get those files back!

Photo recovery software to the rescue!

simon pollock photography gtvone

It’s not always the fault of the card or the drive – a premature ejection like pulling the drive out of your computer / usb / firewire or indeed grabbing a card out of your camera while it’s writing a file – most of the time the file system (like a set of drawers on the card or drive) manages to put the data away before stopping, but sometimes, like my office floor, things are left everywhere and that’s when you encounter data corruption (very basically).

Stellar Phoenix Mac Photo Recovery 6 Mac

stellar phoenix photo recovery software review

What they say

Stellar Phoenix Mac photo recovery is a utility that recovers deleted, formatted, lost photos, pictures, songs, movies, and other multimedia files from Mac systems.

  • Recovers from Mac – Systems, External Drives, USB Drives, iPod and Digital Cameras
  • Supports a wide range of image, audio, and video file formats
  • Supports hard drives with capacities over 2 TB
  • Efficient Scan Engine scans the storage media faster
  • Also recovers Thumbnails of the corresponding image files
  • Compatible with Mac OS X 10.5 up to the Latest OS X Mavericks

What we say

After recovering from all kinds of old drives, CF cards (a 16mb one from a LONG time ago) including a 2TB disk, I am very happy with Stellar Phoenix Mac Photo recovery! It’s dead easy to use – you start it up, choose your drive and click recover… Sure, you can head into the advanced tab and recover only single file types if you wish, for example if you were after a set of CR2 files (Canon RAW) from a CF card, you could narrow your search down to just those files. Once scanned you can save the scan / found files information if you wish to restore the files at a later date.

5

I started this review a long time ago and, with the first version of the software, I had some minor issues – it called a CR2 a DNG and so on, which in the big scheme of things wasn’t a total fail, but could be very confusing… I was able to give this feedback to the creators, and with the new version there are no issues, and none of the previous bugs.

There are two versions of the software, one that simply recovers any of your media files and another slightly more expensive ($ 39 vs $ 49.99) version that also repairs corrupt jpeg files. I am using the regular version and I did encounter a couple of corrupt images, I hope to run through the same tests with the platinum version soon.

Recovery time was about average based on my previous experience (Yes, the photo at the top is me and yes, we’d just lost a 9TB storage array… long story) with a CF card of 16GB taking a bit over an hour and a 2TB drive via USB taking about a day and a half. In both cases I was able to successfully recover the data I needed.

Data recovery isn’t always guaranteed, I’m not going to lie – sometimes the pretty photographs just don’t want to come back. ever. I was able to recover everything I set out to recover using Stellar Phoenix Mac Photo software in this case.

Conclusion… Based on my time in I.T. and my previous experience with recovery software, I’m happy to recommend this software if you find yourself in a spot of digital bother.

For more on image recovery and back up see:

  • Recover Images from a Damaged SD card
  • Recovering lost or deleted files – Backing Up & Saving Your Images: Part 4
  • Memory Cards – How to Extend Their Life and Keep Them Healthy

The post Stellar Phoenix Mac Photo Recovery Software Review by Sime appeared first on Digital Photography School.


Digital Photography School

 
Comments Off on Stellar Phoenix Mac Photo Recovery Software Review

Posted in Photography


Mastering Self-Portraiture II: Various and Stellar Kinds of Self-Portraits

19 Mar

Do you want to take your self-portrait,but still don’t know where to start ? Don’t worry! Have your latest attempts been a little boring? Trust us. It’s normal. The first self-portraits you take might be out of focus, boring or nothing out of the ordinary. But keep this in mind: Practice makes perfect. Keep shooting, and don’t be afraid to Continue Reading

The post Mastering Self-Portraiture II: Various and Stellar Kinds of Self-Portraits appeared first on Photodoto.


Photodoto

 
Comments Off on Mastering Self-Portraiture II: Various and Stellar Kinds of Self-Portraits

Posted in Photography


Sand Cities: Geometric Architecture Sculpted from Beaches

19 Mar

[ By WebUrbanist in Art & Sculpture & Craft. ]

geometric micro city structures

A serious step beyond traditional sand castles, these sculptural micro-structures range from simple sets of cubes to miniature buildings and architectural complexes.

geometric sand pavillion stairs

geometric sand building design

geometric mini city complex

Calvin Seibert of New York recently traveled to Hawaii to complete his latest series of semi-abstract beach sculptures, employing skills he has learned as an assistant sculptor and in carpentry and construction trades.

geometric micro urban design

geometric sand micro buildings

micro architecture sand city

The results exhibit an uncanny grasp of architecture, design and composition, balancing structure and space within individual mini-buildings and larger arrays alike. Crisp edges and smooth curves make them look almost like stone or concrete.

geometric beach abstract art

mini micro curved sculpture

geometric beach art wall

Some of his pieces draw on landscaped earthworks and urban layouts, while others show off a whimsical and eclectic mix of imagination, art and geometry.

geometric beach architecture design

geometric sand castle art

geometric villa design mini

Naturally, the tides always turn on these creations, flattening them back out as the ocean rolls in, making each a temporary expression, but in many cases one could imagine a permanent, life-sized version standing the test of time.

Share on Facebook


[ By WebUrbanist in Art & Sculpture & Craft. ]

[ WebUrbanist | Archives | Galleries | Privacy | TOS ]


WebUrbanist

 
Comments Off on Sand Cities: Geometric Architecture Sculpted from Beaches

Posted in Creativity