Ein Beitrag von: Robert Mehlan

kwerfeldein – Fotografie Magazin
[ By Steve in Abandoned Places & Architecture. ]

Rest stops and welcome centers are to highway travel what oases are to desert caravans, with one exception: when an oasis dries up, the camels unload anyway.
 (image via: Neoamaru)
Making a run for the border? Not so fast… this abandoned rest stop on the border between France and Belgium no longer offers a welcome break for weary travelers; one imagines the Wehrmacht was rather put out. Kudos to Flickr user Neomaru for capturing this curious relic of modern architecture in its currently colorful yet sadly forlorn state.
 (images via: Midwest Roads)
We don’t make a habit of ignoring road signs (and neither should you) but in this case we’ll make an exception: the rest stop at milepost 104 on US 41 southbound, about 3 miles north of Fond du Lac, Wisconsin, hasn’t existed since some time in the mid-1990s. So then, does the sign advise the next rest stop is 21 miles further down the road or that this is (was) the last rest stop FOR 21 miles? Why not both?
 (images via: Midwest Roads)
Scott Kuznicki visited the location of this late and unlamented rest stop on October 5, 2002… we don’t know why, but he’s got the photos to prove he (and the rest stop) was/were there. Maybe he just needed an alibi. Anyway, as you can see there’s not much evidence for the rest stop’s existence besides fencing and faded stripes on the road.
 (images via: Wikimapia)
Rest stops in California are funded and maintained by the state’s Department of Transportation, known as CalTrans. While many rest stops in remote areas were closed relatively recently due to California’s never-ending fiscal crisis, the rest stop whose remnants linger on Highway 99 bit the dust in the early 1980s. It did have one claim to fame while still standing, though: an episode of the popular TV crime drama CHiPs centered around an accidentally abandoned baby left at a rest stop… THIS rest stop.
![]()


[ WebUrbanist | Archives | Galleries | Privacy | TOS ]
![]()
     |
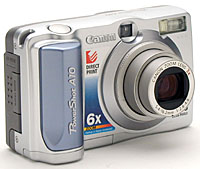 This morning I opened up the cupboard in my study where I keep my camera gear and my eye was drawn to the very first digital camera that I owned – a little Canon Powershot A10 camera (pictured right) with what I thought at the time was an amazingly big 1.3 megapixel sensor. Before that I’d used a friends Sony Movica camera that had a 1.4 inch floppy disk to record the images).
It made me think about how digital cameras have changed over the years and how many different digital cameras of different types I’ve owned.
I have 13 cameras in that cupboard today (I have a feeling I owned another couple which may be in the hands of family or friends) plus have used numerous camera phones.
I thought it might make an interesting poll question. How many digital cameras have you owned? Keep your response to just the cameras (not camera phones) if you can.
Note: There is a poll embedded within this post, please visit the site to participate in this post’s poll.
I’d also love to hear in the comments:
For me the first was my Canon A10 but I think my favorites would have to have been my Canon EOS 20D (my first DSLR which was when I really started to get intrigued by digital) and my Leica M9-P which helped me slow down and begin to enjoy my photography again after a period of getting a little disillusioned by it.
What about you?
Post originally from: Digital Photography Tips.
Check out our more Photography Tips at Photography Tips for Beginners, Portrait Photography Tips and Wedding Photography Tips.
How Many Cameras Have You Owned? [POLL]
[ By Delana in Design & Products & Packaging. ]

You might have fond memories of sharing a Coca-Cola with a special person, but those memories probably involve a glass and two straws. This clever marketing campaign lets you split your Coke can right in the middle to share it easily.
The “Sharing Can” is a clever design that allows you to split apart a normal-size Coca-Cola can with a simple twist. The top and bottom halves separate, giving you two half-size Cokes – one for you and one to share.

The design is simple but clever along with being visually striking. These cute little cans would be the perfect conversation starter for getting to know someone.

Splitting your Coke with someone else would also be better for your health than drinking a whole can on your own. Unfortunately, we won’t be seeing them in stores or machines anytime soon. The “Sharing Can” was a limited-time campaign in Singapore.
![]()
[ WebUrbanist | Archives | Galleries | Privacy | TOS ]
![]()
| |

Image by Eric May
Last week I was speaking with an amateur photographer who told me that he’s been struggling for photographic inspiration and ideas lately.
He reflected that he felt like he’d become something of a lazy photographer and was in a bit of a rut – always photographing the same things in the same ways.
I shared a number of ideas from my own experiences of seeking photographic inspiration (some of which I’ll share below) but it struck me halfway through the conversation that a lot of the ideas I was suggesting was actually about him limiting himself in his photography in some way – in order to find inspiration.
Let me explain by looking at 5 photography ideas that I shared with him.
Note: by no means am I suggesting that these are the only ways to get inspired – they’ve just helped me at times.
 I wrote about this recently in a challenge here on dPS. The idea is to choose a focal length and only shoot at it for a period of time.
While many of us have become used to (or reliant upon) shooting with a zoom lens – there’s something about shooting with a prime lens (fixed focal length) that makes you think about the composition of your shots a little more.
So choose a focal length that you don’t shoot at much and stick with it for a week and see how you go (and if you don’t have a prime lens to do this with – use your zoom but simply stick at one end of its range for a week).
Variation: another option for this is to choose a lens that you may not have used much before. Many photographers buy multiple lenses but then stick with one, ignoring others. Alternatively swap lenses with a friend for a week or even try renting one for a short period.

Image by Paul G
I was out shooting with a photography enthusiast friend recently and was amazed at the number of shots he took. At one point we were photographing his son (who was quietly playing with lego) and my friend shot off a burst of 20 or so shots at 4 frames per second.
Considering his son was sitting still and only really moving his fingers for those few seconds I did wonder at the need to shoot so many shots.
Of course I also know the temptation – shooting heaps of shots is easy to do. It doesn’t really cost you anything (although fills up hard drives pretty quick) and some might think it increases your chance of capturing the perfect moment.
The problem is that when you rely upon the quantity of your shots to improve the quality of your images that you can easily become lazy and complacent.
Here’s my challenge – next time you go out on a shoot – limit yourself to 36 shots (the number in a roll of film). In doing so you’ll find yourself really thinking about your shots. You’ll time them better and make sure each shot counts!

Image by Alan Antiporda
Speaking of old school film photography – do you remember that feeling when you got to the end of shooting a roll of film and wondering how your shots would turn out?
You’d put the film in for processing and wait a week or so for them to be ready and then go to the photo lab with anticipation… rip open the package and go through them one by one – reliving the moments you captured a week or so ago?
I love that digital photography gives us instant access to the images we take – but sometimes I wonder if by having that little screen on the back of our cameras we might be missing something from the experience of photography?
There are certainly advantages of being able to quickly review our shots or compose them on a larger screen – but similarly to my point above on shooting lots of shots I wonder if the instant review could be making us a little lazy? We’ll just keep taking shots till we’re happy.
I personally also find myself looking at my camera a whole lot more than I am looking at the scene in front of me and wonder if some of the joy of the moment could be lost.
So try this – turn off your LCD screen. Some cameras let you do this in your settings while others might take a little self discipline to do this – but I’d be interested to see what impact it has.

Image by Shazeen Samad
Shooting recently with the Leica M9-P (a fully manually focused camera) reminded me how little I shoot with manual focus these days.
I admit it – I’ve become lazy and have relied too much upon Auto Focus.
Shooting with the M9-P also reminded me how focusing manually can open up all kinds of possibilities. Just thinking about your focus rather than relying upon those 21 auto focal points your camera has (or how every many there are) puts you in a different frame of mind.
I find shooting in manual focusing mode makes me slow down a little, consider my shots and get a little more creative.
So switch to Manual Focusing and see what impact it has on your photography! I’d love to hear how it goes for you in comments below.

Image by Travis Lawton
I was flicking through some of my shots recently in Lightroom and as the images opened in front of me I noticed something that I’d not considered much before. Almost every shot I’d taken over a month or so had been taken at the maximum aperture of the lenses I was using.
I was shooting wide open almost all of the time.
There were a number of reasons for this – partly I shoot a fair bit indoors where the extra aperture lets more light in – but I guess it is also part of my style. I love narrow depth of field shots – bokeh is my friend.
However I wondered whether by shooting wide open so much I perhaps was ignoring other possibilities. Perhaps some of my portrait work would have been better if I shot with a smaller aperture and included more in focused backgrounds to give my subjects context (environmental portraits).
For the next week I began to shoot with a smaller Aperture – it was challenging at first and I wanted to give up – but at the end of the week I realised I was again being more thoughtful with my shots and had expanded the possibilities of styles at my fingertips when shooting.
These are about half of the ideas I shared with my friend – I’ll write up the others in the coming week – but in the mean time I’d love to hear ideas from others too. What do you do when you find yourself in a photography rut needing inspiration?
Post originally from: Digital Photography Tips.
Check out our more Photography Tips at Photography Tips for Beginners, Portrait Photography Tips and Wedding Photography Tips.
5 Ideas to Kick Start Your Photography Again
Da ich in meinem Freundeskreis Skater habe und auch früher eine Weile das Griptape plagte, wurde ich neugierig, als in meiner Facebook-Timeline ein Videoportrait über Erik Koston geteilt wurde. Ich sah es mir an und während des Schauens hatte ich paar mal Gänsehaut. Denn das Gesagte in Verbindung mit den wunderbaren Bildern sprach zu mir auf einer emotionalen Ebene: Leidenschaft.
Wenn man ein Leben lang einer geliebten Sache folgt und ihr treu ist, dann entsteht eine Beziehung zur Tätigkeit, die nicht mehr von der Person zu trennen ist. Im Video spricht Erik Koston, professioneller Skaterboarder, genau darüber. Er erzählt davon, wie er in der Schule ständig ans Skaten dachte und sich heute fragt, wie lange er im Alter von 37 seiner Leidenschaft noch folgen kann.
Ich mag es, Menschen dabei zuzuhören, wie sie über die Passion ihres Leben sprechen, wie sie ihr folgten und was daraus enstand. Das spricht zu mir deshalb, weil ich als Fotograf genau dasselbe tue – oder es zumindest versuche. Ich kann viel von solchen Menschen lernen, denn sie machen auf ihrem Weg ganz eigene Erfahrungen und finden Worte für vieles, was ich sehr gut nachempfinden kann.
So ein Moment ist folgender (ich werde nicht zu viel vorwegnehmen): Erik spricht darüber, dass das Skaten mittlerweile zu ihm gehört, wie ein Körperteil: Wie seine Hand. Er würde sich nie von seiner Hand trennen. Ist das nicht eine sehr treffende Metapher?
Des Weiteren liebe ich es, Menschen wie ihm bei der Tätigkeit zuzusehen. Denn meistens sieht das leicht, mühelos und flüssig aus. Erik macht hier ein paar Flips, da ein paar Grinds und es kommt einem beim Zusehen so federleicht, so ganz natürlich vor.
Nun, das ist es auch, aber: Alles, was leicht aussieht, ist die Folge jahrelanger Wiederholung. Von Abertausenden Fehlern (bei Erik: Stürzen). Täglich. Immer wieder. Nur, wer dran bleibt, kommt irgendwann da an, wo Erik Koston heute ist.
Erik Koston ist für mich in dieser Hinsicht ein Vorbild. Sein Tun motiviert mich, weiter täglich auf der Straße mein Ding zu machen. Auch, wenn die Ergebnisse manchmal noch weit von dem entfernt sind, wo ich mal ankommen möchte.
kwerfeldein – Fotografie Magazin

The GigaPan EPIC Pro is an affordable motorized panorama head for DSLRs, built to create high-resolution images from multiple frames. in this article, Ireland-based landscape photographer Carsten Krieger takes the device out into the field to put it through its paces. Click through for a link to the full review.
News: Digital Photography Review (dpreview.com)

I’m not sure how the Ricoh GR one will do in the marketplace, now that smartphones are gnawing away at the digicam sector. But, I figure it will have enormous appeal to enthusiasts and the adventurous. After all, how many people do you know who will die for a fixed lens camera?
But wait, it images to an APS-C sized CMOS. Surely worth a dollar or two and a moment of your time to peruse this review.
The Pentax GR is a small, magnesium alloy bodied compact camera with an f2.8 lens equivalent to a 28mm 35 SLR optic. It succeeds the 2011 camera — the GR DIGITAL IV — and upgrades the basic specs and functions of that model.

The lens diaphragm is nine-bladed, so highlights are reproduced naturally; I found I could shoot directly into the light without annoying flares (see the video).
An internal neutral density filter is accessed via the finder menu: handy to slow the shutter speed for shooting flowing subjects like tides, waterfalls etc.
The 16.2 million pixel CMOS captures a maximum image size of 4928×3264 pixels, leading to a 42x28cm print.
Video? Full HD capture at 1920×1080 pixels. In video, the GR takes a different path to every other digicam on the market in requiring you to tap the same shutter button for stills and video recording. I fell foul of this situation a number of times, thinking I was shooting video when I was actually shooting stills! And vice versa!
You can easy fall into this trap as the LCD display has text of an inordinately small size, so you can easily be unaware of where you’re at! So, naturally, you can’t shoot stills while recording video.
But … you can add effects such as Retro and Bleach Bypass to a video recording.
Another: Ricoh calls it an Interval Composite mode. The camera can be set to fire off a sequence of timed exposures of the night sky at a fixed interval, then it selects and combines only the high-luminance pixel data from each of those images to produce a single composite image. Great when you want to combine the trails of the moon and the stars with a landscape.
There is a useful dual-axis on screen level for horizontal and vertical alignment.
And catch this: not only does the camera offer Bulb and Time for long exposures but you can also set the shutter to fire off exposures between 1/4000 second and 300 seconds. That’s right: five minutes!


There are relatively few external controls.
At the side of the camera: a flash activation button and beneath it is a button giving access to a range of image effects: retro, high key, miniaturise, cross processing, B&W etc. The B&W mode actually offers three variations: straight mono; tinted mono; high contrast mono.
: on/off button; shutter button; mode dial with positions for auto, PASM, MY1/2/3 user settings and video record. This has a useful detent button that avoids the chance of an accidental alteration to the setting.
: just over the lip is an up-down lever that adjust shutter speed and lens aperture. Off to the right is a button to alter exposure compensation and another to give you screen replay.
Lower down is an AF function button and lever. Set the lever to the Continuous AF (C-AF) mode and you can shoot a series of sharp images of a moving subject by tapping the shutter release button while pressing the AF button. An optional setting takes you to a continuous shooting mode, activated while the C-AF button is pressed.
Lower still is the four way jog dial that gives access to white balance settings, menu, a function button, flash options plus macro. And here’s a trap that’s easy to fall into: set the macro function on the rear four way jog dial, turn off the power, turn it back on again and the macro function is still active. Dangerous if you want to shoot distant subjects in a hurry!
And lower again are buttons for the self timer and screen display options.

The rear screen menu options are extensive, identified by a no frills list of text options.


A slight increase in noise became evident at ISO 3200 which rose even further by ISO 6400. At ISO 12800 noise rose further still but IMHO the overall quality made it useful for some shots.
ISO 25600: it’s all over Rose! High noise level, poor sharpness, muddy colour.
I was able to take my first shots just two seconds after startup. Follow ons came in faster than I could hit the shutter!
There is slight barrel distortion.
And a note: if you need more coverage with the fixed lens you can buy an optional wide lens converter that will effectively give you the 35 SLR equivalent of 21mm.
Quality: excellent in all respects: vivid, natural colour, razor sharpness. A top performer.
: top lens; small form factor; copious shooting features.
: unless you surrender to the principle of a fixed focal length lens you will be frustrated; no stabiliser so it makes it less than perfect for handheld video shooting.
A camera for the specialist.
Image Sensor: 16.2 million effective pixels.
Metering: Multi zone (484), centre-weighted average; spot.
Sensor Size: 23.7×15.7mm CMOS (APS-C).
Lens: f2.8/18.3mm (28mm as 35 SLR equivalent).
Exposure Modes: Program AE, shutter and aperture priority, manual.
Shutter Speeds: 300 to 1/4000 second, Bulb and Time; movies 1/60-1/2000 second. check
Memory: SD/SDHC/SD/SDXC/Eye-Fi plus 54 MB internal memory.
Image Sizes (pixels): 4928×3264 to 640×480. Movies: 1920×1080, 1280×720, 640×480.
File Formats: RAW, JPEG, MPEG4.
ISO Sensitivity: Auto, 100-25600.
Viewfinder: 7.6cm LCD screen (1.23 million pixels).
Interface: USB 2.0, HDMI mini, AV.
Power: Rechargeable lithium ion battery, DC input.
Dimensions: 117x61x34.7 WHDmm.
Weight: Approx. 245 g (inc card and battery).
Price: Get a price on the Ricoh GR at Amazon.
Post originally from: Digital Photography Tips.
Check out our more Photography Tips at Photography Tips for Beginners, Portrait Photography Tips and Wedding Photography Tips.
Richoh GR Review

We’ve been fans of Aaron Johnson’s comic strip ‘What the Duck’ for years. ‘WTD’ is one of the best satirical comic strips in the world, and it’s published here every week, as well as being included in our weekly newsletter. Barbed, topical and always amusing, we hope you enjoy WTD as much as we do. Click through for this week’s strip.
News: Digital Photography Review (dpreview.com)

You must be logged in to post a comment.