RSS
 

Archive for April, 2013

Seasonal: Weekly Photography Challenge

12 Apr

Under "That" TreeThis week your photographic challenge is to take and share an image based on the theme of ‘Seasonal’.

Recently we published a post on how to improve your photography of Flowers which may serve as inspiration for those of you in the Northern Hemisphere for this weeks challenge but for those of us down south it could be time to look for some more Autumnal shots (I notice the leaves on the trees in our street this week are turning red).

So whatever the season where you are – grab your camera, head outside and try to capture the essence of what’s happening in Mother Nature in your part of the world right now.

Once you’ve taken your ‘seasonal’ image and have upload it to your favourite photo sharing site either share a link to it or – embed it in the comments using the our new tool to do so.

If you tag your photos on Flickr, Instagram, Twitter or other sites with Tagging tag them as #DPSSEASONAL to help others find them. Linking back to this page might also help others know what you’re doing so that they can share in the fun.

Also – don’t forget to check out some of the images posted in our last challenge – Window Portraits challenge where there were some great images submitted.

Post originally from: Digital Photography Tips.

Check out our more Photography Tips at Photography Tips for Beginners, Portrait Photography Tips and Wedding Photography Tips.

Seasonal: Weekly Photography Challenge


Digital Photography School

 
Comments Off on Seasonal: Weekly Photography Challenge

Posted in Photography


Heat-Sensitive Business Cards Take On Temporary Images

12 Apr

[ By Steph in Design & Graphics & Branding. ]

Thermal Business Cards 1

Many of the people who end up with your business cards will use them to jot down notes or grocery lists, but this creative twist on the conventional lets them leave their mark in a much more fun and memorable way. Austrian graphic design studio Bureau Rabenstein created a set of heat-sensitive, white-bordered business cards that look like developing Polaroids for photo producer Natalie Daniels.

Thermal Business Cards 2

The thermo-sensitive black ink under the surface takes on the imprint of whatever is placed upon it – be it fingers, lips or objects – for just a few moments before they fade.

Thermal Business Cards 3

While they’re are certainly nowhere near as cheap to produce as plain old paper ones, they’re also nowhere near as disposable. Creative business cards like these will not only make a (literal) impression, they’re likely to stick around as fun keepsakes instead of ending up in the trash.

Thermal Business Cards 4

Other cool, way-out-of-the-box business card designs include razor blades, lock picking kits, pop-up cards, Legos and x-rays. Check out 15 examples.

Share on Facebook


[ By Steph in Design & Graphics & Branding. ]

[ WebUrbanist | Archives | Galleries | Privacy | TOS ]


WebUrbanist

 
Comments Off on Heat-Sensitive Business Cards Take On Temporary Images

Posted in Creativity


500px redesigns online photo portfolios

12 Apr

500px_Portfolios_-_Editor.jpg

500px has redesigned its online photo portfolio feature, offering photographers more customization tools and advanced options for interacting with followers and customers. The new portfolio UX is expected to roll out by May and will allow for store integration so visitors can purchase photos directly from a portfolio, and blog integration and even full CSS customization. Learn more about the upcoming changes at connect.dpreview.com.

News: Digital Photography Review (dpreview.com)

 
Comments Off on 500px redesigns online photo portfolios

Posted in Uncategorized


12 April, 2013 – The Age of Narcissism – Digitized, Homogenized

12 Apr

Me, me, me! Not an old phrase, and not an unfamilar one. But how does this play out in the always-connected digital photo age? Find out in Kathlene Hay’s The Age of Narcissism – Digitized, Homogonized.


"Yes I downloaded the videos. THEY ARE AWESOME!!! I learned so much I think my brain is going to explode.


The Luminous Landscape – What’s New

 
Comments Off on 12 April, 2013 – The Age of Narcissism – Digitized, Homogenized

Posted in News


Fotografie ist Therapie

12 Apr

Ein Beitrag von: Laura Zalenga

Vor einer Weile schon ist mir etwas aufgefallen. Etwas, das mich überrascht hat und eigentlich doch ganz logisch ist.

Ich saß zufrieden in eine Decke gekuschelt auf dem Sofa und habe eine Zoosendung angesehen – ich finde, es gibt nichts Entspannenderes als Zoosendungen! – als mir plötzlich auffiel, dass ich schon seit fast zwei Wochen kein einziges Foto gemacht hatte. Über Jahre hatte ich nie länger als drei Tage keine Bilder gemacht. Wenn es sonst nichts gab, bin ich für Selbstportraits mit meiner Kamera losgezogen.

Wieso also lag das arme Wunderding nun so lange unbeachtet im Schrank? Ich hatte nicht weniger Zeit als sonst gehabt. Ich hatte einfach kein Bedürfnis, Fotos zu machen.

Laura Zalenga

Ich fing an, mich zu fragen, was mit mir los sei, suchte nach allen möglichen Gründen, fand aber nichts. Es dauerte noch eine ganze Weile bis mir etwas auffiel: Ich war zufrieden und ausgeglichen. Mir fiel kein einziges Problem ein, das mich beschäftigte, es ging mir einfach nur gut.

Zum ersten Mal begriff ich, dass das erste, was ich immer tat, wenn es mir schlecht ging, wenn ich traurig oder verwirrt war, wenn mich etwas sehr beschäftigte, war, dass ich mir meine Kamera schnappte und Fotos machen ging. Je mehr ich darüber nachdachte, desto offensichtlicher wurde es.

760 Fotos in meinem Flickrstream, davon 500 Selbstportraits und dennoch kennt fast keiner der Betrachter mein Lächeln. Wenn jemand über meine Fotografien schrieb, fielen Worte wie „ausdrucksstark“, „ehrlich“, „ungefilterte Emotion“, „verletzt“ und „dunkel“.

Laura Zalenga

Und sie haben Recht. Vor meiner Kamera lasse ich jede Fassade fallen, erzähle mit Blicken und Bewegungen davon, was mich bedrückt und sie hört zu, versteht mich und antwortet mit leisem Klicken. Es fühlt sich gut an, alles zeigen zu können und so ehrlich zu sein, wie man es nicht einmal zu seinem Spiegelbild ist. Während diesen Therapiestunden lasse ich alle Gefühle zu, die ich im Alltag hinter einem Vorhang verschleiere. Es fühlt sich an, als könnte ich meine Gefühle während des Fotografierens analysieren und ordnen.

Wenn ich meine Kamera dann schließlich ausschalte, geht es mir besser. Ich habe einen Teil der Trauer, der Wut, der Unsicherheit an meine Bilder abgegeben. Sie sind darin festgehalten und werden für immer eine Erinnerung sein. Ich kehre oft zu ihnen zurück und sehe, was sich verändert hat und was ich daraus gelernt habe.

Laura Zalenga

Wenn ich mir jetzt dieses Bild von meinem halbjährigen Auslandsaufenthalt in Cardiff ansehe, weiß ich wieder genau, wie ich mich gefühlt habe: Ich hatte Heimweh und vermisste Freunde und Familie, ich schaffte es einfach nicht, mich einzugewöhnen und der tägliche Regen trug nicht unbedingt zu einer besseren Stimmung bei.

Ich war so unglücklich wie lange nicht, wollte einfach nur weg. Abends auf dem Weg von der Uni zu meinem Zimmer hatte die Kamera wie immer im Rucksack dabei und als ich den kleinen von Laternen gesäumten Weg entlang ging, war es plötzlich glasklar, dass ich sie herausnahm, auf das Stativ stellte und mir selbst eine Therapiestunde verschrieb. Es tat unglaublich gut, die Alles-okay-Fassade abzulegen und zu zeigen, was ich fühlte.

Wenn man dann erst einmal alle negativen Gefühle freigesetzt hat, ist auch endlich wieder Platz für positive.

Laura Zalenga

Ja, wahrscheinlich würde ich mich nun auch selbst für ein wenig komisch halten und nach Tassen in meinem Schrank suchen, wenn ich nicht unter vielen Fotos im Netz die Notiz „self portrait therapy“ gefunden hätte.

Es geht also nicht nur mir so. Es scheint, als würde diese Therapie bevorzugt mit Hilfe von Selbstportraits funktionieren. Wahrscheinlich, weil man sich so intensiv mit sich selbst auseinandersetzt. Es wäre jedoch sehr interessant zu erfahren, ob auch Fotografen aus ganz anderen Genres diese Erfahrung machen.

Ich bin jedenfalls dankbar, dass ich zwei meiner Fotografenfreunde überreden konnte, im Folgenden auch ihre Erfahrungen preiszugeben.

~

Nikolas: „Fotografie als Therapie – für mich? Ich könnte jetzt so ganz plump sagen: Alle meine Fotos und der Prozess dahinter, der ganze Gedanke, all das wirkt auf mich wie eine Therapie. Und das wäre nicht mal gelogen. Gerade diese Wirkung von Kunst, neben der Ehrlichkeit, die durch das Fotografieren ermöglicht wird, ist enorm wichtig für mich.

Nikolas

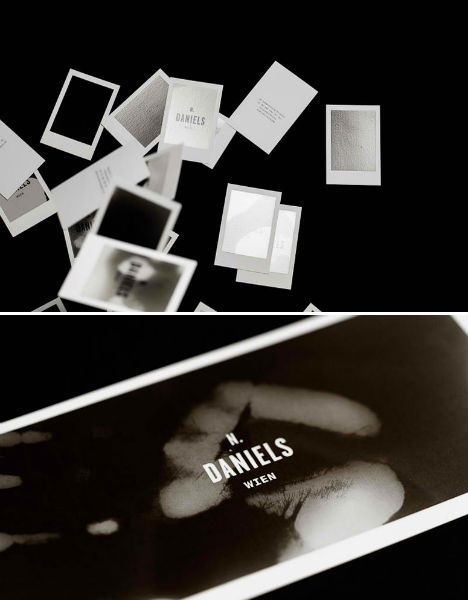
Aber speziell diese eine Serie, ‚memorials‘, entstand in erster Linie aus dem Antrieb, Gefühle und Erinnerungen zu verarbeiten. Zu sehen sind Orte allseits gewöhnlich; eine Straße, eine Wiese, für andere nichts Besonderes. Aber eben genau diese Orte sind für mich so viel mehr als nur ein wenig Asphalt oder ein paar Grashalme, wild aneinander geordnet.

Nein, diese Orte sind ein Teil von mir. Also fing ich an, diese Teile genauer zu betrachten: An was erinnern sie mich, welche Gefühle geben sie mir, wie fühle ich mich eigentlich gegenüber diesen Orten? All das habe ich in das Endergebnis mit einfließen lassen. In Licht, Schatten, Ausschnitt, Komposition. In diesen Moment, in dem ich nun da stand, die Kamera im Rücken, wie eine Statue. All das für ewig einzufangen, ein Denkmal zu erschaffen.

Wenn ich jetzt an diesen Orten bin, sind sie nicht mehr wirre Gedanken – noch weniger sind es die Erinnerungen, die an ihnen stattfanden. Es ist nicht mehr dieser Kuss, all diese unverständlichen Tränen, dieses flatternde Gefühl in meinem Bauch, sein Gesicht, unser Abenteuer – es ist alles verpackt, geordnet. Schön und ordentlich zusammengekehrt wie welkes, nasses Laub, dekorativ zu einem Haufen.

Nikolas

Jetzt habe ich damit abgeschlossen. Ferner, aber immer noch nah. Greifbar eben, immer wieder abrufbar. Diese Orte sind jetzt mehr das Foto und all das, was dieses Foto für mich bedeutet. Nicht mehr und nicht weniger. Ich denke, kein Therapeut könnte mich dazu bringen, in dem Maße mit etwas abzuschließen, wie ich es mit dieser Serie tue.

Und das Schönste an all dem ist, dass sie kein Ende nimmt. Es werden immer neue Orte kommen, neue Erinnerungen und es werden immer neue Fotos entstehen. Es ist wie ein Tagebuch, wenn auch in einem anderen Maße und wenn ich so darüber nachdenke, werde ich wohl niemals damit aufhören. Niemals dieser Serie ein Ende setzen. Und das ist irgendwie ein positiver Gedanke, der allein so schon beruhigend auf mich wirkt.“

Rona: „Es gibt nicht viele Dinge in meiner Welt, die mir so wichtig sind wie Freundschaften und wenn ich abends mit einem Lächeln auf dem Gesicht einschlafe, weil ich eine anregende und aufschlussreiche Konversation mit einem guten Freund hatte, dann hätte der Tag fast besser nicht sein können.

Rona

Und trotzdem stehe ich oft vor demselben Problem, auszudrücken, was mir am meisten bedeutet, in Worte zu fassen, was ich eigentlich unbedingt loswerden will und Informationen zufriedenstellend zu übermitteln, weil ich vielleicht nicht einmal selbst genau weiß, wie es mir mit einer bestimmten Situation wirklich geht.

Über die Jahre habe ich gelernt, auf eine andere Art zu kommunizieren, aber vor allem zu reflektieren. Erster Ansprechpartner ist bei wichtigen Ereignissen in meinem täglichen Leben oft meine Kamera, die mir unendliche Möglichkeiten bietet, mich durch sie auszudrücken, im fertigen Foto übermittelt, was ich nicht in der Lage war zu sagen und mir oftmals sogar neue Sichtweisen eröffnet. Manche Dinge können und sollen nicht in Worten ausgedrückt werden. Und manche Fotos müssen nicht in Worten, sondern in Gefühlen geschrieben werden.

~

Es tut gut zu wissen, dass es zum Beispiel Rona und Nikolas ähnlich geht. Mit ihnen ist das gegenseitige Verständnis unserer Bilder auf einer ganz anderen Ebene. Aber nicht jeder kann sehen, was sie sehen und wissen, was sie wissen und genau deshalb kommen mir manchmal Zweifel.

Geht dieser emotionale Exhibitionismus zu weit? Gebe ich zu viel preis? Vermittle ich ein falsches Bild von mir? Menschen, die nur meine Bilder kennen, würden sich wundern, wie glücklich ich mit meinem Leben bin und wie viel ich lächle. Aber scheinbar brauche ich für all die positiven Momente eben keine Therapie.

Rona

Und nur um der Sache wegen, den Millionen von künstlichen Grinsebildern ein eigenes hinzuzufügen, in meinen Fotos quasi zu lügen? Nein, danke. Ich will echt sein. Und weil sie einfach so gut tun, diese echten Bilder, schiebe ich jeden Zweifel zur Seite.

Und ich glaube, genau deshalb schreiben mir immer wieder Menschen, dass sie sich in meinen Bildern wiedererkennen und dass sie die Emotionen darin berühren. Und gibt es etwas Schöneres, als die Betrachter mit einem Werk zu berühren? Für mich ist es das schönste Kompliment. Erst jetzt wird mir bewusst, wie sehr das Motto meiner Fotografie genau dieses Gefühl wiederspiegelt: „Don’t look at me, just feel my soul.“

Also falls Ihr irgendwann denkt, Ihr könntet einen Therapeuten brauchen, schnappt Euch Eure Kamera. Diese Therapie ist kostenlos und die Schweigepflicht wird in 100% aller Fälle eingehalten. Ihr müsst Euch nicht auf ein Sofa legen, es gibt keine befristete Stundenanzahl und Euch muss absolut nichts peinlich sein. Für die kleinen Alltagssorgen ist sie jedenfalls ein Hausmittel, das es zu testen lohnt.


kwerfeldein – Fotografie Magazin

 
Comments Off on Fotografie ist Therapie

Posted in Equipment


7 Easy Steps To Take Your Photography Career To New Heights

12 Apr

We all know that being a successful professional photographer requires a lot of hard work, dedication, and a little bit of luck. The advice I hear most often is don’t bother trying, do it as a hobby. But for some of us, taking photos is something we have to do because there’s nothing else we’d rather be doing. So we Continue Reading

The post 7 Easy Steps To Take Your Photography Career To New Heights appeared first on Photodoto.


Photodoto

 
Comments Off on 7 Easy Steps To Take Your Photography Career To New Heights

Posted in Photography


Clothing for Portraits – How to Tell your Subjects What to Wear

12 Apr

portrait-clothing-featured

The clothes your clients or portrait subjects are wearing in their photo can be a touchy subject to discuss with them, especially if you are just doing a portrait for them as “a friend with a good camera”. Even as pros we have a hard time getting people to listen and they show up in clothes that make us cringe and even hurt our eyes.

This article will help you understand what to suggest your subjects wear for their portrait. You’ll also learn how to help them understand why your suggestions really are in their best interest so they actually listen to get it right.

Clothes make the portrait

What the subjects are wearing in a portrait is just as important as all the other details such as: lighting, location, and posing. Poorly selected clothing can really take away from an otherwise really great portrait.   The goals in helping your portrait subjects or clients select clothing are:

  •  to make the people the main subjects
  • to flatter the subjects and help make them look their best
  • to disappear and be a non-issue

Poorly chosen clothing, or having no discussion about it at all, can result in just the opposite of all those things.  NOT what you want to have happen!

  • clothing that stands out so much you hardly even notice the people
  • arms, legs or tummies that look less than flattered and people that are unhappy with the end results
  • clothing that takes so much attention and draws your eye around that it becomes more about the clothes and a fashion photo that it does a portrait of the people in them

So what IS the best thing for people to wear?

I get asked for tips on this a lot in my portraiture classes. People “hear” funny things about what they should or shouldn’t wear for their portraits and show up in the damnedest things that sometimes make you shake your head and say “what were they thinking?” But they don’t know what is right, or what is better unless you tell them and help them understand why.

This is what I recommend for what to wear to a portrait session

  • wear solid coloured clothing
  • choose muted tones that are a bit subdued
  • choose similar tones for your top and bottom (both dark or both light)
  • choose 1-3 colours for your group portrait, ones with similar tones that go nicely together and have everyone work within that colour palette. For example: dark green, navy, and burgundy – all dark jewel tones.  OR tan, a lighter olive green, and denims – all lighter, softer tones.
  • choose a top with sleeves at least to the elbow
  • choose long pants for men/ladies or a skirt below the knee for ladies
  • choose dark socks and footwear (unless it’s a barefoot photo on the beach)
  • keep jewellery simple and minimalistic
  • do your hair the way you’d normally do it while wearing these clothes (I’ll explain more later)
  • if getting a haircut or new hairdo, make your appointment at least 2 weeks prior to your portrait session

Okay so I added a few bonus pointers on hair and make-up but they go right along with the clothing.

Notice I consciously did NOT use the word “don’t” anywhere in the list above?  There’s a reason for that. People’s brains actually don’t register the words: don’t, not, or no. So when you say them the brain just disregards and registers what comes after.  For example, if I say, “do NOT think of a lemon” what did you just do?  Of course, thought of a lemon. So when you are explaining clothing (or anything for that matter) and giving suggestions on what to wear, take great care to always say what you DO want.

If you tell people, “okay don’t wear stripes, flowers or bright colours.”  What will they remember?  “I think my photographer said something about stripes and bright colours,  so that’s what I’ll wear.”

And they probably heard somewhere that for photography you need to put your make-up on extra dark and heavy, so even ladies that normally wear none or very little can show up with black eye liner and raccoon eyes. I know, because it’s happened to me when I didn’t discuss it. She will HATE her photos because it doesn’t look like her.  She likely won’t say anything, she just won’t pick any and you’ll think she didn’t like your work.

It is YOUR job as the photographer, even if you are just doing it for fun and for friends, to help people look their best in the portrait you take.  So let’s look at the points above and how you explain it to them so they get on board!

I actually had a hard time coming up with “bad” examples of what not to wear. I’ve been doing this for so long I don’t have any portraits that don’t come fully prepared.  So I’ve found a couple group images just so you can see the difference the clothing makes.

The image below is from a wedding so they weren’t all planning on having this group portrait done. But it shows what happens when the clothes have not been planned.  There’s multiple colours, some dark and some light. We have a few bright patterns and a short skirt. We have a lot of short sleeves (it was a hot day) and some white shoes.  Can you see how all those things make an impact?  Overall it’s actually not that bad, I’ve seen a lot worse but let’s see what a little refinement can do to help.

portrait-clothing-001

Group portrait from a wedding, not planned so they were wearing what they were wearing.

portrait-clothing-002

Another “bad” example, again a group portrait from a photo walk this time. Notice how all the colours and patterns draw attention?

Examples of clothing that is working

This family chose all black and denim and for the most part it is working really well. Only thing I suggest as a change would be Mom in longer sleeves.  Notice how much attention her arms get?  For her that’s fine, but for someone self conscious about their arms or their weight, this will make their arms look larger.

portrait-clothing-004

In the image below everyone is in black except the baby. Babies are always tough because finding plain colours or black for a baby is almost impossible. Notice two things here.  #1 the baby stands out the most, and in this case that’s fine because she’s the smallest and you want to see her.  #2 if that had been an adult in the light outfit do you think it would work as well?  Doubt it, the result will be that person will stand out and look larger. No one likes to look bigger!  Trust me.

portrait-clothing-005

This is my sister’s family so they’ve been well trained on what to wear (I even got in this phone). Once again dark tones have been selected: greys, deep purple, and navy. Those all work well with jeans. Can you see the difference between me wearing long sleeves (left) and my sister wearing short sleeves (upper right)?  What does it do to the bare arms? How do they look compared to mine?

portrait-clothing-007

How to get them to agree and follow your suggestions

The key to explaining all this and getting people to agree and go along with your suggestions is in HOW you tell them. If you just list off all this stuff it can seem a bit pushy and like you’re telling them what to do. Most assume they know how to dress themselves and giving them a list could make them feel a tad insulted so they get defensive rather than listen to your suggestions.

Photography is part technical stuff, part artistic stuff and part psychology!

Let’s look at my recommended list again but this time adding in the WHY. By stressing the benefit to the subjects, or why they would want to do this, they will “get” it in a big way. Like I said, I have very few portraits that I’ve done in the last ten years that show up in poor clothing because I’ve prepped them so well and they know that if they want to look their best they will follow these guidelines.

  • wear solid coloured clothing so that we see all of your faces and no one person stands out. If you wear stripes or flowers, you will stand out from the rest of your group.
  • choose muted tones that are a bit subdued so that you are the subject not your clothes and you don’t stand out from the group. Bright colours project (especially reds, oranges, and yellows), which also makes you look larger.
  • choose similar tones for your top and bottom (both dark or both light) so that one doesn’t look bigger than the other.  White top, dark pants will make your top look bigger.  White pants, dark top will make your butt look bigger.
  • choose 1-3 colours for your group portrait, ones with similar tones that go nicely together and have everyone work within that colour palette. For example: dark green, navy, and burgundy – all dark jewel tones.  OR tan, a lighter olive green, and denims – all lighter, softer tones.  So that we see the people first and your portrait looks stunning. Wedding group photos look so good because they’re all wearing the same colours and the people stand out!
  • choose a top with sleeves at least to the elbow  because your arms take up more skin area than your face and will draw attention and it may also make your arms look larger
  • choose long pants for men/ladies or a skirt below the knee for ladies so that your legs don’t take attention from your faces, and you will be able to sit and bend without showing too much leg
  • choose dark socks and footwear (unless it’s a barefoot photo on the beach) because white just sticks out like a sore thumb and that’s all you’ll notice in your portrait
  • keep jewellery simple and minimalistic because too much draws attention from your face
  • do your hair the way you’d normally do it while wearing these clothes – no fancy up dos with jeans, no pony tails with evening gowns, etc. This is common sense, or so you’d think, but I’ve had ladies go to the hair salon and get fancy up dos then show up in jeans and a t-shirt.  It just simply doesn’t make sense cause you wouldn’t normally do that to put on jeans and go to the park for a BBQ or something. So tell them “it is because your portrait will be more timeless and represent more closely who you are, not just what you look like.”
  • if getting a haircut or new hairdo, make your appointment at least 2 weeks prior to your portrait session – again this seems like a no brainer but you’d be surprised! Fresh hair cuts rarely look their best the same or next day. Ladies need time to practice working it, men need it to grow out just a little. Allow some time to live with your new look before your portrait session.

See a common thread in my notes above?  Most people have the same fears about being photographed – yes fears!  Being photographed is right up there on the fear list next to public speaking and going to the dentist, I kid you not!  Their fears are about looking stupid, not knowing how to stand or pose, and looking fat or old. So if you can help them see that these clothing tips will allow them to eliminate at least one of their fears before you even start, then you just have to deal with all the rest later!  Most of clothing suggestions has to do with helping them look slimmer and not stand out. How to stand and pose to minimize weight issues is another article, stay tuned!

Putting it all together

You may notice most of the “good” examples here are wearing dark colours. That’s pretty common as most people have heard that dark or black makes you look slimmer. To some degree that’s true. But light colors can work too if everyone in the group does similar, then the one person in dark clothes would stand out. Little kids in denim and white tops with bare feet is super cute, as is little girls in white sun dresses. Don’t be afraid of other colours or tones, just keep them similar. Some of my largest extended family groups over the years that have done the best even went as far as to put each family unit in their own colour scheme (one in browns, one in greens, etc) and mom and dad in another – all with dark jeans.  I’ve also had some ladies go as far as to buy everyone a matching shirt.

The thing is once you get them on board and understanding the logic behind it – the WHY – they will go to great lengths to make it work because they know it’s for their benefit!

portrait-clothing-006

Action Plan

If this all sounds like a lot and is overwhelming, feel free to copy my list and make a little sheet to hand out to people.  Just make sure you add the benefits, like in my second list.

Show me your successes or ones that didn’t work out so good. I’m happy to give suggestions on how to improve it for next time.

Post originally from: Digital Photography Tips.

Check out our more Photography Tips at Photography Tips for Beginners, Portrait Photography Tips and Wedding Photography Tips.

Clothing for Portraits – How to Tell your Subjects What to Wear


Digital Photography School

 
Comments Off on Clothing for Portraits – How to Tell your Subjects What to Wear

Posted in Photography


DEAL: 25% Off Trey Ratcliff’s ‘Discover the Art of Photography’ Online Course

12 Apr

NewImage
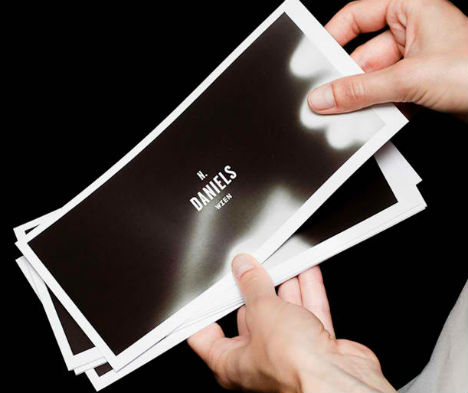
This week over at our sister site – SnapnDeals – we have a great deal running where you can get 25% off Trey Ratcliff’s ‘Discover the Art of Photography’ video course.

Trey Ratcliff is one of the world’s best known photographers on social media and via his blog StuckinCustoms. He specialises in HDR photography and was the first photographer to have a HDR photograph hung in the Smithsonian.

In this four part course Trey shares some great information on the basic elements of photography. The episodes covered are:

EPISODE 1 – GETTING STARTED (30 mins)

  • Introduction to photography
  • Learning through curiosity and discovery
  • Setting up your camera
  • Taking your first photo
  • Editing your photo with Adobe Lightroom

EPISODE 2 – PHOTO COMPOSITION (40 mins)

  • Challenging the traditional teachings on composition
  • Live example: Composing a landscape photo
  • Live example: Composing a photo with people
  • Editing the landscape and people photos
  • Review examples of many different compositions

EPISODE 3 – FINDING YOUR OWN STYLE (60 mins)

  • Discovering your unique path to your own art
  • Live examples: Photos in a park and a candy shop
  • Reviewing examples of small-object composition
  • More advanced techniques using Adobe Lightroom

EPISODE 4 – PHOTO EDITING (34 mins)

  • Moving past the learning curve of post processing
  • Sharing your photos with others online
  • Playing with Adobe Photoshop
  • Tips & Tricks with Adobe Photoshop
  • Introduction to HDR (High Dynamic Range) photography

Get 25% off this course for the next 4 days only on SnapnDeals.

Post originally from: Digital Photography Tips.

Check out our more Photography Tips at Photography Tips for Beginners, Portrait Photography Tips and Wedding Photography Tips.

DEAL: 25% Off Trey Ratcliff’s ‘Discover the Art of Photography’ Online Course


Digital Photography School

 
Comments Off on DEAL: 25% Off Trey Ratcliff’s ‘Discover the Art of Photography’ Online Course

Posted in Photography


Rendering the Digital Physical: 10 Bitcoin Designs & Ideas

12 Apr

[ By WebUrbanist in Gaming & Computing & Technology. ]

bitcoin digital physical designs

The crypto-currency Bitcoin is all over social media, blogs and news sites. But beyond the volatility, speculation and noise there is a fascinating question being asked and answered: from coins to wallets, how does the world’s first widespread digital currency manifest in visual or physical form(top image by cybrbeast)

bitcoin 3d currency variants

The Bitcoin logo is a rather simple affair, borrowing much from traditional currencies (a partial strike-through) and clearly, most of all, the United States dollar. For some, though, seeing is not enough – for emotional and practical reasons alike, many want a physical analogue to their virtual wealth.

bitcoin physical round design

That baseline design, however, has spawned not only 3D renderings approximating solid coins, but actual physical coins themselves for fans of hand-held collectibles. The Casascius series have solid brass, electroplated gold and pure silver variants that ‘contain’ real Bitcoins (an address with a private key hidden below a removable hologram). Like Gold Eagles, the value of these on the secondary market has consistently stayed above the ‘spot’ price for the currency they contain.

bitcoin paper currency notes

And it does not end there. For security purposes, many people prefer to keep copies (in some cases: their only copies) of their virtual Bitcoin ‘wallet’ in offline form. For better or worse, this translates computer-centric risks (hacking and data corruption) back into more familiar ones (physical theft or loss). Designers on that front  have come up with a number of interesting options, from plasticized and paper ‘notes’ to self-printed wallets. In the decentralized, open-source spirit of Bitcoin, many designers (like Doctor 75R) give these designs out freely as well.

bitcoin printable folding wallet

Canton Becker lists off the advantages of his variant, shown above: “(1)Private key is hidden behind folds, so your wallet content is still safe if left out in the open or photographed. (2) Tamper-proof tape indicates when you (or someone else!) has revealed the private key. (3) Folding design obfuscates private keys so they’re hidden even when holding wallet up to a bright light. (4)Reverse side has basic wallet operation instructions and a register for writing down deposits / balance. (5) Private and public keys are replicated (and rotated) in triplicate to maximize chances of recovering keys if paper is damaged / crumpled.”

bitcoin physical ring designs

There is even a movement toward making Bitcoin secret (de)coder rings – like gold or silver ones, they can be stolen, but they also allow you to wear and keep your wealth (literally) close at hand. By engraving the private key on the inside of the band, there is no way to see it unless you (or someone) takes it off.

bitcoin wallpaper digital designs

And, of course, anything with sufficient fans warrants making wallpapers – here are a series of six available at full size on Flickr.

Share on Facebook


[ By WebUrbanist in Gaming & Computing & Technology. ]

[ WebUrbanist | Archives | Galleries | Privacy | TOS ]


WebUrbanist

 
Comments Off on Rendering the Digital Physical: 10 Bitcoin Designs & Ideas

Posted in Creativity


Erez Marom Explains Focus Stacking in Macro Photography

12 Apr

image_9.0.jpg

Macro photography can be extremely challenging, but very rewarding if you get it right. In this article – the latest in a series – Erez Marom explains how to use focus stacking to achieve deep depth of field for capturing tiny subjects with a macro lens. Click through for a link to the article ‘Focus Stacking in Macro Photography’.

News: Digital Photography Review (dpreview.com)

 
Comments Off on Erez Marom Explains Focus Stacking in Macro Photography

Posted in Uncategorized