RSS
 

Archive for March, 2013

Domestic Daredevils: 12 Insanely Cool Home Climbing Walls

25 Mar

[ By Steph in Design & Fixtures & Interiors. ]

Climbing Walls main

When the mountains are too far away and you don’t feel like going to the gym, you can always scale the walls of your living room or bedroom – if you’ve got one of these 12 amazing indoor climbing walls installed in your home. Ranging from the modest and colorfully modern to 36-foot rugged rock walls mimicking natural boulders, these residential climbing walls will give you something to do when you’re tired of watching television.

3 Way House by Naf Architect

Climbing Walls 3 Way House

A climbing wall offers alternative access to the roof terrace from the first floor, for athletic people who are tired of taking the stairs. Designed by Japanese studio Naf Architect & Design, the 3 Way House in Tokyo turns the climbing wall into a main visual component of the home by placing it in a glassed interior courtyard visible from many rooms.

Modern Indoor Climbing Wall in Tokyo

Climbing Walls Moon Design

The ‘Outdoors Indoors’ house by Be-Fun design + EANA in Tokyo features a large indoor climbing wall that hovers over the communal area of the home, ascending into a wood-lined ‘cavern.’

Spiral Slide from Pirate Ship to Climbing Cave

Climbing Walls Pirate Ship 1

Climbing Walls Pirate Ship 2

Climb down from an elevated pirate ship replica via drawbridge and head to the mudroom to plunge yourself down a secret spiral slide that will take you all the way down to the ‘climbing cave’ adjacent to a golf simulator room. This house looks insanely fun for kids of all ages.

Yellowstone Club Residence by Krannitz Gehl

Climbing Walls Krannitz Yellowstone 1

Climbing Walls Krannitz Yellowstone 2

Paying tribute both to the rustic traditional cabins of Montana and the state’s rugged beauty, the Yellowstone Club Residence by Krannitz Gehl features a large glass window to maximize views and sun exposure, right next to a large climbing wall. The arrangement almost gives climbers a sense of being outside.

Indoor Treehouse Playroom by Gabriel Builders

Climbing Walls Gabriel Builders

Some lucky little kids got an indoor treehouse with their own private miniature climbing wall in this residential project by Gabriel Builders.

House in Izumi-Ohmiya by Tato Architects

Climbing Walls Izumi

A converted warehouse in Osaka by Tato Architects features a double-height living and dining rom with a ladder providing a shortcut to and from the master bedroom. Designed for an active young couple who like ‘bouldering’, a kind of free climbing, the home also features a small climbing wall.

Next Page:
Domestic Daredevils 12 Insanely Cool Home Climbing Walls

Share on Facebook


[ By Steph in Design & Fixtures & Interiors. ]

[ WebUrbanist | Archives | Galleries | Privacy | TOS ]


WebUrbanist

 
Comments Off on Domestic Daredevils: 12 Insanely Cool Home Climbing Walls

Posted in Creativity


25. März 2013

25 Mar

Ein Beitrag von: Jens Franke

glimmstaengel


kwerfeldein – Fotografie Magazin

 
Comments Off on 25. März 2013

Posted in Equipment


DxO Optics Pro 8.1.4 adds Olympus XZ-2, Nikon 1 J3 and Panasonic GH3

25 Mar

opticspro8logo_large.png

DxO Labs has released version 8.1.4 of its DxO Optics Pro software. Both the Elite and Standard versions gain Nikon Coolpix P7700, Nikon 1 J3, Olympus XZ-2 iHS, and Panasonic DMC-GH3 support. The update also adds more than 200 lens and cameras combinations for Canon, Nikon, Olympus, Panasonic, Pentax, Sigma, Tokina, and Zeiss users. These modules join the existing list of over 11,000 combinations. Click through for the download link.

News: Digital Photography Review (dpreview.com)

 
Comments Off on DxO Optics Pro 8.1.4 adds Olympus XZ-2, Nikon 1 J3 and Panasonic GH3

Posted in Uncategorized


10 Tips for Improving Your Flower Photos

25 Mar

Spring is here!

For those of us in the Northern Hemisphere who have been hunkered down for winter, enduring the rain and the snow, the time has finally come to get outside and enjoy some long awaited sunshine.

As the flowers start to emerge from the soil, all the neighbours begin emerging from their houses with gardening tools in hand. I, on the other hand, have my camera in hand ready to capture the spring flowers and I hope you do too!

Here are 10 tips that will help you make the most of your flower photography this spring.

1. Photograph flowers on an overcast day

Okay, not every day in spring is a sunshiny blue sky day. But that’s okay because the white sky days are perfect for photographing flowers.

The soft even light of an overcast day compliments the delicacy of the flowers and there are no shadows and no harsh bright spots, which makes it easier to get a good exposure.

Flowers in soft light by Anne McKinnell

2. Backlight will make your flowers glow

Another type of light that is excellent for flower photography is backlight. Backlight happens when the sun is directly in front of you lighting your flower from behind. Because flower petals are translucent, backlight makes flowers appear to glow.

Try to capture backlit flowers late in the day when the sun is close to the horizon which will cast nice warm light on the rest of your image too. You might even be able to catch some rays of light filtering through the trees.

Backlit flowers by Anne McKinnell

3. Watch out for wind

When it comes to photographing flowers, wind is your enemy. The easiest way to avoid it is to do your photography early in the morning when there is less chance of wind. If there is a bit of wind, you can use a piece of cardboard or your reflector to create a block.

Your other option is to bring a flower inside. I photographed the flower below by taking it inside and placing it in front of a white sheet.

Gerbera by Anne McKinnell

4. Get closer

There are a number of ways to go about making the close up images of flowers we all love.

First, you can use a telephoto lens and zoom in to the flower. In this case, make sure you take note of the minimum focussing distance of the lens. This is usually marked on the outside of the lens. For example, my 70-300mm telephoto lens has a minimum focusing distance of 1.5 meters (or 5 feet). It simply will not focus on anything closer.

There are a couple of solutions for getting around the minimum focussing distance problem. One is to use extension tubes which are hollow tubes that you place between the camera and the lens. Essentially the tubes move the lens farther away from the camera’s sensor which allows the lens to focus on closer objects. The other solution is to use a close-up filter which works like a magnifying glass and attaches to the end of your lens.

Finally, you can use a dedicated macro lens which has the ability to focus on objects that are close to the end of the lens.

Spring Tulips by Anne McKinnell

5. Use a reflector

If your subject is in the shade, you can use a reflector to bounce some light back towards your subject and make the flower more vibrant.

6. Avoid a cluttered background

As with every photograph, the background can make or break the image. Try to change your position so that there is nothing distracting behind your flower.

7. Use a shallow depth of field

Shallow depth of field is when only part of the image is sharp and the rest is soft and out-of-focus. You can achieve this by using a wide aperture (low aperture number) such as f/4 or f/2.8. The effect is even more pronounced if you are using a telephoto lens with a wide aperture.

Flowers and water drops by Anne McKinnell

8. Make it sharp

Even if you are using a shallow depth of field, it is essential that at least part of the flower is sharp. Use a tripod, a cable release or your camera’s two second timer, and the mirror lock up function for the best results.

Remember that even if there doesn’t appear to be much wind, flowers always move. If your flower isn’t sharp, try using a faster shutter speed.

Finally, check your focus and if necessary use manual focus to ensure the camera is focussed on the most important part of the subject.

9. Change your point of view

Move around and try some different angles for more interesting images. Try photographing the flower from behind or underneath to capture a point of view that is different from what we see from a standing perspective.

Behind the flower by Anne McKinnell

10. Focus through another flower

One technique I love is focussing through another flower. Remember how I said in tip #4 that your lens has a minimum focussing distance? You can use that to your advantage! Try positioning yourself so that another flower is in front of your main subject and very close to the end of your lens. The secondary flower will become a blur of colour and your final image will have a more abstract feel.

Flowers using the shoot through technique by Anne McKinnell

If your camera has been gathering dust this winter, now is the perfect time to get yourself and your camera outside to enjoy the sunshine and the flowers and make some beautiful images!

Post originally from: Digital Photography Tips.

Check out our more Photography Tips at Photography Tips for Beginners, Portrait Photography Tips and Wedding Photography Tips.

10 Tips for Improving Your Flower Photos


Digital Photography School

 
Comments Off on 10 Tips for Improving Your Flower Photos

Posted in Photography


Lighten Up! (Your Photos)With The Pocket Spotlight

25 Mar

Extra photos for bloggers: 1, 2, 3

We have seen the light! …and now we carry it around with us to light our photos.

It’s called The Pocket Spotlight, and it’s a portable panel of LEDs perfect for adding diffused light to dark situations.

Since it’s a constant light (and not some fleeting flash) you can take your time directing the light in just the right angle and setting the perfect exposure.

It comes with a headphone jack mount and a hot shoe mount, and if you’re not into mounting, you can just hold it in your hot little hand.

Get Ahold of The Pocket Spotlight
$ 30 at the Photojojo Store

 Tweet it!      Share

Related posts:

  1. Fotoclips and The Electric Pocket — Picture-Perfect Stocking Stuffers Seeing as it’s December, you’ve been good all year, and…
  2. Our New Color Lens and Flash Filters, a ROYGBIV for Your Pocket Extra photos for bloggers: 1, 2, 3 Dear friend, Your…
  3. New! Adorable 12 Color Pocket Flash for Your Camera Extra photos for bloggers: 1, 2, 3 Has blinding your…


Photojojo

 
Comments Off on Lighten Up! (Your Photos)With The Pocket Spotlight

Posted in Equipment


Google announces Nik Collection of plugins for $149

25 Mar

nic_logo.png

Google has announced the Nik Collection, a bundle of all six of Nik software’s imaging plugins for $ 149, or 70% off the original price. Consisting of Dfine 2.0, Viveza 2, HDR Efex Pro 2, Color Efex Pro 4 Complete Edition, Silver Efex Pro 2, and Sharpener Pro 3.0, the collection uses a single installer which is compatible with Adobe Photoshop, Photoshop Elements, and Lightroom, and Apple Aperture. It’s available now as a download from the Nik Software site for $ 149, with a 15-day free trial available. Google is also offering existing users of any Nik plugin the entire collection for free. Click through for more details on Connect.

News: Digital Photography Review (dpreview.com)

 
Comments Off on Google announces Nik Collection of plugins for $149

Posted in Uncategorized


Fotogenes Deutschland – Westerheversand

25 Mar

Ein Beitrag von: Mathias Rehberg

Auch im Norden unserer Republik finden sich schöne Orte, um wirklich tolle Fotos zu machen. Da wo das Land flach ist, eine steife Brise weht und blökende Schafe auf den Salzwiesen stehen, da findet man den Leuchtturm Westerheversand.

Der Leuchtturm befindet sich auf der Halbinsel Eiderstedt. Ich meine, dass ihn nahezu jeder schon einmal gesehen hat. Sei es in Zeitschriften, auf Bildern anderer Fotografen oder in der Werbung.

Auf mich hat dieser Ort eine fast schon magische Wirkung. Und diese beginnt genau dann, wenn die Sonne sich dem Horizont nähert. Dabei ist es egal, ob man zum Sonnenunter- oder -aufgang zum Fotografieren kommt.

Es ist einfach großartig, sich nach einem Sonnenaufgangsshooting auf die kleine Bank vor dem Leuchtturm zu setzen, einen Tee zu schlürfen und sich die Sonne auf das kalte Gesicht und die steifgefrorenen Fingern scheinen zu lassen.

Die weiten Salzwiesen liegen einsam vor einem. Nur ab und zu zerreißt das Blöken eines Schafes die Ruhe. Auf dem Rückweg zum Auto kommen dann so langsam die ersten Touristen. Aber diese bemitleide ich immer, denn das Beste haben sie schon verpasst.

Westerhever

Westerhever

Westerhever

Westerhever

Übrigens: Gleich um die Ecke befindet sich St. Peter Ording. Das ist aber ein ganz eigenes Kapitel und dafür folgt sicherlich noch ein toller Artikel.


kwerfeldein – Fotografie Magazin

 
Comments Off on Fotogenes Deutschland – Westerheversand

Posted in Equipment


Cool Colors: Rainbow Igloo Built of 500 Translucent Blocks

25 Mar

[ By WebUrbanist in Art & Installation & Sound. ]

colorful rainbow ice igloo

When your prospective future mother-in-law takes the time to fill hundreds of cartons with colored water before your visit, it would behoove you to do something with them. And thus this unexpected collaboration was born.

colorful iglooe interior blocks

Braving temperatures down to negative 25 degrees (both Fahrenheit and Celcius), engineering student Daniel Gray and his girlfriend Kathleen Starrie took these frozen ice bricked (formed by Brigid Burton) and constructed an incredible structure.

colored snowcrete construction process

Instead of carving each block, Gray developed a kind of ‘snowcrete’, using flexible layers of snow as mortar to create the hemispherical shape required (after extensive calculations to make sure it was of a size that would not run them out of building materials).

colorful igloo night entrance

150 combined work-hours and 5 days later, the result is nothing short of stunning – the semi-spontaneous igloo is colorful by day, but even more dazzling by night when lit from the inside. If this was a pre-marital tes, one can only hope he passed with flying (or frozen) colors.

Share on Facebook


[ By WebUrbanist in Art & Installation & Sound. ]

[ WebUrbanist | Archives | Galleries | Privacy | TOS ]


WebUrbanist

 
Comments Off on Cool Colors: Rainbow Igloo Built of 500 Translucent Blocks

Posted in Creativity


Meet The Photographers Who Write For Digital Photography School ~ Jason Weddington

25 Mar

You’ve been reading their articles for months or years. Have you ever wondered: “Who are the photographers who write for dPS”? Today meet San Diego based photographer Jason Weddington.

The EDF Energy London Eye

1. How long have you been shooting?

My first camera was a Kodak disk camera, similar to the ones shown here. I must have been 8 or 9 at the time. Around the same time, I took a black and white photography course during summer vacation. I learned how to develop black and white film, as well as how to make prints. I remember being very proud of an image of an empty root beer can that I’d photographed in the street. That photo sat in a frame on my dresser for a few years.

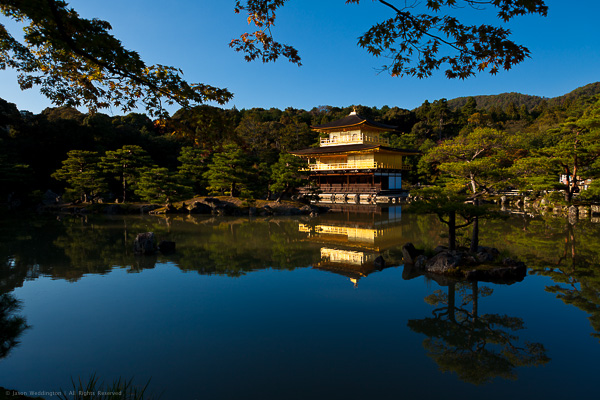
Then I went several years without having a camera or being exposed to photography (pun intended). In 1998 I joined the Marines and was stationed in Japan. I bought a Kodak Advantix film camera, because I wanted to be able to capture and share scenes from my time in Japan. I wouldn’t say I was interested in photography per se, I was more interested in ‘taking pictures’, if the distinction makes sense. I was happy to point and shoot, and drop the film off at the lab. I would flip through the prints and say things like “too bad that one didn’t come out.” In those days I thought cameras made photos, not photographers. Pushing the shutter was like rolling the dice, sometimes the pictures came out, sometimes they didn’t. It would be a few more years before my awareness changed.

By 2001, I was really into computers. The Internet was still pretty new, technology was racing forward, and some exciting things were becoming possible. I bought a digital camera, because it was yet another cool thing I could do with my computer. I was more into computers than cameras – digital seemed like the logical camera choice.

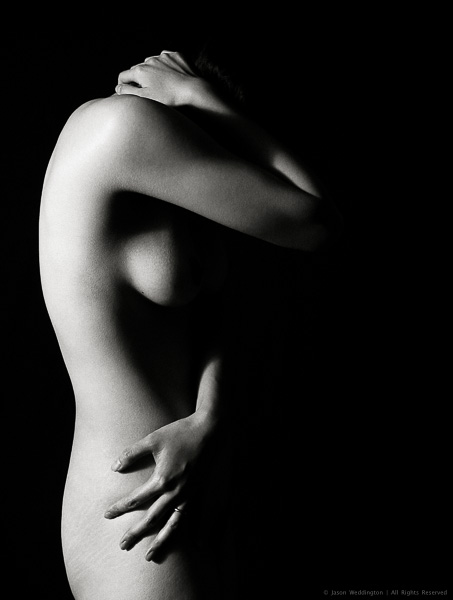
In early 2001, I saw some fine art nude photographs on the Internet. I was amazed and inspired. I hadn’t seen much fine art photography before, or maybe I hadn’t given it much notice. But this time my eyes were opened to a whole new world. I became aware of photography as an art form, rather that simply a tool for capturing moments.

I’d just married a beautiful woman, and I had a 1.2 megapixel (!!) digital camera. It seemed so simple. Knowing next to nothing about photography, I asked my wife to model for me. The pictures weren’t very good. Suddenly I became aware that photography is a skill, and a skill that I needed to learn.

2. Do you have a full time job or are you a full time photographer?

The short answer is “neither one.” The long answer is more complicated. I left my full time job as an IT manager at the end of 2012 to start my own business. My goal is spend more time on my personal photography projects, and more time with my family. I’m building a business around my interest in photography, but I don’t plan to work full time as a photographer.

Going forward I hope to make a living from a combination of activities. I’ve just finished a book of my photography, and I’m beginning to market prints on my website. I’m also in the process of launching a software company. We’ll be producing products and services for photographers.

Me!

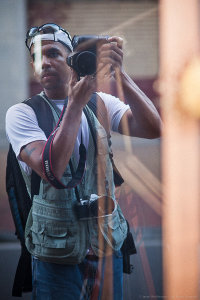
Photographer Jason Weddington

3. If you had to limit yourself to one genre of photography, what would it be and why?

That’s a hard question, I hope I’m never in that position. I guess if I had to, I would limit myself to photographing people. I like portrait work, I’m inspired by the idea of creating a portrait that really captures the sitter’s personality. I love it when people are happy with a photo I’ve made of them, since most people don’t enjoy being photographed.

4. When did you start writing for dPS and why?

I wrote a trial post for dPS in September of 2012, and was accepted as a regular writer in October. I’d already made the decision to leave my full time job to pursue my own business, and I wanted photography to be a big part of that. I genuinely enjoy teaching and sharing, when the topic is something that I am passionate about. So writing for dPS is a good fit, and the timing was perfect.

5. What do you shoot with and what is your favorite lens?

I’m a Canon guy. My main camera is the EOS 5D Mark III. I also have an old Canon AE-1 film body, and a Canon EOS 7s (aka ELAN 7) film body.

I like prime lenses. My favorites are probably the EF 135mm f/2L and the EF 50mm f/1.2L. Is is cheating to pick two?

6. What would be your number one tip to any new photographer?

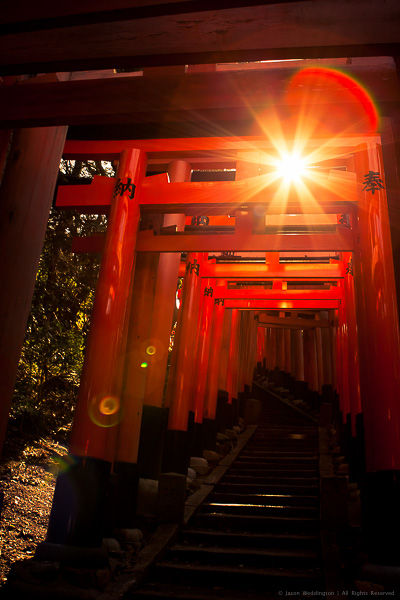
Become a student of light. Practice visually deconstructing photographs and picturing where the light comes from. Do the same thing in real life, as you walk around your city or neighborhood. Notice what light does to a subject when it comes from above, from the side, from behind, from in front, and from below.

You can learn the technical stuff as you go, and modern cameras will take care of exposure for you most of the time, at least well enough to get you started. But no camera will teach you how to find the good light.

7. What’s your next big project?

I’ve just hired a software and web developer to help me build a social media marketing service for photographers. The goal of the service is to provide a set of online tools to help photographers get more exposure for their work on major social sharing sites like Flickr, 500px, Facebook, and Tumblr. We will start development in March and I hope to launch the first version of the service in May.

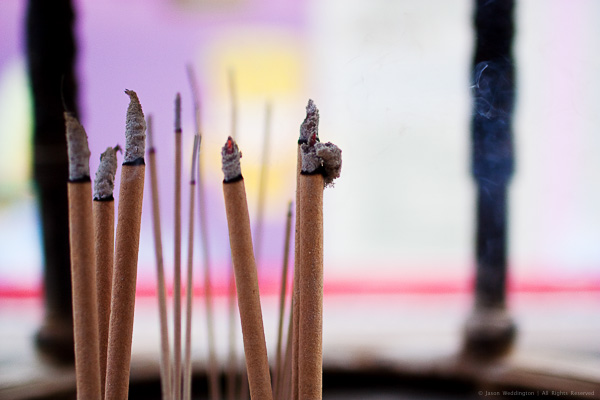
I’m also working on my second photography book which will be a collection of photos from Japan.

8. Where can people go to find out more about you and your work?

My Portfolio Site – This site features my portfolio, fine art prints, and my books.

My Blog – This is my personal blog. The focus going forward will be photography tips and tutorials, information about my photography projects, and eventually some premium training materials.

Uncovered Beauty – This is the brand for my fine art nude photography. You can see some of my work here, and later this year I will launch a fine art nude photography training course from this site.

Facebook – Like my Facebook page to get updates when I have something new to share. I post links to my dPS articles here, and also share photos and tips. As my other projects move forward, I’ll post updates from time to time. I try to make sure that the things I share on Facebook are genuinely useful.

Snowy Day

Joy

Fashion Shoot

Figure

The Golden Pavilion

Joss Sticks

1000 Torii Gates

Post originally from: Digital Photography Tips.

Check out our more Photography Tips at Photography Tips for Beginners, Portrait Photography Tips and Wedding Photography Tips.

Meet The Photographers Who Write For Digital Photography School ~ Jason Weddington


Digital Photography School

 
Comments Off on Meet The Photographers Who Write For Digital Photography School ~ Jason Weddington

Posted in Photography


Lightroom 4 Virtual Copies 101

25 Mar

Introduction

This tutorial has been transcribed from the SLR Lounge Lightroom 4 Workshop on DVD, a 14 hour Lightroom 4 A – Z guide with over 130 tutorials for mastering Lightroom from start to finish. The Digital download can be purchased from SLR Lounge while the physical copy is available through Amazon Prime.

Overview

The way an image is post-produced can drastically change the mood and feel of that image. We often take pictures that would look great in color, black and white or even with vintage effects. Virtual Copies are great for creating duplicates of an image with different develop settings applied to them. In this tutorial, we will go over the basics of Virtual Copies in Lightroom 4 and how they differ from Snapshots.

What is a Virtual Copy?

Virtual Copies are not copies of the original RAW file (that’s actually what makes them so awesome to begin with). Instead, a virtual copy is only a copy of the develop settings, represented as a new image within the Lightroom catalog. When you export the image, Lightroom will create outputted images based on each virtual copy of a particular image. Virtual Copies are great because they do not take up much space on the hard drive since only the settings of the photo are saved within the catalog. However, once you export these images out from Lightroom, they will take up more space because Lightroom is creating different versions of the original image.

Creating Virtual Copies

There are several ways to create a virtual copy of an image. We can right-click on an image and hit “Create Virtual Copy.”

01_right-click-create-virtual-copy

But, my favorite method is simply to use the shortcut. To create a Virtual Copy at any point hit (Ctrl + ’) on the desired image.

Filtering and Deleting Virtual Copies

At times, it might be beneficial to view all the Virtual Copies within our Lightroom catalog. To aid us, we can actually filter by Virtual Copies in Lightroom. First, you need to bring up your Filter Menu. To do this, you need to be in the Library Module. Once there, hit “\” to bring up the Filter Menu. Click on “Attribute” and on the far right of the panel there are 3 little box icons. To select Virtual Copies, click on the middle box, as shown below. Once you turn this filter on, you can see all the Virtual Copies in your catalog.

02_virtual-copies-filter

Filtering by Virtual Copies is very handy if say you wish to clear out all of your Virtual Copies in your catalog. Often times I also like to filter by Virtual Copies when I want to create a “universal look” with the develop settings for all of my Virtual Copies.

Remember, if you delete a Virtual Copy, the original file with the original settings will still be in your catalog. Deleting a Virtual Copy has no effect over the original image. Delete Virtual Copies the same way you would a regular image, simply right-click on the images, and hit “Delete Photos.”

03_delete-virtual-copies

A dialogue box will then appear, asking if you want to remove the Virtual Copies. Once again, this will not remove your original image from your catalog (so long as the original image isn’t selected for deletion).

04_confirm-remove-virtual-copies

Virtual Copies vs. Snapshots

We are often asked what the difference is between a Snapshot versus a Virtual Copy. Given that both functions are used to create different looks for an image, it can seem similar. However, in reality, these two functions are very different, particularly when it comes to exporting.

When you create different looks via Snapshots, only the “active” or selected Snapshot develop settings will be exported to the final image. Let’s illustrate with an example.

Let’s say we have an image with 3 different looks created with Snapshots, and another image with 3 different looks created with Virtual Copies.

When we export the image with the 3 different Snapshots, Lightroom will create one exported image with the develop settings from the “active” snapshot.

When we export the image with the 3 different Virtual Copies, Lightroom will actually create 3 separate exported images using the develop settings from each Virtual Copy.

To keep it simple. Virtual Copies will create additional exported images while Snapshots will not.

Learn More with the Lightroom 4 Workshop Collection!

This was a sample tutorial from the Lightroom 4 A to Z DVD which is one of the DVDs in the Lightroom 4 Workshop Collection. A collection of nearly 30 hours of video education teaching everything from Lightroom basics to advanced raw processing techniques.

The LR4 Workshop Collection also includes the critically acclaimed Lightroom 4 Preset System which is designed to enable users to achieve virtually any look and effect within 3-5 simple clicks. From basic color correction, vintage fades, black & white effects, tilt-shift effects, faux HDR, retouching, detail enhancing, and so much more. Click the links above to learn more.

Post originally from: Digital Photography Tips.

Check out our more Photography Tips at Photography Tips for Beginners, Portrait Photography Tips and Wedding Photography Tips.

Lightroom 4 Virtual Copies 101


Digital Photography School

 
Comments Off on Lightroom 4 Virtual Copies 101

Posted in Photography