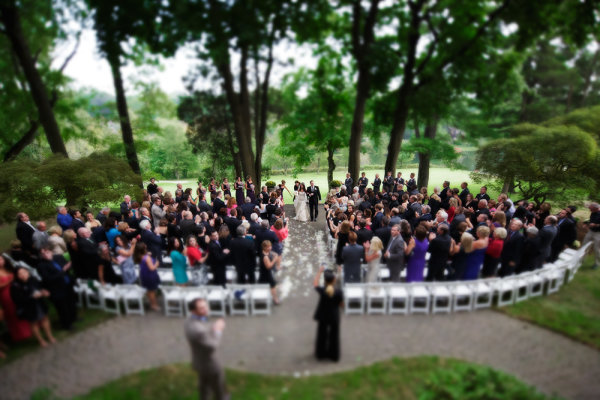
One of the things I’ll do is set up a remote camera in the back of the ceremony, elevated if possible. In this shot, a tilt-shift lens was used to create that miniature look. EOS 5D Mark III, TS-E 17mm f/4L. Exposure was 1/320, ISO 3200, f/4. Photo by Rick Berk/kNot Photography
Throughout the first 20 years of my career in photography, I’d photographed a lot of different things- NHL All-Star games, Major League Baseball, NFL Football. I’d photographed portraits, boudoir, model portfolios. Landscape photography became a passion of mine. One thing I never photographed was a wedding. When I began my career, I assisted on exactly two weddings. Never did I shoot one. The two weddings I assisted on went so badly that I never wanted to touch one again. I thought all weddings were like that. It wasn’t until years later that I understood it was more the photographer I worked for than it was the weddings themselves.
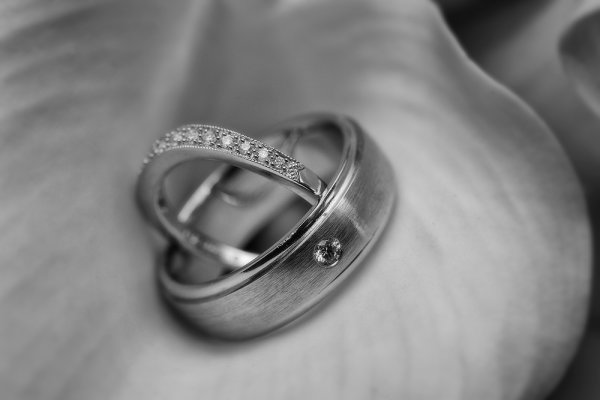
This type of shot is the kind that makes for a nice touch in the overall collection from a wedding. They complete the set and really show a photographer’s attention to detail. EOS-1D X, EF 100mm f/2.8L IS Macro. ISO 800, 1/200, f/8. Photo by Rick Berk/ OneRedTreePhoto.com
For a variety of reasons, I made myself available as a second shooter in 2012, and got my first taste shooting weddings. That first one was intimidating, but I learned a few things along the way.
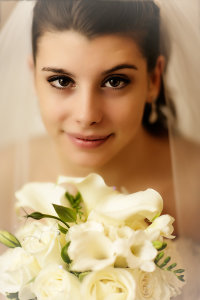
This is a must. Depending on the setting it will always change, but at least one formal portrait of the bride is essential. This shot simply used on camera flash, bounced into a reflector at camera left. EOS-1D X, EF 85mm f/1.2L II. 1/250, f/1.2, ISO 400. Photo by Rick Berk/OneRedTreePhoto.com
1. Prepare and be organized.
Prior to the wedding day, speak to the bride and groom about what shots they absolutely must have. Plan when and where you will be shooting each of the shots. If you’re doing group shots in the park, make sure they know that’s the plan, and when you need them there. Keep a shot list with you. Don’t promise anything more than that you will try to get these shots, because things could always happen preventing you from getting the shot. But at least this way you know what to try and focus on. This is also where you manage their expectations so they understand that you can’t possibly get EVERYTHING, but you will try to get what’s most important to them.
2. It’s your job to manage things.
Your bride and groom have a ton on their plates on the wedding day. Photography is the last thing on their mind. But you still need to get the shots and you need to do so as efficiently as possible so as not to hold up the proceedings. Gentle reminders to the bride and groom about the shots they wanted will help, especially if you can give them a few minutes warning. For instance, “We need to get the family portrait, and we have a window in 5 minutes if we can get you all together,” works fine. They WILL ask why the shot isn’t there if you don’t get it, and even if they are resistant during the event, they will thank you later.
3. Do what you can without their cooperation.
Yes, there will be some shots you absolutely need to pull the bride and groom away for. But if you can manage to get shots without interfering in their activities, you’ll be exactly the kind of wedding photographer everyone wants- an invisible one who delivers the goods. Shoot preparation shots, detail shots of the rings, the cake, etc., while you have the free time and nothing else is going on. Getting those kinds of shots out of the way makes it easier to get the really important stuff later.
4. Don’t try to go it alone.
It’s easy to underestimate how much work goes into shooting a wedding. Many times, a photographer’s first taste is when a friend asks them. It’s an honor to be asked, but it’s also a great responsibility. Theoretically, this is a once in a lifetime event. You can’t be everywhere at once. The weddings I worked as a second shooter, I wasn’t a secondary shooter. I just wasn’t the guy contracted to do the job. But I shared responsibility for getting certain shots. For instance, the bride and groom getting ready at different locations. One of us would go to the bride’s, one to the groom’s. We’d meet back at the church, or at another location where we might be doing shots, depending on how the day is planned. This takes a huge amount of pressure off. In terms of the ceremony, it ensures that multiple angles are covered so if one of you is blocked, the other might have a chance at getting the shot.
5. Be on the lookout for those special moments.
It can be easy to focus on the primary photos and lose sight of those smaller, special moments that, when captured, make for the best images. Be on the lookout for a tender moment between bride and groom, the bride and her father, or the groom and his mother. Look for moments with friends and relatives that might end up telling a story. This means your camera is always ready and you are always watching. There is no time to let down your guard.
6. Approach it like any other shoot.
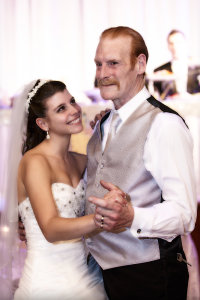
There are a lot of little moments that make up a wedding day. Near the end of the father-daughter dance, the bride looked up and had this beautiful expression of admiration for her father. When her mother saw the image, tears came to her eyes. As a photographer, those are the moments I live for. Photo by Rick Berk/OneRedTreePhoto.com
One common theme I’ve heard from all photographers thinking of diving into the wedding pool is that they build it up so much that they become intimidated by it. You were hired for your expertise, so approach it like anything else. Look for creative shots you can use to illustrate the day, to give a storybook feel to the images, and to capture the emotion. If you need the bride and groom and other family members in a certain spot, direct them as you would a portrait shoot. Don’t be afraid to ask for them to do something for you if you think that by doing so, you can provide them with a shot that will make them remember the day fondly for the rest of their lives.
7. Use ALL of what you have.
In my bag at most weddings I keep a 24-70mm lens and 70-200mm lens. These are my workhorse lenses. But I try to offer variety and for me this means using different lenses for different shots. I have a 100mm macro for ring and detail shots, but also for portraits. I use a fisheye lens for some candids on the dance floor. I’ll use an ultra wide angle like a 16-35mm. I keep a couple of speedlites with me. Sometimes I use them on camera, sometimes off, and sometimes I turn it off and just shoot available light. The point of all this is to provide variety. Different shots with different looks create more interest when the images are viewed as a collection. Yes, you could get away with using a 24-70 for the entire day, but I like to change things up when I can.
8. Have backup.
This means a backup camera, flash, batteries, memory cards. Anything that can die, go bad, break, corrupt. If you are being paid, you are considered professional, and being a professional means that the words “My camera broke” cannot be used as an excuse.
9. Check with the officiant
Each priest, minister, judge, or other officiant I have worked with so far has had a different set of rules where photography during the ceremony is concerned. Prior to the ceremony, introduce yourself, and ask what is permissible and what isn’t as far as you are concerned. Is flash ok during the ceremony? Where would he prefer you NOT be during the ceremony? Laying the ground rules beforehand can make a huge difference in how you cover the event.
10. Have fun!
Weddings are fun, happy occasions. Enjoy it. There’s good music, happy people, and you get to capture the memories. If you are enjoying yourself, it will show in your work.
For 20 years I always swore I wouldn’t touch a wedding. But having shot three of them now, I find I enjoy the challenge and creativity of capturing these once (or twice) in a lifetime event for the couples I’ve worked with. No, they aren’t for everyone. But with the right attitude and know-how, they can be incredibly satisfying to shoot.
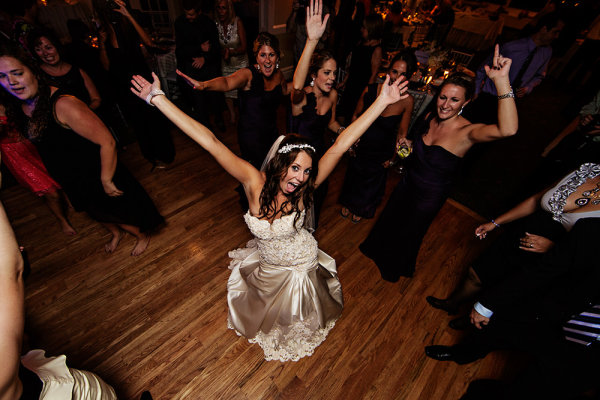
When the dancing started I decided I wanted something different. I mounted a 5D Mark III on a monopod with 14mm lens. a flash was mounted on the camera with the head aimed at the ceiling for bounce. I held the camera out over the dance floor by extending the monopod a few feet. Using a remote release, I got the bride’s attention and waited for her reaction, firing when I saw it. Photo by Rick Berk/kNot Photography

The church had these huge windows with light pouring in. I knew I wanted to use it but time was tight. I grabbed the bride and groom quickly and asked them to stand by the window and look out. I fired off a handful of shots varying the exposure a bit. The black and white conversion added a nice artful touch. EOS-1D X with EF 24-70 f/2.8L II. ISO 1250, 1/100 f/5.6. Photo by Rick Berk/OneRedTreePhoto.com
Further Wedding Photography Reading:
- 21 Tips for Amateur Wedding Photographers
- 50 Must Have Wedding Photography Shots
- The One Location Technique for Wedding Photography
Post originally from: Digital Photography Tips.
Check out our more Photography Tips at Photography Tips for Beginners, Portrait Photography Tips and Wedding Photography Tips.
Weddings Through The Eyes of a “Noob”: Lessons I Learned

Digital Photography School


 Earlier in the week we published a post on how to use Diptych’s to tell a story. Today we’re issuing the challenge to go out and shoot and edit one up to share with us!


You must be logged in to post a comment.