RSS
 

Archive for the ‘Photography’ Category

How to Use Manual Mode to Make Artistic Choices for Your Photography

27 Sep

When learning photography, it can be tricky to understand how your DSLR works. Most of us started shooting in automatic because we did not know what we were doing when we switched our camera to manual mode.

Basically, your DSLR has four main shooting modes, they are; Program (P), Manual (M), Aperture Priority (Av/A) and Shutter Priority (Tv/S).

Manual mode image1

The different shooting modes on an advanced DSLR.

Manual mode image2

Manual mode lets you control everything on your camera.

In this article, I will try to explain shutter speed, aperture, and ISO in the easiest way possible. Hopefully, it will help you to never use automatic mode on your camera anymore. I do not hate automatic mode, but I think that it reduces your creativeness.

Manual mode image3

Aperture Priority mode lets you control everything except the shutter speed – it will be set automatically depending on your other settings. You can control your ISO or leave it on automatic.

Manual mode image4

Shutter Priority mode lets you control everything except the aperture – it will be set automatically depending on your other settings. You can control your ISO or leave it on automatic.

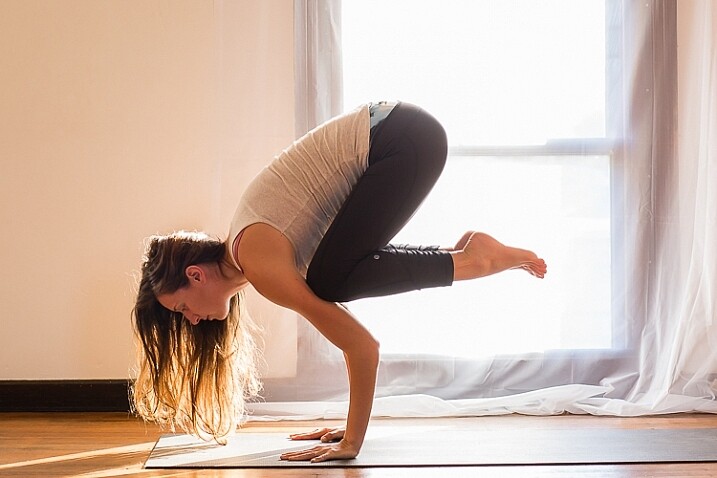
Manual Mode makes you think and slow down

When you take a photo in auto mode, you’re just capturing a moment objectively. For example, let’s say you’re taking a picture of a cat. Your only intention is to have the cat pictured , that’s a snapshot. Automatic mode gives you the right exposure straight away whereas in Manual Mode, you have to go through a creative process in your brain to take the image.

Let’s say you’re taking a picture of the same cat in Manual Mode, you’re not just clicking a button. You’re actually thinking about what you want to do. You might want to picture the cat with a blurred background, you might want to photograph the cat in motion or freeze the moment while it’s blinking. My point is that manual mode brings more subjectiveness to your photographs, a bigger piece of consciousness about your intent, and what you need to do to achieve the end result you want.

Manual mode image5

The problem many people have with Manual Mode, or at least I did, is how to get the right exposure. My pictures would be either over or underexposed.

Finding the correct exposure

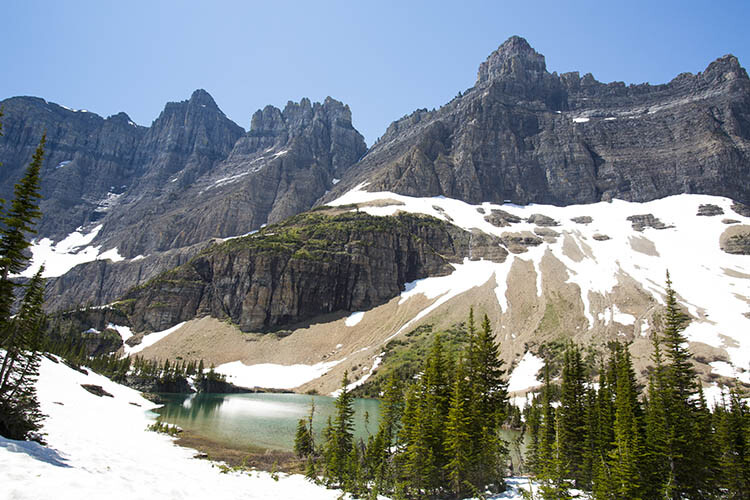
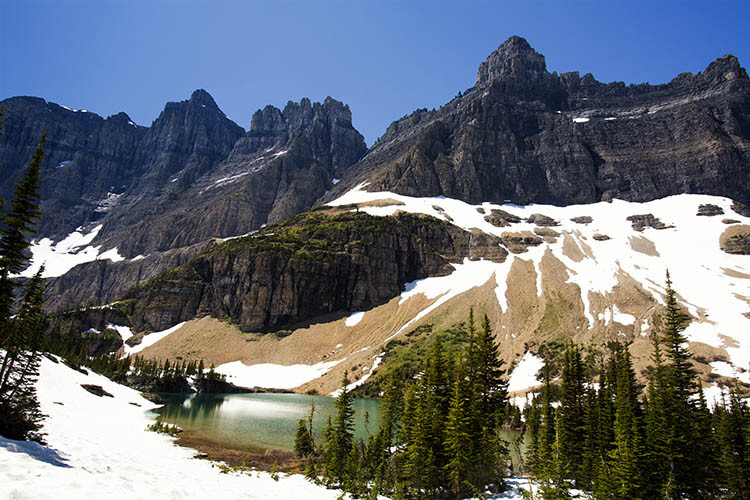
You will have a correct exposure when you are able to create the perfect balance between the shutter speed, aperture and ISO depending on the amount of light that’s available. When you are shooting outside, your exposure will always change, let’s say you are doing a portrait session in natural light. Your exposure will change every five minutes because the light varies all the time.

Manual mode image6 8

Comparison between a correctly exposed image, overexposed and underexposed one (left to right).

There might be a cloud covering the sun or it may be setting, so the intensity of the light will change. In a studio session, once you get your lights positioned the way you want and have found the correct exposure, you will not need to change your settings again unless you change the position of your light and its intensity. Basically, my point is you have to consider the amount of light available, the intensity, and its direction.

Manual mode image9

A studio portrait. As soon as I get my exposure settings right, I will not change them.

Shutter speed, aperture, and ISO explained

Before I get to the main subject of this article and you finally leave the automatic mode for good, I want to explain shutter speed, aperture, and ISO.

Shutter speed

The shutter speed is the amount of time the sensor inside your DSLR is exposed to light. A faster shutter speed will let in less light than a longer one. That is why we use very long shutter speeds in low light photography. The time between the shutter opening and closing will vary depending on how much light you want in your picture.

The shutter speed controls ambient light, that is one very important thing. If you need less light, then get a faster shutter speed. Do the opposite if you need more light. A fast shutter speed will also freeze action because the picture will be taken much quicker than a longer shutter speed. This will let you control if you want a moving subject to appear in motion or frozen in your image

Manual mode image10

Using a fast shutter speed to freeze a moving sports car

Manual mode image11

Using a slow shutter speed shows cars in motion or only the light trails from their headlights.

Aperture

The aperture (opening in the lens) controls the amount of light that is let inside the camera. There is one confusing thing about apertures. A large aperture lets in more light but large apertures are translated with small numbers. In other words, an aperture of f/1.8 is a large aperture (opening) but the number is small, whereas an aperture of f/16 is a small opening but the number is big. Once you get this straight in your mind, it should be fine because the aperture is not that difficult to understand.

Basically, you use aperture for two main things. If you have low light conditions, you will need to use a big aperture (small number) to let in more light. But mostly we use aperture to control the sharpness of an image. A bigger aperture (small number) will give you a shallower depth of field (a blurred background), and a small aperture (bigger number) will give you a larger depth of field (there won’t be any blur in the background, most of the photo will be sharp).

ISO

with an aperture of f/5.6 during a concert, I had no flash and had to boost up my ISO to over 1000 to get a proper exposure. I used a focal length of 50mm

Shot with an aperture of f/5.6 during a concert, I had no flash and had to boost up my ISO to over 1000 to get a proper exposure. I used a focal length of 50mm.

The ISO is the sensitivity of your camera sensor to light. With a higher ISO, the sensitivity to light is increased, therefore you will have more light in your photograph. One tip I can give you is not to be scared of the ISO. It does damage your photo quality wise by adding grain (noise) but with today’s DSLRs you can boost up the ISO to 1000 (or more) and still have good quality. Besides, you can always reduce noise later in post-production. I sometimes take portraits up to 1250 ISO, because I don’t really have a choice and choice is the whole point of this article.

Manual mode

Manual mode in photography is all about making choices. Sometimes use an ISO of 1250 for portraits. Most people would tell me I have no idea what I am doing if they see my settings because they’re scared of a grainy high-ISO picture. But I made the choice to use a high ISO to compensate for the shutter speed (make sure it was fast enough).

a portrait using a large aperture of f/1.8 and an ISO of 1000, I had no flash with me and it was long after the sunset.

This a portrait using a large aperture of f/1.8 and an ISO of 1000, I had no flash with me and it was long after the sunset.

If I use a long focal length with an aperture of f/5.6, I will mostly likely get satisfying bokeh. A shutter speed of at least 1/125th or 1/160th is needed to avoid any blurred shots due to camera shake as my lens is pretty heavy. I really need a sharp photo, so this will make me boost my ISO to 1250 because my choice was to shoot with that lens, at that aperture and that shutter speed.

To use manual mode, you have to make artistic choices and play with the shutter speed and the aperture, leaving the ISO as an additive compensation to get the correct exposure. If you want to photograph a road with cars passing by in the middle of the day, you will most likely want a sharp photo so you will use a small aperture. You then need a fast shutter speed to freeze the cars so the ISO, in this case, will most likely be pretty high.

is an image during daylight of a fast car using a fast shutter speed. The amount of light available enables me to use a fast shutter speed with an ISO of 100 and a small aperture. If it was during sunset I would have needed to increase my ISO to compensate for the light.

An image during daylight of a fast car using a fast shutter speed. The amount of light available enabled me to use a fast shutter speed with an ISO of 100 and a small aperture. If it was during sunset I would have needed to increase my ISO to compensate for the lack of light.

If you’re shooting sunsets and you want to capture some clouds moving in the sky; you will most likely use a small aperture to cut down the light, which will force a long (slow) shutter speed so you will likely need to decrease the ISO to 100. What you are doing is playing around with the shutter speed, the aperture, and the ISO to get the desired effect.

There are many ways to balance them, but each choice produces a different artistic result. It’s up to you to make that choice.

is a long exposure of 30 seconds with an ISO of 100, the camera was placed on a tripod, I used a small aperture of f/14  for a sharp image.

This is a long exposure of 30 seconds with an ISO of 100, the camera was placed on a tripod, I used a small aperture of f/14 for a sharp image.

Conclusion

Using Manual Mode makes you put more thought and reflexion into the photo you are about to take; I call this the artistic choice. Like I previously said, the shutter speed, the aperture, and the ISO make the photograph. Between your artistic choices, you can choose to have a shallow depth of field, a large depth of field, a subject in motion, or frozen.

Manual mode image12

Think about what you want to do before pressing the shutter button.

You can also choose how much light you want in your photo. If your artistic choice is determined by the aperture, then you have play around with the shutter speed and the ISO to find the right exposure. However, if it is determined by your shutter speed then you need to play around with the aperture and the ISO to find the correct exposure.

Note: your camera will reach its limits. But, you can use ND filters to darken your image or flash to brighten it up.

googletag.cmd.push(function() {
tablet_slots.push( googletag.defineSlot( “/1005424/_dPSv4_tab-all-article-bottom_(300×250)”, [300, 250], “pb-ad-78623” ).addService( googletag.pubads() ) ); } );

googletag.cmd.push(function() {
mobile_slots.push( googletag.defineSlot( “/1005424/_dPSv4_mob-all-article-bottom_(300×250)”, [300, 250], “pb-ad-78158” ).addService( googletag.pubads() ) ); } );

The post How to Use Manual Mode to Make Artistic Choices for Your Photography by Yacine Bessekhouad appeared first on Digital Photography School.


Digital Photography School

 
Comments Off on How to Use Manual Mode to Make Artistic Choices for Your Photography

Posted in Photography


Tips for Getting Started Doing Photography with Drones

26 Sep

Until very recently, my mindset was decidedly anti-drone. To me, drones seemed like a complicated plaything for geeks. After all, isn’t this photography hobby expensive enough without adding flying apparatuses to the equation? Plus there was very little doubt in my mind that if I bought a drone I would send it flying into the ocean on its first flight. No thanks.

Downpatrick-Head photography with drones

Why a drone?

I had a problem though. I had a coastal photography trip planned, and in coastal photography it is often difficult to take pictures of the coast while standing on the coast. I have long wanted some way to be able to look back at the coast from out to sea and photograph it from that perspective. A drone was the only real answer for me, so I bit the bullet and bought one.

After having used the drone for several months now, I can say my attitude has changed markedly. Much of what I thought about drones was wrong, or at least the problems were overemphasized. Flying them is actually very easy. It isn’t that complicated. It isn’t even that expensive (at least not compared to what we spend on cameras and lenses).

You may be pondering buying a drone, or at least wondering what they are all about. You might also see all the video footage from drones and wonder how drones are used in still photography. So let me introduce you to drones and how they can add a new dimension to your photography.

Kinbane-Head

Flying drones is easy

First, let’s talk about flying drones. This is something you are probably concerned about. You might wonder if flying will require skills you don’t have. Or perhaps you just don’t want to devote time to learning it. This is one area where you have nothing to worry about. Flying a drone is remarkably easy. That’s not to say you shouldn’t be careful or that you won’t be nervous every time you fly it, but flying is really easy.

The main thing to understand is that if you have your drone in the air, and you completely let go of the controls, it will just hover harmlessly in the air. It literally just sits there until you tell it what to do. Another thing that people worry about is having the battery run out while you are in the air. That won’t happen. Most drones have a feature that brings the drone back to its take-off point when the battery gets down to a certain level. In fact, most drones have a return to home feature you can press if you ever find yourself in an uncomfortable situation. You always have a way out.

Controlling the drone is easy. You have a controller with two joysticks on it. Pushing on one of them sends the drone up or down; doing the same to the other joystick sends it forward and backward. Each of the joysticks also goes right and left. One will turn the drone to the right and left; the other will make it move to whichever side you push to. I’ll talk more about the specifics of the control later. For now, I just want you to get a feel for how easy it is. If you were worried about being able to fly a drone, don’t be.

Fanad-Head

Watch where you fly

You may have heard a lot about the new laws affecting drones. It is true that most countries are enacting regulations for drones. In the U.S., the FAA has recently finalized its rules regarding drones. But many of the rules and restrictions apply to those using drones commercially. Most of us are just doing this for fun, so let me try to make this simple for you.

If you are flying your drone for recreational purposes, you don’t need a permit. There are no pilot requirements. Just register your drone with the FAA and you are set. The registration process is simple and only costs $ 5. To do so, just go to this page, create an account, and follow the instructions to register your drone.

That said, you cannot just fly your drone wherever you want. The main limitations you should understand are as follows:

  • You must always fly below 400 feet.
  • You must keep your drone within direct eyesight.
  • Never fly near other aircraft, or within five miles of any airport.
  • Never fly over groups of people, stadiums, or sporting events.

There are other restricted areas as well. For example, you cannot fly anywhere in Washington D.C. or in national parks. There are online maps and apps for your phone – including the FAA’s B4U Fly app – that will tell you when you are in a restricted space.

Anyway, the regulations above apply to the U.S. Other countries will have their own regulations. Here are links to the regulations for Australia, New Zealand, and the UK.

Old-Head

Getting the right drone

Next, let’s talk about getting a drone, if you don’t already have one.

You may have dreams of buying a drone and sending up your DSLR to take high quality pictures. Forget about that, unless you want to spend upwards of $ 6,000. Instead, you’ll probably want to get a drone that comes with its own camera, but there are also models that work with the GoPro. The most common models are the Phantom 4 by DJI (check prices on Amazon or B&H Photo) or the Typhoon H by Yuneec (check prices on Amazon or B&H Photo). These will cost you about $ 1,300 – $ 1,500 for the drone and camera, although you can still get older models cheaper.

What will you get for that? You’ll get a drone that will fly up to about 40 miles per hour, which can operate up to a few miles away from you. It will remain aloft on a battery charge for about 20-30 minutes. You can expect it to have features like an automatic return to home, collision avoidance, and the ability to follow you. Of course, specific features will depend on the actual model you choose.

As to the camera, you can expect to get one that shoots both stills and video (usually 4K). We’ll talk more about the specifics of the cameras in a minute. First let’s talk more about how to fly.

Giants-Causeway

How to fly

When you fly the drone for still photography, things are pretty simple. Unlike shooting video, you won’t need to do any fancy pans or reveals. You just want to get the drone to the right spot(s) to take the picture. It’s just a matter of getting it up in the air, watching where you are going with it, and moving it where you want.

Your drone will have a controller with two joysticks. The controller plugs into your phone or other device. You control the drone with the two joysticks. At the same time, you can see through the drones camera on your device. To send the drone up into the air, all you do is press up on the left joystick. That stick controls altitude. It is as simple as pushing up on the stick to increase the altitude, and pulling down to bring the drone down. That stick will also turn the drone from side to side. The other (right) joystick will fly the drone forward and backward by pressing up and down. When you press that joystick left or right, it moves the drone in that direction.

Monitoring the flight

To keep an eye on where your drone is going, you can either watch the drone itself or watch where it is going via the screen on your phone. Of course, you can operate the controller while keeping your eyes on the drone to make it go where you want.  But you can also see what the drone sees to control it, which is often much easier. You will have a controller that connects to your phone or other device. Your screen will show the view from the drone’s camera as well as other pertinent data. Remember that your drone has to be kept in direct eyesight though.

That doesn’t sound too difficult, does it? It’s really not. After a few flights, it will be even easier. Of course, there are additional nuances and things will be a little different depending on what model you buy. Be sure to read the instructions and watch a few online videos on your specific model.

Monasterboice

You’ll be using a camera made for video

Next let’s talk about the camera that will come with your drone. First, the good news. When it comes to shooting video, the cameras in drones are top notch. They routinely shoot Ultra HD and most shoot 4K video. It doesn’t get better than that.

The bad news is that still photography is something of an afterthought for drones. The sensors are small. In most cases they are what you’d get in a compact camera. The resolution is moderate (12-16 MP is standard). The dynamic range is extremely limited and the low light performance isn’t great.

In addition, the lens will likely be very limited; a fixed focal length. It will be a wide angle lens, usually around 15-20 mm. The lens will also have a fixed aperture, meaning you cannot change it.

Working with the limitations

Virtually none of us would feel good about going out shooting with such a limited camera and lens. However, in drones it isn’t that bad. As to the camera, remember you will be shooting in daylight (you can only fly drones during the day – within 30 minutes of sunrise and sunset – in the U.S.), so there will usually be plenty of light. As to the lens, the fixed aperture isn’t as limiting as it would first appear. Keep in mind that everything in your picture will be so far away that the focus will be at infinity. You don’t need a lot of deep depth of field for everything to be sharp.

So the cameras are pretty limited, but you can make do. In any event, the cameras are getting better all the time, so you can expect significant improvements in camera quality in the near future.

Malin-Head

Tips for photographing with your drone

We’ve talked about the capabilities of drones and the basics of how to fly them. Let’s talk now about taking pictures with them. For the most part, it is similar to operating a normal camera. You have the normal modes to choose from. You can set the shutter speed and ISO yourself or have the camera set them for you. That said, there are some aspects of using cameras on drones you should be aware of. Here are some tips to get you started:

#1 Consider Shooting in Automatic Mode

I am a dedicated manual mode shooter when it comes to shooting with my DSLR. I would not think of using an automatic exposure mode. But when it comes to shooting with a drone, I put it in automatic exposure mode more often than not.

Why? Because there is enough to worry about when it comes to drones. I don’t want to add exposure control to my list of issues to think about. So when you are starting out using a drone for photography, consider using automatic mode. When you get more comfortable with the other controls, you can then set the exposure controls yourself. In any case, your camera will typically do a pretty good job setting the exposure level. You’ll rarely have tricky exposure scenarios here.

Connemara

#2 Bracket your photos

One way to make sure you get the right exposure every time is to bracket your photos. Drone cameras are usually capable of doing 3-shot brackets. Use this to overexpose and underexpose your shots by a stop. Think of this as exposure insurance. Sometimes you will just like one of the over or underexposed shots better. In that case, just use it. In addition, you can blend the exposures or use HDR software to combine the exposures later.

#3 Use filters

As mentioned earlier, the lens on your drone will likely have only one aperture. That leaves you limited options for changing shutter speeds. You aren’t completely out of luck though; you can still buy neutral density filters for your lens. These filters are used more for video, but they also help still photographers. They restrict the amount of light that gets into the camera, thereby forcing the camera to use a longer shutter speed.

Dunluce

You can also get polarizing filters for your drone. These filters cut down on reflections and make skies appear a deeper, richer blue. This is helpful for drone photography, where the sky is often a significant part of the picture.

#4 Get multiple batteries

This isn’t strictly a photography tip, but it is important nonetheless. Be sure to get more than one battery for your drone. Drone batteries typically last only 20-30 minutes. That isn’t a lot of time. Further, you may also want to fly in a few different locations on the same day. Most of the time you won’t be able to charge your battery in between locations. So, you’ll need more than one.

How many do you need? That depends. You can get away with only two batteries (I do), but many drone photographers have three or four. You shouldn’t need more than that. Batteries are not cheap so think carefully about what you will need.

DownhillCastle

#5 Watch out for the deone’s blades in your pictures

Obviously, when you are flying the blades on your drone will be spinning. Remember that you will also be using an extremely wide angle lens. If you aren’t careful, your picture will include the spinning blades.

The best way to avoid this problem is to simply angle the camera down. That will keep the spinning blades out of the camera’s field of view. Of course, changing the angle of the camera will change the composition of your picture. Flying higher while angling the camera down might keep the composition similar to the picture you originally had in mind.

In any case, just be sure to look for blades in your pictures. You will need to look closely sometimes because it isn’t always obvious. You don’t want to get home and discover that your pictures are all ruined because there are spinning blades in all your pictures. If they are present, just change things up and take another shot without the blades in the picture.

#6  Keep it low

Your drone will fly up to 400 feet in the air. It is fun to fly it high, and it also ensures that you are far away from trees, power lines, and other obstacles. But for the best photos, you will not want to be anywhere near that high. Your shot will look like something from Google Earth. Instead, keep your drones pretty low to the ground (under 100 feet) to get the best shots. That will help you establish a foreground for your picture.

Connemara-2

Getting started with your new drone

So I admit it, I was wrong about drones. They are fun, easy to fly, and they really add something to your photography. Is one right for you? The answer will be different for everybody, but if you are on the fence I really encourage you to give it a shot.

A “just get out there and do it” attitude might not seem appropriate when it comes to drones. After all, any mistake can lead to a crash. But there is one simple rule that will make flying drones easy. That is to just stay away from everything. In fact, stay far away. Don’t go anywhere near trees, buildings, power lines, etc. If you do that, very little can go wrong.

Do you have any other drone tips to share with dPS readers? Please do so and share your drone images in the comments below.

googletag.cmd.push(function() {
tablet_slots.push( googletag.defineSlot( “/1005424/_dPSv4_tab-all-article-bottom_(300×250)”, [300, 250], “pb-ad-78623” ).addService( googletag.pubads() ) ); } );

googletag.cmd.push(function() {
mobile_slots.push( googletag.defineSlot( “/1005424/_dPSv4_mob-all-article-bottom_(300×250)”, [300, 250], “pb-ad-78158” ).addService( googletag.pubads() ) ); } );

The post Tips for Getting Started Doing Photography with Drones by Jim Hamel appeared first on Digital Photography School.


Digital Photography School

 
Comments Off on Tips for Getting Started Doing Photography with Drones

Posted in Photography


Top 5 Nik Collection Filters to Improve Your Landscape Photos

25 Sep

One of the best image editing programs available right now happens to be free. The Nik Collection by Google is a desktop photo editing software that was recently declared free of charge earlier this year. Today, the Nik Collection makes available over 55 filters that do everything from old camera and film simulation, to image sharpening, noise reduction, and basic retouching and correcting of photos. Of these many filters, there are 5 within the Color Efex Pro 4 toolset  that are particularly useful for landscape photos. This article will highlight these essential filters and why they are so valuable.

Nik Collection Color Efex Pro free photo editing software

Note that all tools and filters within the Nik Collection contain certain points that can be individually controlled to apply the filter effect as little, or as much, as you desire. You can also add the effects of several different filters, so be sure to play around with as many as possible to achieve the look you’re after.

#1 – Pro Contrast Filter

Have a photo that needs higher levels of contrast without sacrificing detail? The Nik Pro Contrast filter tackles this problem with three filter settings that you can tinker with.

  1. Correct Color Cast reduces any inherent color cast in an image, such as the orange hue the sunrise casts onto the water below.
  2. Correct Contrast offers general contrast adjustment.
  3. Dynamic Contrast delivers the most pop by boosting contrast in flat areas of the photo. The latter feature is also demonstrated in the Polarization After photo below.
Nik - Pro Contrast 1

Before

Nik - Pro Contrast 2

After – with the Pro Contrast filter applied

Nik - Pro Contrast

#2 – Polarization Filter

For landscape photographers, the circular polarizer is a must-have glass filter that enhances blue skies and reduces water glare. It is often said that the effects of a polarizer can’t be replicated in post-production. But Color Efex Pro 4 offers a pretty impressive Polarization effect that can be applied to any photo, even if it was taken without a glass circular polarizer.

There are two Polarization filter settings that can be tweaked: Rotate, which simulates the effect of physically rotating the glass filter in front of your lens, and Strength, which controls how much of the filter effect is applied.

Nik - Polarizer 1

Before

Nik - Polarizer 2

After – with Polarization and Pro Contrast filters applied.

Nik - Polarizer

#3 – Skylight Filter

This handy filter simulates a glass warming filter by removing any blue color cast and applying a warming effect to your photo. Control the strength of the filter to determine how much warmth is added.

Nik - Skylight 1

Before

Nik - Skylight 2

After – with Skylight filter applied

Nik - Skylight

#4 – Graduated Neutral Density Filter

Similar to the glass circular polarizer, the graduated neutral density filter is a staple among landscape photographers as it helps lighten or darken just a portion of an image. Think about a landscape with perfectly balanced land and blown out sky. That is a job for the graduated neutral density filter.

There are five different settings to play with for this filter. Upper and Lower Tonality let you adjust the brightness of the top and bottom portions of the image, Vertical Shift controls the placement of the filter’s horizon, while Rotation adjusts the angle of the horizon filter. Finally, Blend helps integrate the filter effect in a more natural way.

Nik - ND Grad 1

Before

Nik - ND Grad 2

After – with Graduated Neutral Density filter applied.

Nik - ND Grad

#5 – Reflector Efex

Nik - Reflector FX 1

Before

The reflector is a favorite photographer’s tool that has also been simulated by a Color Efex Pro 4 filter. Use this filter to control light in your image and open up shadows.

The Method setting allows you to choose from Gold (warm), Soft Gold (milder warm), and Silver (neutral) lighting colors. Light Intensity controls the amount of reflector light added, Light Falloff controls the abruptness of the lighting effect falloff, while Position controls where the falloff starts. Finally, Source Direction lets you choose where the reflector effect begins.

Nik - Reflector FX 2

After – with Reflector Efex Soft Gold filter applied.

Nik - Reflector FX

Over to you

There you have it! Five handy filters within the Nik Collection’s Color Efex Pro. It’s again worth noting that there are many more filters within the software, and each can add as subtle or dramatic an effect as you desire. At the very least, this photo editing software is available for free, so it’s worth trying out if you haven’t already.

What are your most used filters within the Nik Collection for your landscape photos? Let me know in the comments below.

googletag.cmd.push(function() {
tablet_slots.push( googletag.defineSlot( “/1005424/_dPSv4_tab-all-article-bottom_(300×250)”, [300, 250], “pb-ad-78623” ).addService( googletag.pubads() ) ); } );

googletag.cmd.push(function() {
mobile_slots.push( googletag.defineSlot( “/1005424/_dPSv4_mob-all-article-bottom_(300×250)”, [300, 250], “pb-ad-78158” ).addService( googletag.pubads() ) ); } );

The post Top 5 Nik Collection Filters to Improve Your Landscape Photos by Suzi Pratt appeared first on Digital Photography School.


Digital Photography School

 
Comments Off on Top 5 Nik Collection Filters to Improve Your Landscape Photos

Posted in Photography


Pushing your Composition to the Edge

25 Sep

The world is filled with photographs. I did a bit of research and found the following statistic. Researchers estimate that the average individual is now exposed to approximately 250 different images per day. It’s no secret that we are now inundated with visual stimulus. Everyone owns a camera and everyone is shooting images. In 1857 Francis Frith took photographs of the pyramids and the Sphinx. The general public was mesmerized by images of a faraway and exotic location. Today, if I search “Images of the Pyramids” I get 7 million results; everyone knows what the pyramids look like. This whole phenomenon translates into a challenge for photographers. How do you shoot something different and unique when the world uploads 1.8 billion photographs a day?

Image 7

There is no easy answer. I don’t know how many times I have heard someone say, “That’s a beautiful image of the shoreline. You are a really great photographer but take a look at this. I shot the same thing last year on vacation.” Some photographers may become frustrated with this occurrence, but perhaps we should look upon this as a challenge. What can you do to make your photographs more unique?

Live on the edge – of composition

We all want people to view our images and say, “That’s amazing! I’ve never seen that before!” It’s going to be tough but it’s worth a try. It’s time to push your composition skills to their limits. Consider using techniques or viewpoints that are a little unconventional. Try pushing the main subject of your composition towards the edge of your frame. Let’s consider this photograph of a kayaker.

Image 1

In this version, the image is composed using the rule of thirds. The scene has a pretty unique atmosphere as the sun struggles to break through the morning mist. Shouldn’t that be enough to make the viewer stop and take notice? It’s a beautiful image and it was a fantastic morning. I know people will love this image. But what if it was recomposed to push the kayaker to the edge of the frame? Does this make the image even more appealing? Consider the difference.

Image 2

This second image is cropped way down to illustrate a point. What did you look at first? Hopefully, your answer is the red light on the left of the frame and then your eye moved over the image to discover the kayaker. This technique is called “the delay” which means that the viewer is delayed by other details before focusing on the main subject. This means that the viewer notices the details in a much slower and more deliberate manner. You might even create the emotion of surprise when your viewer discovers the full extent of your composition. That’s a good thing. Creating emotions within the viewer ensures they will remember your image.

When the rule of thirds is not the best choice

Let’s take a look at another image. In this case the main subject, the flower bud, has been pushed right to the edge of the frame.

Image 3 Image 4

By placing the main subject closer to the edge of the frame you can create more tension within your image (above left). The image is certainly more dynamic and interesting than this conventional version which focuses on placing the flower bud along the rule of thirds (above right).

In this shot of the boxer and his trainer I was disappointed and considered it a failure because it didn’t follow any of the rules of composition. The autofocus locked onto the training gloves, not the boxer. But after consultation with the magazine editor, he decided to use it because the angle was so unique. The composition told the story in a different way. Notice the trainer’s nose is just in view in the top corner. The editor loved that element and it sealed his choice.

Image 5

Sometimes you will be surprised by what works.

Finding the right balance

Of course, there are times when this technique doesn’t work and the resulting image just feels unbalanced and awkward. This image of a decaying pier in Lake Huron is a good example of when placing the subject close to the edge unbalances the shot.

Image 6

There’s just too much visual weight placed on the right side of the frame and the image is not successful. But that’s okay because at least something was learned about the importance of creating visual balance when pushing the subject matter to the very edge of the frame. Try to balance the weight of the object along the edge with the visual weight of the rest of the space.

Conclusions

Image 9

However, you choose to compose your images the challenge will always be to create something unique that stands out from the crowd. The reality is the crowd of images is only going to get bigger.

Are you up to the challenge? Are you willing to continue experimenting with the methods you use for composing your images? I say push things a little further each time you take a photograph and experiment with how you can use the edge of the image to create interest in your work.

Please share your compose on the edge images and thoughts in the comments below.

googletag.cmd.push(function() {
tablet_slots.push( googletag.defineSlot( “/1005424/_dPSv4_tab-all-article-bottom_(300×250)”, [300, 250], “pb-ad-78623” ).addService( googletag.pubads() ) ); } );

googletag.cmd.push(function() {
mobile_slots.push( googletag.defineSlot( “/1005424/_dPSv4_mob-all-article-bottom_(300×250)”, [300, 250], “pb-ad-78158” ).addService( googletag.pubads() ) ); } );

The post Pushing your Composition to the Edge by Erin Fitzgibbon appeared first on Digital Photography School.


Digital Photography School

 
Comments Off on Pushing your Composition to the Edge

Posted in Photography


Weekly Photography Challenge – Silhouettes

24 Sep

Let’s look at the definition of silhouette:

screen-shot-2016-09-14-at-10-15-44-pm

If you want to see some good examples have a look here:

Weekly Photography – Silhouette

Haricharan

By Haricharan

To complete your challenge this week to shoot a silhouette these articles may have some helpful tips for you:

  • 7 Steps to Create Street Photography Silhouettes
  • 5 Secrets to Create a Perfect Silhouette Portrait Outdoors
  • Create Powerful Silhouettes by Telling a Story
  • 5 Tips For Photographing Silhouettes
Roberto Trombetta

By Roberto Trombetta

AdA Durden

By AdA Durden

Jeff S. PhotoArt At HDCanvas.ca

By Jeff S. PhotoArt at HDCanvas.ca

Share your images below:

Simply upload your shot into the comment field (look for the little camera icon in the Disqus comments section) and they’ll get embedded for us all to see or if you’d prefer, upload them to your favourite photo sharing site and leave the link to them. Show me your best images in this week’s challenge. Sometimes it takes a while for an image to appear so be patient and try not to post the same image twice.

Share in the dPS Facebook Group

You can also share your images on the dPS Facebook group as the challenge is posted there each week as well.

???9? - Photographer No.9

By ???9? – Photographer No.9

Brian.abeling

By brian.abeling

googletag.cmd.push(function() {
tablet_slots.push( googletag.defineSlot( “/1005424/_dPSv4_tab-all-article-bottom_(300×250)”, [300, 250], “pb-ad-78623” ).addService( googletag.pubads() ) ); } );

googletag.cmd.push(function() {
mobile_slots.push( googletag.defineSlot( “/1005424/_dPSv4_mob-all-article-bottom_(300×250)”, [300, 250], “pb-ad-78158” ).addService( googletag.pubads() ) ); } );

The post Weekly Photography Challenge – Silhouettes by Darlene Hildebrandt appeared first on Digital Photography School.


Digital Photography School

 
Comments Off on Weekly Photography Challenge – Silhouettes

Posted in Photography


18 Shape Defining Silhouette Images

23 Sep

Doing a good silhouette requires a few things. A subject with a good shape, proper exposure, and position of the subject to best showcase its shape and define its outline.

Lighting is key, and contrast is essential to get a nice clean silhouette. Look at how these photographers pulled off some great silhouette images. Take note of the kinds of subjects make good silhouettes.

Club Med UK

By Club Med UK

Kenneth Garcia

By Kenneth Garcia

Grendelkhan

By grendelkhan

Darron Birgenheier

By Darron Birgenheier

Jqpubliq

By jqpubliq

Nicolas Alejandro

By Nicolas Alejandro

Iggyshoot

By iggyshoot

Grant

By Grant

Jonathan Camuzo

By Jonathan Camuzo

Deven Dadbhawala

By Deven Dadbhawala

Nattu

By Nattu

Matthew Roth

By Matthew Roth

Tara R.

By Tara R.

Andy Tolsma

By Andy Tolsma

Wheats

By Wheats

Jenny Downing

By jenny downing

Brian Gratwicke

By Brian Gratwicke

Chuck Holland

By Chuck Holland

googletag.cmd.push(function() {
tablet_slots.push( googletag.defineSlot( “/1005424/_dPSv4_tab-all-article-bottom_(300×250)”, [300, 250], “pb-ad-78623” ).addService( googletag.pubads() ) ); } );

googletag.cmd.push(function() {
mobile_slots.push( googletag.defineSlot( “/1005424/_dPSv4_mob-all-article-bottom_(300×250)”, [300, 250], “pb-ad-78158” ).addService( googletag.pubads() ) ); } );

The post 18 Shape Defining Silhouette Images by Darlene Hildebrandt appeared first on Digital Photography School.


Digital Photography School

 
Comments Off on 18 Shape Defining Silhouette Images

Posted in Photography


Tips for Fast and Effective Studio Product Photography

23 Sep

This is the second part of a series that will explore a studio setup aimed at product photography. You can see the first here: Equipment Tips for Quick and Efficient Studio Product Photography.

Although this is built primarily for product photography you can use it for a few other genres. In this second part I will be going hands on with an actual shoot. I will show you how to set up a shoot based on the equipment from part one and go over some tips that I have gathered over the years of using it. If you haven’t read part one yet, head over there and give it a quick look so that you are up to speed with how we are about to implement that system.

PICTURE 1

Getting set up

Now that you are caught up let’s dive in. For almost every shoot I start by turning on my table lights. Those include the lights behind and beneath my table to allow the surface to glow from within (see photo above).

I have one of my Spiderlite TD6 heads above the table aimed straight down. This really helps fill in the top of the product and knock down the shadows caused by the table that underlights the product. My second TD6 light is the one that moves around my set. This is my main light as it is set brighter than the others and it is responsible for the main direction of light.

Settings for my lights will differ slightly from what you will need but this is a good starting point. The overhead TD6 is set for 30% power. The two Flashpoint lights under the table are set to 50% power. I have two small fluorescent softboxes behind the table at full power. My main TD6 is usually at 66% power (two switches turned on).

PICTURE 2 PICTURE 3

These are the settings I run on my lights, and they work for almost all of my clients that need photos shot for their Amazon, Ebay, Etsy stores or their online company catalog. You need to realize that all bulbs are not created equal and that if you are mixing different daylight balanced fluorescents that colors can come out altered in your shots.

Set the color balance

To counter this problem, invest in the Xrite color checker. Make a custom profile for your camera using your lights and this will ensure that colors are accurate. To find more information on incorporating the Xrite into your workflow check out this article by Andrew Gibson: How to Use the X-Rite ColorChecker Passport to Obtain Perfect Color.

PICTURE 4

Set the exposure

As for my camera, I have one of my custom buttons pre-programmed and ready to go, I simply switch to C2 and I am shooting in seconds. My C2 settings are fixed for Manual Mode at f/16 and 1/6th of a second, highlight detection on, and a square crop. This will get me very close with my studio setup. If I need a little more blowout on my white table I slow my shutter speed, or alternatively if any clipped whites creep into my product I can increase the shutter speed.

PICTURE 5

I also find that manual focus is much faster in this situation. Focus hunt happens a lot during shoots and it eats time quickly when you are shooting 20+ products with 4+ angles per part. With a quick flick of a button on the back of my camera, I can enter Live View mode, zoom in, and get the exact focus that I would like. I shoot with highlight detection on so that when the image comes up for review anything that is clipped will flash black.

PICTURE 7

From there I am able to determine if I obtained a proper exposure. The histogram doesn’t help very much here as it is always going to be spiked to the right because I am purposely blowing out the background. I have also set my camera to crop the image to a square as this tends to be the only format my customers want for this style of photography.

Make a raised platform

A big tip that I can share with you is to use a raised platform. The reason you need a raised platform is because when an object gets placed directly on the table surface it tends to add a glaring highlight to the bottom of the product. The tabletop and the highlight are so close in terms of power it becomes difficult to blow out your table and keep the highlight on the bottom of your product from clipping. I have a super easy solution to get around this dilemma. What I did was take two boxes, stack them on top of each other, and then wrapped both in regular old white printer paper.

PICTURE 8

PICTURE 9

If you leave them unwrapped then you will have black strips reflecting in your product. The next thing I did was get a sheet of clear acrylic from Lowes. It is a quarter inch thick, and is 18×24″. It cost me around $ 20. I place this acrylic on top of the wrapped boxes which raises the shooting surface by seven inches.

PICTURE 10

What this does is allow the table to blow out, but because of light falloff it prohibits the product from being overly lit on the bottom and clipping the highlight. While I was at it I wrapped two smaller boxes of different sizes in white paper as well. I use these quite often to bounce light back into the shadows.

PICTURE 11

Ready to place the subject

Now that we have gone over power settings for the lights, the configuration of my camera, and some tips on knocking down blown highlights by raising the surface, let’s set up an actual shoot. We will ease into it and start with something that doesn’t give you a whole lot to think about. Let’s do a regular coffee mug.

I placed the mug directly in the middle of the acrylic. The overhead light is directly over the mug aimed down. The other TD6 is at 90 degrees, hitting the mug from camera right.

PICTURE 12

Picture-13b

The resulting image is 95% ready to go online almost straight out of the camera. There are a few things you might want to obsess over, like adding more white reflection and narrowing the dark gap. But honestly, it’s ready to go as is. I did say this was an easy subject so let’s move onto something a bit harder, shall we?

Let’s try a harder subject

The next thing we will attempt is something that gives plenty of photographers fits; a white subject on a white background. Well, because we have a blown out table top and we are controlling the amount of light that the tabletop is introducing to our subject, it actually isn’t difficult to get great results.

Let’s start with the same lighting. Light from directly above, and one more light at 90 degrees to camera right. Straight out of camera we can see we did a pretty good job.

Picture-14b

There is no major clipping going on the subject yet the background is completely white. There is not a lot of shape and dimension to the item, however. So let’s move the right light so that instead of 90 degrees it is 45 degrees. Now the light will hit the product on the front of this USB hub. Bingo.

Picture-15

We now have highlights on the leading edges which helps give it shape and dimension. It’s very close, but we can still do a little better. Let’s add one of those white wrapped boxes we made earlier to the shadow side and bounce some of our key light back into the product.

PICTURE 16

Picture-17b

Now what we get is just a subtle fill in the shadow and that just about does it for this product. Yes, we could obsess further over some other details and finesse it some more, but remember this is a speed table. We are trying to get products on and off the table quickly. This image would pass for all of my clients.

Shooting reflective surfaces

For our final demonstration let’s do a reflective surface. Leaving the lights exactly the same as the previous shot (again because this is about speed) I will remove the white box that is acting as a fill and shoot this RCA adapter.

PICTURE-18b

Again right out of camera it is pretty good. You can see some red reflecting on the shadow side in the lower left which is coming from a red bag out of frame, and there is a really dark strip running down the left/center side. Let’s clean those two things up and try again. I will remove the red bag from out of the frame and put the smaller white box fairly close to the adapter.

PICTURE 19

picture-20b

With just those two changes it has made a large difference in the shot. Let’s try and clean this up a tad more. The reason there is a black line is because it is reflecting the much darker room behind the camera. Using the angle of incidence I will use my large white box just below my lens and throw light back into the subject.

PICTURE 21

picture-22b

There we go! A perfectly acceptable image for an online catalog. The RCA adapter is cleanly lit, no harsh black lines, a fully white background and it is already squared because of our camera settings. This image is ready to go.

Read more info about shooting reflective surfaces here.

Summary

The reason I built this system is for speed. If you are trying to knock out 100 products a day, with this system you could absolutely do it. I know because I have done it.

Of course, there is the third and final part of the process and that is editing using your favorite software.

I use Lightroom, and it will really going up your product photography game. You need it to catalog all of your client’s images, keep track of the part numbers, export to their specification and clean up shoot errors using very little time.

Please share your questions and comments in the space below.

googletag.cmd.push(function() {
tablet_slots.push( googletag.defineSlot( “/1005424/_dPSv4_tab-all-article-bottom_(300×250)”, [300, 250], “pb-ad-78623” ).addService( googletag.pubads() ) ); } );

googletag.cmd.push(function() {
mobile_slots.push( googletag.defineSlot( “/1005424/_dPSv4_mob-all-article-bottom_(300×250)”, [300, 250], “pb-ad-78158” ).addService( googletag.pubads() ) ); } );

The post Tips for Fast and Effective Studio Product Photography by Jacob Macias appeared first on Digital Photography School.


Digital Photography School

 
Comments Off on Tips for Fast and Effective Studio Product Photography

Posted in Photography


The Importance of Setting Photography Goals for Yourself

23 Sep

A wiser person than myself once said that if someone does not know to which port they are sailing, no wind is favorable. I heard that advice early in my photographic journey and it has stuck with me throughout the years. Learning about photography is important. Developing your skills as photo maker is even more important.

However, one of the most important things that you can do in order to grow as an artist (and business person) is to recognize the importance of finding a direction, setting photography goals for yourself. Without a direction or goals, all the passion, skill, and creativity you possess will not be enough to help you reach your full potential as a photographer.

Direction

Finding your direction

That is the hard part. Figuring out which direction to focus your energy on can be frustrating and at times extremely confusing. There really are no shortcuts. The key is to shoot, shoot, and shoot some more. Shoot a lot. You won’t know what kind of photography you truly love until you let yourself go and become lost in your own work.

Don’t limit yourself to only one type of photo when you’re just starting out in the art; meaning don’t exclusively do street work or only shoot portraits. Make photographs of anything: people, landscapes, architecture, food, toasters – anything. You might find that your true passion strangely discovers you when you least expect it. The important thing is to keep shooting and keep yourself open to new opportunities.

Shoot

Bear in mind, however, that directions can and often do change. Even though you may be firmly set on the path you want to pursue with your photography remember that you are not confined to it exclusively. As you grow as a photographer so will your tastes and your inclinations may evolve. Again, keep your creative mind free and be willing to try something completely different if the muse strikes you to do so. You make the photograph…the photograph does not make you.

Applying your direction

For a moment let’s imagine that you have found your direction. You’re elated and you can’t describe how great it feels to have that overwhelming urge to create photographs. Now what? Do you just go out into the world and hope for the best? Of course not. Instead, take all of that excitement and artistic energy and channel it into something tangible.

Sample 1

In short, you must set clear goals for yourself as a photographer. Setting goals for your photography will help you immeasurably. There are so many things to consider when first starting out. At times it becomes shockingly easy to lose your focus which will lead to frustration. Developing goals will keep you grounded in your work and heading in the direction you have chosen. Not only will having clearly defined goals keep you focused but will also keep you motivated and make you more determined to accomplish what you have set out to do.

Learn to set goals which are realistic

No one that I know of ever had their first photograph published on the cover of National Geographic Magazine. If that’s your goal that’s great. But understand that while setting goals is essential to success, they must also be realistic goals.

Find goals for your work which are challenging but attainable. Examples of realistic goals could be learning a new technique or getting your work in a local gallery. Don’t set yourself up for disappointment because you set the bar unimaginably high. Success is a ladder that must be climbed one step at a time.

Acheive

Confidence

Gaining confidence is somewhat of a paradox because you need confidence in order to find it – think about that for a moment. Boosting your confidence level is perhaps the most important reward that will come out of setting goals for your photography.

Taken as whole, going from a beginner to a professional photo maker is a daunting task to say the least. There is just so much that can go wrong on the journey from point A to point B. Instead of attempting to cover the distance in a single leap, lay out achievable goals that will eventually take you where you want to go. Along the way, with each goal met and overcome, you will naturally build confidence. The next goal will be met and then the next and the next, and so on.

As you become more confident in your work and your abilities each new goal you set will be more and more ambitious. One day you will look back to see how far you’ve come and how much you’ve accomplished just by focusing on each step one at a time.

Steps

Be brave

You found the courage to follow your dreams and take up the mantle of “photographer”. It’s not always going to be an easy road, but by simply finding your direction and setting photography goals you will be able to achieve things you never thought were possible.

Learn to understand what it is that truly gives you a spark when you photograph, then develop a game plan by setting small goals to help you along your way. Those goals will be your signposts. With each goal you achieve you will build skill, confidence, experience, and knowledge. As you learn and grow you will undoubtedly change as an artist. Be mindful but don’t fight the natural current and healthy evolution of your own creativity.

Trees 1

Whether the goals you set are designed to facilitate a transition from hobbyist to pro photographer, or to just reach the next stage in your photographic journey, the important thing to remember is to never stop moving. Always strive to learn something new, set new goals, and reach new heights.

What are your photography goals? Please share in the comments below.

googletag.cmd.push(function() {
tablet_slots.push( googletag.defineSlot( “/1005424/_dPSv4_tab-all-article-bottom_(300×250)”, [300, 250], “pb-ad-78623” ).addService( googletag.pubads() ) ); } );

googletag.cmd.push(function() {
mobile_slots.push( googletag.defineSlot( “/1005424/_dPSv4_mob-all-article-bottom_(300×250)”, [300, 250], “pb-ad-78158” ).addService( googletag.pubads() ) ); } );

The post The Importance of Setting Photography Goals for Yourself by Adam Welch appeared first on Digital Photography School.


Digital Photography School

 
Comments Off on The Importance of Setting Photography Goals for Yourself

Posted in Photography


How to Use 1 Natural Light Setup to Create 3 Different Portrait Looks

22 Sep

As a portrait photographer, the majority of my work is shot on location. This can be outdoors or in my clients’ homes or places of business. I mostly shoot using natural light and have become adept at finding the best light source in any location as well as creating backgrounds that won’t interfere with the subjects. In this tutorial, I want to show you an easy, natural light portrait setup you can recreate in your own home. Simply by repositioning yourself and your model, you can create three distinctly different portraits from this one setup.

one natural light setup - 3 looks

No special lighting or fancy equipment is needed, and the techniques are straightforward and easy to master. Experiment to create different looks using various backdrops such as plain walls or sheets, or different outfits for your subject. You can also get different effects by changing your lens, distance to the subject, and experimenting with different apertures.

Equipment

Below is a list of the items I have used for this setup and suggested substitutes:

  • SHEER CURTAIN or FABRIC: You can buy a sheer curtain or length of fabric from any fabric or haberdashery store. I picked this one up from the clearance table at my local Spotlight store (Australia) for under $ 20.
Image showing basic natural light portrait setup using a white cloth

A white sheer curtain or large sheet of sheer fabric will filter the window light.

  • REFLECTOR: I have a circular, five-way reflector that follows me everywhere. Each side has a different colour; white, silver, gold, and black, plus a diffuser. It folds into a neat little disc, is lightweight, and can be thrown into the back of my car. You will get endless use out of a portable reflector, and at around $ 30 from Amazon, it’s a worthwhile investment. However, if you don’t want to rush out and buy a reflector (or wait for your order to arrive before you start shooting) a large piece of white card, polystyrene, or foam board, will work equally well.
Image showing basic natural light portrait set-up with a reflector

This reflector was a great investment at around $ 30. It is lightweight and folds up compact to the size of a dinner plate.

  • BACKDROP CLAMPS: another Ebay or Amazon purchase, my backdrop clamps come in packs of 12 for under $ 20. These are infinitely useful for creating makeshift studios. In this instance, I used them to attach the sheer curtain to the rolled-up window blind. You can also use masking tape to stick the curtain directly onto the window, or use heavy-duty stationery clips.
clamps can be helpful for a natural light portrait setup

Backdrop clamps can be purchased inexpensively from Ebay or Amazon and similar.

Lens

My favourite portraiture lens is the Canon EF 85mm f/1.8, but you can use a 50mm, a 100mm – whatever works in the space you have. A tighter space will require a shorter focal length.

Basic portrait setup

Look for a window or glass door with a good strong light source coming through, so that you can shoot at the lowest possible ISO. If the window has a sheer curtain, pull it across to filter the light. If there is no curtain, you can attach a piece of sheer fabric to the window using the backdrop clamps or masking tape.

As you can see, the setup couldn’t be simpler. This is the corner of my living room, with sliding glass doors to the left of the shot. The strong afternoon light is filtered with a sheer curtain clipped to the bottom of the roller blinds. I have closed the curtains in the adjoining room to create a dark background for my subject. If your room layout doesn’t allow this, you can hang a sheet or large piece of coloured fabric behind your subject, or just use a plain wall.

natural light portrait setup background

The setup couldn’t be simpler.

As you can see in the setup below, I brought my model forward (away from the open door behind her). This is to ensure she has good light on her face, and that there is sufficient distance between her and the room behind her to make sure it is completely out of focus. In this pull-back shot, you can see some detail in the room behind her. However, in the first pair of portraits, further along, you can see no background detail. The room behind looks like a studio backdrop.

Add a reflector

If you are going to use a reflector, you’ll need someone to hold it for you. If there is no-one to help, try propping it on a chair. Let your creative photographer’s brain get to work and figure out a creative solution.

natural light portrait setup reflector and assistant

You’ll need an extra person to hold the reflector – in this case, my husband!

Portrait #1: side lighting and a reflector

This is my most-used natural light setup. Side lighting contours and shapes the face, and is flattering for most subjects. If your subject is male, or if you want to create a moodier portrait, you can try moving the reflector further away from your model or removing it altogether. This creates more contrast by increasing shadow on one side of the face.

Your model can sit, stand, or even lie on the floor if the window is low enough. How you position your model’s face and body is up to you. To recreate the look below, your model’s face needs to be at a 90° angle to the main light source (the window). Her body turns 45º away from you. The door behind my model is opened and I darkened the background room to minimize distracting elements. Position the reflector on the shadowed side of her face, to bounce the light back and fill in the shadows

In the photos below, the image on the left is shot without a reflector. The one on the right is shot with a reflector. The effect in this example is subtle because the light in this room is already balanced somewhat by small, high windows on the opposite wall to the main window. In the photo on the right, you can see how the reflector brightens the face and fills in the shadows, particularly the under-eye shadow of her left eye. It also brings out more detail and highlights in her hair and improves separation from the background.

natural light portrait setup with and without reflector

Left (no reflector): ISO 320, f/4, 1/200th. Right (with reflector): ISO 320, f/4, 1/320th.

Portrait #2: shooting into the backlight

I love this technique for photographing women and girls. It creates soft, non-directional  lighting on the face, so is flattering to every age group. And the backlighting creates a gorgeous halo around the hair. This works especially well if the model wears her hair out, or wears a dress with some sheer elements – think darling little girls in fairy costumes and tutus!

Technique for backlighting

Using the same window setup as before, your model sits or stands with her back to the window. Position the reflector in front of her, bouncing the light back into her face. Your light meter will try to read the light coming from the window, and will underexpose your model’s face. You can obtain the correct exposure by getting in close to her face to set your exposure. You might also bracket your exposures and check the back of the camera until you’re happy with the result (review the histogram but note that the background area may show clipping – that’s okay). To get the exposure right on the face, you will lose detail in the background, which is the idea!

natural light portrait setup backlighting

ISO 320, f/4, 1/160th

The photo below is a yoga instructor posing in front of a window on the floor of her studio. The backlighting is beautiful through her hair, and the warm tones of the timber floor reflect back on her skin to give her a golden hue. The lighting technique is identical to the previous photo. But in this photo, I have allowed the curtain and window to be visible as I think it adds something to the scene.

natural light portrait setup backlighting

ISO 500, f/5, 1/80th.

Portrait #3: shooting with front-on light

For this set-up, the sheer curtain remains in place. Your model faces the window, and you position yourself between your model and the window. If you are taking a wider shot than the example below, you may be able to bounce light into the back of her hair with a reflector.

Frontal lighting removes virtually every shadow on the face. It brings out detail and colour in the eyes, and can be quite striking with the right subject. However, this technique is not for everyone. It can give the face a flat, two-dimensional appearance, and if the light source is too strong, your subject will squint. This lighting tends to highlight every imperfection, which is fine if your subject happens to be young and gorgeous. But, it can be too harsh for a mature model, or someone with a lot of blemishes.

Examples of front lighting

The photo below of a young girl snuggled into a faux-fur hood has been enduringly popular on my social media sites. It was shot using this lighting technique in warm, late-afternoon light.

natural light portrait setup front lighting

ISO 400, f/4.5, 1/200th.

The photo below of my daughter, sun-kissed after a day at the beach, was photographed with front-on lighting. As we were  on vacation and I didn’t have my usual bag of tricks at hand, I didn’t use a sheer curtain to filter the light. As you can see, the highlights are more pronounced than those in the first photo, but the effect is similar.

natural light portrait setup front lighting

ISO 250, f/3.5, 1/125th.

Now it’s your turn

I’d love to hear how you get on trying this setup at home. Please post any questions, comments or examples of your portraits in the comments section below.

Don’t forget, there is also our dPS Facebook Group, which you can join to share your photos and get a critique from other dPS readers.

googletag.cmd.push(function() {
tablet_slots.push( googletag.defineSlot( “/1005424/_dPSv4_tab-all-article-bottom_(300×250)”, [300, 250], “pb-ad-78623” ).addService( googletag.pubads() ) ); } );

googletag.cmd.push(function() {
mobile_slots.push( googletag.defineSlot( “/1005424/_dPSv4_mob-all-article-bottom_(300×250)”, [300, 250], “pb-ad-78158” ).addService( googletag.pubads() ) ); } );

The post How to Use 1 Natural Light Setup to Create 3 Different Portrait Looks by Karen Quist appeared first on Digital Photography School.


Digital Photography School

 
Comments Off on How to Use 1 Natural Light Setup to Create 3 Different Portrait Looks

Posted in Photography


How Playing With Manual Mode Can Help You Learn Exposure Faster

21 Sep

I have a disclaimer before I even begin this article. I shoot much more often in Shutter or Aperture Priority than I do in Manual mode. I save Manual mode specifically for studio shooting, for some tripod work where I have a lot of time to get the settings perfect, or for situations where the lighting is very consistent.

Subways in Motion, New York

Learn Manual Mode to better understand exposure

However, I think it is immensely important for you to try to periodically shoot in Manual early on, especially if you’re just learning. Take a look at your camera. How many buttons does it have on it? New cameras these days can have 20 or more buttons on them all doing different things, but in reality, there are only three settings that make the photograph: the ISO, the Shutter speed, and the Aperture.

Central Park, New York

Before you even go out, turn your camera to Manual mode and figure out the fastest and most comfortable way to change each of these settings. You’re going to do a lot of that in Manual.

Understanding shutter speed

The next step is to understand a couple of important points. The shutter speed always needs to be at least one over your focal length to offset handheld camera shake. So if you are at 50mm (on a full-frame camera), then your shutter speed needs to be 1/50th of a second. To freeze the motion of moving subjects such as people, I like a shutter speed of around 1/250th or 1/320th of a second, but you can get away with a little slower than that. You will need a faster shutter speed to freeze faster moving subjects like cars, etc.

Understanding aperture

For your aperture, the lower the number (such as f/2.8), the less depth of field and more bokeh there will be. This is counterintuitively called a large aperture because the size of the aperture hole in the lens is actually larger. This will also let in a lot of light due to the size of the hole. A small aperture (such as f/11 or f/16) will create a much larger depth of field, but the tradeoff is that it will let in less light.

Waiting in Grand Central Terminal, New York

Understanding ISO

The ISO is the sensitivity of your camera’s sensor to light. The higher the number, the more noise that an image will have, but the more sensitive to light it will be. Newer cameras can make beautiful photos up to ISO 3200 or even 6400, but older or entry level cameras can have a lower limit of around ISO 1600 (test your camera to find your comfort zone with its upper ISO limits).

If you want a lot of bokeh in your image, and you set your lens to f/2.8, that means the camera will be letting in so much light that you will usually want a low ISO. However, if you are shooting street photography, fast moving subjects, you want a shutter speed of 1/250th or faster, and/or a smaller aperture such as f/11 – unless you are in bright sunlight, you will often have to raise your ISO to be able to let in enough light to use those settings. In general, if it’s darker out, then your ISO will often have to go up unless you are on a tripod.

Now play with them

Those are the main considerations that you need to learn; now just walk out the door and mess around with your settings. Screwing around with the settings in Manual is the fastest way to start to learn them well. Start off with your aperture. How much depth of field do you want in the image? Once you pick that, then take a guess at the shutter speed and ISO and see how it looks. View the back of the screen, look at the histogram, and zoom in on the details.

If an image is too dark, then slow the shutter speed, raise the ISO, or use a larger aperture. If the main subject is too blurry, then speed up the shutter speed.

Couple in Sheep Meadow, New York

Try different lighting scenarios

Explore different lighting situations. Paying attention to lighting is the first thing that you should do before you take a photograph. How strong is the light? Where is the sun or artificial light in relation to what you are shooting? The strength of the light will be the number one factor in helping you figure out your settings. From there, you can figure out the depth of field that you want and if you need to freeze the motion of your subjects or not.

Get comfortable walking from one lighting situation to another. If you walk from the sun into the shade, what will you need to change to expose the scene correctly? Pay attention to scenes with both bright highlights and darker shadows. With these scenes you need to figure out which is most important to expose correctly. If the shady area is more important, then let in more light. If the highlights are the most important, then darken the scene so they are correctly exposed and the shadows are closer to black. If you are in sunlight, learn how your settings will change if you are shooting into the sun versus shooting away from it.

Smokestack and Graffiti, New York

Go out in the morning, in the middle of a sunny day, at dusk, or in light rain. Learn how your settings change in each of these lighting situations.

Most digital cameras will show you the light meter reading for what they believe will correctly expose your image. For instance, if you choose the three settings, the light meter might show you that it thinks you are underexposed by one stop (look in your viewfinder for a + 0 – scale, press the shutter button part-way down to activate it). Keep an eye on this because it can help you, but also try to not pay too much attention to it. The point of Manual shooting is to learn the numbers yourself without relying on the camera. You can rely more on the camera later.

Conclusion and practice

The only way to learn these things is to experiment and do them. Shooting in Manual at first will make you screw up much more than in Shutter or Aperture Priority, but a handful of dedicated days of doing this will have you understanding the settings in a much more intuitive way. Then if you decide to shoot in Shutter or Aperture Priority, you will have a strong understanding of how to use those modes to the best of their ability.

SoHo at Night

googletag.cmd.push(function() {
tablet_slots.push( googletag.defineSlot( “/1005424/_dPSv4_tab-all-article-bottom_(300×250)”, [300, 250], “pb-ad-78623” ).addService( googletag.pubads() ) ); } );

googletag.cmd.push(function() {
mobile_slots.push( googletag.defineSlot( “/1005424/_dPSv4_mob-all-article-bottom_(300×250)”, [300, 250], “pb-ad-78158” ).addService( googletag.pubads() ) ); } );

The post How Playing With Manual Mode Can Help You Learn Exposure Faster by James Maher appeared first on Digital Photography School.


Digital Photography School

 
Comments Off on How Playing With Manual Mode Can Help You Learn Exposure Faster

Posted in Photography