Category: Photography

  • Weekly Photography Challenge – Birds

    Don’t we all wish we could be a free and fly away like a bird? Well we can’t, but we can photograph them!

    See: 24 Fantastic Photos of our Fine Feathered Friends – Birds

    Dennis Skley

    By Dennis Skley

    Weekly Photography Challenge – Birds

    Whether in flight or on the ground, your challenge this week is to get out and photograph a bird or some birds. Here are some articles to help you:

    • 10 Surefire Tips for Photographing Birds in Flight
    • 8 Tips For Photographing Birds
    • How to Take Better Wildlife Photos: Be a Naturalist First
    • 10 Common Bird Photography Mistakes and Their Solutions
    • Bird Photography Tips for Beginners
    • Bird Photography Tips – How to Make Your Bird Photographs Stand Out
    Matthew Paulson

    By Matthew Paulson

    Bill Gracey

    By Bill Gracey

    Howard Ignatius

    By Howard Ignatius

    Tjarko Busink

    By Tjarko Busink

    Vi Neves

    By Vi Neves

    Eyesplash - Summer Was A Blast, For 6 Million View

    By Eyesplash – Summer was a blast, for 6 million view

    Share your images below:

    Simply upload your shot into the comment field (look for the little camera icon in the Disqus comments section) and they’ll get embedded for us all to see or if you’d prefer upload them to your favourite photo sharing site and leave the link to them. Show me your best images in this week’s challenge. Sometimes it takes a while for an image to appear so be patient and try not to post the same image twice.

    Steven

    By Steven

    googletag.cmd.push(function() {
    tablet_slots.push( googletag.defineSlot( “/1005424/_dPSv4_tab-all-article-bottom_(300×250)”, [300, 250], “pb-ad-78623” ).addService( googletag.pubads() ) ); } );

    googletag.cmd.push(function() {
    mobile_slots.push( googletag.defineSlot( “/1005424/_dPSv4_mob-all-article-bottom_(300×250)”, [300, 250], “pb-ad-78158” ).addService( googletag.pubads() ) ); } );

    The post Weekly Photography Challenge – Birds by Darlene Hildebrandt appeared first on Digital Photography School.


    Digital Photography School

  • 5 Tips for Avoiding Boring Photos of Mountains

    Jagged peaks, precipitous drops, deep and sweeping valleys: mountainous landscapes are unquestionably some of the most photogenic places on the planet. It shows too – take a look at any photo magazine or website, and you are likely to find not just one or two, but dozens of images of mountains.

    Bhutan-Jhomolhari-02

    Mountains are a landscape torn apart by the steady pressure of plate tectonics and erosion, and in that drama is the potential for spectacular photography. Why then are so many images of mountains boring? Because landscape drama does not always translate well into photographic drama, without the right combination of factors. Though there are really too many of these to name, I think five are particularly important: foreground, light, color (or lack of it), juxtaposition, and perspective.

    Before we dive in, I want to make it very clear that there are as many different methods for making successful images of mountains as there are mountains themselves. Not every image has to have a compelling foreground, nor does of every image have to contain dramatic color or light. These five points are suggestions and starting places, not a formula. That noted, let’s get started:

    1. Foreground

    Foreground serves a number of purposes in a landscape; among these are depth and scale, setting details, and to provide a starting point for the path through the image. Foregrounds are tricky, done wrong they can make an image confusing, misleading, or unbalanced.

    I’m a sucker for a good foreground. I love the way a well placed element can echo and balance features in the background, provide detail to a larger scene, and lead the viewer’s eye neatly into the photograph.

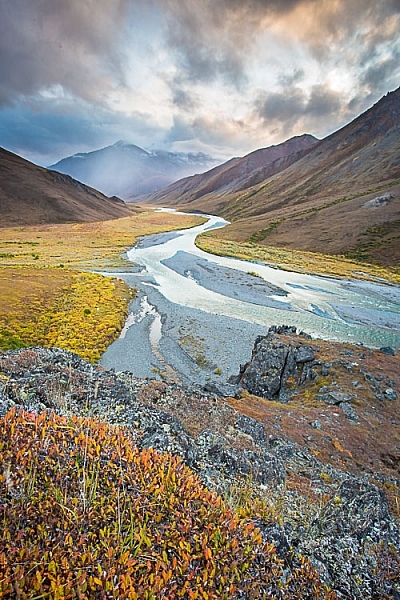
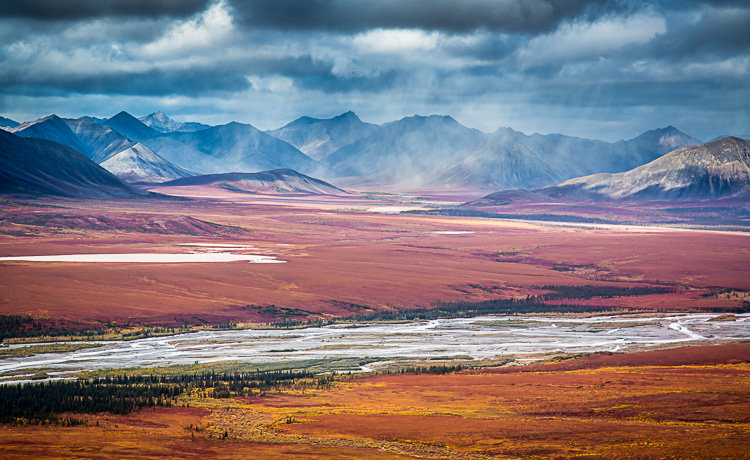
    The autumn colors in the close foreground provide a good starting place for this image, guiding the eye to the winding river and then onto the stormy mountains beyond.

    The autumn colors in the close foreground provide a good starting place for this image, guiding the eye to the winding river and then onto the stormy mountains beyond.

    Yukon-Kluane-lake-123074-32

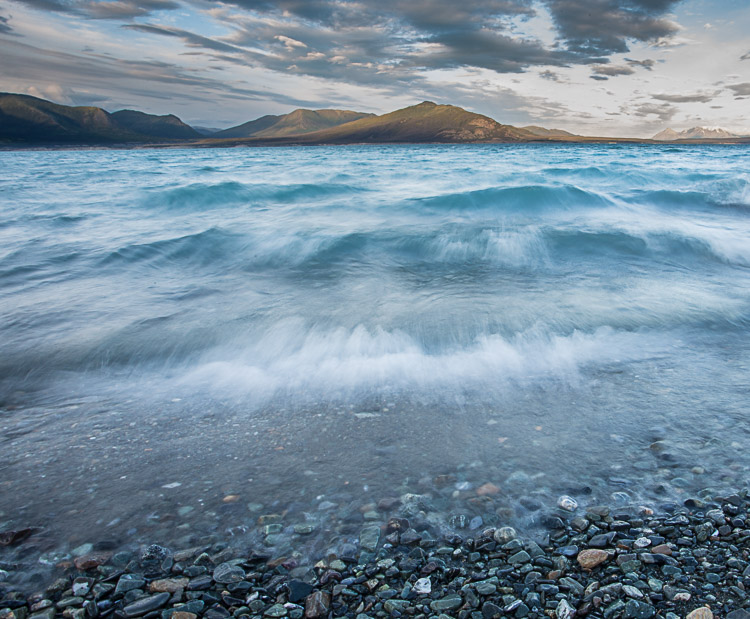
    Water is a great foreground subject, and in this image of a wind-tossed lake, the water plays double duty, providing color and interest, while the texture is reminiscent of the mountains in the background.

    AK-ANWR-Kongakut-WhaleMtn-1063-101

    2. Light

    Lighting may be the single most important aspect of a successful image. While backlight, and front light can work under some circumstances, mountains thrive in side-light. Light from the side brings out the shadows, and detail in the ridges, cliffs, and rolling slopes. It provides contrast and drama.

    Images of big landscapes, like mountains, rely on natural light to for illumination, so you are really at the whim of the weather. Cloudy days can flatten the light, while midday sun will drown out shadows and turn pleasing contrast into an eye-squinting mass off whites and blacks. Successful images can arise from these challenging scenarios, but low-angle side-light makes our lives as photographers so much easier.

    AK-ANWR-Jago-106274-35

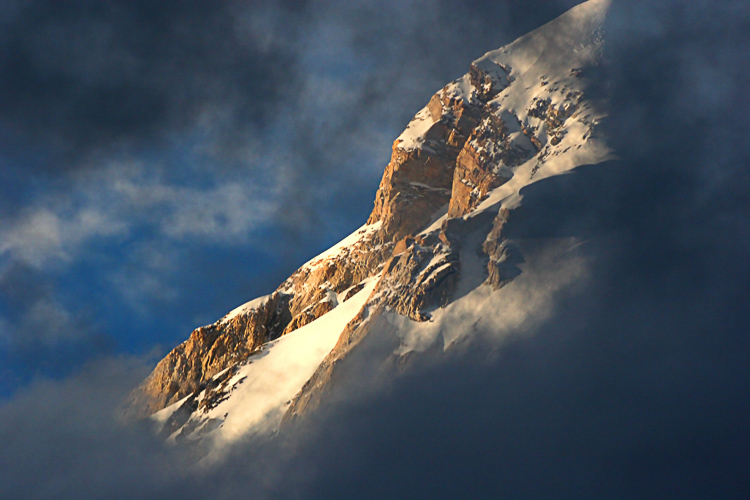
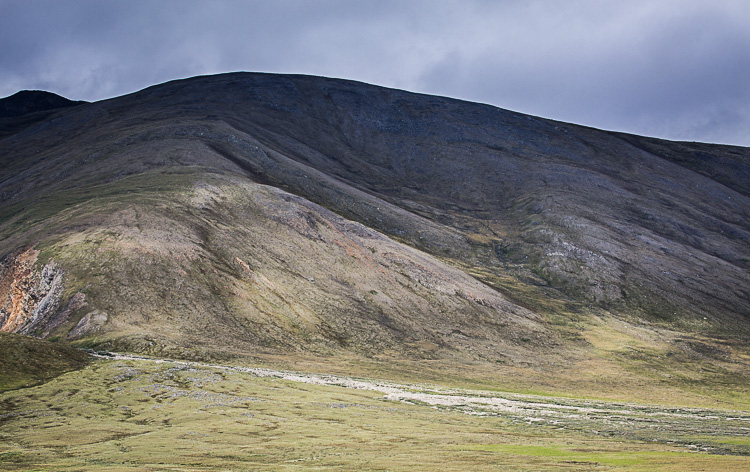
    This detail shot of a mountainside in Alaska’s Brooks Range, despite being front-lit, retains some drama thanks to the patchy sunlight.

    AK-ANWR-Kongakut-WhaleMtn-1063-274

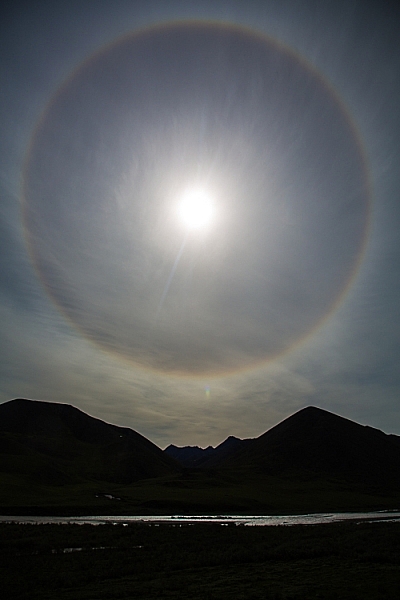
    A case where backlight worked to my advantage was when the mountains, darkened to silhouette, appeared to cradle this ring around the sun (caused by high elevation clouds).

    AK-DenaliNP-June2008-95

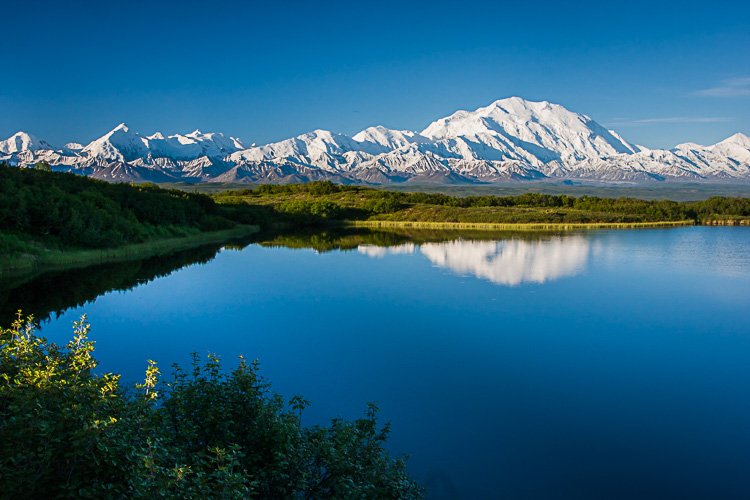
    Classic side light on Denali peaks of the Alaska Range, from Reflection Pond in Denali National Park, Alaska.

    3. Color (or lack of it)

    Bright colors (not artificially saturated) attract the eye. This is particularly true in images of mountains. Sunset and sunrise, colorful foregrounds, and bright blue alpine skies, will help catch and hold the gaze of a viewer.

    AK-NoatakPreserve-KellyRiver-1083-320

    As I think about it, this goes very tidily with #2 (Light). Good light very often equates to good color. The better the light quality, the more vivid the colors of the scene become. Get one, and you often get the other.

    None of this is to say that an image has to have bright colors to be successful. Low-saturation images can be moody and brooding. Storms and winter images are two examples where colors may not be rich, but do not hurt the final image. These photos thrive on the drama of the scene, rather than their colors.

    AK-ColleentoKongBP-1066-105

    In black and white images, color is absent, and yet can result in a rich portrayal of the mountains. In such images, contrast and mood play an even more important role.

    A note on Black and White: when factors like light and color are not in your favor, a black and white conversion can often be a great tool. I’ve made numerous images on flat-light days that converted well to black and white, when a true-color image would have been dull and muted.

    AK-DNP-17Sep07-46

    AK-GAAR-AIR-1073-1012

    Bolivia-Altiplano-Feb2008-555

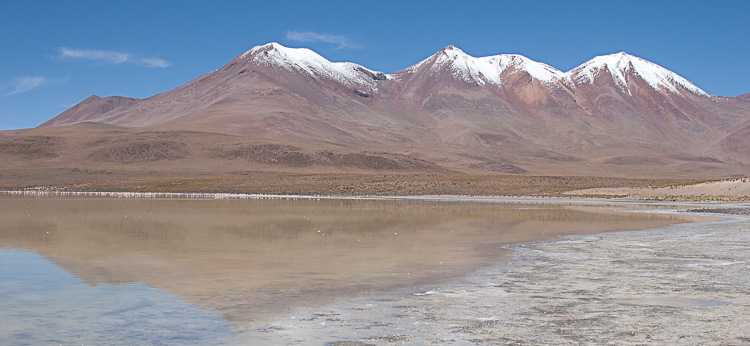
    I made this image of peaks in the Bolivian Altiplano at mid-morning when the near-equitorial sunlight was hot and bright. It doesn’t look particularly good in color.

    Bolivia-Altiplano-Feb2008-554

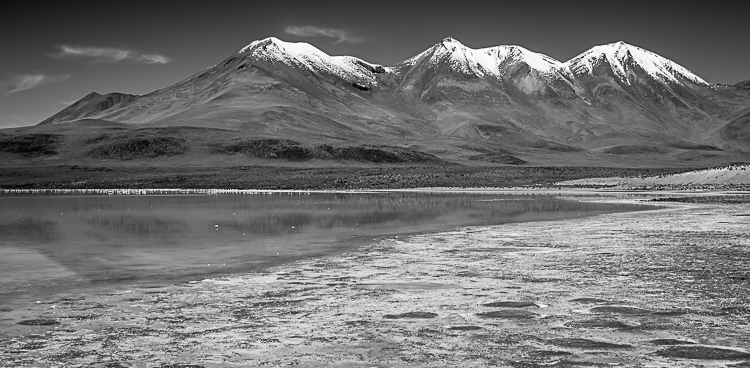
    Convert the above image to black and white, however, and the photo comes alive in a way it wouldn’t otherwise be able.

    4. Juxtaposition

    Juxtaposition is defined as: “two things placed together with contrasting effect”. In photography, that contrast can be literal; light versus dark contrast, colors (bright versus subtle), tonality (hot or cool), or, perhaps most effectively, the subject matter.

    All of these are important parts of mountain photography. Contrast, I noted earlier in this article, but tonality and subject matter both warrant some attention.

    Juxtaposed color tones combine in interesting ways. Mountain scenes, particularly from places like the Rockies, Cascades, or Alaska, tend to be dominated by cool tones; blue skies, green tundra and forest, glacial streams, or clear blue lakes. These cool-colored scenes often benefit when warm tones, like yellow, red, or pink, are integrated into the scene. Often that warm tone is best presented as a flash of color, a setting sun, a wildflower, the bright jacket of a hiker, rather than as an equal to the cool tones. When the two are equivalent, your brain has a hard time sorting out which to pay attention to, and the pleasing juxtaposition becomes a tangle of clashing color.

    AK-GAAR-AIR-1073-1028

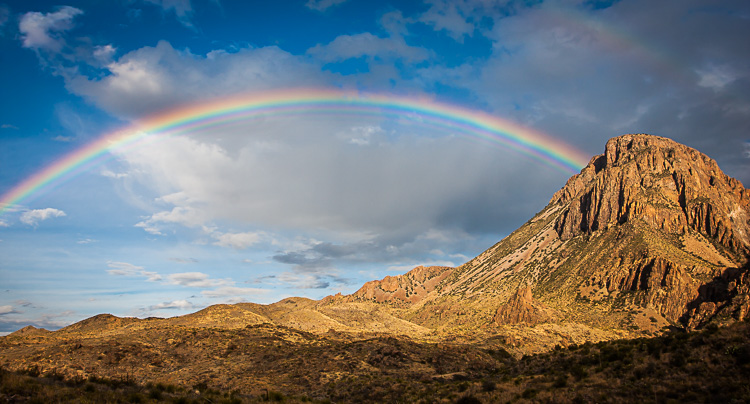
    Subject juxtaposition is where a landscape images comes alive. When it comes to mountains, the potential for such contrasts are many. So many in fact, that it’s hard to mention just a few. Some, like the image below of the rainbow over the desert mountains of Big Bend National Park, have obvious subject juxtaposition (rain and dry desert rock). But the same image also has contrasts in shapes and texture (the jagged rocks and and smooth curve of the rainbow for example). All of these combine nicely to provide interest.

    TX-BigBendNP-Jan2009-735

    AK-CanningMarshFork-1066-49

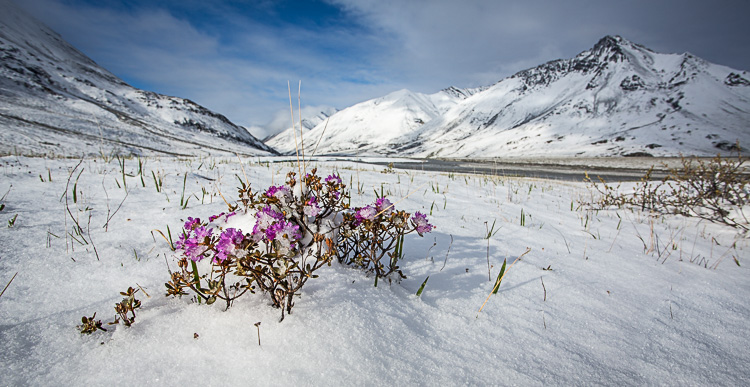
    Snow and flowers is an obvious juxtaposition in this image of the aftermath of a June snowstorm in the Arctic National Wildlife Refuge, Alaska.

    5. Perspective

    The final aspect of mountain photography I want to discuss is perspective. Which is to say, the perspective from which you make the image. For simplicity sake, I’ll break this down into three divisions: bottom, middle, and top. Each of these greatly impacts not just the appearance of the final image, but also its mood and feel.

    Photographs of mountains made from a valley bottom looking up, make the mountains appear large and imposing. These low shots provide space for an interesting foreground, and many classic landscapes have been made from this perspective. Though effective, there are drawbacks to shooting from the valley bottom. The low perspective means that the view is limited; there are no seas of mountain peaks spreading to the horizon. Light too is often difficult. The bottom of the valley is the last place to gain sunlight in the morning, and the first to lose it in the evening, so balancing light makes exposure tricky, and by the time the landscape is evenly lit, the sweet light of dawn or dusk is long past.

    AZ-GCNP-FebMar12-160

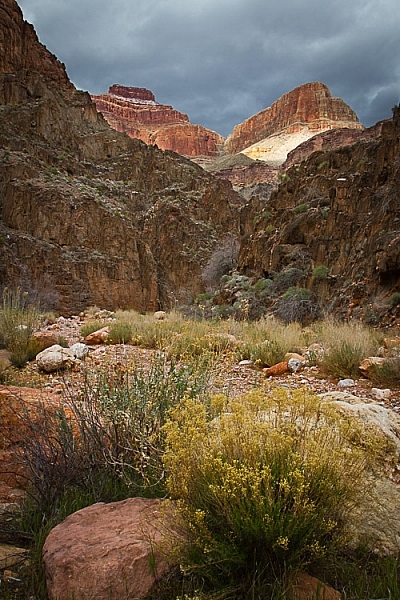
    Exposure was tricky as I tried to capture the storm light on the Red Wall of the Grand Canyon high above my camp along the Colorado River.

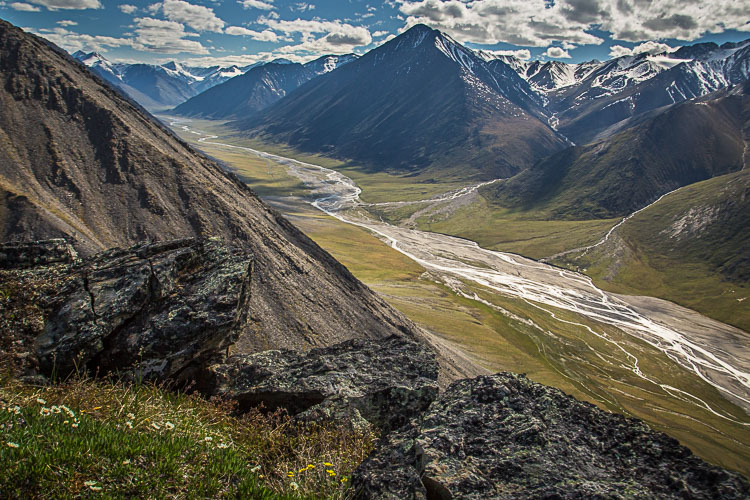
    Mid-mountain shots can be spectacular, providing views both below and above. This perspective is one of my favorites, allowing for a lot of depth in the landscape, while maintaining the size and drama of the mountains.

    AK-ANWR-Jago-106244-14

    AK-NoatakPreserve-KellyRiver-1083-469

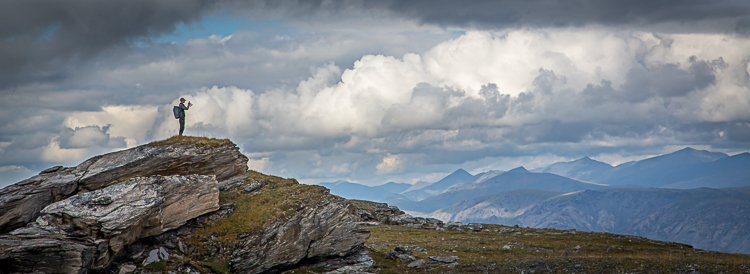
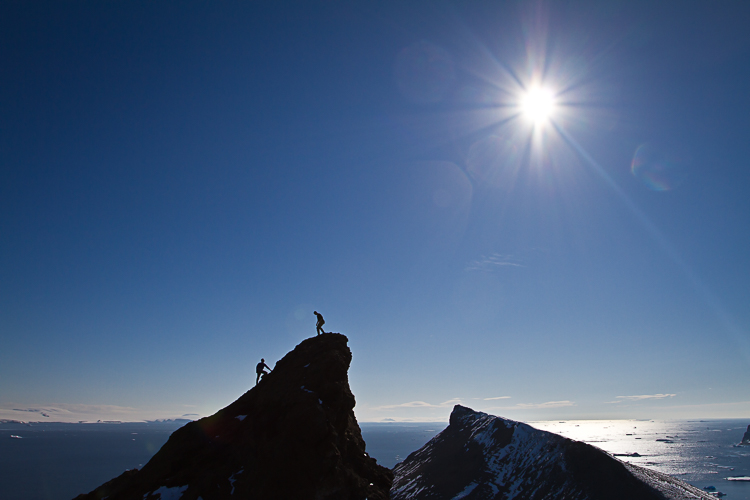
    Mountaintops are tricky. Images made from the summit of peaks tend to make the surrounding landscape look small. I’ve taken photographs from peaks in which all the mountains look like rocky waves, rather than the towering summits they are. You can make up for this by adding a human to the shot, which provides scale. You remove the focus from the mountains, and place it on the human experience within them. It changes the image, making it less of a landscape, and more of a portrait or action shot, but the results can be effective.

    AK-GAAR-Alatna-Noatak-1083-347

    A hiker atop a mountaintop in Gates of the Arctic National Park, Alaska becomes the subject in this image.

    ANT-16Jan10-DevilsIsl-11

    Without the climbers nearing the top of this peak in Antarctica, there wouldn’t be much to look at in this image.

    Conclusion

    One of the great joys of photographing mountains, is simply being in the mountains. A camera is great excuse to go for a hike, or float a mountain river. But, the camera can also be a tool for experiencing the place more deeply. It can make you appreciate how the mountains look in various light and seasons, and from different angles. In turn that appreciation can lead to better images. Now go out and explore.

    This week we are doing a series of articles to help you do better nature photography. See previous articles here:

    • 3 Habits Every Outdoor Photographer Should Develop to Avoid Missing Shots
    • 5 Tips for Better Nature Photography
    • 27 Serene Images of the Natural World
    • Weekly Photography Challenge – Nature
    • 10 Ideas for Photographing Nature in your Backyard
    • 6 Tips for Capturing Character and Personality in Wildlife Photography
    • 5 Tips for Setting the Focus in Your Landscape Photography
    • 7 Tips for Better Marine Wildlife Photography
    • Tips for Processing Landscape Photos – from Basic Edits to Artistic Interpretation

    googletag.cmd.push(function() {
    tablet_slots.push( googletag.defineSlot( “/1005424/_dPSv4_tab-all-article-bottom_(300×250)”, [300, 250], “pb-ad-78623” ).addService( googletag.pubads() ) ); } );

    googletag.cmd.push(function() {
    mobile_slots.push( googletag.defineSlot( “/1005424/_dPSv4_mob-all-article-bottom_(300×250)”, [300, 250], “pb-ad-78158” ).addService( googletag.pubads() ) ); } );

    The post 5 Tips for Avoiding Boring Photos of Mountains by David Shaw appeared first on Digital Photography School.


    Digital Photography School

  • Street Photography in Tokyo with Dave Powell

    Today we came across this great little video of a photographer that we’ve admired for some time (and who has even written a post for us here at dPS). It was produced by SmugMug and features Dave Powell of the Shoot Tokyo photo blog.

    In it Dave shares a little of how he got into photography, why he loves doing it in Tokyo, but also gives a glimpse into how he sets up his shots.

    Check out Dave’s guest post on dPS which has some great advice in it too – 10 Things I Learnt from Daily Shooting.

    googletag.cmd.push(function() {
    tablet_slots.push( googletag.defineSlot( “/1005424/_dPSv4_tab-all-article-bottom_(300×250)”, [300, 250], “pb-ad-78623” ).addService( googletag.pubads() ) ); } );

    googletag.cmd.push(function() {
    mobile_slots.push( googletag.defineSlot( “/1005424/_dPSv4_mob-all-article-bottom_(300×250)”, [300, 250], “pb-ad-78158” ).addService( googletag.pubads() ) ); } );

    The post Street Photography in Tokyo with Dave Powell by Darren Rowse appeared first on Digital Photography School.


    Digital Photography School

  • 8 Quick Tips to Produce Better Forest Photography

    As my nation (USA) celebrates 100 years of the National Park Service, renewed interest in our untouched landscapes is growing, and that’s a great thing. Even with the selfie-crazed tourists crowding our parks and national monuments, it’s a positive point that more of us are getting out into the great outdoors and connecting with this land of ours.

    A side benefit of this movement is a renewed interest in nature and the outdoors in general. Even 58 national parks in the U.S., it may not be possible for all of us to get to them as often as we’d like. Luckily, we can enjoy nature in our own backyards, as there are state parks, forests, and trails for us to explore almost everywhere you turn in America (and likely wherever you live also).

    040916_-2

    As with any environment, forest photography brings its own unique challenges to the table, but at the same time offers an almost unlimited array of subject matter, due to the variety of flora and fauna in these locations. Add in the side benefits of experiencing the fresh air and sunlight of the outdoors (which our bodies were built for), and you have all the reasons you need to snap some photos in the woods!

    Let’s cover a few tips and recommendations when heading for the trails, then get out there and enjoy!

    1 – Safety first

    As with any outdoor photography project, you need to consider the environment you’re going into. Be sure to bring a camera bag or backpack to store items in, and to keep your extra gear and accessories out of the weather. Items to bring could include snacks, a compass, a map (a topographical map is always best if available), sunscreen, bug spray and a dry towel or rag to remove moisture, dirt, or rain from any exposed gear.

    2 – Gear up

    As always with shooting landscapes, a tripod is a must. Both wide-angle and narrower primes lenses, such as a 50mm can come in handy. I personally use a 24mm prime lens to capture wider forest shots, to get many trees in the frame at once, but then switch to my 50mm to get closeups of things like leaves, insects, or flowers.

    HauntedWoods

    Though there are cases for and against using them, a clear ultraviolet (UV) filter can be useful to keep dirt and grime off of your lens element. I don’t use them myself, and find if I’m careful with my lenses I can keep them clean without needing a protective filter. Always use a microfiber cloth for cleaning your lenses, not rags or towels of any type, especially if you take one for other purposes while you’re out in the forest.

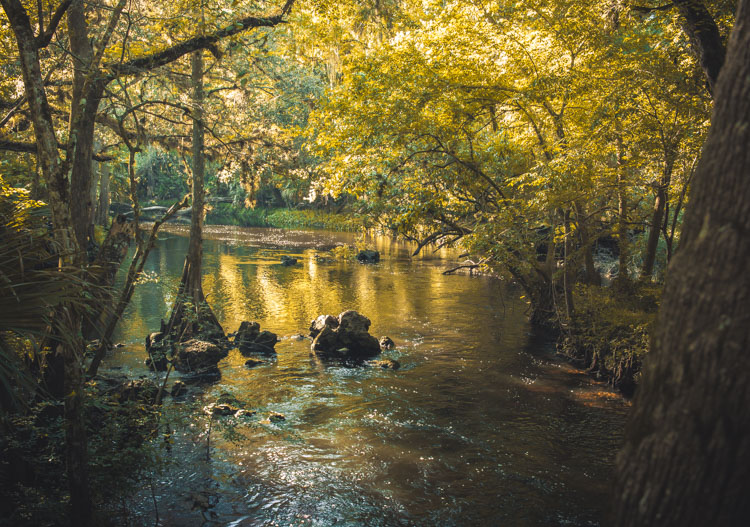
    Finally, a polarizing filter can come in handy, as it will help cut reflections in any body of water such as a river or stream, and also deepen and enhance colors in the scene. Keep in mind that you’ll be reducing the amount of light coming into your camera when using a filter like this, so plan accordingly (just bring your tripod).

    3 – When to get out there

    As outdoor or natural light photographers, we know that the best times to shoot are early mornings or late evenings, and to do our napping at noon. But forest environments are one of those places that can still work well during bright, more direct sunlight.

    This is due to the canopy above that you’ll usually have, which filters out some of the harsh light, and gives you more of a lighting situation you’d expect to find at the edges of the day. As in many situations, if you can’t avoid the light from directly overhead, you can always switch over to black and white, and take advantage of the sharper shadow edges, and higher contrast.

    062814_

    With that being said, your subject will almost always be more magical if you head out during the early hours of the morning, or late in the evening. If you’re near water, you may experience some ground fog, which can add serious mood to your images, and the sunlight will be dramatically cooler or warmer than in the middle of the day, depending on what time you decide to go.

    In short, plan your excursion for the first two or three hours after sunrise, or before sunset, for the best results.

    4 – Try vertical orientation

    Primeval

    Landscape shooters are used to primarily using horizontal or landscape orientation for the majority of their images, but when you’re in the forest, portrait orientation can sometimes work better. Since you’re dealing with tall trees as your primary environment, wide-angle shots can capture more of a scene when shooting vertically, and give the image a sense of grandiose scale and height.

    5 – Color contrast is key

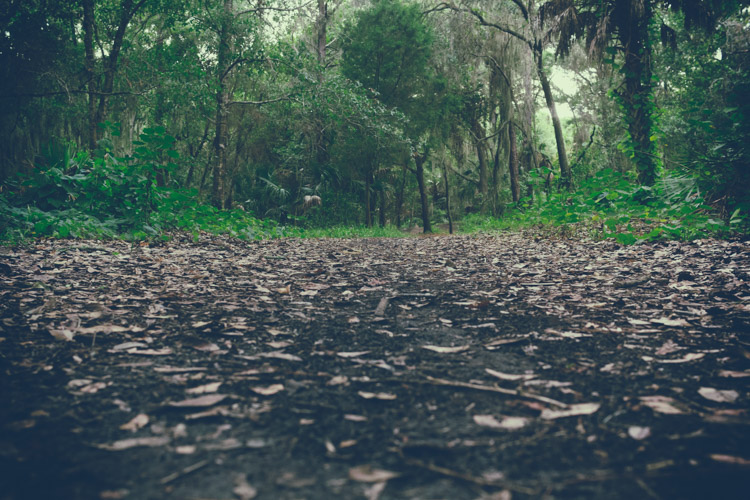
    One drawback to shooting in a forest environment (unless you’re in the northeast United States during the fall, or any area where foliage changes near the end of the year) is the lack of color contrast. The majority of your environment will most likely be composed of green leaves and brown tree trunks.

    Flora can help break up the monotony by adding color to the scene. Look for patches of brightly colored flowers of yellow or red; even white flowers can change the contrast profile within the frame.

    040916_

    Playing the sun off of the environment can also add color, without needing a physical object. Golden-hour light and sun glare placed in your photo by composition, can inject the warmth of oranges and reds, and give your image a more vibrant look.

    6 – Use Black and White

    Sometimes when you’re shooting, nothing seems right. The light isn’t hitting the way you’d like, colors are off, or you just don’t get a sense of drama from your photo. This can happen in a forest environment, sometimes due to the general consistency of color from scene to scene; a lot of greens and browns can make it hard to highlight a subject.

    Shooting in black and white (or processing the images later as monochrome) can let you concentrate on what the light is doing in your scene, by removing the element of color that can sometimes distract you from how varying levels of light affect the image.

    Forest

    If you’re going to shoot the photo itself in black and white in-camera, be sure to switch over to RAW + JPEG in your camera settings, that way you’ll have an unprocessed RAW file and a black and white JPEG for each frame you take. Or simply shoot in RAW mode so you’ll still have the full range of color data, in case you’re not happy with the results. But you’re shooting in RAW anyway right?

    7 – Post-Processing the results

    Photos taken in wooded areas benefit from many of the same post-processing workflow you’d normally do with other images, but there are some additional things you can do to give these images a bit more pop.

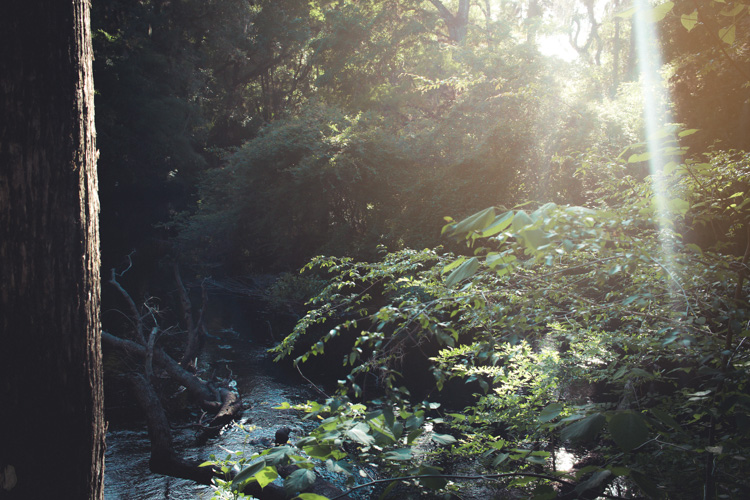
    Lighting tends to be a little more dramatic in the forest, since you usually have a canopy of trees to filter some of the sun, and can result in gorgeous rays hitting the forest floor, or leaves and plants highlighted by shafts of light. You can enhance these by using a bit of contrast, specifically on these areas. You can also add a bit of vibrance to the image overall, and play around with the hue/saturation of the individual colors of green and brown, to bring out the natural feel of the shot.

    040916_-3

    For my own images, I like to soften the image overall via the Clarity slider in Lightroom (to give it a dreamy or magical feel), and then target the subject or other important areas of the photo and add clarity and sharpness back in with a local adjustment (+Clarity plus -Clarity balances out, for example:  -30 Clarity plus +50 Clarity equals net +20 Clarity on the area targeted, use the Adjustment brush tool to apply this).

    8 – Leave the forest as you found it

    I love the planet we’re on, and it angers me to no end when I see evidence of people not caring about the effect they have on the natural surroundings. Beer can rings and cigarette butts at beaches, plastic bags on roads near the forest, and the list goes on.

    We should consider it a privilege to document this incredible world we live in, and the most important thing we can do is also the simplest; leave the area as you found it. This means many things including; not littering the woods or forest with any traces of man-made products such as trash, as well as not interfering with nature by getting too close to wildlife, or disturbing sensitive plants or trees.

    030616_

    Little things like this may seem trivial, but if we all participate in this practice, we could have a positive effect on our natural world and keep it a little more serene for generations to come. As photographers, we have an even greater responsibility to be conscious about what impact our actions might have on our environment.

    Conclusion

    Most of us have access to forest areas, fortunately, so it’s easy to try out this kind of photography. While this type of nature photography presents a few challenges, as long as you’re prepared with the right gear and a little knowledge, it can be an enjoyable experience, will help connect you with our natural world, and maybe even enlighten you a bit.

    Do you have any stories or images of your adventures in the wild woods or forest that you’d like to share? Engage with us by commenting below, and get out there and have fun!

    This week we are doing a series of articles to help you do better nature photography. See previous articles here:

    • 3 Habits Every Outdoor Photographer Should Develop to Avoid Missing Shots
    • 5 Tips for Better Nature Photography
    • 27 Serene Images of the Natural World
    • Weekly Photography Challenge – Nature
    • 10 Ideas for Photographing Nature in your Backyard
    • 6 Tips for Capturing Character and Personality in Wildlife Photography
    • 5 Tips for Setting the Focus in Your Landscape Photography
    • 7 Tips for Better Marine Wildlife Photography
    • Tips for Processing Landscape Photos – from Basic Edits to Artistic Interpretation
    • 5 Tips for Avoiding Boring Photos of Mountains

    googletag.cmd.push(function() {
    tablet_slots.push( googletag.defineSlot( “/1005424/_dPSv4_tab-all-article-bottom_(300×250)”, [300, 250], “pb-ad-78623” ).addService( googletag.pubads() ) ); } );

    googletag.cmd.push(function() {
    mobile_slots.push( googletag.defineSlot( “/1005424/_dPSv4_mob-all-article-bottom_(300×250)”, [300, 250], “pb-ad-78158” ).addService( googletag.pubads() ) ); } );

    The post 8 Quick Tips to Produce Better Forest Photography by Tim Gilbreath appeared first on Digital Photography School.


    Digital Photography School

  • Review: Light Painting Brushes – Tools for Creativity

    If you enjoy light painting photography, I think this review of tools from Light Painting Brushes (LPB) will interest you. All photographers know that light is essential to taking a successful photograph. At night, when light is limited, light painting can be a fun and artistic form of photography that may stretch a shutter-bug’s creativity by creating light, solely for the purpose of photographing light. If you are new to light painting please read my article – Beginner’s Guide to Light Painting for some ideas to get started.

    Light-Painting-Brushes-10

    Also, Light Painting Brushes has a great online presence, full of ideas, examples and tutorials. Check out this example of the great tutorial video available:

    There are two main types of light painting:

    1. Off-camera painting, by which a light source, unseen to the camera’s view, is used to illuminate a scene or objects so as to make them appear out of the dark in an image. Here the light is only showing the subject and is not part of the image.
    2. Secondly, on-camera painting, in which the light source is seen by the camera and is a subject to be photographed. So here the light IS the subject.

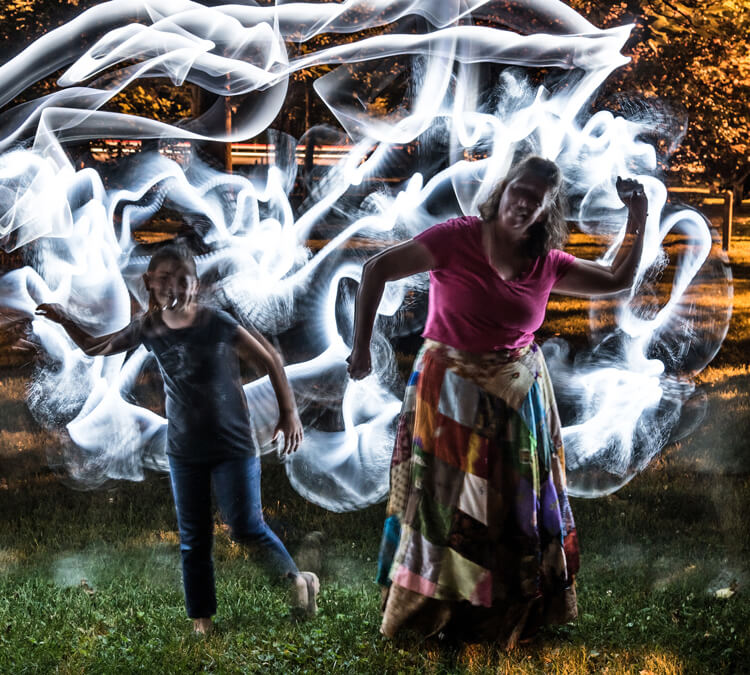
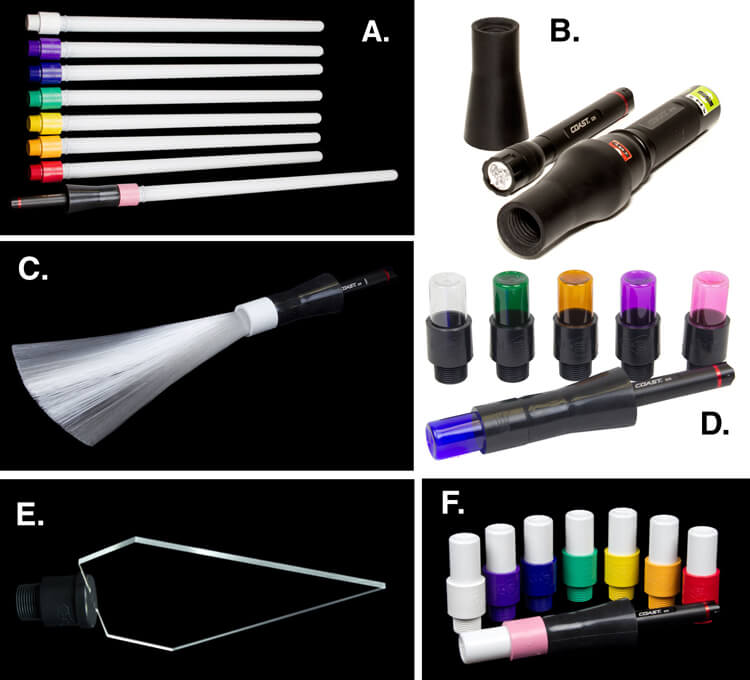
    The tools I am reviewing in this article are used for on-camera light painting. With Light Painting Brushes, most of the tools are used to add a graffiti-type light to a scene. This can be lots of fun (especially in social situations) and the creative options are endless! Listed here are the items from Light Painting Brushes that I will be reviewing in this article. (Spoiler alert. they are really cool!)

    • Universal Connectors
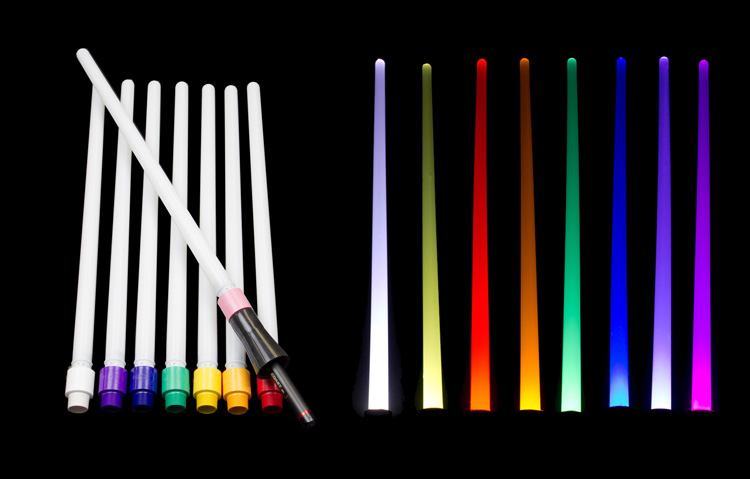
    • Set of 8 Opaque Light Writers
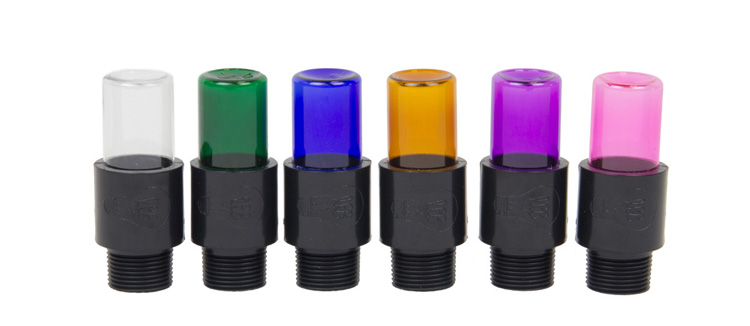
    • Set of 6 Translucent Light Writers
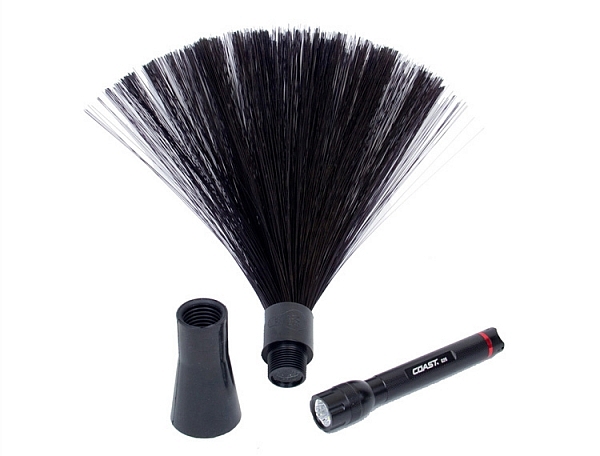
    • White Fiber Optic
    • Black Fiber Optic
    • Plexiglass Diamond
    • 22″ Light Sword
    Light-Painting-Brushes-Tools

    A. – Light Sword, B. – Universal Connectors, C. – White Fiber Optic, D. – Translucent Light Writers, E. – Plexiglass Diamond, F. Opaque Light Writers

    Universal Connectors

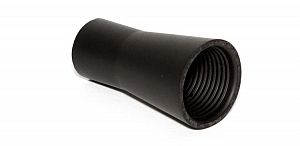
    The universal connector is the glue that literally holds this whole system together. Made of a durable rubber, the universal connector allows any flashlight with a diameter of .975″ to 1.5″ to connect to any of Light Painting Brushes’ tools. The end of the universal connector appears to be threaded, but don’t try to screw the brushes into the connector. The thread’s function is to just grip the brush and hold it tightly it in place.Light-Painting-Brush-Universal-Connector-2-750px

    Flashlights will easily insert into the other end, but never hold the whole thing by just the flashlight, as the brush may slide out. Instead, hold it by the universal connector. The universal connector may also be used to connect a “brush” of one’s own making, such as a pop bottle, to a light source (your flashlight).

    Opaque Light Writers (Set of 8)

    Use the universal connector to connect these opaque colored lights to your light source. The set is available in eight hues including white, purple, blue, green, yellow, orange, red, and pink. The opaque color makes them excellent tools for light writing, drawing or graffiti, and creative uses limited only by one’s own imagination. Because of the opaque colors of these light brushes, a very crisp drawing or writing source results. After some practice with this tool, I am sure some very detailed light drawings can be captured within a photograph.

    Translucent Light Writers (Set of 6)

    Light_Painting_Brushes_Translucent_Light_Writer_Set-750px

    These attachments are very similar to the opaque light painting brushes, but because they are translucent the lights create a more textured effect than the opaque lights. Another tool for artistic expression lighting up the night!

    White Fiber Optic

    Light-Painting-Brushes-9

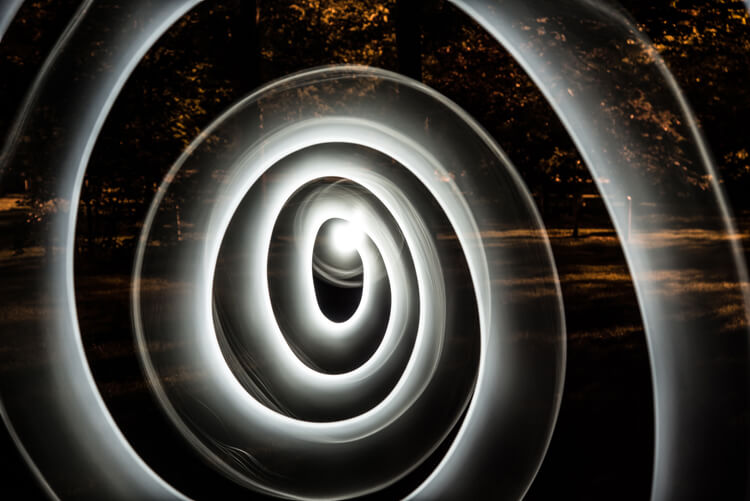
    Spiral design created using the White Fiber Optic brush

    The fiber optic brush connected to a light source really makes some awesome wispy lines. The white light has great depth as the whole strand of the brush lights up. This tool really gave me the feeling that I was actually painting with light! The white fiber optics is so much fun to use, creating some great effects and can be used for many light painting applications.

    Black Fiber Optic

    Light-Painting-Brushes-Black-Fiber-Optic-02-750px

    The black fiber optic tool only lights up the ends of the brush, great for use in portraits. However, I feel it has a more limited use for other types of light painting, since it puts out a lesser amount of light.

    Plexiglass Diamond

    Light-Painting-Brushes-11

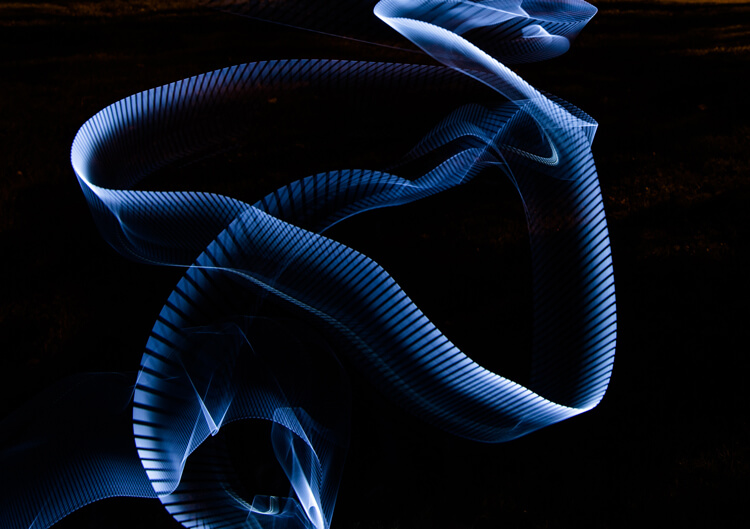
    Abstract design created using the Plexiglass Diamond brush

    The 9” Plexiglass Diamond shines light out through the cut edges, creating interesting and unique textures when waved about as the image is being shot. This tool is great for light graffiti, portraits, and abstract designs. It is my favorite tool of all the ones I’ve reviewed in this article!

    22″ Light Sword

    22in-Light-Swords-Illuminated-750px

    These tools create a very wide path of light, and are available in 8 different colors: blue, green, orange, pink, purple, red, yellow and white. The colored swords cause some stunning effects, but while the white sword can make some nice strokes of light, in my opinion its results are not as exciting as the colors.

    Light-Painting-Brushes-8

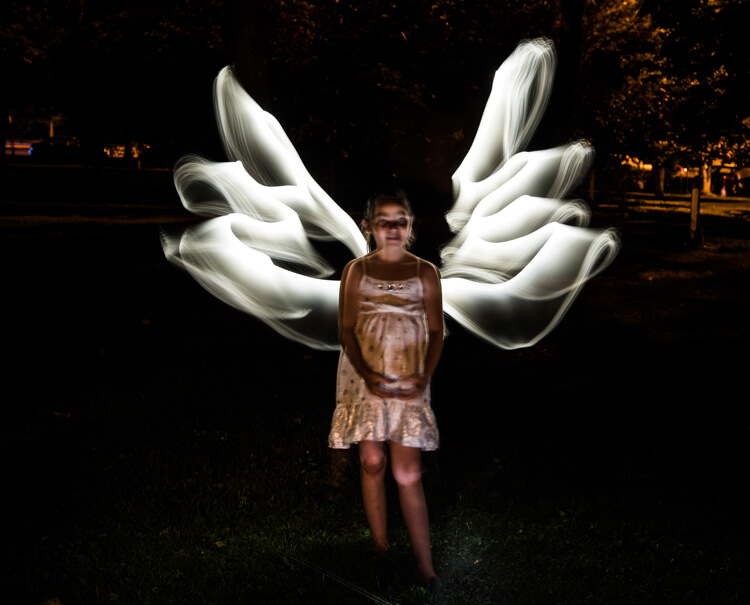
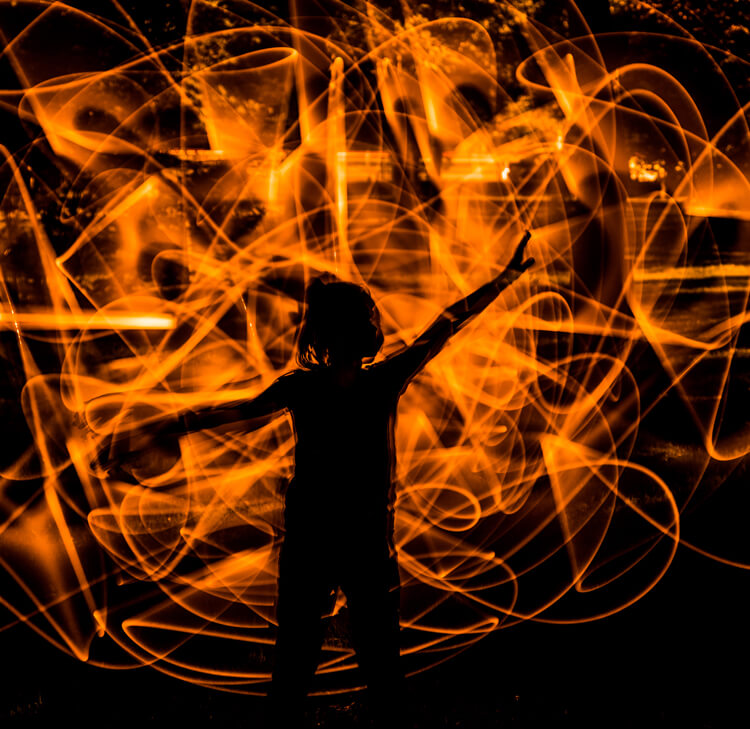
    This silhouetted image of a girl was created using the orange 22″ sword brush

    Tips:

    • To remain as invisible as possible when trying to photograph a light painting, wear dark colored clothing, keep moving, and avoid holding the light source too close to your body.
    • Speed of motion can make a big difference with many of these tools: the slower the motion, the more vibrant and textured the effect; the faster the motion, the smoother but fainter the effect.

    First impressions

    Light-Painting-Brushes-7

    I recently had the privilege to lead a light painting workshop with some local photographers, so I introduced the Light Painting Brush system to them during our course. The following feedback comes from a few of the participants:

    • “I felt like a kid, amazed and surprised with all the images we shot and with the numerous options we used to create and express ourselves as we played with the Light Painting Brushes. My favorite was the colored ones because they made things and shapes look like I was using chalk, and the colors were great in the pictures! It helped me to express and to imagine numerous things. I just wish we’d had two more hours!”
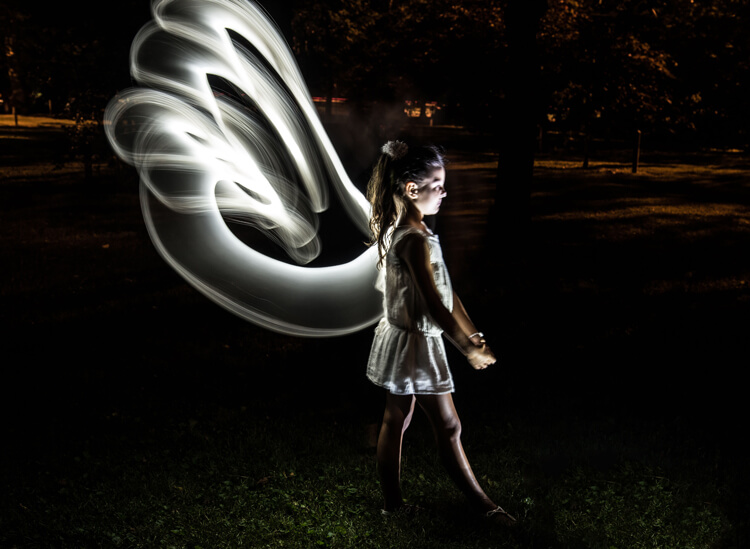
    • “Several lighting methods were demonstrated, but my favorite was using light painting brushes to create an angel figure out of a beautiful little girl.”
    • “My favorite was the white fiber optic, as it made a really pretty effect and I felt I could be more creative with it.”
    • “I was very impressed with the quality and the different possibilities of the light painting tools! I love that it gives you the ability to add your own personal unique touch to a photo!”

    The brushes were easy to use, even for beginners, and cast a new “light” giving night photography a new perspective and dream like world.

    Light-Painting-Brushes-13


    Conclusion

    Whether you are an experienced light painter or just wanting to give this technique a try for the first time, these tools from Light Painting Brushes are a fantastic addition to your accessory arsenal. They are designed by light painters who create and use their products. If you watch their tutorials online you’ll see that they have a passion to create tools that are to be used to create works of art in Light Painting.

    Here’s another really cool thing you can do with these tools – make a spirograph!

    The Universal Connector is the essential tool for using the actual brushes. I really like the unique textures and shaping possibilities of my two personal favorite brushes, the White Fiber Optics and the Plexiglass Diamond. My previous experience with light painting has mostly been of the off-camera type, but after using these Light Painting Brushes my interest has really been piqued to pursue on-camera light painting.

    googletag.cmd.push(function() {
    tablet_slots.push( googletag.defineSlot( “/1005424/_dPSv4_tab-all-article-bottom_(300×250)”, [300, 250], “pb-ad-78623” ).addService( googletag.pubads() ) ); } );

    googletag.cmd.push(function() {
    mobile_slots.push( googletag.defineSlot( “/1005424/_dPSv4_mob-all-article-bottom_(300×250)”, [300, 250], “pb-ad-78158” ).addService( googletag.pubads() ) ); } );

    The post Review: Light Painting Brushes – Tools for Creativity by Bruce Wunderlich appeared first on Digital Photography School.


    Digital Photography School

  • Tips for Processing Landscape Photos – from Basic Edits to Artistic Interpretation

    All professional, and many hobbyist photographers, post-process their photos. There are various reasons why you want to edit your photos, besides the fact RAW files need some level of processing, including:

    • To fix minor errors made when you took the image.
    • To make the image look more like you envisioned when you took it.
    • To add your artistic touch to the image.
    • Because image editing is fun, and is an important part of photography.
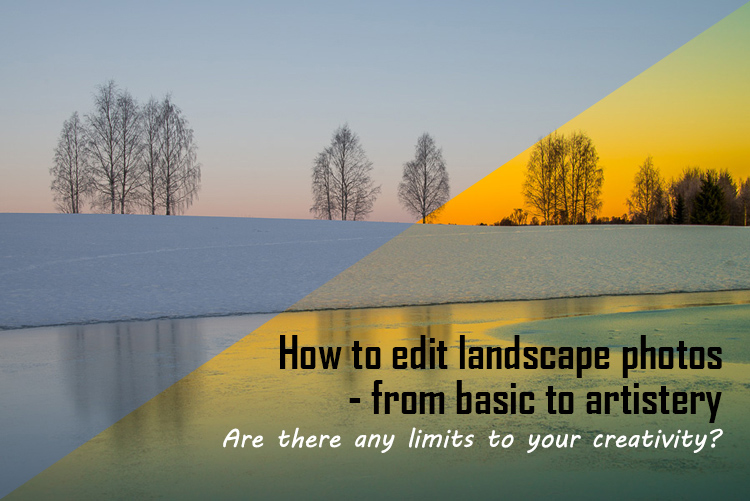
    Sunrise 0

    Landscape photography is often about being in the right spot at the right time. This is not always possible, so a little post-processing might help. “Why make it when you can fake it” seems to have become more and more common.

    One question often raised, is how much editing you can do before you have over-processed your photo. Too much and your photo no longer represents the reality of the landscape.

    It’s subjective how much editing is acceptable. Some argue the editing has gone way too far and is destroying photography. Others put their heart and soul into image editing. They try to get the most out of every detail in the photo, and to make their personal interpretation.

    Landscape photographers are not photojournalists documenting reality. As such there should be plenty of room for an artistic interpretation of landscape photos. In the rest of this article, I’m going to discuss different levels of editing, using one of my own landscape photos as an example.

    1. The leave as is approach – no editing

    The easiest method is to save your files as JPG and do no editing at all. If you don’t want to buy an image editing software, or you simply don’t care to spend time on post-processing, that’s fine. It’s your decision. You can still enjoy the time you spend out in nature taking photos.

    Obviously, with this approach, nobody can accuse your photos of not being real. But unless you learn some basic editing skills and post-process your images, you’re likely not to be regarded as a serious photographer.

    Hardly any of the images with most likes on social media and photo sharing sites are unedited. In digital photography capturing the photo is just half the work, the rest is about post-processing techniques.
    Sunrise 1

    2. Basic editing

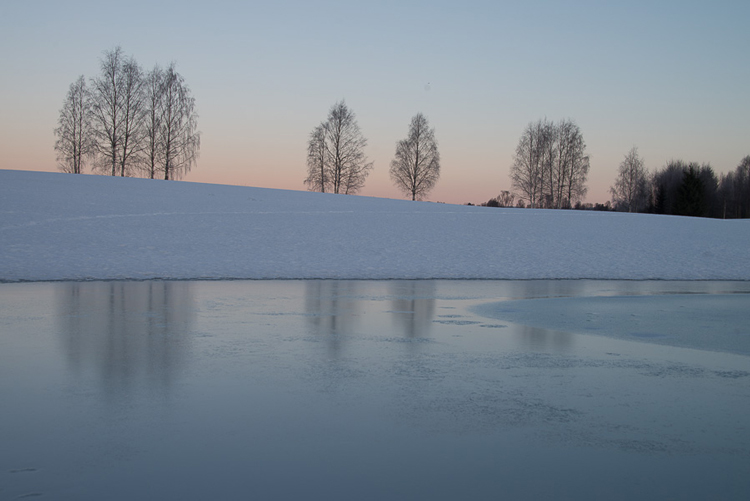
    In my image (above), I realized I was sloppy with the composition when I took it. I had to fix this. Often one adjustment leads to another. Let’s go through the different steps I applied to this image.

    The image above is the untouched RAW file straight out of the camera. Some photographers are happy with this result, and leave it there. After a closer look, I found there were several other things with the image I could improve. Because it’s a RAW file, I knew there was a lot of image data to work with.

    Basic editing is supposed to enhance what’s already in the photo, not fix what is wrong. Ideally, you should get the shot as technically correct as possible in the camera. One nice thing about digital photography is how easy it is to make small adjustments after the shot. If you fail on the exposure or the horizon is not perfectly straight, no problem, you can fix it

    Levelling a tilted horizon and verticals, cropping, and dust spot removal
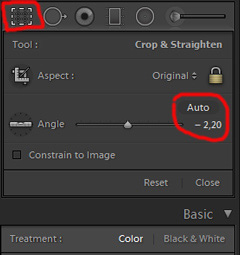
    capture-2bWhile you edit, you can make simple adjustments to your composition, like levelling the horizon and cropping. By cropping, you can tighten the composition, and to some extent “move” elements, so they align according to the rule of thirds or golden mean.

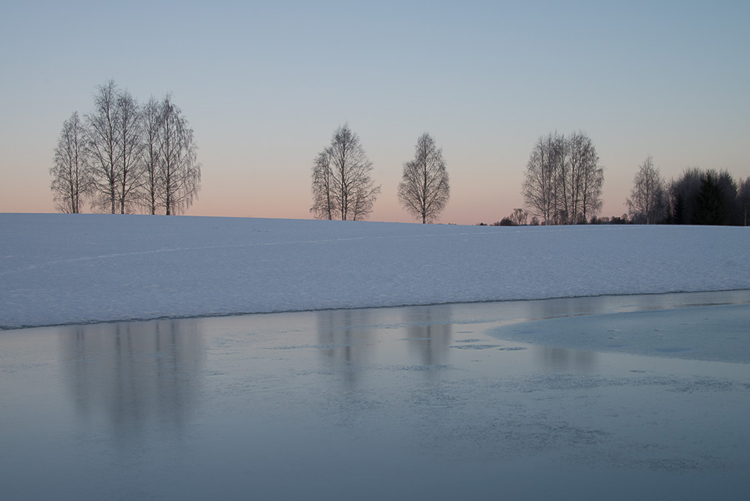
    In the photo below I have levelled the trees, as they were leaning slightly to the right. I did not notice that when I took the photo. Most photographers will not question if levelling the horizon, cropping, and removing dust spots are acceptable image editing. It’s part of the workflow.
    Sunrise 2

    Adjusting the White Balance (WB)

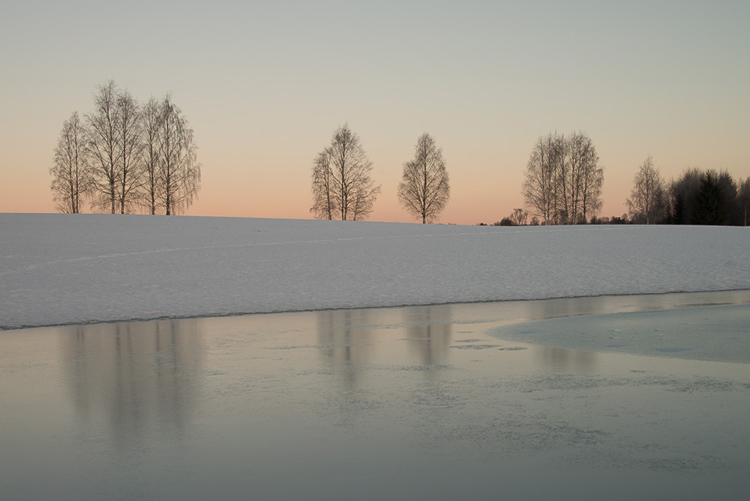
    I took this image an early morning, at sunrise. The reflections from the clear blue sky gave the scene an overall blue color cast. At the computer, I remembered the scene as being warmer. Warmer is perceived as more pleasing. I could be wrong, because who remembers exactly what colors a scene had at the time they took the image?

    Photographers often claim they edit their photos to represent how they saw the scene. It is probably more correct to say they edit their photos the way they wish they saw the scene.
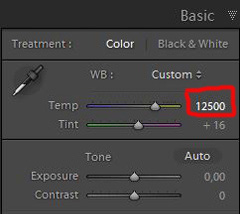
    capture-3bSo I decided I wanted my image to have a warmer color tone. I adjusted the White Balance by adding more yellow.

    I could have achieved something similar by setting the camera White Balance to the Cloudy preset, at the time I took the image. Changing the White Balance after the shot is another advantage when you shoot your files as RAW. Either way, the result is altered, and to some extent, the reality is changed.

    Although the significant impact changing the White Balance can have on an image, it is usually accepted as part of the post-processing workflow.
    Sunrise 3

    Increasing Exposure and Contrast

    Because no adjustments are made to the RAW files in camera, the images look unfinished when you open them up on your computer. The preview on the LCD is an embedded JPG version of the photo, which often looks much better.
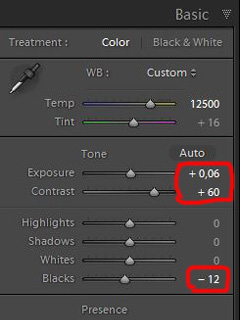
    capture-4bEven with modern digital cameras you don’t always hit spot on with the exposure. If you don’t get it right in-camera, with RAW files you can easily correct the exposure one two stops when post-processing.

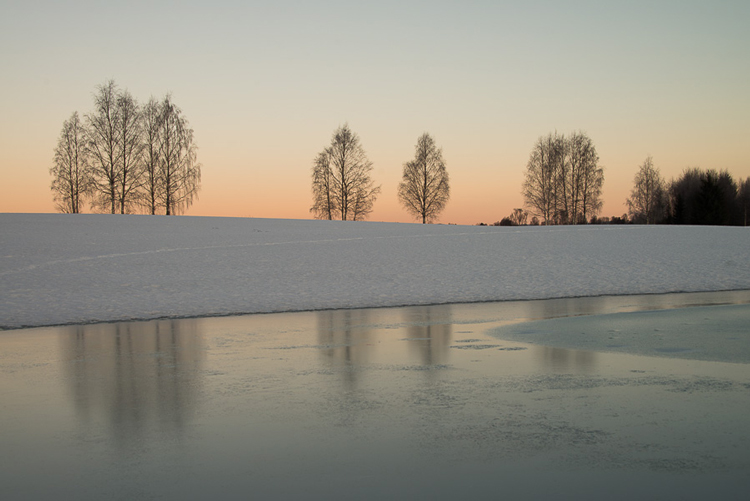
    My image is no exception, it looks flat, and needs a few more adjustments. So I increased the contrast slightly. When you increase contrast, the image tends to get a little darker. To compensate for this, I had to increase the exposure a tiny bit. You can see the result so far below.
    Sunrise 4

    Decreasing Highlights and increasing Shadows
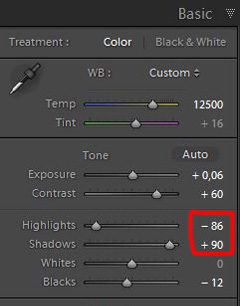
    capture-5bOne more thing that bothered me was the black chunk of trees to the far right. The trees have now become too dark with no details in the shadows. I fixed this by increasing the shadows slightly. I also lowered the highlights a little to bring out more of the texture in the ice. In the version below the trees to the right are no longer completely black.

    With these last adjustments, the image starts to look pretty decent. So far so good. All of the edits I have done until now are within what most photographers will find acceptable.
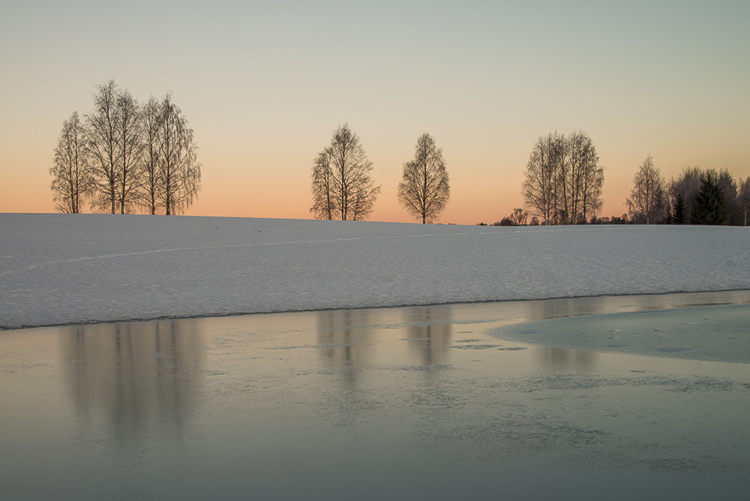
    Sunrise 5

    3. Beyond basic editing

    Oversaturated colors

    Photos with saturated and vibrant colors are eye catching. If you want attention when you post your images on social media sites, it’s a good idea to boost the colors first.capture-6
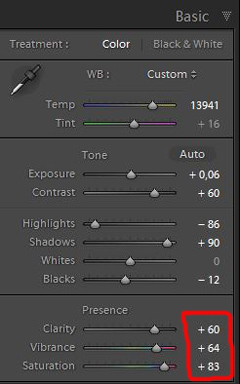
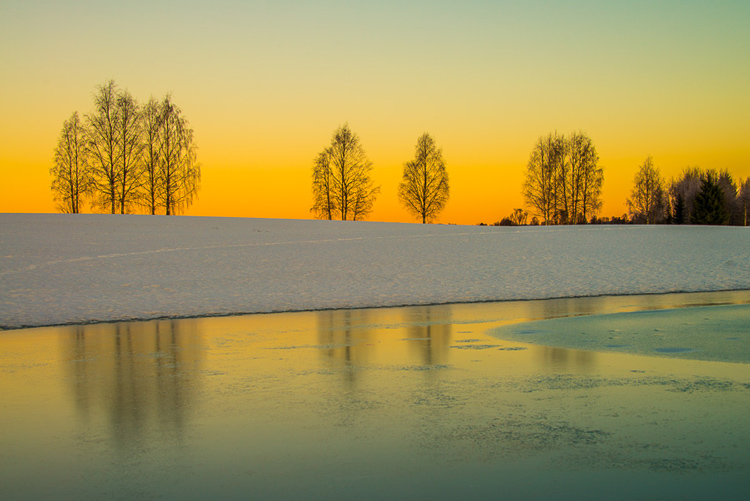
    At this stage, it was attempting to make the sunrise more beautiful. To me, it was already an awesome winter morning sunrise. But I felt I could make it even better – with some over-processing.

    I did this simply by increasing vibrance and saturation significantly. The image now has an entirely different feel. To me, it looks fake. But I bet this version would have received more attention on my social media sites if I posted both versions there. I have seen this happen with some of my other images before.

    With this level of editing, the discussions start as to whether or not the image represents a realistic landscape. It can be your artistic interpretation of the scene, but to me it’s not authentic anymore.
    Sunrise 6

    4. Photo editing artistically

    Adding texture for a complete different look

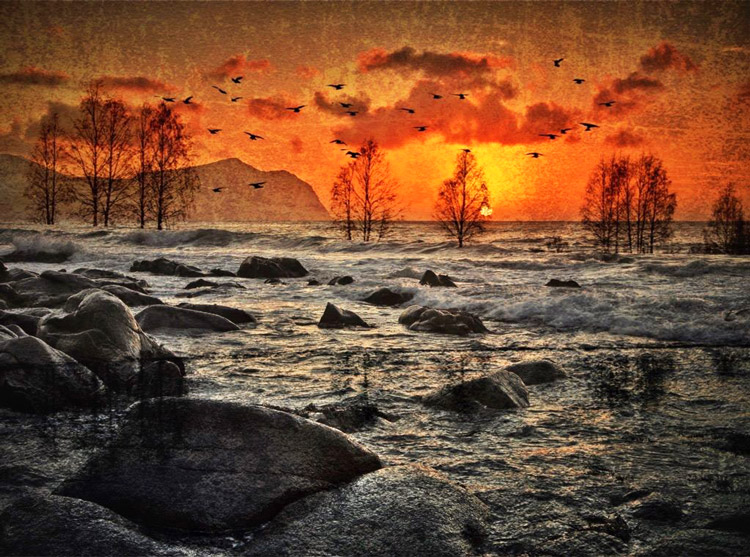
    In the next image I have used my artistic freedom as a photographer and artist. I blended in a couple of texture layers and photo filters with the original image. By using textures properly, you can create some interesting effects on your images.

    If this is a realistic landscape photo or not, is no longer a relevant question. It’s not, nor is it supposed to be. But you can discuss whether or not you like this style. While all the previous edits were made in Lightroom, the last two versions were made in Photoshop, as Lightroom doesn’t have the layers function which is needed.
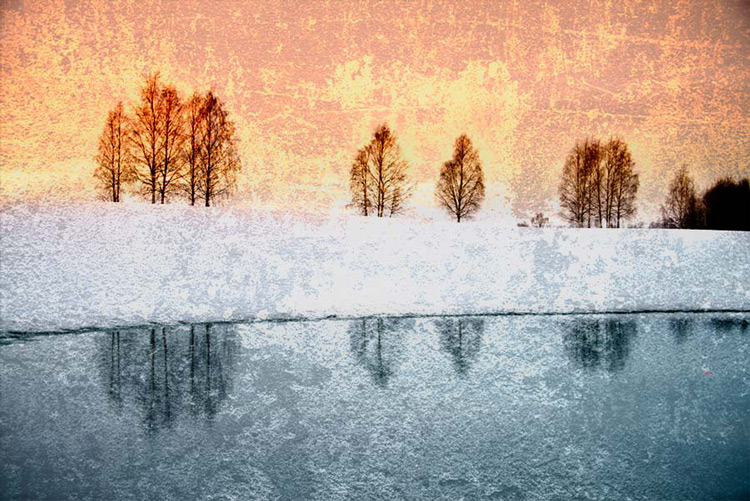
    Sunrise 7

    Composite of several images makes this surreal piece

    The last version of my image is a composite. Only a few elements are left from the original, but you can tell it’s still there. The result is so extreme that nobody can blame you for faking a realistic landscape image. Everybody know this is a creative piece of art. Again it’s very subjective whether like the style or not. Compositing is a whole new level of photo editing, it’s not for everyone.

    When you create composites, you need many of the same skills as when you photograph. For a balanced composite, you must know about composition techniques and how to deal with light and shadows, as well as colors.
    Sunrise 8

    Conclusion

    With digital photography it’s possible to create the image you want. Your imagination and skills are your only limitations. The general trend is bold and vivid colors get a lot of attention, at least among some photographers. Whether you want to follow this trend or not, is your decision. The fact is that more of the images you see online look similar, due to the same post-processing techniques. It’s getting harder to be recognized online unless you make something different.

    As a landscape photographers you have a few challenge to tackle because the elements of nature are limiting. Light and weather conditions might not be as you wish when you’re at your dream scene. Maybe you never come back to the same spot again. In such a situation it’s tempting to fix the light (slightly) in post-production. In other words, to fake reality like I did with the oversaturated image.
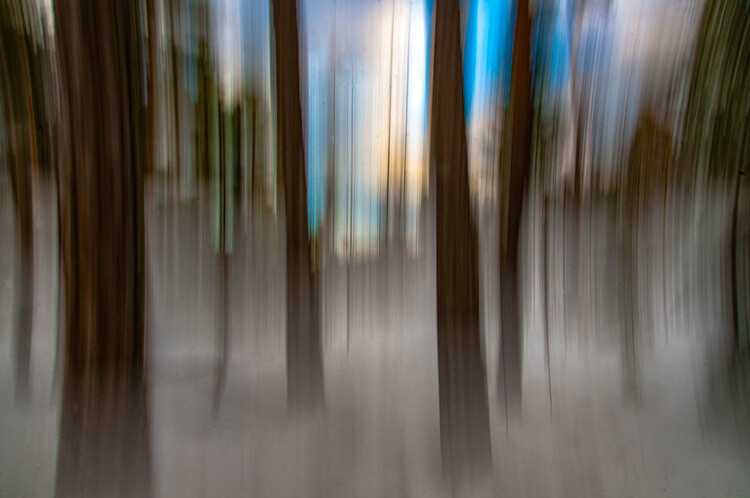
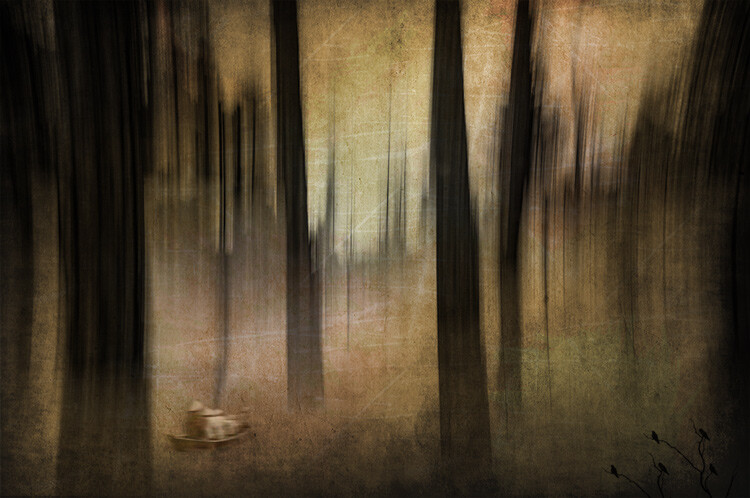
    ICM_forest_original_edit

    Original edit

    ICM_forest_creative_edit

    Creative edit

    Photography is art, so it’s not wrong if you choose to do so, but be open with what you have done. Don’t pretend you experienced the sunrise of your life if you didn’t. In the end, it’s up to you what you’re comfortable with. Nobody can take away your creative vision.

    You can do more advanced editing in Lightroom than I have shown in this tutorial. In Photoshop however the possibilities are endless. You can manipulate, remove, and add content to your images. With such drastic steps, you’re not only altering the reality, but you’re cheating. That’s if you claim your photo is real.

    Now it’s your turn. What’s your opinion about how much you can edit landscape photos? Please share your thoughts in the comments below.
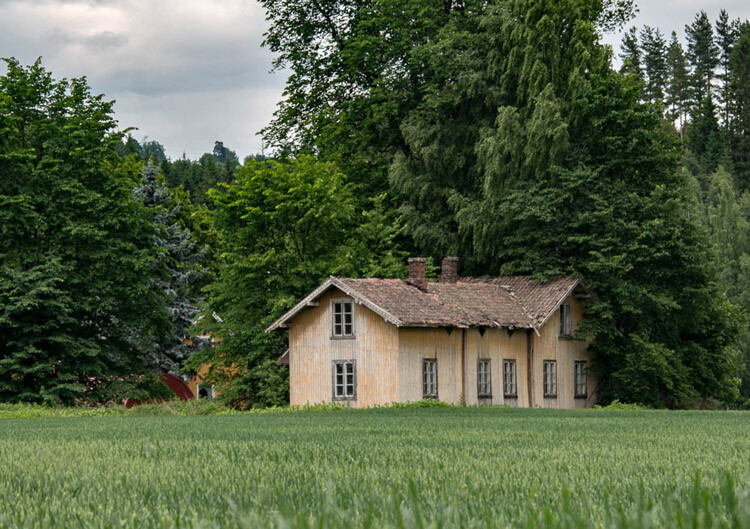
    Original edit
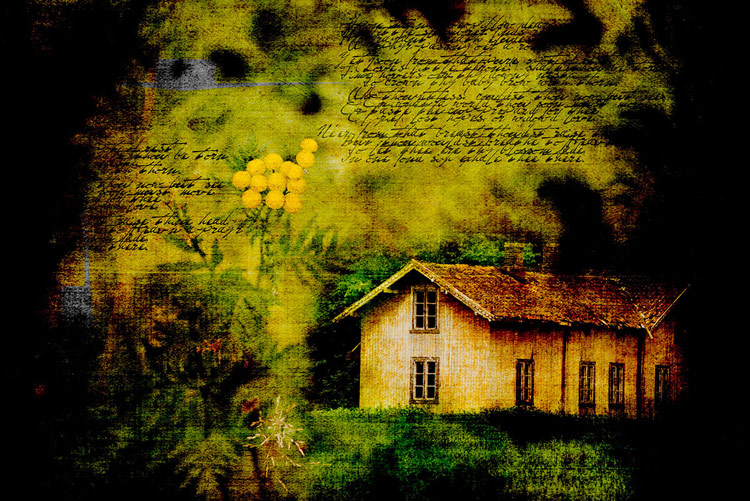
    Original edit

    Creative edit

    Creative edit

    This week we are doing a series of articles to help you do better nature photography. See previous articles here:

    • 3 Habits Every Outdoor Photographer Should Develop to Avoid Missing Shots
    • 5 Tips for Better Nature Photography
    • 27 Serene Images of the Natural World
    • Weekly Photography Challenge – Nature
    • 10 Ideas for Photographing Nature in your Backyard
    • 6 Tips for Capturing Character and Personality in Wildlife Photography
    • 5 Tips for Setting the Focus in Your Landscape Photography
    • 7 Tips for Better Marine Wildlife Photography

    googletag.cmd.push(function() {
    tablet_slots.push( googletag.defineSlot( “/1005424/_dPSv4_tab-all-article-bottom_(300×250)”, [300, 250], “pb-ad-78623” ).addService( googletag.pubads() ) ); } );

    googletag.cmd.push(function() {
    mobile_slots.push( googletag.defineSlot( “/1005424/_dPSv4_mob-all-article-bottom_(300×250)”, [300, 250], “pb-ad-78158” ).addService( googletag.pubads() ) ); } );

    The post Tips for Processing Landscape Photos – from Basic Edits to Artistic Interpretation by Kim Rormark appeared first on Digital Photography School.


    Digital Photography School

  • 7 Tips for Better Marine Wildlife Photography

    I’m an ocean girl. To me, there is no better way to spend a summer day than to get out on the water and explore the mystery that is the deep blue sea, and hopefully experience some of the majestic creatures that live in it and on it.

    Whether you are photographing on shore or from a boat, there are a few tips that will help you improve your marine wildlife photography. Underwater photography, though, is an entirely different thing, with a different set of techniques, that are not covered in this article.

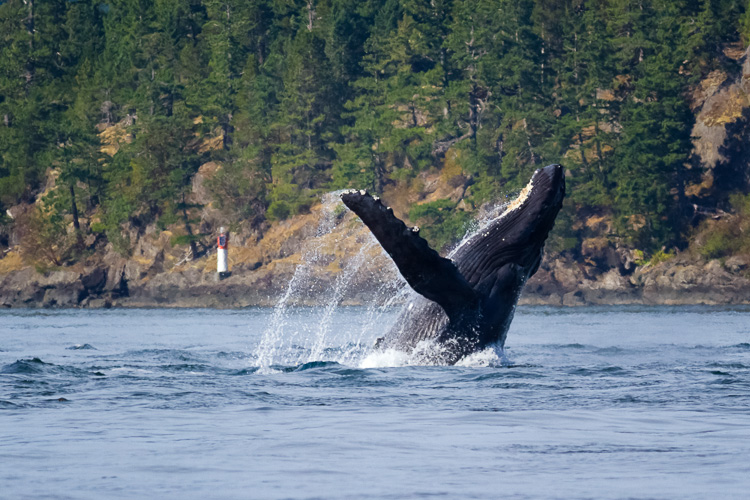
    Humpback whale breaching near Campbell River, British Columbia

    Humpback whale breaching near Campbell River, British Columbia

    The photos in this article were all made in the cool waters off the west coast of North America, but the same tips apply to marine photography all over the world.

    1 – Explore the Shore

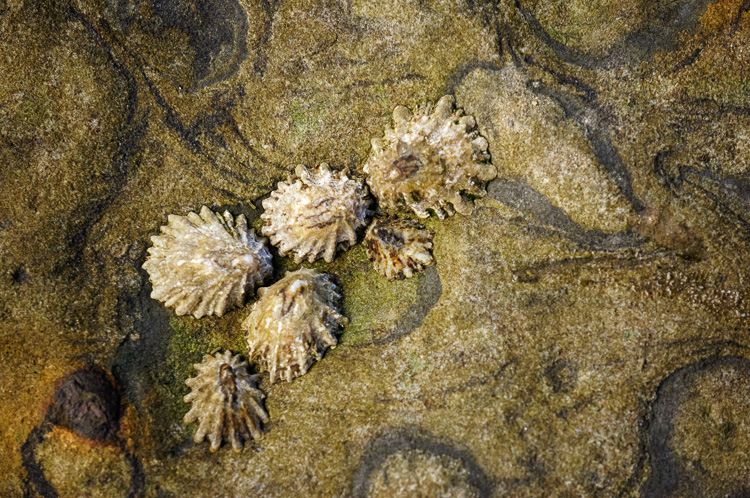
    Let’s start with the shore where you’ll find all sorts of sea creatures. Check the tide tables, and if you can find a rocky beach at low tide. You’ll discover all the animals that live in the shallow tide pools such as urchins, sea anemones, starfish, mollusks and crabs.

    Mollusks in a Tide Pool in Big Sur, California

    Mollusks in a Tide Pool in Big Sur, California

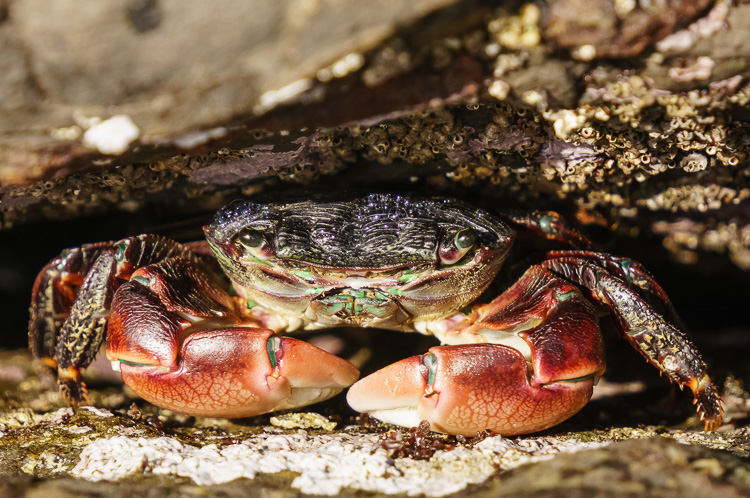
    Except for the crabs, they don’t seem to mind your presence one bit, so you can get some practice photographing the creatures that don’t notice you. Crabs sometimes pay attention, but if you don’t get too close, you may find they come out of the tide pools, and out from under rocks, and sometimes put on a bit of a show. I photographed this crab in Big Sur, California, where it came out from a crack in the rocks, and proceeded to make all sorts of bubbles as it began molting.

    Crab at Big Sur, California

    Crab at Big Sur, California

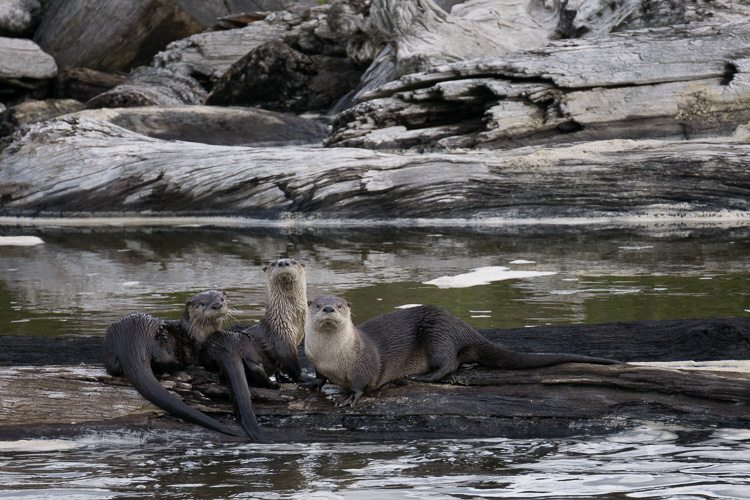
    Close to shore, you may also be able to photograph sea otters and river otters (which are also found in salt water). Like other animals, given enough space and time to get used to you, they will go about their daily tasks in your presence, even looking directly at you (and your camera) allowing you to make images that feel intimate.

    River Otters, Redwood National Park, California

    River Otters, Redwood National Park, California

    You’ll also find all kinds of sea birds to photograph such as gulls, geese, ducks, cormorants, and eagles.

    2 – Get Out in the Deep

    My favourite way to photograph marine wildlife is to get out in a boat. Whether you kayak, row, paddle, sail or use a power boat, there’s nothing like the freedom a boat gives you when it comes to exploring the ocean and finding wildlife. If you don’t have access to a boat, consider renting one. Or, try a whale watching tour, which are well worth the money for the photo opportunities they provide including whales, dolphins, seals, and sea lions.

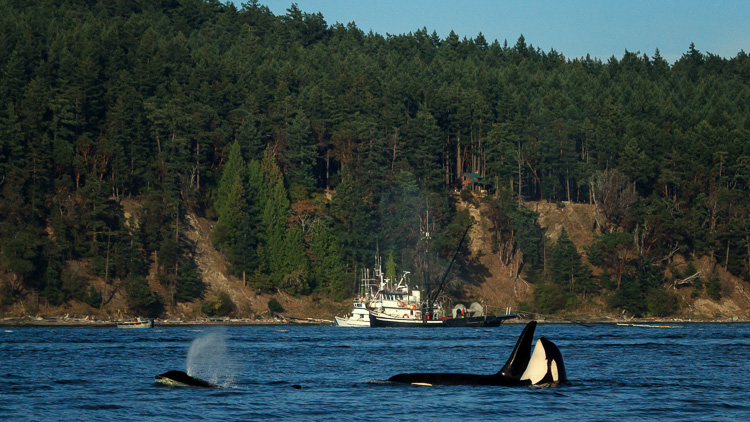
    Orcas and commercial fishing boats near San Juan Island, Washington.

    Orcas and commercial fishing boats near San Juan Island, Washington.

    Weather makes all the difference between an enjoyable day on the water, and those days that make you feel a little on the green side. Check the weather forecast before choosing your day, and once you are out there, keep an eye on changing conditions to stay safe.

    If you are driving the boat yourself, and you expect some choppy seas, you should keep your camera safe and dry while underway. I store mine in a Pelican case, which is shockproof and waterproof, so I don’t have to worry about my camera while driving the boat. When shooting, try not to get splashed because salt water can do a lot of damage to your camera.

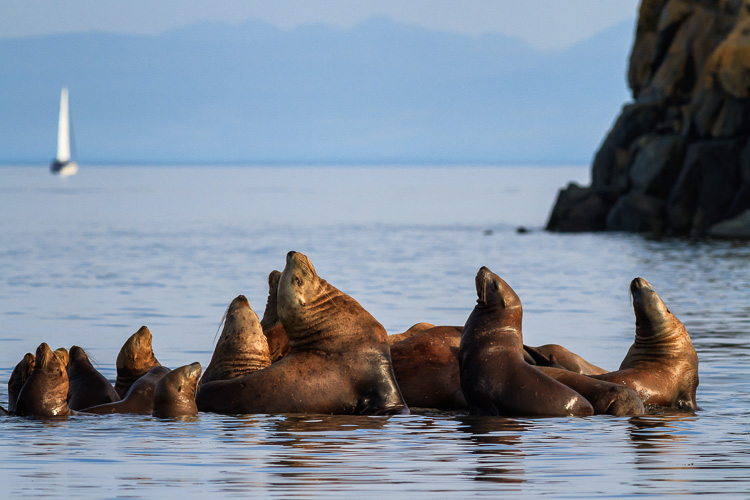
    Sea lions basking on rocks near Vancouver Island, British Columbia.

    Sea lions basking on rocks near Vancouver Island, British Columbia.

    3 – Shoot Handheld

    For marine wildlife photography, shooting handheld gives you the freedom to move quickly, as the animals do. Unless you are photographing animals that don’t move very much in the tide pools, a tripod or monopod can slow you down and you’ll likely miss the shot. They are also not very practical on boats.

    Instead, use a high ISO, a fast shutter speed, and shoot handheld. Remember to turn your image stabilization on to prevent any camera shake blur. I usually start out with ISO 400 and a shutter speed of 1/1,000th of a second, then make changes based on lighting conditions and the speed the animals are moving. For dolphins and whales, an even faster shutter speed may be required.

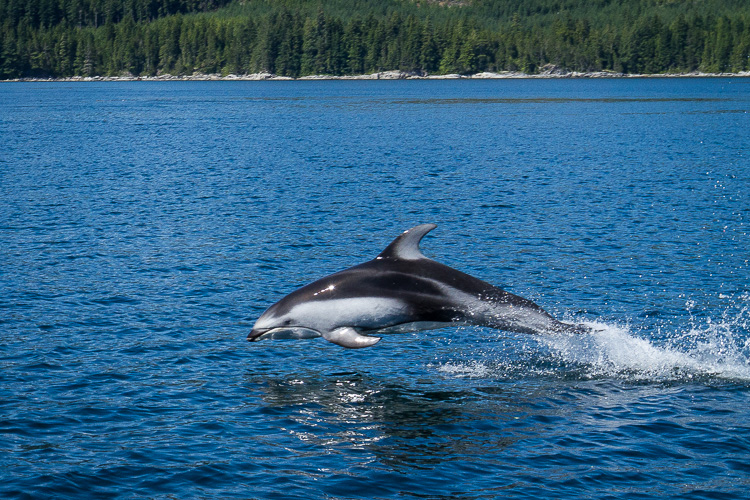
    Pacific White Sided Dolphin in Johnstone Strait, British Columbia

    Pacific White Sided Dolphin in Johnstone Strait, British Columbia

    4 – To Polarize or Not?

    When shooting in tide pools, a polarizing filter can be helpful to cut through the glare of light reflecting off the surface of the water, and allow you to see through to the creatures that are underwater. Aside from that however, I don’t generally use a polarizing filter because the cost of doing so is about one stop of light. If I’m not trying to see through the water, I would rather have that stop of light for a faster shutter speed, or a lower ISO for better image quality.

    5 – Lenses

    You’ll need a variety of lenses for shooting marine wildlife. If you are shooting birds and whales, you’ll need a long telephoto lens to get you close enough to make an image with impact. I like to use a 70-300mm zoom lens or a 400mm prime lens for most of my marine wildlife photography.

    Dolphins, on the other hand, will require a wide angle lens because they tend to get very close to the boat. My favourite lens for dolphins is my 11-35mm. So bring a variety of lenses along, and just make there is no salt water spraying around when you switch lenses.

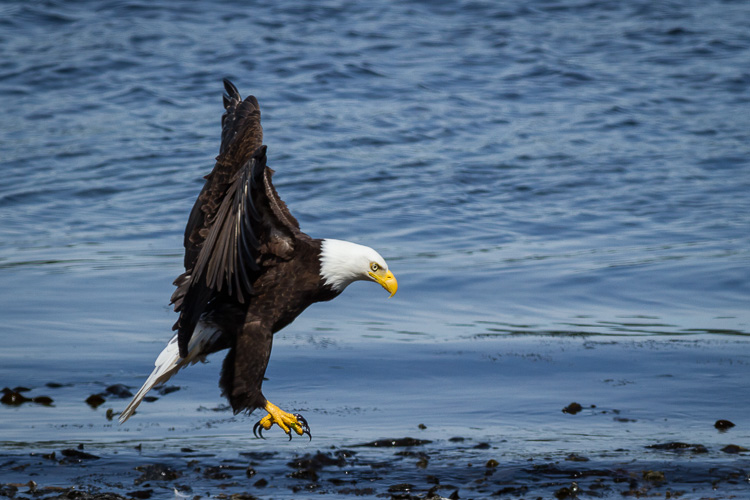
    Bald Eagle in Campbell River, British Columbia.

    Bald Eagle in Campbell River, British Columbia.

    6 – Focus Modes

    When photographing the creatures that don’t move too much, one shot auto focus or even manual focus is fine. But when shooting animals that move fast, you’re better off using continuous autofocus mode because it locks on to your subject and tracks its movement, increasing your chances of getting a sharp image. It’s not easy though. Getting focus fast enough to capture the moment is probably the biggest challenge in this type of photography.

    7 – Respect the Animals

    When you are so close that your presence changes the animal’s behaviour, you are too close. Respect their space by using a longer lens, instead of getting too close. Don’t forget, in most areas there are rules about how close you can get to marine wildlife, especially whales. Usually it is around 100 meters or 100 yards, so check the rules (laws) in your area before heading out.

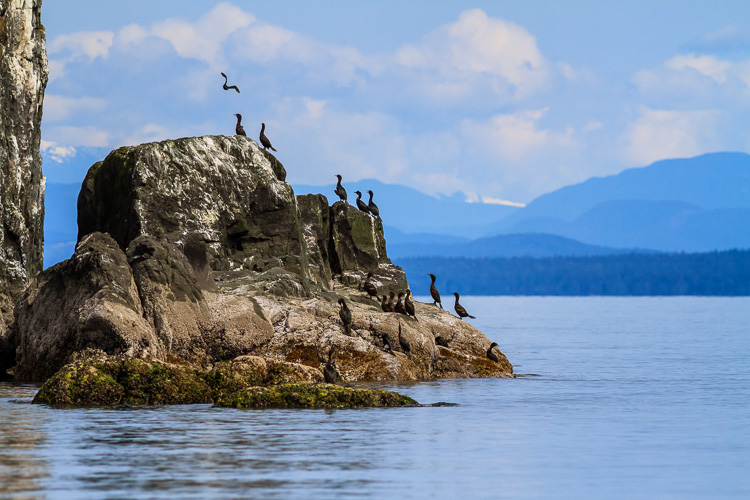
    Cormorants on Middlenatch Island, British Columbia.

    Cormorants on Middlenatch Island, British Columbia.

    I hope these tips help you capture the sometimes elusive, but majestic creatures of the sea, the next time you explore the shoreline or go on a boating adventure.

    This week we are doing a series of articles to help you do better nature photography. See previous articles here:

    • 3 Habits Every Outdoor Photographer Should Develop to Avoid Missing Shots
    • 5 Tips for Better Nature Photography
    • 27 Serene Images of the Natural World
    • Weekly Photography Challenge – Nature
    • 10 Ideas for Photographing Nature in your Backyard
    • 6 Tips for Capturing Character and Personality in Wildlife Photography
    • 5 Tips for Setting the Focus in Your Landscape Photography

    googletag.cmd.push(function() {
    tablet_slots.push( googletag.defineSlot( “/1005424/_dPSv4_tab-all-article-bottom_(300×250)”, [300, 250], “pb-ad-78623” ).addService( googletag.pubads() ) ); } );

    googletag.cmd.push(function() {
    mobile_slots.push( googletag.defineSlot( “/1005424/_dPSv4_mob-all-article-bottom_(300×250)”, [300, 250], “pb-ad-78158” ).addService( googletag.pubads() ) ); } );

    The post 7 Tips for Better Marine Wildlife Photography by Anne McKinnell appeared first on Digital Photography School.


    Digital Photography School

  • 5 Tips for Setting the Focus in Your Landscape Photography

    In many types of photography the question of where you should set your focus is pretty simple. For example, in portrait photography, there is one simple rule: focus on the eyes. When the eyes aren’t on the same plane of focus, focus on the near eye. End of story.

    It is pretty simple with other types of photography as well. In wildlife photography you focus on the animal. In fact, in any type of photography where there is a clear subject, you always focus on that subject. That’s not to say it is always easy, but at least it isn’t difficult to figure out.

    Mullaghmore

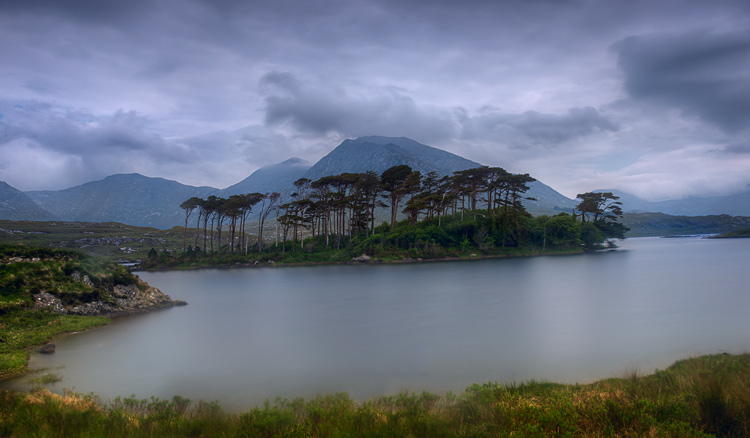
    Foreground sharpness is paramount in many landscape photos.

    But what about landscape photography where you are generally capturing more of a scene than a solitary subject? Where do you focus to ensure that everything in the scene is as sharp as possible? The answer isn’t always so clear. Therefore, in this article, we’ll cover some tips for helping you know where to set the focus.

    Tip 1: Don’t Just Set the Focus at Infinity

    Again, oftentimes in landscape photography, you are trying to capture a scene rather than a solitary thing. Many times, the scene you are trying to capture is far away from you. Most lenses have a range of focus values, and once you get beyond a certain distance (often 20-30 feet, or 8-10 meters) the focus is set at infinity. Everything beyond that point will just be infinity. Therefore, if you are taking a picture where most things in the frame are far away, it might seem that you should just set the focus at infinity. If you are using autofocus (and most of us are), you might be inclined to set the focus using something that is very far away from you.

    If everything in the frame is truly at infinity, then setting the focus at its maximum distance is not a horrible idea. If there is nothing close to you, then there is just no need to do anything else, you don’t need to overly complicate things. But more commonly there are aspects of the scene that are closer to you than infinity. Where do you set the focus then?

    Derryclare

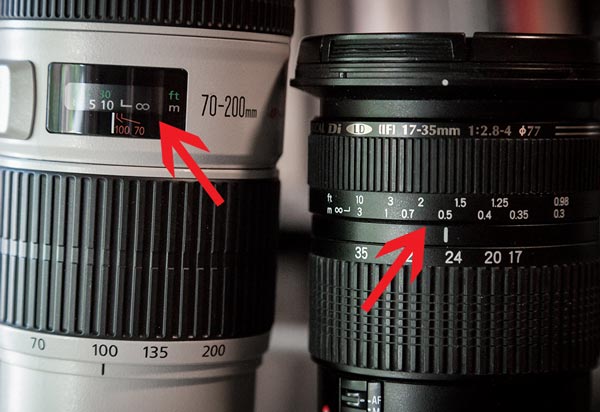
    You can get into hyperfocal distance (we’ll talk more about that in a minute) and make this as technical as you want. But often your time is precious when you’re out shooting. The light is changing and things are moving. You can get a pretty good sense of things without resorting to calculations. As a result, consider this rule of thumb: set the focus at infinity and then just turn it back a little bit. The obvious question is what is, how do you define a little bit, and I’m afraid I don’t have a good answer for you. It will vary from lens to lens, but will usually be about a 5-10° turn or just to the highest distance number printed on the lens (if your lens has these numbers).

    focus-ring-distance-600px

    Why would you want to do that? Because of the depth of field that will be in your picture (more on depth of field below). Since you are taking an outdoor photo, you will probably not be shooting wide open, or even with a large aperture. So, there will likely be some depth depth of field involved. It doesn’t necessarily have to be a large depth of field, but the point is that it gives you some leeway. By pulling the focus forward, that leeway will still get everything out to infinity in focus. It will also get things a little closer in focus as well.

    Tip 2: Try Focusing a Third of the Way into the Picture

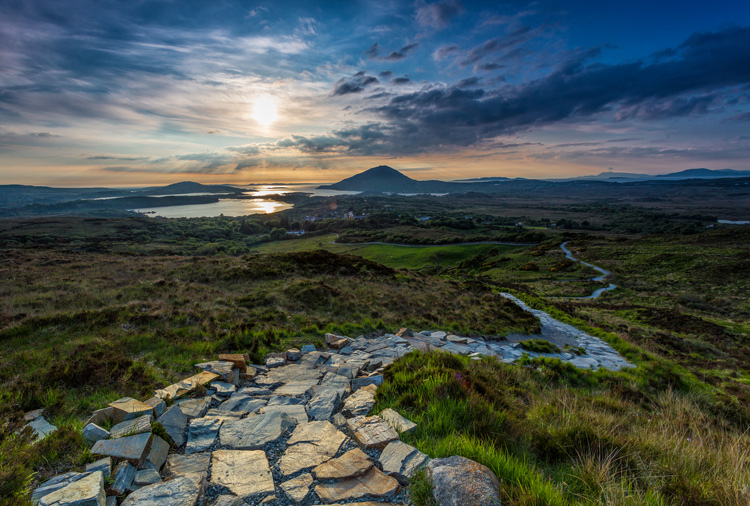
    Many pictures are ruined because the foreground is not sharp. It happens all the time. Therefore, if you have something in your scene that is close to the camera, focus on it. If the ground is prominent in your picture, set your focus close to you. Make sure that foreground is in focus. Often you will set the focus only a few feet in front of you.

    But wait a second, you might ask, what about my background? Won’t it be out of focus or blurry? Probably not. If you’re using your wide-angle lens (and if you are taking a outdoor photo that has a discrete foreground, then you probably are) you will have a wide depth of field, even at moderate to large apertures.

    Connemara

    A sharp foregound focus furthers the viewer’s sense that they can walk into the picture.

    Tip 3: Focus on the Subject Matter

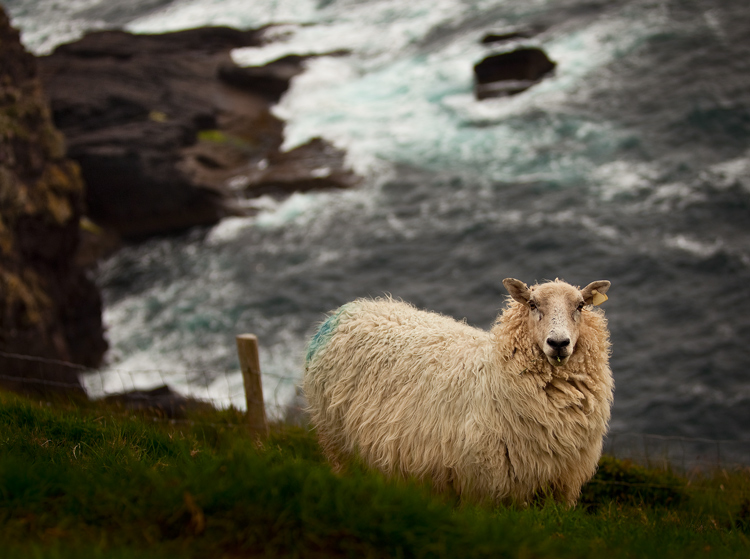
    Let’s not lose sight of the obvious though. When you have a definite subject or center of interest in your photo, just focus on that. It is the most important part of your picture and you absolutely need it in focus. Don’t worry about your foreground, don’t worry about your background. Just make sure the subject is in focus. Frankly, if there is a little fall-off in sharpness from your subject, that will probably not be such a bad thing.

    Dingle-Sheep

    Sometimes you just want a definite subject in focus, and having the background start to blur out is just fine, as in this image of a sheep.

    Tip 4: Watch the Aperture

    There are no free lunches in photography. You probably already know that by using a smaller aperture to get a larger depth of field, it will cost you light. The smaller aperture lets in less light so you will have to use a longer shutter speed (risking blur if you aren’t using a tripod) or raise the ISO (risking digital noise in your picture). But the smaller aperture will also lead to something called diffraction, particularly in cameras with smaller digital sensors. Therefore, just using the smallest aperture possible isn’t always the answer. You cannot just set your focus anywhere and rely on a super-wide depth of field to save you.

    There are two ways around this issue though, which we’ll talk about next.

    Kinbane-Head

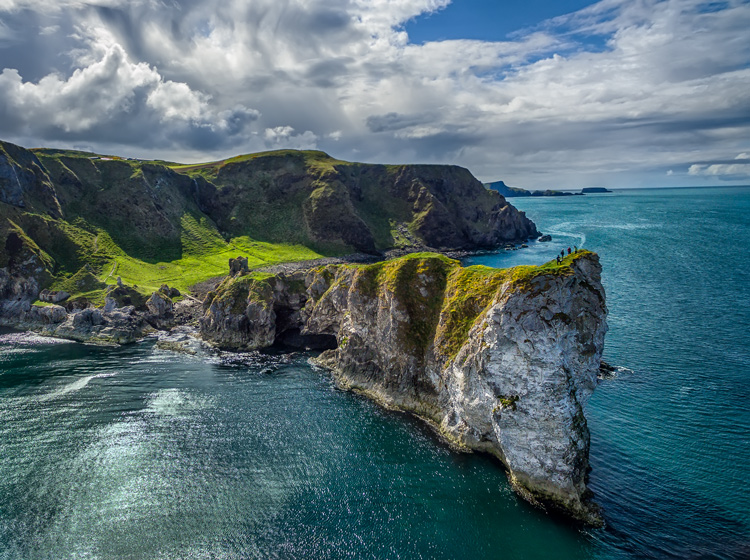
    With everything in the shot at a distance of infinity (30 feet or more), I did not need a wide depth of field to keep everything in focus.

    Tip 5: Know Your Hyperfocal Distance

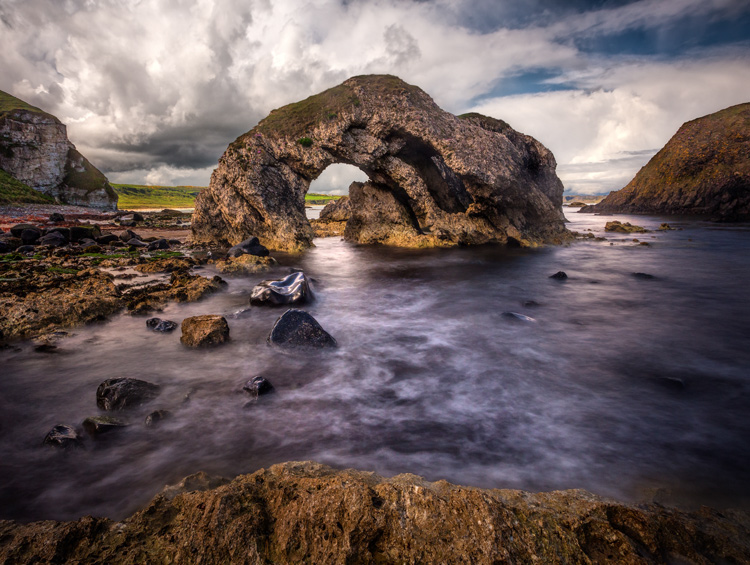
    Hyperfocal distance is just a fancy name for determining how close you can set your focus, and still keep your background acceptably sharp. There are apps and calculators that will tell you this distance depending on your aperture, sensor size, and focal length. For a full explanation of hyperfocal distance along with some charts and links to apps that will calculate it for you, check out How to Find and Use Hyperfocal Distance for Sharp Backgrounds .

    An example will illustrate the point made above about backgrounds tending to remain sharp when you are using wide angle lenses. If you’re using a 16mm lens on a full frame camera, and shooting at f/11, your hyperfocal distance is only 2.5 feet. That means you can set the focus on a point just in front of you, and keep everything behind that point sharp.

    Knowing the hyperfocal distance will often liberate you to set the focus point quite close, in order to maintain sharp foregrounds in your picture. It also means you often don’t need to use the smallest aperture your lens offers, so you can avoid the effects of diffraction.

    Ballintoy-Arch

    Tip 6: Consider Focus Stacking

    When the methods above won’t work for you, or you just need to make sure absolutely everything in the photo from front to back is tack sharp, you may want to consider focus stacking. Here you take multiple pictures of the same scene using different focus points.

    Start by setting the aperture of your lens where it is sharpest (also called the sweet spot – if you don’t know, that is usually in the range of f/5.6 – f/8). Take a shot with the focus set close to you, then repeat the process, gradually setting the focus point farther and farther away with each shot. Later you blend your pictures in Photoshop (for more about how to do that check out Maximizing Depth of Field Without Diffraction).

    This method is not a cure-all. It obviously won’t work with moving subject matter. In addition, it can be tedious, and you risk slightly moving the camera since you have to twist the focus ring between shots. Still it can be a powerful tool for maintaining focus and sharpness throughout your entire picture.

    Setting the Focus Summary

    No rule is going to cover every situation when it comes to focus. As with many aspects of photography, you’ll just have to use your own judgment in the field. Hopefully, as you do so, these tips will help you nail the focus and keep the picture tack sharp where it matters.

    This week we are doing a series of articles to help you do better nature photography. See previous articles here:

    • 3 Habits Every Outdoor Photographer Should Develop to Avoid Missing Shots
    • 5 Tips for Better Nature Photography
    • 27 Serene Images of the Natural World
    • Weekly Photography Challenge – Nature
    • 10 Ideas for Photographing Nature in your Backyard
    • 6 Tips for Capturing Character and Personality in Wildlife Photography

    googletag.cmd.push(function() {
    tablet_slots.push( googletag.defineSlot( “/1005424/_dPSv4_tab-all-article-bottom_(300×250)”, [300, 250], “pb-ad-78623” ).addService( googletag.pubads() ) ); } );

    googletag.cmd.push(function() {
    mobile_slots.push( googletag.defineSlot( “/1005424/_dPSv4_mob-all-article-bottom_(300×250)”, [300, 250], “pb-ad-78158” ).addService( googletag.pubads() ) ); } );

    The post 5 Tips for Setting the Focus in Your Landscape Photography by Jim Hamel appeared first on Digital Photography School.


    Digital Photography School

  • 6 Tips for Capturing Character and Personality in Wildlife Photography

    If you want to take your wildlife photography to the next level, then you need to look at capturing the character and personality of an animal. This makes for a much more appealing image, rather than simply a bird on a stick. A photo always needs to tell a story, but I think many photographers don’t realize that this applies to wildlife photography too.

    Even though we can’t directly relate to most wild animals, it is still possible to document a story through a single image, or a sequence of images.

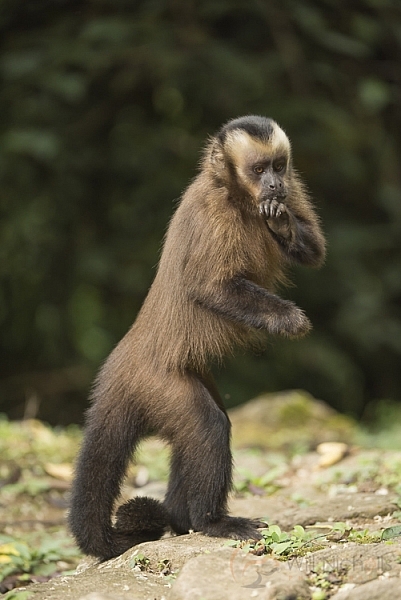
    Tufted Capuchin

    Tufted Capuchin

    Without anthropomorphising animals, many do have their own personalities. I am doubtful this applies to something like an ant, but mammals in particular can be observed to have particular traits and habits. Some may be bold and investigate new things, whereas others may retreat and shy away from disturbances. This can be seen as the animal’s personality, and it is up to us as wildlife photographers to capture this on camera.

    It’s definitely not easy though, as stills photography captures one moment in time and freezes it forever. Working with video makes it far easier to convey character, but it’s not impossible to do it in a single frame. Here are some tips to help you get character in your wildlife photography.

    #1 – Behaviour

    As a zoologist, I am fascinated by animal behaviour. Some behaviours we see as normal and predictable, whereas others shock and surprise us. Did you know that fish swallow small stones to aid digestion?

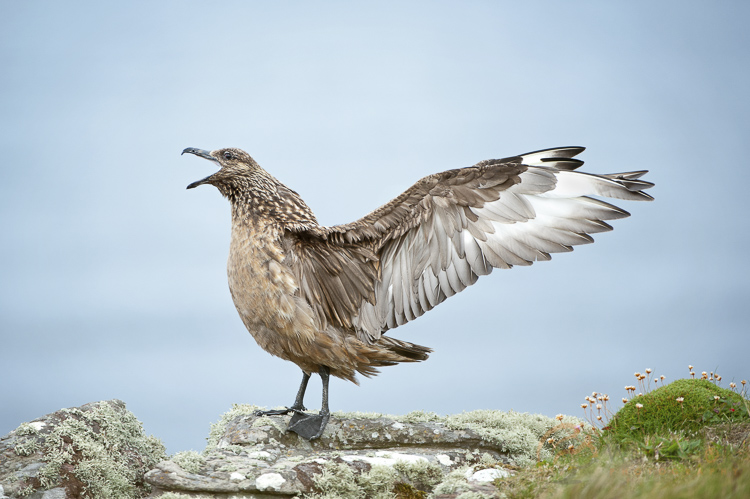
    It’s capturing these interesting behaviours on camera that properly conveys the essence of a particular species. When you’re behind the camera, it’s easy to stare through the viewfinder and get tunnel vision. But if you step back and study an animal, reading up about it beforehand, you’ll learn what you need to look out for. Many animals have giveaway moves that warn you of an impending display – which is the case with great skuas, a seabird found in the northern hemisphere.

    great skua

    Great Skua, photographed in Scotland (Stercorarius skua)

    In this particular case, the skua was preening its feathers continuously. This is a typical thing for birds to do before flapping their wings or displaying. It’s almost like a big stretch and yawn. I waited patiently for 15 minutes while the bird preened, knowing that I would probably be rewarded with such a display afterwards (image above).

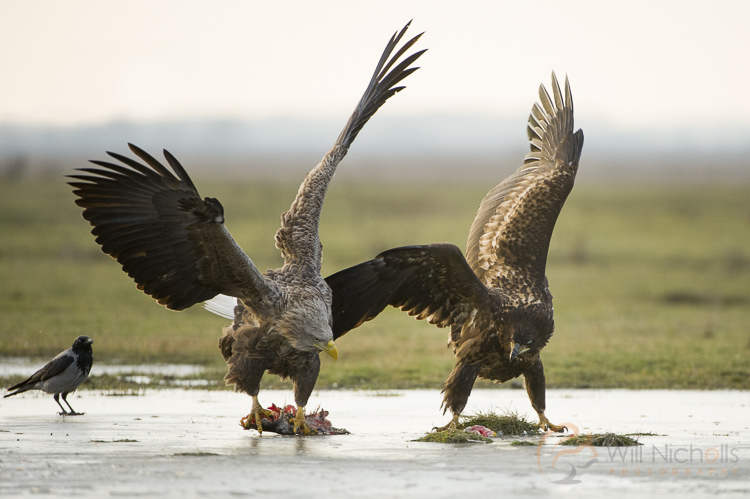
    Confrontations between two animals are commonplace. If you see one animal, even if it’s of a different species, approaching another, then chances are you’ll see some sort of interaction. Take these white-tailed eagles, for example. I was pretty sure that they’d both have a disagreement over who had rights to the tasty fish laying on the ice. With my focus nailed, I kept the shutter half-pressed and fired as soon as they lifted their wings.

    white tailed eagles

    White-tailed Eagles, photographed in Hungary.

    #2 – Humour

    While animals won’t inherently try to be funny, they often do things that make us chuckle. These are usually opportunistic photos that you can’t prepare for, but being poised and ready at all moments is key to capturing them.

    When I lead workshops, one of the main things I try to get my clients to realize is that as soon as you drop your camera down, you’re risking missing the shot. If your subject is in front of you, then you’ve done the hard bit of waiting for an appearance – keep your eye to the viewfinder and remain at the ready, almost like a sniper training his eye on a target.

    red squirrel

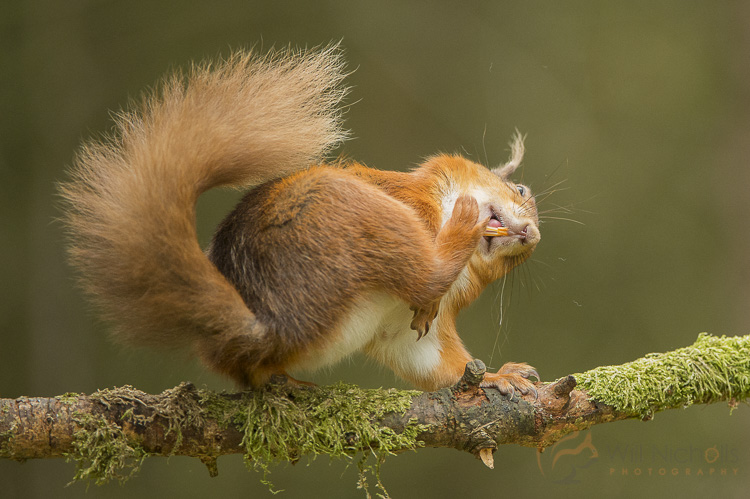
    Eurasian red squirrel (Sciurus vulgaris), photographed in England.

    A quick scratch from a squirrel lasting just a couple of seconds was possible to catch on camera, because I was already following its progress along the branch through the viewfinder.

    Red deer

    A red deer stag in the Scottish Highlands.

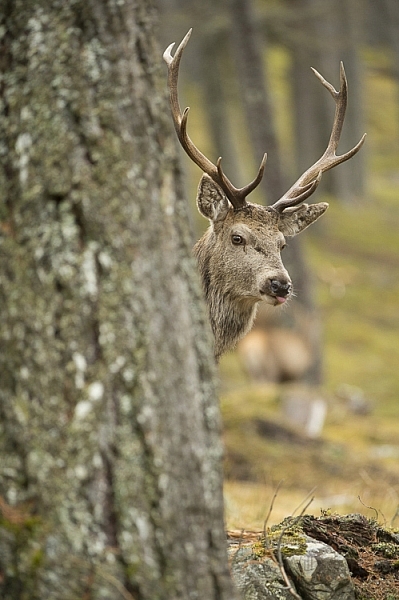
    I had been looking to capture a stag peering through the trees, and while this wasn’t my intended outcome, I couldn’t help but click away when this stag stuck its tongue out round the tree. It’s little things like this that bring a smile to the viewer, and bring in personality and character to your wildlife photos. Although they make some chuckle more than others…

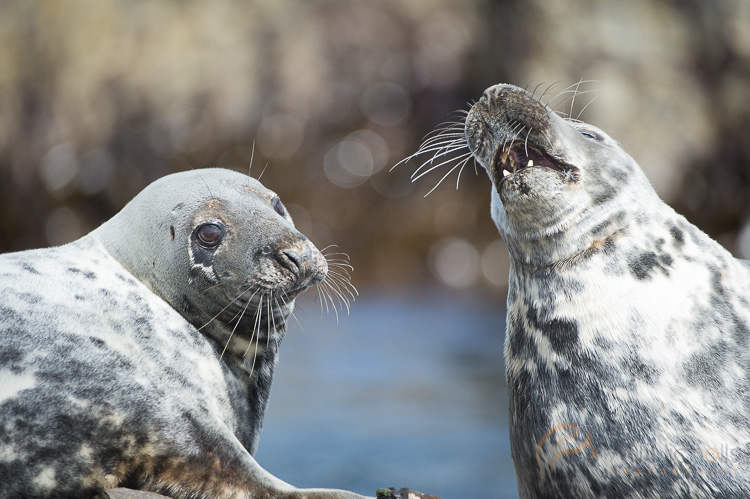
    atlantic seals

    #3 – Tight in the Frame

    All the images I’ve shared so far in this article are fairly tight in the frame. This is a particularly useful composition technique you can use to bring the focus solely to the animal. The bokeh also helps, isolating the subject against the background – this is done using a wide aperture (and subsequently a shallow depth of field), most often successfully with a telephoto lens.

    red squirrel

    Eurasian red squirrel (Sciurus vulgaris).

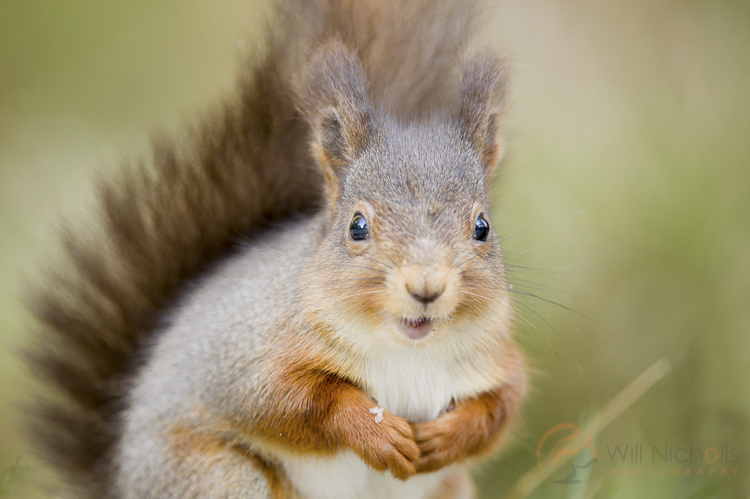
    When the attention of the viewer is trained on the animal alone, without distracting background elements to tear the eye away, then they feel more interacted with the animal in the image. It perhaps sounds a little cliché, but it is true. In this image of a squirrel, you can see that eye contact, along with a catchlight in the eye, really makes the photo pop.

    When doing tight compositions like this, be careful not to chop limbs off half way down their length. It’s all or nothing, I always say!

    #4 – Family Ties

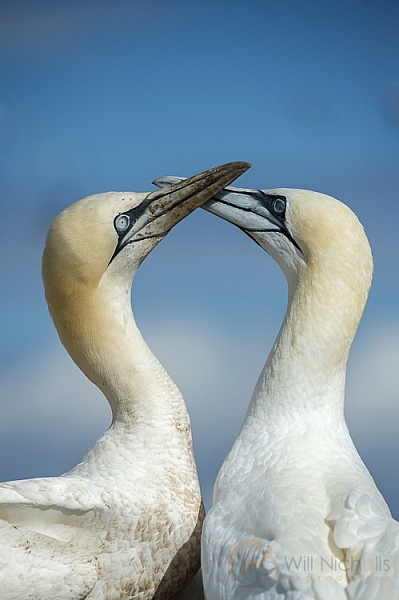
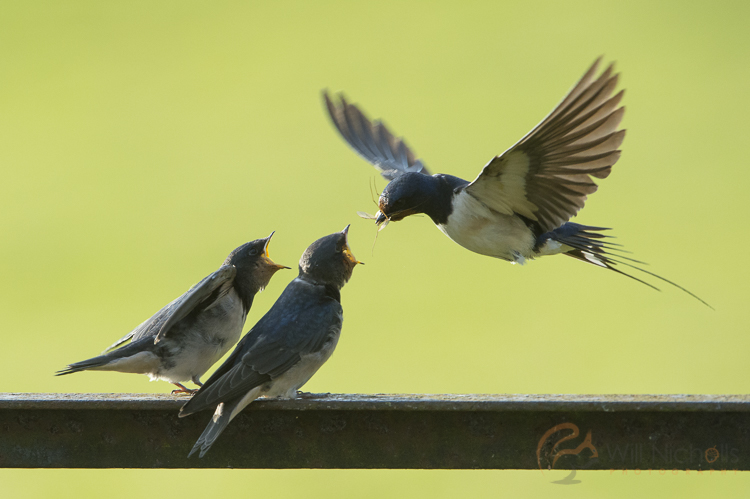
    If there’s anything humans can relate to with animals, it’s the bond between parents and offspring. Not all animals care for their young, of course, but those that do can be seen to care and work endlessly to raise their young. Take these two gannets – a male and a female – courting to reaffirm their bond each time the other returns to the nest from gathering fish.

    gannet

    Northern gannets (Morris bassanus).

    If you can capture the parents feeding their young, even better. It doesn’t have to be a feeding behaviour though, and in particular playful shots between a family will give your shots the aww factor. Obviously, you have to be in the right place at the right time, and these particular kinds of shots require a lot of dedication and time to achieve, due to their rare nature.

    barn swallow

    Barn swallows feeding fledglings in British countryside.

    #5 Try Something Different

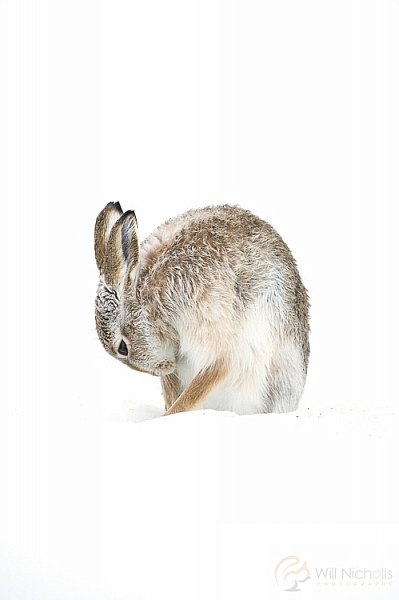
    Experimenting is something you’ve probably been told to do again and again – but it works. I am a particular fan of the high-key style of photography for wildlife, isolating the subject against the background by blowing out the highlights in an image. This mountain hare was grooming its fur, but as it bowed its head it looked rather solemn. The white background makes it almost look like a painting, and personally I think this is a rather intimate portrait.

    Mountain Hare

    Be prepared to step outside your comfort zone. That is where the photos are, that set you apart from the endless bird on a stick shots we see day to day. At first it’ll probably all go wrong, but that’s okay! You know all those rules you’ve been told? Rule of thirds, golden triangle, etc., break them, and see what happens.

    #6 – Light

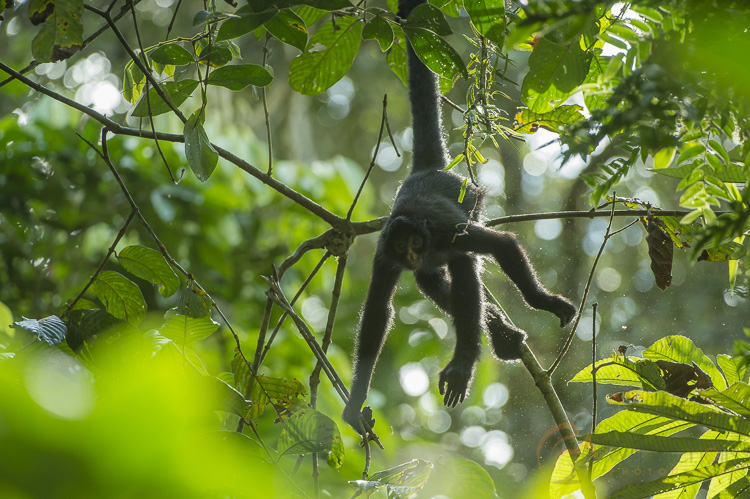
    Ooh, it’s that scary unknown again. Light. It’s a maker or breaker for photography, and that doesn’t change when you step into nature photography either. Backlighting is particularly effective for conveying mystery and magic in an image. I used this to my advantage when photographing Peruvian spider monkeys – a primate that is unfortunately on the endangered list. Even so, the backlighting breaking through the rainforest canopy makes this image appear magical.

    A backlit Peruvian spider monkey in the Amazon Rainforest in Manu, Peru.

    A backlit Peruvian spider monkey in the Amazon Rainforest in Manu, Peru.

    If you see interesting light like this, then be careful about your exposure. It’s important not to blow the highlights rim-lighting the animal, while at the same time keeping the individual exposed properly too. But when it works, it really works.

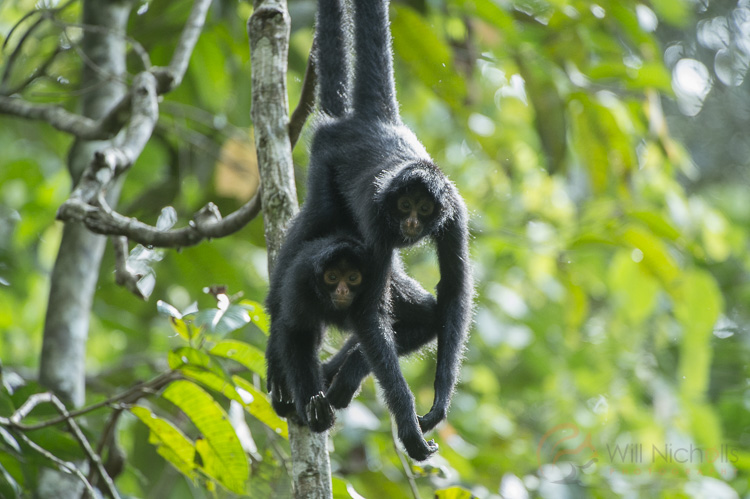
    I feel that to end an article about character and personality, it is only right to use primates as an example. We can really relate to them, more than any other animal, due to our close relations. They’re curious, intelligent, and a clear example of an animal capable of emotions.

    A male and female black-faced spider monkey stick together in the Peruvian Amazon Rainforest. These two individuals are displaying courting behaviour.

    A male and female black-faced spider monkey stick together in the Peruvian Amazon Rainforest. These two individuals are displaying courting behaviour.

    So keep clicking the shutter each time something of interest happens. Don’t wait and savour space on your memory card, because you might just miss something amazing.

    This week we are doing a series of articles to help you do better nature photography. See previous articles here:

    • 3 Habits Every Outdoor Photographer Should Develop to Avoid Missing Shots
    • 5 Tips for Better Nature Photography
    • 27 Serene Images of the Natural World
    • Weekly Photography Challenge – Nature
    • 10 Ideas for Photographing Nature in your Backyard

    googletag.cmd.push(function() {
    tablet_slots.push( googletag.defineSlot( “/1005424/_dPSv4_tab-all-article-bottom_(300×250)”, [300, 250], “pb-ad-78623” ).addService( googletag.pubads() ) ); } );

    googletag.cmd.push(function() {
    mobile_slots.push( googletag.defineSlot( “/1005424/_dPSv4_mob-all-article-bottom_(300×250)”, [300, 250], “pb-ad-78158” ).addService( googletag.pubads() ) ); } );

    The post 6 Tips for Capturing Character and Personality in Wildlife Photography by Will Nicholls appeared first on Digital Photography School.


    Digital Photography School

  • Side by Side Comparison: The Sony a6300 Versus Fujifilm X-Pro2

    The Sony a6300 and Fujifilm X-Pro2 are two mirrorless cameras that debuted very recently as updated versions of their popular and beloved predecessors. Both cameras are comparable in technical specs and appeal, but how does each fare when compared side-by-side? Find out below!
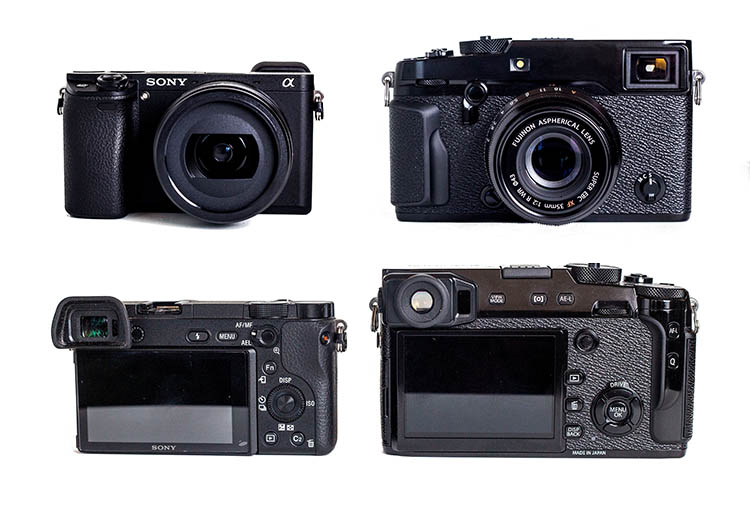
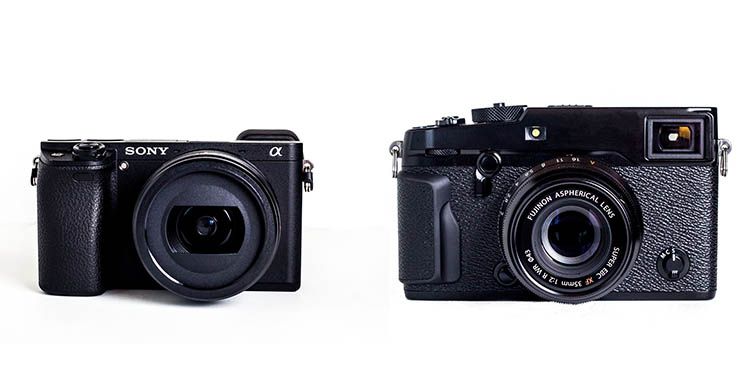
    Fujifilm X-Pro2 versus Sony a6300 6

    Technical Specs: Main Similarities

    Camera Sensors and Format

    Both the a6300 and X-Pro2 are APC-C crop sensor bodies with a 1.5x crop factor. Each has a CMOS sensor with 24-megapixel resolution and is capable of shooting in both JPG and RAW on SD memory cards.

    Solid, Weather-Resistant Body

    Perhaps the biggest cosmetic upgrade that Sony made to the a63000 was including a tougher, more weather-resistant body. Like the X-Pro2, the a6300 is composed of magnesium alloy promises to be dust and moisture resistant.

    Fujifilm X-Pro2 versus Sony a6300 6

    In-Camera Wi-Fi

    Like most modern digital cameras, both the X-Pro2 and a6300 have built-in Wi-Fi, making it a snap to transfer photos from your camera to your mobile phone, or shoot remotely via a mobile app.

    Technical Specs: Main Differences

    Price

    The a6300 can be purchased body-only for $ 998.00, while the X-Pro2 is quite a bit more expensive at $ 1,699.00. Accompanying Fujifilm lenses also tend to be pricier than Sony equivalents.

    Size and Weight

    The X-Pro2 is quite a bit bulkier and heavier, weighing in at 15.70 ounces (445 g) body-only compared to the a6300’s 14.25 ounces (404 g). In terms of dimensions, the X-Pro2 is also slightly bigger with dimensions of 5.5 x 3.3 x 1.8″ (141 x 83 x 56 mm), compared to the a6300’s dimensions of 4.7 x 2.6 x 1.9″ (120 x 67 x 49 mm). Accompanying Fujifilm lenses are also heavier and larger than Sony equivalents.

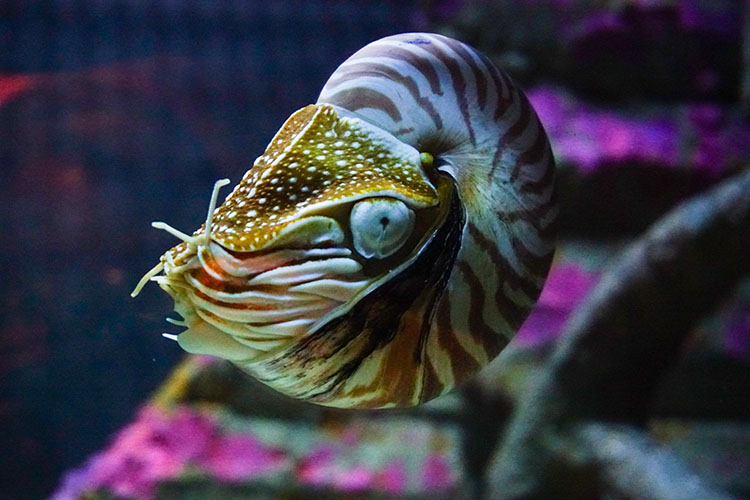
    Sony a6300

    Sony a6300

    Fuji X-Pro2

    Fuji X-Pro2

    Both shot with the same settings. Images are straight from the camera, unedited.

    Video

    The a6300 can record 4K video, while the X-Pro2 can only record video at 1080p. Interestingly, the Fujifilm offers two SD-card slots compared to the Sony’s single SD-card slot. You’d think Sony would squeeze in another slot to accommodate their higher-quality video formats.

    Viewfinders

    Among the unique features of Fujifilm’s digital cameras is their signature hybrid viewfinder which really shines on the X-Pro2. For those unfamiliar, the hybrid viewfinder offers the ability to switch between optical (rangefinder style) and electronic viewfinders , which can be a huge advantage for photographers who dislike shooting with electronic viewfinders only, which is what you get with the a6300.

    Focus Tracking

    Besides the inclusion of 4K video, the main selling point of the a6300 was its brand new sensor, and what Sony claims is the world’s fastest autofocus (dubbed “4D focus”) with 425 phase detection autofocus points. Combined with the Sony’s ability to shoot at up to 11 frames per second and accurate lock-on AF, the a6300 is a beast for shooting sports and action photography.

    Comparatively, the X-Pro2 sports a total of 273 AF points including 169 embedded phase-detect AF points, plus a maximum burst rate of 8 frames per second.

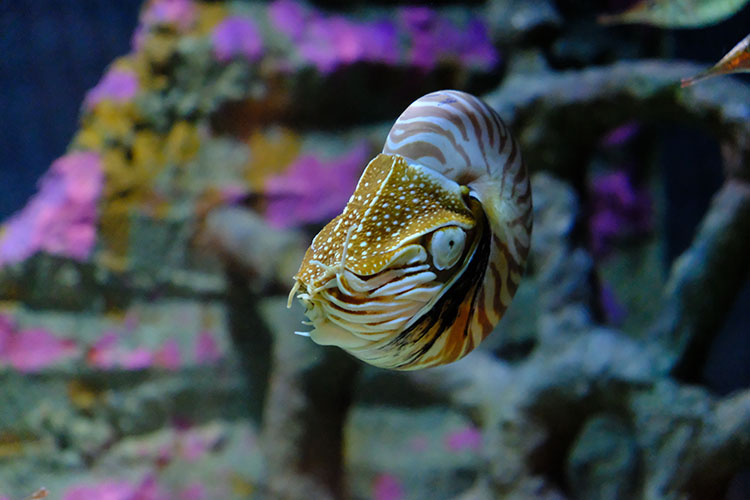
    Sony a6300

    Sony a6300

    Fuji X-Pro2

    Fuji X-Pro2

    Display Screen

    While both cameras have a 3-inch rear LCD screen, the a6300 has a pop-out tilting screen, while the Fujifilm’s screen is melded to the camera body.

    Built-in Flash

    The a6300 offers a small pop-up flash that can be angled to bounce off the ceiling, in addition to a hot-shoe mount, while the X-Pro2 does not have a built-in flash (only a hot-shoe mount).

    In Practice

    Given the technical similarities and differences above, how did it actually feel to handle both cameras? The Fujfilm’s weight and size were definite factors, especially while switching between the smaller, lighter-weight Sony. With that being said, one could definitely argue that Fujifilm’s heavier, more solid camera and lenses felt like a higher-quality investment compared to some of Sony’s lightweight, plastic-based lenses.

    Sony’s newly engineered 4D focus tracking was incredibly spot-on and accurate, especially compared to the Fuji. However, unless you’re shooting a ton of action scenes, Sony’s ultra-fast autofocus is a luxury that isn’t a make or break feature. One feature on the Sony that did come in handy was the flexible pop-up flash that would have been nice to have on the Fuji.

    Fujifilm X-Pro2 versus Sony a6300 6

    Sony a6300 photo on the left; Fujifilm X-Pro2 photo on the right. Both shot with the same settings. Images are straight from the camera, unedited.

    The X-Pro2 has a clear vintage, rangefinder look and feel to it, which some photographers may prefer. Personally, I preferred the feel and overall button placement of the Sony, and was ultimately able to customize buttons and settings to operate it similarly to my Canon 5D Mark III.

    On both cameras, the built-in Wi-Fi was a little tricky to set up, but from then on was incredibly intuitive and easy to wirelessly transfer images straight from the cameras to cell phones.

    Sony a6300

    Sony a6300

    Fuji X-Pro2

    Fuji X-Pro2

    One last consideration – lens availability

    Since both the a6300 and X-Pro2 are interchangeable lens cameras, compatible lens selection is another crucial difference between the two brands. Fujifilm lenses, while more solid and often more expensive, are contained to primes with a rather limited selection of zoom lenses, most of which have variable maximum apertures. In comparison, Sony offers a slightly more varied selection of lenses from primes and wides to mid-range and telephoto zooms.

    Which is better for you?

    Both the X-Pro2 and a6300 are feature-packed, brand new cameras that will appeal to different types of photographers.

    Go Sony: If you value wicked fast autofocus, enhanced video recording capabilities, and/or are on a bit of a budget, the Sony a6300 is probably best for you.

    Go Fuji: If you love the look and feel of a rangefinder camera, value Fuji’s unique hybrid viewfinder, and/or have a larger budget, the X-Pro2 will be your new favorite camera.

    Sony a6300

    Sony a6300

    Fuji X-Pro2

    Fuji X-Pro2

    Have you tried either or both of these cameras? What are your thoughts?

    googletag.cmd.push(function() {
    tablet_slots.push( googletag.defineSlot( “/1005424/_dPSv4_tab-all-article-bottom_(300×250)”, [300, 250], “pb-ad-78623” ).addService( googletag.pubads() ) ); } );

    googletag.cmd.push(function() {
    mobile_slots.push( googletag.defineSlot( “/1005424/_dPSv4_mob-all-article-bottom_(300×250)”, [300, 250], “pb-ad-78158” ).addService( googletag.pubads() ) ); } );

    The post Side by Side Comparison: The Sony a6300 Versus Fujifilm X-Pro2 by Suzi Pratt appeared first on Digital Photography School.


    Digital Photography School