Category: Photography

  • 10 Ideas for Photographing Nature in your Backyard

    Have you noticed how many photographers are fascinated with the natural world? Even if we specialise in another genre, few of us can resist a gorgeous flower, or a branch of autumn leaves.

    One of the best things about photographing nature is that it is so accessible. You needn’t travel far to find it, because it’s all around you. You may take it for granted because you see it every day, but your own backyard is treasure trove. Every hour of every day and every season, bring something new.
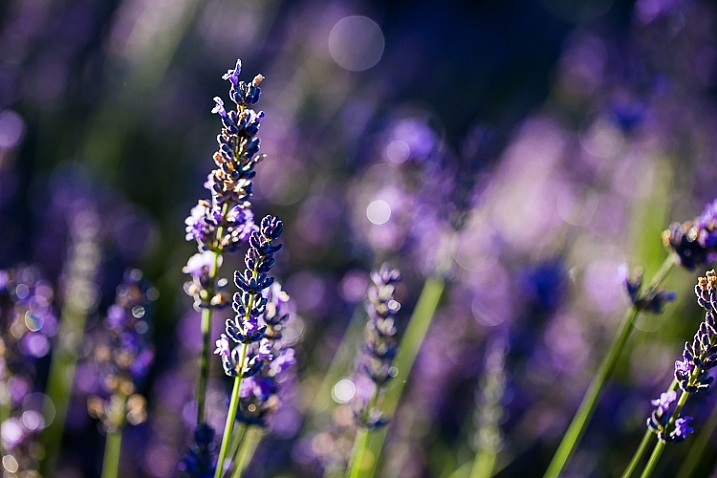
    image showing photographing nature in your backyard

    Summer lavender: ISO 100, f/3.5, 1/200th

    Backyard needn’t be taken literally here. If you don’t have a backyard, you’ll find plenty of nature to photograph just by wandering the streets or public parks and gardens.

    Tech details: All of the photographs in this article were shot on my Canon 5D Mark III. Unless otherwise stated, I have used my Canon macro 100mm f/2.8 lens. I have included details of ISO, aperture and shutter speed settings.

    #1 – Flowers and leaves

    Flowers and leaves are often the first things that come to mind when we look for subjects in our own backyards. They offer an endless variety of colours, shapes and textures for you to photograph. You could create a collection based on a single colour scheme, or try to find as many different leaf or flower shapes as possible.
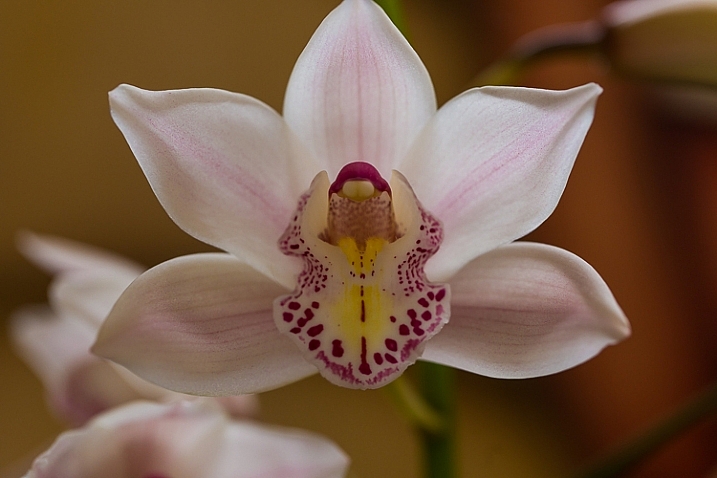
    iso 640, f4, 1/100 sec

    Cymbidium orchid: ISO 640, f/4, 1/100th
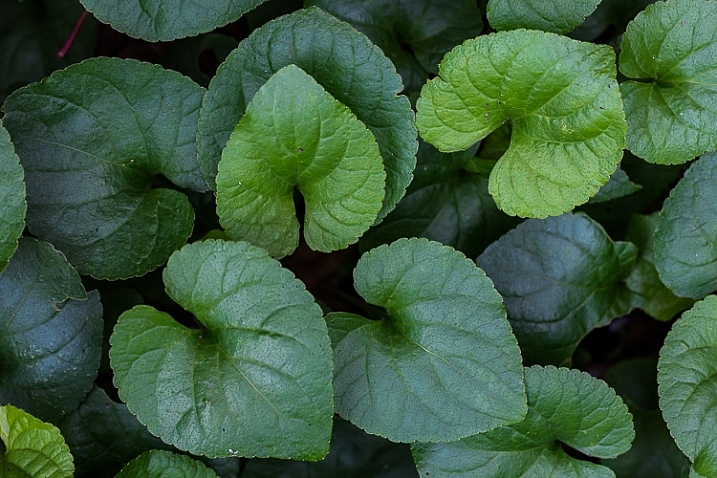
    image showing photographing nature in your backyard

    Violet leaves: ISO 800, f/8, 1/30th

    image showing photographing nature in your backyard

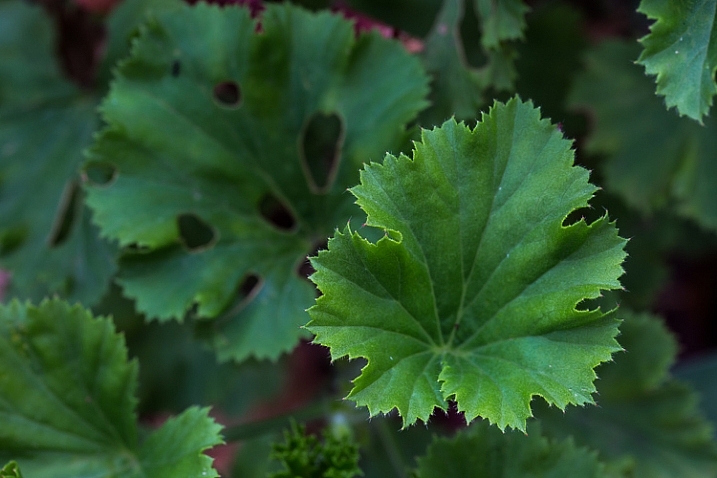
    Geranium leaves: ISO 320, f/8, 1/40th

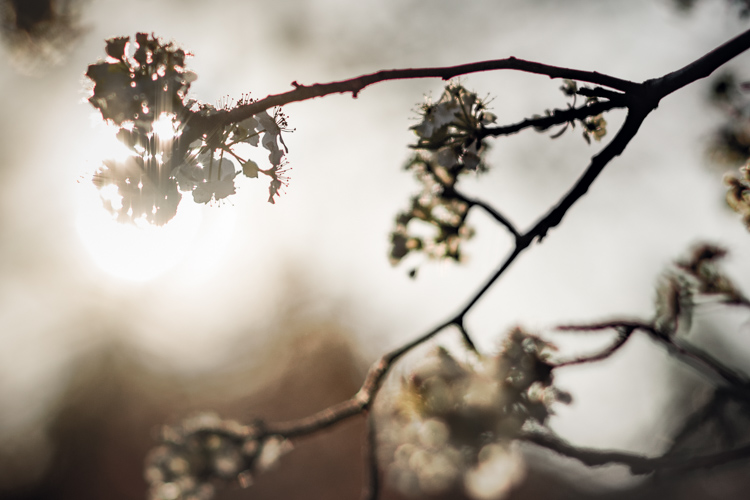
    Experiment with different lighting and conditions. I love backlighting for leaves and flowers, as it creates a luminous, almost three-dimensional effect, and you can see details such as veins. Some shapes look better with strong, directional light, and I love how colours are enhanced in the wet.
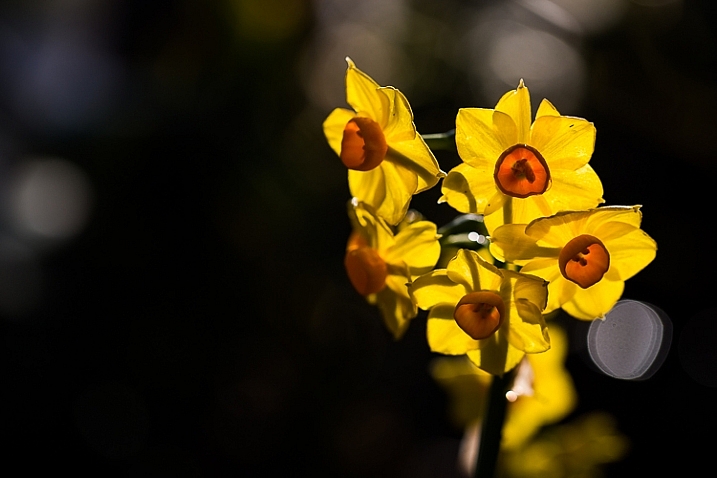
    image showing photographing nature in your backyard

    Erlicheer daffodils BACKLIT: ISO 100, f/4, 1/640th
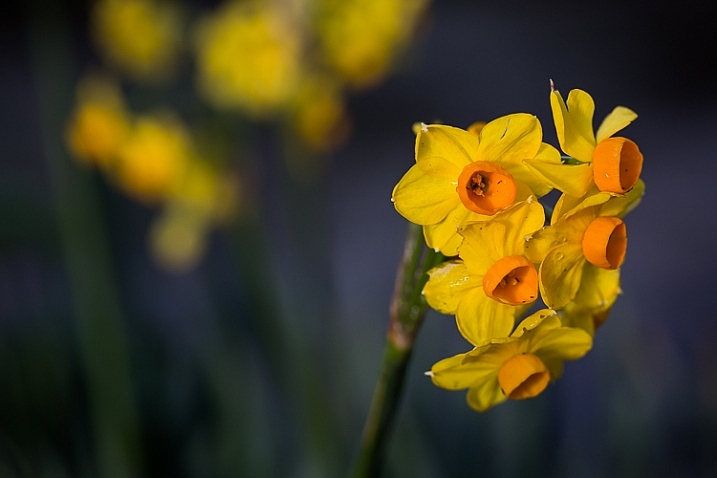
    image showing photographing nature in your backyard

    The same flower shot with the sun on my back: ISO 100, f/4, 1/800th
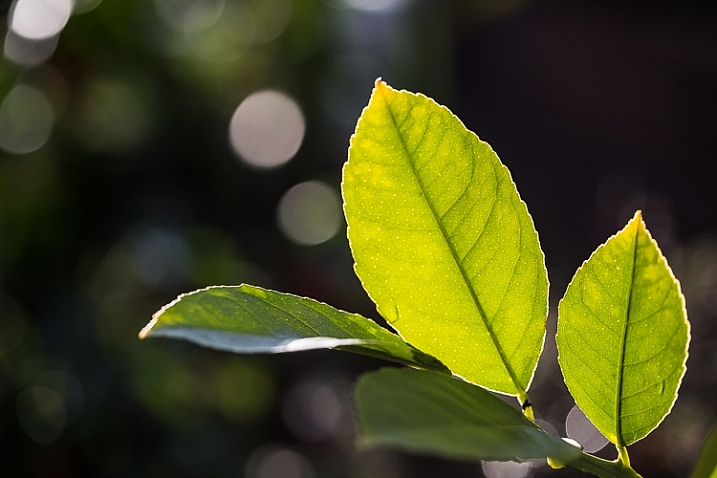
    image showing photographing nature in your backyard

    Backlighting a leaf reveals details you wouldn’t see if you lit it directly : ISO 100 f/4, 1/250th

    Flowers are seasonal, and in temperate zones, spring and summer offer the widest variety. There are still flowers to be found in winter, although you may need to look harder. Don’t forget that weeds, such as dandelions ,are also beautiful! Autumn (fall) provides the greatest colour spectrum in leaves.
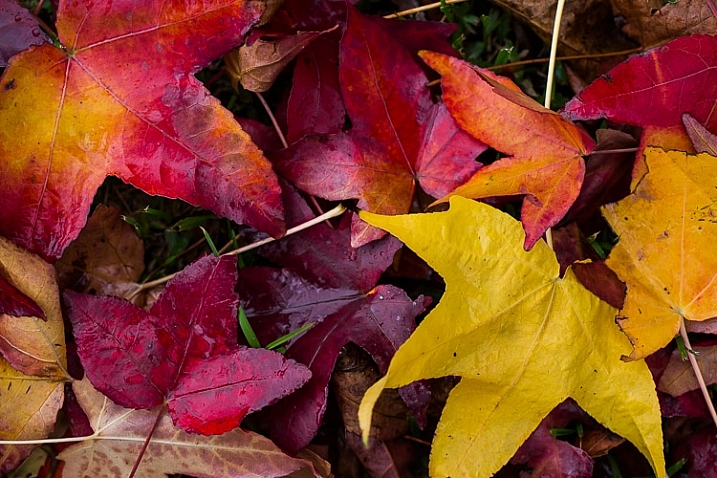
    image showing photographing nature in your backyard

    Liquidamber leaves photographed en masse: ISO 640, f/4, 1/80th
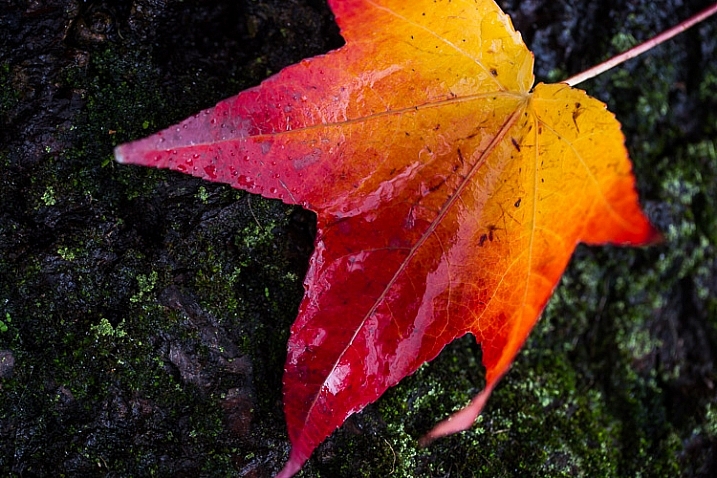
    image showing photographing nature in your backyard

    A single leaf isolated against a dark background: ISO 640, f/4, 1/30sec

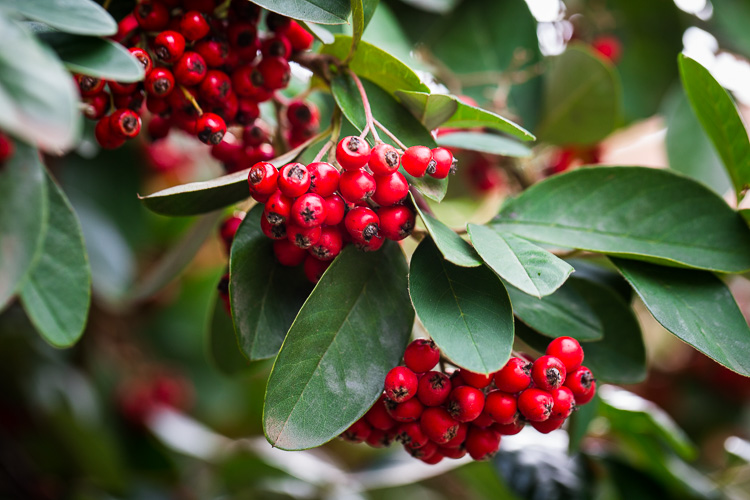
    #2 – Fruit, berries and seed pods

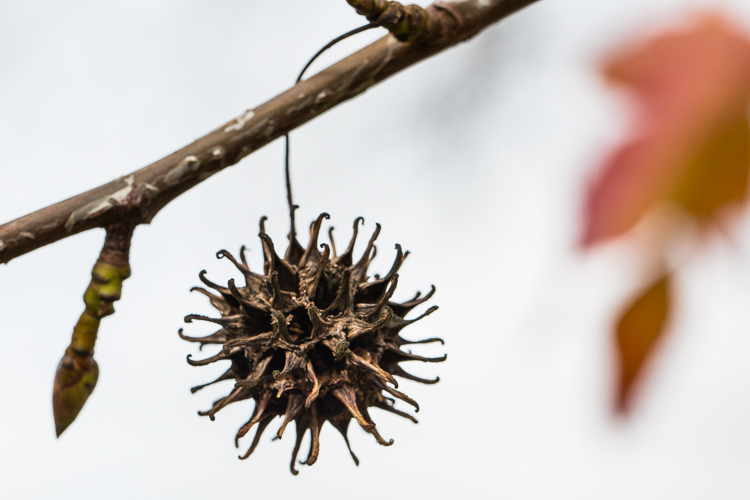
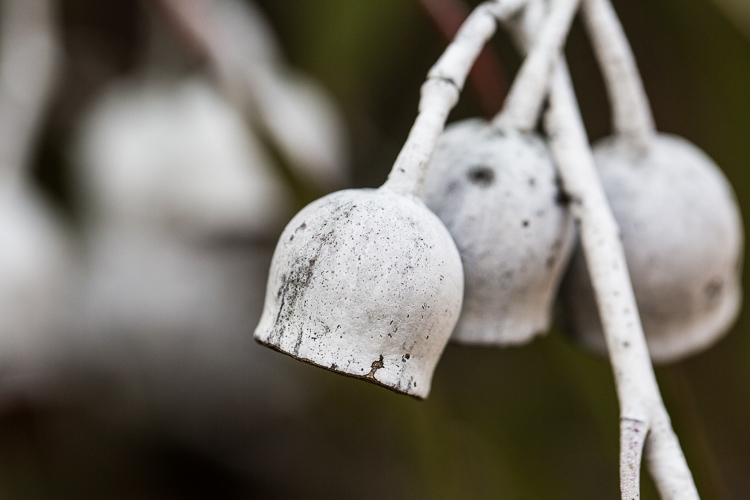
    When the summer flowers disappear, fruits and berries are nature’s way of providing for birds and animals throughout the colder months. Many berries and seed pods ripen towards the end of autumn, bringing colour to the winter garden. Citrus trees bear fruit in winter, and persimmon trees lose their leaves to reveal branches of shiny orange fruits. Think also of acorns, pine cones, and nuts.
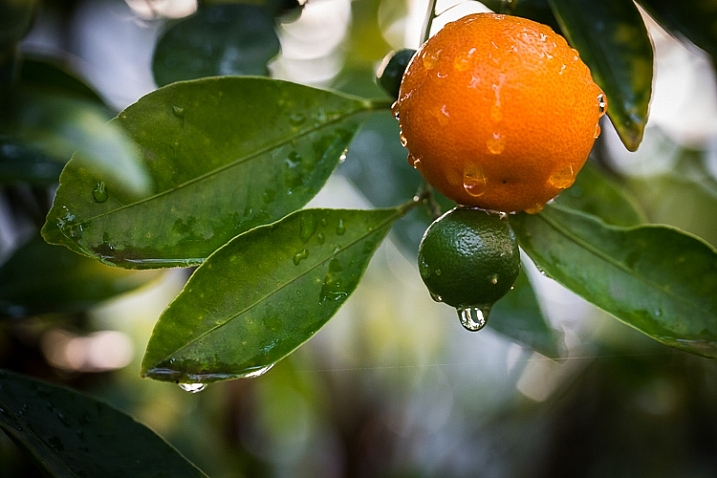
    image showing photographing nature in your backyard

    Kumquat: ISO 2500, f/4.5, 1/50 sec

    photgraphing nature in your backyard

    ISO 800, f/8.0, 1/500th.

    photgraphing nature in your backyard-4

    ISO 500, f/5.0, 1/1250th.

    photgraphing nature in your backyard-3

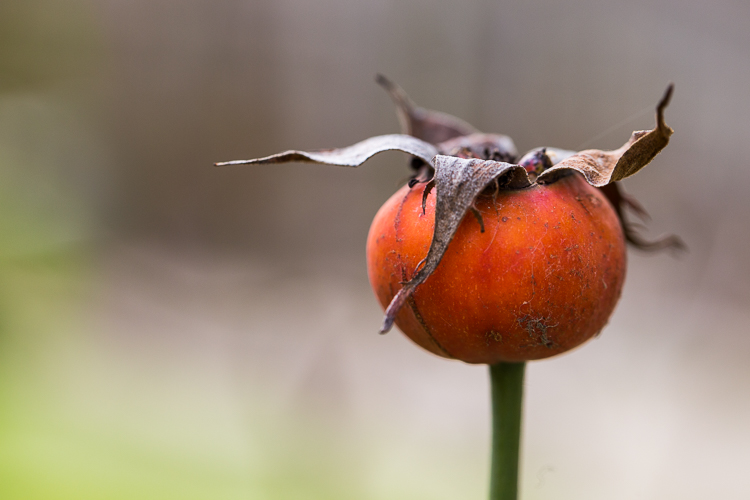
    Orange rosehip: ISO 500, f/5.0, 1/160th
    photgraphing nature in your backyard-2

    Bunches of red berries: ISO 500, f/5.0, 1/100th.

    #3 – After the rain

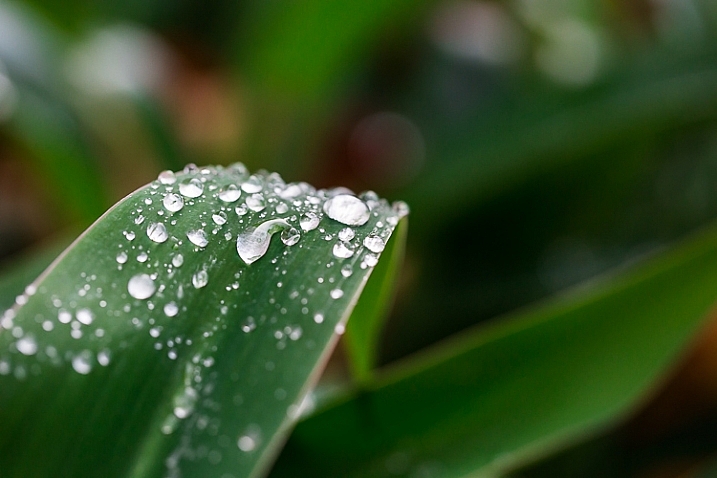
    Raindrops are fascinating through the lens. Try photographing them from various angles, and in different lighting. When photographing a single droplet, or a string of them, isolate them by keeping the background uncluttered. You can do this by creating distance between the droplets and the background, and using a wide aperture to ensure it is blurred. Notice also how water sits in nice round droplets on some types of leaves, but on others it disperses.
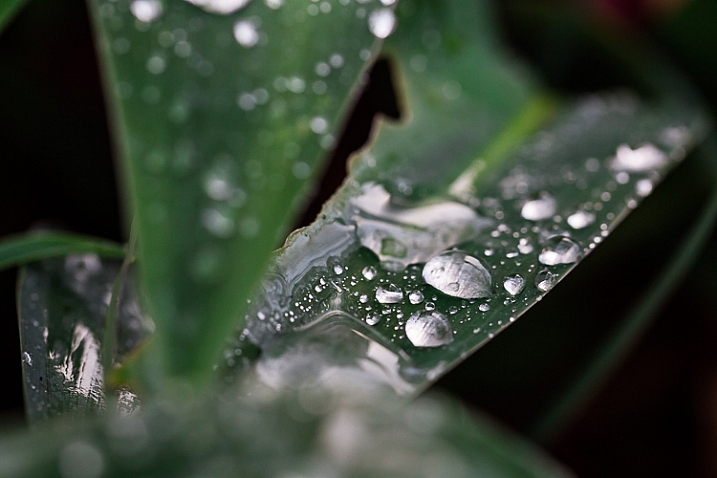
    image showing photographing nature in your backyard

    Arthrododium leaves after rain: ISO 800, f/4.5, 1/80 sec
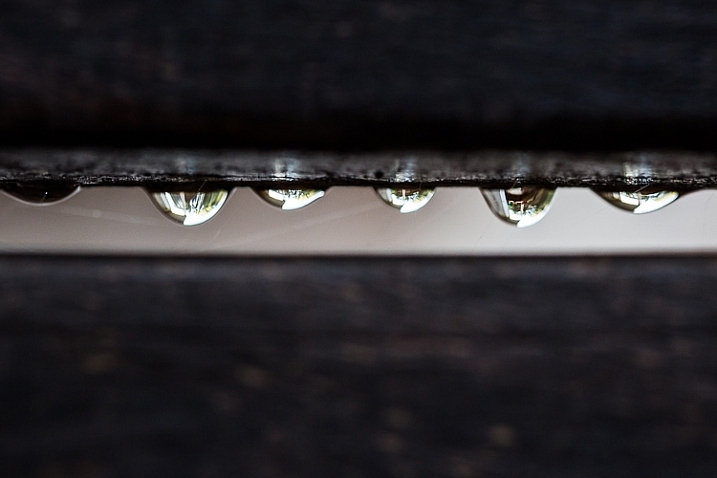
    image showing photographing nature in your backyard

    Raindrops hang from the slats on the back of a garden chair: ISO 1000, f/4, 1/125 sec
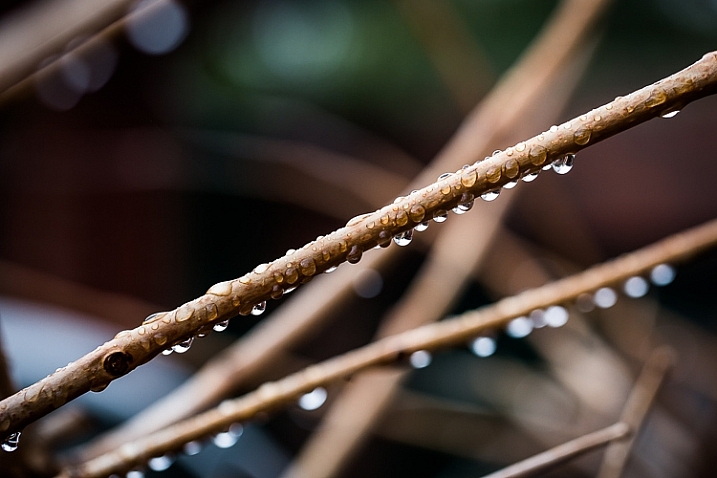
    image showing photographing nature in your backyard

    ISO 640, f/4, 1/125 sec

    image showing photographing nature in your backyard

    ISO 1000, f/4, 1/125 sec

    #4 – Mushrooms, toadstools and fungi

    These are abundant in autumn and winter, but some species pop up throughout the year after rain. Look in damp, mossy places, on the sides of trees and log piles for them.

    My personal favourites are the red toadstools with white speckles. They are evocative of fairy tales and magic, and their colours are a nature photographer’s dream!
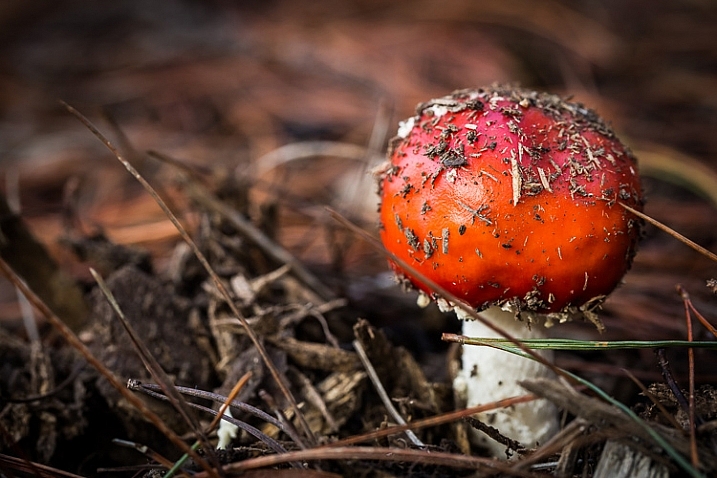
    image showing photographing nature in your backyard

    Toadstool: ISO 1000, f/6.3, 1/250 sec
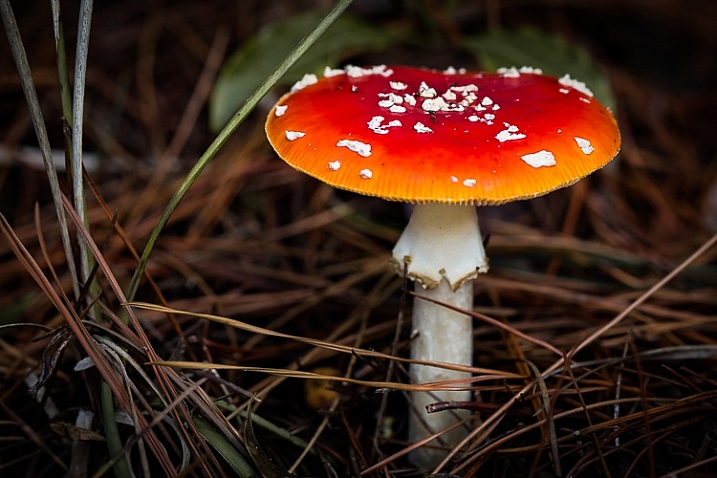
    image showing photographing nature in your backyard

    ISO 1000, f/6.3, 1/160 sec

    Don’t ignore the tiny, dull-coloured mushrooms and fungi. The ones in the photo below were growing in a crevice in the side of my herb garden. You can see by the scale of the woodgrain how tiny they were. From above, they were nondescript, but when I lay on the ground beneath them and shot into the backlight, they became translucent and I could see their delicate structure.
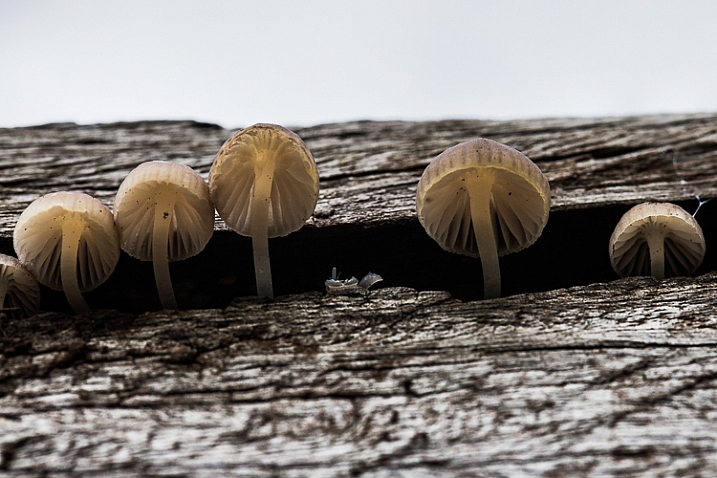
    image showing photographing nature in your backyard

    These tiny mushrooms were no bigger than the fingernail on my pinky finger! ISO 800, f/8, 1/160 sec

    #5 – Look up . . . look down

    We have a ginormous tree in our backyard. It was probably planted when our house was first built in the 1920s, and its canopy is as big as the footprint of the house. One of my favourite things to do in the warmer months is to put a picnic rug on the lawn, and lie on my back gazing up into its branches. It is free therapy!

    Watching the leaves change from bright spring green through to darker green in summer, the first blush of colour in autumn, through to rich claret just before they drop, never ceases to delight me. I have photographed it time and time again through the seasons. Even lying on the ground with my 35mm lens, I can only capture a small portion of the canopy.
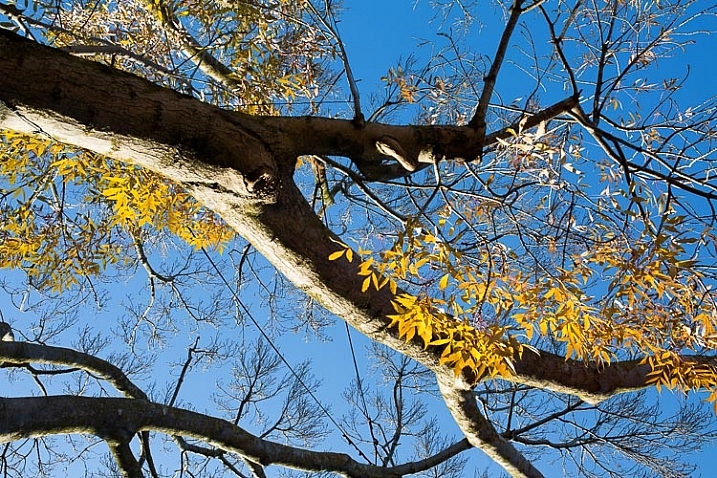
    image showing photographing nature in your backyard

    Sigma 35mm Art lens, ISO 160 f/11, 1/60 sec
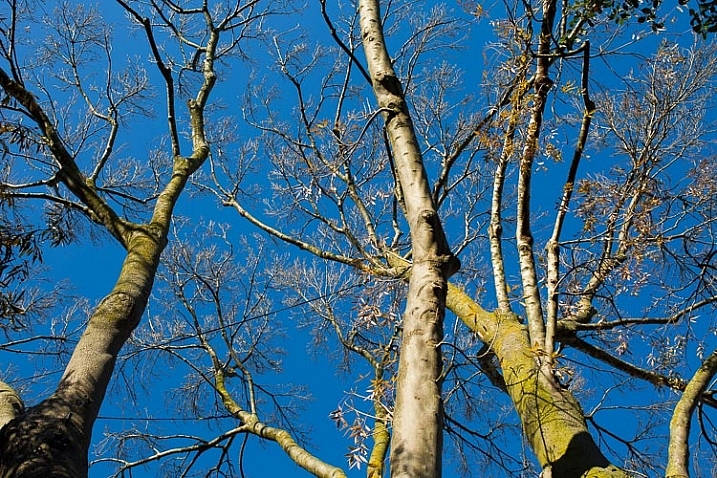
    image showing photographing nature in your backyard

    Sigma Art lens 35mm, ISO 160, f/11, 1/100 sec

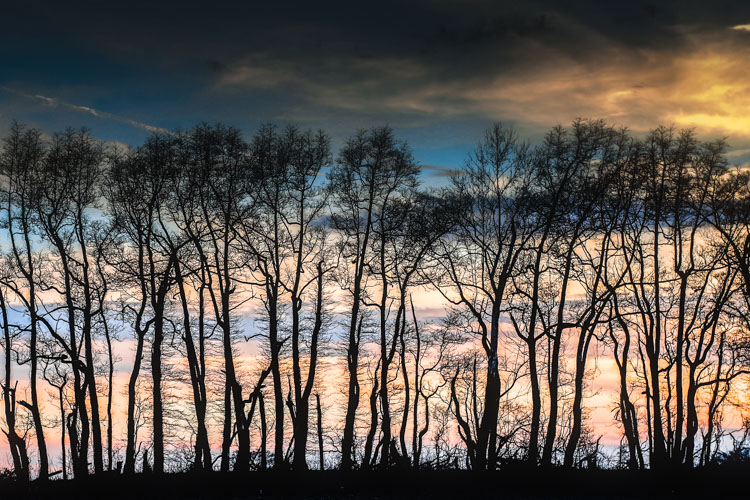
    If you are lucky enough to have trees in your garden, try standing or lying directly underneath them and shooting up into the branches. Notice how the light changes from early morning, throughout the day into late afternoon and evening. Branches, whether they are naked or covered with leaves, contrast beautifully against a blue sky. They are equally stunning at sunrise and sunset, and on a moonlit night.
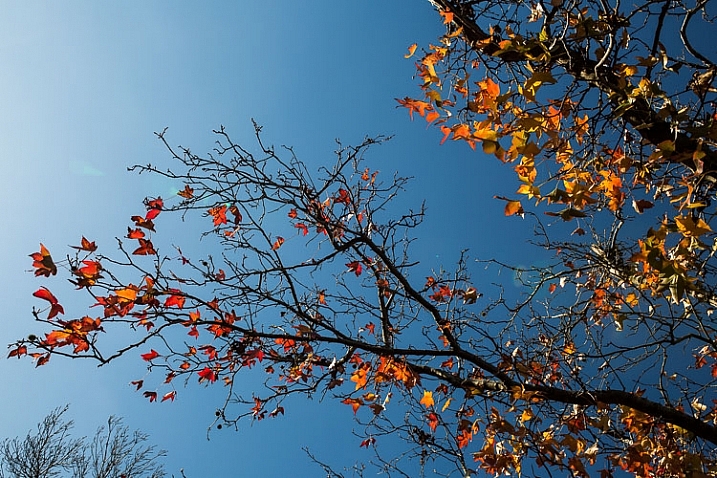
    image showing photographing nature in your backyard

    Sigma Art lens 35mm: ISO 200, f/11, 1/200

    If you haven’t any trees, look for interesting cloud formations to photograph. You can create a collection of skies to use as Photoshop overlays, to add interest to other outdoor photos such as portraits. Look for vertical cloud formations, fat white fluffy ones, and those lovely soft colours around the edge of the clouds at dusk and dawn.

    Down on the ground are a million microcosms in the moss, the lawn, between the paving stones, and the fallen bark and leaves. You won’t see them until you get down to ground level, so lie flat on your tummy and peer into another world.
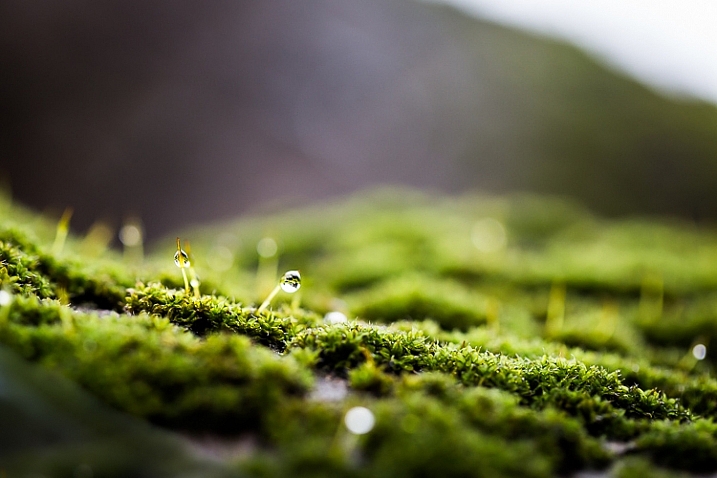
    image showing photographing nature in your backyard

    Macro world: the moss on a tree trunk. ISO 640, f/4, 1/40 sec

    #6 – Black and white beauty

    We tend to think of colour photography when we think of nature, but don’t dismiss the idea of black and white. Nature provides sculptural shapes and contrasting textures that make great black and white subjects. If you have succulents or cacti in your garden, they are often more interesting in black and white than they are in colour (except on those rare occasions when they flower). Ditto with white flowers against a dark background. Smooth pebbles, rough bark, snail shells, acorns and pine cones all look fabulous in black and white. Try strong, directional lighting, and a high contrast edit.
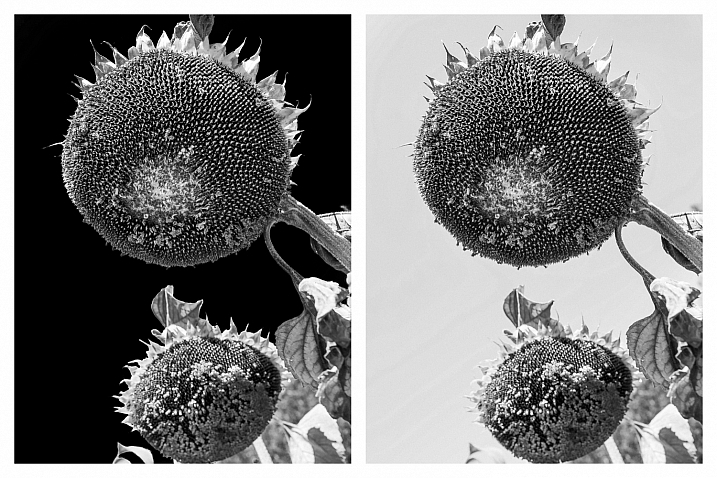
    image showing photographing nature in your backyard

    When I converted this file to B&W in Lightroom, I played with the sliders in the HSL panel. The photo on the left has the blue slider pulled all the way down to -100 to darken the blue sky. On the right, the blue slider is set to zero.
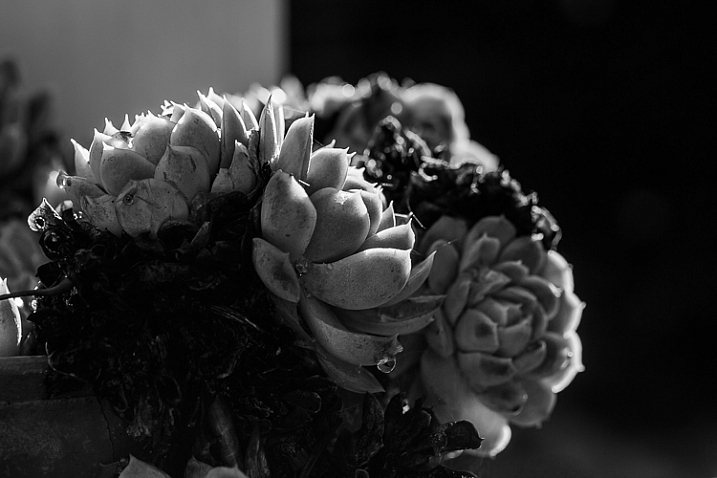
    image showing photographing nature in your backyard

    ISO 100, f/8, 1/100th. Converted to B&W in Lightroom.

    #7 – Experiment with sun flare and haze

    Your backyard is one of the best places to experiment with effects and new techniques. Firstly, you become familiar with how things look at various times of the day, and throughout the seasons. Secondly, you don’t need to travel far, so you can respond to anything on a whim. If you spot something amazing while you’re sipping on your morning coffee, you needn’t even get out of your pyjamas to capture it!

    The subjects in the two photographs below are both visible from my desk. Every morning last summer, I noticed how this shaft of hazy sunlight would hit the planting of succulents on the pedestal, so I knew exactly what time to capture it at its best. Also sitting at my desk, I saw how the sun caught this spray of orchids just after the rain, and I rushed outside with my camera.
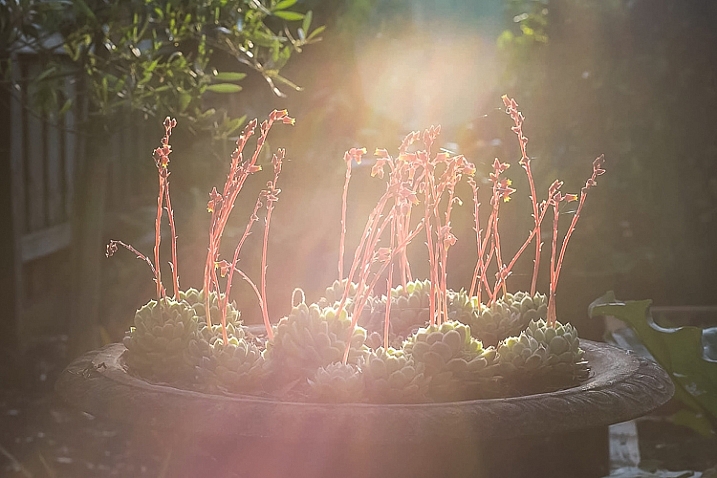
    image showing photographing nature in your backyard

    Canon 85mm lens, ISO 100, f/4, 1/800th.
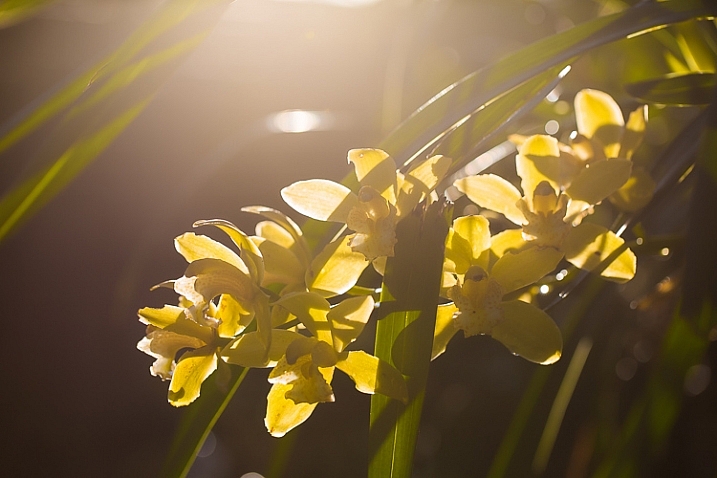
    image showing photographing nature in your backyard

    Shot with sun flare and no lens hood: ISO 100, f/4, 1/1000 sec
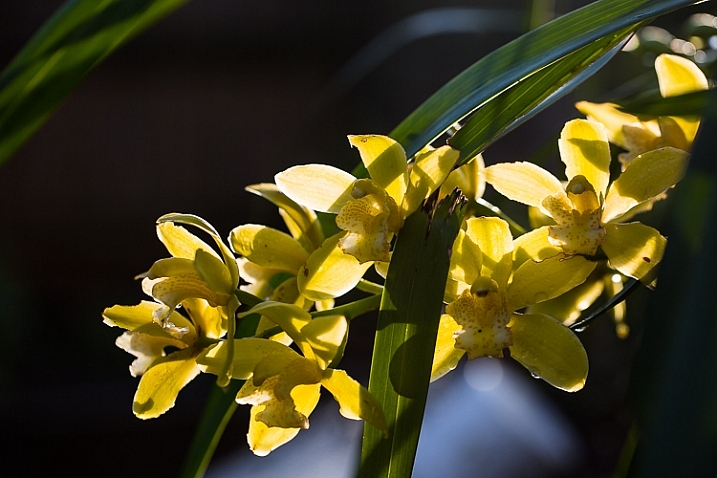
    image showing photographing nature in your backyard

    For comparison, this is the same scene shot with a lens hood to cut flare: ISO 100, f/4, 1/320sec

    #8 – Snails, bugs and spiders

    For nine months of the year, there are a million creepy-crawlies in my backyard. Butterflies, cicadas, crickets, praying mantis, caterpillars, moths, bees, wasps and spiders (I could happily do without the latter two). At the time of writing this article, it is winter in Melbourne, so most bugs are hiding or dormant.

    #9 – Birds and other wildlife

    I’m going to preface this paragraph with honesty. Confession #1: photographing wildlife of any kind requires more patience and a longer telephoto lens than I possess. Confession #2: I have the greatest admiration for those who do it. I have a Pinterest board just for animal photos (you’ll notice a clear bias towards squirrels) and on 500px I follow a number of photographers, one of whom only photographs squirrels!

    Editor’s note: our own Will Nichols specializes in photographing squirrels.

    The kinds of animals and birds you’re likely to find in your backyard obviously depends on which part of the world you live in, and how built-up your neighbourhood is. You will know which kinds of critters visit your backyard, and what their habits are. With that in mind, find a spot where you won’t be too conspicuous, and be prepared to wait. If you’re using a long lens, you might consider using a tripod or monopod to avoid camera shake. Have your ISO and aperture all set to go, with a fast shutter speed to freeze motion. If you have been watching the animal or bird’s behaviour over several days or weeks, it may be possible to focus roughly on the area you expect them to appear – for example, the birdbath.

    Also read: Guide to Attracting Critters to Your Garden for Backyard Wildlife Photography

    #10 – Portraits in nature

    Nature provides us with the perfect canvas for portraiture. Look for a bank of flowers, a bed of autumn leaves, or just a green hedge – the colours in nature never seem to clash.

    When photographing children and pets in particular, I almost always prefer an outdoor location over a studio. My eldest daughter usually runs a mile when she sees the camera, but the chance to roll around with the dog in these glorious leaves was clearly too much for her to resist.

    I love how the soft hues flatter her skin tone. If you are shooting outdoors with lots of colours, such as flowers or autumn leaves, take care with your subject’s outfit. These portraits might been too busy if my daughter had been wearing a patterned outfit.
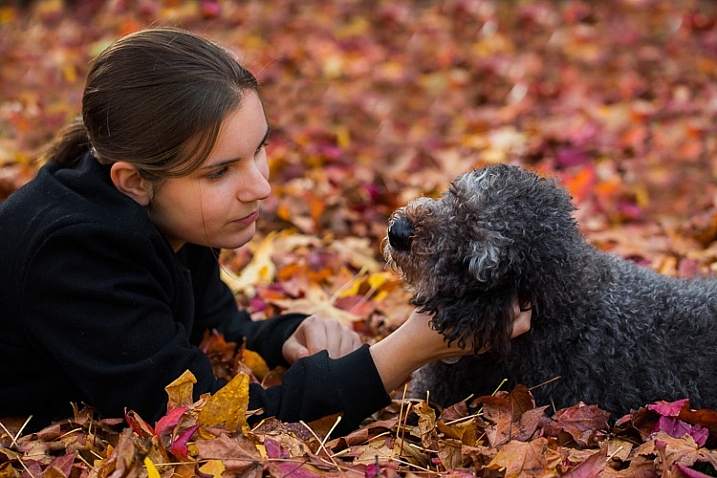
    image showing photograph nature in your backyard

    Not even teenage daughters can resist these leaves! ISO 320, f/4, 1/400 sec
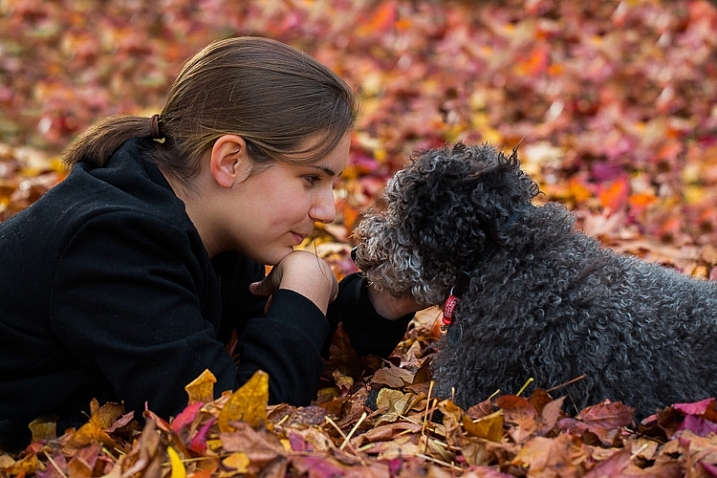
    image showing photographing nature in your backyard

    ISO 320, f/4, 1/320 sec

    Let’s hear from you!

    So there you have it – plenty of inspiration to get outdoors and photograph nature in your own backyard. It’s time to stop reading and get out there with your camera. Please share your backyard nature photographs in the comments below … especially if they involve squirrels!

    This week we are doing a series of articles to help you do better nature photography. See previous articles here:

    • 3 Habits Every Outdoor Photographer Should Develop to Avoid Missing Shots
    • 5 Tips for Better Nature Photography
    • 27 Serene Images of the Natural World
    • Weekly Photography Challenge – Nature

    googletag.cmd.push(function() {
    tablet_slots.push( googletag.defineSlot( “/1005424/_dPSv4_tab-all-article-bottom_(300×250)”, [300, 250], “pb-ad-78623” ).addService( googletag.pubads() ) ); } );

    googletag.cmd.push(function() {
    mobile_slots.push( googletag.defineSlot( “/1005424/_dPSv4_mob-all-article-bottom_(300×250)”, [300, 250], “pb-ad-78158” ).addService( googletag.pubads() ) ); } );

    The post 10 Ideas for Photographing Nature in your Backyard by Karen Quist appeared first on Digital Photography School.
    Digital Photography School

  • 15 Photographs from Ed Ruscha and the Great American West

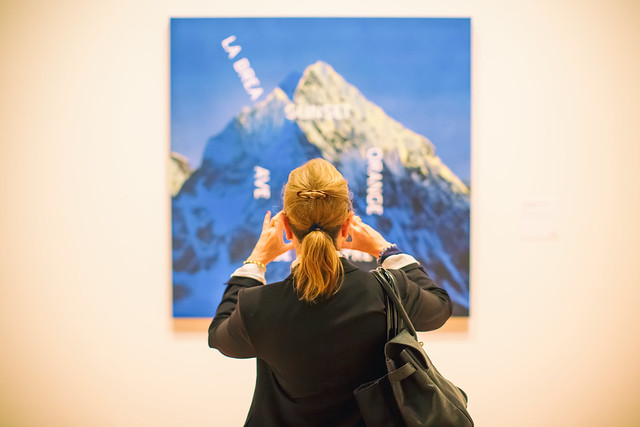
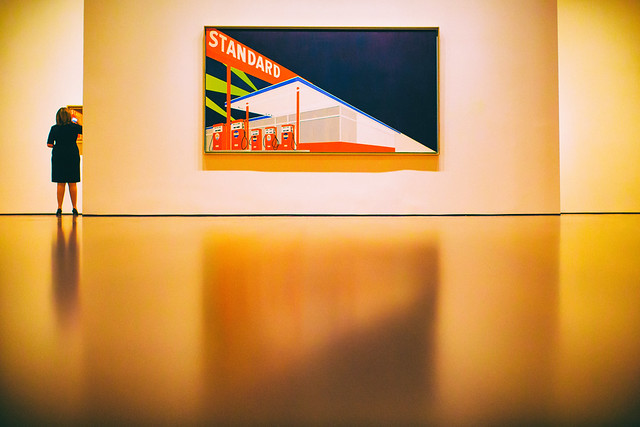
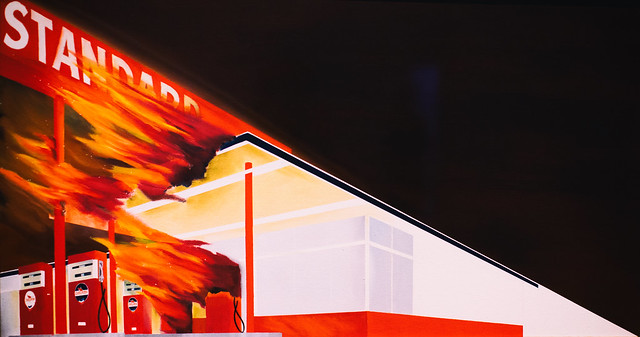
    I had a wonderful opportunity to attend the press preview on Thursday for the new exhibition “Ed Ruscha and the Great American West,” which opens today and runs through October 9th at the de Young Museum in San Francisco.

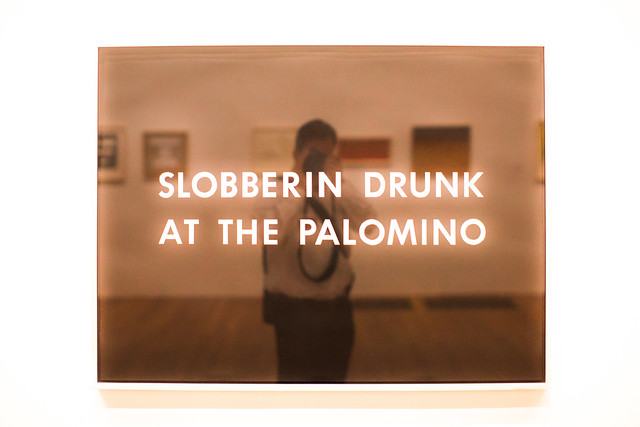
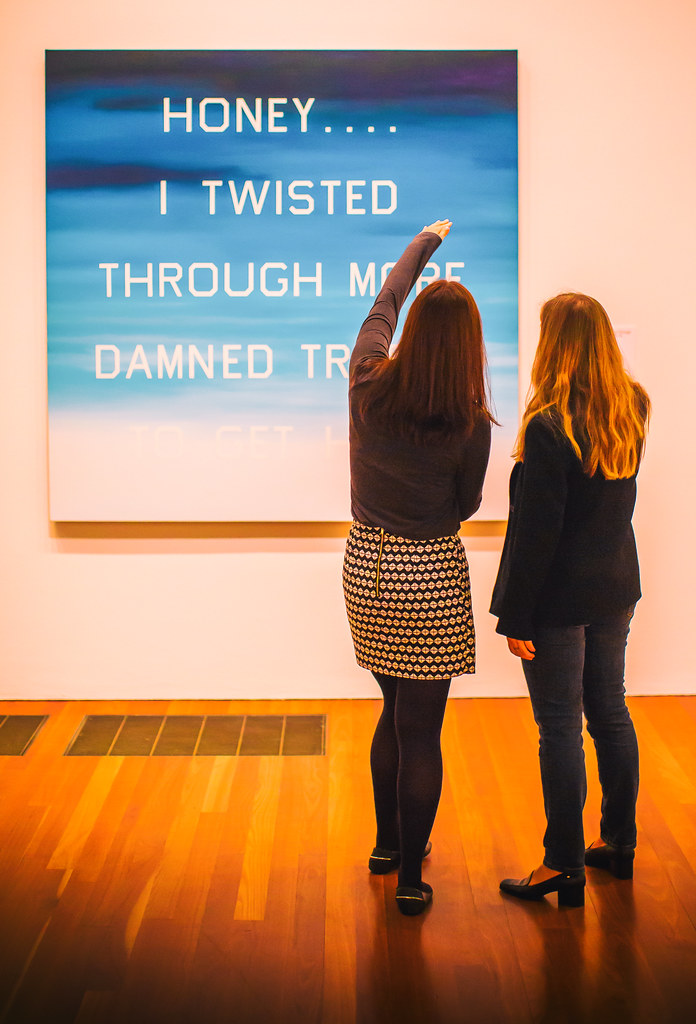
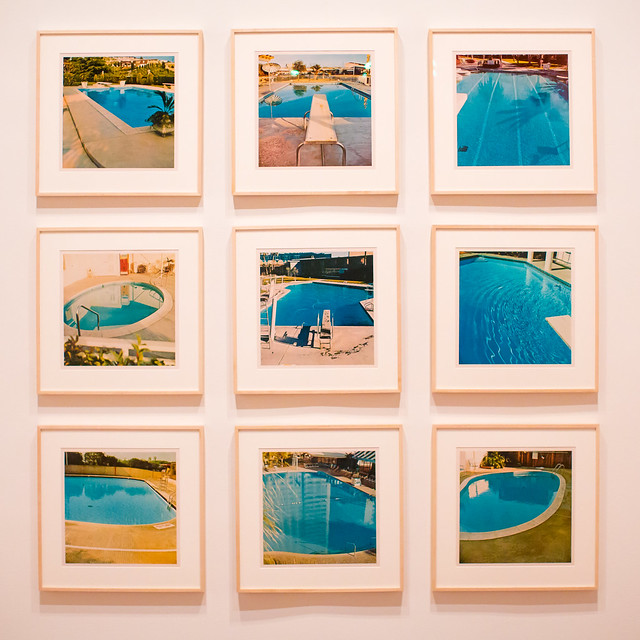
    Ed Ruscha has long been a hero of mine. With my own photography focusing on the American Road and my background growing up in Los Angeles, so much of Ruscha’s work has always rung true to me personally and I’ve felt a certain sort of affinity with it. Gas stations, neon signs, old swimming pools, and the images of a uniquely American experience, fill the current Ruscha exhibition. Mixed in with these beautiful, nostalgic and iconic images are the words that further explain this modern life: “Honey . . . . I Twisted Through More Damned Traffic to Get Here,” “God Knows Where,” “Slobberin Drunk at the Palomino” I remember back in high school or was it college once watching X, or maybe the Blasters or the Knitters perform back at North Hollywood’s Palomino, my memory is hazy and alcohol likely was involved.

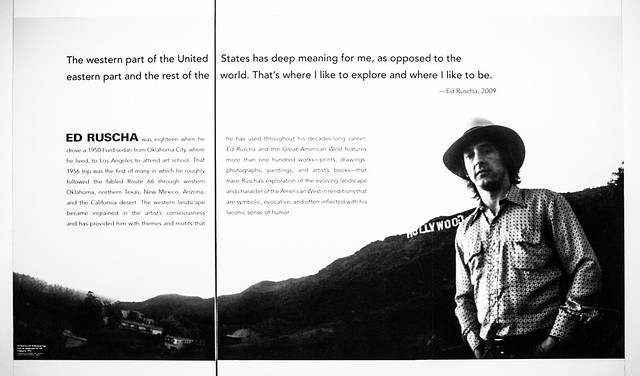
    “In 1956, at the age of 18, Ed Ruscha left his home in Oklahoma and drove a 1950 Ford sedan to Los Angeles, where he hoped to attend art school. His trip roughly followed the fabled Route 66 through the Southwest, which featured many of the sights—auto repair shops, billboards, and long stretches of roadway punctuated by telephone poles—that would provide him with artistic subjects for decades to come.” This may be all the inducement you need to read to get you to this show.

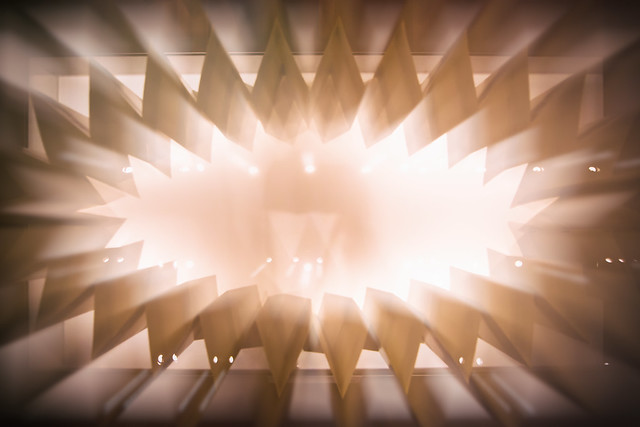
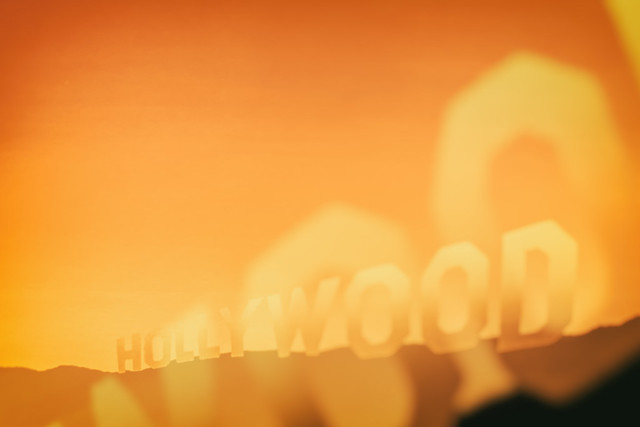
    Here are 15 photographs that I took on Thursday at the new exhibit representing my own interpretation.

    Standard

    Every Building on the Sunset Strip

    A Particular Kind of Heaven

    Slobberin Drunk at the Palomino

    Honey . . . . I Twisted Through More Damn Traffic to Get Here

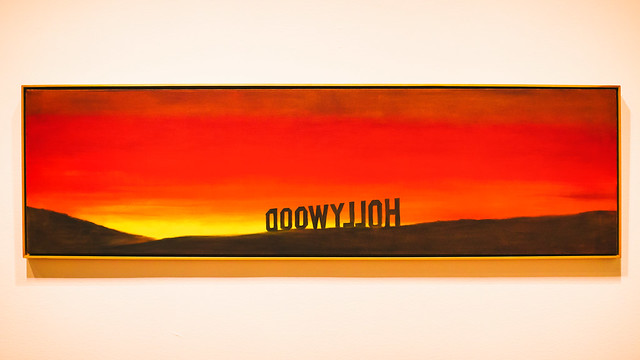
    Hollywood

    Poolside, Series of Nine Photographs

    God Knows Where

    Burning Gas Station

    Hollywood, 19698

    La Brea, Sunset, Orange, De Longpre

    Texas

    Ed Ruscha

    15 Photos from Ed Ruscha and the Great American West-9

    Ed Ruscha and the Great American West Exhibition Store

    Complete 15 photo set here, but everything usually looks better on Ello. ?

    More Ruscha here.

    More de Young Museum here.


    Thomas Hawk Digital Connection

  • How to Accelerate the Development of Your Personal Photographic Style with Lightroom

    If you want more Lightroom help from Viktor, get 50% OFF his Four Seasons Lightroom Preset Collection, on now at Snapdeals (only until July 19th, 2016)

    Over the years, Lightroom has become the most important tool for my photography. I use it for organizing and editing my photos, as well as publishing them to various channels. But, this hasn’t always been the case.

    Images Personal Artistic Style in Lightroom 01

    When Adobe introduced Lightroom years ago, 100% of my editing was done in Photoshop. But, gradually over the years with every new version or update of Lightroom, it became a one-stop destination for all of my post-processing activities. Today, Lightroom meets 90% of my photography needs with Photoshop meeting only 10%.

    Compared to Photoshop, I love Lightroom because of its nondestructive RAW editing and speed. But, if I had to choose my favorite Lightroom feature, it would be the ability to create presets.

    Images Personal Artistic Style in Lightroom 02

    Notice patterns and make them into presets

    Preset functionality drastically changed the way I approach photo editing and helped me accelerate the development of my personal style. Yet, when presets were first introduced in Lightroom 3, I initially overlooked the feature until I decided to put an extra effort toward increasing the efficiency of my editing.

    When I started analyzing the way I take and edit photos, I noticed certain patterns. I recognized that the way I take pictures directly affects the way I process photos in Lightroom.

    For example, when shooting landscapes and cityscapes, I always set the exposure for the highlights (sky) that results in underexposed foreground shadow areas. Then, as I begin editing, I start by opening up the shadows, recovering details in the highlights and adding a graduated filter to the sky area. I boost contrast and clarity, increase the saturation and vibrance. This usually results in an oversaturated sky so I only desaturate the blue hues. I also ensure that the vegetation in my photos is not electric green by shifting the green hues toward the yellow spectrum. In the final steps, I add vignetting, increase sharpening and reduce noise.

    Images Personal Artistic Style in Lightroom 03

    Though these steps soon became second nature, it also meant that I performed anywhere from 20 to 30 identical adjustments to every edited photo. When I realized this, it quickly became obvious that if I recorded the common edits and adjustments as a Lightroom preset, then I could reuse them again and again more efficiently.

    When I finally saved the edits listed above, my first preset was born. I named it “Natural” because it fully reflected my photography style in achieving a natural and well-balanced look, with rich colors.

    Images Personal Artistic Style in Lightroom 04

    Create variations

    I then created two more presets, based on the first Natural preset. I shifted the color balance toward warm colors (yellow, orange) to emulate the warm hues of the early morning. I called this one “Sunrise.” Another preset I created was “Overcast” in which I decreased saturation and boosted contrast to imitate cloudy and darker days.

    These three presets – Natural, Sunrise and Overcast — were the foundation of my Landscape collection.

    Images Personal Artistic Style in Lightroom 05

    Over the years, I gradually created new presets while making sure each of them reflected my taste and photography style. At some point, I looked back and realized that I was actually defining and perfecting my own artistic style while also exploring different artistic directions and the future of my work.

    Today, I have three main preset collections that cover the different aspects of travel photography: Landscape Collection, Cityscape Collection and People Collection.

    Experiment and save

    I use the preset-based editing approach on a daily basis because it not only saves me an enormous amount of time editing, it also keeps my artistic style consistent. But, at the same time, I am also able to continue experimenting with new approaches that can be saved as new presets that reflect my evolving style.

    I highly recommend that you try a similar approach with your photography.

    Images Personal Artistic Style in Lightroom 06

    Making your own presets

    Here are some actionable steps that can help you jumpstart the process of creating your own presets:

    If you’ve been using Lightroom and have a decent sized photo collection, select your favorite photos from the archives and create your own presets based on the edits and adjustments of the selected photos. Continue refining your presets over time to make sure that they are generic enough to work with a variety of photos. Also, keep growing your preset collection, and be sure to organize them by topic and/or style.

    For photographers who are just starting out and don’t yet have a sizeable archive, I recommend using someone else’s presets as a starting point. It is fairly common that well-established photographers are willing to sell or give away their Lightroom presets to help budding photographers. Simply find a photographer whose style you like, and use his or her Lightroom presets as the foundation for your future collections.

    You can even try to reverse engineer them to figure out how certain effects were achieved. Also, don’t be afraid to modify the presets until you come up with something exciting and unique to you.

    Images Personal Artistic Style in Lightroom 07

    Conclusion

    Developing your personal artistic style in photography is a long, and sometimes chaotic and uncontrollable process. By recording your artistic tastes and versions as Lightroom presets, and by using them as the foundation for your preset-based editing routine, you can accelerate, simplify, and streamline an otherwise extremely complex process.

    If you want more Lightroom help from Viktor, get 50% OFF his Four Seasons Lightroom Preset Collection, on now at Snapdeals (only until July 19th, 2016)

    googletag.cmd.push(function() {
    tablet_slots.push( googletag.defineSlot( “/1005424/_dPSv4_tab-all-article-bottom_(300×250)”, [300, 250], “pb-ad-78623” ).addService( googletag.pubads() ) ); } );

    googletag.cmd.push(function() {
    mobile_slots.push( googletag.defineSlot( “/1005424/_dPSv4_mob-all-article-bottom_(300×250)”, [300, 250], “pb-ad-78158” ).addService( googletag.pubads() ) ); } );

    The post How to Accelerate the Development of Your Personal Photographic Style with Lightroom by Viktor Elizarov appeared first on Digital Photography School.

    Digital Photography School

  • Weekly Photography Challenge – Nature

    This week we are doing a series of articles to help you do better nature photography. See previous articles here:

    • 3 Habits Every Outdoor Photographer Should Develop to Avoid Missing Shots
    • 5 Tips for Better Nature Photography
    • 27 Serene Images of the Natural World
    Rodney Campbell

    By Rodney Campbell

    Weekly Photography Challenge – Nature

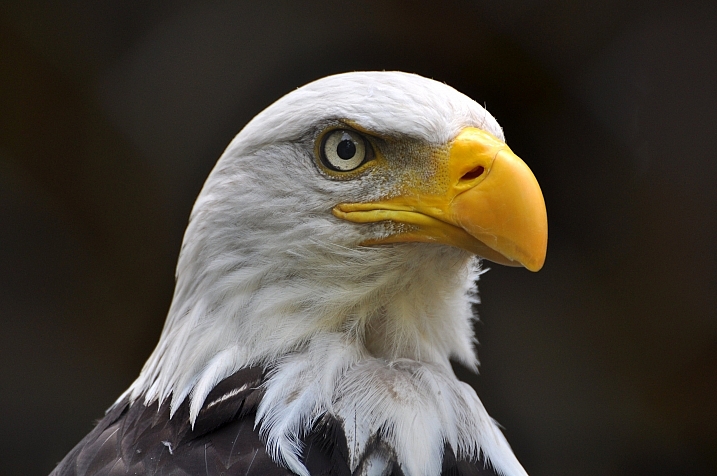
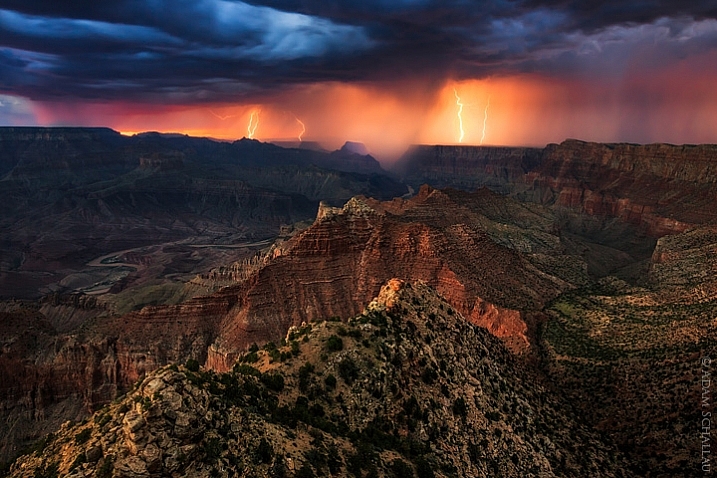
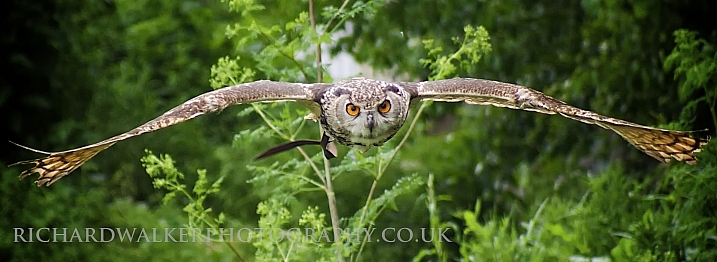
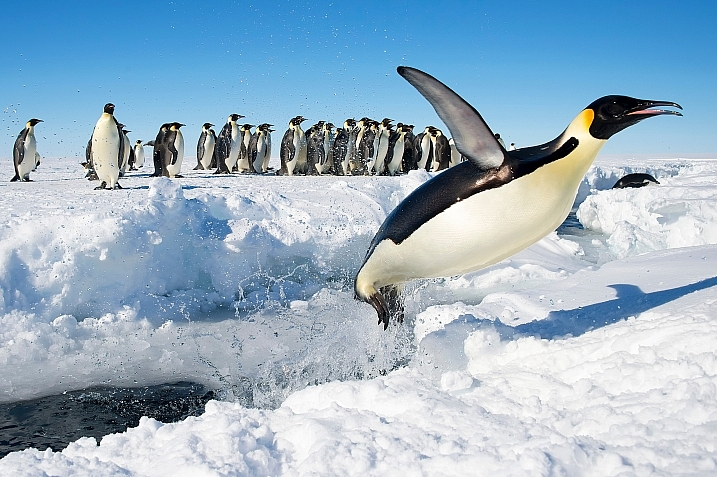
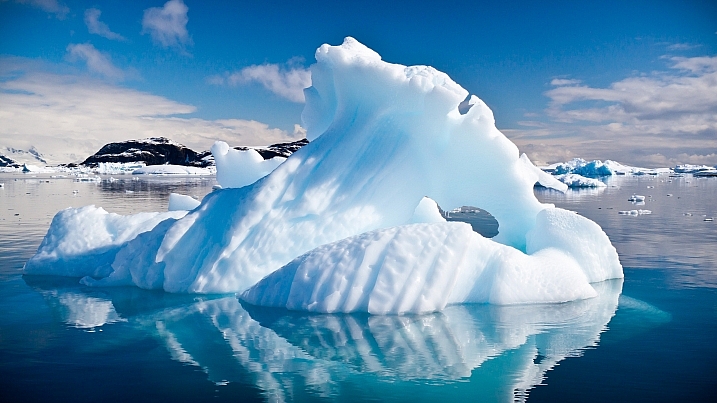
    This one is pretty straight forward. Go find some nature and take photos of it. It could be as exotic as an iceberg in Antarctica or an elephant on a safari in Kenya – or as everyday as the squirrell or little bird in your backyard, or a walk in your local park with your dog.

    Remember, more nature articles every day this week – so keep reading!

    Christopher Michel

    By Christopher Michel

    Matt Biddulph

    By Matt Biddulph

    Mark Moschell

    By Mark Moschell

    Stan Lupo

    By Stan Lupo

    Share your images below:

    Simply upload your shot into the comment field (look for the little camera icon in the Disqus comments section) and they’ll get embedded for us all to see or if you’d prefer upload them to your favourite photo sharing site and leave the link to them. Show me your best images in this week’s challenge. Sometimes it takes a while for an image to appear so be patient and try not to post the same image twice.

    googletag.cmd.push(function() {
    tablet_slots.push( googletag.defineSlot( “/1005424/_dPSv4_tab-all-article-bottom_(300×250)”, [300, 250], “pb-ad-78623” ).addService( googletag.pubads() ) ); } );

    googletag.cmd.push(function() {
    mobile_slots.push( googletag.defineSlot( “/1005424/_dPSv4_mob-all-article-bottom_(300×250)”, [300, 250], “pb-ad-78158” ).addService( googletag.pubads() ) ); } );

    The post Weekly Photography Challenge – Nature by Darlene Hildebrandt appeared first on Digital Photography School.

    Digital Photography School

  • 27 Serene Images of the Natural World

    This week we are doing a series of articles to help you do better nature photography. See previous articles here:

    • 3 Habits Every Outdoor Photographer Should Develop to Avoid Missing Shots
    • 5 Tips for Better Nature Photography

    So here are some examples of some shots of nature to give you some ideas, or just to make you feel refreshed like a walk in the woods.

    Nutmeg66

    By nutmeg66

    Matoff

    By Matoff

    Dave Edens

    By Dave Edens

    Anderson Mancini

    By Anderson Mancini

    Moyan Brenn

    By Moyan Brenn

    Daniel Sallai

    By Daniel Sallai

    Moyan Brenn

    By Moyan Brenn

    Susanne Nilsson

    By Susanne Nilsson

    M.shattock

    By m.shattock

    Md. Al Amin

    By Md. Al Amin

    Chris Gin

    By Chris Gin

    ELKayPics / Lutz Koch

    By eLKayPics / Lutz Koch

    Jack Haskell

    By Jack Haskell

    Hehaden

    By hehaden

    W. Visser

    By W. Visser

    Jeff Power

    By Jeff Power

    U.S. Department Of The Interior

    By U.S. Department of the Interior

    Richard Walker

    By Richard Walker

    Christopher Michel

    By Christopher Michel

    Shutter Fotos

    By Shutter Fotos

    Neil Howard

    By Neil Howard

    Jason Carpenter

    By Jason Carpenter

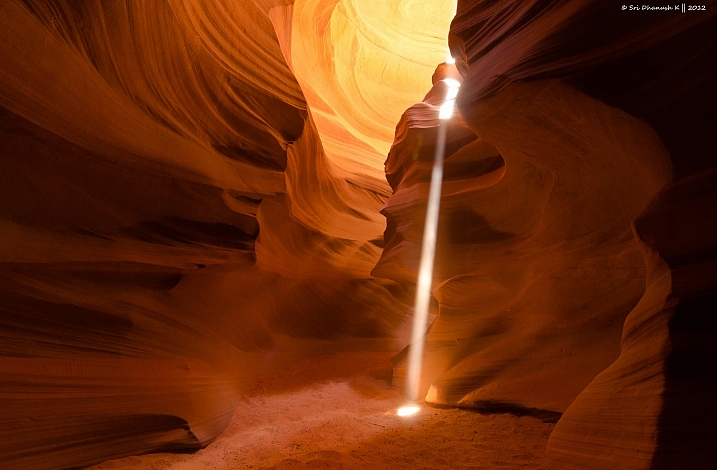
    Sri Dhanush K

    By Sri Dhanush K

    Massmo Relsig

    By Massmo Relsig

    Images By John 'K'

    By Images by John ‘K’

    Ravas51

    By ravas51

    Lenny K Photography

    By Lenny K Photography

    googletag.cmd.push(function() {
    tablet_slots.push( googletag.defineSlot( “/1005424/_dPSv4_tab-all-article-bottom_(300×250)”, [300, 250], “pb-ad-78623” ).addService( googletag.pubads() ) ); } );

    googletag.cmd.push(function() {
    mobile_slots.push( googletag.defineSlot( “/1005424/_dPSv4_mob-all-article-bottom_(300×250)”, [300, 250], “pb-ad-78158” ).addService( googletag.pubads() ) ); } );

    The post 27 Serene Images of the Natural World by Darlene Hildebrandt appeared first on Digital Photography School.

    Digital Photography School

  • 5 Tips for Better Nature Photography

    One of the most challenging things about photography is finding good subject matter. People want to see images of places and things that they normally may not get to witness in person. It’s not always easy to find fresh and appealing material that will draw in your viewer and capture their attention.

    Luckily, with a little looking, you have the most abundant resource you will ever need to produce wonderful photographs, that have appeal and carry timeless beauty: nature. That’s right, our incredible natural world offers virtually limitless opportunities for you to bring out the very best in yourself so you can show others the awesomeness that surrounds us all.

    Nature

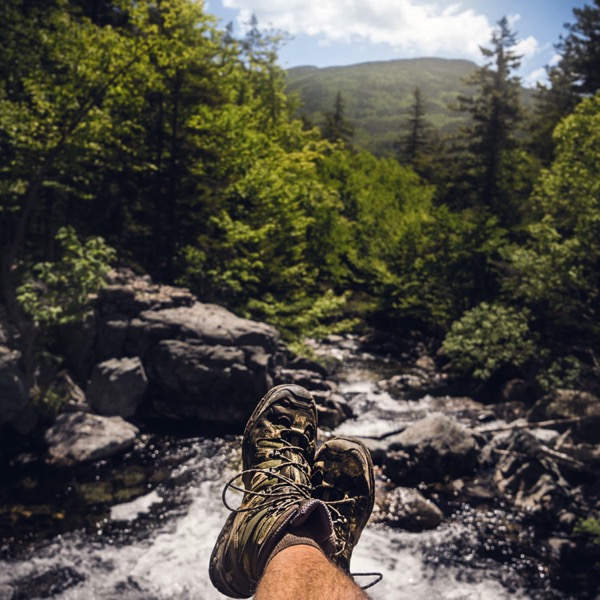
    Whether you’re shooting in rugged mountains, the ocean, or in your own backyard, there are ways to get the most out of your photography to be sure you produce some of the best images you possibly can, each and every time. Here are five easy to follow tips, which will help you take better nature photography, as you venture out to explore the natural world!

    #1 – Go Small

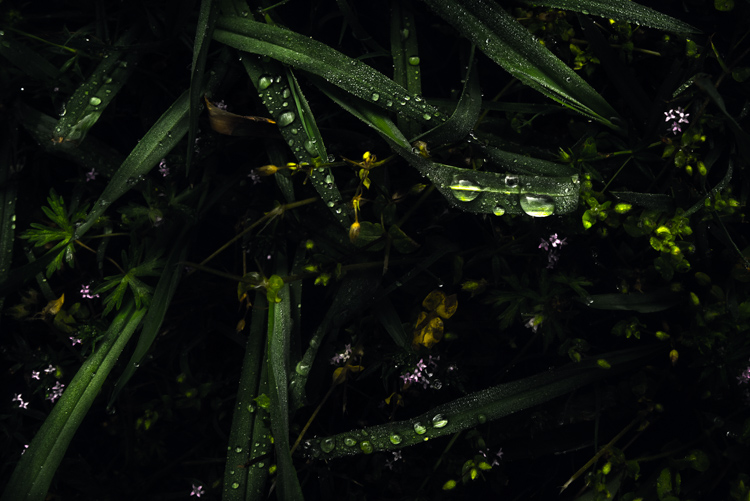
    The vast majority of the comings and goings occurring in nature, take place completely unknown to us. Wonderful little occurrences move constantly along in harmony, and can offer great chances for getting an equally wonderful photograph.

    Dew

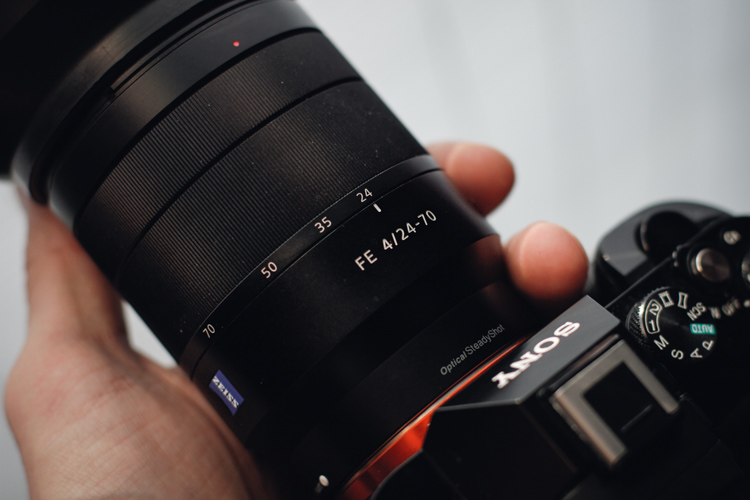
    When you’re out shooting in nature, don’t forget to pay attention to the smallest of details. Bring a lens that has a decent zoom (over 50mm) and is capable of focusing close-up. Certainly you don’t need a macro lens in order to get great photos of small things, but do keep in mind that the closer you can get the better off you will be.

    Lens

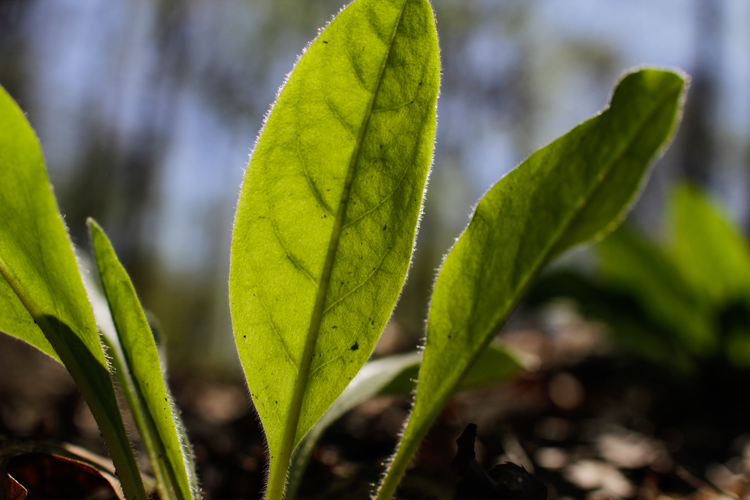
    Look for insects going about their daily lives, and pay special attention to the patterns in nature that can be found in leaves, flowers, and the Earth itself.

    Plant

    Getting close to small natural wonders means that you are also likely to be get a little dirty, so remember not to go out shooting wearing your best clothes.

    #2 – Look Up, Look Down, Look All Around

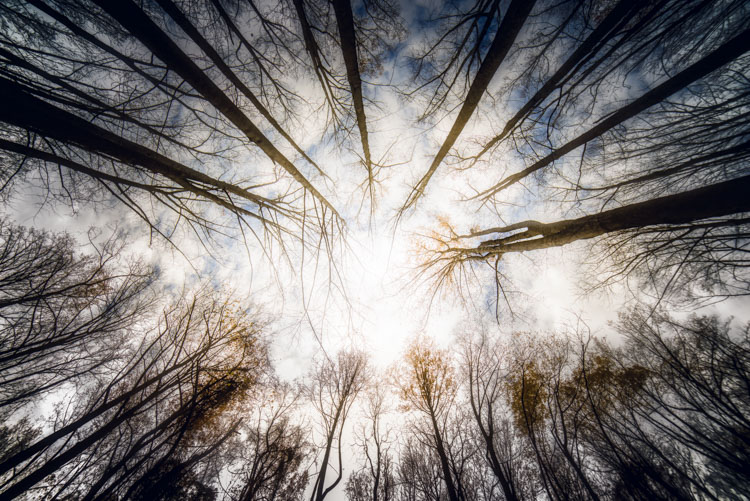
    Far too often we unintentionally view the world that is directly in front of us, and neglect to see the literal big picture. There is so much more to see if we would only look tilt our heads up. There are many wonderful things to photograph above our heads, and even greater opportunities for creative photography.

    Trees 1

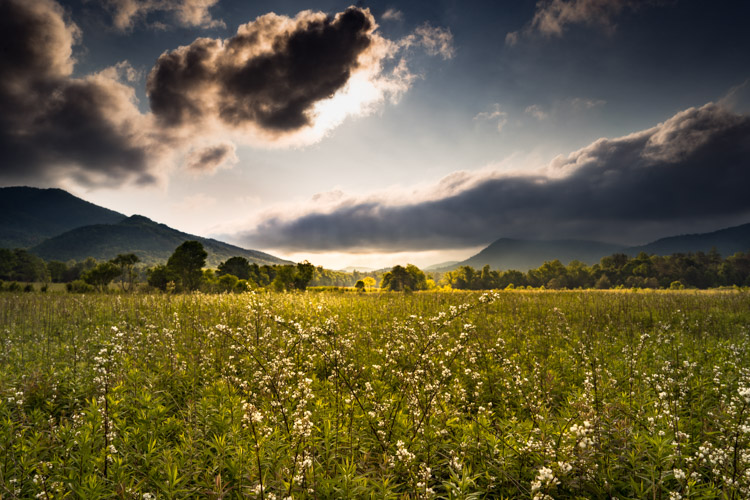
    Look for interesting and dramatic cloud formations, and incorporate clouds in your shots of other natural scenes. Remember that hardly anyone likes looking at an uninteresting sky, so try and compose your shots with that in mind.

    Field

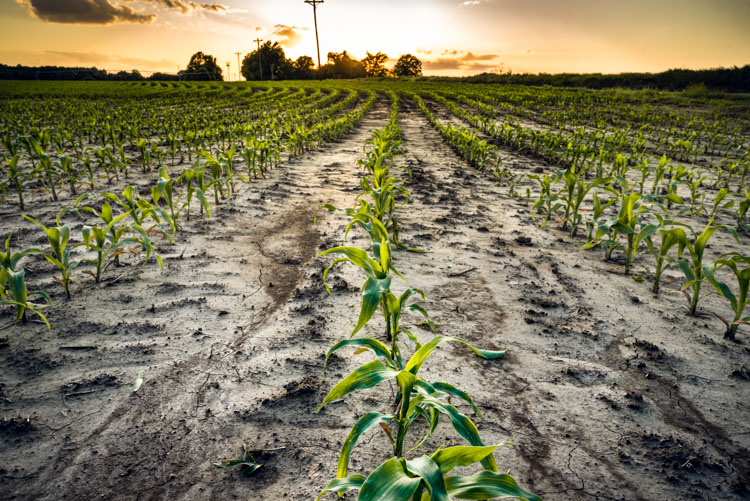
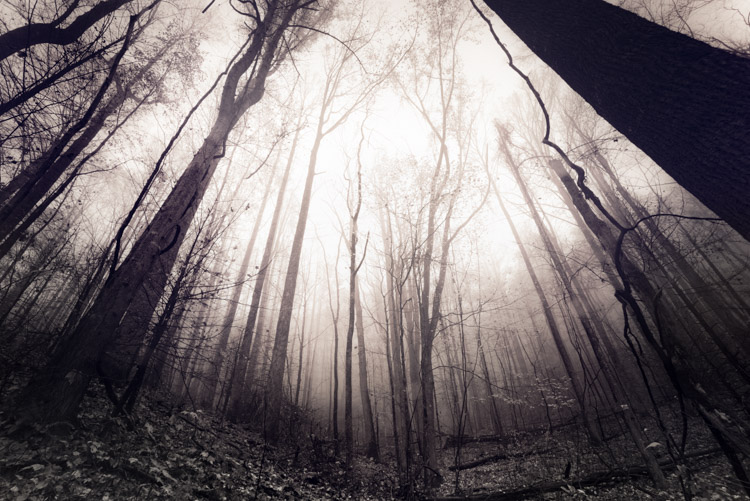
    It doesn’t stop at merely looking for cool cloud formations either. Get instant creativity in your shots by using leading lines, and vertical perspectives to give your images a uniqueness, that is sure to catch the attention of your viewers.

    Crops

    Trees 2

    The same goes for looking down onto your subject. There are many interesting perspectives to be had by shooting straight down on your subject from above.

    Hedge

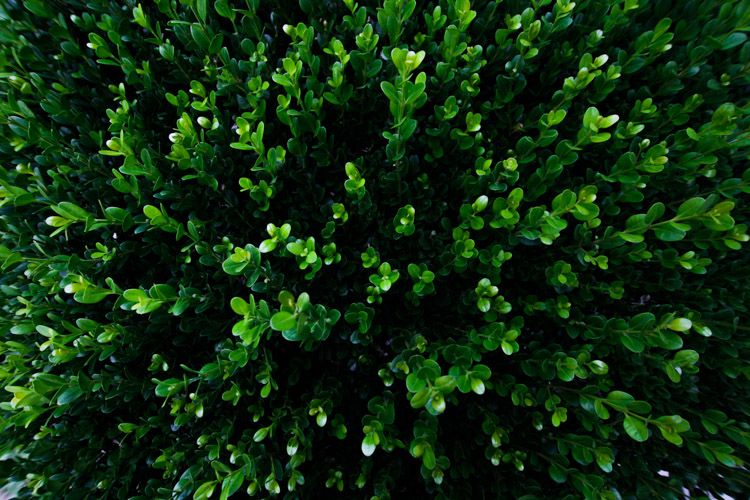
    The key thing to remember here, is that your goal is to show things in nature in ways that most people don’t get to see, or have not even considered looking for in the first place. Make use of the power of perspective, and pay attention to everything around you, whether it’s above your head or below your chin.

    #3 – See the Light

    Light is the basic force behind all photography. It illuminates your subjects, and brings shadows and contrast to your photos. Learning to understand the nature of light is a lifelong journey for any photographer. Using the light found in nature is one of the best ways to add impact to your images and gain powerful compositions. Seeing light is something that takes practice, but that doesn’t mean that you aren’t capable of using it to your advantage right now.

    Sunlight

    When you’re out shooting, be sure to pay close attention to the way shadows are cast, and by whatever you happen to be photographing. Seeing the contrasts within the scene helps you to avoid dry and drab photos that are generally unappealing.

    Direction of light is also very important, and can make a place or object look completely different depending on the angle of the sun. Be sure to visit a location more than once, at varying times of day (or even at night), so that you can find your creative spark.

    #4 – Get out Early . . . Stay out Late

    If you are searching for good natural light for your photographs, it means that you have to be there when it happens. That good light almost always comes about in the morning hours as the sun rises, or in those late evening hours when the sun begins to disappear. You must be prepared to get out and be ready for this great light if you want to increase your chances of getting great shots.

    While you are definitely able to find good light throughout the day, it’s a good idea to get out and about early, or late in the day, so that you can see the gorgeous effects of morning and afternoon light.

    trees 3

    Furthermore, most animals and insects operate at their peak during the very early and late hours of the day. Even if it means losing a little sleep, it will almost always be worth the trouble to make sure you’re there when the magic happens.

    #5 – Bring Backup

    One of the most depressing feelings you will ever experience as a photographer is that of a dead battery, or a full memory card, as a beautiful scene disappears before your eyes. It’s always worth your while to bring an extra battery and memory card (extra film) so that you’re prepared when Murphy’s Law makes an appearance. Stack the odds in your favor when shooting the natural world be being prepared.

    Lens Cloth

    This doesn’t end with simply bringing an extra battery either. A lens cloth and blower brush can save the day when you get a little rain or dirt onto your lens. Being prepared for the small things isn’t difficult, and it ensures that you’ll be ready when the time to click that awesome photo comes along.

    Follow these five simple tips and make the most of your time shooting out in our amazing natural world. Have some tips of your own? Be sure to share them in the comments below as well as your nature photography images.

    This week we are doing a series of articles to help you do nature photography. This is the second, also read: 3 Habits Every Outdoor Photographer Should Develop to Avoid Missing Shots  – and watch for more coming soon! 

    googletag.cmd.push(function() {
    tablet_slots.push( googletag.defineSlot( “/1005424/_dPSv4_tab-all-article-bottom_(300×250)”, [300, 250], “pb-ad-78623” ).addService( googletag.pubads() ) ); } );

    googletag.cmd.push(function() {
    mobile_slots.push( googletag.defineSlot( “/1005424/_dPSv4_mob-all-article-bottom_(300×250)”, [300, 250], “pb-ad-78158” ).addService( googletag.pubads() ) ); } );

    The post 5 Tips for Better Nature Photography by Adam Welch appeared first on Digital Photography School.

    Digital Photography School

  • 11 Amazing Photos Pokémon Go Characters Fit Perfectly In

    While Pokémon Go is quickly becoming a new fitness, it’s no wonder that Pokémon characters are now among the most popular photography subjects. Well, most of such photos are just screenshots meant to show the Pokémon rather than carry any photographic appeal. However, the game is just a few days old (right, days!), so it’s probably won’t be too long Continue Reading

    The post 11 Amazing Photos Pokémon Go Characters Fit Perfectly In appeared first on Photodoto.


    Photodoto

  • 3 Habits Every Outdoor Photographer Should Develop to Avoid Missing Shots

    Have you ever been out to photograph a gorgeous sunset, just to realize that you can’t, because your batteries are dead? Perhaps you’ve come home and imported your images, and noticed that all of them are unusable due to hundreds of dust spots?

    Don’t worry. Most of us have experienced the exact same things. Luckily, there are certain habits you can develop to avoid ever missing a shot again. None of them are time consuming, so there’s really no excuse not to implement them into your workflow.

    Kerry-Park-Sunset

    Habit #1 – Charge your batteries

    It might sound obvious that you should charge your batteries but you would be surprised how often I meet people that are out in the field without any battery power. In fact, I’m guessing you’ve experienced this yourself (don’t worry, so have I, and most other photographers too).

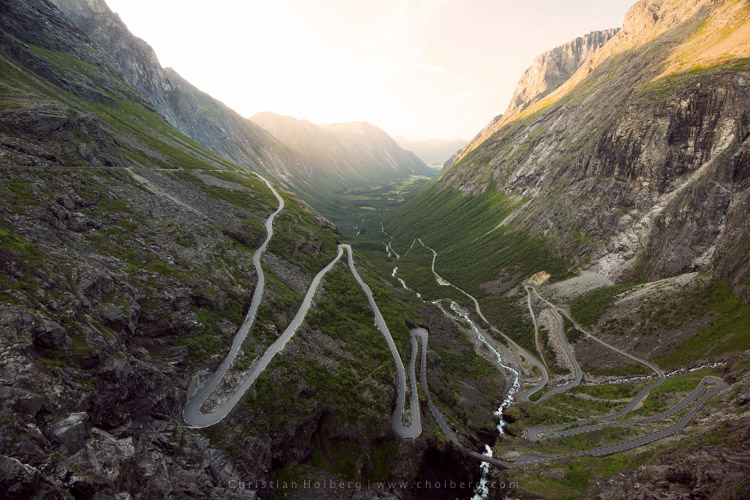
    About a year ago I decided to take a seven hour drive to Åndalsnes in Norway, known for its spectacular landscape, in particular the iconic Trollstigen road. I had been there a few times before, but the weather was never ideal, so I wanted to go back and capture at least one good image. When I arrived at the scenic road and walked out to the viewpoint I managed to take a handful of pictures before my battery died. Weird, I thought, but no problem, I still have two spare batteries. Turned out both of them where empty too. I guess you can imagine my frustration when I realized that this entire trip was ruined because I had forgotten to charge my batteries.

    trollstigen-sunset-glow

    I managed to capture one decent image before my batteries died

    I made it a habit after that incident to always charge my batteries after I come home from a trip, or evening out photographing. I set my batteries to charging even before I import my images, because I know if I don’t do it right away I may forget.

    Habit #2 – Clean your equipment

    Cleaning your camera gear is extremely important (especially for outdoor photographers) not only to lengthen the life of your equipment but also to improve image quality. I always get a bit upset when I view a beautiful image that is broken due to hundreds of small (or a few huge) dust spots. This is so unnecessarily, and easy to get rid of, so why let others believe you’re not as talented as you actually are.

    Honestly, you don’t need more than a cheap microfiber cloth to remove dust and dirt from your lens or filters. Even though that is enough in most cases (and something that should always be in your camera bag), I do recommend purchasing a liquid lens cleaner too, as this helps get rid of all smudges and especially salty spots.

    After bad weather on Iceland my lens was filled with dus spots

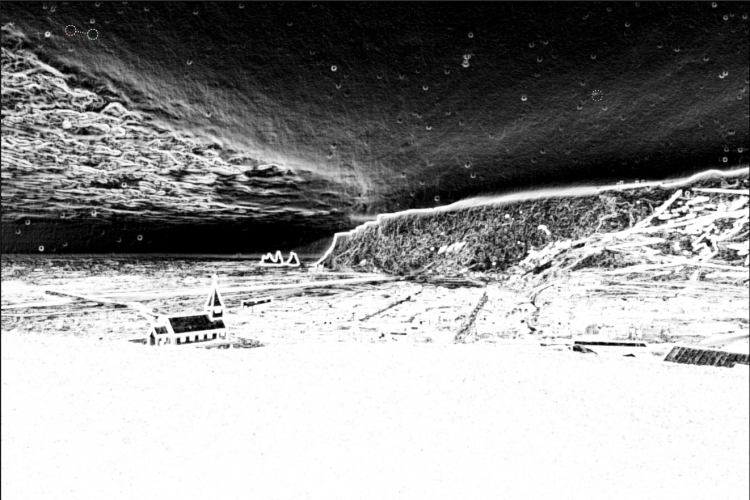
    After bad weather on Iceland my lens was filled with dust spots, as you can see here in Lightroom.

    I’ve made it a habit to clean my equipment after each photo trip that lasts more than a day. If I’m out photographing seascapes or in windy/rainy conditions, I usually spend an extra minute afterwards getting rid of the worst. Making this a habit will help save you a lot of time in post-production using tools such as Lightroom’s Spot Removal.

    If you’re getting serious with your photography, and perhaps you have even began selling a print or two, it’s even more important to get rid of those nasty spots. Just imagine selling a large print, then seeing that those small spots suddenly look large and take away the attention of the image. Don’t make that mistake!

    Habit #3 – Don’t leave before it’s over

    My final habit is perhaps one of my most important advice for any outdoor photographer.

    Don’t leave before it’s over!

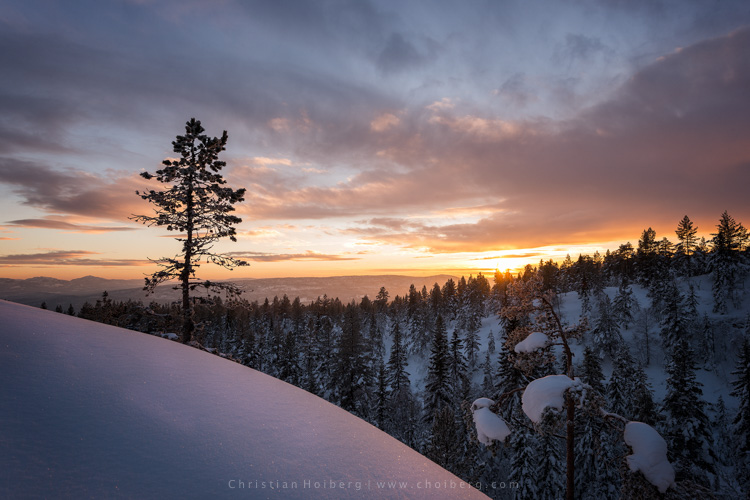
    An unexpected sunset this winter in Norway

    An unexpected sunset this winter in Norway

    This is a habit I had to learn the hard way. It happened many times when I was an amateur photographer that I decided a sunrise or sunset wouldn’t turn into anything good, because the weather looked a bit shabby. Instead of staying at the location longer, I preferred to go home and hope for better conditions next time. What happened as I was driving back home? The sky turned red for just a few minutes.

    Even though the conditions look a little dull it doesn’t mean that you won’t have a few minutes of good light. Alright, in most cases it doesn’t turn into something spectacular, but the times it does you will wish you had stayed for that 10-20 minutes extra.

    So, remember this the next time you’re considering leaving early: it’s not over before it’s over. Stay a little bit longer, and perhaps you will be treated with great light that results in a portfolio worthy image. It’s worth it!

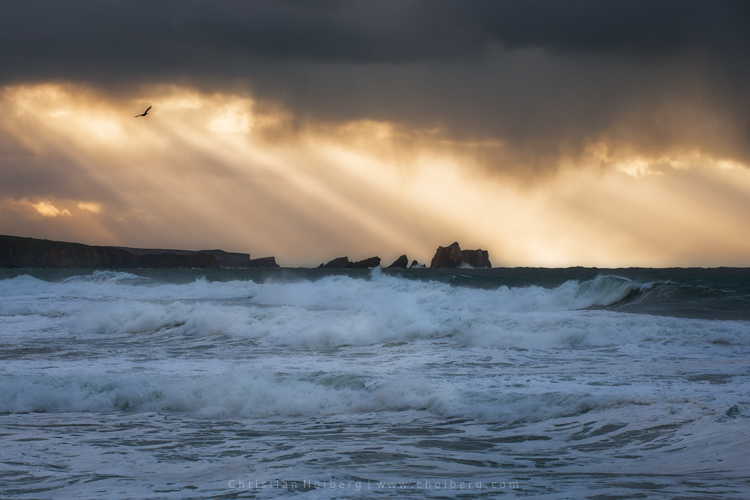
    Bird flying through a stormy sunset at Liencres, Cantabria.

    Bird flying through a stormy sunset at Liencres, Cantabria.

    Are you guilty of missing these 3 habits? Have you developed any other habits, either in the field or when you’re back home? Let us know by leaving a comment below!

    This week we are doing a series of articles to help you do nature photography. This is the first – watch for more coming soon! 

    googletag.cmd.push(function() {
    tablet_slots.push( googletag.defineSlot( “/1005424/_dPSv4_tab-all-article-bottom_(300×250)”, [300, 250], “pb-ad-78623” ).addService( googletag.pubads() ) ); } );

    googletag.cmd.push(function() {
    mobile_slots.push( googletag.defineSlot( “/1005424/_dPSv4_mob-all-article-bottom_(300×250)”, [300, 250], “pb-ad-78158” ).addService( googletag.pubads() ) ); } );

    The post 3 Habits Every Outdoor Photographer Should Develop to Avoid Missing Shots by Christian Hoiberg appeared first on Digital Photography School.


    Digital Photography School

  • All 7 Photography Deals Back – 24 Hours Only

    If you missed out on any of the amazing offers over the last 7 Days of our Summer Sale, today’s your final chance to grab a bargain.

    fb-all_deals_are_back_3_1024

    As in previous years we’ve received a few sad messages from readers who missed out on deals along the way, asking if there was any way to get them.

    As a result, today we’re opening all 7 deals back up again for one last chance.

    So if there’s a deal you regret missing or if you missed one of our emails – you’re in luck.

    Just to recap, here’s what’s available for the next 24 hours:

    1. The Complete Portraits Pack (71% Off)
    2. Lightroom Rapid Editing System for Travel Photography (72% Off)
    3. Landscape Photography Ebooks & Video (Save $ 400)
    4. The Essential Guide to Black And White Photography (Just $ 6)
    5. Photo Nuts Courses Bundle (70% Off)
    6. The Complete Photography Tutorial eBook (61% Off)
    7. The Ultimate Post Production Photography Bundle ($ 5000 worth for $ 79)
    8. See all 7 deals over at our Summer Sale page!

    googletag.cmd.push(function() {
    tablet_slots.push( googletag.defineSlot( “/1005424/_dPSv4_tab-all-article-bottom_(300×250)”, [300, 250], “pb-ad-78623” ).addService( googletag.pubads() ) ); } );

    googletag.cmd.push(function() {
    mobile_slots.push( googletag.defineSlot( “/1005424/_dPSv4_mob-all-article-bottom_(300×250)”, [300, 250], “pb-ad-78158” ).addService( googletag.pubads() ) ); } );

    The post All 7 Photography Deals Back – 24 Hours Only by Darren Rowse appeared first on Digital Photography School.

    Digital Photography School

  • Tips for Using Natural Framing to Improve Your Composition

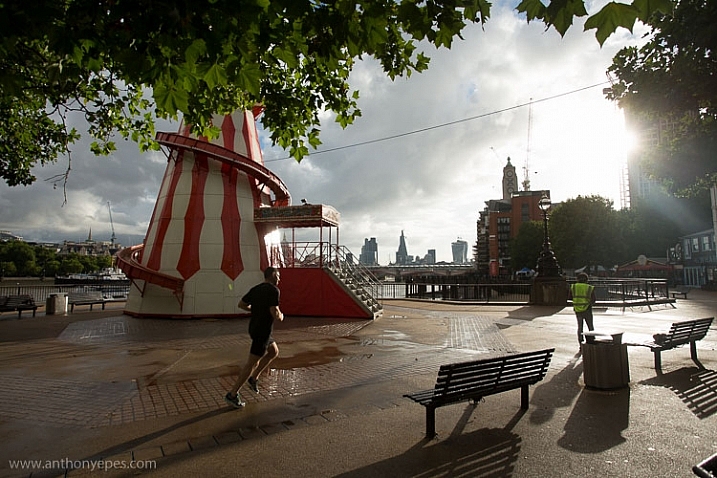
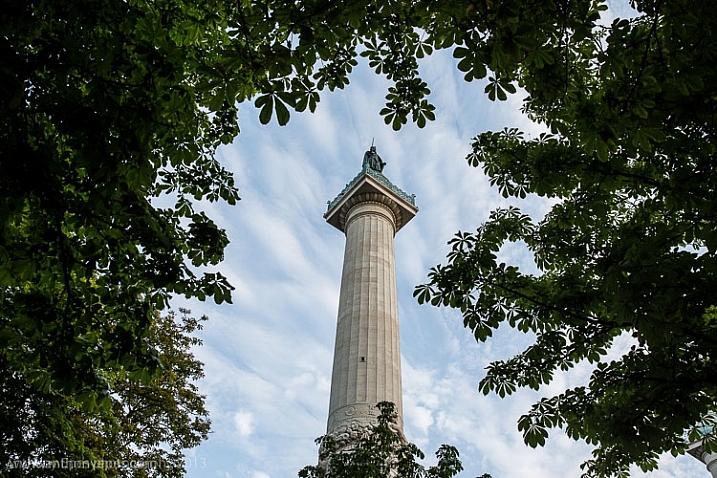
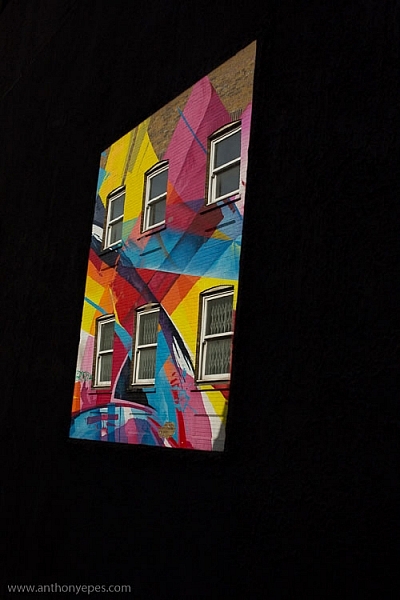
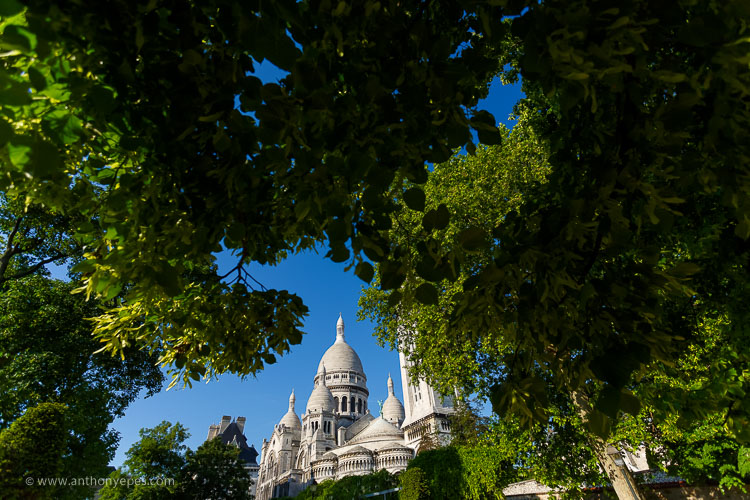
    To help you compose more exciting and beautiful photographs, there are certain key composition techniques that you can use. Natural framing is one that is widely known, but needs careful and thoughtful application. Using framing can create extremely impressive and elegant images when done right. Here are some tips to help you.

    natural-framing-tips--10

    Natural framing is when you use an element within your image to frame the subject. This draws the eye into the photo and highlights the actual subject.

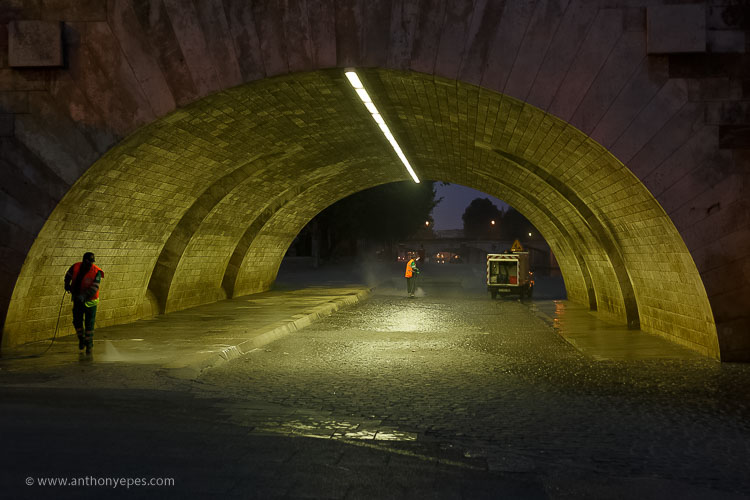
    This internal frame can be constructed using a multitude of things you’ll find anywhere – branches, archways, tunnels, door frames etc., as well as things that aren’t solid like light, shadows, rain, fog, etc. – it doesn’t matter what you use.

    Framing is a technique to use sparingly – but when it’s totally right, it looks natural. So few people use it well that if you can master it, you can create some fantastic shots.

    natural-framing-tips--2
    Why you should use natural framing:

    • It easily draws your viewer’s eye into the photo and emphasizes the subject.
    • It isolates and separates your subject from what’s around it.
    • It brings a sense of order and structure to a photo – and the eye loves order.

    When to use natural framing

    • To obscure boring sky (my favourite).
    • To add depth to an image – especially when the item acting as the frame is not in focus.
    • To bring contrasting elements into the photo without detracting from the subject.
    • To create structure.
    • To create a feeling of a self-contained image, particularly if you are photographing something quite ordinary and simple, a frame will help give depth to the subject.

    natural-framing-tips--12

    Traditionally the frame should be distinctly separate from the subject, so that it’s not confusing to the eye. But I will also show you where I haven’t done that, and the photo still works. I will show you both how to use this technique as well as where else you can take it – how to let it inspire you to develop your images.

    Rules are made to followed, bent and broken

    Like anything that is considered a technique or rule, people can feel very passionately for or against their use.

    “Consulting the rules of composition before taking a photograph, is like consulting the laws of gravity before going for a walk.” Edward Weston

    But for me, it comes down to not using any of the rules so much, that your photos end up all looking the same. Don’t let rules keep you stuck in a box. They are a great springboard for your photography, or a way to help refresh your vision, so that you start composing in a different way.

    natural-framing-15

    When I was starting out, I worked hard to get really familiar with the key compositional techniques, but then after a while, once I’d embedded them, I started to develop my own way of using these techniques, my own style.

    I also encourage you to think of all these techniques and rules as opportunities to see and learn to organise the elements within your photos differently. In my workshops I’ve noticed that one of hardest things for people is to break the world down into elements, and then learn how to organise these elements to create striking compositions.

    Natural framing isn’t an add-on

    Natural framing is one of the harder rules to pull off well. I think many people use it to make a boring landscape or scene more interesting. But to me, if your subject is boring, no technique is going to liven it up. Framing should be used as an additional interesting element – not as an overlay to a mundane scene (just search: “natural framing” on Google images and you’ll see what I mean).

    natural-framing-tips--3

    I find natural framing is most interesting when used in the loosest possible interpretation. It has to be employed in a way that enhances the photo, and feels like it is a natural part of the composition.

    “There is no better time to crop a bad composition than just before you press the shutter release.” Bryan Peterson

    With those caveats – now it’s time to relax, have fun, and play with it!

    Creating your frame

    natural-framing-20

    You don’t need to have a frame around all four sides of your photo for it to work – in fact I’d encourage you not to do that. I think more often than not, it looks more natural and pleasing to the eye for the frame to take up just two or three sides of the image. But like every recommendation – use your own personal judgement.

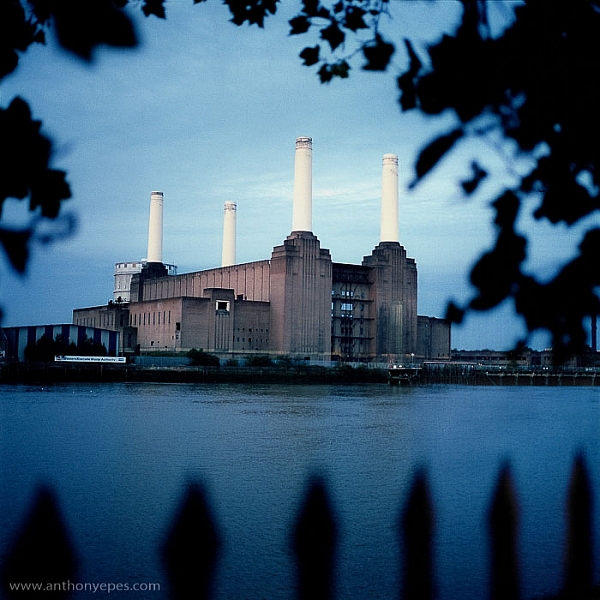
    The photo above of Battersea Power station is probably one of my most traditional interpretations of natural framing. I have framed the building with the branches and leaves at the top, and the outline of a fence at the bottom. Two important things to point out in this photo:

    • When the frame is out of focus it create a sense of depth to the image.
    • The frame can be made from different elements: I’ve used two different elements but their colour is the same, and they are both interesting shapes – so they have some common qualities.

    Obscuring boring sky

    natural-framing-tips--7

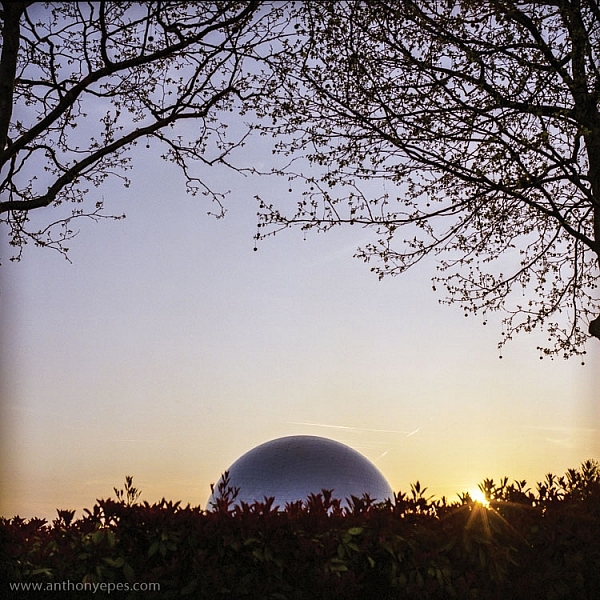
    In the photo above, I wanted to capture the shiny dome and the rising sun. But that wasn’t enough to make an interesting photo. There was some pretty endless sky, so I added a silhouette of the bare branches above. I seem to use a lot of tree branches in my natural framing compositions. In this case, I love how they create this beautiful, wild, chaotic pattern, above the very clean and shiny dome. Then I’ve added this little almost tuft of leaves below, which balances the photo out.

    I love using framing elements that have great texture – again they add depth. Just remember to keep it well organized and clear so people can see what you are trying to do. This photo is really about the simple contrasting shapes – and by using natural framing it creates a nicely ordered photo, constructed from the available elements.

    natural-framing-17

    So once you’ve got a grasp of the concept you can start using the technique in other ways – have fun!

    You are in control of how the viewer sees the image

    Naturally framing is a very good way to remember that you are in control of how the viewer’s eye will go around the image. It doesn’t matter how big the photo is, the eye won’t see the complete image all at once. The eye will be drawn to one part and then move around the image depending on where the elements are placed. Your job as a photographer is to direct the eye.

    natural-framing-tips--4

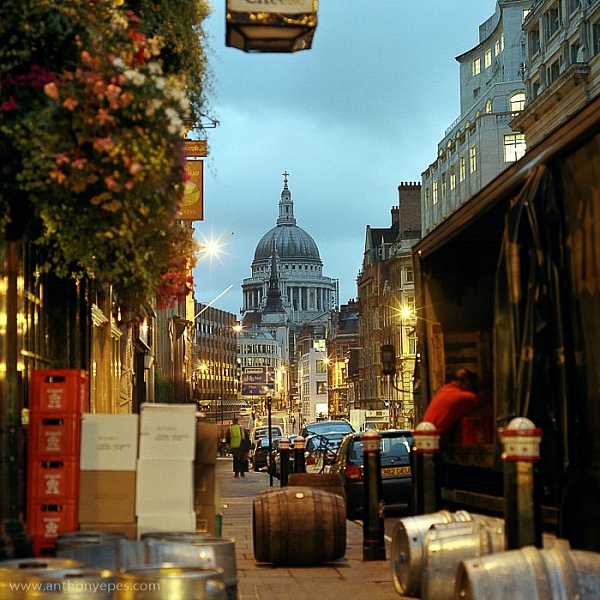
    Here the subject is St Paul’s Cathedral, bang in the centre of the image. But all around it there are buildings, streets, cars, etc. When you first see the image, all of that other detail bleeds into one, creating a natural frame for the cathedral. But then gradually you start to see the details, so the image becomes something quite different.

    This photo is a good example of how you can use framing to create order to a very busy scene, and give the viewer a way into the photo. It’s also a good example of how your eye moves around an image.

    The one-sided frame

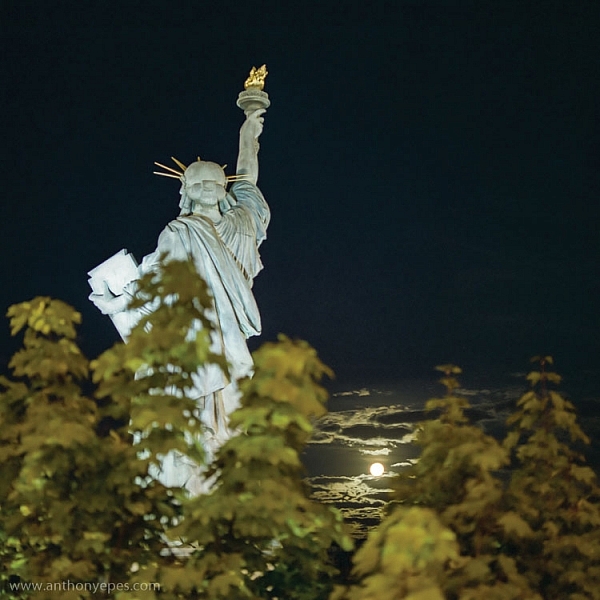
    It is possible to do a one-sided frame, and it works! Below, even though the foliage is only running along the bottom, it creates a great grounding effect, and pushes the eye up toward the moon and the Statue of Liberty. Therefore, in my book, it adheres to the principal of drawing your eye towards the real subject of the photo. This isn’t even a strong line that’s creating the framing element – it’s simply the power of suggestion.

    natural-framing-tips--6
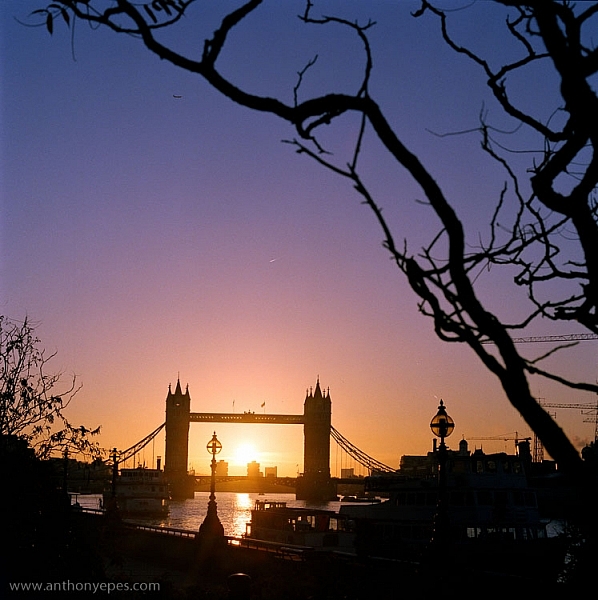
    In the photo below you’ll see some framing which is going across the corner of the photo. So it’s still drawing your eye to the subject – which is the rising sun and Tower Bridge – but it’s quite subtle. I would perhaps suggest that the bottom elements are creating a second framing element, grounding the photo, and framing the sun. What do you think?

    natural-framing-tips--8

    When I am shooting photos with big sky – which is favourite subject of mine – what I often do is shoot when small objects appear in the sky, like above. If you look closely you can see a very small plane. Or sometimes a tiny bird appears, or some other random object. People often ask me why I don’t Photoshop it out because it can look like a piece of dust or a mistake, but I love these little surprising elements. It’s great if there can be tiny details that create layers of interest in your shots, so your viewers don’t see everything all at once. (Or as Henri Cartier-Bresson said, “The little, human detail can become a Leitmotiv.”)

    Here is another photo that is truly on the edge of being framing. But I think it shows how you can play with the idea (and there is nothing more fun than playing with all these different concepts and ideas, and making them your own).

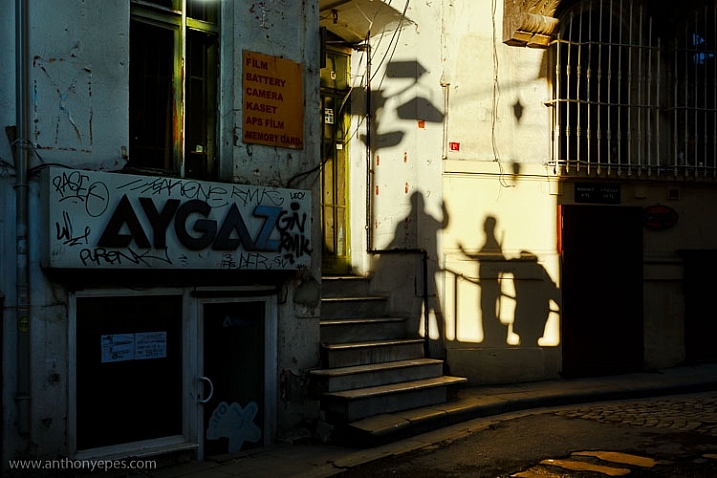
    Greeting Shadows

    I looked at this photo and thought – wow, I’ve framed the image of the shadows of the people with the surrounding dark shadow. It is doing what natural framing tells us to – which is use a frame to draw attention to the real subject of the photo, so I think it fits.

    Use multiple frames within one image

    I am a little bit obsessed with photographing things I find on the street. I love photographing very ordinary things – like chewing gum or lines on the road, disconnecting them from their wider context, and just playing with their shapes. This is also another way to help train you to practice breaking the world down into elements, so that you can then start to organize them in a more constructive way.

    You can go further still by making the frame within your image just a part of the image, and not the whole thing. It could even be just a suggestion of a frame, like I did here.

    natural-framing-tips--5

    I love using very simple backgrounds with strong colours for my portraits. This is because firstly, I want the background to not distract from subject, so a simple background is usually best. The camera can’t easily recreate the layers that we see with our awesome 3D eyes. So if, for example, you put a subject in front of a crowd, you will get a flat image without depth.

    Homeless World Cup Hasselblad Portraits

    Plus, I like to have the colour and texture of the background really fit with the subject – maybe with their clothes, their posture, their expression, etc. This photo is a good example of my philosophy on this point.

    Now back to framing! One key reason the photo above works is the added dimension of some framing. Yes, again not a totally traditional use of it, but you can see that the yellow arch shape and the blue strips either side are adding some great structure and form to the image. You’ve also got a sense of them confining the subject, which gives a nice balance to his strong, proud posture. That feeling of being confined is something you can do well with natural framing, and adds a curious feeling to the photo (since the posture of the subject is so proud and strong, you can’t imagine him being confined, right?).

    Everything within your frame has a message

    natural-framing-19

    As the photographer, you need to make sure that everything you put in the frame is saying something that you want it to – that the elements are all working together to form the idea and feeling that you seek. If you don’t know what that’s supposed to be – just ask yourself:

    • What am I feeling here?
    • What is interesting to me in this scene?
    • Why is this important?

    It’s these feelings that you will be communicating through your images, if you’ve done it well and created a strong photograph.

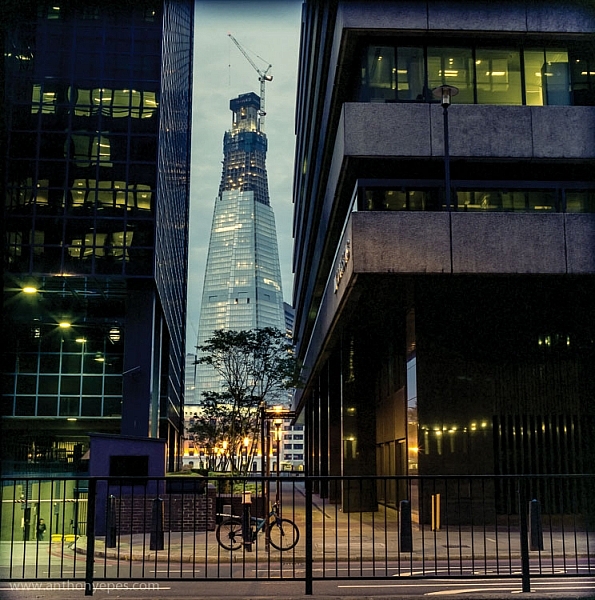
    In the image below I framed the Shard, with buildings on the side and a fence along the bottom. There is a risk that it could all have blended in together, but that bright blue sky has created a natural space around the subject.

    natural-framing-tips--1

    If this is all feeling like a bit too much, don’t worry, as it all becomes instinctive after a while. As a final note, I like this thought from Henri Cartier-Bresson:

    “You just have to live and life will give you pictures.”

    It’s a great way to live.

    I’d love to know what you think of natural framing – do you use this technique? What do you think of the examples I’ve given here? Have you been inspired to try this out if you’ve never used it before? If you have any photos you’d like to post here I’d love to see them.

    googletag.cmd.push(function() {
    tablet_slots.push( googletag.defineSlot( “/1005424/_dPSv4_tab-all-article-bottom_(300×250)”, [300, 250], “pb-ad-78623” ).addService( googletag.pubads() ) ); } );

    googletag.cmd.push(function() {
    mobile_slots.push( googletag.defineSlot( “/1005424/_dPSv4_mob-all-article-bottom_(300×250)”, [300, 250], “pb-ad-78158” ).addService( googletag.pubads() ) ); } );

    The post Tips for Using Natural Framing to Improve Your Composition by Anthony Epes appeared first on Digital Photography School.

    Digital Photography School