Category: Photography

  • How to Use Portrait Angles More Creatively: A Visual Guide

    When it comes to creating a successful portrait, there are a lot of moving parts! We talk often about finding the light, composition, and camera gear when it comes to portraits. While all three of those things are important in creating your final image, they aren’t the only variables at play.

    Another important aspect in capturing portraits is angles. Understanding and making good use of angles in portrait photography, allows you to capture images of your subjects in the most flattering way, unique to each person you’re photographing.
    portrait-angles1

    Under the umbrella of “angles” are two different aspects – facial view, and camera angle. Facial view simply refers to how much of a person’s face is visible in the photograph. Whether or not you recognize the term facial view, you probably understand that there’s a visual difference between a photograph of someone looking directly into the camera, and a photograph of them in profile. These are examples of both ends of the facial view spectrum. In addition to facial view, you’ll also want to learn to utilize camera angle in portraiture. Camera angle refers to whether you’re holding the camera at eye level, or above or below the eye level of your subject.

    The concepts themselves are pretty simple, right? However, the difficult part is learning how each of these variables interact with each other, and your subject. Let’s walk through some visual examples of different facial views and camera angles using the same gear, subject, location, and same time of day, while observing how different angles change the look and the feel of each image.

    Camera Angles
    portrait-angles2

    Eye Level

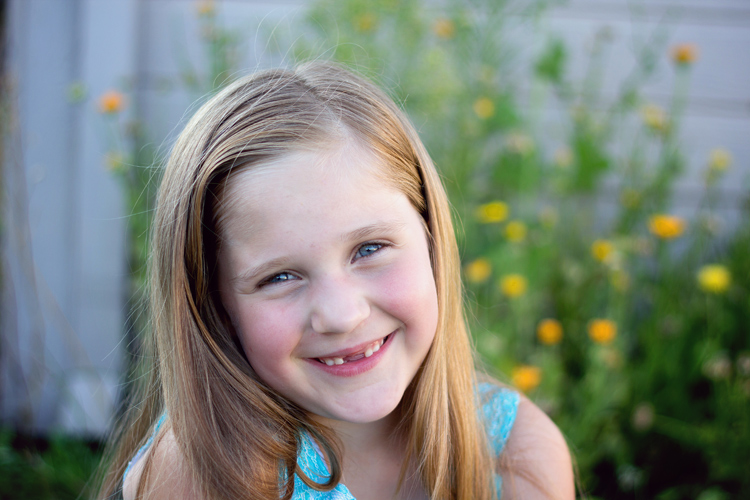
    One of the most common camera angles for portraits is to place the camera at the subject’s eye level. This camera angle results in a final image that is balanced, and proportionate between head and body. It also allows for the subject to look directly into the lens, which tends to create the feeling of connection in a portrait. This is a flattering camera angle for most people.
    portrait-angles3

    High Camera Angle – Above Eye Level

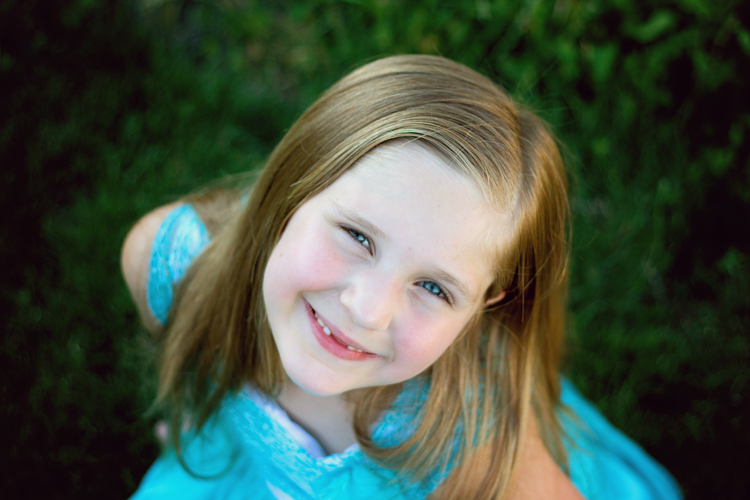
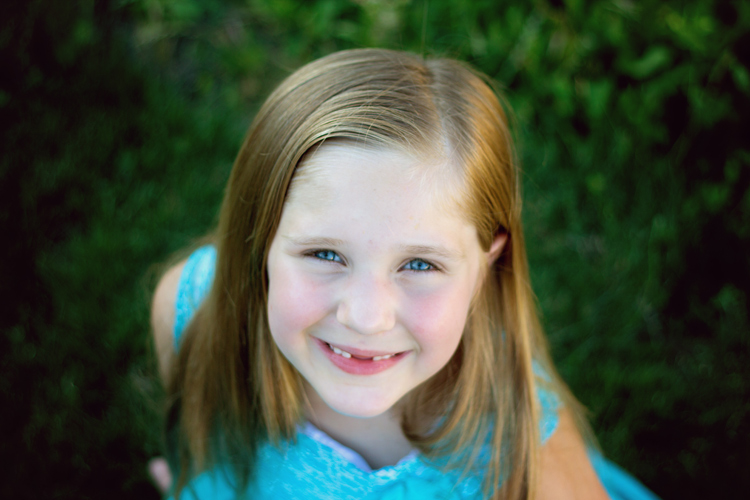
    Shooting from a high camera angle (with the camera above the subject’s eye level) is another great option to try in your portrait photography. With this angle, the focus is on the face rather than the body and can be a very slimming angle for adults. I’m not at all concerned with making children seem slimmer than they really are, but find that I use this angle a lot when photographing children because I like the way that it emphasizes the childlike qualities of kiddos. I find that parents tend to really enjoy photographs of their children taken from a high camera angle, and I believe that’s because parents see their children from this angle quite often in their day-to-day life, so it feels very natural and candid.

    As a bonus, shooting from a high angle makes it really easy to achieve good catch lights in their eyes, and can also help to camouflage a less than desirable background. On the other hand, this camera angle may not be to your advantage in some situations; if your subject is very thin, shooting from above can sometimes make your subject look like a bobble-head, which is very rarely flattering.
    portrait-angles4

    Low Camera Angle – Below Eye Level

    Shooting from a low camera angle (with the camera placed below the subject’s eyes and tilted up) can make people seem tall and authoritative, but can also tend to make people (their body in particular) look larger than they really are, which is not very flattering for most people.

    This is particularly important to keep in mind if you’re photographing someone who is taller than you. If you’re 5’2″, and the person you’re photographing is 6’4″, you may need to be creative to make sure that you’re not photographing the whole session from a low camera angle. Have your subject sit, crouch, or find something that you can climb on to create a more even plane, for at least some of the photos – it really will make a difference.

    I’ve used this camera angle a handful of times with newly walking babies, and could envision using it with a wider angle lens (to capture more of the body) if I were photographing a politician, a football player, or someone who wished to appear particularly powerful. Overall though, this is usually not the most flattering angle for portraits.
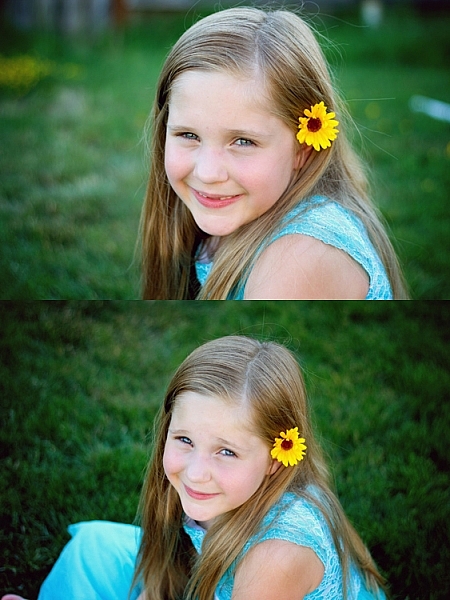
    portrait-angles7

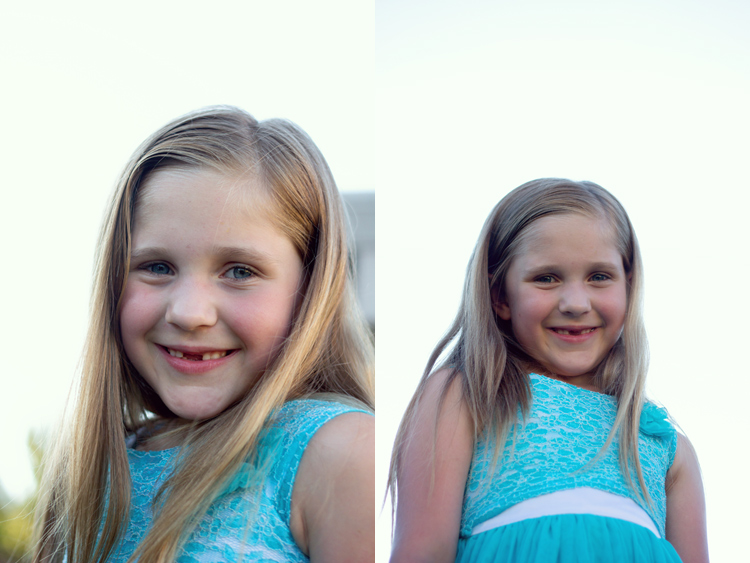
    Don’t be afraid to experiment. Try capturing the same image from two different camera angles. The image above demonstrates how the same subject and pose appears from eye level, as well as from a high camera angle. If you did a poll, I bet you’d find that some people prefer the eye level shot, and some prefer the high camera angle. This is largely a matter of taste and preferred aesthetic, so I frequently make a point to include both sorts of angles in my portrait sessions.

    Facial Views
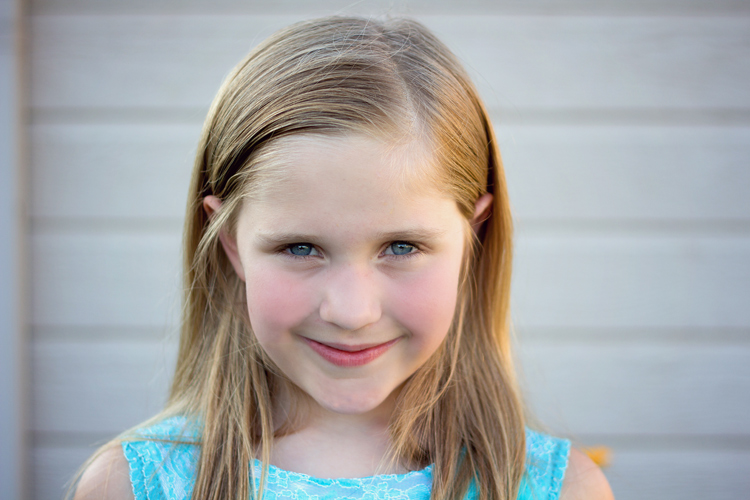
    portrait-angles6

    Photographing a subject full-face means that their face is pointing directly towards the camera lens – you can see both ears, and both sides of the face in equal amounts. Full-face portraits often convey a sense of confidence and assertiveness, especially when the person being photographed is looking directly into the camera with their eyes also.
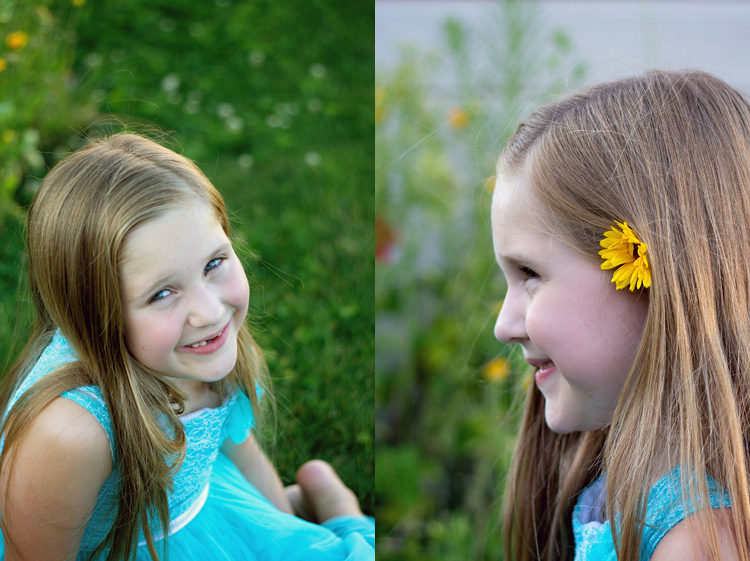
    portrait-angles8

    Other facial views include 3/4 view, 2/3 view, and profile view. With 3/4 view, the subject has turned just enough so that one of their ears is no longer visible to the camera. With 2/3 view, the subject has continued to turn so that their nose is just about to break the plane of their back cheek. For a true profile portrait, the subject’s face is turned 90 degrees, and is perpendicular to the camera.

    Shooting with the subject’s face turned to 2/3 view or 3/4 view tends to convey a more casual, and less assertive portrait. Images shot with a 3/4 facial view, and the subject looking just off camera, are often the most successful candid images, because the facial expressions are still easily visible to the viewer. Similarly, shooting in profile allows for portraits that feel unposed, while also being graceful and demure (particularly when shot in silhouette).
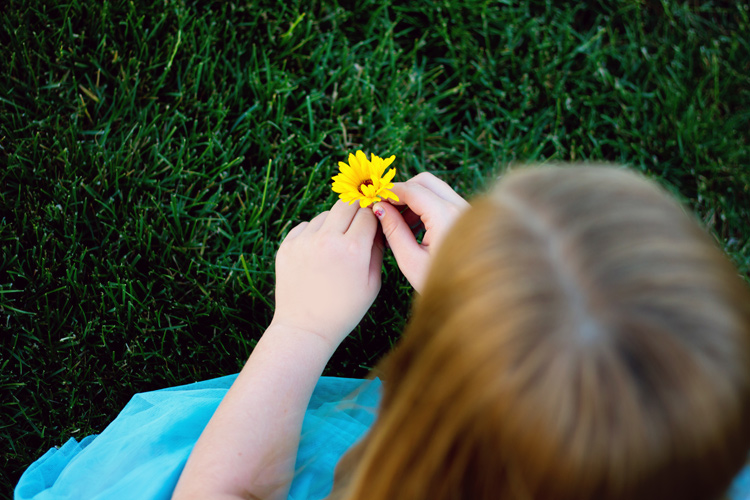
    portrait-angles5

    The best way to begin to learn, and really understand angles, is to grab a friend and go experiment. Take photos from every camera angle you can think of, including non-traditional angles like a bird’s eye or worm’s eye view. Then, take a photo with every facial view – full face, 3/4 view, 2/3 and profile. If you’re really feeling ambitious, try combining facial views and camera angles – does the feel of the portrait change if you shoot full-face from eye-level versus from a high camera angle?

    Chime in below, do you find that you gravitate towards images with a particular facial view and/or camera angle? What tends to be your preference and why?

    googletag.cmd.push(function() {
    tablet_slots.push( googletag.defineSlot( “/1005424/_dPSv4_tab-all-article-bottom_(300×250)”, [300, 250], “pb-ad-78623” ).addService( googletag.pubads() ) ); } );

    googletag.cmd.push(function() {
    mobile_slots.push( googletag.defineSlot( “/1005424/_dPSv4_mob-all-article-bottom_(300×250)”, [300, 250], “pb-ad-78158” ).addService( googletag.pubads() ) ); } );

    The post How to Use Portrait Angles More Creatively: A Visual Guide by Meredith Clark appeared first on Digital Photography School.
    Digital Photography School

  • Review of The MIOPS Smart Trigger

    The MIOPS Smart Trigger is many things you’d want in a photography accessory; small, rugged, and multipurpose. It may not be the perfect answer to any solution, but its range of modes and really cool connectivity options, make it a very useful and intriguing tool nonetheless.

    At the time of this writing, the MIOPS Smart Trigger is available for $ 199.99 at Amazon (for the standard versions), which makes it a bit pricey for its size, but a great value when you consider the depth of its functionality. The trigger features seven different modes of operation, all available with various sensitivity settings, they include:

    1. Lightning mode
    2. Sound trigger mode
    3. Time lapse mode
    4. Laser mode
    5. HDR mode
    6. DIY mode (experts only)
    7. Scenario or custom mode

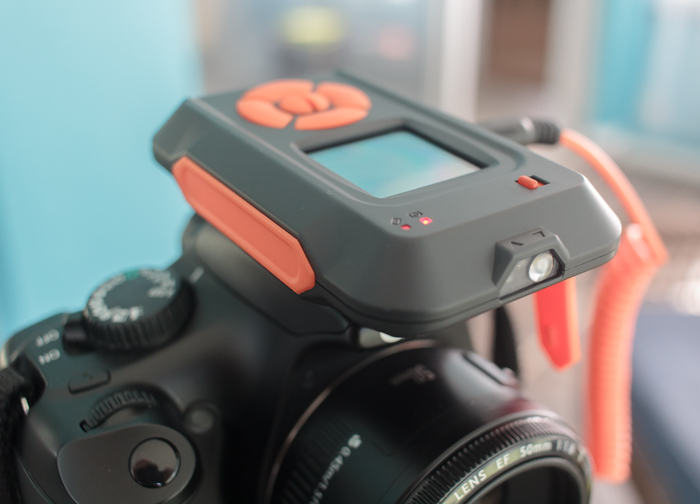
    MIOPS Camera Trigger

    The exterior of the unit is very rugged and appears it would be extremely durable. You definitely get a feeling of solidness when holding it. A 128×128 pixel, full color display, is mounted just above the large buttons, used for operation and selecting menu options on the front of the trigger.

    The device is powered by a 3.7 volt/1020 mAh lithium ion battery, which is rechargeable via the provided USB cable. It is also possible to provide power through the USB connection, with no battery in place.

    This new trigger kit from MIOPS is an evolution (and apparent replacement) to the Nero Trigger previously available from the company. The newer version was reworked, inside and out, to be a more rugged and competent accessory. Versions of the kit are available for Canon, Nikon, and Sony camera systems, as well as other brands including Olympus, and certain smartphones.

    MIOPS7

    The various camera connection cables mean that one unit can operate with many different camera makes and models, and extends the usefulness of the accessory.

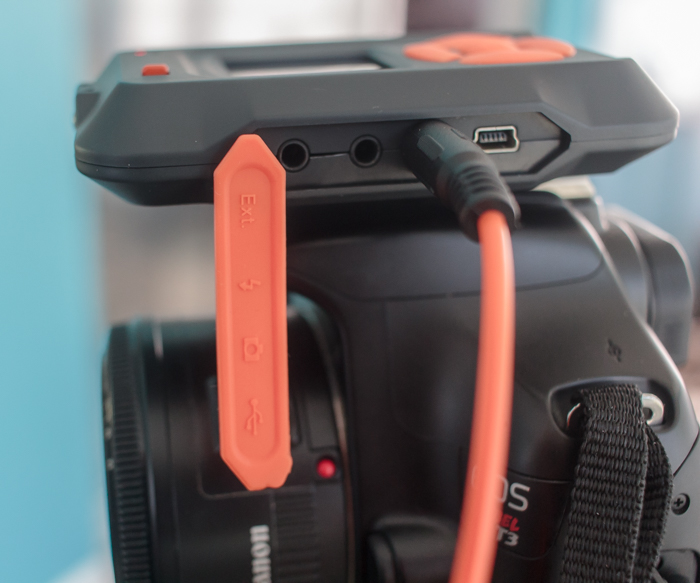
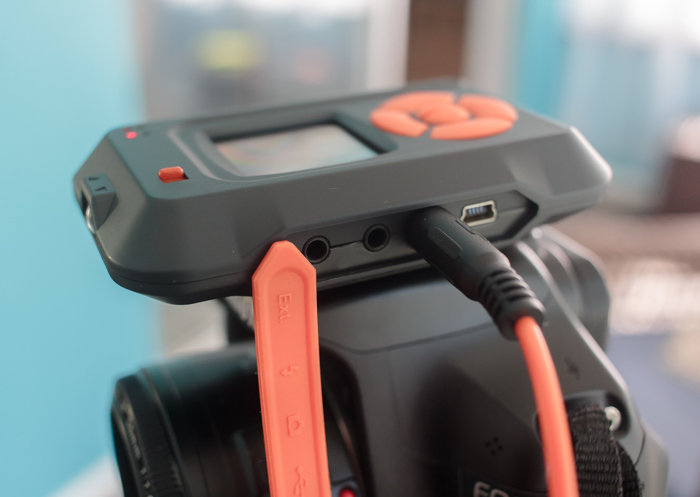
    The trigger unit itself is connected in one of two ways, either to an external flash unit, or to the camera itself. Cables for each are included with each unit. This allows the trigger to sync and fire, either the flash system, or the camera shutter itself. Flash units are connected via the PC sync jack, and cameras are connected through the remote shutter release jack, meaning any camera or flash unit with these common connectors can be potentially be paired with the MIOPS trigger.

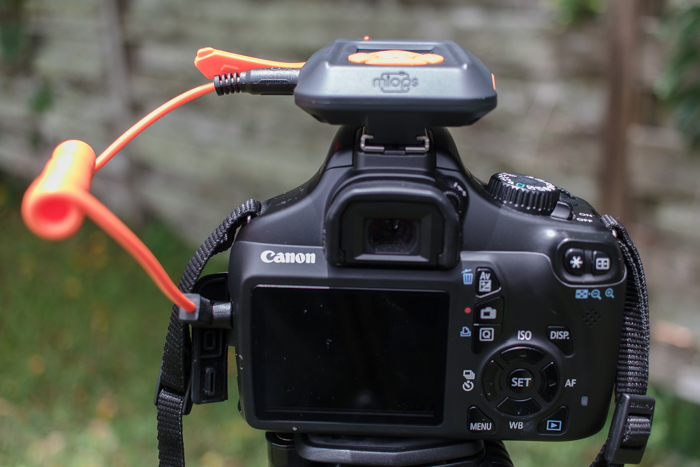
    The MIOPS trigger can either mount on your DSLR’s hotshoe connector, or on your tripod via a standard screw-in connection.

    The MIOPS trigger can either mount on your DSLR’s hotshoe connector, or on your tripod or light stand, via a standard screw-in connection.

    The unit can be connected for charging via a micro-USB cable, which basically means most smartphone charging cables, which are readily available. The trigger housing is rugged plastic, with raised, easy to press controls and features a large color screen for displaying information, a microphone, and a light sensor that is used for the Lightning and Laser modes. Lastly, an additional port is available for connecting various external sensors in DIY Mode.

    The trigger slides on a standard camera hot shoe, but also has a screw mount for placement on a separate tripod or light stand.

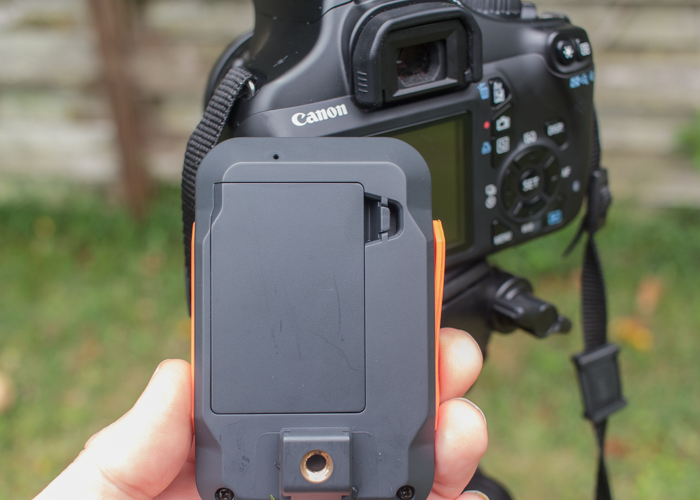
    The trigger will accept a standard screw-in type connection for mounting on a tripod.

    The trigger will accept a standard screw-in type connection for mounting on a tripod.

    To me, one of the best features of the unit is its available remote connectivity via the MIOPS smartphone app. The app is free (available for Apple and Android phones), and allows you to access and control all modes offered by the trigger. After downloading the app, I found it connected to the unit without issue, and I was able to access all modes and modify the settings quickly, without having to even look at the unit mounted on top of my camera.

    The accompanying MIOPS smartphone app is a highlight of the system, and allows you to control everything remotely.

    The accompanying MIOPS smartphone app is a highlight of the system, and allows you to control everything remotely.

    1 – Lightning Mode

    Lightning mode is intended to allow you to capture flashes of lightning with your camera, without having to run series of long exposures or using bulb mode. You can set the sensitivity from 1 to 99, and start the sensor to capture the event. This mode is also sensitive to other types of light, such as fireworks, sparks, as well as artificial light, widening the gamut of possibilities. I didn’t get an opportunity to test the unit in a lightning storm, but I did attempt to trigger the MIOPS with a burst from a flashlight, and found that it picked up the light immediately and accurately.

    As with several modes on the product, you’ll need to have your camera’s lens in manual focus in order for it to work.

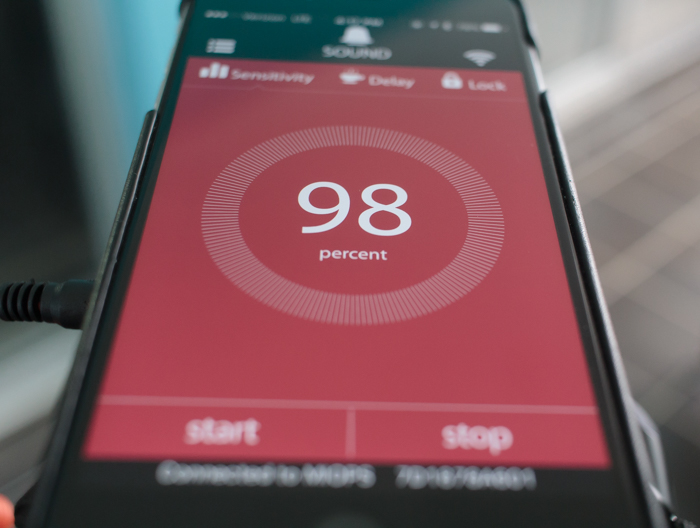
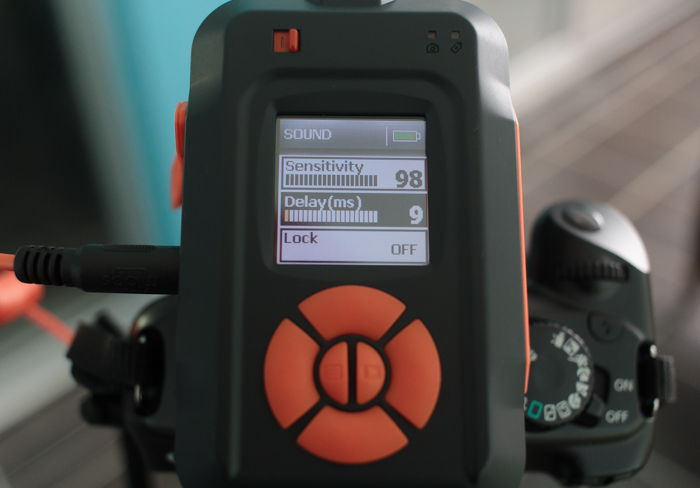
    2 – Sound Mode

    Although this is the mode you’d expect to be the most useful, (and the biggest draw to the device) I found this one less intriguing due to the way it works. Without using the device, I’d expect it to allow me to trigger the shutter (cables are included to hook the MIOPS unit up to either your camera shutter, or an external flash unit), and capture the image, such as a balloon being popped, for example. This isn’t possible however, due to a slight lag, and the ridiculous shutter speeds necessary.

    Each mode features several customizable parameters, each adjustable on the unit itself as well as the smartphone app.

    Each mode features several customizable parameters, each adjustable on the unit itself as well as the smartphone app.

    Instead, you have to perform any captures of this type in total darkness, a pretty big drawback in my book. The idea is to leave your camera shutter open (which is why darkness is needed), and use the MIOPS unit to trigger a separate flash and capture the action.

    As a natural light landscape photographer, I don’t have external speedlites available to me. The one I was finally able to get ahold of ended up not being a TTL enabled flash, and didn’t have the connection port I needed to use it.

    In the end, I became frustrated and gave up. But of course, this isn’t the trigger’s only feature, and there were plenty of other modes to keep me busy and satisfied.

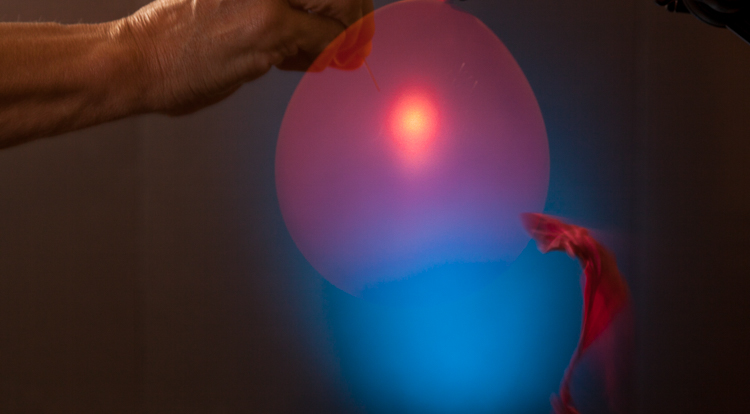
    Editor’s note: I actually had a chance to try out the Miops trigger as well and was playing with sound mode. My friend and I had the same issues – we realized we had to fire the flash with it, in total darkness and somehow pop the balloon. We tried it on a balloon and smashing a light bulb. This is all we managed to get:

    miops-sound-750px-01

    Not exactly frozen or what we were hoping for. We learned later that by turning down the power on the flash the duration is shorter and more freezing occurs. Would have been good for more helpful instructions to come with the unit. We struggled to make this work.

    miops-sound-750px-02

    The best bulb smash we got after many attempts. Be careful if you try this at home! – Darlene

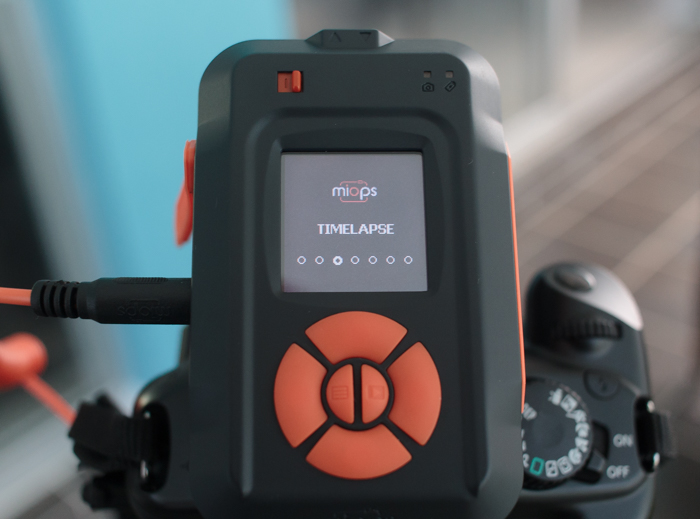
    3 – Time Lapse Mode

    Another extremely useful mode is the time lapse feature. With this mode you’re able to set a few parameters, to produce a set of images showing changes to a scene over a period of time. With this feature, you must set your camera to bulb mode so that the trigger can override your camera’s settings.

    MIOPS5

    After switching to time lapse mode on the unit, you can set the interval (how often the camera takes a shot), the exposure (this is why your camera must be in bulb mode), as well as the total number of images that will be shot before the process completes.

    In my testing, I found it very easy to set these parameters, and after a couple of trials, was pleased to find all of the functionality of this mode worked perfectly, without any issues.

    4 – Laser Mode

    This is another mode that I was unable to try out, but based on the accuracy of the sensor, I believe it would perform well. This mode requires a constant laser beam to be fed into the front sensor, and will trigger the camera when this beam is broken.

    The laser doesn’t have to be a particular type or color, meaning a $ 10 pen laser pointer from an electronics store will do just fine. The hardest part of the operation will probably be mounting the laser on a stable surface and preventing the beam from being broken prematurely. After you’ve setup the laser, you can adjust the delay on the unit up to 999 milliseconds. A final setting allows you to designate a set number of frames to capture in this mode before the trigger stops.

    This mode could be used to capture animals moving into the frame (could be tricky to setup) or something falling or moving like pouring shots or freezing water droplets.

    10

    Image by dPS author Ivo Guimaraes

    5 – HDR Mode

    HDR is a familiar term for most photographers; it is a technique where two or more images of varying levels of exposure are combined in post-production to capture a higher dynamic range, more equivalent to what the human eye sees. The MIOPS trigger allows you to set these parameters on the unit itself, including the center value (the middle value in the range of exposure levels to be captured), the difference in exposure value from one frame to the next (such as 1 stop between, or 1 1/2 stops between), and the total number of frames to expose, up to 7.

    A 3 shot HDR composite from the MIOPS trigger.

    A 3 shot HDR composite from the MIOPS trigger.

    While this feature definitely extends the functionality and usefulness of the device, it must be said that it doesn’t really offer anything that most DSLR’s can’t do already, and I would almost always prefer to just set this up in-camera.

    6 – DIY Mode

    DIY mode is one of the modes that really makes the MIOPS unit shine, as it adds functionality not standard on most cameras. The trigger has a 3.5mm stereo jack on the side of the housing, and this allows you to connect a multitude of external sensors, adjust the threshold (percentage of change from the sensor), the delay of the trigger event in milliseconds, and mode, which lets you set what type of event detected from the external (add-on) sensor will trigger the unit, such as change, increase, or decrease.

    This mode is advanced, and requires multiple connections in most cases, but the possibilities are almost endless. Sensors that measure changes in temperature, pressure, humidity, or motion can all be used to trigger the camera’s shutter.

    7 – Scenario Mode

    Scenario mode basically allows the user to program the unit by stringing together a series of functions, and having them execute based on a unique situation. Up to 5 steps can be saved for each custom scenario, and a total of 3 scenarios can be stored on the trigger. This entire function can then be executed via the Miops unit itself, or remotely via the smartphone app.

    For example, let’s say a thunderstorm is approaching and you want to capture different types of shots during the event. You could program Lightning Mode as the first step, capturing a set number of stills of the lightning, and then immediately activating Time Lapse Mode in the second step, capturing photos at 5 second intervals to assemble later.

    For each step, all of the usual parameters for each mode are available.

    I didn’t get the chance to try this scenario out during an actual thunderstorm, but I did attempt to string together a couple of functions and execute them, and the results were excellent. Once the first step was completed (a 5 shot HDR photo), the trigger immediately went into Sound Mode, and stopped after it detected a loud sound (the clap of my hands from a few feet away).

    I’d definitely chalk this mode up as one of the most useful features of this unit.

    Remote Release

    To me, this is one of the most useful features of the MIOPS trigger. I can connect the unit via bluetooth, fire up the accompanying app, and control my shutter from several feet away, wirelessly.

    I tried this in a normal scenario I often find myself in, which is my tripod lowered to a short height, legs planted into the surf of a local beach, taking low angle, long exposure shots.

    MIOPS_LowAngleBeach

    I was able to snap off many perfectly-timed images, without ever having to worry about holding on to my usual corded cable release, keep the camera as still as possible, while avoiding the high winds blowing the cord around and smacking my camera.

    I will use this, all the time!

    Conclusion

    The MIOPS Camera Trigger is a sturdy, rugged little unit that was easy to set up and use (note: this device is more aimed at intermediate to advanced photographers and could easily be confusing for beginners). It has a couple of features that almost make it worth the price of admission in my book, but a few issues linger that keep it from being the perfect tool, including a highly-touted Sound Mode. It promises high-speed photography but requires total darkness and a flash setup to accomplish, as well as a couple of modes that feel a bit tacked on, and not anything you couldn’t do already with existing camera settings (HDR and time lapse).

    MIOPS6

    Still, the MIOPS is a fun tool to use, the Remote Release mode, DIY mode, and smartphone connectivity are extremely useful, and if you’ve got $ 200 bucks burning a hole in your pocket for a new gadget, this might be one to pick up.

    Have you had any experience with the MIOPS Camera Trigger, or triggers in general? Sound off below and let us know what you think, and show us some of the work you’ve accomplished!

    googletag.cmd.push(function() {
    tablet_slots.push( googletag.defineSlot( “/1005424/_dPSv4_tab-all-article-bottom_(300×250)”, [300, 250], “pb-ad-78623” ).addService( googletag.pubads() ) ); } );

    googletag.cmd.push(function() {
    mobile_slots.push( googletag.defineSlot( “/1005424/_dPSv4_mob-all-article-bottom_(300×250)”, [300, 250], “pb-ad-78158” ).addService( googletag.pubads() ) ); } );

    The post Review of The MIOPS Smart Trigger by Tim Gilbreath appeared first on Digital Photography School.

    Digital Photography School

  • DEAL: Learn How to Take Beautiful Black and White Photos for just $6

    NewImageToday is deal 4 of our mid year sale and you’re sure to love this one…

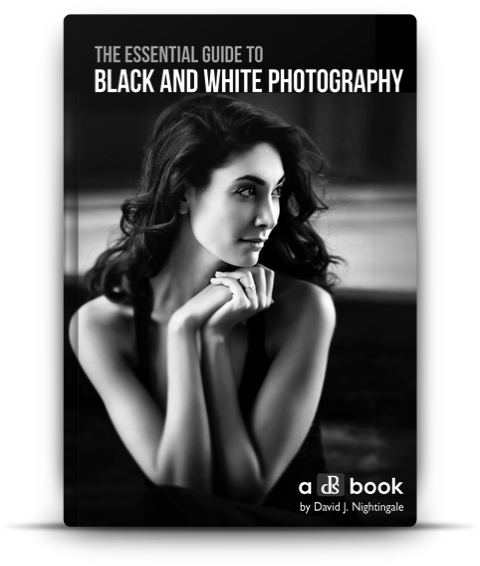
    Our Essential Guide to Black & White Photography ebook – just $ 6!

    We’ve never offered this best selling eBook at this price – so save 70% today only.

    Grab your copy using this link: http://resources.digital-photography-school.com/summer/day4

    Not only do black and white images have undeniable beauty, they can also bring added emotion, passion and drama to your photography portfolio. So if you’re looking to ramp up any of these things in your work, then this is definitely the deal for you.

    Remember, each deal this week is open for 24 hours only. So get in early or risk missing out on this exceptional $ 6 price!

    Snap it up here before it’s gone.

    Note: as with all our eBooks this one comes with a money back guarantee. If you don’t find it suits your needs simply contact our support team within 60 days and we’ll refund your money – no questions asked.

    googletag.cmd.push(function() {
    tablet_slots.push( googletag.defineSlot( “/1005424/_dPSv4_tab-all-article-bottom_(300×250)”, [300, 250], “pb-ad-78623” ).addService( googletag.pubads() ) ); } );

    googletag.cmd.push(function() {
    mobile_slots.push( googletag.defineSlot( “/1005424/_dPSv4_mob-all-article-bottom_(300×250)”, [300, 250], “pb-ad-78158” ).addService( googletag.pubads() ) ); } );

    The post DEAL: Learn How to Take Beautiful Black and White Photos for just $ 6 by Darren Rowse appeared first on Digital Photography School.

    Digital Photography School

  • Deal 3: Save $401 on The Complete Landscape Photography Pack

    It’s Day 3 of our Summer Sale and if you’re interested in the art of landscape photography – this offer is for you!

    Day 03 fb ad
    InFocus Deals are offering dPS subscribers their Complete Landscape Photography Pack with a massive 89% discount!

    For US$ 49 you’ll get US$ 450 worth of learning materials in The Complete Landscape Photography Pack – a mammoth savings of US$ 401!

    Take a look at what’s in this amazing Landscape Photography pack:

    Get full details of the bundle over at the InFocus Deals Page

    This bundle is huge and will help you improve your Landscape Photography for sure!

    But of course, as with all our deals this week, an offer this fantastic can’t last forever.

    So, don’t miss out. Lock in the unbeatable savings of US$ 401 today.

    googletag.cmd.push(function() {
    tablet_slots.push( googletag.defineSlot( “/1005424/_dPSv4_tab-all-article-bottom_(300×250)”, [300, 250], “pb-ad-78623” ).addService( googletag.pubads() ) ); } );

    googletag.cmd.push(function() {
    mobile_slots.push( googletag.defineSlot( “/1005424/_dPSv4_mob-all-article-bottom_(300×250)”, [300, 250], “pb-ad-78158” ).addService( googletag.pubads() ) ); } );

    The post Deal 3: Save $ 401 on The Complete Landscape Photography Pack by Darren Rowse appeared first on Digital Photography School.

    Digital Photography School

  • 4 Tips for Better Child Photography by a Mom

    Elena Shumilova and her family moved to the country and she started photographing her two sons. Then she put her images online and something magical happened – the world loved them! She has over 50 million views of her images and counting.

    In the first video below you can see how she captures the natural moments of her children’s lives in such a way as to captivate the world. Then watch the second to get four tips you can use to do the same and do better child photography of your own kids, grandkids or neighbors.

    Mom Captures Childhood of Her Sons

    4 Expert Tips for Child Photography

    You can see more of Elena’s images of childhood here.

    Are you inspired? Go take some photos of the children in your life and share them below!

    googletag.cmd.push(function() {
    tablet_slots.push( googletag.defineSlot( “/1005424/_dPSv4_tab-all-article-bottom_(300×250)”, [300, 250], “pb-ad-78623” ).addService( googletag.pubads() ) ); } );

    googletag.cmd.push(function() {
    mobile_slots.push( googletag.defineSlot( “/1005424/_dPSv4_mob-all-article-bottom_(300×250)”, [300, 250], “pb-ad-78158” ).addService( googletag.pubads() ) ); } );

    The post 4 Tips for Better Child Photography by a Mom by Darlene Hildebrandt appeared first on Digital Photography School.

    Digital Photography School

  • How to Edit Corporate Headshots in Lightroom

    Although even lighting, and perfect exposure are your biggest allies when it comes to making people look their best in headshots, there are many small adjustments you can make in the editing process, that will make your shots (and your clients) look that much more professional.

    corporate-18-of-18b

    To begin, a lot of things on the day of the shoot will be out of your control. Take a booking I had recently, for example, it was scheduled on a Friday afternoon after a full week of the Annual Meeting. All the head honchos were dead tired and this was the last thing on their to-do list. After a week of deciding the future of their company, a lot of them looked a little, let’s say, less than fresh. Dehydration, bags under the eyes, and coffee-stained teeth began to rear their ugly heads. Because we’re human, and that’s what happens. Although soft light helps, our wonderfully designed cameras tend to be rather unforgiving of the under-slept.

    Although most of my corporate headshot clients know that post-production doesn’t mean they’ll end up as Heidi Klum, they do appreciate just a smidge of help once the photos are loaded up.

    Corporate touch-ups are about making the subject look as fresh as can be. I like to keep my post-processing efficient, effective, and easy, so I can get the photos off my desk and onto theirs as quickly as possible. Here’s how I tackle it.

    My Lightroom Workflow

    Let’s start with the shot straight out of camera.

    dpsheadshot (1 of 1)

    This particular company wanted to feature their employees in their native work environment, so the office became the background, which eliminated the need to bring a backdrop. I lit the subject with window light, an octabox, and a reflector. You’ll notice I shot these with 50mm lens as well. Normally, I’d grab my 85mm for corporate work, but we were out of town and didn’t have our full complement of gear with us. The 50mm did the job just fine.

    My first step is to adjust the Cropping, Exposure, and White Balance. I need to crop the reflector out of the frame for starters, apply a lens correction to get the side wall to line up. I’m happy with the way the White Balance is on this, but I’d like to take the exposure up slightly and take the overall highlights down slightly.

    We end up with this:

    dpsheadshot2 (1 of 1)


    Local Adjustments

    The local (in one area of the image only) adjustments I use are subtle. The best way to get some of these adjustments is to have the client get a great night’s rest and stay hydrated, but those are mostly out of our control. These adjustments aren’t meant to turn anyone into an airbrushed masterpiece, just to give them a little nudge.

    Before we dive in, let’s review some Local Adjustment Quick Keys to help you in the process.

    Adjustment Brush Quick Keys

    • Press H to hide or show the pin you’re using. This is helpful when the pin is in the way and you want it to disappear.
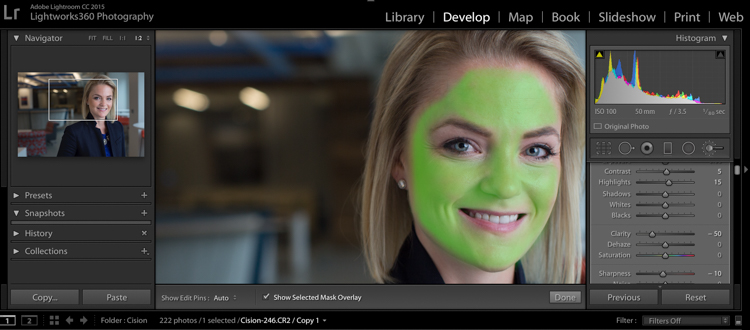
    • Press O to hide or show a mask overlay of the Adjustment Brush tool effect, or use the Show Selected Mask Overlay option in the toolbar. This is helpful so you can see exactly what areas you’re affecting. It also makes editing at a coffeeshop or plane pretty funny because whoever peeks over your shoulder thinks you’re turning all your subjects into the Incredible Hulk. (Shift+O will tile through the overlay colors: white, black, red, green).
    • Press Ctrl+Z (Windows) or Command+Z (Mac OS) to undo your adjustment history.
    • Hold Alt to take away any mask you’ve put in (holding Alt while you use the paintbrush turns it into an eraser to paint away). This is helpful just to clean up any minor mistakes you made while adding adjustments.

    Okay, here are the adjustments I make (in this order too):

    #1 Soften Skin

    This helps just to clear up pores and generally be forgiving of any blemishes.

    • Clarity -50
    • Sharpness -10
    • Contrast +5
    • Highlights +15 (to counteract the highlights being muddied by lowering clarity)

    I take my brush over the entire face except for the eyes, eyebrows, and lips, so the face is fully Hulkified.

    dpsheadshot (1 of 6)

    Note that you can change the color of the Mask Overlay (Shift+O), but I just stick with green as it’s nice and easy to see. If you make a mistake and go over any of the areas you want unaffected, just use the Alt key to turn the brush into an eraser and paint them away.

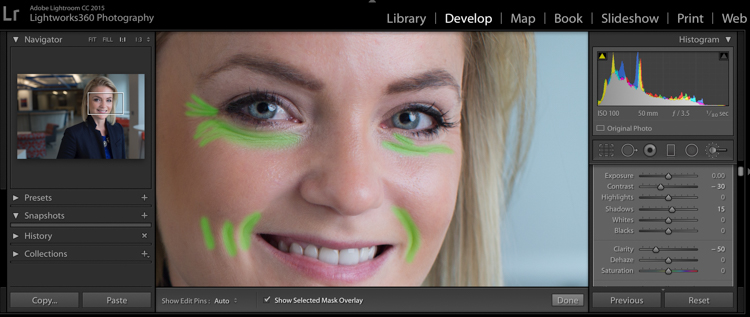
    #2 Diminish Lines

    I put this in to give an overall softening of shadows created with any kind of wrinkle or smile line.

    • Contrast -30
    • Shadows +15
    • Clarity -50
    • Sharpness -10

    dpsheadshot (2 of 6)

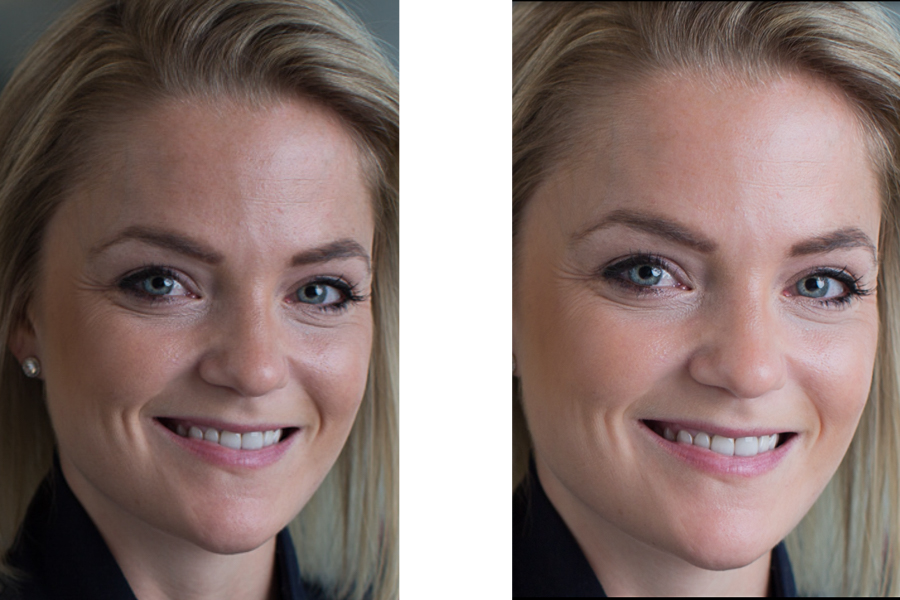
    So let’s look at the before and after of what we have so far. You’ll see that the the skin is more even throughout, and the deep shadows of the lines are reduced and softened, but not removed completely. The goal is to freshen, not make them look like a plastic doll.

    dpssidebysideskin

    Next up, let’s get those eyes popping a little more. This is easy to overdo, so be judicious with this step.

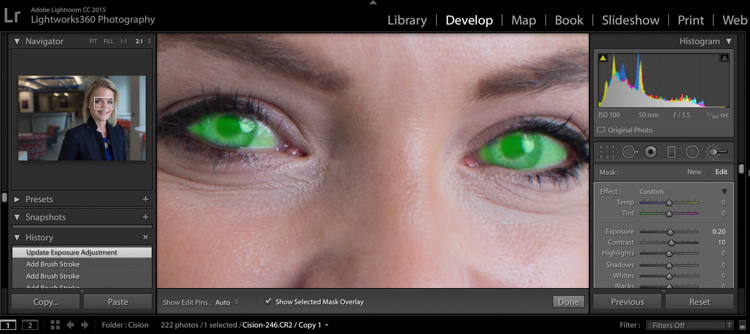
    #3 Brigthen Eyes

    Get the whole eye in this first adjustment:

    • Exposure +0.2
    • Contrast +10
    • Clarity +10

    dpsheadshot (4 of 6)

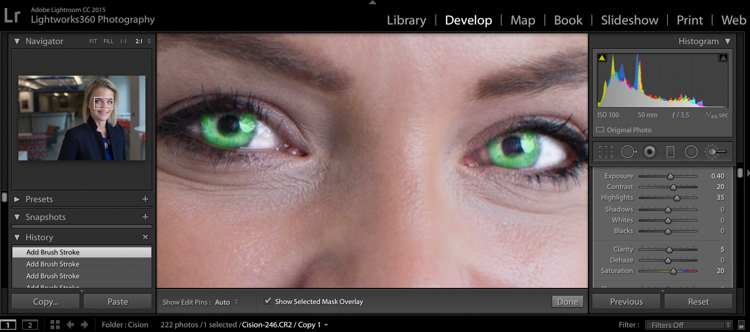
    #4 Enhance the Iris

    Now we’ll focus on just the colorful part of the eye, the iris. We’ll add a little more exposure and a touch of saturation:

    • Exposure +0.40
    • Contrast +20
    • Highlights +35
    • Clarity +5
    • Saturation +20

    dpsheadshot (3 of 6)

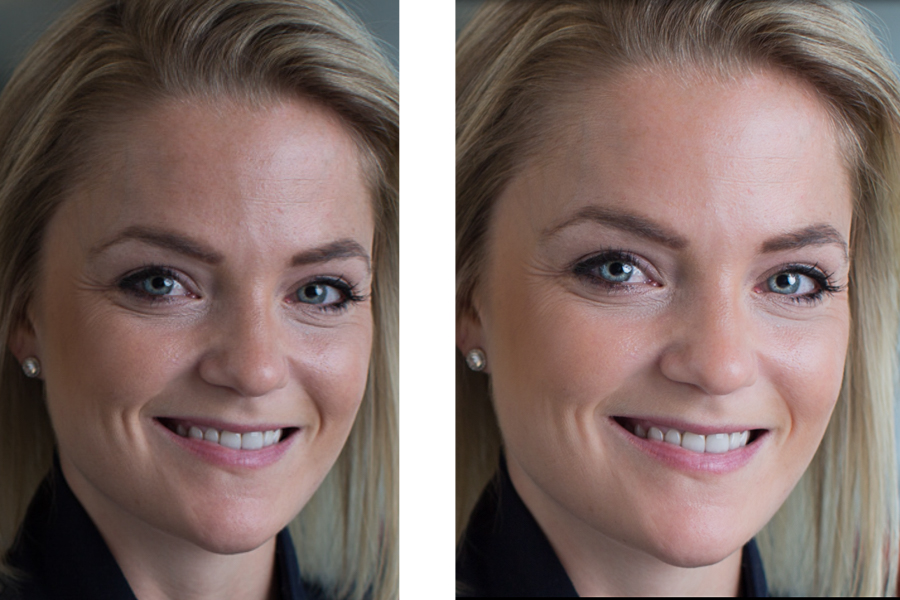
    Let’s check back in with a before and after comparison:

    dpssidebysideeyes

    It’s subtle, but there’s just enough pop around the eyes, without it being overdone.

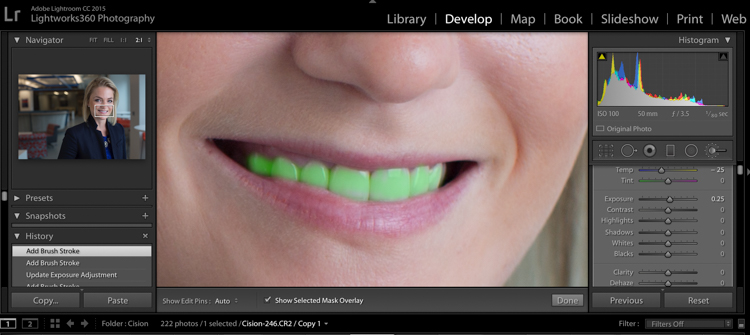
    #5 Whiten the Teeth

    Let’s make their dentist proud:

    • Temp -25 (adding blue takes out any yellow in the teeth)
    • Exposure +0.25
    • Saturation -20

    dpsheadshot (5 of 6)

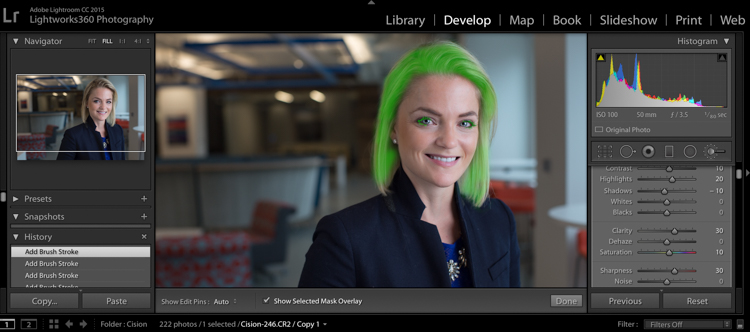
    #6 Hair and Eyelashes

    For this final touch, it’s nice to give a little definition to the hair and eyelashes.

    • Contrast +10
    • Highlights +20
    • Shadows -10
    • Clarity +30
    • Saturation +10
    • Sharpness +30

    dpsheadshot (6 of 6)

    Cute wig, right?

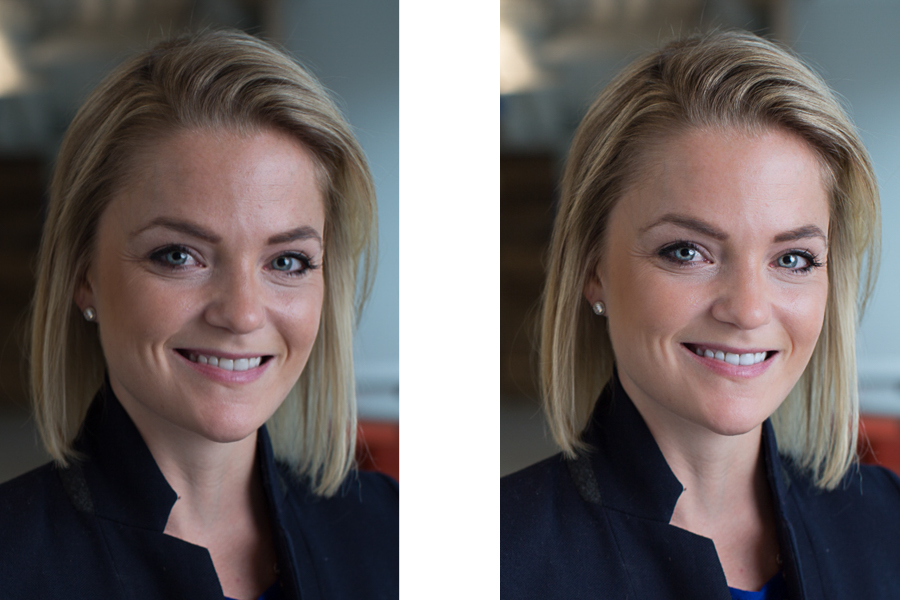
    Let’s look at the final before and after now:

    dpsheadshotsidebysidefinal

    And here’s the photo that was delivered to the client:

    dpsheadshotdeliver (1 of 1)

    All of these changes are delicate. Done right, and they’re almost imperceptible. Retouching your corporate headshots doesn’t need to be an hours-long endeavor. Your clients don’t need to be on the cover of Vogue– they need a no-fuss photo that’s Linkedin ready, and shows them at their best.

    googletag.cmd.push(function() {
    tablet_slots.push( googletag.defineSlot( “/1005424/_dPSv4_tab-all-article-bottom_(300×250)”, [300, 250], “pb-ad-78623” ).addService( googletag.pubads() ) ); } );

    googletag.cmd.push(function() {
    mobile_slots.push( googletag.defineSlot( “/1005424/_dPSv4_mob-all-article-bottom_(300×250)”, [300, 250], “pb-ad-78158” ).addService( googletag.pubads() ) ); } );

    The post How to Edit Corporate Headshots in Lightroom by Tim Sullivan appeared first on Digital Photography School.


    Digital Photography School

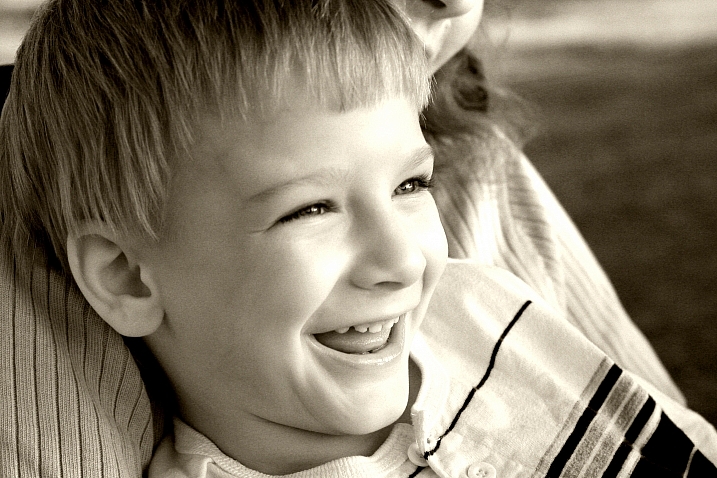
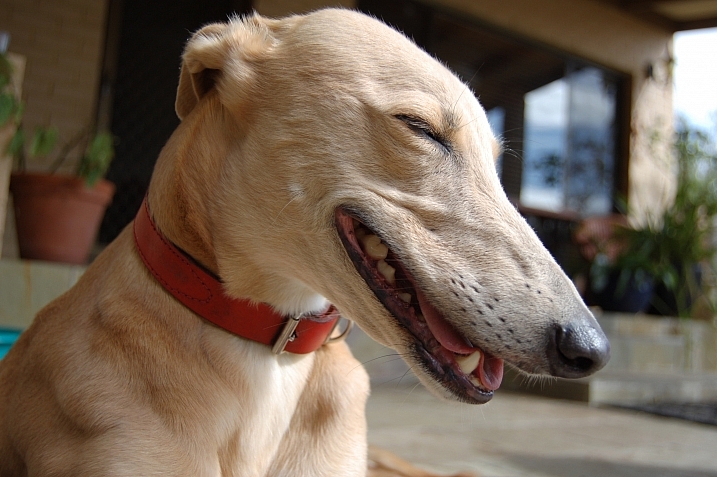
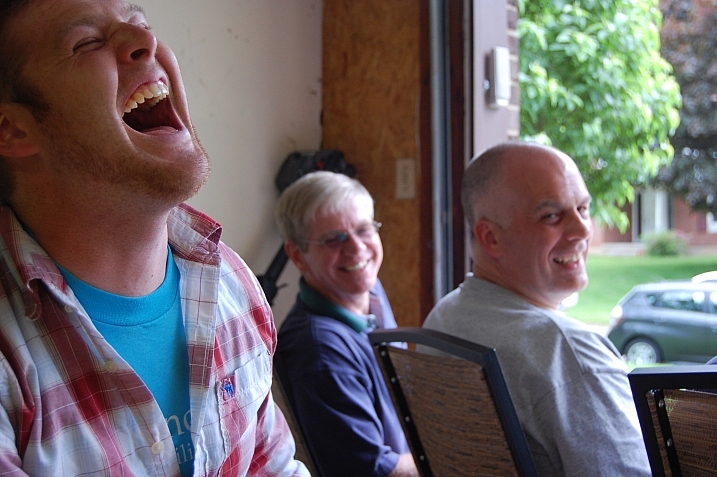
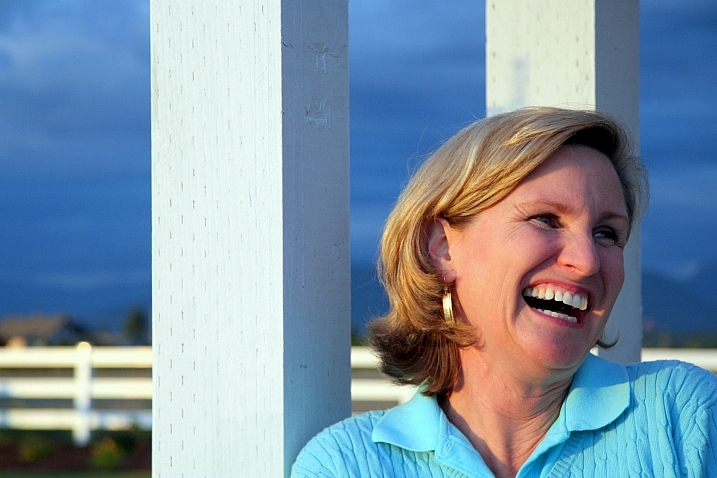
  • 21 Fun Images of People Laughing

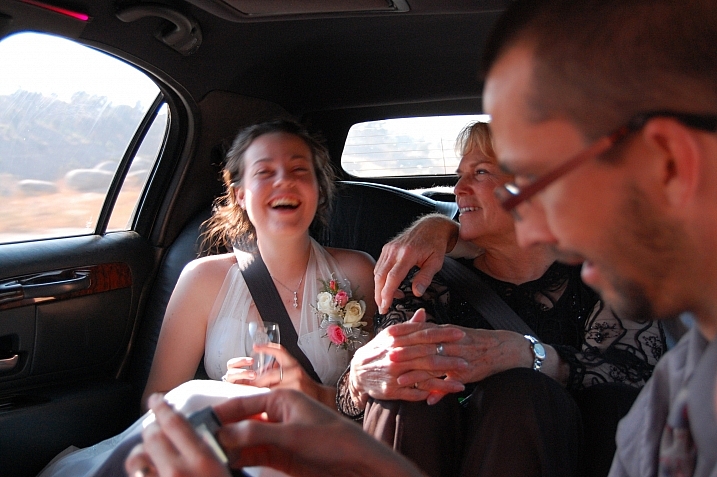
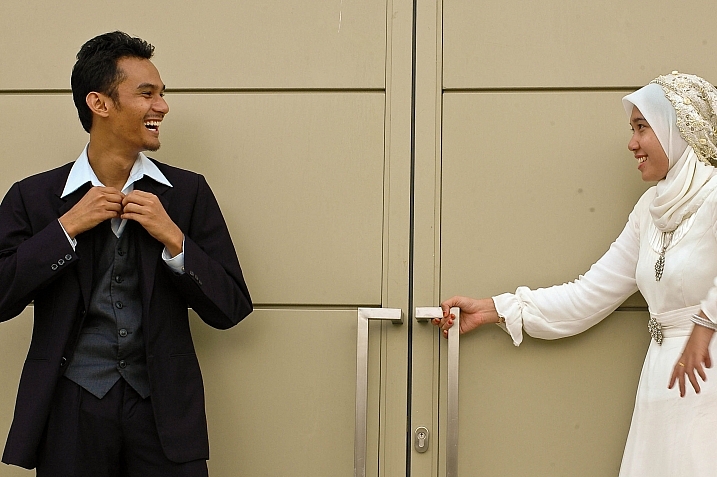
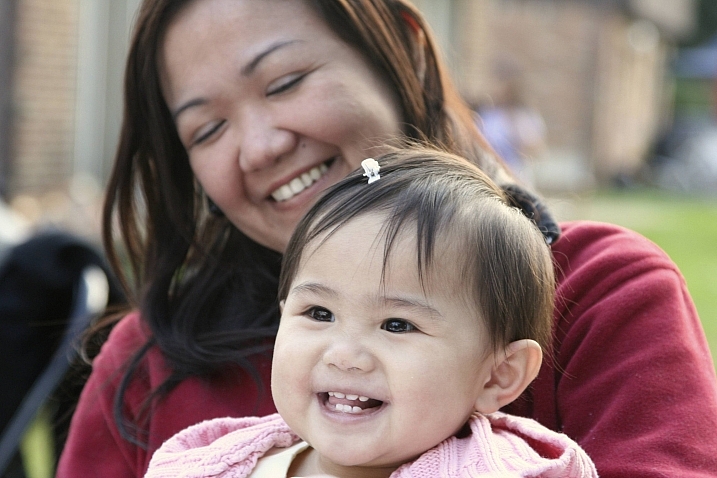
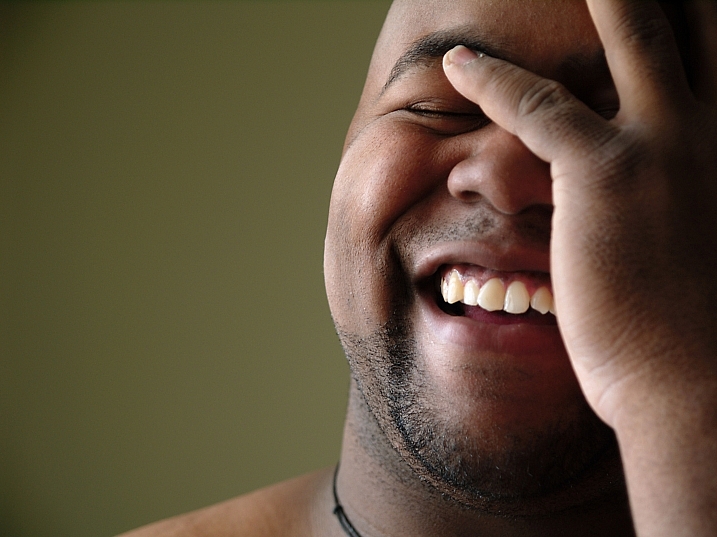
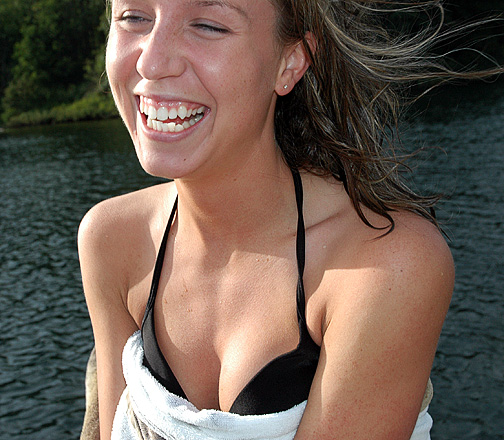
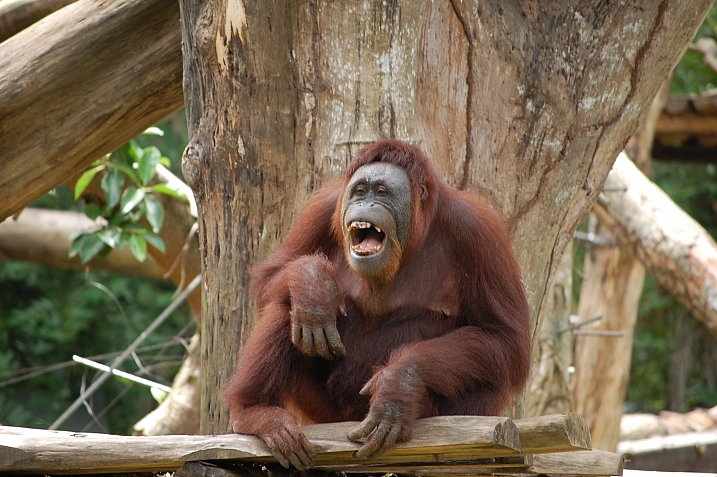
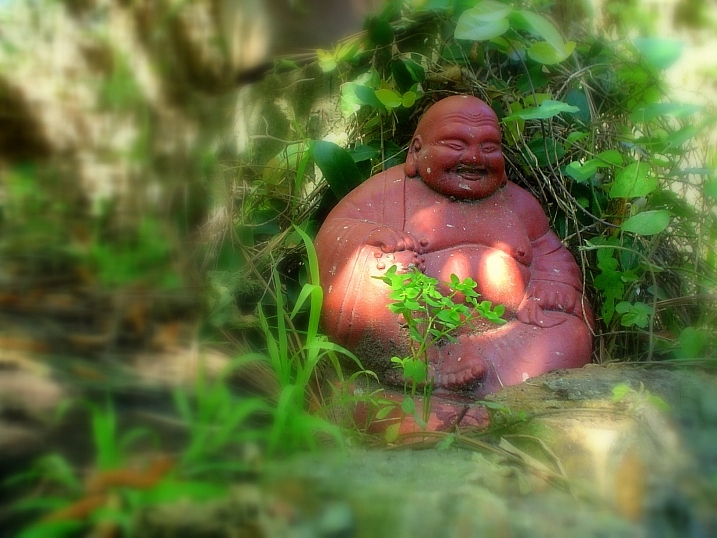
    Laughter is contagious. One person starts doing it and soon others around them follow.

    Overduebook

    By Overduebook

    Capturing real human emotions with a camera can be challenging. Some people are guarded with their emotions, and getting a real smile, let alone a laugh can be difficult.

    If you’re a portrait photographer it’s your job to make your clients feel at ease enough to relax and let their real emotions show. If you do candid or street photography it’s about paying attention and capturing just the right moment. Here are some images of people laughing to get you inspire or maybe to put a smile on your face too.

    Notice they aren’t all technically perfect, but can you feel the emotion and hear the laughter? Then the image is successful. Yes, animals count too!

    Naomii.tumblr.com

    By naomii.tumblr.com

    Marc Kjerland

    By Marc Kjerland

    Rosino

    By Rosino

    *Robert*

    By *Robert*

    Al-jubey

    By al-jubey

    Via Tsuji

    By Via Tsuji

    Gregory Gill

    By Gregory Gill

    David K

    By David K

    Rachael

    By Rachael

    Philippe Put

    By Philippe Put

    MichelleNMS

    By MichelleNMS

    Devon D'Ewart

    By Devon D’Ewart

    Filippey

    By Filippey

    Peter Kelly

    By Peter Kelly

    Alon

    By Alon

    Davina

    By Davina

    Tommy Wong

    By Tommy Wong

    Taminator

    By taminator

    Su-lin

    By su-lin

    François Reiniche

    By François Reiniche

    Sadiq Alam

    By Sadiq Alam

    googletag.cmd.push(function() {
    tablet_slots.push( googletag.defineSlot( “/1005424/_dPSv4_tab-all-article-bottom_(300×250)”, [300, 250], “pb-ad-78623” ).addService( googletag.pubads() ) ); } );

    googletag.cmd.push(function() {
    mobile_slots.push( googletag.defineSlot( “/1005424/_dPSv4_mob-all-article-bottom_(300×250)”, [300, 250], “pb-ad-78158” ).addService( googletag.pubads() ) ); } );

    The post 21 Fun Images of People Laughing by Darlene Hildebrandt appeared first on Digital Photography School.

    Digital Photography School

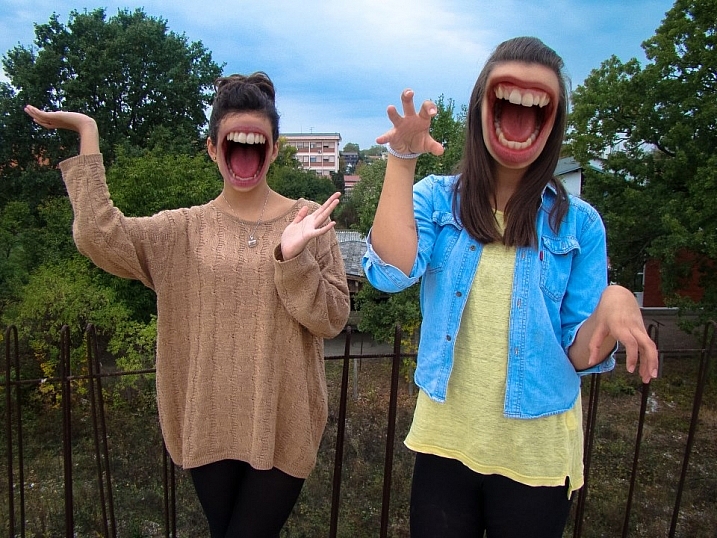
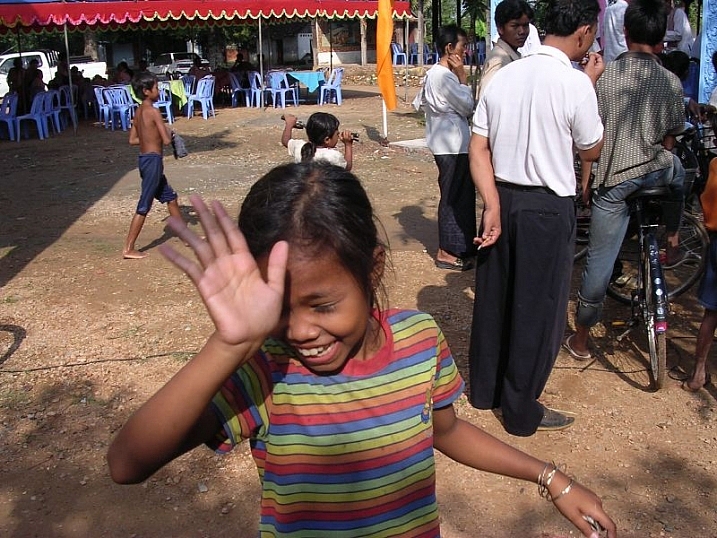
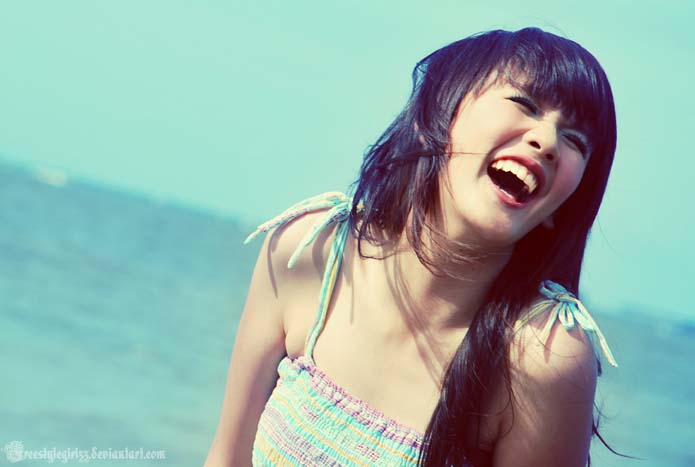
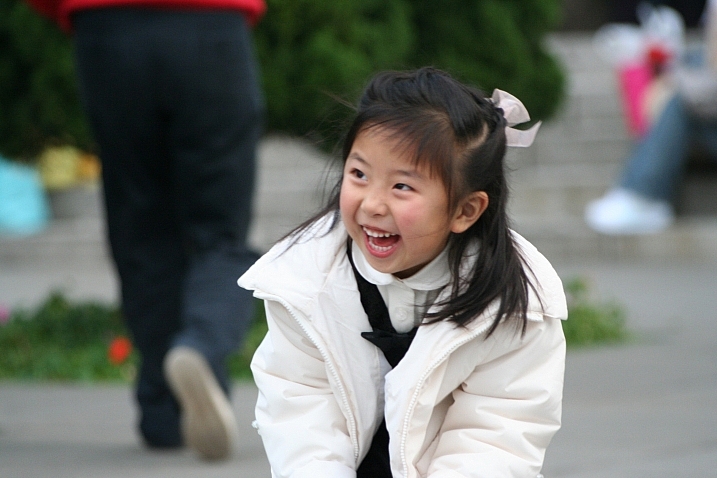
  • Weekly Photography Challenge – Laughter

    Real, natural emotions captured with a camera can be challenging like getting photos of real laughter.

    How to approach people photography is up to you. There are two basic approaches:

    1. The sneak attack with a long lens where the subject is unaware of being photographed
    2. The direct approach where the subject is engaged with you and the camera
    Meena Kadri

    By Meena Kadri

    Dennis Brekke

    By Dennis Brekke

    Weekly Photography Challenge – Laughter

    How you decide to approach it is up to you. Do you prefer to be inconspicuous and wait for the right moment, observing people from afar. Or do you like to be part of the action, maybe even take part in or help cause the laughter.

    Do you find, like I do, that children are quicker to laugh than adults? Perhaps because they have less inhibitions? Or maybe they’re just sillier?

    Either way – go take some photos of people laughing, and have some fun yourself!

    Pauleon Tan

    By Pauleon Tan

    Thomas Hawk

    By Thomas Hawk

    Atli Harðarson

    By Atli Harðarson

    Becca.peterson26

    By becca.peterson26

    Elizabeth Pfaff

    By elizabeth pfaff

    BMiz

    By BMiz

    Share your images below:

    Simply upload your shot into the comment field (look for the little camera icon in the Disqus comments section) and they’ll get embedded for us all to see or if you’d prefer upload them to your favourite photo sharing site and leave the link to them. Show me your best images in this week’s challenge. Sometimes it takes a while for an image to appear so be patient and try not to post the same image twice.

    googletag.cmd.push(function() {
    tablet_slots.push( googletag.defineSlot( “/1005424/_dPSv4_tab-all-article-bottom_(300×250)”, [300, 250], “pb-ad-78623” ).addService( googletag.pubads() ) ); } );

    googletag.cmd.push(function() {
    mobile_slots.push( googletag.defineSlot( “/1005424/_dPSv4_mob-all-article-bottom_(300×250)”, [300, 250], “pb-ad-78158” ).addService( googletag.pubads() ) ); } );

    The post Weekly Photography Challenge – Laughter by Darlene Hildebrandt appeared first on Digital Photography School.

    Digital Photography School

  • DEAL: Save 72% off Lightroom Editing System for Travel Photography

    Travel lightroom presetsIt’s day 2 of our Summer Sale and today we have a special Adobe Lightroom Presets Travel pack* for you with a 72% Saving.

    This “system” normally sells for $ 176, but it’s being offered to dPS readers for the special price of $ 49 USD – a massive 72% saving.

    One of the best parts about travelling is documenting your trip with pictures. But what’s not so great is pending hours weeding out the stinkers from the keepers. And editing them to look as awesome as possible.

    What if you could systemize and cut the editing process in half?

    And reduce the struggle, endless fiddling and overwhelm with all the features and options of Lightroom editing tools?

    Well, now you can thanks to the Lightroom Rapid Editing System for Travel Photography.

    Pro travel photographer Viktor Elizarov got tired of drowning in digital images. And spending more time processing pictures than taking them.

    So he searched for a better way. And after a year testing different approaches and systems with lots of trial and error – the Rapid Editing System was born.

    And he wants to share it with you.

    Learn how to automate 80% of your editing process so you save time on repetitive tasks. And have more free time to spend on fun tasks (like taking pictures).

    Viktor’s system features a large collection of Lightroom Presets specifically for travel photography. And will help take your photos from good to great – fast.

    Viktor normally sells his system for $ 176, but he’s offering it to dPS subscribers for the special price of $ 49 – a 72% saving.

    Here’s everything you get:

    • 90+ page eBook with step by step tutorial on how to use Lightroom Rapid Editing System
    • 20 1-Click LANDSCAPE Style presets
    • 20 1-Click CITYSCAPE Style presets
    • 20 1-Click PEOPLE Style presets
    • 10 1-Click Fall Colors Style presets
    • 10 1-Click Winter Colors Style presets
    • 10 1-Click Spring Colors Style presets
    • 10 1-Click Summer Colors Style presets
    • 41 TOOLKIT adjustment presets
    • “Reset All” preset that reverts your image to its original state
    • Documentation and Installation Instructions
    • Source RAW and JPEG photos used in the tutorials

    If you love travel photography – or just want to speed up your post processing – don’t miss out.

    But hurry! This valuable offer for the Lightroom Rapid Editing System for Travel Photography only lasts 24 hours – secure it for yourself and save 72% today only.

    *Note: You’ll need a copy of Adobe Lightroom installed to use these presets.

    googletag.cmd.push(function() {
    tablet_slots.push( googletag.defineSlot( “/1005424/_dPSv4_tab-all-article-bottom_(300×250)”, [300, 250], “pb-ad-78623” ).addService( googletag.pubads() ) ); } );

    googletag.cmd.push(function() {
    mobile_slots.push( googletag.defineSlot( “/1005424/_dPSv4_mob-all-article-bottom_(300×250)”, [300, 250], “pb-ad-78158” ).addService( googletag.pubads() ) ); } );

    The post DEAL: Save 72% off Lightroom Editing System for Travel Photography by Darren Rowse appeared first on Digital Photography School.


    Digital Photography School

  • DEAL: Save 71% on our Complete Portraits Pack of eBooks

    July is here, and do you know what that means?

    It’s time for our dPS Summer Sale where for the next 7 days we’re going to be sharing 7 amazing deals on training resources for photographers!

    While it may not be summer for all of us right now, we can guarantee the 7 deals we have lined up for you over the next 7 days are HOT.

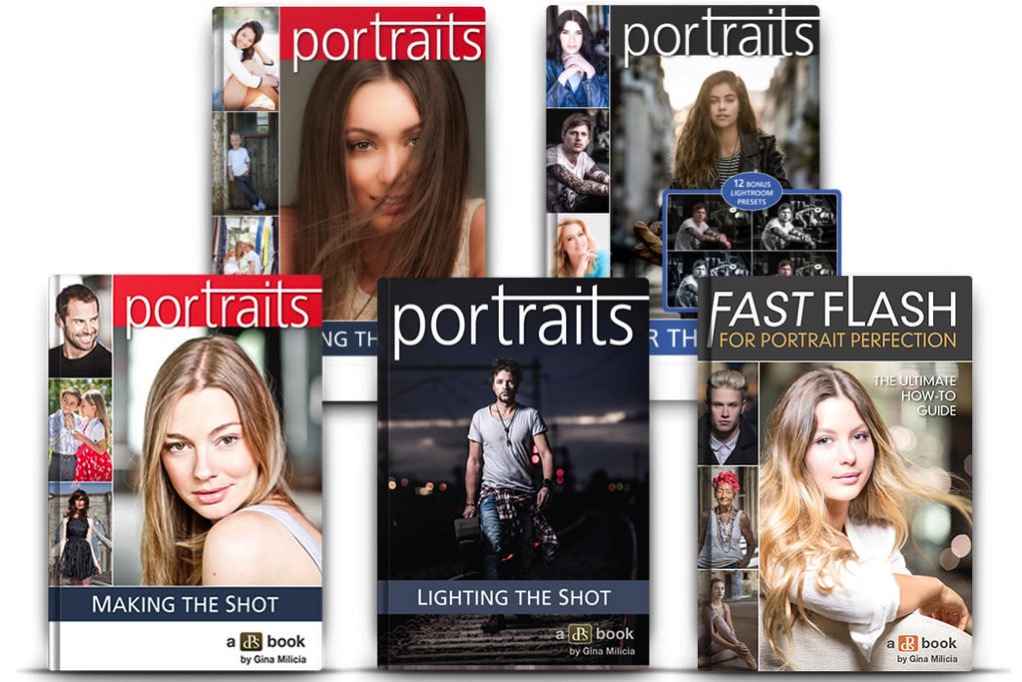
    Deal #1: 71% Off The Complete Portraits Pack

    Photography deal portraits pack

    If you want to transform your dull and lifeless portraits into works of art… whether you’re a beginner, enthusiast, or pro – this deals for you.

    dSP favourite and world class photographer, Gina Milicia shares everything and more about portrait photography in 5 in-depth ebooks.

    Get this ultra comprehensive Portraits pack for $ 29.

    For just $ 29 (a staggering 71% off the regular price) you’ll learn how to take portraits with soul.

    Here’s what you’ll get from one of the best in the biz with these exclusive dSP guides:

    • Portraits: Making the Shot – 84 pages of practical tips for bringing your portraits to life
    • Portraits: Lighting the Shot – 130 pages of the secrets to beautiful portrait lighting
    • Portraits: Striking the Pose – 119 pages and your go-to guide of natural posing positions
    • Portraits: After the Shot – 139 pages on master portrait post production and workflow
    • Fast FLASH For Portrait Perfection – 125 pages of Flash techniques & lighting set ups

    These ebooks regularly sell for $ 19.99 each (dPS readers rave about them!) but when you buy today you’ll only pay $ 7 per ebook!

    But here’s the deal – The Complete Portraits Pack only lasts for 24 hours.

    So if you’ve ever been disappointed that your portraits didn’t capture the true spirit of your subject… or lacks the WOW factor… don’t miss out on this incredible deal.

    Get your 5 ebooks today – they’re crammed with practical, easy to follow, step-by-step instructions, tips and tricks of portrait photography.

    Not only is Gina Milicia one of the best photographers in the business – she’s one of the best teachers!

    Subscribe to Get All 7 Deals the Moment they are Released

    If you’re looking for more photography training deals you can subscribe over on our Summer Sale page here to get notified the moment all of the next 6 days of deals go live. There are some great ones still to come!

    googletag.cmd.push(function() {
    tablet_slots.push( googletag.defineSlot( “/1005424/_dPSv4_tab-all-article-bottom_(300×250)”, [300, 250], “pb-ad-78623” ).addService( googletag.pubads() ) ); } );

    googletag.cmd.push(function() {
    mobile_slots.push( googletag.defineSlot( “/1005424/_dPSv4_mob-all-article-bottom_(300×250)”, [300, 250], “pb-ad-78158” ).addService( googletag.pubads() ) ); } );

    The post DEAL: Save 71% on our Complete Portraits Pack of eBooks by Darren Rowse appeared first on Digital Photography School.

    Digital Photography School