Category: Photography

  • 6 Ways of Using Reflector to Take Better Portraits

    I’ve been making my living as a photographer for over 20 years, and have accumulated thousands of dollars of gear over time. I have the latest Canon SLRs, a full complement of lenses, strobes, light stands, gels, filters, soft boxes, tripods, and even some video and audio gear. But the one thing that often makes the biggest difference in the quality of my portraits is a simple $ 20 reflector. I never leave home without it and neither should you.

    When shooting outdoor portraits, the first thing many photographers think about is the background, but the pros consider the quality of the light first and foremost. They know, for example, that a portrait with nasty overhead lighting is not going to work, no matter how cool the background.
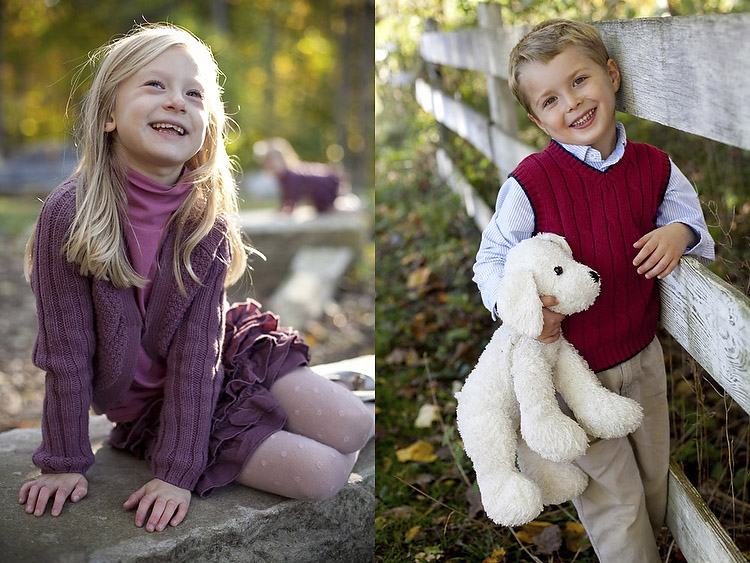
    Photo12

    A reflector can help you salvage bad light, and turn okay light into something magical. You can use your reflector from below to fill in shadows, or from above to block distracting light. You can bounce the sun from the silver reflector to create a main light, or you can use a reflector with a black side to create deeper shadows. You can even sit on your reflector to keep your pants clean when shooting outside, or pop it open dramatically to dazzle young children.

    Most of the photos in this article were shot with a 5-in-1 reflector you can buy for less than $ 20. 5-in-1 refers to the fact that the reflector and cover can combine to give you five different options: white, silver, gold, and black sides, as well as a diffuser.

    Here are 6 tips to help you use this versatile tool, a reflector, to transform your photos.

    1. Using a Reflector for Fill Light

    The most traditional use of the reflector is to simply reflect light into the shadows. I took my wife Karen out into our local park to demonstrate this.
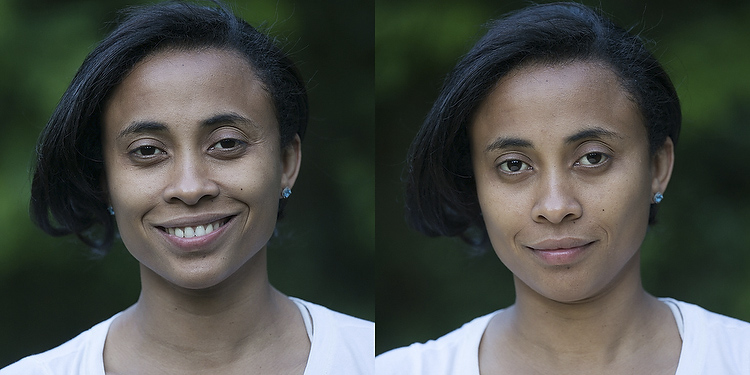
    Photo1

    In the photo on the left (above), she is photographed in nice soft light, but there are still pretty deep shadows under her eyes and chin. In the photo on the right, she is holding a reflector at her waist. The shadows on her face are noticeably lighter and there is a subtle catch-light (reflection of the reflector) in her eyes. If she were an older person with more textured skin, the contrast would be even more dramatic.
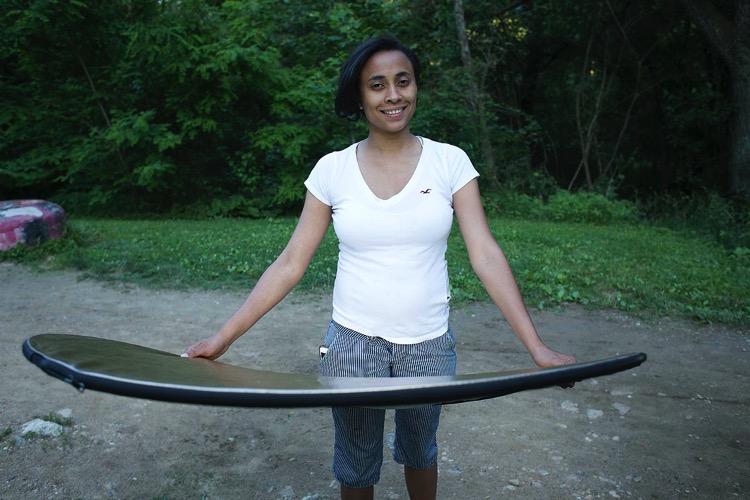
    Photo2

    Of course, you may not always want to fill in the shadows in this way, but if you are trying to flatter someone it almost always helps. You don’t even need an official photo reflector. Anything that reflects light will work. In a pinch I’ve used everything from old newspapers to a nearby person wearing a white shirt.

    2. Using a Reflector as the Main Light Source

    This is one of my go-to reflector moves, and an easy way to wow your friends and family. You place your subject with the light hitting them from behind, then use a reflector to bounce the light back into their face. You will get nice soft light on their face, with a dramatic rim light on the back of the subject’s head. The only trick is positioning yourself so the light doesn’t go straight into your lens and create lens flare (unless you like that look, of course).
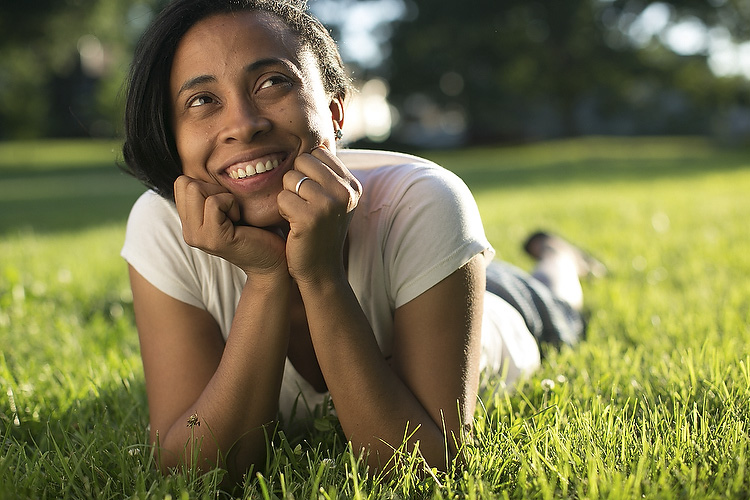
    Photo3

    In the photo above the is sun hitting the left side of her face and arm. The light from a reflector is bouncing back some of the sun to light up her face.

    You may also notice the shallow depth of field in this photo. If you are lighting with a reflector, you can jack up your shutter speed as much as you like to allow for a wide aperture (this photo was shot at 1/1250th of a second at f/2.0, with a 50mm lens). If you were using flash to create this same effect, you would have to lower your shutter speed (to 1/250th or whatever matches your camera’s maximum) to sync with the flash, requiring a larger aperture and greater depth of field (killing the whole look).

    Yes, yes, some of you are no doubt thinking, “What about high speed sync?!” Well, yes, that could give you the same effect if you had the right equipment (and know how to do that). Or, you know, you could just use an old newspaper.
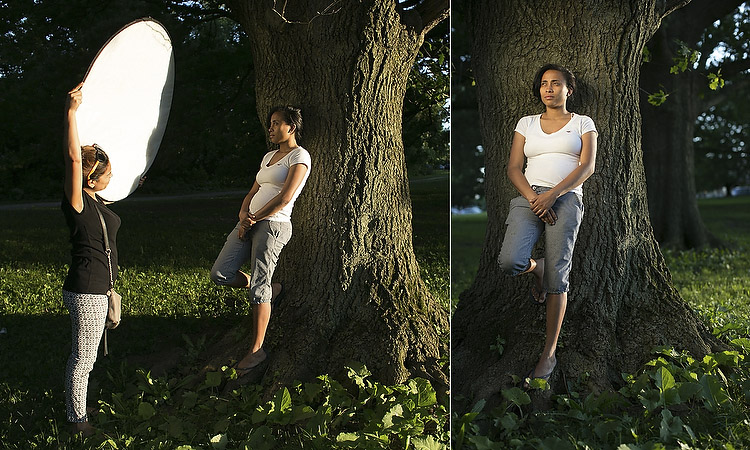
    Photo4

    In the next example above, we positioned Karen against a tree and had her cousin Claudia reflect a spot of sunlight on her from about 10 feet away. At this distance, the light from the reflector looks more like it is coming from a grid spot or snoot (hard light) – in other words, it’s a focused and dramatic beam (notice the fall-off of light on her legs). It’s a cool look that you can recreate with a reflector, a few feet of aluminum foil, or your bathroom mirror. Your friends will be wowed, and ask what fancy gear you used for the shot (and your family will ask what happened to the bathroom mirror).

    Using a slight variation of this technique, we moved the reflector slightly behind the subject (relative to the camera) to created a dramatic rim light on the face in a profile shot (see below).
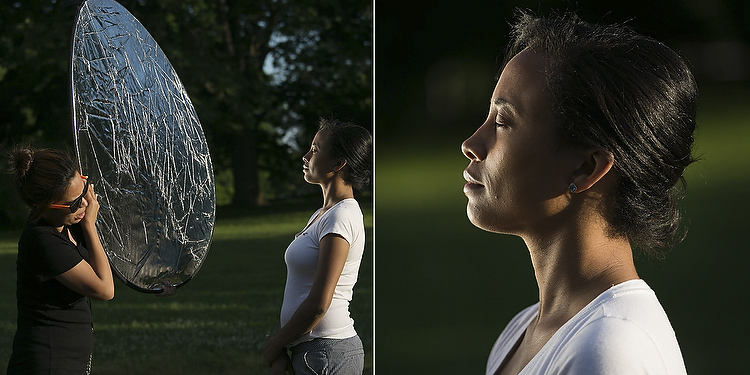
    Photo4a

    3. Using a Reflector to Block Light

    Sometimes you’ll find yourself in some beautiful shady light under a tree, except for that pesky sunbeam that finds its way through the leaves to light up your subject’s left ear. When this happens, turn your reflector into a light blocker (sometimes called a flag or gobo).

    A few years ago, I was doing a maternity portrait in a local park, when a newspaper photographer snapped my picture using just this technique. If you look at the reflector, you can see the bright spots of sunlight that it’s blocking (imagine how those spots would have ruined the final image if we didn’t block them).
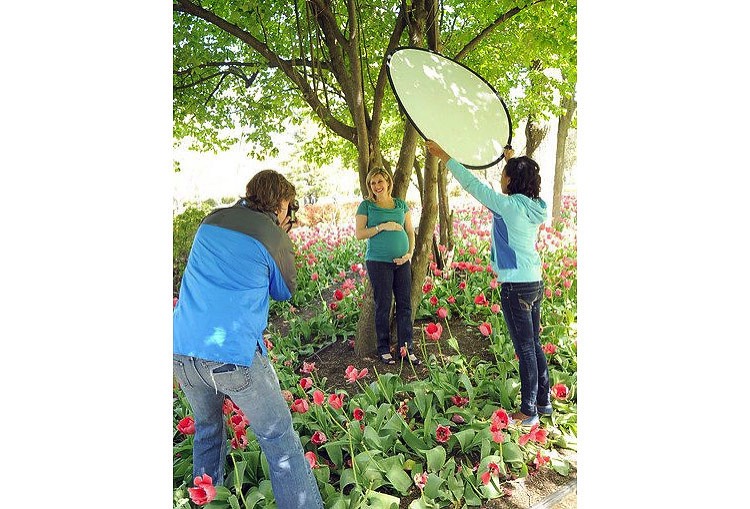
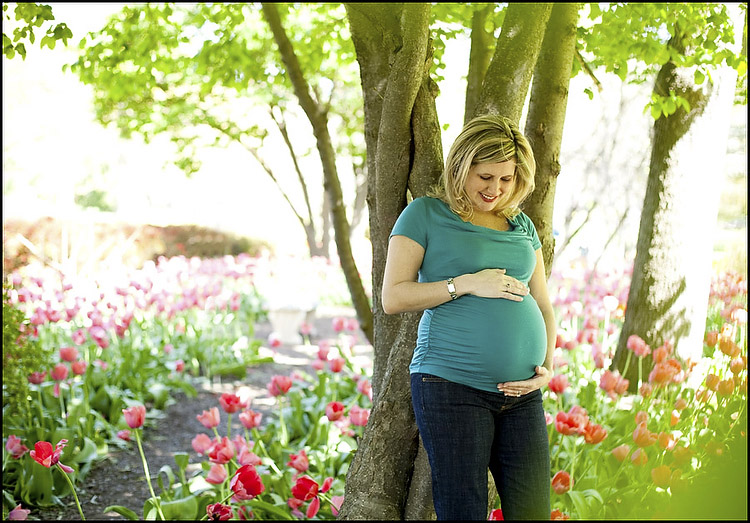
    Photo5

    Photo6

    4. Using a Black Reflector to Create More Dramatic Shadows

    Sometimes you actually want to deepen the shadows. I use this technique all the time in my headshot studio. Below is a photo of me with a white background. In one shot, I have a silver reflector opposite the main light, sending light back towards my left cheek. In the other, the reflector has a black cover on it, gobbling up reflected light, leaving a dark shadow on the cheek.
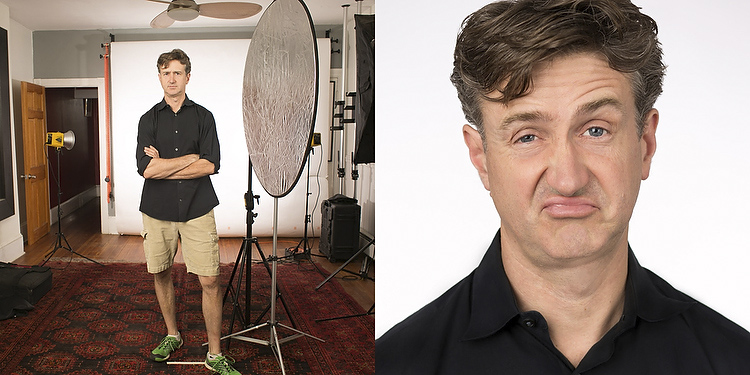
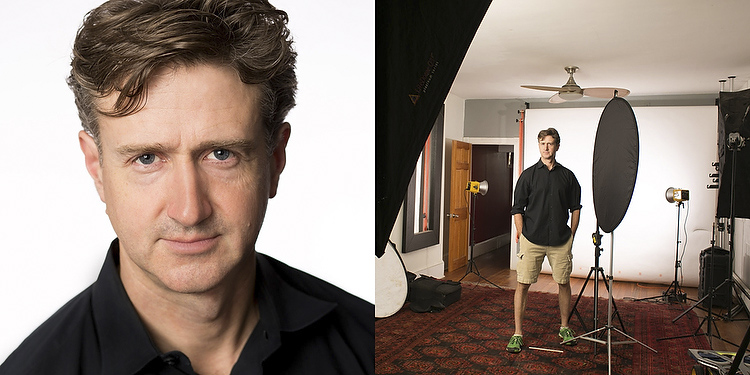
    Photo7

    Photo8

    Except for the small change of literally flipping the reflector from one side to the other, the lighting setup is identical, but as you can see the difference is pretty dramatic. (For you studio lighting enthusiasts out there, my key light here is a large soft box, and there are two bare heads pointing at the background to make sure it is nice and bright white).

    This is the same technique used in the famous Steve Jobs portrait where he has his hand on his chin. In addition to creating a little drama, you can also use this technique to give someone a photographic face-lift by trimming pounds from the dark side of their face and under their chin.

    5. Who Holds the Reflector?

    You may be saying to yourself, “But, I don’t have an assistant! Who’s going to hold the reflector for me?”. I usually don’t have an assistant either, but there is usually someone nearby who is more than happy to help, be it a family member, passerby, intern, wedding guest, etc. Sometimes you can even have the subject of the photo hold the reflector themselves (as in the photo of my wife holding the reflector at her waist in the photo above). Of course if you’re in the studio, or outside on a day without too much wind, you can just pop your reflector onto a light stand (like in the studio shots of me above).

    In the photo below, I was shooting wedding portraits on a beach in the Florida Keys. My reflector assistant that day was one of the bridesmaids, who truly enjoyed helping her friends out with their portraits.
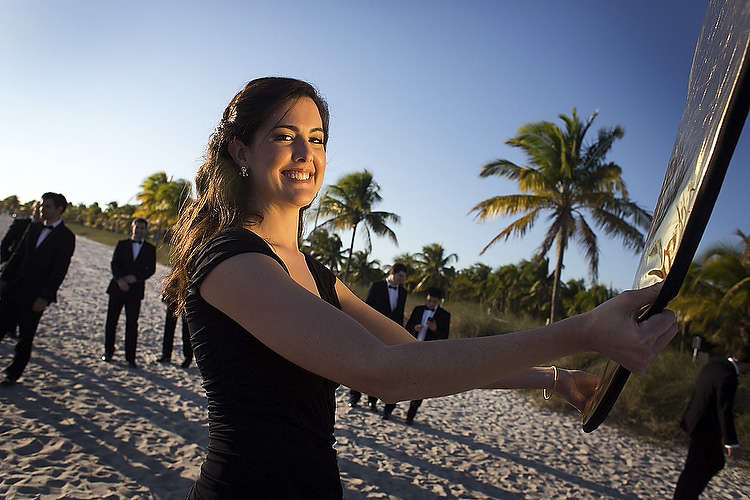
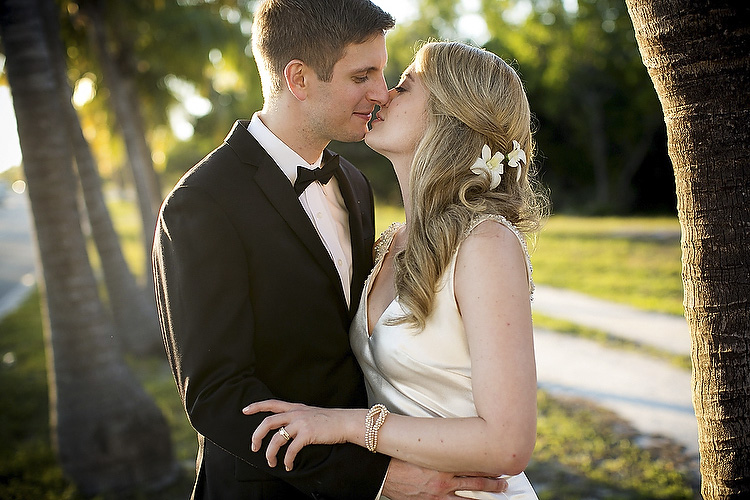
    Photo9

    Photo10

    6. Reflectors in the Environment

    Once you get the hang of reflectors, you’ll probably start noticing reflected light everywhere. Ever see a white building getting blasted by the sun? Well that’s nothing but a giant reflector! Depending on what’s around it, you may have found yourself a giant studio, with no rental fee.

    Mind you, anything that reflects enough light can work as a reflector. A brick building, large truck, flock of seagulls flying by at just the right moment…

    Final Notes

    Although they may not be as sexy as strobe kits, reflectors can often yield similar, or superior results for your portraits, and are cheaper and easier to use. I will leave you with a few more assignment photos, shot using nothing more than a reflector.

    In the child portraits below, note that there is light behind the kids in both cases, but there is still beautiful light on their faces. Same goes for the athlete portraits.
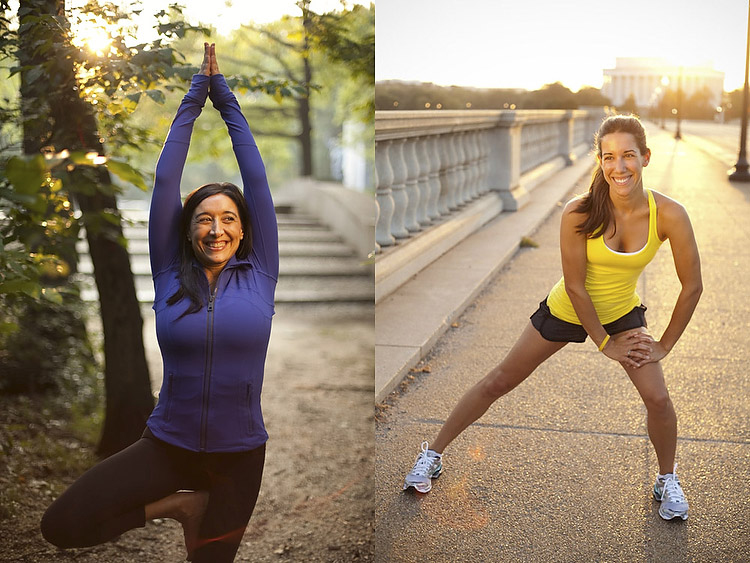
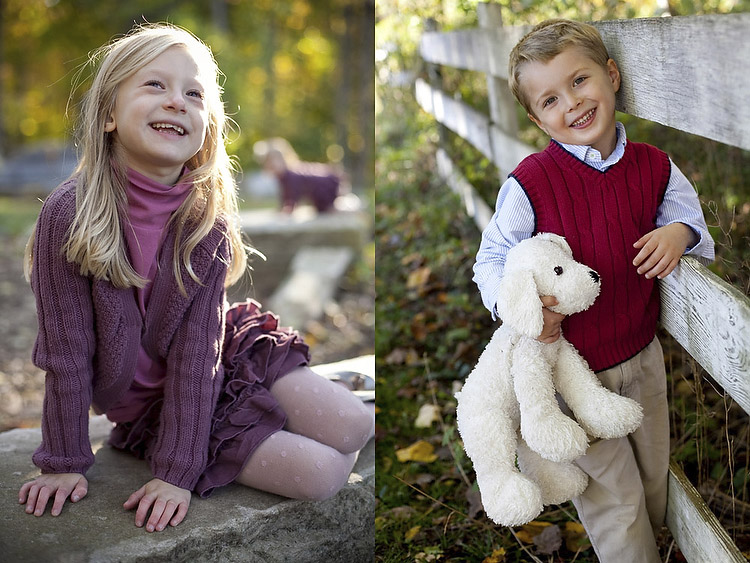
    Photo11

    Photo12

    As a final image, I leave you with a group of wedding guests who were so enamoured of my reflector that they wanted a picture with it. Hopefully you will soon have similar feelings towards your own reflector!
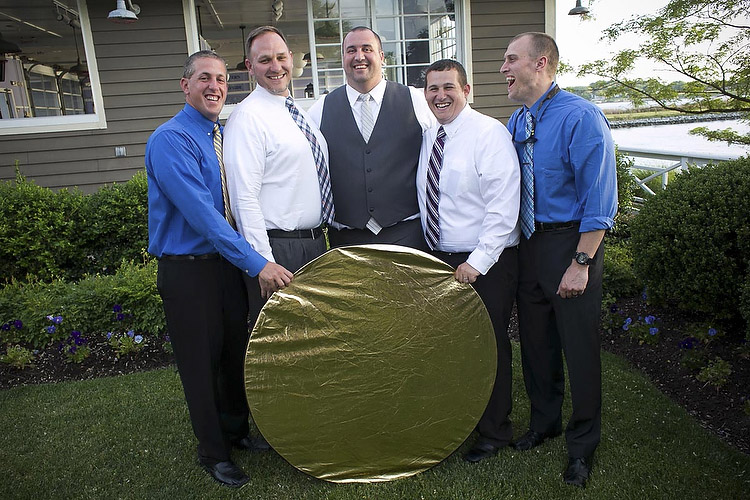
    Photo13

    Do you have any additional reflector tips to add? Please do so in the comments below.

    googletag.cmd.push(function() {
    tablet_slots.push( googletag.defineSlot( “/1005424/_dPSv4_tab-all-article-bottom_(300×250)”, [300, 250], “pb-ad-78623” ).addService( googletag.pubads() ) ); } );

    googletag.cmd.push(function() {
    mobile_slots.push( googletag.defineSlot( “/1005424/_dPSv4_mob-all-article-bottom_(300×250)”, [300, 250], “pb-ad-78158” ).addService( googletag.pubads() ) ); } );

    The post 6 Ways of Using Reflector to Take Better Portraits by Dennis Drenner appeared first on Digital Photography School.
    Digital Photography School

  • How to Understand the Mysteries of ISO for Beginners

    Josh Cripps has many really helpful videos on his YouTube channel. In this one he will help you get a handle on one of the elements of the exposure triangle that is often confusing and perplexing to many beginners – ISO.

    Watch as his gives real world examples, learn what ISO is, when to change it, when you should raise it or lower it and why. Ultimately having a better grasp of ISO will help you take better photos, and get the results you want.

    He also mentions his teacup video where he explains the relationship of aperture and shutter speed. You can see that one below for your reference as well:

    I hope these videos have given you a good idea about ISO and how to use it in your photography.

    googletag.cmd.push(function() {
    tablet_slots.push( googletag.defineSlot( “/1005424/_dPSv4_tab-all-article-bottom_(300×250)”, [300, 250], “pb-ad-78623” ).addService( googletag.pubads() ) ); } );

    googletag.cmd.push(function() {
    mobile_slots.push( googletag.defineSlot( “/1005424/_dPSv4_mob-all-article-bottom_(300×250)”, [300, 250], “pb-ad-78158” ).addService( googletag.pubads() ) ); } );

    The post How to Understand the Mysteries of ISO for Beginners by Darlene Hildebrandt appeared first on Digital Photography School.


    Digital Photography School

  • Tips for File Renaming Success in Lightroom

    This article is about how to build a useable file renaming strategy, and how to implement it in Lightroom. Your standard camera names are generally pretty boring. IMG this or DSC that, or even P0235425653. If you’re not using continuous naming you might even end up with hundreds of IMG_0001 files. Don’t laugh, I was there once upon a time after reading some terrible advice on camera settings.

    If you’re using Lightroom, renaming is really straightforward and accessible from quite a few places in the application.

    File naming in lightroom 1

    Before we talk about how to rename your files, let’s talk about what you should name them. First and foremost, each photo should have a unique name. There are two number sets that can pretty much ensure this. The first is the date the photo was taken, and the second is the sequence number the camera creates (assuming you do use a continuous camera naming system). Mixed together these give each file a unique name. You’d need to shoot 10,000 images in a day to get two identical names with this structure. You could just use this method and nothing else, but a series of numbers, while great for sorting, is generally meaningless to most people.

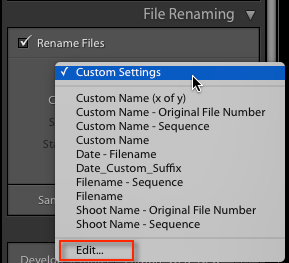
    File naming in lightroom 2Some photographers use those number sets and their initials to get the filename. It’s enough to create that unique pattern. A string of numbers doesn’t tell you what’s in the file though, even with some initials. For this reason, I use a custom text field that I change with each shoot that I import. In Custom Text field I put a little description of the shoot. That way even outside Lightroom I can tell the contents of the file just from the name. It also gives me additional search terms I can use when looking for a file. Let’s look at how to set this up.

    File naming template in Import

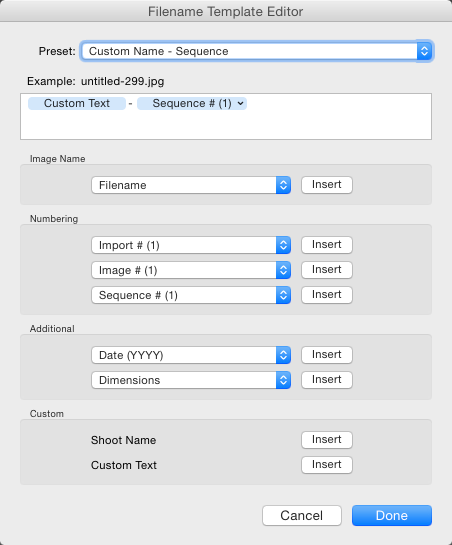
    Renaming in Lightroom uses a mix of tokens and direct text in the box. The Dialog for creating File Naming Templates can be called up from a variety of places in Lightroom. The first place you see it is in the Import Dialog box when using one of the following settings: Move, Copy or Copy as DNG. It’s on the right hand side in the appropriately named File Renaming panel. As well as the type of File Naming, you can choose Custom Text/Shoot Name, a Start Number, and whether the file extension is upper or lower case.

    File naming in lightroom 3

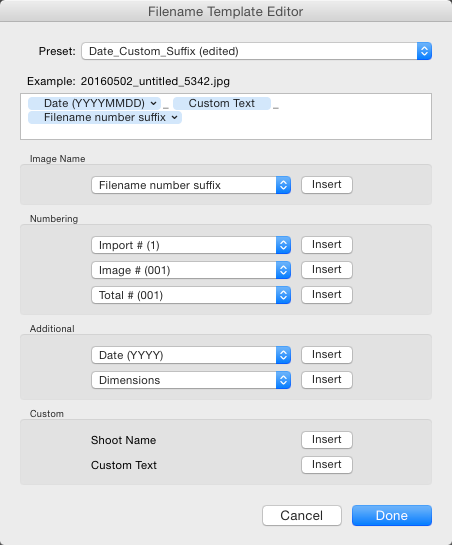
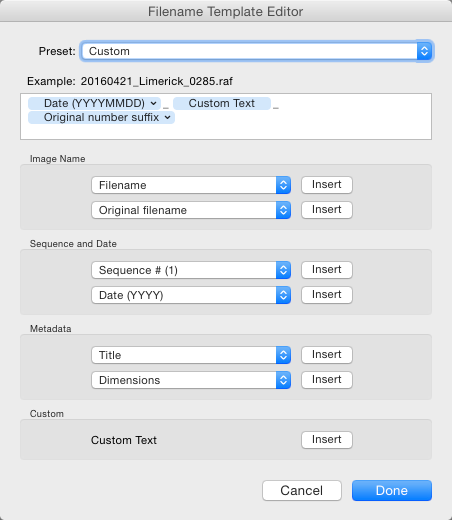
    File naming in Lightroom depends on Templates, so click on the Template list and choose Edit from the bottom of the list (shown above). This opens the Filename Template Editor (below). At the top we see the current Template, or in a typically Lightroom fashion, it’s called a Preset here, versus being called a Template in Import. The contents of this list matches the one you saw in Import from the Template dropdown. Note that the Filename Template Editor is not exactly the same in each location you can use it in Lightroom. You’d think it would be, but nope, it’s not.

    File naming in lightroom 4

    Note this is the box you will see in the Import dialog popup. If you access rename files from the Library module it looks slightly different.

    Next is the text box where the template is built. Any item you click from the list below will be added to the box, in the order you click them. You can also type directly into the box. Remember that text typed directly into the box will be added to all filenames, so use it sparingly (above there is only a hyphen added between tokens Custom Text and Sequence # to separate them).

    File naming in lightroom 5

    Below this are the tokens, split into sections of similar information. Image name has two options, Filename and Filename number suffix. The latter refers to the string of numbers at the end of the current filename (not necessarily the original file numbers). Note: When you use Edit in the Library version of renaming, you also get Folder Name as an option.

    File naming in lightroom 6

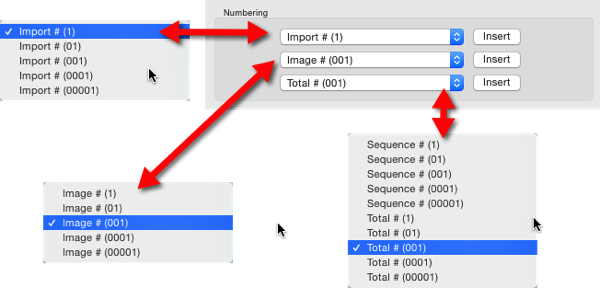
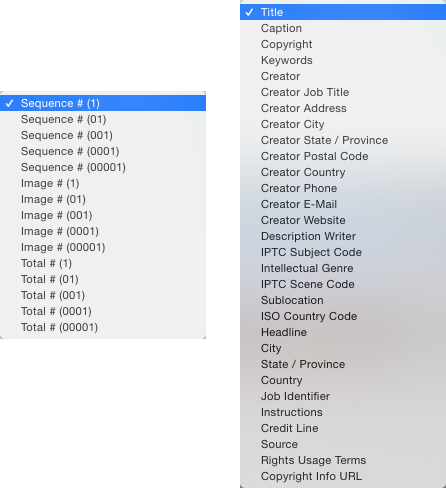
    Numbering has far more options. In each case you can choose an option with leading zeros. It’s good practice to include enough of these so your sorting looks okay. For example, Image1 is followed by Image10, then Image2 if you have no leading zero in the file name. For most things three leading zeros is enough.

    File naming in lightroom 7

    Import refers to the number of imports and can be set in the Catalog Settings dialog (under the Edit menu on PC, Lightroom menu on Mac), as can Image. Image itself refers to the number of images imported into Lightroom. Sequence creates a new sequence each time, with the start number set in the renaming panel (except on Export). Total refers to the number of images that are being imported at that time.

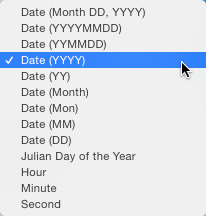
    File naming in lightroom 8Next is the Additional Section. For the Date, you can opt for any combination of year, month, day, hour, minute or second. Personally I go for the YYYYMMDD version, though you could choose Year YY, Month MM and Date DD as as shorter year set. Using this at the start of the name puts all the photos in a dated chronological order when when sorting by name.
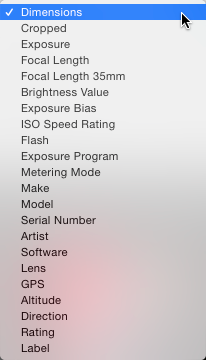


    File naming in lightroom 9

    The 2nd part of Additional is a metadata list (above). It contains things like the camera serial number and file dimensions.

    Custom lets you add text that can change between imports. Shoot Name is available only in the Import menu. Shoot related naming is not available using Auto Import.

    File naming in lightroom 10

    When you’ve entered the tokens you can either click Done, to have the settings apply as Custom Settings or you can go back to the Presets menu, where you now have additional options. If you started off by editing an existing Preset (e.g. Filename) you can Save you settings as a new Preset, Update the Current Preset, or restore the default presets.

    File naming in lightroom 11

    If you select a Preset and don’t edit it, you get the options to Delete or Rename the preset (below) instead of the Update option. That covers the mechanics of creating a File Naming Template.

    File naming in lightroom 12

    My method:

    My preferred renaming method is: {YYYYMMDD}_{Custom Text}_{Original Filename Suffix}. The items in {} are the tokens from the Date, Custom Text and Filename menus (see right). The underscores are written directly into the textbook between the tokens. You may prefer to use a dash instead. I use underscores, because the Web module changes dashes into underscores.

    File naming in lightroom 13

    This keeps files in order by set based on the Date and Custom text, the Suffix then keeps the sequence. You can use any naming system you like, of course. The important thing is that you use the same naming consistently. When I first started using this kind of renaming system, I had the Custom Text first, but it turned out to be a pain for sorting. Generally when I look through a shoot now, I visually ignore the date part of the name and look at the custom text if I’m just browsing. I don’t need to see it generally, but it helps the sort.

    File naming in lightroom 15

    This is how my file naming looks

    Renaming inside the Library Module

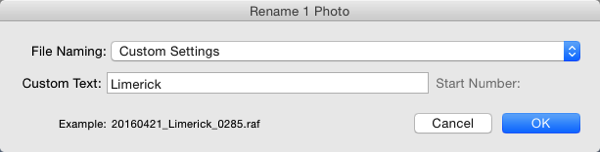
    As well as renaming on Import, you can batch rename inside Library by pressing the F2 key. This brings up a really basic dialog where you can select or edit a preset, change the Custom Text, or the Start Number if you’ve chosen a sequence. When you select Edit from the Preset list, the Filename Template Editor has a slightly different set of options to that of the editor inside of Import.

    File naming in lightroom 14

    We’ve looked at Image Name. The other main differences are the Sequence menu now has Date as well and the Additional section is now called Metadata with a 2nd set of Metadata, in this case IPTC metadata. Other than that, it works identically to in Import.
    File naming in lightroom 16

    Renaming on Export

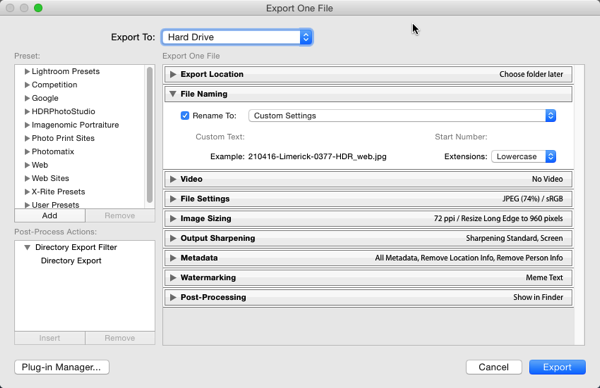
    You can also rename when Exporting. In the Export Dialog, File Naming is usually the second option. It’s similar to the other instances where you can select or edit a file naming preset, add Custom Text or choose a Start Number. In this case the Filename Template Editor is the same as the one available in the Library module.

    File naming in lightroom 17

    So that’s a look at how to choose a suitable naming system in Lightroom, and how to create a filename template to match it. How do you do your file names? What structure do you find works best for sorting and finding images later? Please share your thoughts in the comments below.

    googletag.cmd.push(function() {
    tablet_slots.push( googletag.defineSlot( “/1005424/_dPSv4_tab-all-article-bottom_(300×250)”, [300, 250], “pb-ad-78623” ).addService( googletag.pubads() ) ); } );

    googletag.cmd.push(function() {
    mobile_slots.push( googletag.defineSlot( “/1005424/_dPSv4_mob-all-article-bottom_(300×250)”, [300, 250], “pb-ad-78158” ).addService( googletag.pubads() ) ); } );

    The post Tips for File Renaming Success in Lightroom by Sean McCormack appeared first on Digital Photography School.


    Digital Photography School

  • Weekly Photography Challenge – Stars

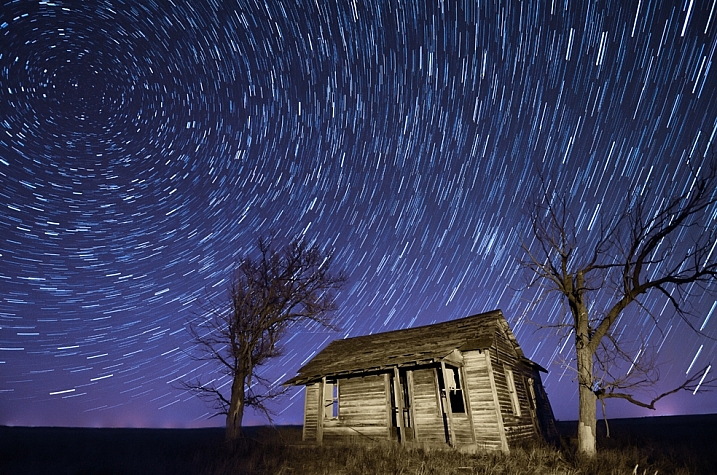
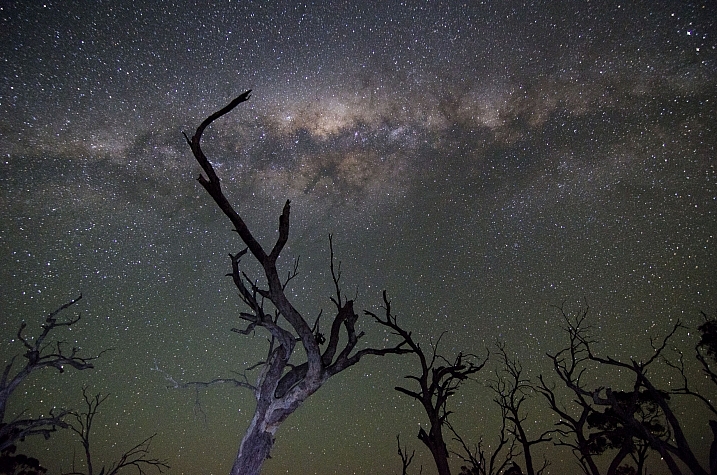
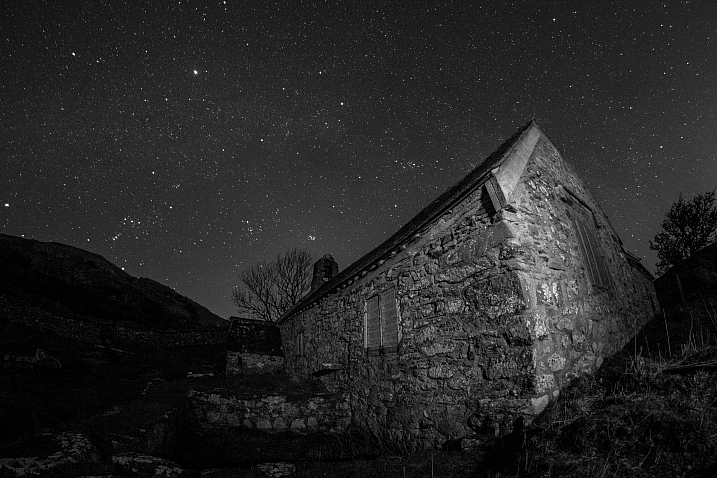
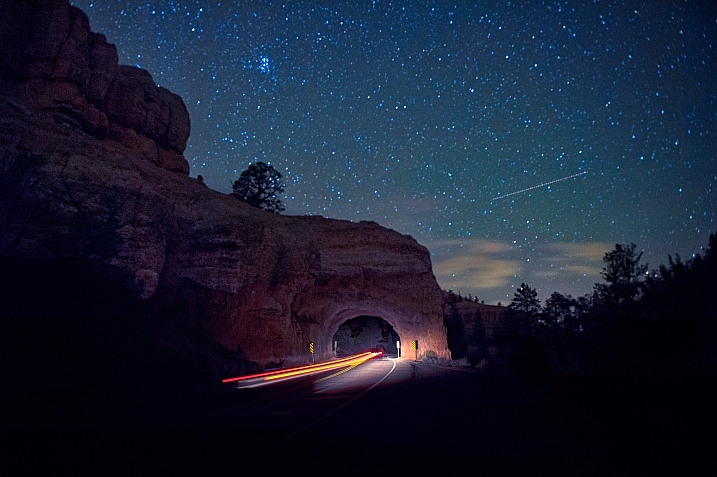
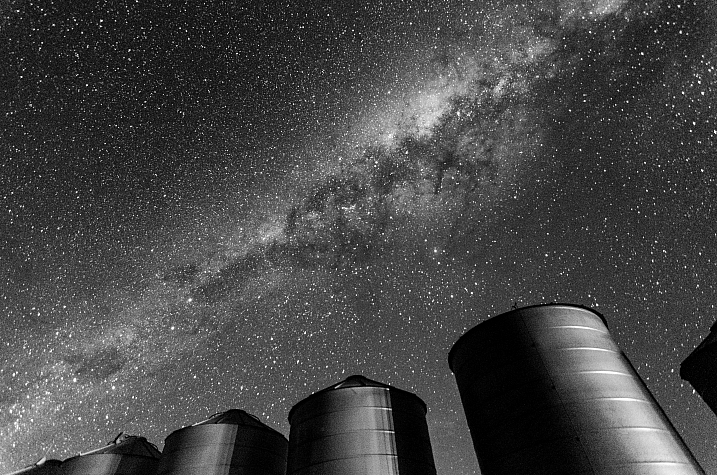
    Night photography is something that goes beyond the average snapshot, something many beginners shy away from because it seems difficult. But the results of learning how to do night photography, especially of stars is well worth the time and effort required.

    Olli Henze

    By Olli Henze

    Weekly Photography Challenge – Stars

    If you need some help with night and astral photography here are some dPS articles to get you started:

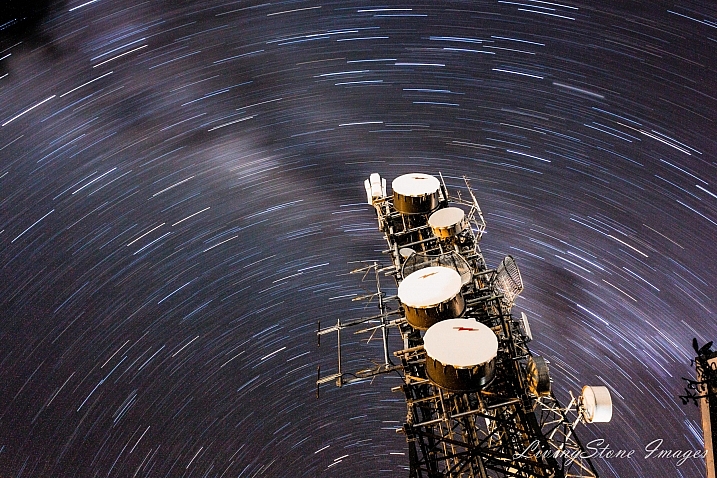
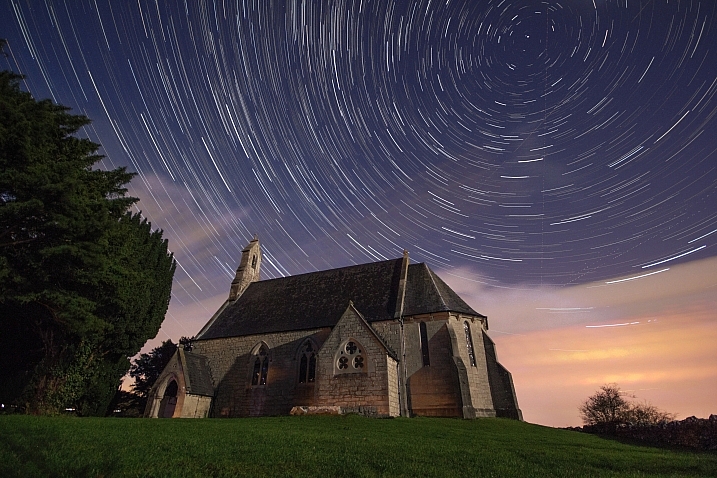
    • Two Methods for Shooting Star Trails Made Easy
    • How to Shoot a Star Trails Selfie
    • Single Image Star Trails – a Powerful Technique to Create Star Trails in Minutes Using Photoshop
    • Photographing Stars Using a Kit Lens
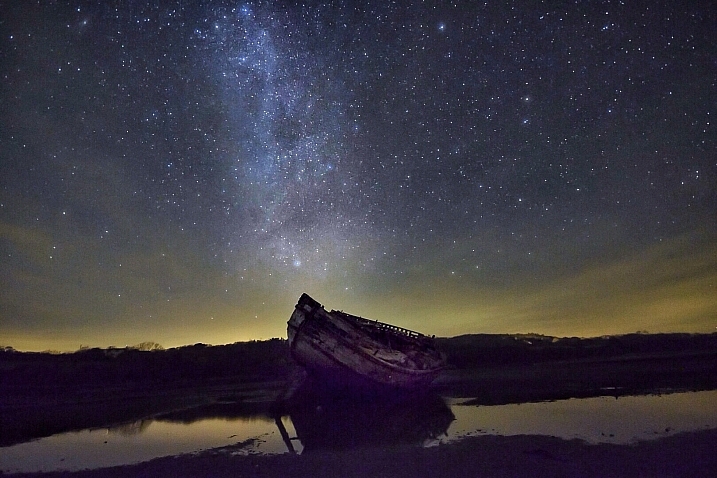
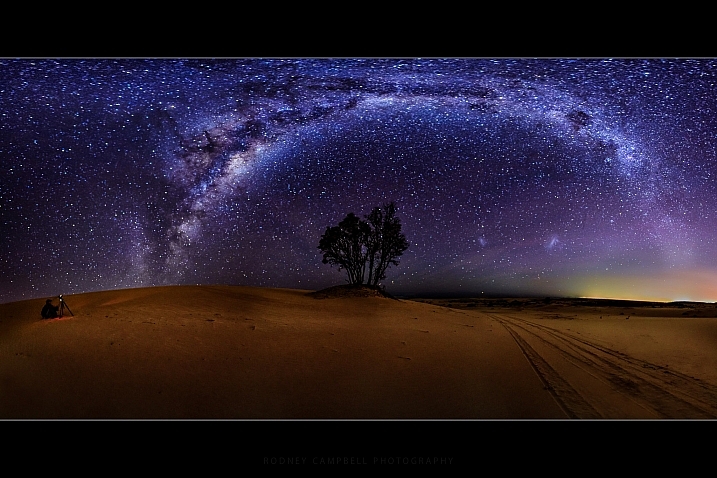
    • How to do Milky Way Photography: A Comprehensive Tutorial
    • How to Photograph the Full Band of the Milky Way
    • Down and Dirty Guide to Milky Way Photography
    • How to Photograph the Stars
    Howard Ignatius

    By Howard Ignatius

    DAVID MELCHOR DIAZ

    By DAVID MELCHOR DIAZ

    Jeff Krause

    By Jeff Krause

    Share your images below:

    Simply upload your shot into the comment field (look for the little camera icon in the Disqus comments section) and they’ll get embedded for us all to see or if you’d prefer upload them to your favourite photo sharing site and leave the link to them. Show me your best images in this week’s challenge. Sometimes it takes a while for an image to appear so be patient and try not to post the same image twice.

    Wayne Stadler

    By Wayne Stadler

    Alistair Nicol

    By Alistair Nicol

    googletag.cmd.push(function() {
    tablet_slots.push( googletag.defineSlot( “/1005424/_dPSv4_tab-all-article-bottom_(300×250)”, [300, 250], “pb-ad-78623” ).addService( googletag.pubads() ) ); } );

    googletag.cmd.push(function() {
    mobile_slots.push( googletag.defineSlot( “/1005424/_dPSv4_mob-all-article-bottom_(300×250)”, [300, 250], “pb-ad-78158” ).addService( googletag.pubads() ) ); } );

    The post Weekly Photography Challenge – Stars by Darlene Hildebrandt appeared first on Digital Photography School.


    Digital Photography School

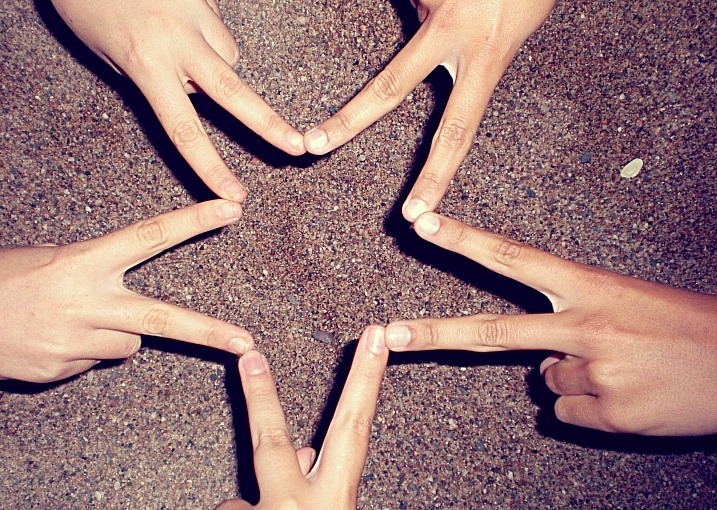
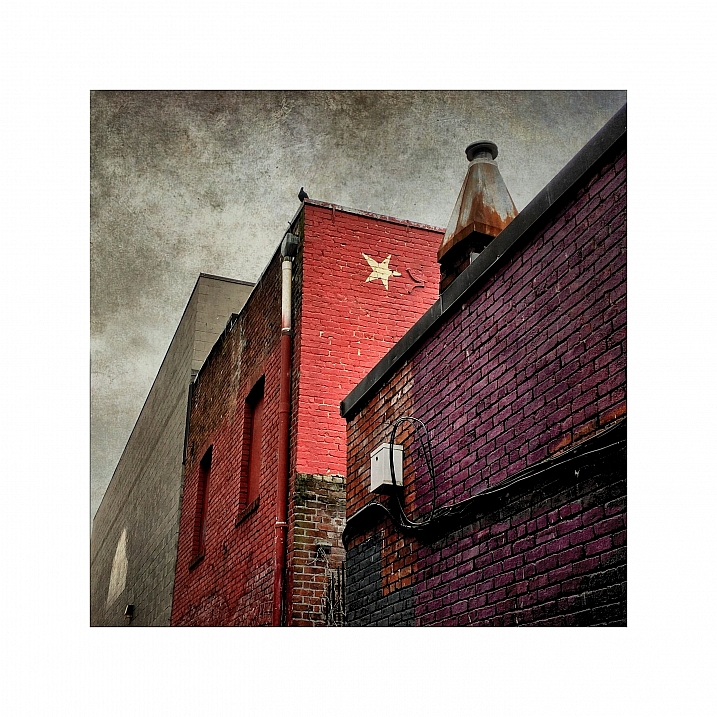
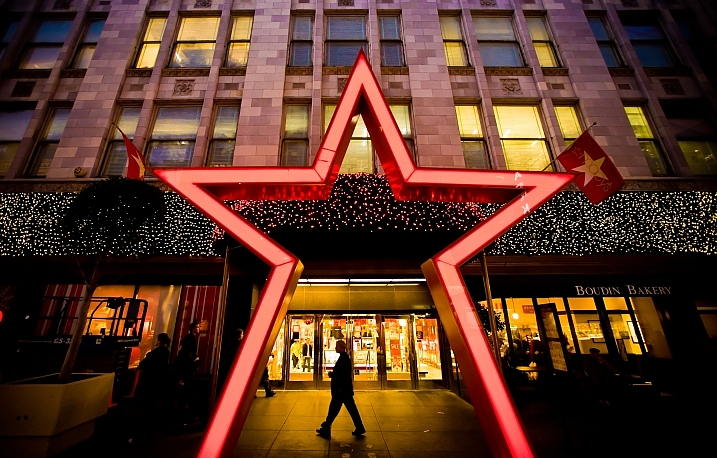
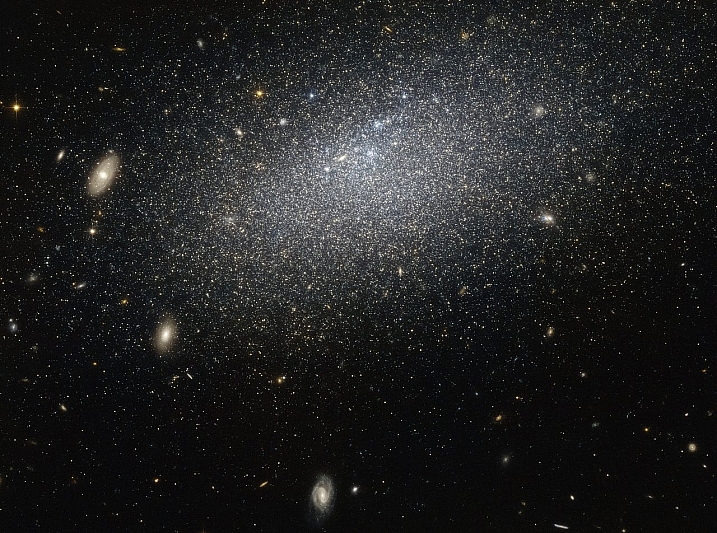
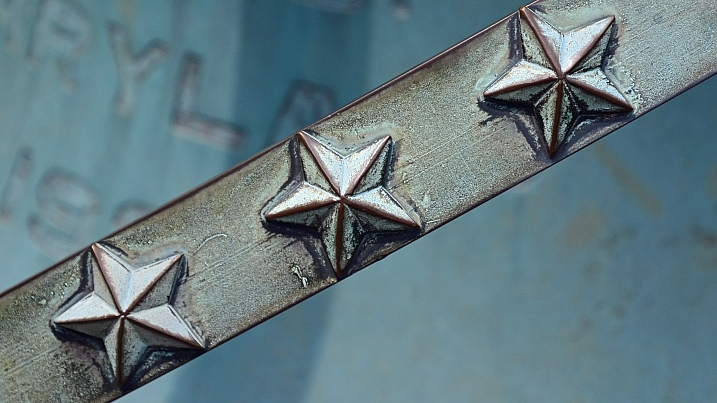
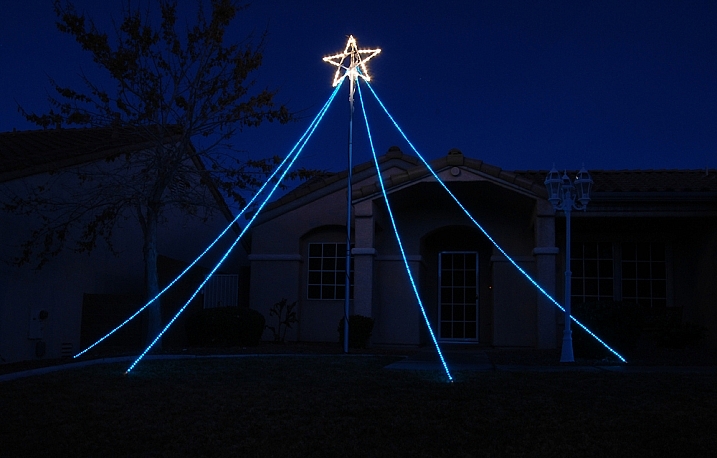
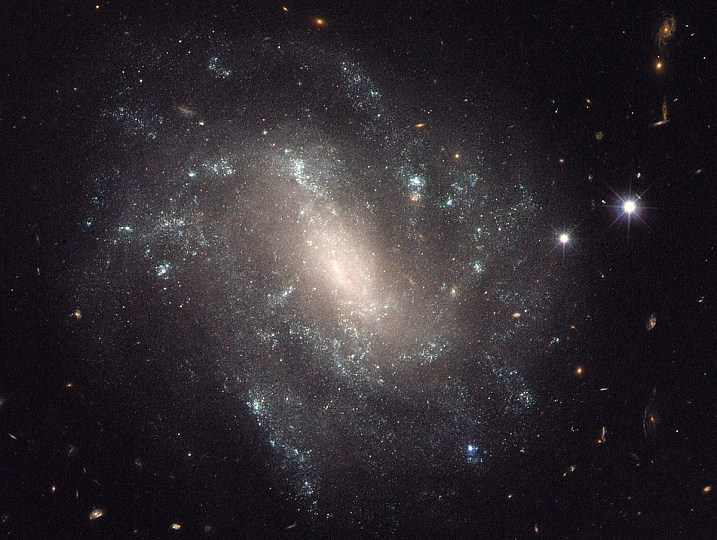
  • 23 Star Struck Images of Celestial Subjects

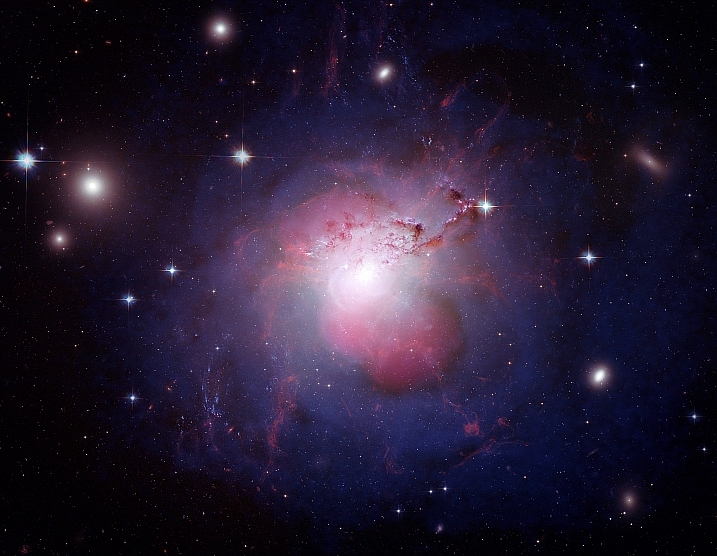
    We can be star struck in more than one way. Celebrity sightings of famous Hollywood stars is one way, the other is by the celestial stars themselves – literally!

    Let’s look at a few images of celestial subjects and see how they can be captured in photographs:

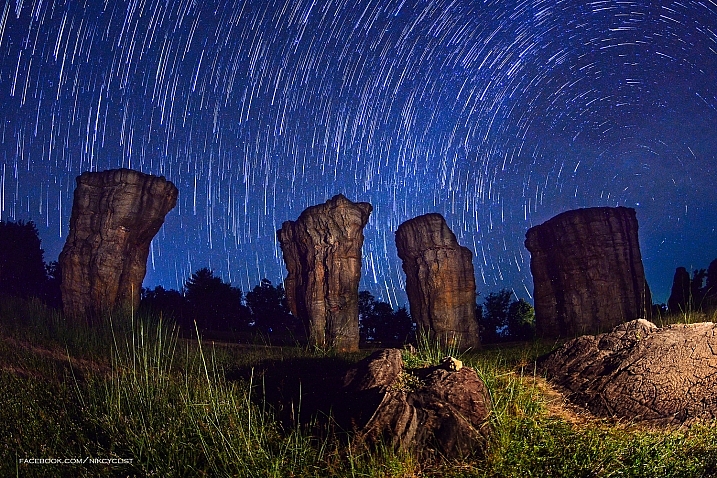
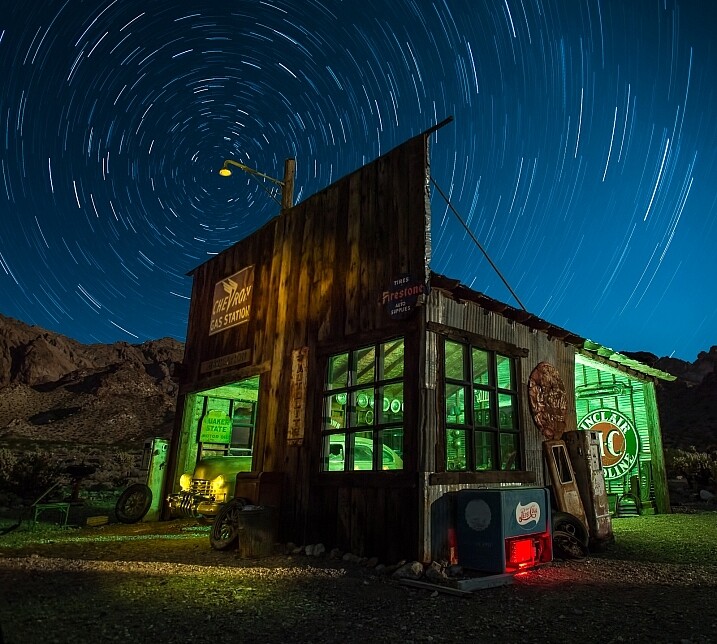
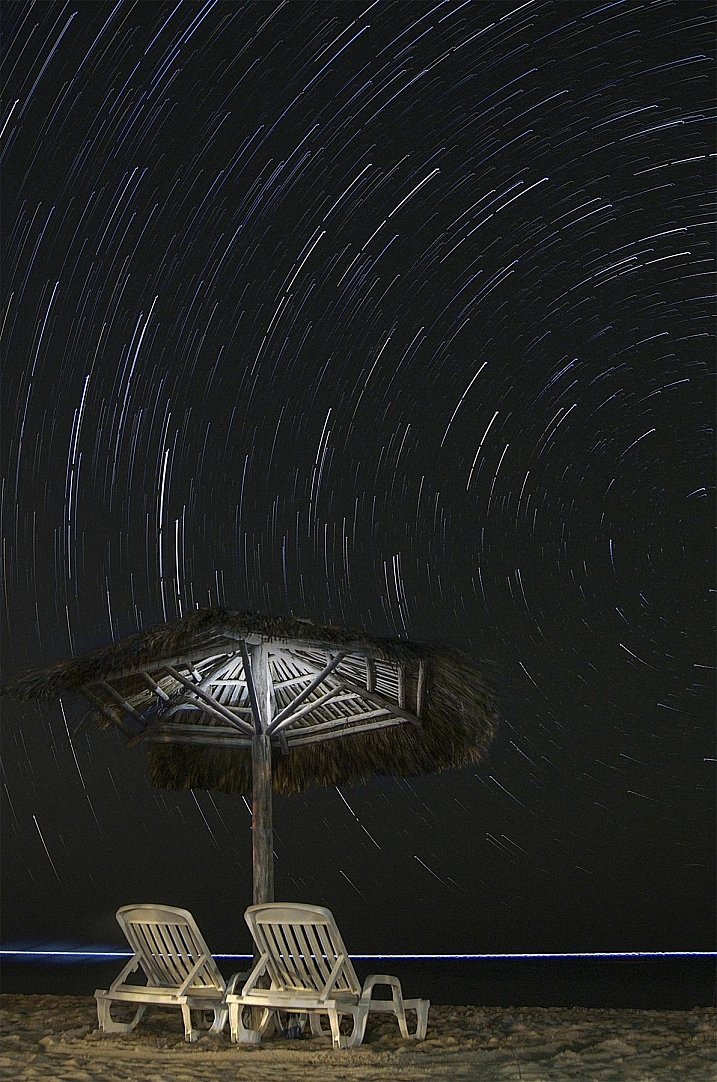
    Star trails

    Shannon Dizmang

    By Shannon Dizmang

    Prachanart Viriyaraks

    By Prachanart Viriyaraks

    Howard Ignatius

    By Howard Ignatius

    Howard Ignatius

    By Howard Ignatius

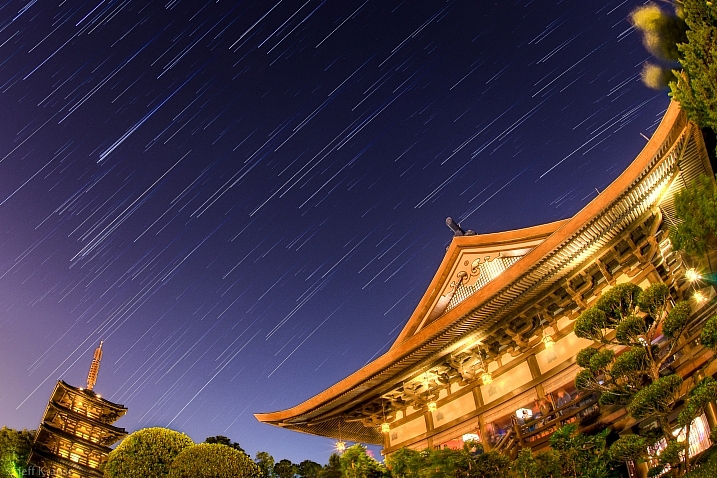
    Jeff Krause

    By Jeff Krause

    Rodger Evans

    By Rodger Evans

    Andrew

    By Andrew

    Aaron

    By Aaron

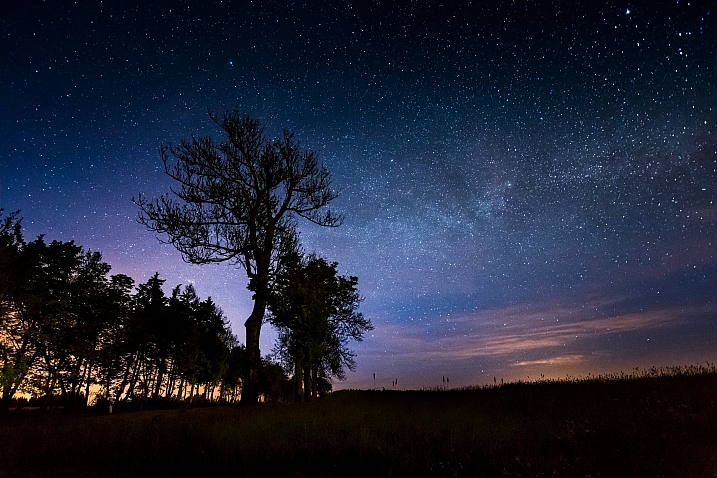
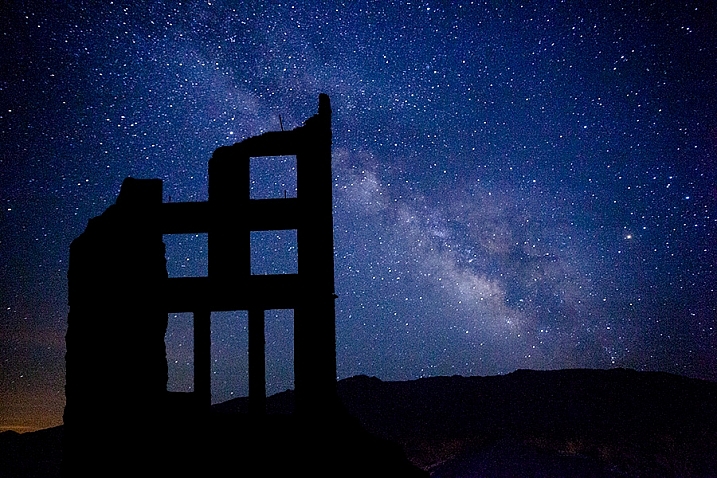
    Starry skies

    Sian Monument

    By sian monument

    Rodney Campbell

    By Rodney Campbell

    Indigo Skies Photography

    By Indigo Skies Photography

    Aaron

    By Aaron

    Diana Robinson

    By Diana Robinson

    Indigo Skies Photography

    By Indigo Skies Photography

    Olli Henze

    By Olli Henze

    Dennis Behm

    By Dennis Behm

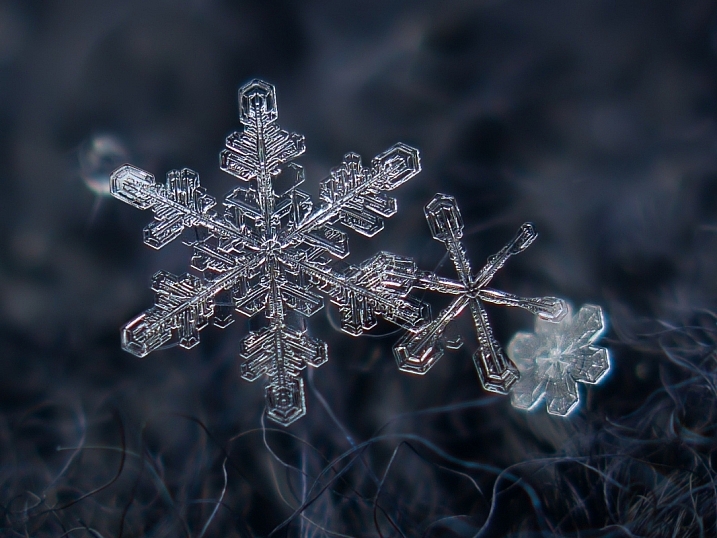
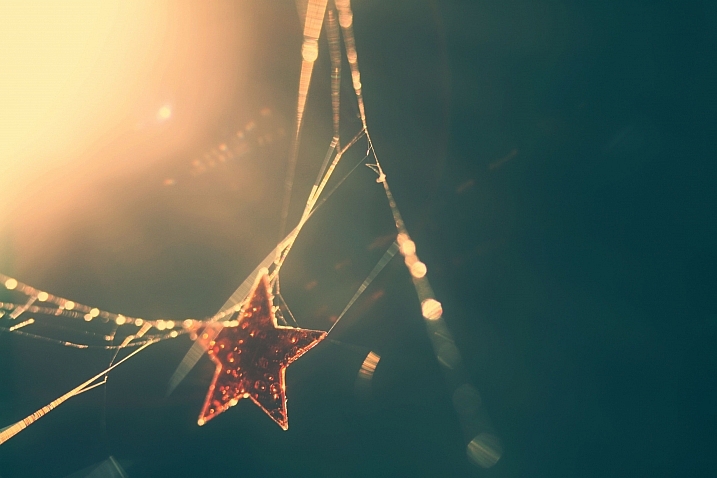
    Other kinds of stars

    Alexey Kljatov

    By Alexey Kljatov

    Neal Fowler

    By Neal Fowler

    Nanabcn19

    By nanabcn19

    Ra1000

    By ra1000

    Thomas Hawk

    By Thomas Hawk

    Peter Miller

    By Peter Miller

    Roadsidepictures

    By Roadsidepictures

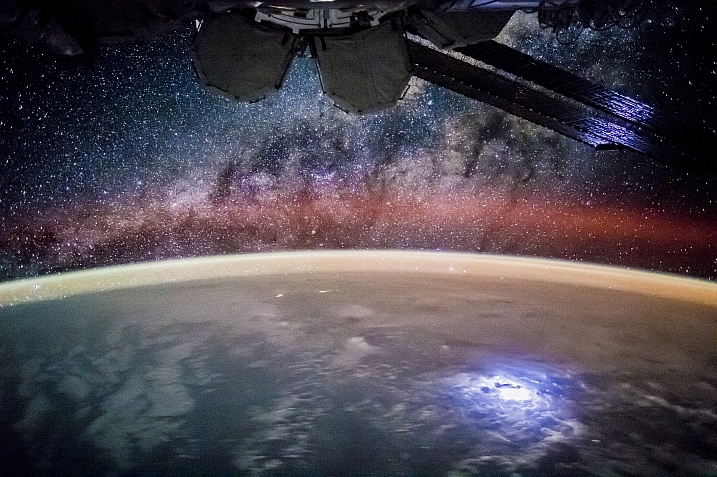
    Bonus – some from NASA

    NASA's Marshall Space Flight Center

    By NASA’s Marshall Space Flight Center

    NASA's Marshall Space Flight Center

    By NASA’s Marshall Space Flight Center

    NASA's Marshall Space Flight Center

    By NASA’s Marshall Space Flight Center

    NASA's Marshall Space Flight Center

    By NASA’s Marshall Space Flight Center

    googletag.cmd.push(function() {
    tablet_slots.push( googletag.defineSlot( “/1005424/_dPSv4_tab-all-article-bottom_(300×250)”, [300, 250], “pb-ad-78623” ).addService( googletag.pubads() ) ); } );

    googletag.cmd.push(function() {
    mobile_slots.push( googletag.defineSlot( “/1005424/_dPSv4_mob-all-article-bottom_(300×250)”, [300, 250], “pb-ad-78158” ).addService( googletag.pubads() ) ); } );

    The post 23 Star Struck Images of Celestial Subjects by Darlene Hildebrandt appeared first on Digital Photography School.


    Digital Photography School

  • How to Use a Travel Photography Shot List to Come Home with Better Photos

    Checking off your travel photo listWant to bring back travel photos that your friends actually enjoy viewing on Facebook? Want to make sure you don’t miss anything when visiting a new culture? Then it’s time to make a list!

    We all have our easy ruts we fall into when photographing, but travel, for me, is about expanding my view. That’s why I take a travel shot list and try my darnedest to get at least one of each shot when visiting a new location.

    What’s on my list?

    Here are some tips for you to help make a travel photography shot list for your next trip. Feel free to use my list and add to it with your own ideas.

    1 – People – old, young, and in-between

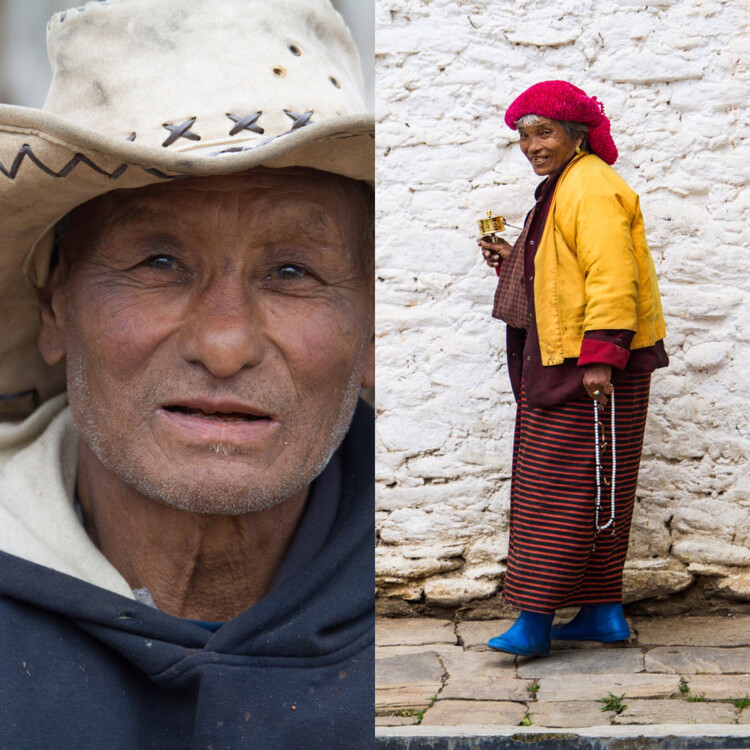
    Spread out your people photos between age ranges. I’ve seen a bazillion images of old ladies from Cuba, while often missing are people like me; middle aged and fairly normal, even a bit boring. Round out your people photos with more variety, is all I am saying.

    Portraits in Bhutan

    What’s not to love about those shoes and that smile?

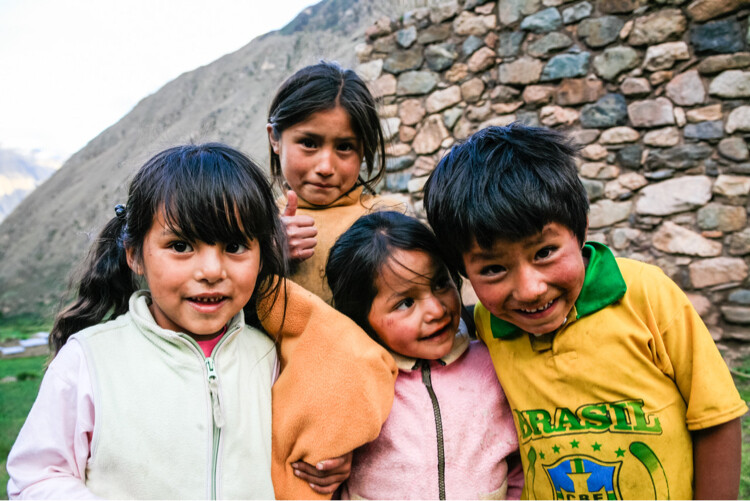
    Kids are an easy target as they often love having their picture taken. You will need to be aware, though, that not all parents wish for their children to be photographed. That’s the crux of it; parents worry how the images this stranger just took will be used. Sometimes all it takes is a simple “Hello” first to the parents to gauge if taking photos is okay. If language is a barrier, you can also point to your camera, then to the children with an inquisitive look on your face. Either way, no matter the answer, respect the parent’s choice.

    Peruvian kids

    Kids playing in Inca ruins, Peru

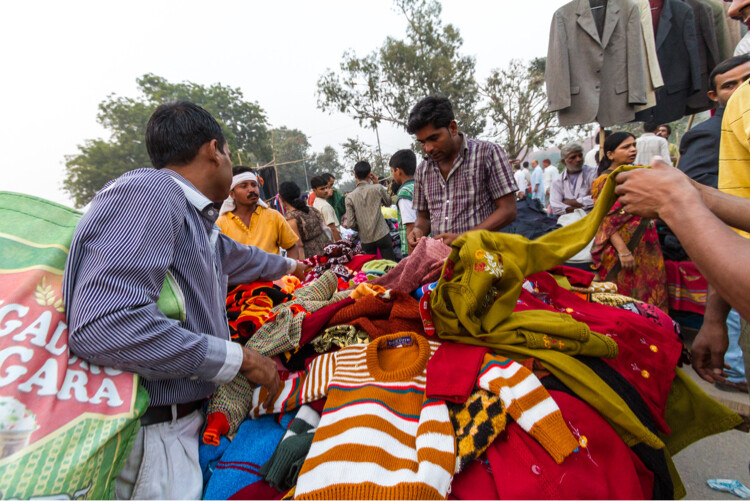
    Delhi street market scene

    Street scene in Delhi, India with people my age.

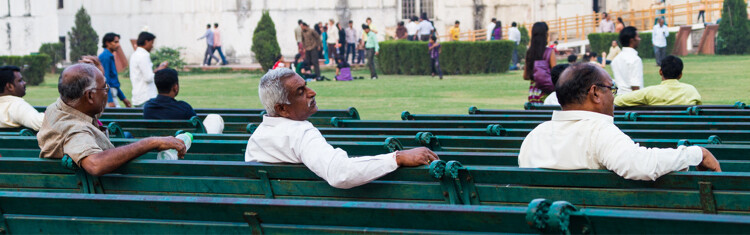
    Men at Red Fort, Delhi, India

    People watching at the Red Fort, Delhi, India

    2 – Food – preperation, presentation, social aspect

    Food brings us together. It’s a basic need we can all relate to, even if we don’t know exactly what we are about to eat.

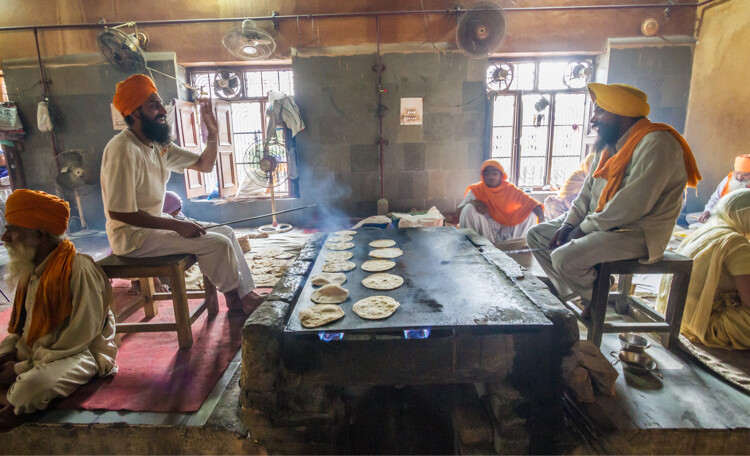
    Cooking at a Sikh Temple

    Inside the commercial sized kitchen at the Golden Temple in Amritsar, India

    Don’t just shoot the Instagram-worthy image of a plate of the amazing new delicacy you are experiencing, find a way to shoot the preparation of food. Get behind the counter (where it’s allowed) to see how it’s cooked, and where it comes from. As you plan to share these photos (why else are you taking them?), you may find that a large, and often hidden, swath of your friends and followers have a strong interest in food prep.

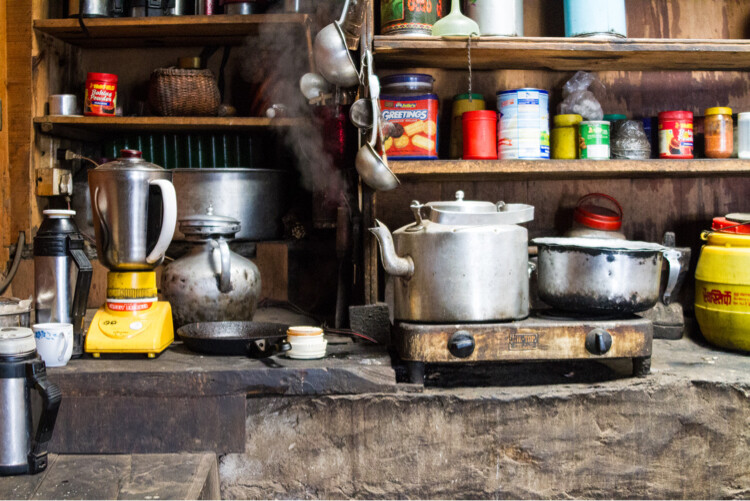
    Buddhist monastery kitchen in Nepal

    The full kitchen at a monastery, high in the Himalayas of Nepal

    3 – Architecture – old, new, juxtaposed

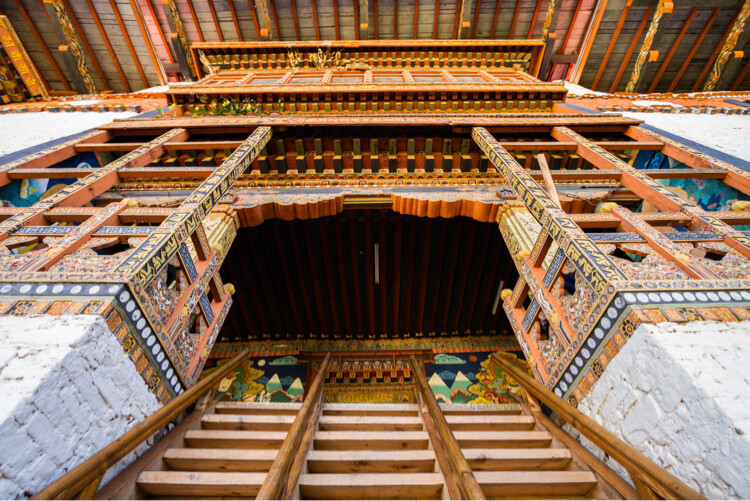
    In some locations the old and the new architecture matches, Bhutan comes to mind. I watched artisans paint a brand new home with traditional patterns and motifs from the nearby 400 year old monastery. Everything there fit a certain style.

    Buddhist Temple in Punakha, Bhutan

    Looking up at the Punakha Temple, Bhutan

    Then we have countries making vast changes from the old style to what constantly evolves as modern – think of Tokyo or Dubai. Look for the differences even where you think there is just one style.

    4 – Water – how is it used?

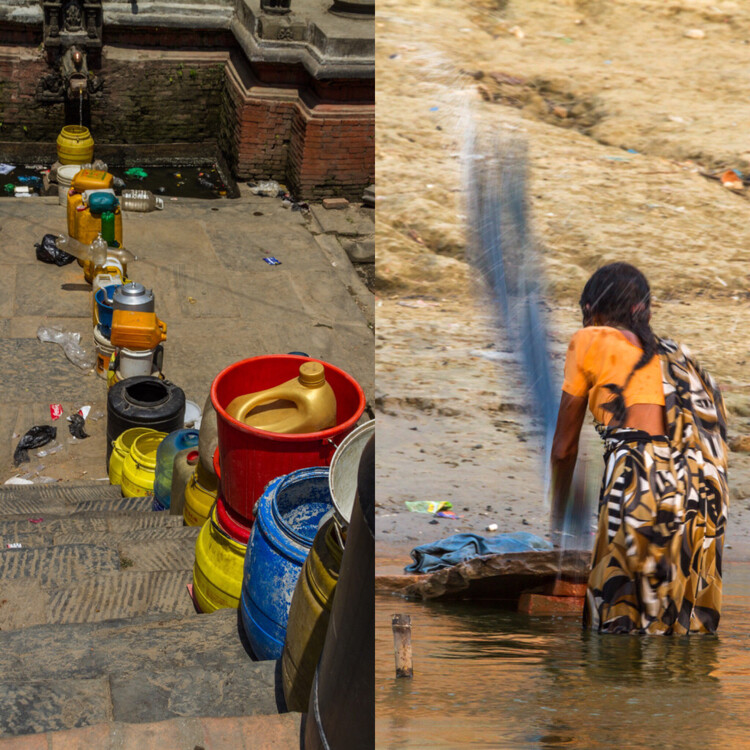
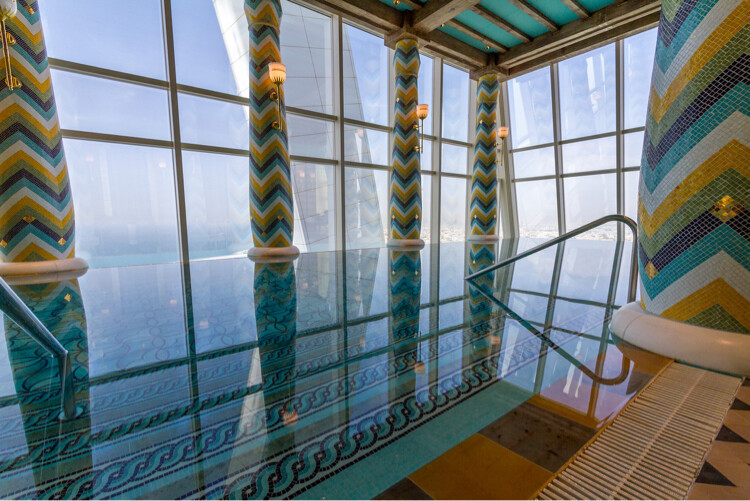
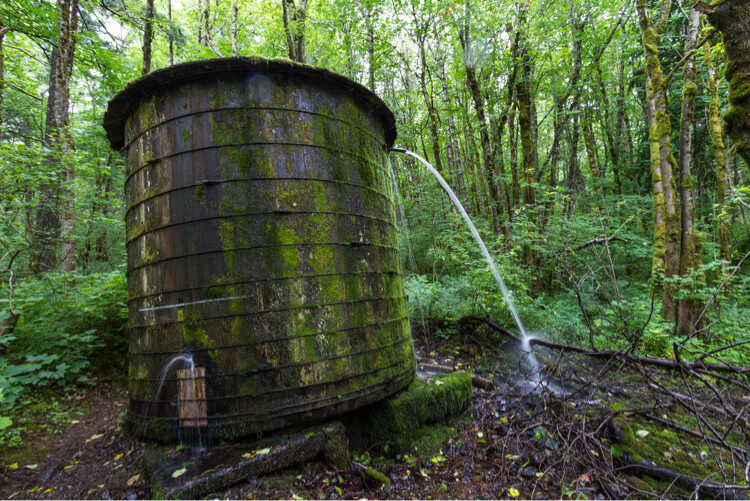
    While food brings us together, water is even more vital to our lives. In California we are familiar with our current drought, but forget that not every place has this problem. Some places are quite extravagant with their use of water, while it is a scarcity in others.

    Water in use in Nepal and India

    Scarcity of water in Kathmandu means water lines, while a woman in Varanasi, India, washes her clothes in the river.

    How do the locals use water? Do they wash their laundry in the rivers? Are there fountains everywhere? Are their cities built along waterways, or with vast ports?

    Infinity pool and Dubai

    An infinity pool 23 stories up in the Burj al-Arab, Dubai, UAE

    Old water storage tank overflowing and leaking

    In the woods of Oregon, there is often way too much water.

    5 – Transportation – private and public

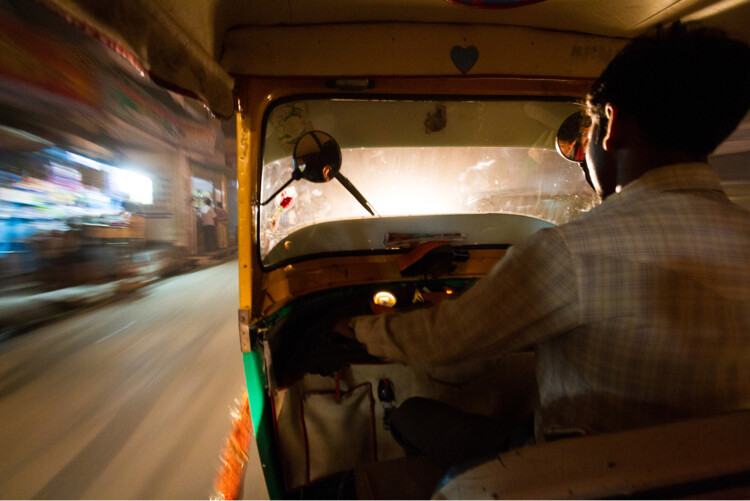
    How do people get around? At home we have our patterns, and often don’t see the other forms of transport we might use. But when you travel, it will hopefully be obvious how the people there transport themselves.

    Tuk-tuk ride at night

    Tuk-tuks in Amritsar, India, are the easiest way to get around town.

    It might a passel of buses, camels, rickshaws, taxis, or Maseratis.

    Also, how are goods moved? Does your location have shipping traffic and a lot of cargo? From continent to continent, the methods for moving goods from here to there can be vastly different.

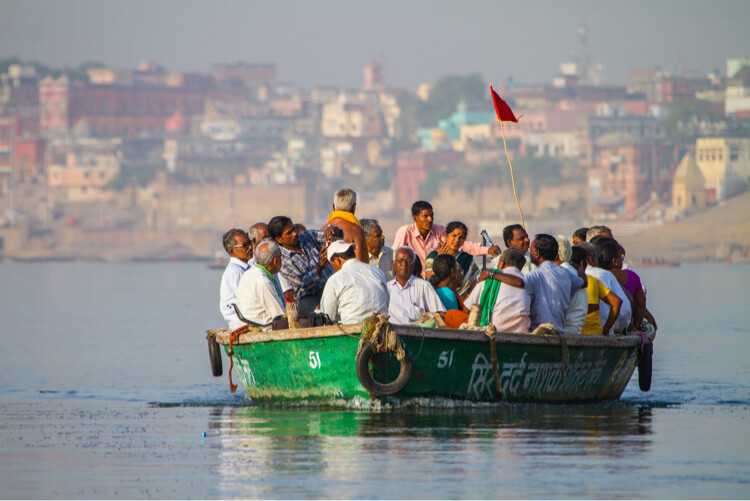
    Boating on the Ghanges River

    Boating along the Ghanges River in Varanasi, India

    6 – Commerce – macro and micro

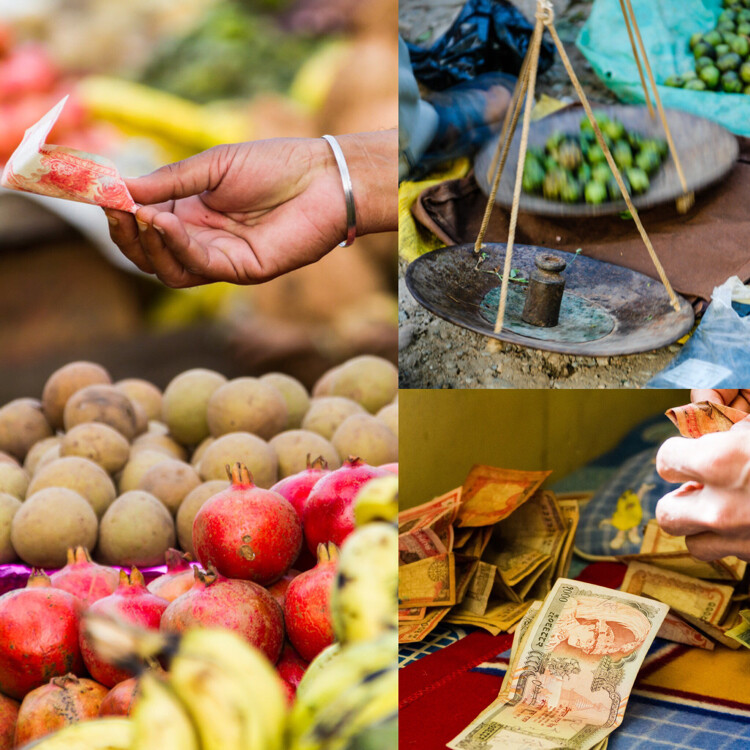
    When I think of macro-commerce I think of things like whole industries like: agriculture, tourism, and banking.

    With micro- commerce, I think of markets and vendors, where money actually changes hands. Who’s selling what, and who is buying? Is there a special technique to transactions?

    image

    Try to capture both the large scale, and intimacy of commerce, and show how things may be very similar, or very different from what you are used to back home.
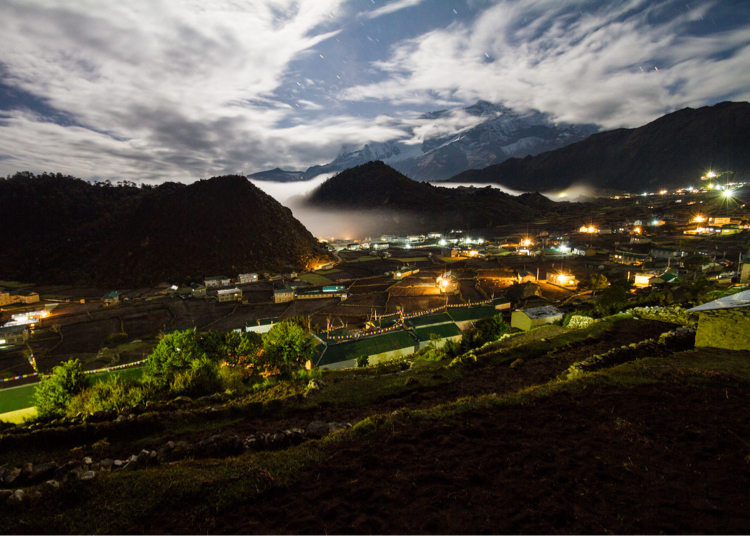
    7 – Nighttime

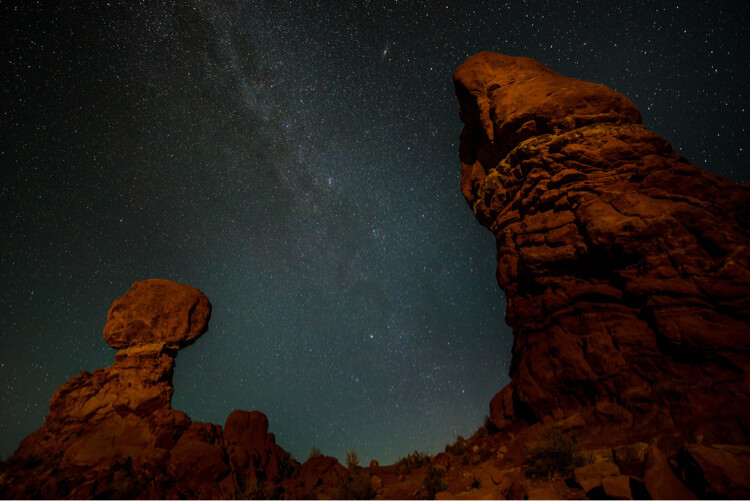
    When the sun goes down, don’t stop shooting! Learn to find light, and exploit its unique qualities during the night. Maybe you have some moonlight or some neon in your location. No matter the source, there is still light at night.

    Balanced Rock, Arches National Park, at Night

    Balanced Rock in Arches National Park, Utah, USA takes on a new look at night.

    Does your location shut down when the sun hits the horizon? Or does it rally for an all-night bender?

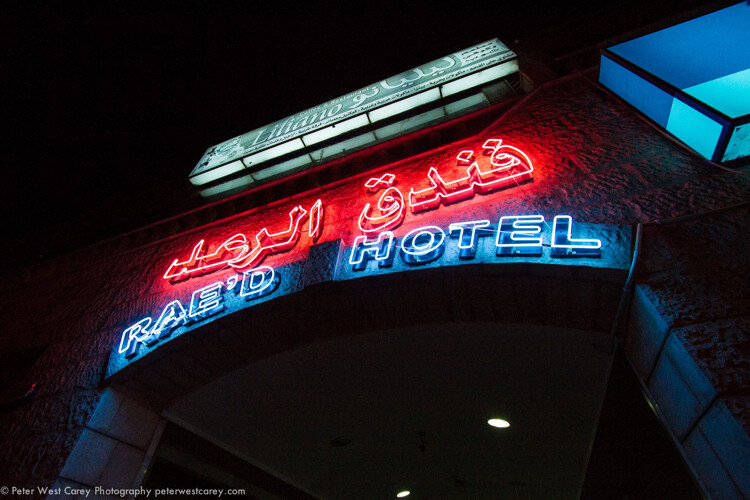
    I found the markets in Aqaba, Jordan come to life once the heat of the day was done. I also found that the town had way more neon signs than I ever expected, but hadn’t bothered to notice while touring in the daylight. Get out at night and explore.
    Noel in Aqaba, Jordan

    Neon in Aqaba, Jorda

    image

    8 – Religion

    How different parts of the world practice religion has always fascinated me. There isn’t a single part of this globe, that does not have some nod to the local religion, in some aspect of their lives.

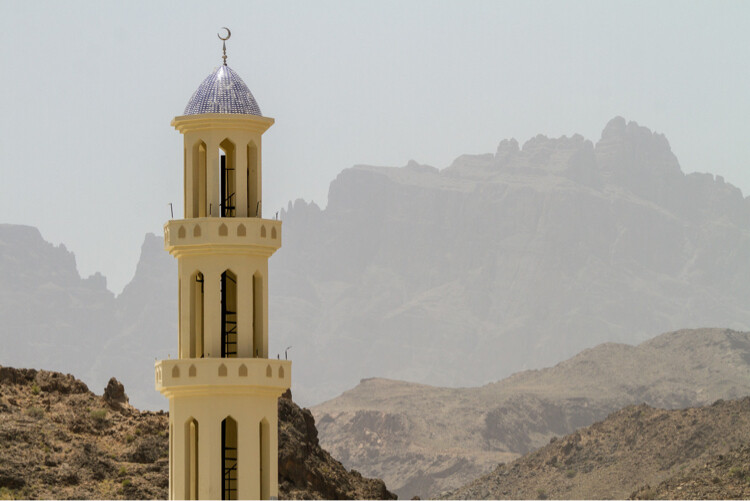
    Minaret of a mosque in Oman

    Colorful minaret in Jebel Shams area of Oman

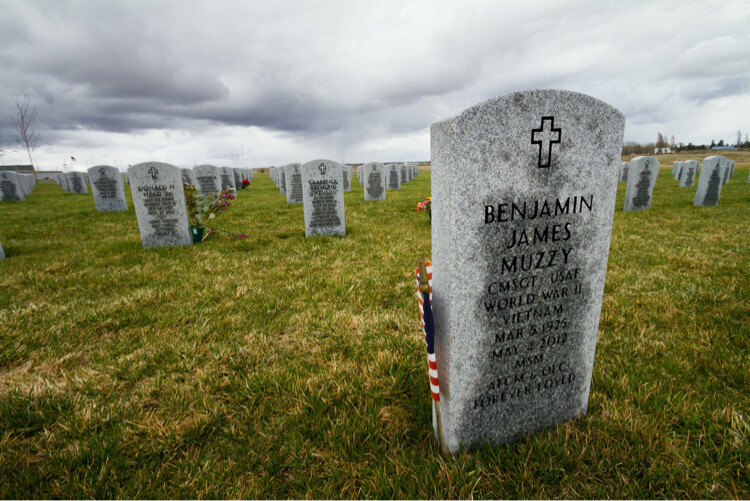
    It may be subtle, such as a small altar to burn incense, or it could be the overt repetition of churches across a city. Travel is a time to break out of your routine and try new things. Stick your head (respectfully) inside a temple. Tour a mosque. Visit a cemetery to see the influence of religion on those in the past.

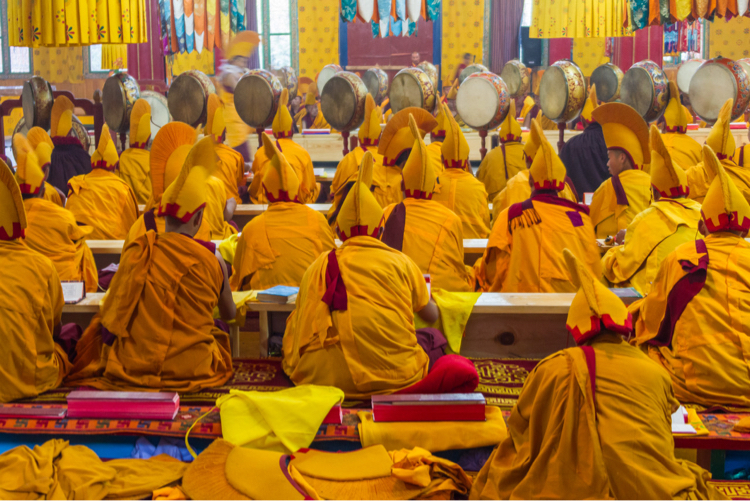
    Buddhist monks in ceremony, Bhutan

    Photography inside many Buddhist temples in Bhutan is banned, but on the night of this retreat for monks from all around the valley, I was allowed to shoot the ceremony.

    Military tombstones and flags located in Eastern Washington, USA

    Military tombstones and flags located in Eastern Washington, USA

    9 – Landscapes – natural and manmade

    I love landscapes, so they come easy to me. But, I have not always been a fan of cities and people. So, it takes me some effort to really appreciate the organization and layout of a nice cityscape. But it’s always worth it to bring back a mix of both in your images.

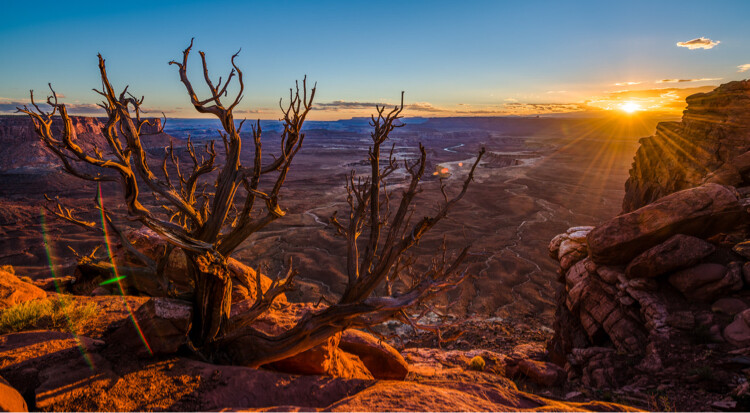
    View of Canyonlands National Park at sunset

    No people to see. Canyonlands National Park, Utah, USA.

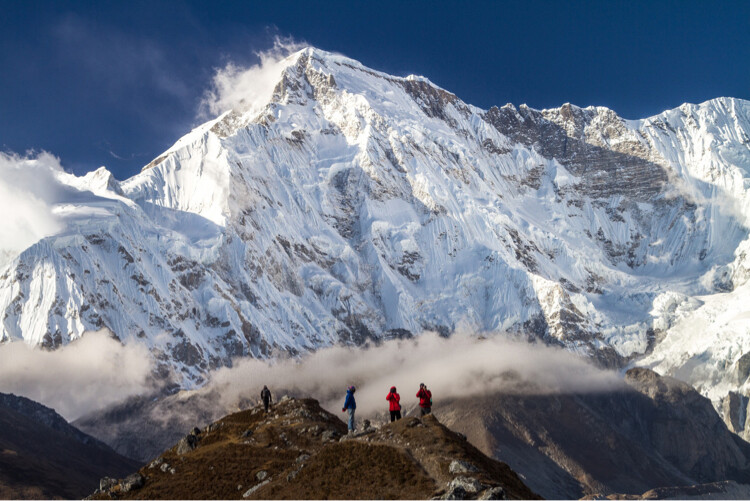
    Photographers and Cho Oyu, Nepal

    A few people give a sense of scale to Cho Oyu, the 6th highest mountain in the world, Gokyo, Nepal.

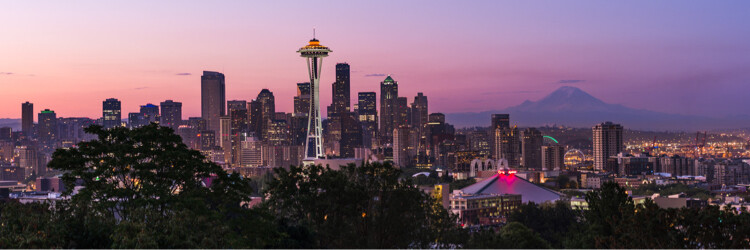
    Sunrise view of Seattle, Washington and Mount Rainier

    Here there are a lot more people in Seattle, Washington, USA

    I am reminded of the craze for photos of Iceland. I’ve seen my fill, and rarely was a single cityscape in the mix. Black sand beaches with ice, waterfalls, all that stuff shows up – but most photographers have left out the manmade landscape. Include it! At least once.
    10 – Icons – clichés big and small

    I know people who refuse to shoot iconic locations. “They’ve been over shot and I wouldn’t be caught dead shooting them,” is a common refrain. Ignore those people.

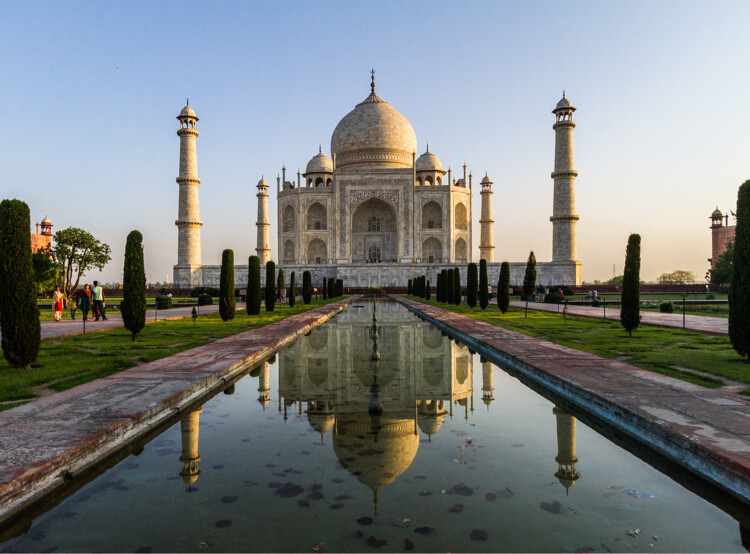
    Taj Mahal and reflection

    The classic Taj Mahal view.

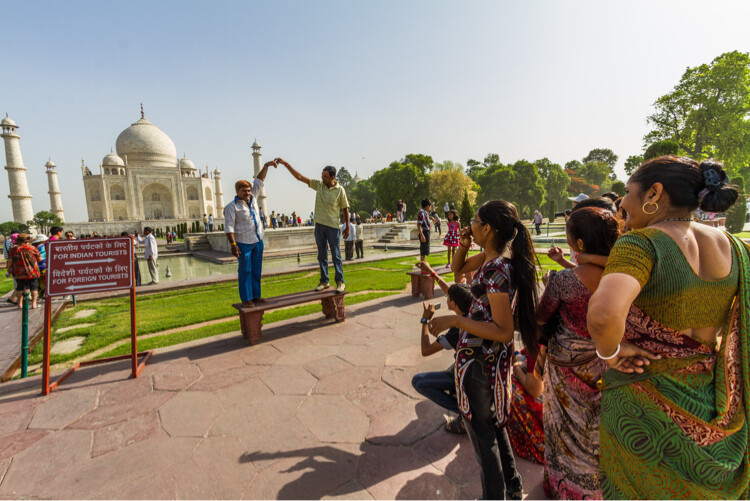
    You’re traveling, so have fun. Shoot the Eiffel Tower if you’re in Paris. Hit up Mesa Arch in Canyonlands National Park, and why not get a reflecting pool image of the Taj Mahal, or a cigar smoking lady in Havana? Do it. Get a posed photo of Masai Mara villagers, a llama in front of Machu Picchu, pretend to push over the Tower of Pisa.

    Heck, even get a photo of that same waterfall everyone else visiting Iceland has shot.

    That being said, you probably shouldn’t share only the cliché shots. Unless you’re on assignment to shoot something highly unique, go ahead and hit the clichés, then move on to the rest of the list. Better yet, look around your cliché location for something new to bring back and share.

    Tourists at teh Taj Mahal

    The not-so-classic view of the Taj Mahal, but a lot more fun.

    11 – Wildlife – domestic and truly wild

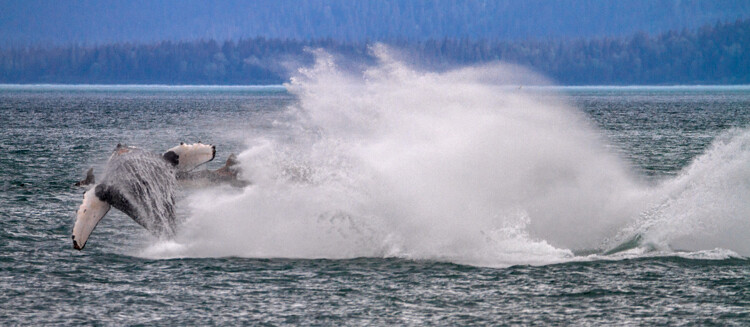
    My daughter’s obsession with taking photos of cats in Morocco sticks with me as a reminder to not ignore the domestic animals, along with the wild. I’ve photographed big cats in India and Africa, tarantulas in Peru and breaching whales in Alaska. But, I’d be remiss if I didn’t convey the fact that the town of Essouira, Morocco, with its fresh fish markets, is a haven for cats of all kinds.

    Breaching humpback whales, Alaska, USA

    Humpback whales in Alaska, USA

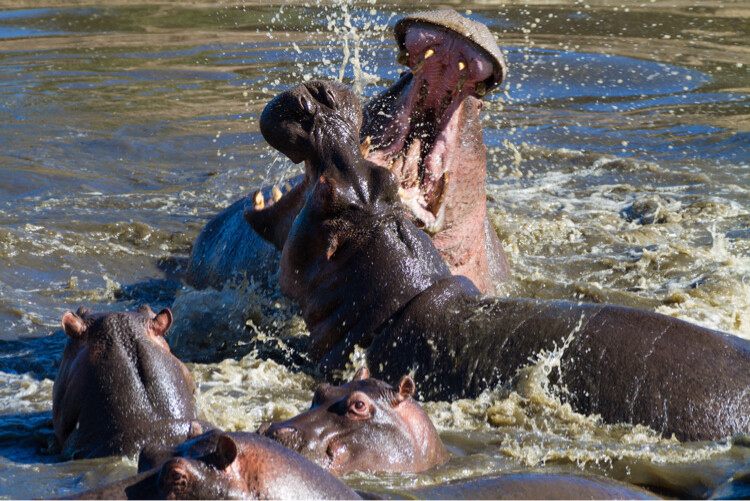
    FIghting Hippos, Serengeti National Park, Tanzania

    Fighting hippos in the Serengeti National Park, Tanzania

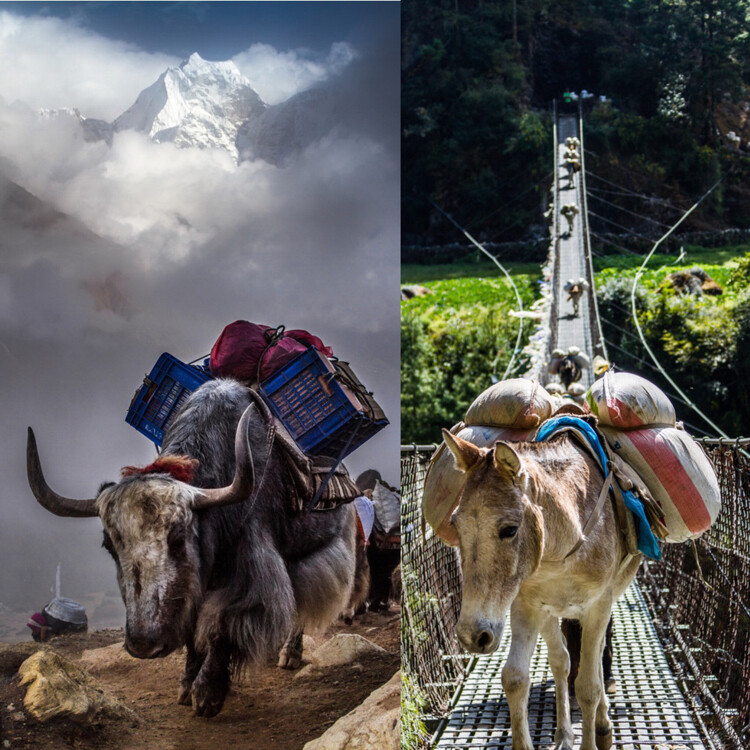
    What about the beasts of burden? The donkeys, llamas, horses and camels? Put those on your list as well.

    image

    12 – All the pretty plants and flowers

    Some of us just don’t care that much about plants. A green thing giving off oxygen at home is the same as a green thing giving off oxygen halfway across the world.

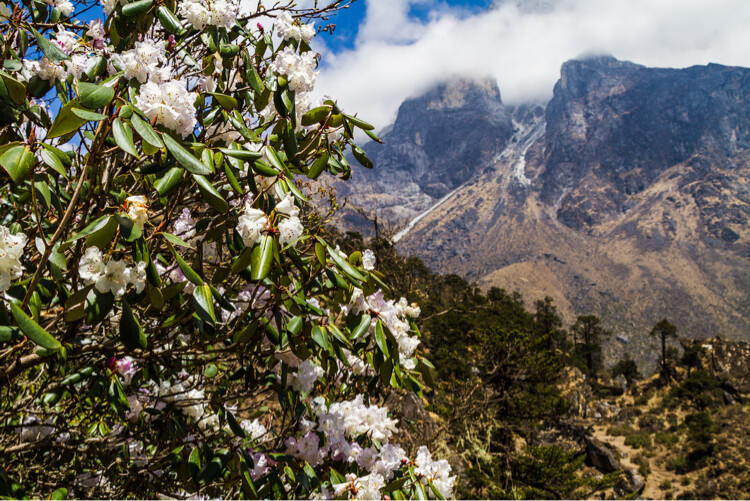
    Rhododendrons in the Himalayas, Nepal

    Rhododendrons at 14,000′ up in the Himalayas

    But, I had no clue there were rhododendrons in the Himalayas of Nepal, much the same (but smaller), as both the ornamental and wild versions, I knew in Washington state growing up. When you get down to the tropics, the plants certainly get exotic, don’t they? Grab their wonderful colors and adaptations to share with friends back home.

    Conclusion

    This list can be just a start for your own customized version. Take it, shape it, make it your own. Put your favorite things on the list, but also keep those that don’t interest you. Growth as a photographer comes from trying new things and shooting new subjects.

    Lastly, when it’s time to share your trip photos, I would suggest using 2-4 images from each category when making an online album. This will force you to pick only the best and it will give your viewers a good cross section of what you saw on your travels.

    googletag.cmd.push(function() {
    tablet_slots.push( googletag.defineSlot( “/1005424/_dPSv4_tab-all-article-bottom_(300×250)”, [300, 250], “pb-ad-78623” ).addService( googletag.pubads() ) ); } );

    googletag.cmd.push(function() {
    mobile_slots.push( googletag.defineSlot( “/1005424/_dPSv4_mob-all-article-bottom_(300×250)”, [300, 250], “pb-ad-78158” ).addService( googletag.pubads() ) ); } );

    The post How to Use a Travel Photography Shot List to Come Home with Better Photos by Peter West Carey appeared first on Digital Photography School.


    Digital Photography School

  • 3 Ways to Simplify and Learn Photography Faster

    It’s not always easy to be a photographer, seeing all of the great photo opportunities around us, and wanting to capture them all. Recently, I was working with a student of mine, and she wanted to know how to handle changing settings quickly from one situation to another.  Her example was trying to go from photographing landscapes, to trying to focus on a bird or other wildlife that may quickly enter the scene. While some seasoned photographers may be ready for a situation such as this, it’s certainly not easy, and for someone just learning, I would argue that it shouldn’t be attempted at all.

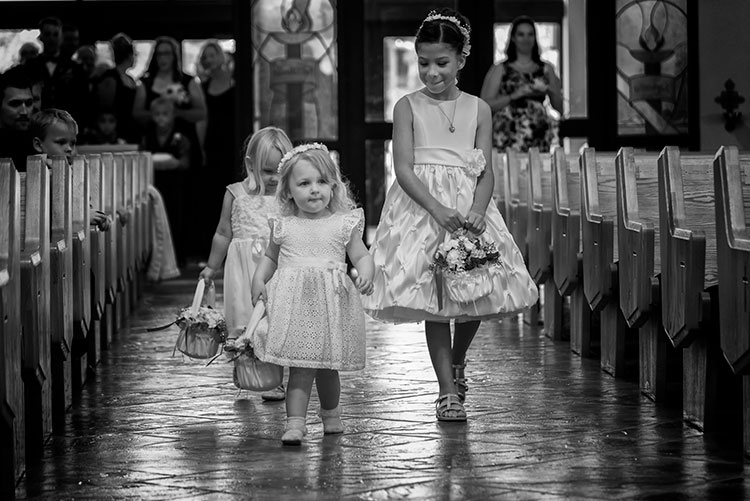
    24-120mm. Shot at 120mm, 1/160, f/4, ISO 1400. Knowing how the lens behaves at both ends of the zoom, I knew I could use this lens for wide angle shots in close, but zoom in as the flower girl was coming down the aisle and still get an interesting shot.

    24-120mm, shot at 120mm, 1/160, f/4, ISO 1400. Knowing how the lens behaves at both ends of the zoom, I knew I could use this lens for wide angle shots in close, but zoom in as the flower girl was coming down the aisle and still get an interesting shot.

    While many of the camera manufacturers want to make photography sound easy (anyone remember “So advanced, it’s simple”?), the fact is, photography is a craft, that despite the advances in technology, takes some time to master. Different photographic situations call for different settings, different lenses, or even a completely different approach to the subject matter. If you’re a hobbyist with only one camera, it can be impossible to be ready for all of the possibilities as they happen.

    So here are three ways to keep it simple while you’re learning photography, and stop the overwhelm.

    #1 – Focus on one subject at a time

    I’m a strong advocate for keeping things simple. First off, if you’re planning to photograph landscapes, wildlife, or portraits, stick with that one goal.  It is easy to get distracted by other subjects that come along. Those opportunities can seem like gold when they pop up, and they can be, but if you’re already set up to shoot a landscape photo at ISO 100, f/16 aperture, and 1/20th shutter speed, quickly switching to settings suitable for capturing a bird in flight is not an easy process. It will likely end in you being frustrated, capturing photos that don’t quite meet your expectations, or worse, don’t come out at all.

    Even now, 20-plus years after beginning my photography career, I try not to do too much at once with a camera. I focus on what my goal was when I first decided to pick up the camera and head out. If I’m planning on photographing a landscape at sunset, that’s what I do. The only time I will try to be ready for two separate subjects, is when I have two cameras. For instance, if I’m photographing a landscape, but there are waterfowl nearby and I want to be ready for that, I have a second camera set up with a telephoto lens, so I can grab it and try and get the shot. Even this requires me to at least temporarily put my initial subject, the landscape, aside for a bit.

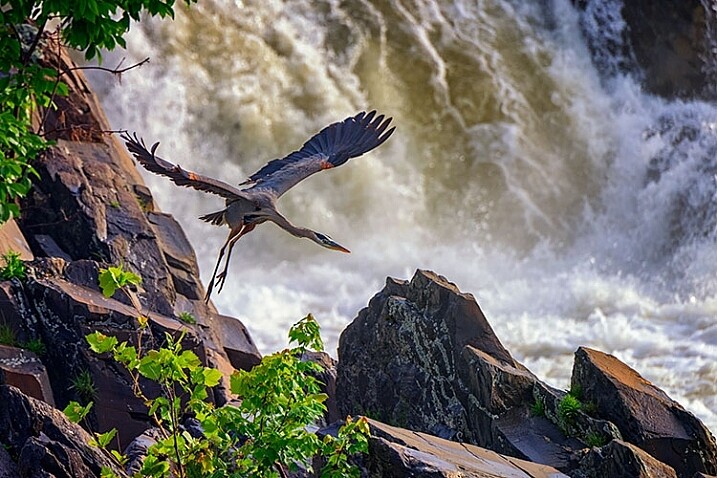
    Wildlife image taken using a fast shutter speed and a telephoto lens.

    This shot of the blue heron was taken with a 400mm lens, using continuous AF, and 1/1250 shutter speed.

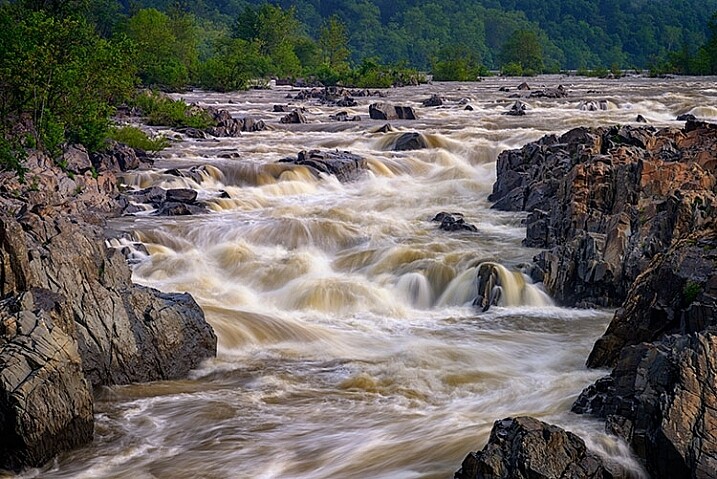
    The image of the waterfall (below), and the image of the great blue heron (above), were both taken at the same location.  However, for the shot of the waterfall, I needed to use a neutral density filter to slow down the exposure. There is no way I’d have been able to remove the filter, and be ready to photograph the heron, even if both shots could have been captured with the same lens. Not only would my shutter speed have needed to be drastically faster to stop the flight of the heron, I would also have needed to use continuous AF to capture its flight sharply, while I always use one-shot AF when photographing landscapes.

    Knowing there may be wildlife nearby, I mounted a Nikon 80-400mm lens on one camera (on a strap on my shoulder), while I had a second camera with a shorter lens, set up on a tripod to capture the waterfalls. If I only had one camera, I would have needed to choose between one subject or the other, and then move on. Rare is the occasion when you can jump so quickly from one subject to a completely different one using only one camera.

    Landscape image using a slow shutter speed and wide angle lens.

    This shot was taken with a 16mm lens, using one-shot AF, and a 0.6 second shutter speed.

    If you’re working with only one camera, don’t try to do too much.  Pick one subject and work that until you feel you’ve accomplished what you wanted, then move on to another subject. Yes, it’s difficult to be set up to catch a sunset and watch a beautiful snowy egret land nearby and start fishing, leaving you itching to try and catch it, but chances are it will fly away again while you’re still fiddling with your settings. Meanwhile, the sun is still setting, the color is fading, and you’ve likely missed a shot or two there as well.

    #2 – Use only one lens

    Back when I took my first photo course in college, my professor was adamant that each student use only a 50mm lens. I didn’t understand why at the time, but I do now. It’s important to understand how your lenses behave, so you’ll know which one is right for the job. As photographers, many of us become gear collectors, always wanting another lens, to allow us to photograph the way we saw another photographer do it. But before you start collecting lenses, it’s important to recognize what each lens can do for you, and to truly understand that, you’ve got to use each lens extensively.

    Wide angle lenses expand perspective.

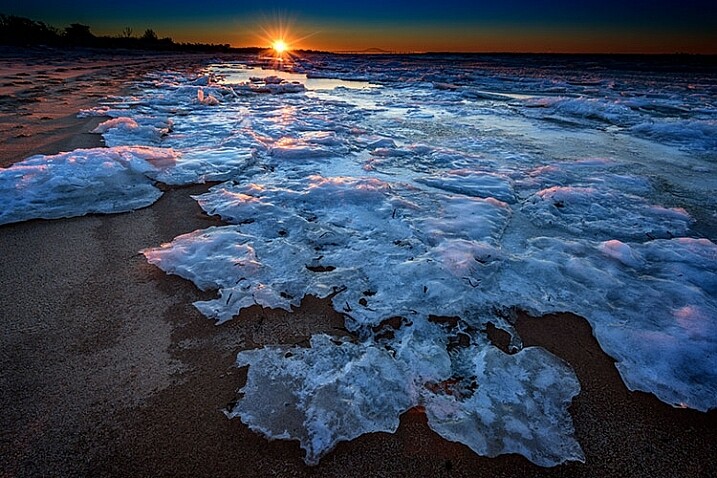
    Using a wide angle lens, I was able to emphasize the ice in the foreground, while pushing the bridge to the background at the top center of the frame.

    I currently have seven camera lenses in my kit right now. At any given time, there may be four or five in my camera bag when I’m out photographing, depending on what my planned subject is, or what contingencies I want to be ready for. But, as usually happens, it’s rare that most of those lenses will see the outside of my bag once I get where I’m going. While each situation is different, I often find that one lens will usually handle what I want to do when I get to a location. So unless it’s one of those rare times when a situation calls for both a telephoto and a wide angle look, usually only one of those lenses gets mounted on the camera. While in the above example I broke this rule and used two cameras with two different lenses, that is not usually the norm for me.

    When you pull your camera out of the bag next time and select lens to use, stick with that one lens. Really get to know it. If it’s a zoom, shoot at only one end of it. The next time you use it, use the other end. Learn how to make that lens really sing. Find out what it’s really good for, and what it’s not good at. Do this with every lens you own, if you own more than one. When it comes time to purchase new glass, you’ll have a much better understanding of where your kit comes up short, and what you need to buy. In addition, you’ll also be building on my first point, focusing on one subject. Too often, new photographers miss opportunities because they are busy changing lenses because they think they need one over another. If changing lenses is not an option, you won’t waste time with it, and can focus on making great photos with whichever lens you find on your camera.

    Telephoto lenses compress perspective.

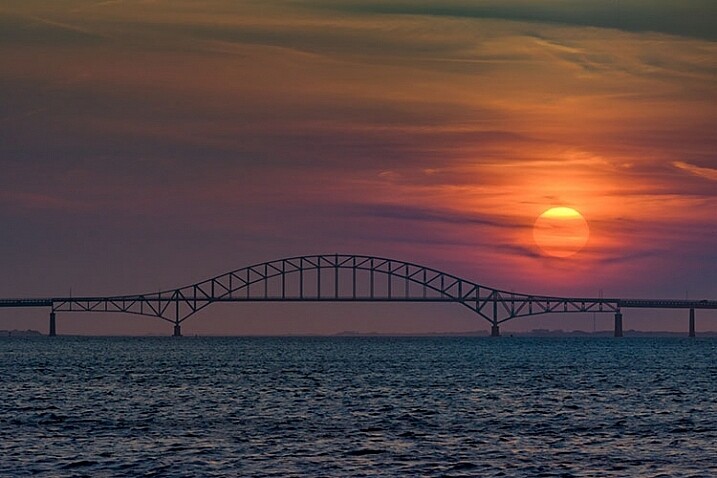
    Telephoto lenses compress perspective. Want to make the sun or moon look really big in relation to a building or structure? Back away from your subject a bit and use a telephoto lens to compress the perspective and distort the size relationship.

    In the two images shown above, the same bridge can be found in both, and both shots were taken from roughly the same spot. One was taken with a 16mm lens, and the other, with a telephoto lens at 290mm. Wide angle lenses expand perspective, emphasizing the foreground and pushing background objects back, while telephoto lenses minimize foreground and tend to flatten perspective. Using only one focal length will also help you to compose more effective images. Zooms can at times make you lazy. Zooming from a wide angle to a telephoto lens changes the image profoundly, and it’s important to understand what effect that can have on your image.

    Telephoto lenses compress perspective, while wide angle lenses enhance it, and each perspective communicates something different to the viewer. There are reasons to use both wide and telephoto lenses, but only working with them extensively will help you recognize the situations where each is most effective.

    #3 – Don’t accessorize

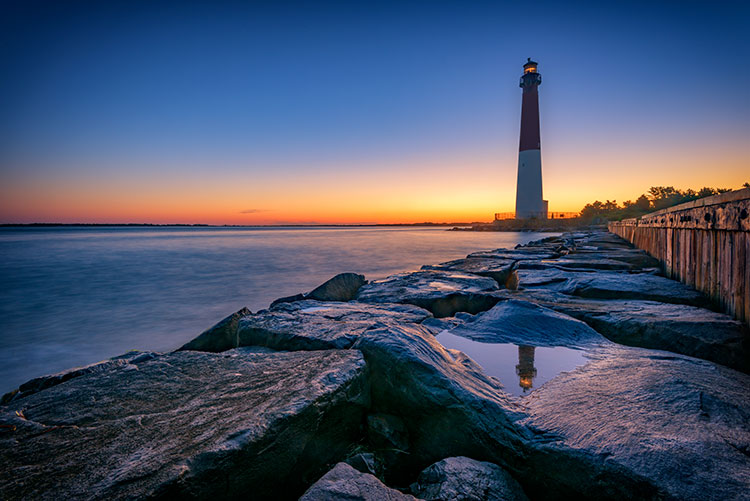
    For the lighthouse image- Shot at 16mm, f/16, 15 seconds, ISO 64. I simplified my composition down to two elements, the reflection in the foreground, and the lighthouse in the background. Knowing the lighthouse would be there regardless of where I stood or how I zoomed, I focused on getting the reflection right, and letting the rest of the composition fall into place.

    Shot at 16mm, f/16, 15 seconds, ISO 64. I simplified my composition down to two elements, the reflection in the foreground, and the lighthouse in the background. Knowing the lighthouse would be there regardless of where I stood or how I zoomed, I focused on getting the reflection right, and letting the rest of the composition fall into place.

    One of the great things about digital photography, and today’s technology, is the many cool new tools available to help with your picture-taking endeavors. It’s great to be able to connect to a camera from your smartphone, and do things such as time lapse or long exposures, but often times, these accessories are one more thing that can go wrong, or distract you from actually taking photos.

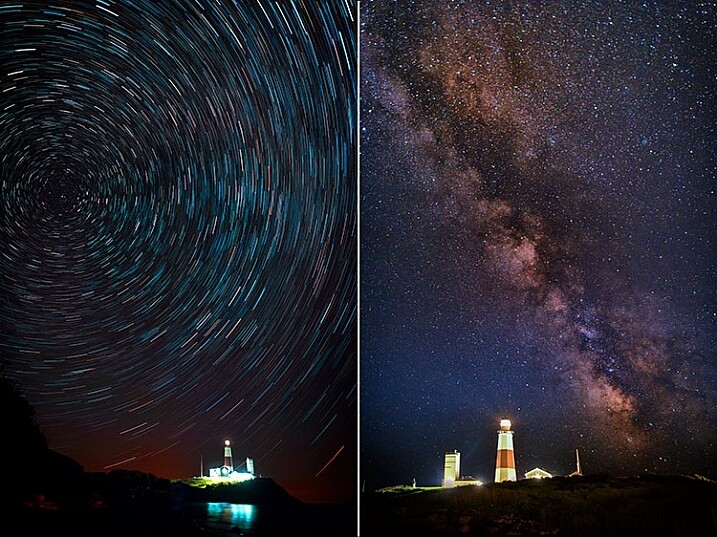
    There are only three accessories that I use regularly. One is a time controller that plugs into my camera directly, second is a tripod, and finally, a set of neutral density and graduated neutral density filters, used to help control exposure. I didn’t even begin using the filters until a few years ago, more than 15 years into my photography career. Both images below used nothing more than a remote shutter release. In the case of the Milky Way image, on the right, I set my camera to manual for a 15 second exposure and used the remote release as I would the shutter button, simply to avoid touching the camera. For the image on the left of the star trails, while that becomes a bit more complicated in processing, in reality, it’s just a lot of 30-second exposures. I simply set my camera to continuous drive, and locked the shutter button on the remote down. Simple.

    Minimize accessories

    Even for images such as these, the only accessory I used was a time controller, with only the shutter button locked down.

    It’s important, when learning photography, to focus on the basics – aperture, shutter speed, and ISO, and understand how they affect your images. It’s too easy to get caught up in all the bells and whistles and how cool they are, and forget that the end result is what matters. In my mind, if the accessory isn’t contributing in a way that affects the final image, then I don’t need to use it. I’m not saying that accessories are bad, or even unnecessary, but if you aren’t sure how to achieve a proper exposure yet, put off purchasing that shiny new toy, and really learn your camera.

    I would even advise you to stay away from the special modes on your camera, such as HDR, or star trails mode (I do that manually in post-production), or multiple exposure mode. Yes, they can look cool, and do great things, but again, understanding the basics of exposure is paramount. If you don’t understand basic exposure, using the bells and whistles won’t help you make music.

    I find that simplifying the process as much as possible helps me come away with the best images possible. What do you do to help simplify your photographic process?

    googletag.cmd.push(function() {
    tablet_slots.push( googletag.defineSlot( “/1005424/_dPSv4_tab-all-article-bottom_(300×250)”, [300, 250], “pb-ad-78623” ).addService( googletag.pubads() ) ); } );

    googletag.cmd.push(function() {
    mobile_slots.push( googletag.defineSlot( “/1005424/_dPSv4_mob-all-article-bottom_(300×250)”, [300, 250], “pb-ad-78158” ).addService( googletag.pubads() ) ); } );

    The post 3 Ways to Simplify and Learn Photography Faster by Rick Berk appeared first on Digital Photography School.


    Digital Photography School

  • How to Create a Dramatic Cinematic Style Portrait Using Photoshop Color Grading

    Cinematic style portraits are personally one of my favourites. What I like the most about them are the desaturated colours and the dramatic ambience.

    Before we start the tutorial on colour grading, I will give you some of my best tips to achieve this cinematic look:

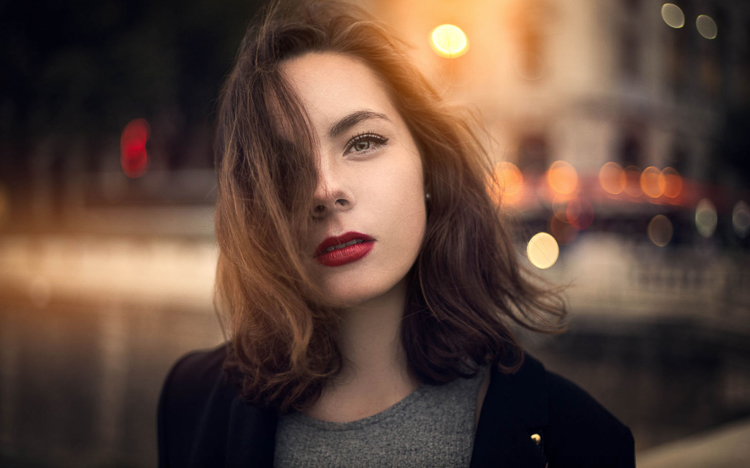
    • Use a large aperture, something between f/1.4 and f/2.0. If you have a long lens then you can also use that. The idea is to have a nice background bokeh (when things in the background are blurred). You also want to have nice separation between the model and the background.

    IMAGE 1

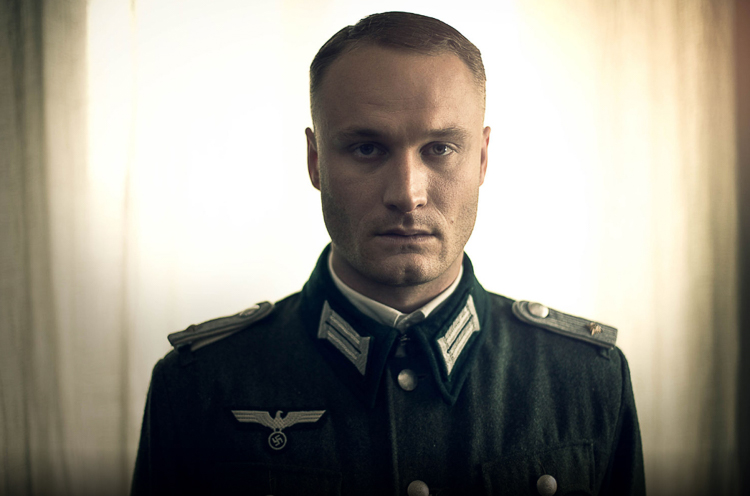
    • If you’re shooting indoors with strobes, then try to add ambience by adding shadows to the model’s face. You do not want flat lighting, it is boring.
    • If somehow you can’t get the dramatic lighting, don’t hesitate to enhance the contrast with some dodging and burning in Photoshop.

    IMAGE 2

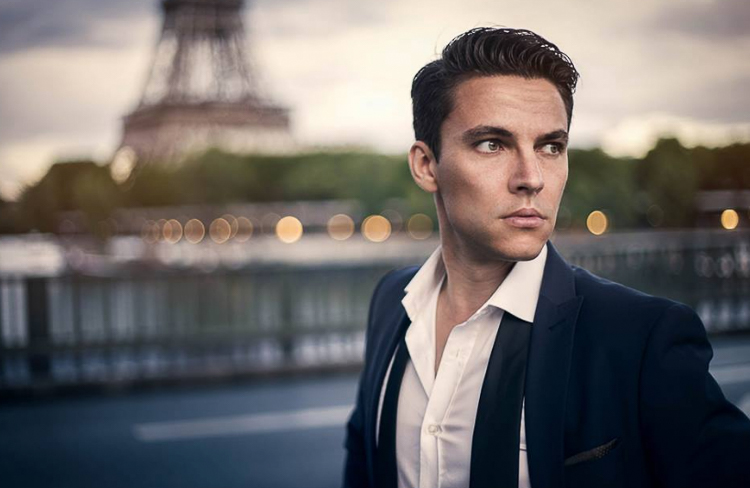
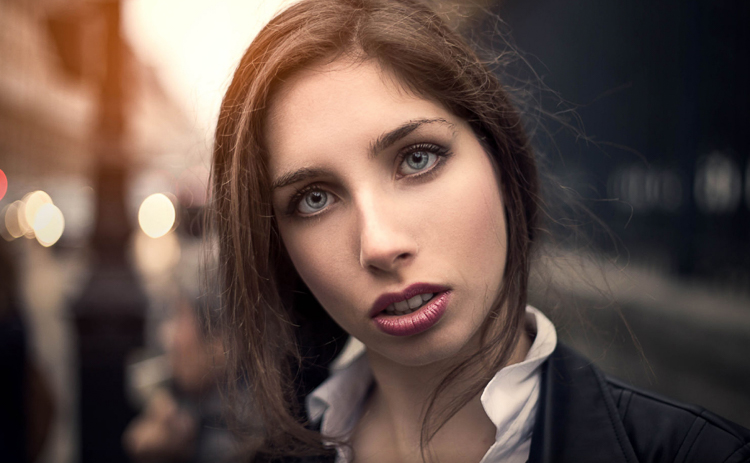
    • If you’re shooting outside, the I recommend shooting right after sunset. You will get nice soft light on the model’s face, and you will also have city lights behind them, to really get a cinematic feel. This only works with a large aperture, and it adds another point of interest.

    IMAGE 3

    • Your model should have a strong expression on their face, especially if it’s a male. Cute smiling images do not really work that well with this style.
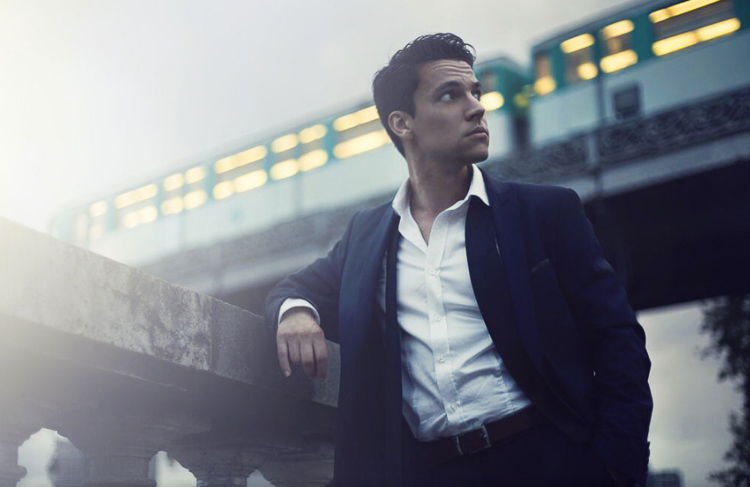
    • Leave some space in the frame. You do not want your model to take up the whole frame, so leave some space around them, to add context to your image. You can get better results if the viewer is able to locate the spatiotemporal context of your image.

    IMAGE 4

    • Your model should not wear something too flashy (something like pink or yellow), limit their clothes to sombre, subdued colours.
    • Try to use complementary colours as much as possible, it creates nice depth to your images. Usually in movies, the actor is either in blue and the background in yellow/orange, or vice versa. Try to keep your actor in a range of cold colours and your background in warm colours, it works the best. The opposite also gives you good results.

    IMAGE 5

    • The most important thing is that your model should look like a character. Try to add accessories, clothes, or poses that make the character look credible. You can discuss with the model or stylist before the session, the look you want to give to your images, and have a look together at the wardrobe.
      IMAGE 6

    Color Grading in Photoshop

    For the colour grading tutorial I am going to work on this image:

    IMAGE 7

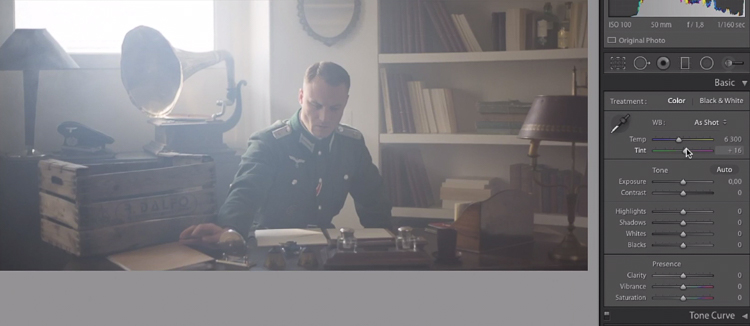
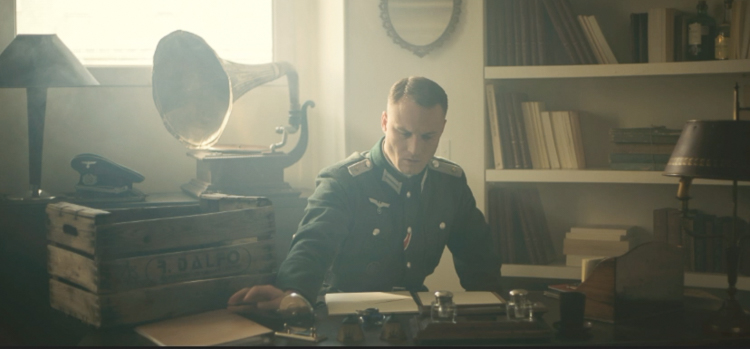
    This image was taken on a Canon 6D, with an aperture of f/1.8, on a 50mm lens. This was taken during a short film where I was the photographer. There was a lighting behind the window aiming at the model, we added some fog to create this 1945 look.

    What we’re going to do with this image is bring it back to life, by enhancing the contrast between the yellows in the highlights, and the greens in the shadows. We’re going to have a colour scheme based on analogous colours, going from green to yellow.

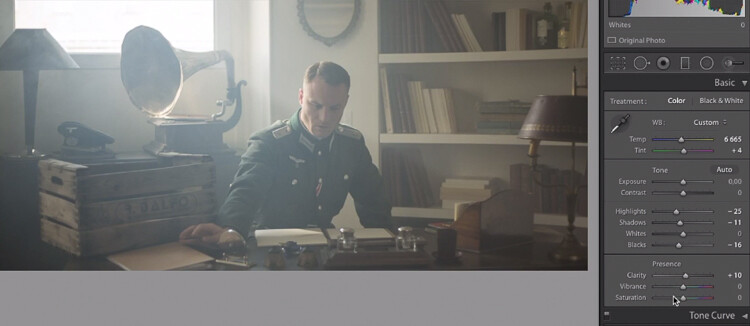
    Let’s start with some basic exposure correction on Lightroom, this will depend on your image, so adjust accordingly.

    IMAGE 8

    Do basic adjustments in Lightroom, or your program of choice, first.

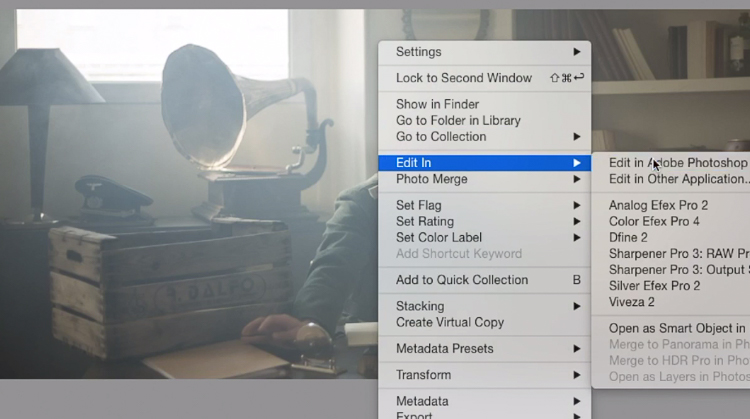
    After the basics are done let’s move the image over to Photoshop to start our colour grading. If you are using Lightroom just right click and choose Edit in Photoshop.

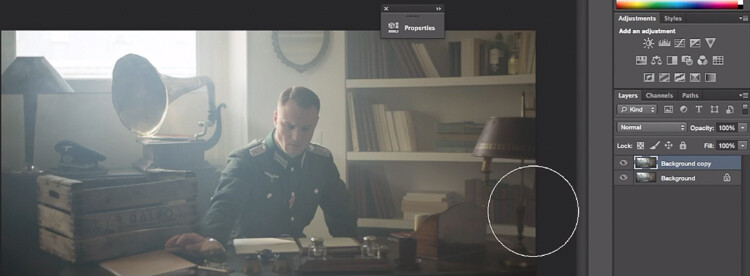
    First, duplicate the layer in Photoshop so that you won’t do any destructive editing. You can always go back to the original layer if you don’t like the results.

    IMAGE 9

    IMAGE 10

    Make a duplicate layer.

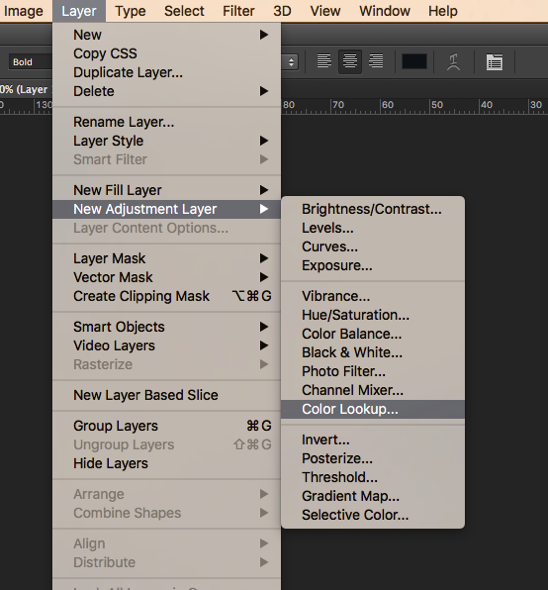
    The first thing we’re going to do is to create a new layer adjustment, go to: Layer > New Adjustment Layer > Color Lookup…

    Screen Shot 2016 06 23 at 2 08 13 PM

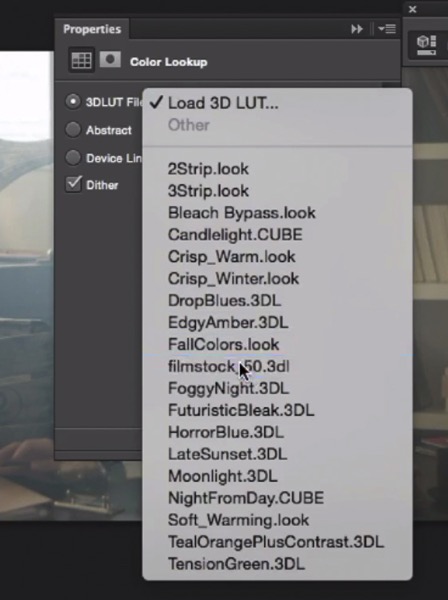
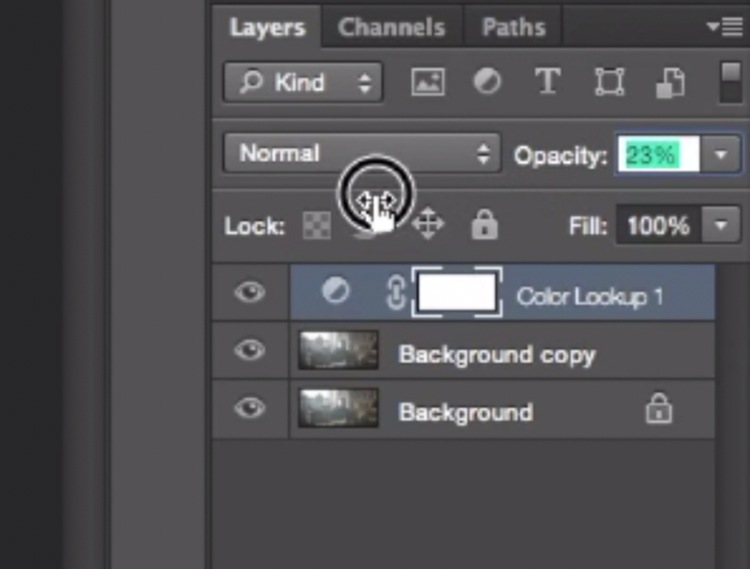
    Pick filmstock_50.3dl and reduce the opacity of the layer to around 20%. You need to reduce the opacity otherwise the effect is going to be too strong.

    IMAGE 12

    IMAGE 13

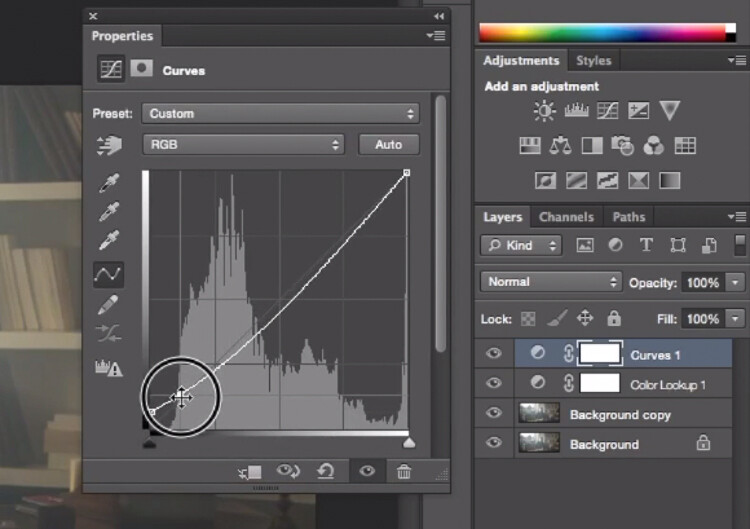
    Next thing we’re going to do is create a curves layer and redo the contrast. This will really depend on your image, so adjust according to your taste.

    IMAGE 14

    Adjustment layer Curves to add contrast.

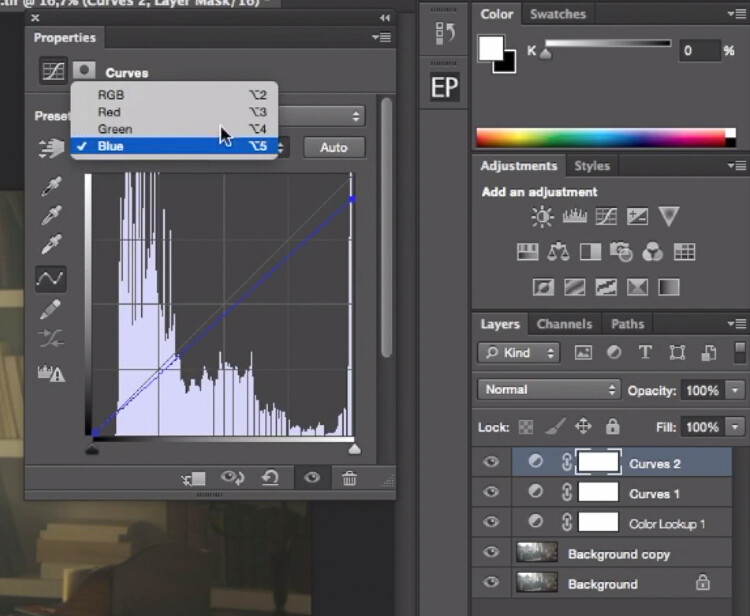
    Then create another curves layer, go to the blue curve and lower the top right extreme of the layer. This will add yellow to your shadows.

    IMAGE 15

    Add yellow to the shadow areas using this curve adjustment

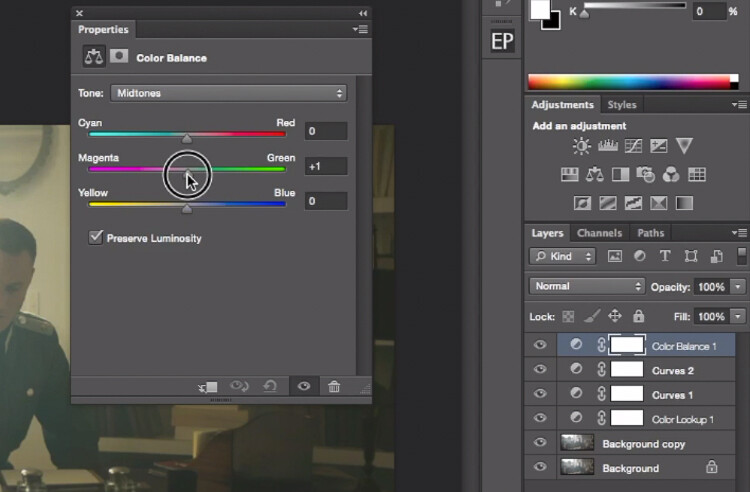
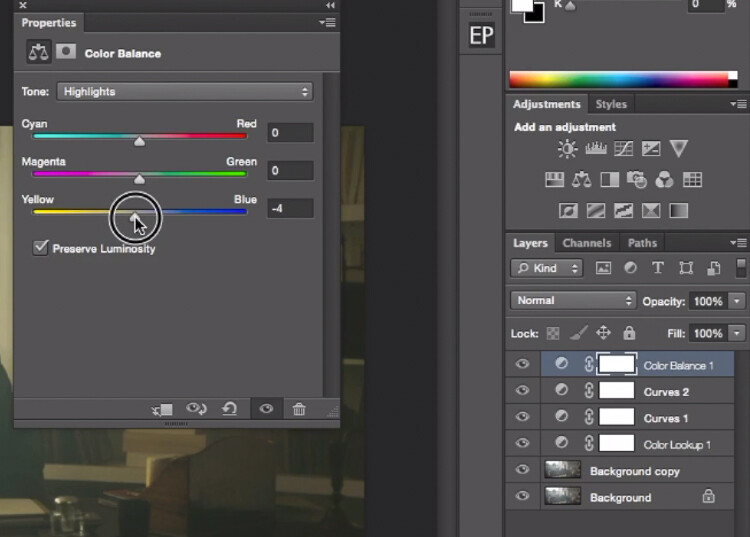
    Next step is to play around with the colour balance (make another new adjustment layer) to enhance to greens in the midtones and the yellows in the highlights. Once again just the sliders to add green and yellow to both the highlights and the midtowns.

    IMAGE 16

    Select Midtones from the pull-down menu and add green and yellow.

    IMAGE 17

    Select Highlights from the pull-down menu and add green and yellow.

    Right now, we are basically done with colour grading. Lastly is to quickly dodge and burn, to enhance the light coming from the window, and to darken the image and the background. We are basically doing a manual vignette.

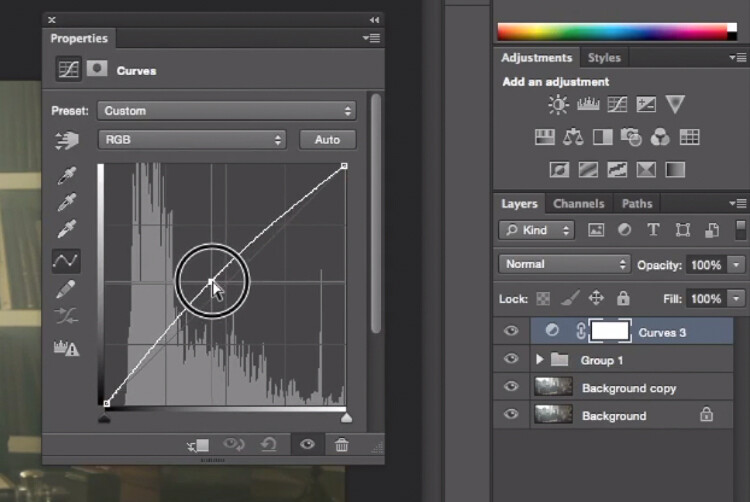
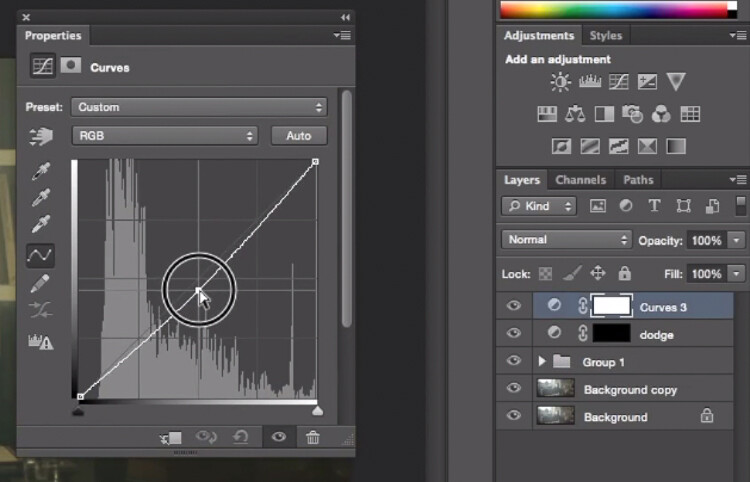
    To lighten up the image, create a curves layer, make it brighter, and add a black layer mask (CMD/CNTRL+I to invert the layer mask). Call the layer Dodge, and paint with a white brush (because the mask is black) in the spots where you want to brighten up the image. Pick a brush with an opacity around 40% with and edge hardest of 0%

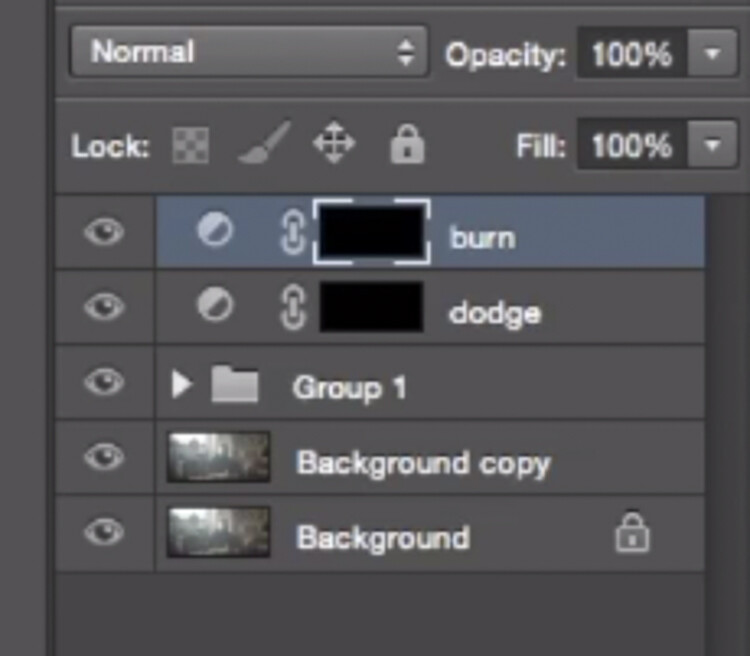
    To create a dark layer, we will basically do the same thing but darken up the curves layer and paint over the spots in the image we want darker.

    IMAGE 18

    This Curves adjustment layer is for dodging or lightening areas of the image.

    IMAGE 19

    This Curves adjustment layer is for burning or darkening areas of the image.

    IMAGE 20

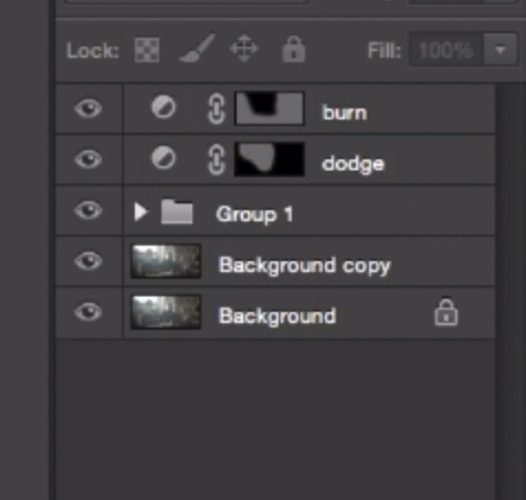
    Rename your layers to identify them easier.

    IMAGE 22

    This is the final result:

    IMAGE 23

    Conclusion

    Cinematic portraits rely heavily on great colour grading – but the lighting, model, camera settings and ambience should not be neglected. It all starts with a great image and ends with Photoshop to enhance your vision.

    Enjoy the art !
    googletag.cmd.push(function() {
    tablet_slots.push( googletag.defineSlot( “/1005424/_dPSv4_tab-all-article-bottom_(300×250)”, [300, 250], “pb-ad-78623” ).addService( googletag.pubads() ) ); } );

    googletag.cmd.push(function() {
    mobile_slots.push( googletag.defineSlot( “/1005424/_dPSv4_mob-all-article-bottom_(300×250)”, [300, 250], “pb-ad-78158” ).addService( googletag.pubads() ) ); } );

    The post How to Create a Dramatic Cinematic Style Portrait Using Photoshop Color Grading by Yacine Bessekhouad appeared first on Digital Photography School.


    Digital Photography School

  • How to Improve Composition by Placing your Subject Off-Center

    You may be wondering – shouldn’t you always place your subject or main point of interest off-center? Isn’t that what the rule of thirds is about? If so, I suggest you refer back to my earlier article about creating strong compositions with a centrally placed subject. It makes the point that it’s perfectly possible to create a well composed image with the subject placed centrally.

    Central composition

    Equally, there are times when you should place the main point of interest away from the center of the frame. Not necessarily on a third, but anywhere between the centre of the frame and the edge, centered neither vertically nor horizontally.

    I firmly believe that you should never ask yourself whether you should place the main subject or focal point on a third when you take a photo. There are much better questions to ask, such as:

    • Is there enough space around the subject to give it room to breathe?
    • Are there any highlights near the edge of the frame that take the viewer’s eye out of the photo?
    • How does the viewer’s eye move through the photo? This question may be partly answered during post-processing, where you can darken or lighten parts of the image to guide the viewer’s eye.
    • How do I make this photo as interesting as possible?

    The answers to these questions influence the decisions you make in composition, and help you decide where to place the main point of interest. Let’s look at some examples.

    Examples of off-centered compositions

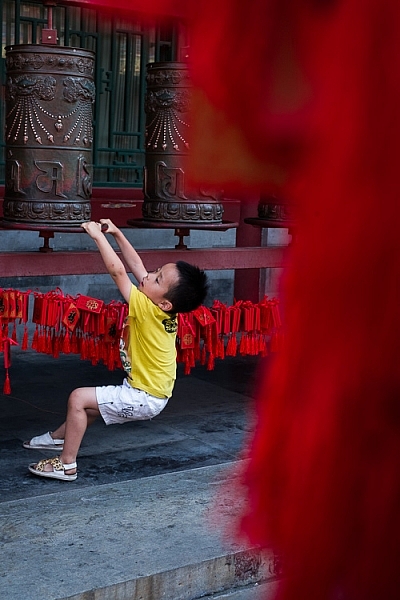
    I took the following photo in a historical building in Beijing called Prince Gong’s mansion. There was a courtyard inside, with Tibetan prayer wheels down one side. As people walked into the courtyard, most of them walked down past the prayer wheels, spinning them as they went. This boy decided to join in the fun.

    Composition and placement

    I placed him off-center because was shooting through some red tags (like the ones you see behind the boy) hanging from another structure. I used an aperture of f/5 to make sure the tags were out of focus. They create a frame that adds a sense of depth, and also pushes the eye towards the boy. It helps that his yellow T-shirt contrasts with the surrounding red hues.

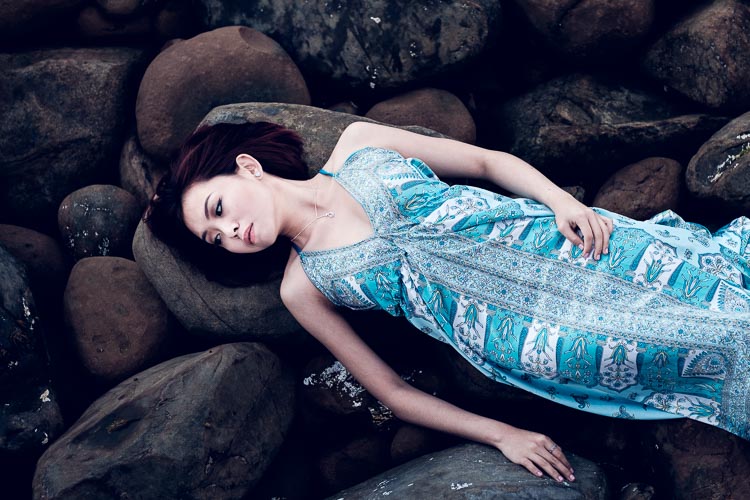
    The next image was taken in New Zealand. I found these beautiful stones by the sea, and asked my model Ashley to lay down on them.

    Composition and placement

    I liked the way the blue dress contrasted against the more subdued colors of the rocks. I framed the photo so that Ashley’s body formed a diagonal that takes the viewer’s eye from the right side of the photo, to the left. Her face, which is the main focal point of the image, had to be placed off-centre. If it was central there would be lots of empty space on the left-hand side of the image, and it would be unbalanced.

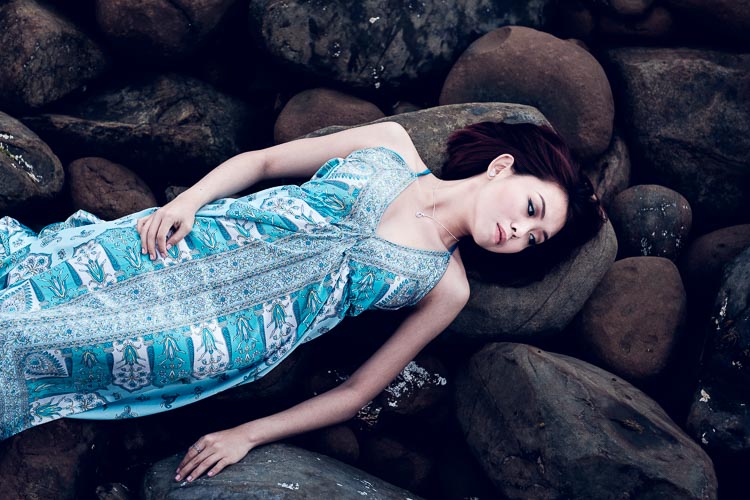
    Incidentally, there is an idea that it is better to compose photos to work with the natural tendency to read a page from left to right. As this photo does the opposite and takes the eye from the right of the frame to the left, I flipped it so that you can see the difference.

    Composition and placement

    Which version of the photo do you think works best? If you have an opinion please let me know in the comments below. I know which version I think is better, but I’d be interested to hear it from people seeing the photo with fresh eyes.

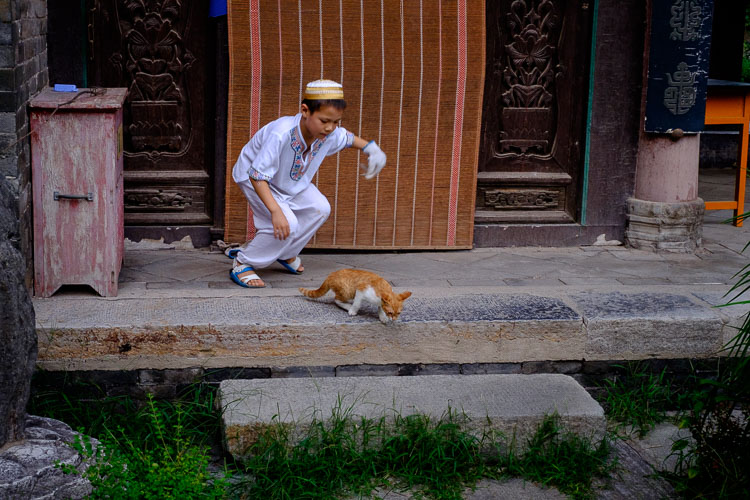
    The next photo was taken in the Great Mosque in Xi’an, China. The boy was trying to catch the cat, and I took a photo as he ran after it.

    Composition and placement

    The boy is the focal point of the image, and because he is moving from left to right in the frame he needs some space to move into – the empty space on the right of the frame provides this. If the boy was centered in the frame there would be too much space on his left.

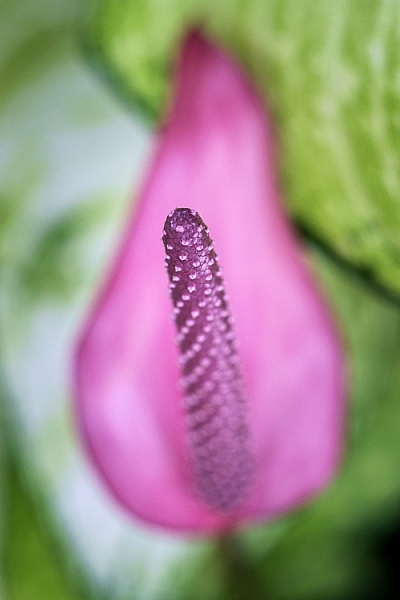
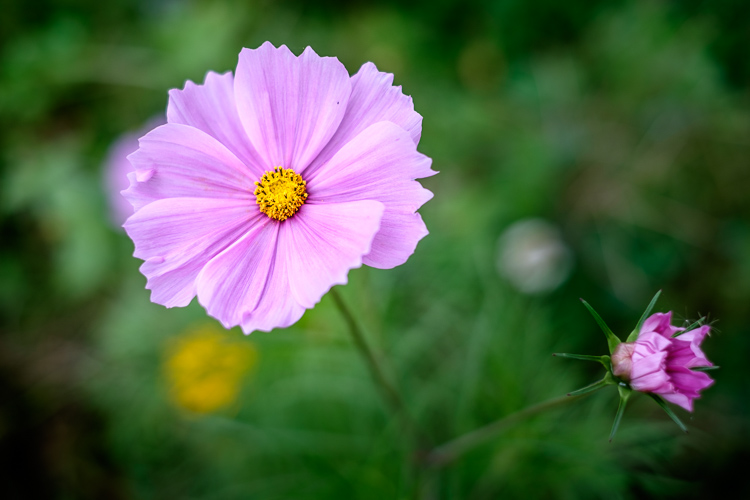
    The next photo, a close-up of a flower, is interesting because it has two focal points.

    Composition and placement

    The main focal point is provided by the open flower on the left. But the closed flower on the right is a second focal point that also pulls the eye. The result is that the viewer’s eye moves back and forth between the two points. When you have two focal points in a photo like this, it makes sense for them to be on opposite sides of the frame, and therefore off-centre, so that they fill the frame adequately.

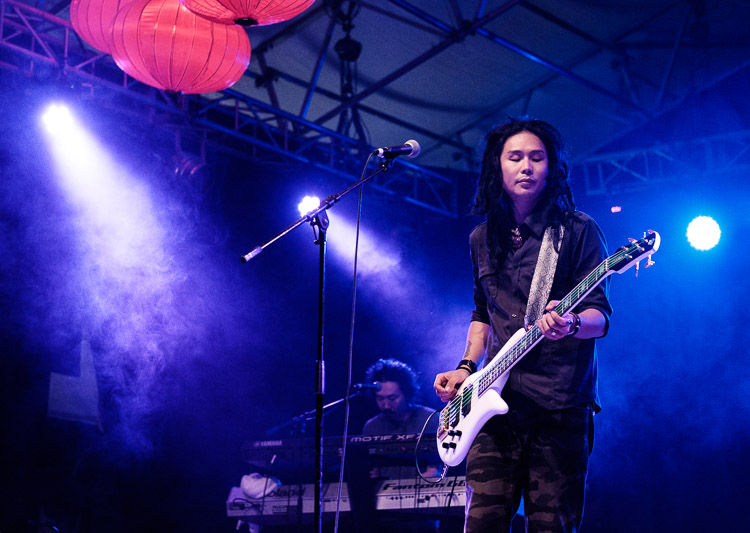
    I took the next photo at a concert in Auckland, New Zealand.

    Composition and placement

    I placed the guitarist off-centre so that I could show him in context. Behind him you have another band member on the keyboard, and three spotlights. You can also see some Chinese lanterns (this photo was taken at the Chinese Lantern Festival in Auckland). The lights also provide leading lines to draw the viewer’s eye to the guitarist.

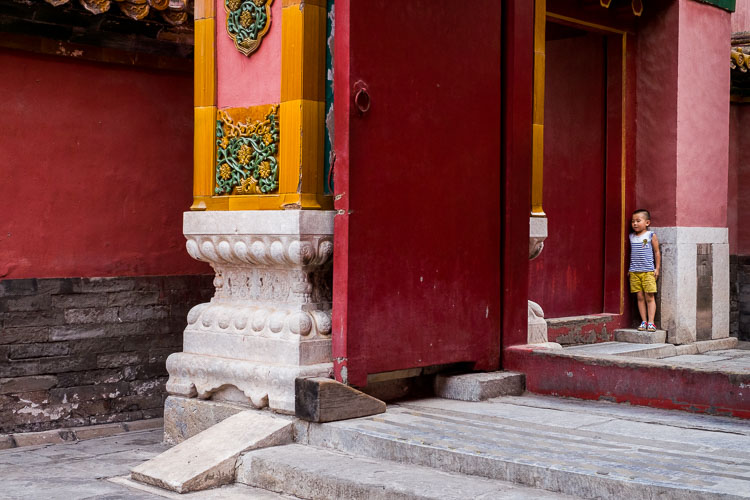
    For the next photo we return to Beijing, this time to the Forbidden City.

    Composition and placement

    I was sitting on a bench resting, when I realized that the doors and pillars you see in the photo lined up nicely when viewed through my 35mm lens. I waited, and took photos as people passed through, hoping to get a good image. Until finally the little boy you see in this image walked through the doorway and hid. A few seconds later he jumped out to surprise someone – as a man, presumably his father, walked through the doorway.

    The boy is so small in the frame that you may not have noticed him right away. It is good for photos to contain surprises like this, as a kind of reward for the viewer when they finally spot it.

    The colors in this photo also harmonize well. The yellow of the boys’ shorts echoes the yellow around the door frame, and the yellow tiles on the pillars. This is purely luck, but it’s the kind of luck that presents itself when you are present with your camera.

    What do you think? What factors do you consider when deciding where to place the main focal points? Let me know in the comments.


    Mastering Composition

    If you’d like to learn more about composition then please check out my ebook Mastering Composition: A Photographer’s Guide to Seeing.

    googletag.cmd.push(function() {
    tablet_slots.push( googletag.defineSlot( “/1005424/_dPSv4_tab-all-article-bottom_(300×250)”, [300, 250], “pb-ad-78623” ).addService( googletag.pubads() ) ); } );

    googletag.cmd.push(function() {
    mobile_slots.push( googletag.defineSlot( “/1005424/_dPSv4_mob-all-article-bottom_(300×250)”, [300, 250], “pb-ad-78158” ).addService( googletag.pubads() ) ); } );

    The post How to Improve Composition by Placing your Subject Off-Center by Andrew S. Gibson appeared first on Digital Photography School.


    Digital Photography School

  • How to Use Photoshop to Enhance Details in Your Photos

    Do you think that your images lack details? Here is the way to extract the extra details that are already present in your photos, but are not visible, using Photoshop. Some methods like high pass sharpening will either give you a way too crunchy look or create halos around the edges of the different elements in your image. However, this Continue Reading

    The post How to Use Photoshop to Enhance Details in Your Photos appeared first on Photodoto.


    Photodoto