Category: Photography

  • How to Use a Reflector and Diffuser to Enhance Flower Photographs

    Photograph Flowers 2016-05-11at15-41-06

    cover-fill-card

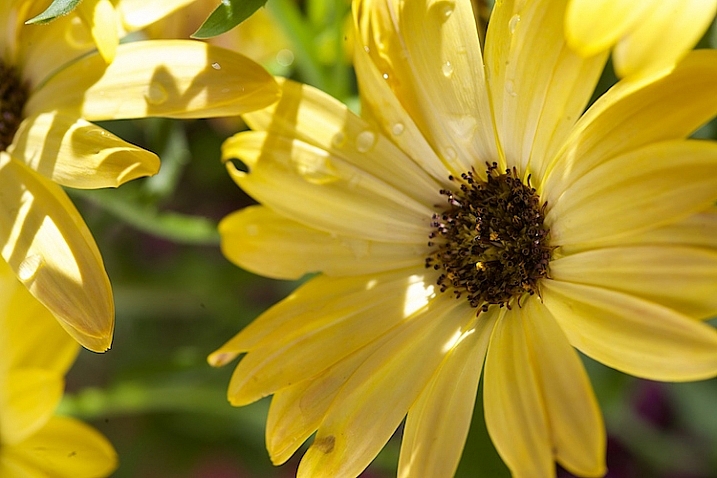
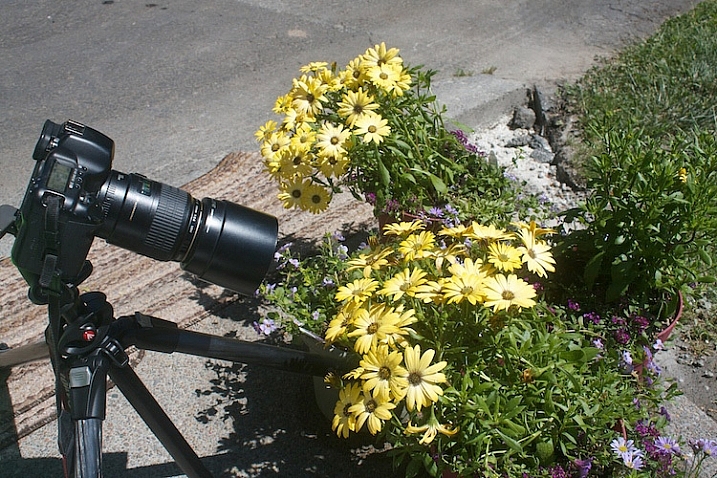
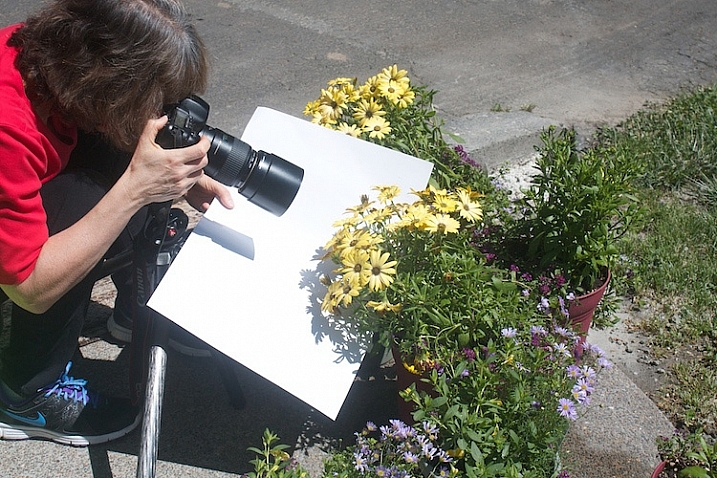
    Learning to see and use light is one of the most important steps to creating great photographs. As you become more aware of what nice light really looks like, you can start to manipulate even the harshest conditions with some simple tools. The photo above was shot in bright sunshine using both a diffuser and a reflector.

    full-sun-overview

    Practice

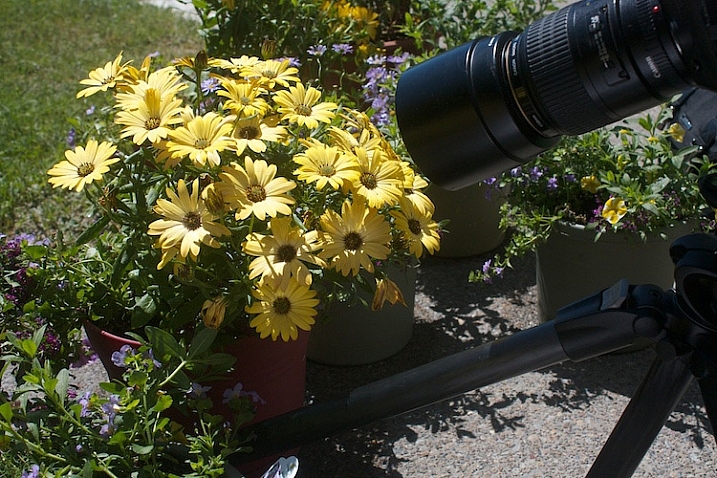
    To practice this exercise, find some flowers in bright sun. You can photograph flowers that are planted in your garden, or in pots.

    Photograph-Flowers-in-sun-3

    Photograph-Flowers-in-sun-2

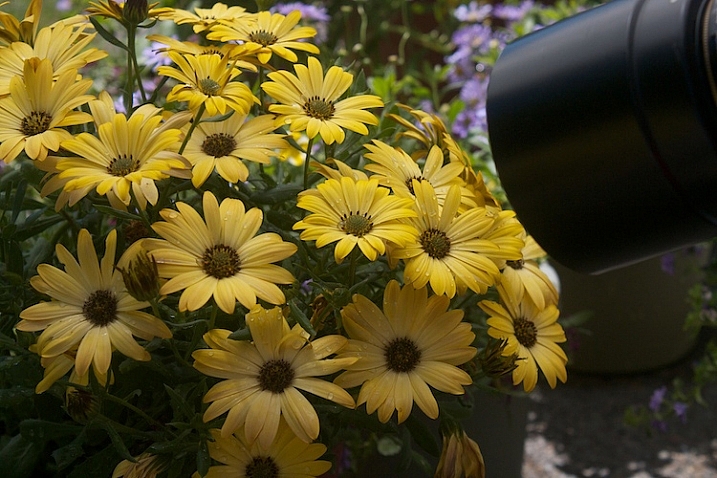
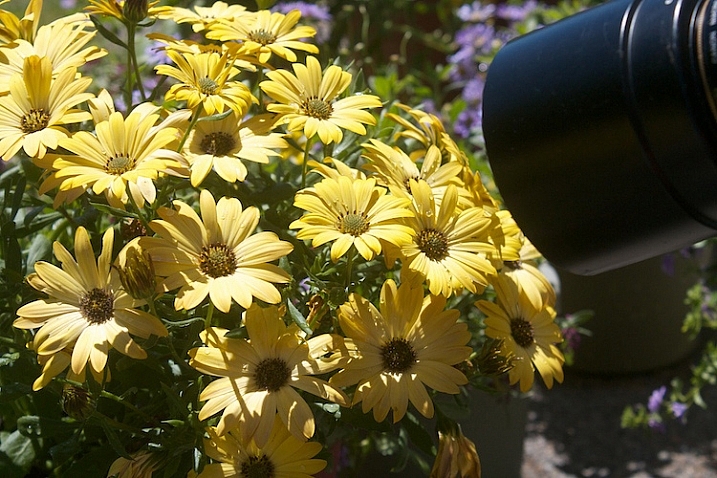
    Notice the quality of light on the flowers. In bright sun, there are strong highlights and deep shadows. There is lot of contrast, which comes through in the image.

    Photograph-Flowers-2016-05-11at15-34-44

    Notice how you lose detail in the highlights. The bright spots caused by the sun don’t add anything to the photograph, in fact, they are very distracting. Our eyes tend to go toward the brightest spots in a photograph and in this situation, the highlights are drawing our eyes away from the center of interest – the flower.

    Photograph-Flowers-2016-05-11at15-09-23

    Add a reflector

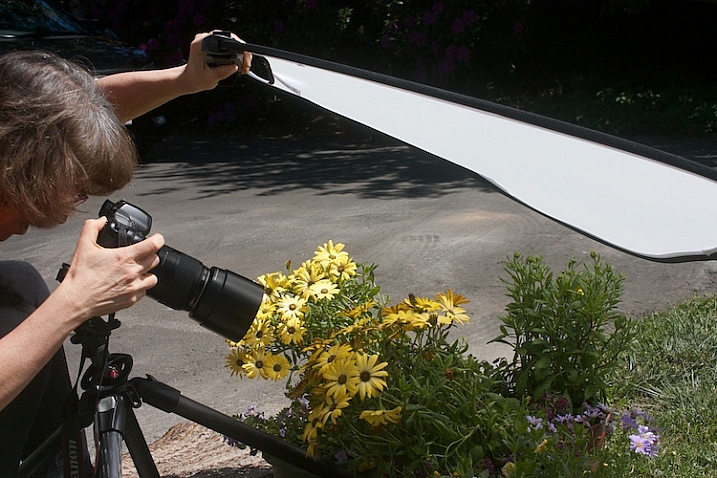
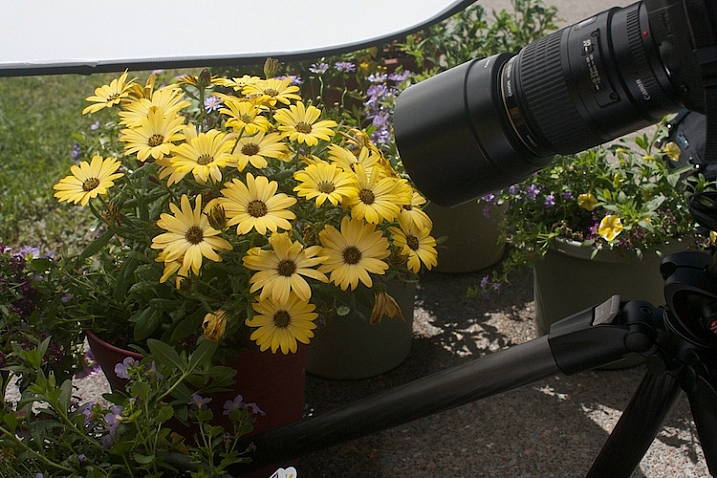
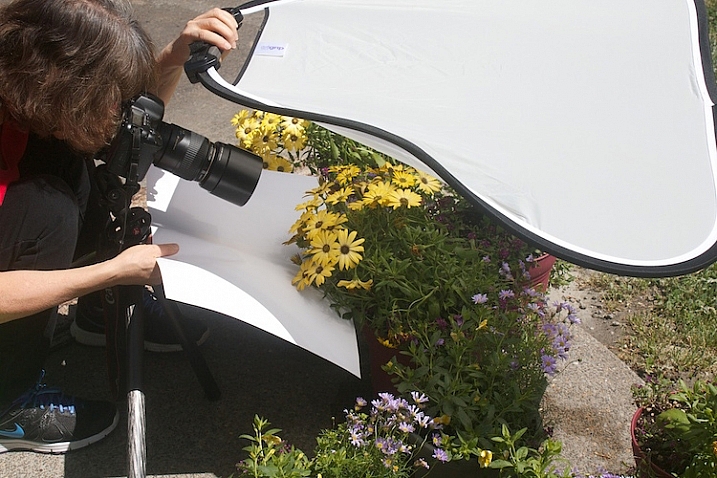
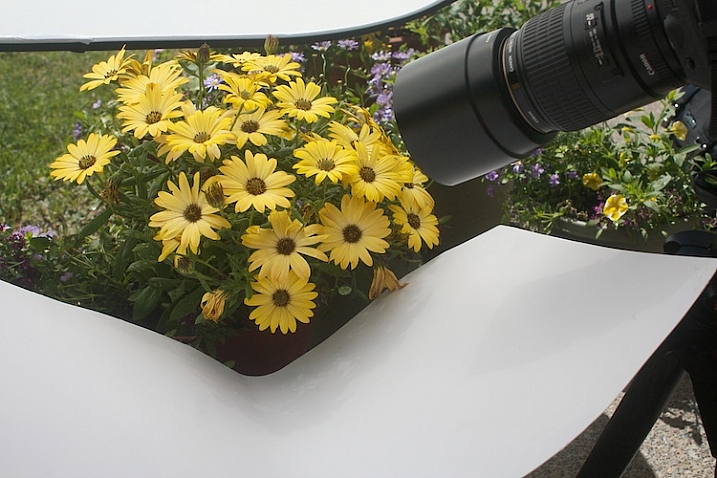
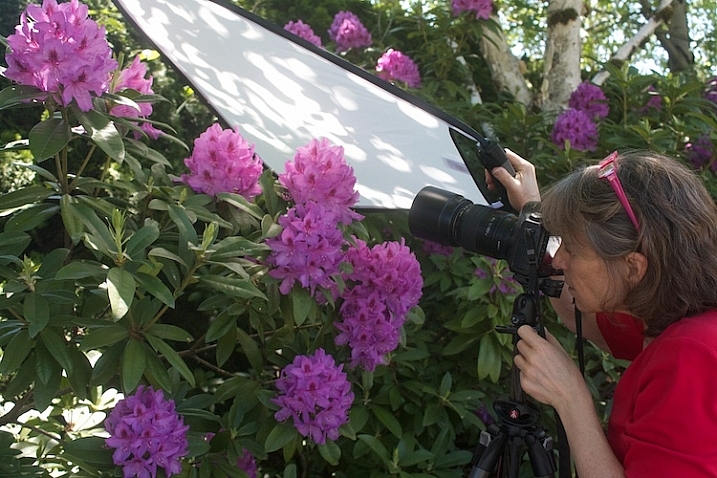
    Now, try using a reflector. Light bounces just like a billiard ball. By placing a light colored, reflective surface opposite the light source, you can bounce light back into the subject. In this instance, our light source is the sun, so I placed the reflector under the leaves to bounce the light back into the shadows. You can use almost anything as a reflector. In this example, I’m using a piece of white poster board.

    Read DIY How to Build and Use a Reflector to Take Better Portraits and 10 Ways to Use a 5-in-1 Reflector for more help on using reflectors.

    Just-below-full-sun-using-fill-cards

    Notice the difference in the image above, compared to the one without the reflector. Can you see how bouncing the light back in brightens up the flower? The exposure settings haven’t changed. The only difference is the reflector (also called a fill card) in the second shot.

    Photograph-Flowers-2016-05-11at15-08-06

    Diffuse the light

    Now, we are going to use a diffuser to soften the light.

    Photograph-Flowers-reflector-above-better2

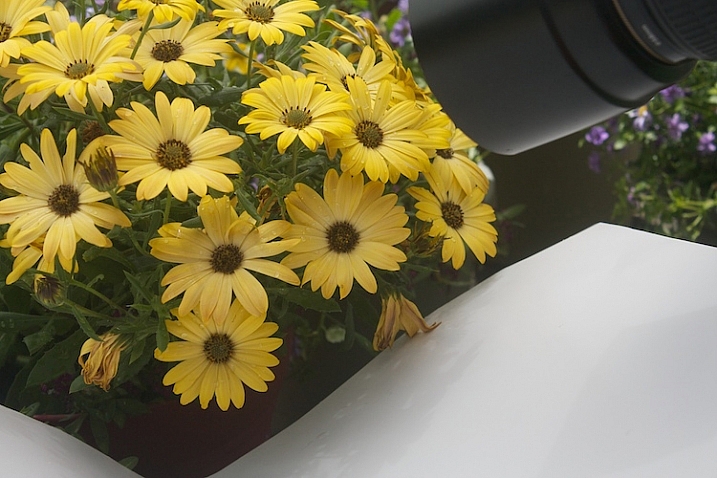
    Here we are starting to see some really beautiful, soft light. Notice how even the light is and how much softer the flowers feel. The highlights and shadows are not as severe and harsh, and more detail is retained in both areas.

    Photograph-Flowers-reflector-above

    Use a reflector and diffuser

    Take it a step further.

    Photograph-Flowers-2016-05-11at15-09-41

    Let’s use a diffuser with a reflector, and see how that looks. Here’s a tip for you: If you can’t prop up your reflectors and diffuser and press the shutter button, you can use the 2-second self-timer on your camera to free up an extra hand.

    Photograph-Flowers-reflector-above-and-below

    With the diffuser above and a reflector below, the flowers start to take on a magical feel.

    Photograph-Flowers-2016-05-11at15-12-20

    fill-card-reflector-top-and-bottom

    cover-fill-card

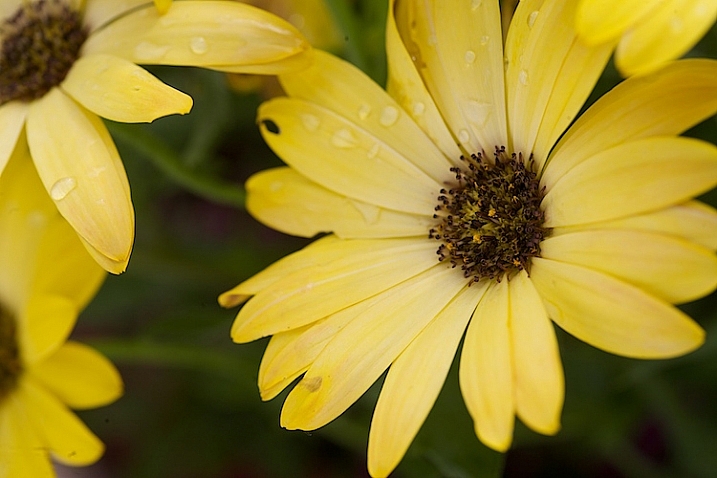
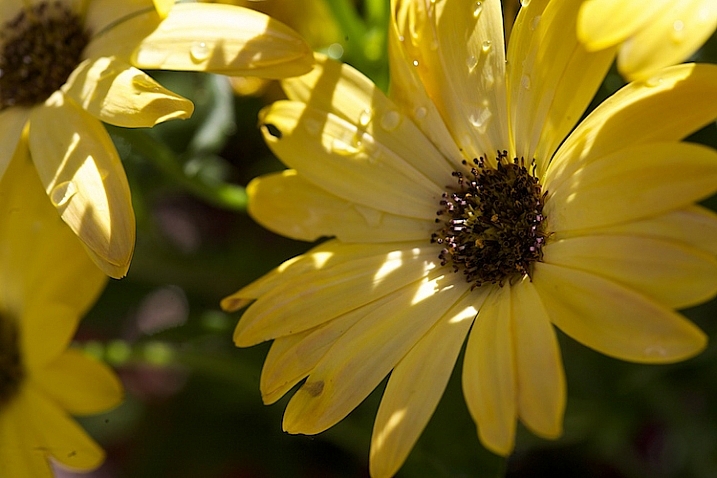
    Now you can see how using a reflector and diffuser can drastically improve your flower photographs. I also want to add that none of these photographs were manipulated in Lightroom or Photoshop in any way, other than a little sharpening. The dramatic difference in the photographs was created entirely by manipulating light.

    Please share you comments and questions below, then try this exercise at home and post your photos in the comments below. I’d love to see them!

    googletag.cmd.push(function() {
    tablet_slots.push( googletag.defineSlot( “/1005424/_dPSv4_tab-all-article-bottom_(300×250)”, [300, 250], “pb-ad-78623” ).addService( googletag.pubads() ) ); } );

    googletag.cmd.push(function() {
    mobile_slots.push( googletag.defineSlot( “/1005424/_dPSv4_mob-all-article-bottom_(300×250)”, [300, 250], “pb-ad-78158” ).addService( googletag.pubads() ) ); } );

    The post How to Use a Reflector and Diffuser to Enhance Flower Photographs by Vickie Lewis appeared first on Digital Photography School.


    Digital Photography School

  • 23 Quick Tips for Street Photography or Your Next Photo Walk

    The guys over at the Cooperative for Photography (COOPH) have some good quick tips from Thomas Leuthard for you. If you are planning on doing some street photography this summer, joining a photo walk, or even doing travel photography – apply this tips to those genres and have some fun. Let’s see the tips:

    My faves are:

    • #2 control your camera remotely: I never even thought of that but will work great with my Fuji X-T1
    • #10 get down low: another thing cameras like the Fuji X-T1 do well with a tilting screen.
    • #13 shoot water as a slow shutter speed: this is starting to sound like an ad for the Fuji X-T1, but I love the fact my camera is weather resistant (WR) and I’ve stood in the rain, and taken a direct hit from an ocean wave and it withstands it and keeps going! Read more on this camera here.
    • #17 shadows make great photos: see How to Use Shadow and Contrast to Create Dramatic Images for more on that

    Thomas Leuthard, “Street photography is like fishing, catching the fish is more exciting than eating it.”

    Which of those quick tips did you like best?

    googletag.cmd.push(function() {
    tablet_slots.push( googletag.defineSlot( “/1005424/_dPSv4_tab-all-article-bottom_(300×250)”, [300, 250], “pb-ad-78623” ).addService( googletag.pubads() ) ); } );

    googletag.cmd.push(function() {
    mobile_slots.push( googletag.defineSlot( “/1005424/_dPSv4_mob-all-article-bottom_(300×250)”, [300, 250], “pb-ad-78158” ).addService( googletag.pubads() ) ); } );

    The post 23 Quick Tips for Street Photography or Your Next Photo Walk by Darlene Hildebrandt appeared first on Digital Photography School.


    Digital Photography School

  • Use Photoshop to Correct Perspective Distortion of Buildings in Your Images

    Shooting buildings can be tricky. The main reason is that they are tall, and you need to get far away from them if you want to fit them into the frame. If you are shooting in the city, you don’t have the luxury of getting really far away, the best you may be able to do is get farther down the street. What you have to do then, is tilt your camera upwards to get the whole building in, and that’s when it happens – perspective distortion.
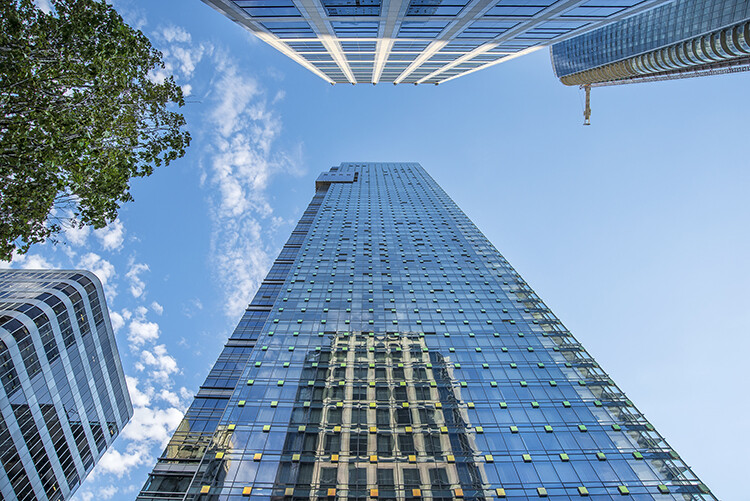
    City Scenes can be difficult to photograph

    City scenes can be difficult to photograph because of the risk of distortion

    When you are using a wide angle lens (which you probably will be when shooting architecture) and you tilt your lens up or down, your image will distort. Architectural photographers would use a tilt-shift lens to counteract this distortion, which can make a really big difference in your image. The only problem is that it is a specialist lens, and it is expensive.

    Until a few years ago, that was the only solution for fixing perspective distortion, but in the latest versions of Photoshop, there are a few truly amazing tools that can fix it painlessly. Sometimes the distortion may work well in the image, but if you need to fix it, these techniques can help. To learn more about getting better architectural photos read: Tips for Different Approaches to Architecture Photography

    1. Working with distortion

    The definition of distortion is: when the straight lines of a subject are either curved in a particular direction, or they converge or diverge. This happens when the focal plane of your camera is pointed upward or downward. This is called perspective distortion. The second most common type of warping is barrel distortion, this type is dependent on the type of lens you are using. Barrel distortion make the image look like it has been inflated in the middle of the scene so it looks like a barrel – wider in the middle, and narrower at the top and bottom. Wide angle lenses tend to distort a fair amount when pointing up or down, and in some cases, you may get barrel distortion in the image too. So, how do we fix this?
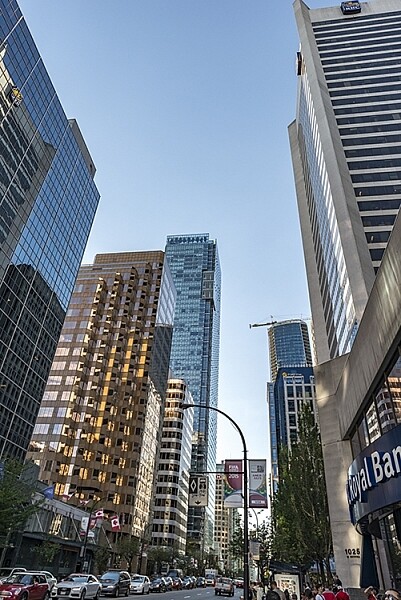
    Tall buildings distort easily with a wide angle lens

    Tall buildings distort easily with a wide angle lens.

    2. Fixing distortion in camera

    If you want to avoid perspective distortion, then you will need to keep your focal plane at 90 degrees to your subject. In other words, don’t tilt your camera up or down when you are shooting. This may work well for landscape photography, but when you are shooting tall buildings, it may be very difficult to get that right. Sometimes there is no way to avoid perspective distortion in camera.

    Thankfully Photoshop can help you out here. Barrel distortion is a function of the lens you are using, wide angle lenses can make the middle of the image seem bloated or inflated. You can try and fix this by zooming in a little, as wide angles tend to suffer from barrel distortion when they are at their widest focal length. Zooming in is not always possible, so we will fix the bulk of the issues in Photoshop.

    3. Fixing distortion in Photoshop

    Photoshop has a few functions that can help you fix both perspective and barrel distortion. One of the best tools that has been included with recent versions is the Adaptive Wide Angle Tool. This tool is intuitive and easy to use, but takes a little practice initially. In the past, I would use the transform tools (i.e., Distort, Skew, Perspective and Warp). While these worked really well, it took a fair amount of time to get the corrections to look realistic.

    In the examples below, you can see that the building looks shorter and more squat. Some further adjustments would need to be made to correct this, but overall, the buildings are vertical and look correct architecturally.  With the Adaptive Wide Angle tool, this process is easily done, in some cases with only three or four mouse clicks.
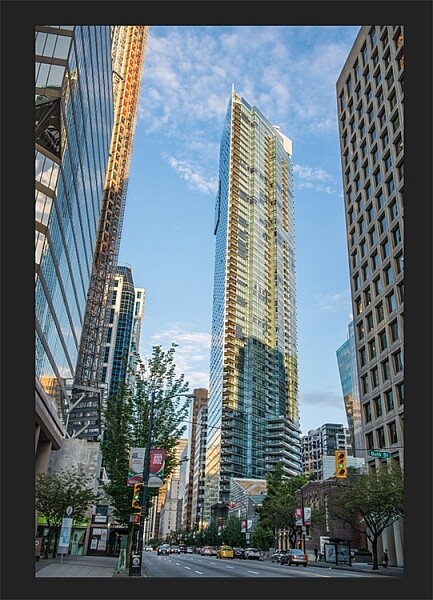
    Image of a building before the distortion tool was applied in Photoshop
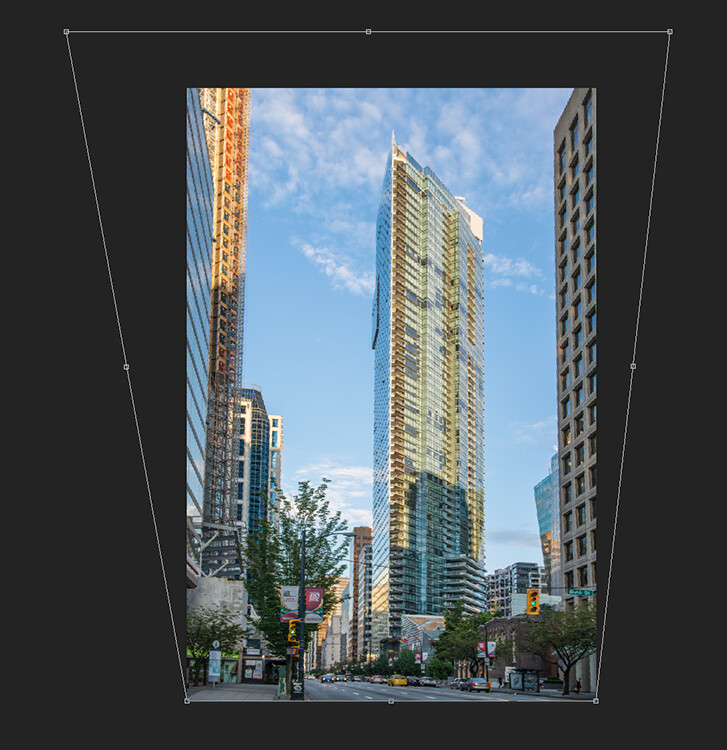
    Image of a building before the distortion tool was applied in Photoshop

    Same image after the distortion tool was applied

    Same image after the distortion tool was applied

    4. Adaptive Wide Angle tool

    The Adaptive Wide Angle tool sits under the filter menu. Open the image you want to correct (with skew buildings or walls) click on FILTER>ADAPTIVE WIDE ANGLE, and a new box will open up with your image inside it.
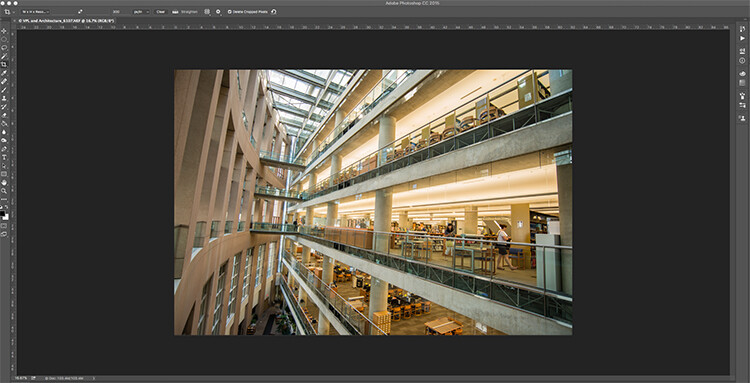
    Adaptive Wide Angle tool screen

    Image to be corrected, you can see the vertical lines are pretty skew

    Depending on how your image is displayed in the box, you may need to scale it to see the whole thing. On the right hand side you will see a box that says Correction. Underneath that you will see a scale slider, adjust it until you can see your whole image in the box. There is a dropdown box in there with other options such as perspective, fisheye, etc., – I find leaving it on Auto seems to work best. The other functions within that box may work in some cases, but by leaving it on Auto and making specific adjustments to the verticals and horizontals in your image, you will get the best results.
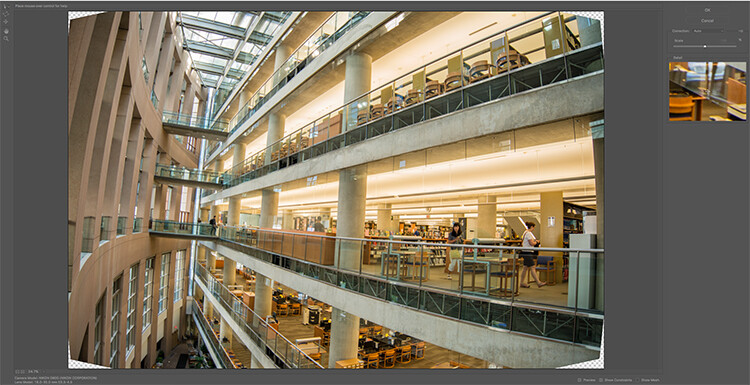
    Adaptive Wide angle tool screen

    Adaptive Wide angle tool screen

    You will then need to identify the walls of the building that are converging or diverging. On the left hand side of the dialogue box, you will see some constraint tools. The tool that is first in the row is simply called the Constraint Tool, this is the one I use most often.

    Click on that and move your mouse over to one of the vertical lines of the building, and draw a line down the wall. Start at the top of the building and drag the line down to the bottom, along a vertical wall that should be straight. Click at the bottom of the line when you are done and Photoshop will drop a line down exactly where you dragged. As you click, Photoshop will correct any barrel distortion, but the line will still be skew.

    At the bottom of the line you will see a square, right click on the square and three options will pop up: Horizontal, Vertical, and Arbitrary. These are the three ways you have to correct that line. If it is a vertical wall, then click on Vertical. Immediately, Photoshop will bring that wall into a perfect upright position. What you will notice is that it may distort other lines now. That’s okay, find a second vertical that is not correct and repeat this process, once you have done three or four verticals, your building should be perfectly straight, as should the rest of the building. Sometimes what may happen is that the horizontal alignment may shift with all these vertical changes. You can then select a horizontal line in the image and repeat the same process you did for the verticals, just use a line that you know should be horizontal. Also, when you right click, select the Horizontal option in the popup box.

    To make sure you are making a precise selection when you draw your line, there is a 100% zoom window on the right hand side. This is really useful, as it can be difficult to be zoomed in to the image, and drag the line down at the same time. This box really helps make sure that you start and finish at the right places on the building.
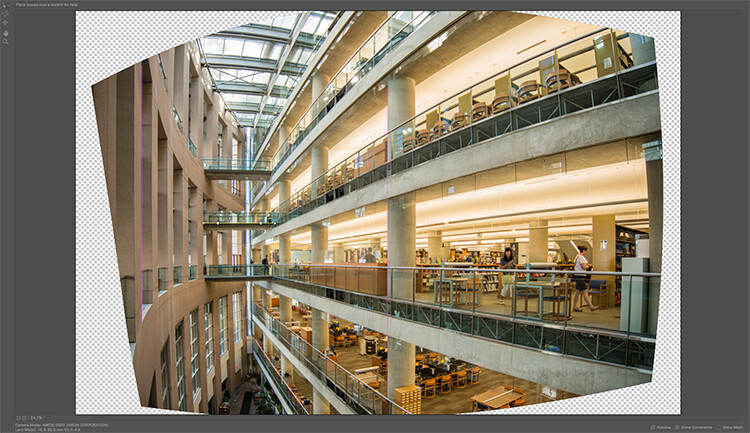
    Adaptive Wide Angle tool and image after 3 adjustments have been made

    Adaptive Wide Angle tool and image after 3 adjustments have been made

    Once you have straightened some of the more skewed verticals, and one or two horizontals, your image should be looking pretty close to perfect. Once you are done, click ok and your image will open up in Photoshop. From there you can edit the rest of the image with all the lines being straight and aligned.

    A new tool has recently been launched by Adobe Photoshop for CC users called Guided Upright and you can find it in Camera RAW of the latest version.

    Final image after being edited in the Adaptive Wide Angle tool

    Final image after being edited in the Adaptive Wide Angle tool and cropped.

    Here is a great short minute video that Adobe has released, take a look, this could also be a useful tool to use.

    What’s your go-to method of correcting perspective distortion? Please share in the comments below.

    googletag.cmd.push(function() {
    tablet_slots.push( googletag.defineSlot( “/1005424/_dPSv4_tab-all-article-bottom_(300×250)”, [300, 250], “pb-ad-78623” ).addService( googletag.pubads() ) ); } );

    googletag.cmd.push(function() {
    mobile_slots.push( googletag.defineSlot( “/1005424/_dPSv4_mob-all-article-bottom_(300×250)”, [300, 250], “pb-ad-78158” ).addService( googletag.pubads() ) ); } );

    The post Use Photoshop to Correct Perspective Distortion of Buildings in Your Images by Barry J Brady appeared first on Digital Photography School.


    Digital Photography School
  • Weekly Photography Challenge – Bridges

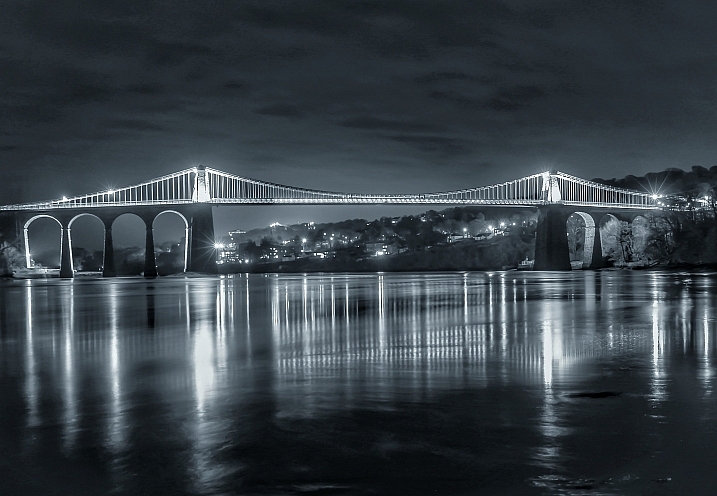
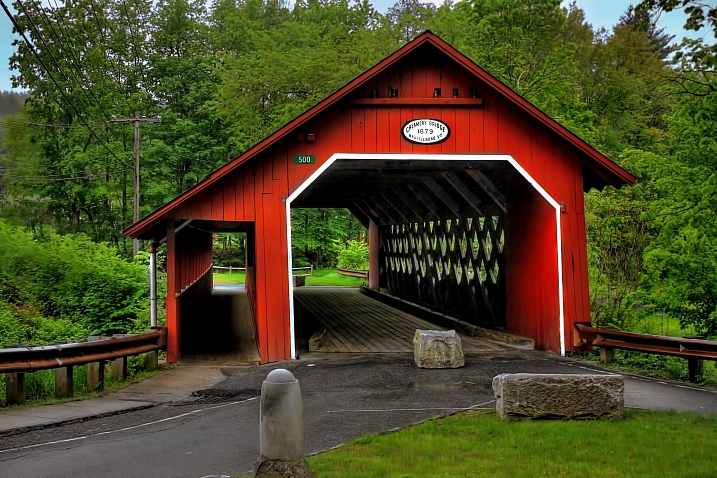
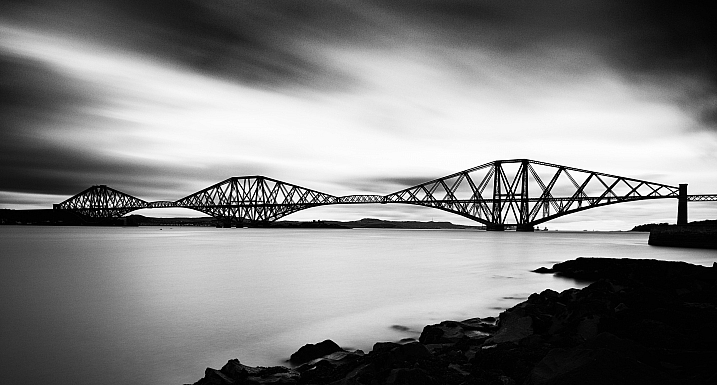
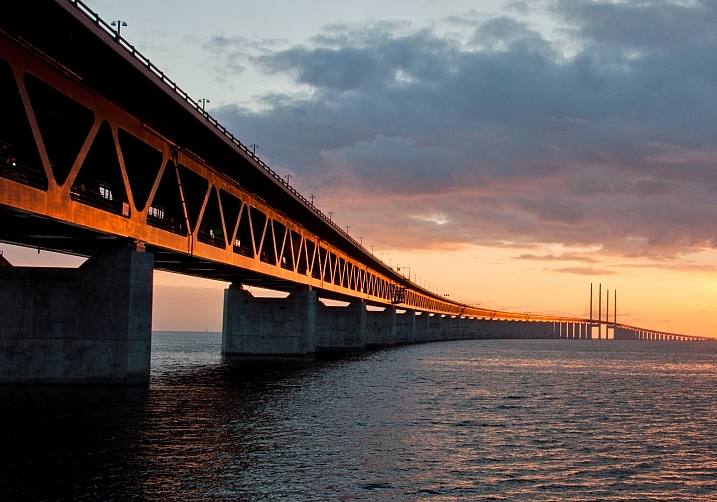
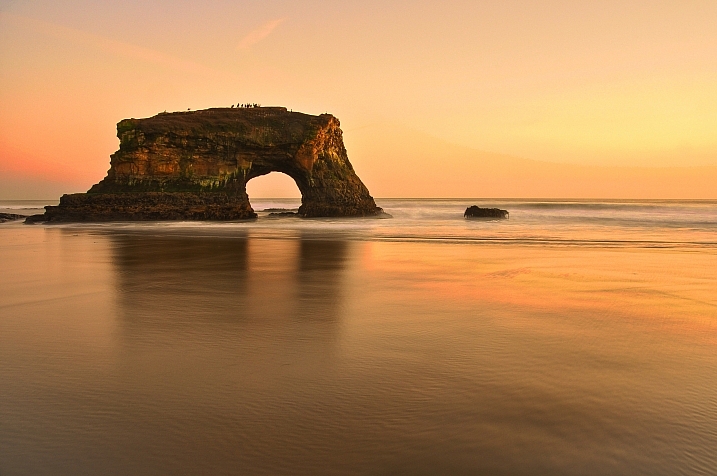
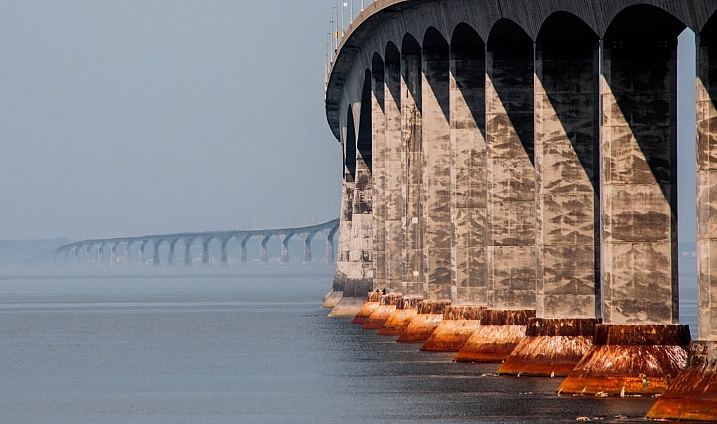
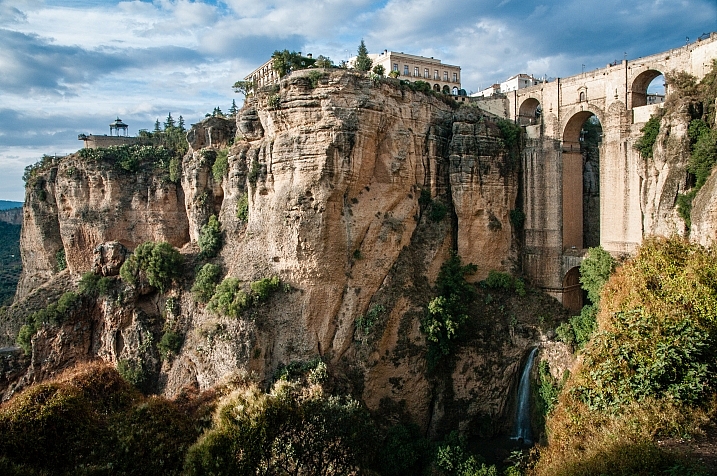
    Bridge the gap – see how these photographers photographed some pretty unique bridges.

    Peter McConnochie

    By Peter McConnochie

    Weekly Photography Challenge – Bridges

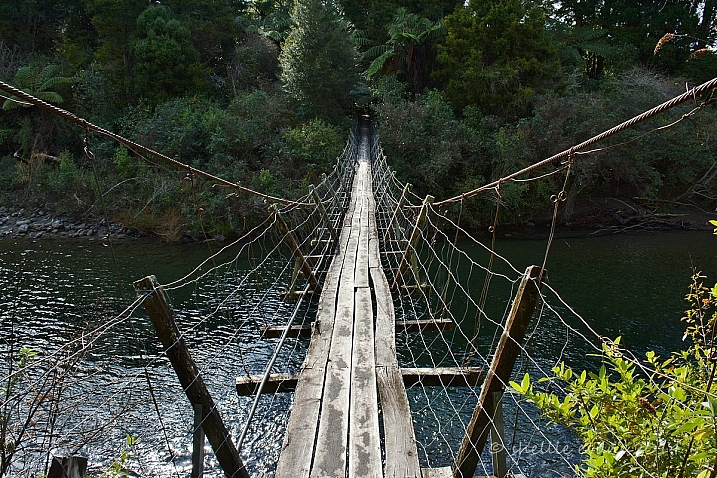
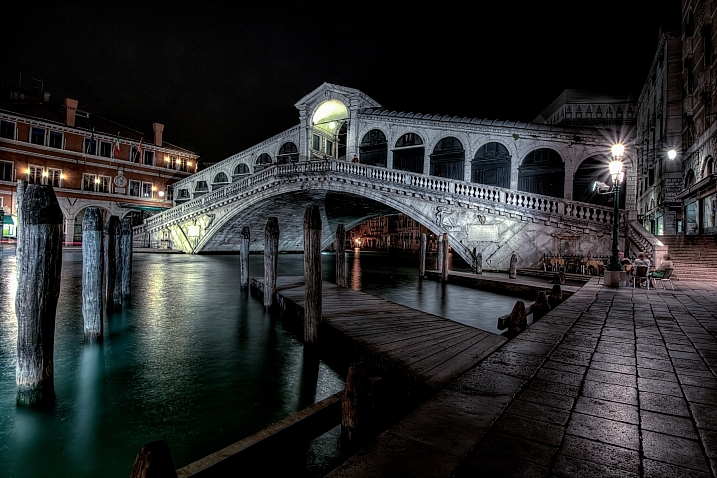
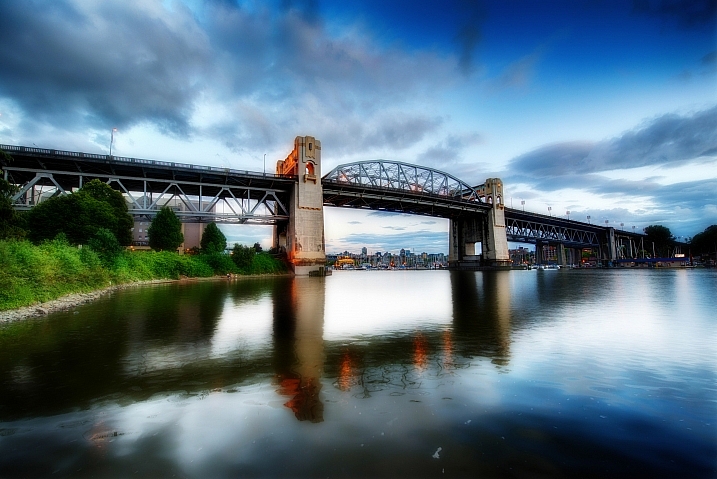
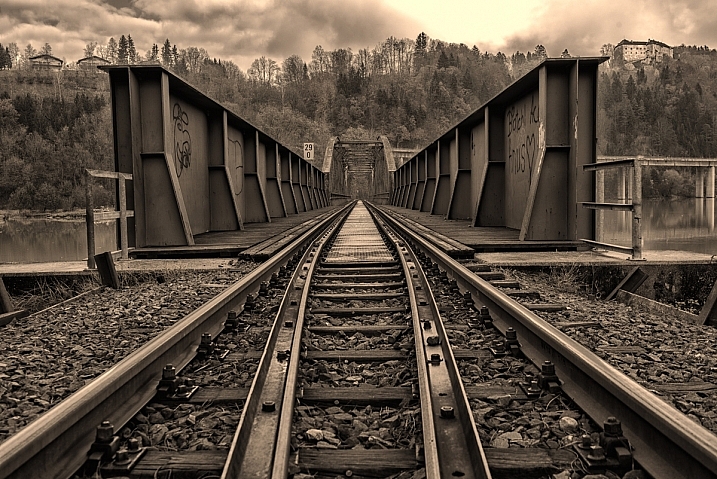
    There are two most obvious ways to photograph a bridge – from the side, or on it – as you can see by the two different angles of the Tower Bridge in London below. That’s a couple ideas for you. They both also use some long exposure photography, and have photographed the bridge at night or blue hour.

    Cat Burton

    By Cat Burton

    Neil Howard

    By Neil Howard

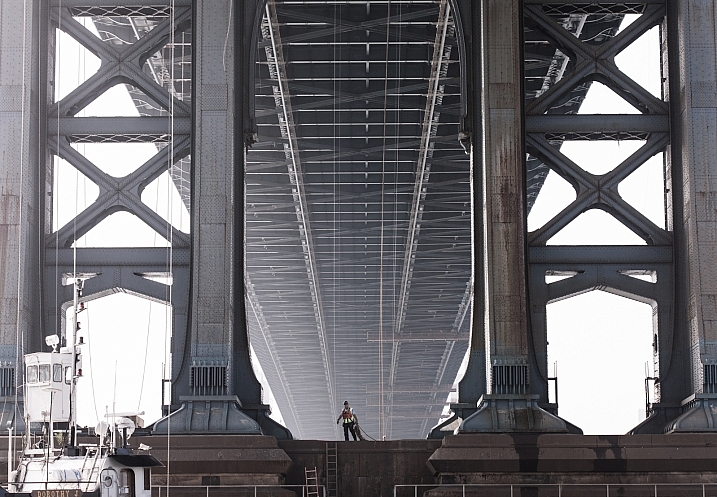
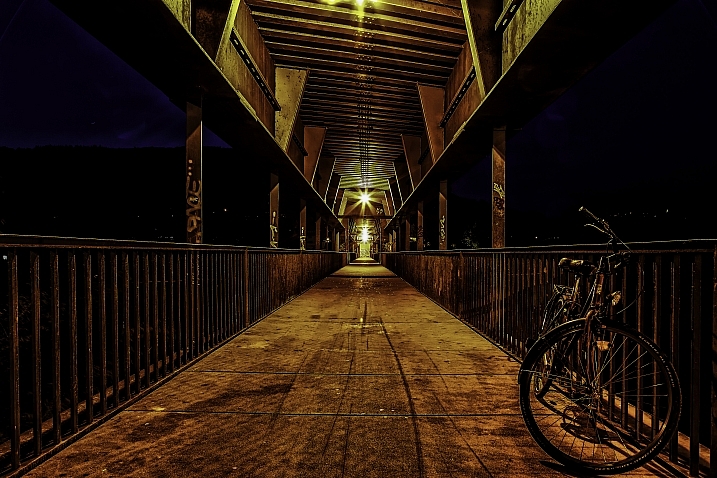
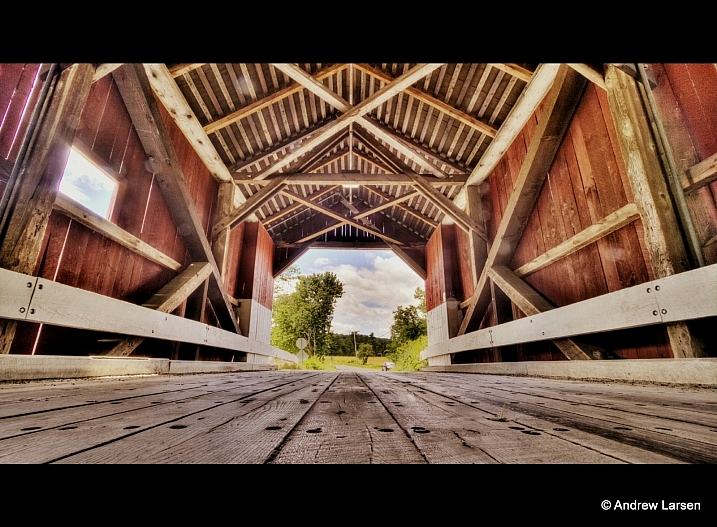
    How about getting under the bridge like this examples – never know what you’ll find under there, maybe a troll?!

    Barnyz

    By barnyz

    Thomas Hawk

    By Thomas Hawk

    Baiazid

    By Baiazid

    Michael Matti

    By Michael Matti

    Share your images below:

    Simply upload your shot into the comment field (look for the little camera icon in the Disqus comments section) and they’ll get embedded for us all to see or if you’d prefer upload them to your favourite photo sharing site and leave the link to them. Show me your best images in this week’s challenge. Sometimes it takes a while for an image to appear so be patient and try not to post the same image twice.

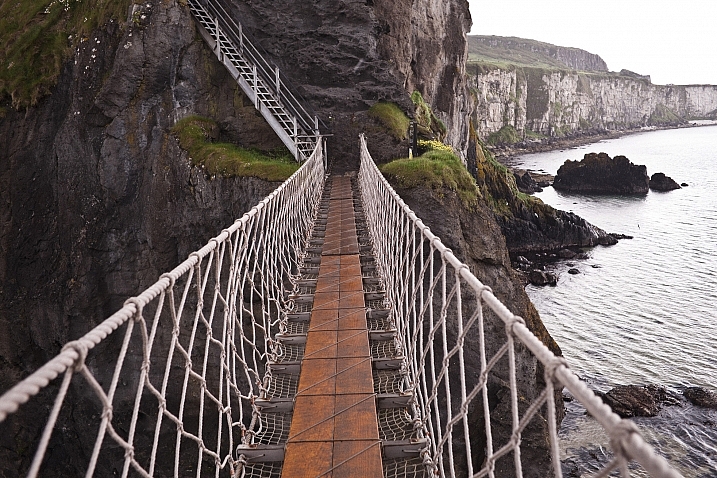
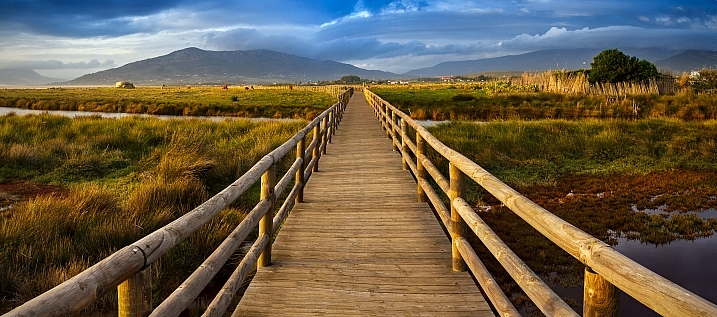
    Photograph a local bridge, or an iconic one if you have one in your area. Just go find a bridge and shoot something in your style.

    Martin Stitchener

    By Martin Stitchener

    Bastian Hoppe

    By Bastian Hoppe

    googletag.cmd.push(function() {
    tablet_slots.push( googletag.defineSlot( “/1005424/_dPSv4_tab-all-article-bottom_(300×250)”, [300, 250], “pb-ad-78623” ).addService( googletag.pubads() ) ); } );

    googletag.cmd.push(function() {
    mobile_slots.push( googletag.defineSlot( “/1005424/_dPSv4_mob-all-article-bottom_(300×250)”, [300, 250], “pb-ad-78158” ).addService( googletag.pubads() ) ); } );

    The post Weekly Photography Challenge – Bridges by Darlene Hildebrandt appeared first on Digital Photography School.


    Digital Photography School
  • 26 Sublime Images of Bridges and Connection

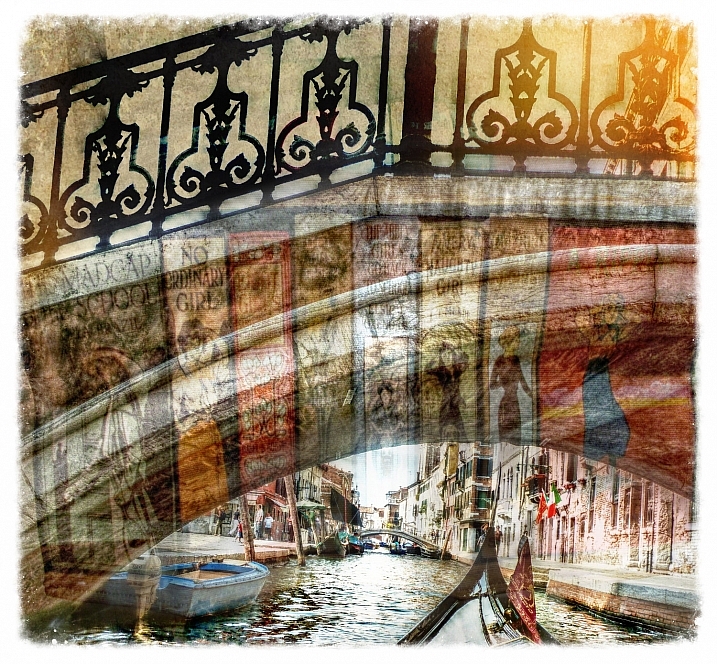
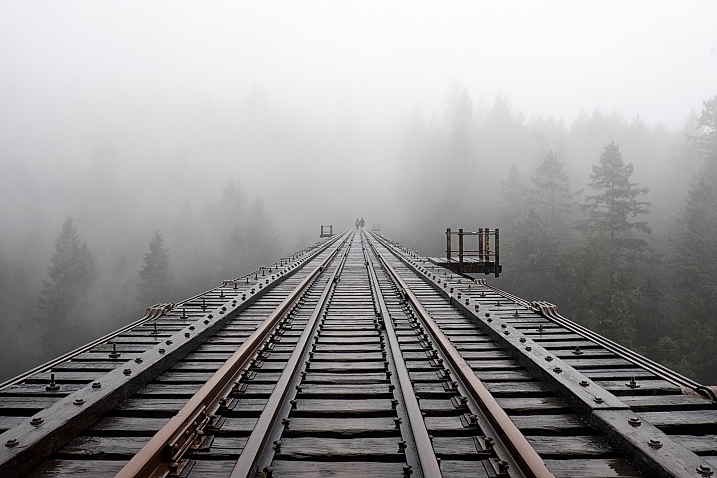
    The term bridge has several meanings. The literal one which is a structure that spans across something, usually over a waterway. The other is of a connection between two things, or a transition from one to the other. Of course there is also the bridge of a ship where the captain takes the helm, bridge of your nose, and a bridge or passage in a musical composition.

    Here are several images that interpret that term – bridge:

    Shellie

    By Shellie

    Several Seconds

    By Several seconds

    Styrovor

    By styrovor

    Julie Anne Johnson

    By Julie anne Johnson

    Yusuke Umezawa

    By Yusuke Umezawa

    Jon Matthies

    By Jon Matthies

    Jacob Surland

    By Jacob Surland

    Thomas Hawk

    By Thomas Hawk

    Omar Bariffi

    By Omar Bariffi

    Rick Schwartz

    By Rick Schwartz

    Raul Lieberwirth

    By Raul Lieberwirth

    Andrew E. Larsen

    By Andrew E. Larsen

    Pablo Fernández

    By Pablo Fernández

    Sian Monument

    By sian monument

    Jason Mrachina

    By Jason Mrachina

    Daniel Mennerich

    By Daniel Mennerich

    Andi Campbell-Jones

    By Andi Campbell-Jones

    David Merrett

    By David Merrett

    JP Freethinker

    By JP Freethinker

    Bernhard Latzko

    By Bernhard Latzko

    Francisco Manuel Esteban

    By Francisco Manuel Esteban

    Timothy Neesam

    By Timothy Neesam

    L.E Daniel Larsson

    By L.E Daniel Larsson

    Sudheer G

    By Sudheer G

    MaxGag

    By MaxGag

    Andrea Moroni

    By Andrea Moroni

    googletag.cmd.push(function() {
    tablet_slots.push( googletag.defineSlot( “/1005424/_dPSv4_tab-all-article-bottom_(300×250)”, [300, 250], “pb-ad-78623” ).addService( googletag.pubads() ) ); } );

    googletag.cmd.push(function() {
    mobile_slots.push( googletag.defineSlot( “/1005424/_dPSv4_mob-all-article-bottom_(300×250)”, [300, 250], “pb-ad-78158” ).addService( googletag.pubads() ) ); } );

    The post 26 Sublime Images of Bridges and Connection by Darlene Hildebrandt appeared first on Digital Photography School.


    Digital Photography School
  • How to Create a Strong Composition by Centring the Subject

    Central composition

    I’m a strong believer that there are no rules when it comes to composition in photography, only guidelines. The rule of thirds is misnamed (but guideline of thirds is not nearly so catchy), and while it is helpful for newcomers to photography realize that you can often improve composition by placing the subject off-centre, it is not a rule.

    The rule of thirds, and other similar guidelines that you may read about (golden section, golden triangle, Fibonacci sequence, etc.) are really about placement. The question you are looking to get answered is, where in the frame should the main subject be placed? Secondary questions are how large should the subject be in the frame, and how does it relate to other elements that may be included?

    In simplistic terms: sometimes the best place for the subject is in the centre of the frame, and sometimes it is not. In this article we’re going to look at some examples where the subject is centred, and talk about how that central placement actually makes the image stronger, not weaker.

    Central composition

    In the photo above I placed the girl in the centre of the frame (horizontally) because that was the best way to include the metal statue she was sitting on. If I moved the camera to the left (to place her on a third) then the statue’s head would be cut off. If I moved the camera right then there would be an empty space to the right of the statue’s head.

    Here, the question of whether or not to place the subject (the girl) on a third, is the wrong question to ask. A better question is – What’s the best way to include everything that needs to be in the frame, and nothing more? Different question, and a different thought process.

    The image also shows a strong use of tonal and color contrast. The girl’s white clothing contrasts against the surrounding dark tones, pulling the viewer’s eye to her. The eye also moves between the girl and the pink umbrella lying on the ground. The pink tones (umbrella, shoes, wristband, hair ribbon) stand out because the rest of the scene is fairly monochromatic.

    Central composition

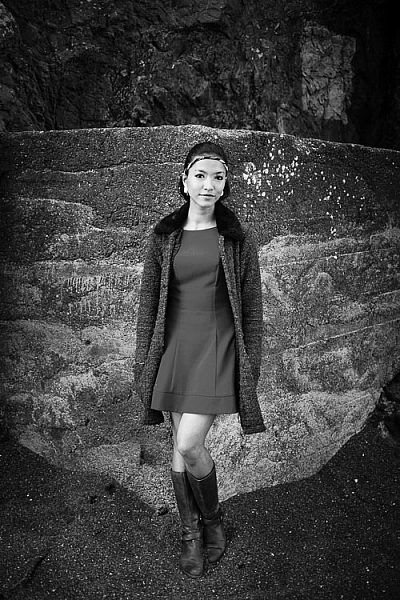
    The photo above is interesting because it utilizes symmetry. I asked the model to stand at the corner of concrete structure, built into the base of the cliff. The sides of the walls, the textured pattern on them, even the way the pebbles lie against the base of the walls all mirror each other. She is placed in the centre of the frame (horizontally) so she doesn’t break the symmetry of the background. The model, however, is not symmetrical. I asked her to put her weight on one foot, creating an S-curve with her body, to break the symmetry created by the background.

    Consider also the size of the subject within the frame. If I had placed her on a third by moving the camera to the right or the left, I would have both broken the symmetry and been left with a large area of empty space. This can work when there is something interesting in that space, but it doesn’t always, and should be considered when deciding where to place the subject.

    Central composition

    In this portrait you can see that the model’s sharp eye, is right in the centre of the frame. There’s a good reason for that – I took the photo with an EOS 5D Mark II, which has just one cross-type autofocus (AF) point in the centre of the frame. When you are using wide apertures, as I was in this case (f/2.5), it’s essential to use a cross-type autofocus point, as it’s the most accurate. One of the weaknesses of this camera is that it forced me to base my composition of portraits around its central AF point.

    That’s the practical reason for using a central composition, but the portrait works. I moved in close so there wasn’t much empty space in the photo, The central composition takes the viewer’s eye to her face, eyes and hair, which are the important parts of the image. If I had moved back a little and placed her face on a third, then there would be a lot more empty space around her, and less emphasis on her features.

    Central composition

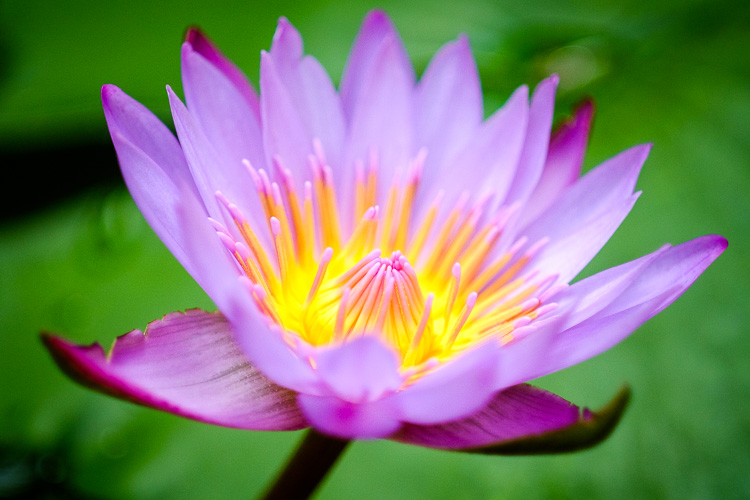
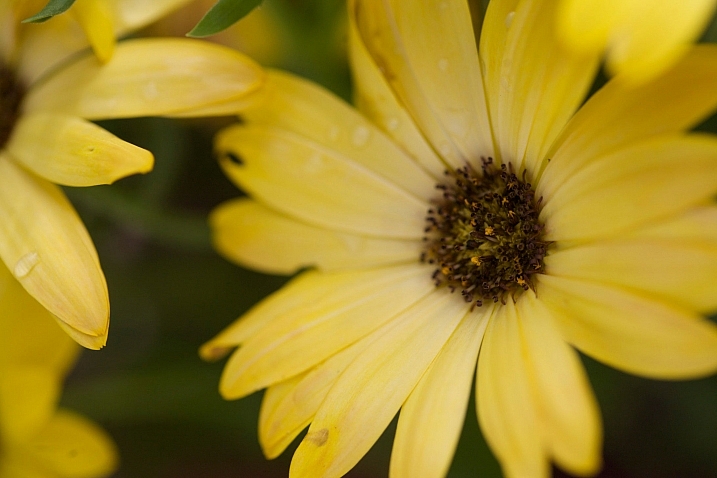
    This close-up photo of a flower (above) is another example of using a central composition for impact. I focused on the flower’s stamen and let the petals go out of focus. Visually, you can divide the photo into three. At the centre there’s the stamen, which is the sharp part of the image. Around that is the petal of the flower, and around that the green leaves. If I moved the camera further away and placed the flower on a third, rather than the centre, then it would lose impact and be a completely different photo.

    Central composition

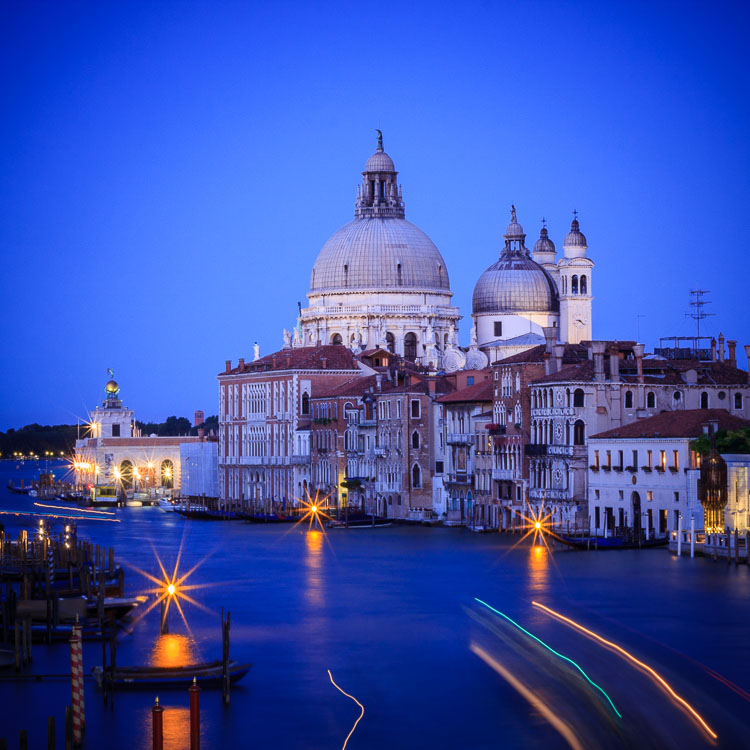
    The final example uses the square format. You’ll see central compositions in the square format, far more than you will with a rectangular aspect ratio, because the square format lends itself to strong, graphic compositions that utilize shape.

    In this example the domes of the Venetian church (centered horizontally) are the strongest shapes, and the focal point of the image. It helps that the lines formed by moving boats from the bottom right of the frame pull the eye towards the church in the distance.

    What do you think? Are there times when you use central composition or do you prefer to place the subject off-centre? Let us know in the comments below.


    Mastering Composition

    If you’d like to learn more about composition then please check out my ebook Mastering Composition: A Photographer’s Guide to Seeing.

    googletag.cmd.push(function() {
    tablet_slots.push( googletag.defineSlot( “/1005424/_dPSv4_tab-all-article-bottom_(300×250)”, [300, 250], “pb-ad-78623” ).addService( googletag.pubads() ) ); } );

    googletag.cmd.push(function() {
    mobile_slots.push( googletag.defineSlot( “/1005424/_dPSv4_mob-all-article-bottom_(300×250)”, [300, 250], “pb-ad-78158” ).addService( googletag.pubads() ) ); } );

    The post How to Create a Strong Composition by Centring the Subject by Andrew S. Gibson appeared first on Digital Photography School.


    Digital Photography School
  • How To Capture Action Shots of Waves

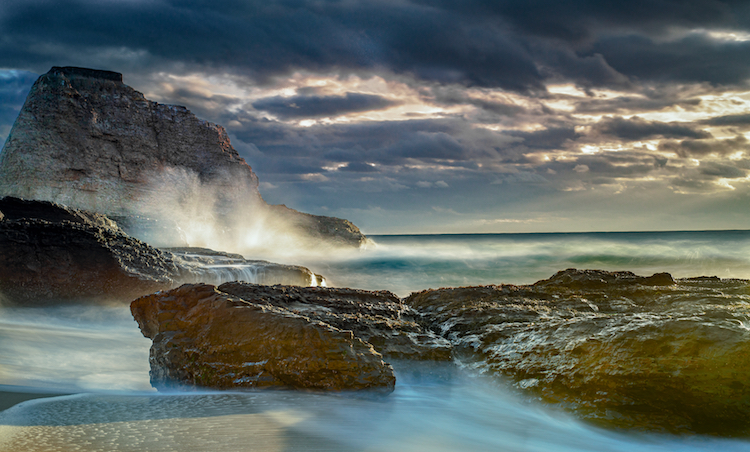
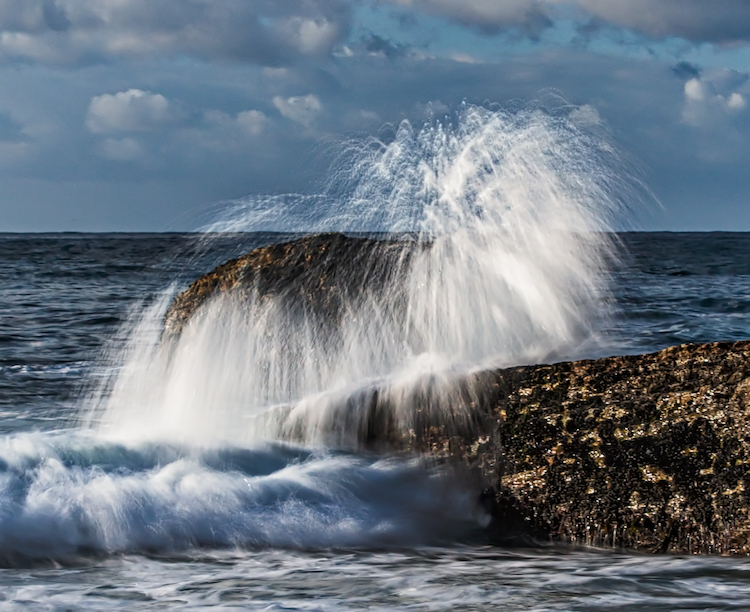
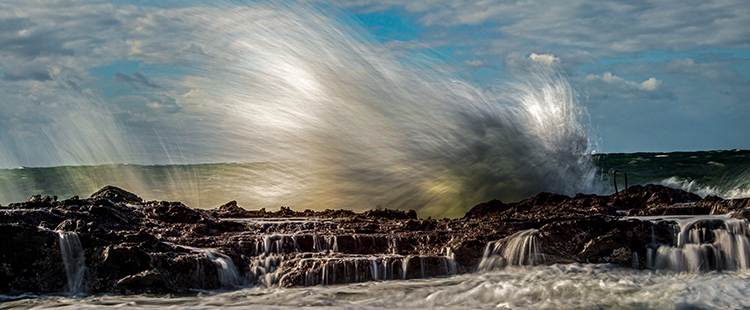
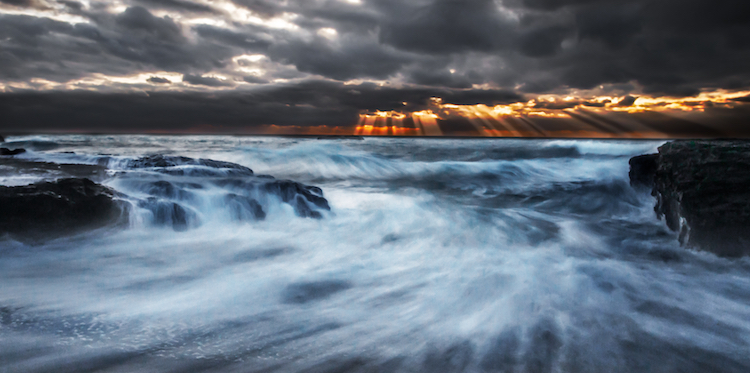
    If you enjoy photographing mother nature and waterscapes, one particularly fun exercise is to capture the beautiful characteristics of the ocean shore. If you are in the right place at the right time, you can create images displaying the delicate balance between the awesome force of a powerful wave crashing into the shoreline, juxtaposed with the calming ebb and flow of the water cascading over the rocks.

    Follow these tip to help you capture great action shots of waves:

    Image001

    EQUIPMENT:

    Use of a tripod is important due to the relatively slow shutter speeds you’ll be working with. Generally speaking, a one-third to one-half second shutter speed range does the job. Perhaps there are lenses and cameras with image stabilization which can help you shoot photographs in this shutter speed range handheld, but I always prefer to keep my setup as motionless as possible to achieve sharp images so I use a tripod.

    I also always use a remote shutter release, because pressing directly on the camera’s shutter button can introduce slight vibration into the setup during exposure.

    Ideally you will be shooting a relatively rough surf (more on that later), so choosing a long lens that keeps you and your setup out of harm’s way is important. I typically choose a medium telephoto, such as a 70-200mm zoom, but sometimes a slightly shorter length is necessary to capture a wide enough composition.

    You may also want to bring a circular polarizer which helps mitigate any glare in the water, and should slightly slow down the shutter speed. You may also want to bring a variable neutral density filter in case it is too bright out to get the correct shutter speeds.

    Image002

    PLANNING THE SHOT:

    If you want to shoot large, powerful waves, pick a location that has incessantly high wind. The higher the winds, the larger and stronger the waves will be. You will also want to shoot during the golden hour, either just after sunrise, or just before sunset. These times of day offer a warm, diffused natural light cast over the beach, and create a nicely saturated background sky.

    Get to the location early. Give yourself plenty of time to scout it out, and pick an area where you can ideally compose a combination of high waves crashing into the surf, with a foreground of water flowing to and from the beach. If possible, pick a beach with rocks and boulders scattered amongst the surf. Rocks give the waves an extra punch when they land, and further add the element of unpredictable force and power to the photograph. Also, water gently flowing over rocks in the foreground adds an interesting element to the image.

    When your composition is set (more on that in a minute), put your camera in aperture priority, set your aperture to f/8 or f/11, and fasten the polarizer to the lens. Rotate the filter until you see the sheen or reflection on the water dissipate to its minimum, then stop. Adjust the ISO to reach a desired shutter speed of around 1/3 to 1/2 of a second. Remember, raising ISO one stop speeds up the shutter by one stop, and lowering ISO one stop reduces shutter speed by one stop, (assuming the aperture stays constant). Depending on how bright it is out, you may need a neutral density filter to slow down your camera’s shutter. Many filter manufacturers make one single filter that has both a polarizer and a variable ND filter combined.

    Image003

    Quick Tip: Whenever I use a neutral density filter, I always manually focus before adding the filter. The ND filter will cause your viewfinder to become relatively dark, which makes focusing difficult – sort of like trying to read with sunglasses on in a dimly lighted room.

    Set your camera so that it shoots continuous photos as quickly as possible, in RAW mode, and fire away!

    COMPOSITION AND POST-PROCESSING:

    When you compose the scene, leave plenty of extra space around the intended target. Since your setup will be locked in place on a tripod, you won’t be able to adjust your composition once you’re set. Thus, you’re basically taking an educated guess as to where the wave will eventually land. Once you’re set, wait for a wave that’s inside your composition, and let it loose.

    Image007

    Shooting wider than necessary greatly increases your chances at nailing some good action shots of waves. Once you’re back at the computer, it’s a piece of cake to crop out the edges and tighten in on the action if necessary.

    With respect to post-processing, aside from cropping, the only adjustment you might want to consider is a mild boost in contrast. Added contrast will enhance the water’s punch and power, as seen by the viewer.

    Image004

    Do you have any other tips for photography the awesome power of nature and ocean waves? Please share in the comments below, as well as your wave images.

    googletag.cmd.push(function() {
    tablet_slots.push( googletag.defineSlot( “/1005424/_dPSv4_tab-all-article-bottom_(300×250)”, [300, 250], “pb-ad-78623” ).addService( googletag.pubads() ) ); } );

    googletag.cmd.push(function() {
    mobile_slots.push( googletag.defineSlot( “/1005424/_dPSv4_mob-all-article-bottom_(300×250)”, [300, 250], “pb-ad-78158” ).addService( googletag.pubads() ) ); } );

    The post How To Capture Action Shots of Waves by Jeb Buchman appeared first on Digital Photography School.


    Digital Photography School
  • 4 Mistakes Beginning Landscape Photographers Make

    Even the most famous photographers started out as beginners. Nobody is a master after day one, and learning is a big part of the process. However, nobody likes to appear as a beginner or an amateur, we all want to create images that looks more professional than just a snapshot.

    There are certain mistakes that makes it very obvious that you’re a beginner, and if you want to gain some exposure online, these mistakes might turn people away. Here are four mistakes beginning landscape photographers make and you can can avoid them.

    An example of when a spirit level is important to see if the horizon is straight.

    An example of when a spirit level is important to see if the horizon is straight.

    Mistake #1 – Uneven or crooked horizon

    In many photographers’ opinions, there are few things more annoying than viewing landscape images with a uneven or crooked horizon. I see so many images with great potential that are ruined because of this issue. The reason we find this annoying is that the composition is severely weakened with an uneven horizon. Instead of using the composition to lead the eye towards the subject, the horizon will grab your attention and lead the eye straight out of the image.

    I know many photographers struggle, or simply forget, to straighten it. This may be because they are so excited to capture the image that they forget to look at it (hi mom!) or because they just don’t know how. Still, straightening the horizon is a huge step towards improving your landscape photography.

    Luckily there are a few simple tools to fix this problem, both in the field and in the post-production stage.

    In the field: Use a spirit level

    If you’ve ever done any sort of construction, this should be a tool you likely know well. But did you know it’s also a highly valued tool amongst photographers?

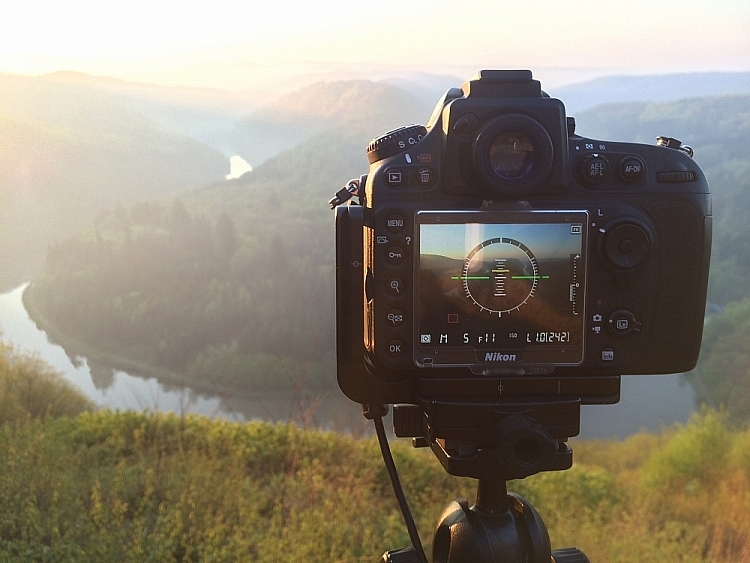
    IMG_7941

    It’s becoming more common, even for mid price-range cameras, to have a built-in spirit level. Nikon names it Virtual Horizon, and Canon has the Electronic Level. Personally, I use the Virtual Horizon for all my compositions when the camera is mounted on a tripod (which is 99% of the time). This tool shows you a spirit level on the camera’s LCD screen, so you need to be working in Live View. Note: Keep in mind that using Live View will drain your battery much quicker.

    Even though a Virtual Horizon or Electronic Level is becoming more common, there are still many cameras that don’t have this feature, and there are those who prefer the old school method: using a spirit or bubble level on top of the camera. This small and handy tool can be found in most photography stores, and shouldn’t cost more than a few dollars (see photo right).

    In post-production: Fix it in Adobe Lightroom

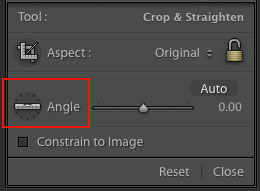
    spirit-level-LRIf you weren’t able to get a straight horizon in the field, there’s also a easy method to fix it in post-production.
    Adobe Lightroom has a great tool called Straighten. You can find this by going into Develop  > Crop Tool (the keyboard shortcut is R). You then see a spirit level followed by the word Angle (outlined in red on the right).

    There are three methods to easily straighten your shot using the crop tool:

    1. Click Auto and see how Lightroom does at straightening the image. It usually does a pretty good job so try that first, you can also undo it if it’s not right and try the other methods.
    2. Select the spirit level and drag a line along the horizon. Adobe Lightroom will then automatically straighten the image according to the data you gave it.
    3. Manually insert amount of straightening you need, or drag the point back and forth until you’re pleased.

    Mistake #2 – Being stuck in Automatic Mode

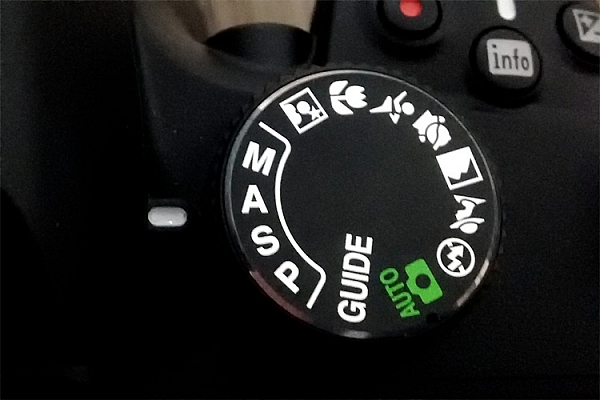
    Mode DialWhile Automatic Mode may have its benefits for those who just bought their first camera, the sooner you stop using it the better. I always recommend mainly using Manual mode, even though both Shutter Priority and Aperture Priority are acceptable for beginners.

    There are several reasons you want learn how to manually control the camera, and understand how the settings work together. Even though the camera does a decent job exposing the image correctly, it doesn’t take the image quality into consideration. In other words, the aperture and ISO will rarely be optimum if you wish to get a sharp result.

    I know it may seem scary in the beginning, and I still remember how I tried to understand the basics when I was starting out, but I guarantee you it’s worth the extra effort. When you can use the ideal settings, the final result will be much better.

    It would be nearly impossible to get an image like this in Automatic Mode

    It would be nearly impossible to get an image like this in Automatic Mode

    Mistake #3 – Not using a tripod

    Besides the camera itself, a tripod is the most important tool for landscape photography. While some may complain that it’s not practical to travel with, trust me when I say –  there’s an ocean of opportunities when you begin using a tripod.

    Not only will your images become noticeably sharper, you will also be able to do certain techniques that aren’t possible without a tripod (such as long exposure photography). Let’s look at some of the advantages of using a tripod for landscape photography:

    • You’re able to achieve longer exposures without getting blurred images.
    • You don’t need to use a high ISO to keep the image sharp. Keep the ISO low and use a longer shutter speed instead.
    • You can carefully make your composition and keep it for many images.
    • Since the camera stays in the same spot you can take multiple images and stack them later (for things like: HDR, time-lapse or techniques to remove people).
    • You’re able to keep the image straight by using Live View, and carefully adjusting the tripod.
    • The amount of motion is reduced so your images become sharper.
    Using a tripod makes it possible to have a longer shutter speed

    Using a tripod makes it possible to have a longer shutter speed to make images like this.

    You don’t need to blow your wallet on the most expensive tripod on the market, but I do recommend getting something that’s more durable than the $ 20 one at the electronics shop. A solid tripod will last for a long time and might save you money in the long run. A sturdy tripod is more flexible to work with, and it’s still gonna do a good job even in windy conditions.

    Mistake #4 – Shooting during the daytime

    I know I might start some discussion with this point, but good landscape images are not taken during daytime. In landscape photography, light is everything.

    You might have heard about the Golden Hour, at times referred to as the Photographer’s Hour. The time around sunrise and sunset is when the sun’s position in the sky is ideal for photography. The low light gives a soft and golden glow to the landscape.

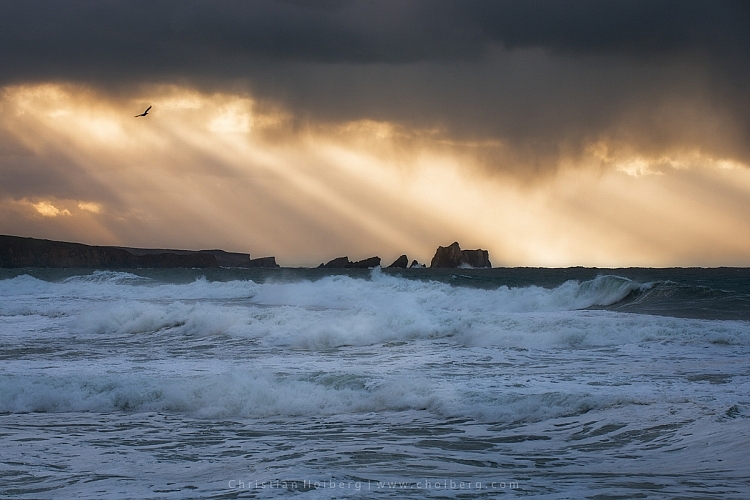
    Bird flying through a stormy sunset at Liencres, Cantabria.

    Bird flying through a stormy sunset at Liencres, Cantabria.

    During midday the light is harsh, and very few images looks good in these conditions. If you want to improve your landscape photography you need to go out and photograph during sunrise and sunset. Daytime is perfect for scouting locations or sleeping.

    As always, there’s a few exceptions to the rule:

    • Commercial travel photography: If you’re photographing for tropical hotels and resorts, they do need sunny pictures, as this is what attracts tourists.
    • Cloudy days can be okay for photographing waterfalls.

    Read also: 5 Reasons Why Bad Weather Days are the Best Times for Photography and 5 Ways to Create Dramatic Landscape Photos at Midday for other ideas.

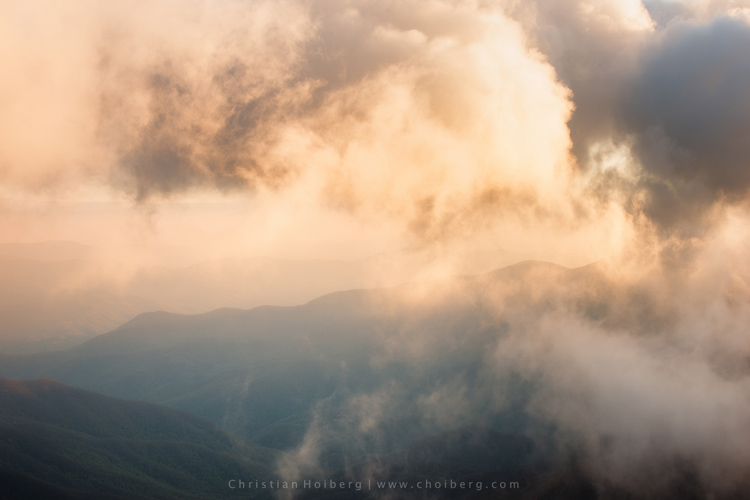
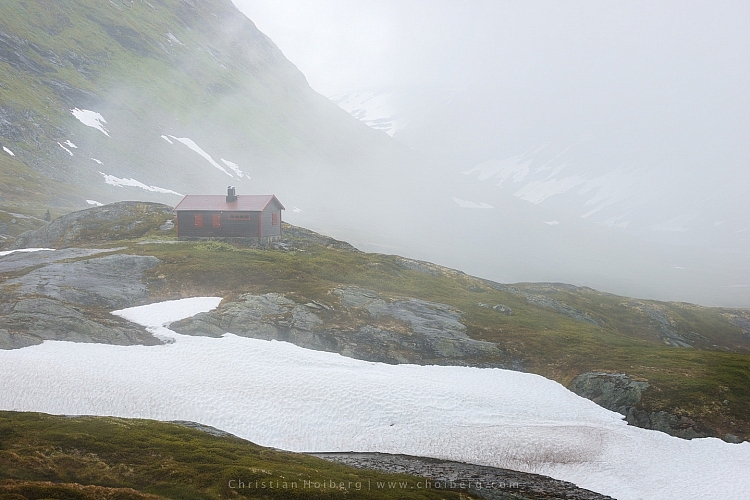
    Jotunheimen-Cabin-Fog

    An example of when shooting during daytime works

    Are you guilty of these four landscape photography mistakes? Have you made any other mistakes that had a negative impact on your photographs? Please share your thoughts in the comments below.

    googletag.cmd.push(function() {
    tablet_slots.push( googletag.defineSlot( “/1005424/_dPSv4_tab-all-article-bottom_(300×250)”, [300, 250], “pb-ad-78623” ).addService( googletag.pubads() ) ); } );

    googletag.cmd.push(function() {
    mobile_slots.push( googletag.defineSlot( “/1005424/_dPSv4_mob-all-article-bottom_(300×250)”, [300, 250], “pb-ad-78158” ).addService( googletag.pubads() ) ); } );

    The post 4 Mistakes Beginning Landscape Photographers Make by Christian Hoiberg appeared first on Digital Photography School.


    Digital Photography School
  • Why Engagement Photos are a Good Investment for You and Your Clients

    Over the past several years, engagement photos (also known as e-sessions or pre-wedding photoshoots) have become quite the norm among couples who are engaged to be married. It is probably one the first things newly engaged couples discuss and plan out. There is a lot of debate about the need for engagement photos from a couple’s point of view – are engagement photos really required, and what purpose do they serve especially if the duration between the engagement and the wedding is very short?

    As a wedding photographer, I believe having engagement photos prior to the wedding is almost as important as the wedding day photos. Here are some of the reasons why I recommend engagement photos to all my wedding clients.

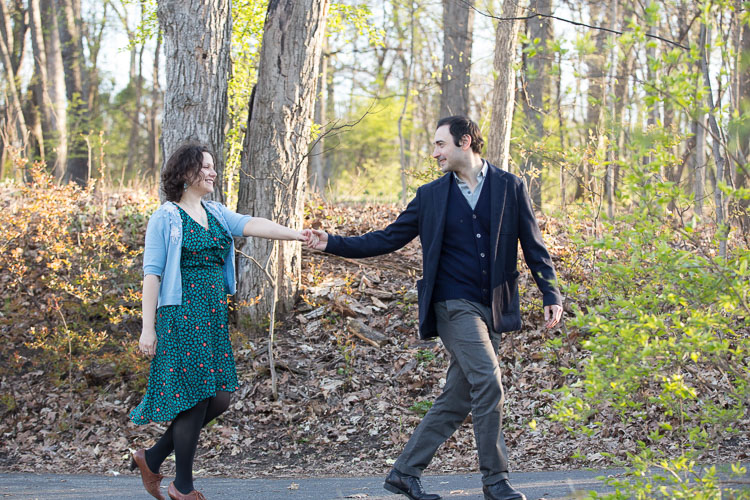
    Memorable Jaunts DPS Article on tips for engagement photos-5-2

    To help them get comfortable in front of the camera

    Most people are quite uncomfortable at the thought of having their picture taken by a professional photographer, especially if they have never had photos taken before, like ever! They feel uncomfortable and awkward and don’t quite know how to relax, how to pose, or how to display emotions. Limbs tend to get stiff, bodies becomes rigid, and forced smiles cause the jaw to lock up.

    This awkward and uncomfortable feeling is usually reflected in the photos. An engagement shoot can help eliminate this discomfort. It is an opportunity for clients to practice being in front of the camera, and get used to the idea of being intimate with their significant other in the presence of another person.

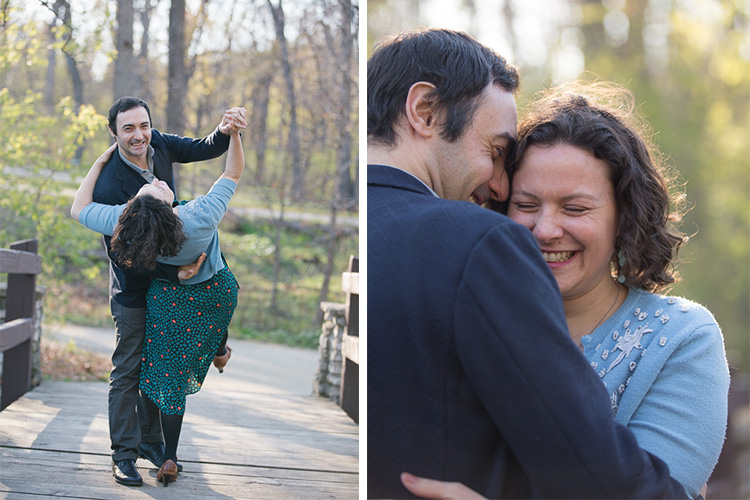
    03Memorable Jaunts DPS Article on tips for engagement photos-1

    These clients came to me for wedding photos, and were very clear that they were not at all comfortable being in front of the camera. I suggested an engagement photo session as a way to get to know me and my style, as well as for me to get to know them. All through the shoot, my only direction was to be comfortable with each other, and spend time together. By the end of the session, they had a good sense of my style and my direction, as well as got pictures together in a more casual setting than the wedding.

    To help them get to know you, the photographer

    In addition to helping clients get comfortable in front of the camera, the engagement shoot is also a great time to get familiar with you, the photographer. Every photographer has a different style of directing and photographing people, and this is a great opportunity for them to get comfortable with your process. Most engagement shoots last an hour or two, sometimes longer depending on the couple and you, and this gives both parties plenty of time to interact, socialize, and chat with each other. This also works on the flip side, where you also get to know the couple. As photographers, we are often looking to understand and learn the relationship dynamics of our clients – how they interact as a couple and what is their comfort level in front of the camera. This way it will help you know how to get the best moments and interactions on the wedding day.

    Documenting the relationship

    Wedding photos capture one of the most important moments of a couple’s life together. But often, the stress and tension of planning the perfect wedding, and the perfect day, gets in the way of capturing authentic imagery of their relationship. The engagement shoot is a great opportunity to highlight the true personality of a couple in a more relaxed and natural environment. A good tip for both you and your clients is to choose a location that is comfortable, and is a meaningful reflection of the client’s personality. This add a personal touch to the photos, and showcases them in a relaxed environment, that is a true reflection of their personality as a couple.

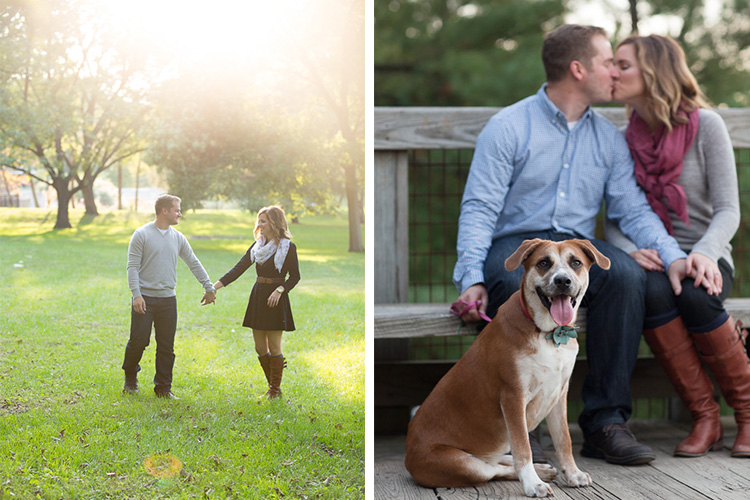
    02Memorable Jaunts DPS Article on tips for engagement photos-1

    These clients choose a location that meant something special to them. They had also recently adopted a pet and wanted to include her in their photos, as they consider her as part of the family. I let my clients completely dictate the setup for this photoshoot, and simply documented their life as true to who they are as a couple.

    Uses for the engagement photos

    Most clients who choose engagement or pre-wedding photos tend to use the photos as save the date cards, guest sign-in books, wedding website setup, or even placing them around the wedding reception area as part of the reception decor. This gives their wedding guests a chance to get to know the couple more intimately.

    01Memorable Jaunts DPS Article on tips for engagement photos-1

    This couple already had a wedding photographer, but wanted engagement pictures as part of their wedding decor. Since they both love the outdoors and it was a fall evening, we decide to do a themed engagement photoshoot that showcased their personality.

    Quality time together as a couple

    This is probably one of the most important reason to have an engagement session. The wedding planning process can be very stressful and taxing, with a million different things to plan and coordinate. The engagement session is a time for couples to take a step back from the wedding planning process to be together, be playful, and just be themselves. A welcome break for most folks! As wedding and engagement photographers, it is our responsibility to ensure that our clients have a stress-free, relaxed time during their engagement session.

    Are you a wedding photographer that recommends engagement photos for your clients? What are some of the reasons you like them? Feel free to share your experiences and images in the comments below.

    googletag.cmd.push(function() {
    tablet_slots.push( googletag.defineSlot( “/1005424/_dPSv4_tab-all-article-bottom_(300×250)”, [300, 250], “pb-ad-78623” ).addService( googletag.pubads() ) ); } );

    googletag.cmd.push(function() {
    mobile_slots.push( googletag.defineSlot( “/1005424/_dPSv4_mob-all-article-bottom_(300×250)”, [300, 250], “pb-ad-78158” ).addService( googletag.pubads() ) ); } );

    The post Why Engagement Photos are a Good Investment for You and Your Clients by Karthika Gupta appeared first on Digital Photography School.


    Digital Photography School
  • Come Join Me—and Greg Heisler—in Columbus, Ohio This August!

    Just a quick heads-up for any of you who may live within striking distance of Columbus, Ohio. (And if that’s not you, no need to keep reading. It’d just piss you off.)

    So MidWest Photo, the folks that brought us the LumoPro LP180 and a bunch of other cool things, are moving to new digs in Columbus. And they are having two days of festivities on August 6th and 7th.
    There is lots of stuff going on: speakers, classes, vendors, giveaways, etc. And it’s all free.
    I’ll be speaking on both days. Saturday the 6th will be on my hybrid “dad/photographer” approach to traveling. And Sunday’s presentation will be on learning to completely rethink and reshape your approach to photography. Each is a completely different talk, and both are geared towards the full range of photographers—from enthusiast to pro.

    But better yet, Greg Heisler is also speaking on Saturday. In fact, I am following Greg on Saturday. You can imagine how thrilled I am.

    If you have never heard Greg in person, I highly recommend it. I guarantee you you will learn some stuff. Especially in a small venue environment like this. As for following him onstage, I highly do not recommend that.

    And since it is all free, it’ll only cost you gas money. (And face paint if you are going to see Greg.) Kidding. Mostly. But that would be awesome.

    Heads-up: it requires registration, because seating is limited. And this will certainly fill. So if you are up for it, make sure to register ASAP for one or both days, here.

    Come out and meet us!

    Cheers,
    David
    Strobist