Look at the photograph below. What an unreal, alien animal! It could be right out of one of the many upcoming Star Wars sequels. You just don’t see creatures like that in your everyday life. It’s a sea slug (to be scientifically precise: Nembrotha Kubayana) which I photographed 20 meters underwater on a reef in the Philippines. The head of the slug is only about a centimeter across, so the image is quite a close-up (macro photograph).

If it doesn’t sound easy to dive 20, 30 or more meters below the ocean’s surface to take a picture of a slug the size of your pinky – it isn’t. But with the right gear, with the proper knowledge and experience using that gear, and with skills to find those small animals you can do it too. So let’s talk about each of these points one at a time.
The Gear
Naturally, you will need an underwater camera. There are a number of great choices these days. Compact cameras have greatly improved in recent years, and you can get a pretty good deal on a camera plus the fitting underwater housing. Many camera manufacturers make acrylic housings for their own compact camera models, which tend to be a lot cheaper than third party models. To have any chance of taking good macro shots, you need a strobe or a video light as well.
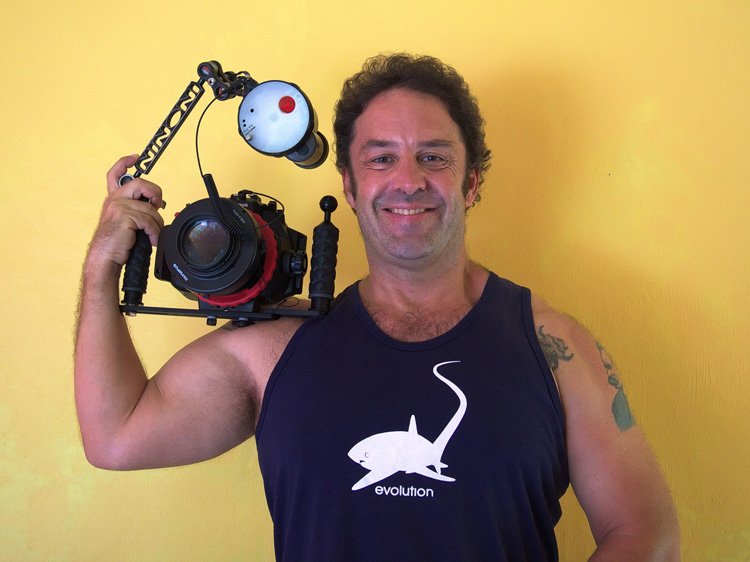
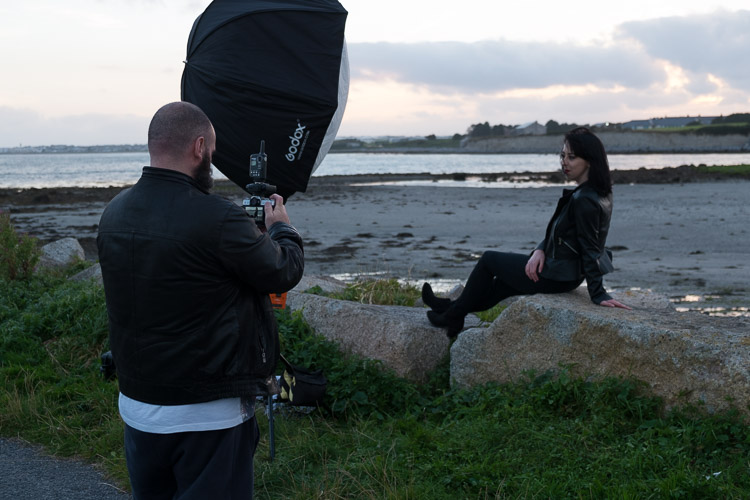
Me with my underwater camera setup. Note the diopter (magnifying lens) attached to the front of the lens port. The strobe is relatively close to the port and aimed slightly forward. The closer the subject, the closer the strobe can be to the port. The farther away the subject is, the further the strobe has to be to avoid backscatter.
If you have a lot of money or if you are obsessed with underwater photography (like myself) you can get yourself a DSLR, and put it in an underwater housing. I have been using a Canon 5DII in a Hugyfot (machined aluminum) housing, with two Inon z-240 strobes for several years now. Camera choice is an interesting and complex issue, but I want to concentrate on the gear you need specifically for underwater macro photography.
Macro lens

Another sea slug, from Botany Bay, Australia.
Modern macro lenses are technological miracles. If you are using a DSLR or a mirrorless camera, you can switch lenses. So you need to mount one that is capable of focusing close up, with significant magnifying power. I routinely use the Canon 100mm f/2.8 macro lens(price it on Amazon or B&H Photo), which can focus at 35 centimeters. That distance is measured from the sensor plane, hence I can place the subject only a few centimeters in front of the housing’s lens port. The sharpness this lens achieves when capturing minute animals is simply amazing. Nikon’s 105mm macro (price it on Amazon or at B&H Photo) is a legendary lens as well, and for cameras with cropped sensors (mirrorless cameras and entry to mid-level SLRs) 60mm macro lenses do a great job.
Other options
A small, but clever piece of gear I have been using with quite some success, is an extension tube. It’s simply a spacer inserted between the macro lens and the camera body. The extension tube eliminates the ability of the lens to focus to infinity (not used in macro photography anyway) and adds another 20% of magnification. The fact that no additional lens elements are introduced is a good thing for image quality.
Diopters (also called close-up filters) are also highly recommended. A diopter is simply a magnifying glass which is placed on the front of the camera’s lens. This is not ideal in terms of the optics, and distortions towards the edges are possible. With diopters, it makes sense to invest in a quality product to minimize such distortions. However, the amount of magnification achieved with a good diopter is absolutely mind-boggling. It can turn your underwater camera setup into a field microscope.

Another goby, very well camouflaged on a soft coral.
You can get both dry diopters which are attached to the actual lens, and wet diopters which are attached to the lens port on the outside of the housing. Wet diopters exist for DSLR and compact camera underwater setups. The convenient thing about the wet ones is that you can take them off underwater, and shoot larger animals again.
Tip: Make sure you store your wet diopter in a safe place when it’s not mounted.
Request: If you see a wet diopter for a 10cm diameter macro port, with a gray plastic mount somewhere on the west coast of Cebu, please return it to me.
How to use your macro gear
I’d like to stress two things when it comes to the proper camera technique for macro underwater photography – camera settings and strobe placement.
Almost all the light for your underwater photographs will come from your artificial light source anyway, so the shutter speed is usually not important. It needs to be equal or slower than the maximum speed your camera can synchronize with the strobes. That kind of information will be in the user manual for your camera since it differs between camera models. Otherwise, a shutter speed as fast as possible is beneficial for sharp images.

A small goby on a piece of hard coral, with the entire image in sharp focus. Canon 5DII, Canon USM 100mm f2.8 lens, at f/22.
Aperture considerations
A small aperture helps to keep the whole scene in your image sharp. Macro lenses naturally have a shallower depth of field due to the distance to subject being much smaller. So to photograph a tiny goby and all of the pretty coral it perches on, with all of it in focus, I use an aperture anywhere from f/22 to f/32 (that’s the smallest my Canon 100mm f2.8 macro can do).
There is also the option of using a wider aperture to achieve a Japanese-style effect in your images. Such a photographic style is indeed popular with Japanese underwater photographers these days. It is somewhat reminiscent of the late medieval Japanese painting style where the artists would just hint at a few twigs to depict a tree. How wide you can go depends on your lens, the distance to the subject and its orientation. The aperture of f/4.2 used in the picture below is as wide open as I can go. Whenever I can, I set my camera to approximately correct values before the dive so that I don’t have to find my way around in the menus while already underwater with a cool fish showing up in photographic range.

Only the face of this stick pipefish from Sydney in Australia is in focus. This Japanese style shot gives the image a dreamy atmosphere. Olympus TG-1, at f/4.2.
Lighting
You will need to use artificial light for most of your macro shots. Light-hungry macro lenses will not make good images with sunlight in many situations on land, and underwater, with so much sunlight absorbed by the water above you, they do even worse. The internal flash of most cameras is not strong enough and it’s in a less-than-ideal position just above the lens.
Avoid back-scatter
The external strobes you use should be mounted on some kind of adjustable or bendable arm. Keep them positioned moderately close to your lens, and a bit behind it. In underwater photography, you are always aiming to avoid back-scatter. Your strobe will light up the suspended particles in the stretch of water between your lens and the sea slug, and this will make your image look as if taken in a snow storm. There is nothing quite as annoying in underwater photography than a well composed, well lit shot, with a lot of back-scatter ruining it. You can take care of back-scatter in post-processing to some degree in some shots, but it’s a pain and better avoided, to begin with. Back-scatter is to underwater photography what blisters are to hiking.
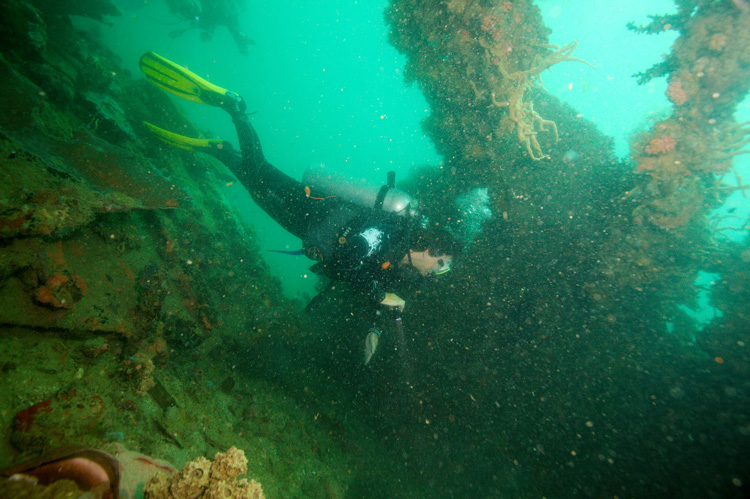
A diver on a shipwreck in the Philippines. These are harsh conditions for underwater photography. I had my strobes turned outwards, and placed away from the camera, but not enough. The illuminated particles (the back-scatter) stand out especially in front of the darker part of the wreck.
When shooting wide-angle underwater, you need to place your strobes far away from your lens and slightly outward-oriented to avoid illuminating any particles in front of the lens’s wide field of view. This minimizes the amount of light reaching the space between your lens and the subject.
Positioning your strobes
In underwater macro photography, the situation is not quite as difficult. Still, the further away you are from the subject (the distance may vary between the subject almost touching the front of the lens port to no more than 30cm) the more you need to move your strobes away from the lens. When I am really close, I try to mimic a ring-flash with my two underwater strobes. In case you haven’t seen one, a ring-flash is a circular light source which is mounted on the front of a macro lens. Such a strobe is often used in land-based macro photography. It provides very even illumination. Putting one of my underwater strobes close to each side of my camera’s lens port gives me a similar type of direct, smooth illumination.
How to find good underwater macro subjects
Photo legend Jim Richardson is quoted as saying that, “If you want to be a better photographer, stand in front of more interesting stuff.”. Underwater, that’s not quite true. You need to hover in the water in front of more interesting stuff, or at least lay in the sand in front of more interesting stuff, but that doesn’t look quite as stylish. And you should definitely not lay on corals in front of more interesting stuff because you may break them and it will evoke the rightful anger of a lot of other divers!

A flamboyant cuttlefish hunting in the Philippines. This animal is about 5cm long.
Good buoyancy will have other advantages besides not breaking corals (thank you again for not doing that). If you are stable in the water, you will be able to position yourself in a proper position in front of the animal you’d like to shoot. You will also not stir up silt or sand from the bottom, which would then cloud the image you are about to capture and cause the aforementioned dreaded back-scatter.

Whip coral goby, Moalboal, Philippines.
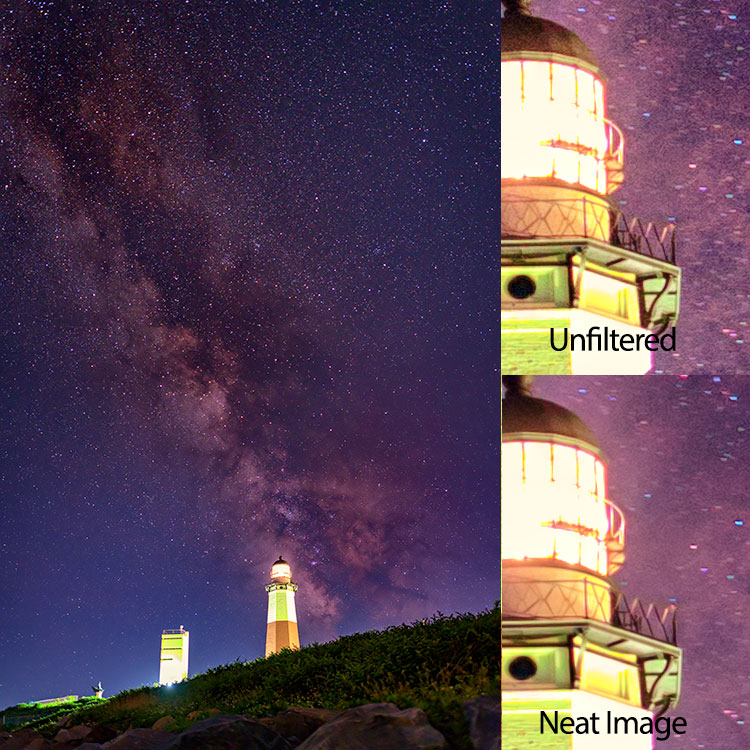
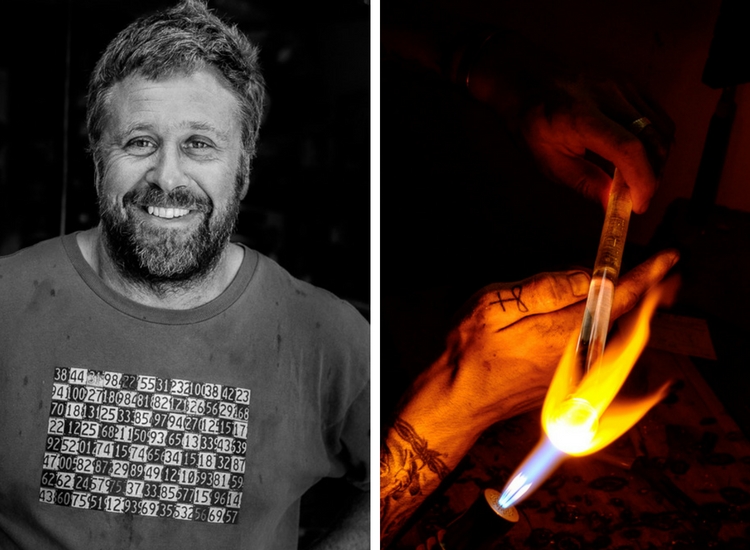
Back-scatter happens, to the best of us, including myself (above).
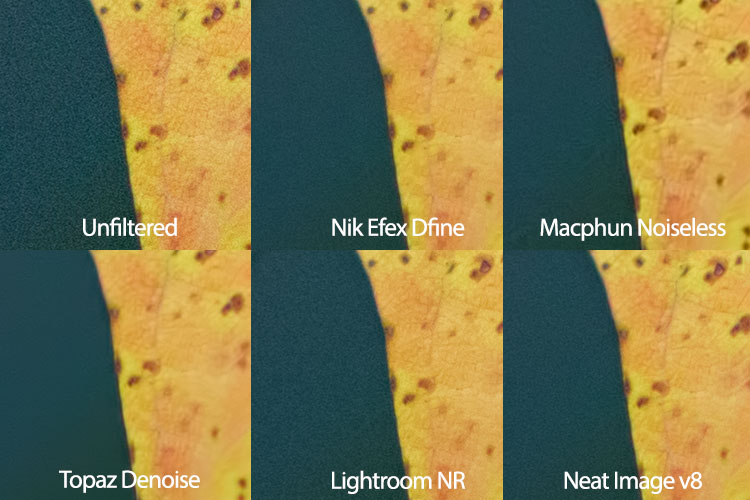
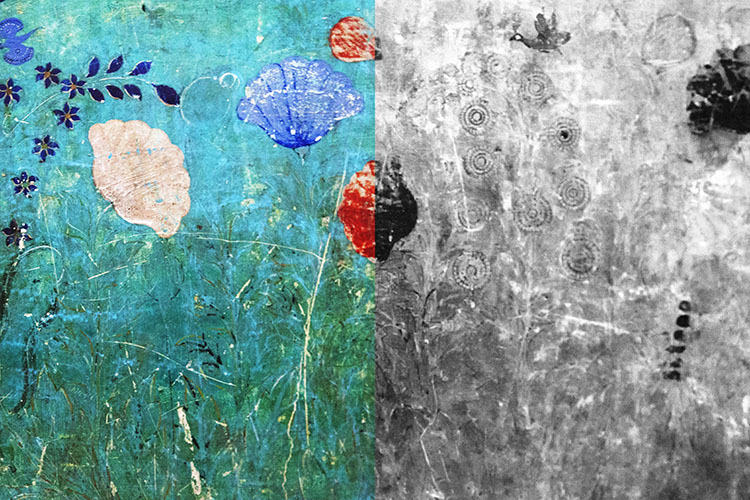
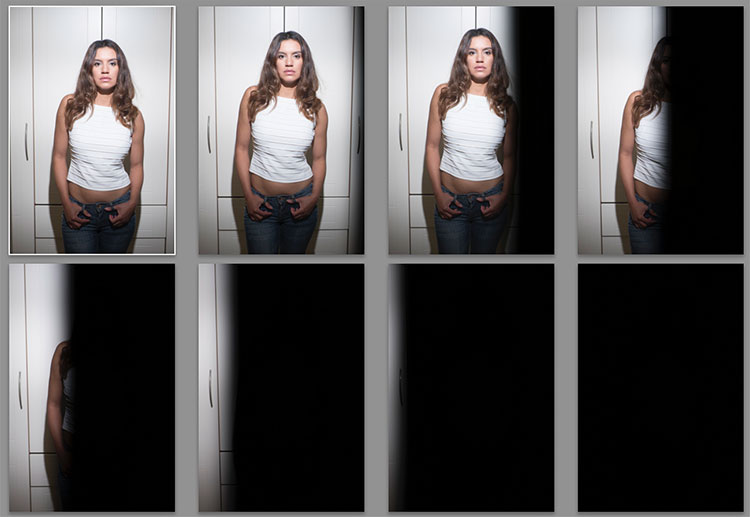
In the bottom image (before) we see way too much backscatter. I did two things. First I corrected the exposure of the image, cutting off the darkest part. This eliminated some of the unsightly dots. The remaining white dots I removed with the healing brush in my image processing program. The resulting image on top is vastly improved by these two post-processing manipulations.
Don’t spook your subjects
A neutrally buoyant, controlled, and calm approach towards your photo subjects will also reduce the chance of spooking them. There is a lot to be said for good buoyancy when photographing underwater. If you are not quite there yet with your positional control while diving, try photographing less easily spooked animals like slugs and sea urchins, and save the shrimp (very nervous) or the blennies (very fast) for the future once you have improved your buoyancy.

A blenny. Not easy to catch!
Hunting subjects
What you have to figure out next is where to find those psychedelic slugs and the fish straight out of Salvador Dali’s sketchbook. If you are on a diving vacation in some foreign tropical land, just follow your guide, and pay good attention to what he points at. The guys and gals guiding every day, year in and out, in the same location, usually know their reefs really well and are proud to show off the unusual animals on it. It also helps to have a quick chat with your dive guide beforehand and to tell him that you are out to find interesting macro subjects.
If you are diving on your own, things will move a bit slower. You will have to become that expert guide yourself. Study the reef when you are diving and study marine life books and web resources on land to figure out what to look for, where, and when. Certain animals will only be active at night, or at sunset (like the famous mandarin fish shown below). Some crabs will only live on one species of soft coral, and some shrimps will only live on the skin of certain sea cucumbers. If you don’t know where to look for them, it’ll be near impossible to find them. It’s a curious psychological effect that you will find such animals over and over again after you have spotted them once for the first time.

A mandarin fish! So pretty!

Sea slug laying its eggs (these slugs called nudibranchs are hermaphrodites, functioning as males and females at the same time). It was magic moments of animal behavior like these that got me addicted to macro photography underwater.
Conclusion
To become a skilled macro underwater photographer you need patience. Go for a dive, take some shots, come back, look at them, and think about them. Rinse (your camera gear, and yourself) and repeat. Take your time to inspect your work, and to reflect on what you could do differently next time. I recommend that you consider the points above during each and every iteration and the following questions:
Did I bring the right gear? Did I use it properly? Did I do a good job in finding that fascinating new sea slug?
Please put your comments and questions below, and do please share your underwater photos there too. We’d love to see them.
googletag.cmd.push(function() {
tablet_slots.push( googletag.defineSlot( “/1005424/_dPSv4_tab-all-article-bottom_(300×250)”, [300, 250], “pb-ad-78623” ).addService( googletag.pubads() ) ); } );
googletag.cmd.push(function() {
mobile_slots.push( googletag.defineSlot( “/1005424/_dPSv4_mob-all-article-bottom_(300×250)”, [300, 250], “pb-ad-78158” ).addService( googletag.pubads() ) ); } );
The post Tips for Doing Macro Underwater Photography by Dr. Klaus M. Stiefel appeared first on Digital Photography School.

Digital Photography School


You must be logged in to post a comment.