RSS
 

Archive for the ‘Photography’ Category

7 Tips for Doing Crystal Ball Refraction Photography

15 Nov

You’ve have heard of reflections in photography, but have you have tried refraction? When used well, refraction creates compelling images that will leave your audience both wowed and curious. I’ve been approached many times by strangers who are curious about how I photograph with a glass ball. Once you’ve mastered this type of photograph you’ll likely get the same audience. Here are some tips to help you do crystal ball refraction photography.

Doing Crystal Ball Refraction Photography - house inside glass ball

The subject shows prominently in the ball, and around the ball is bokeh.

So what is refraction?

Refraction happens when light passes through an object of denser mass, such as water or glass. When this occurs, light is bent, and there is a distortion. When refraction occurs with a transparent spherical object something magical happens. An inverted image of the scene behind the ball is seen. The lens elements in your camera actually work this way as well. You can use a glass ball as an extra lens element, one you can move around your scene.

Doing Crystal Ball Refraction Photography

How to do refraction photography

Now you know what refraction is, it’s time to learn how to apply it to your photography. If you follow the guide below you won’t go far wrong with this type of photography.

#1 – Dealing with the upside down image

There are instances where it works to have an upside down image in the background or inside the ball. If you want to avoid this, the best way to deal with an upside down background is to blur it out using bokeh. An alternative to blurring out the background is to use reflection since the reflected image will be the right way up inside the ball.

Doing Crystal Ball Refraction Photography - The image inside the ball will be upside down.

The image inside the ball will be upside down.

#2 – Get above your subject

You should get the ball off the ground so it’s level with the subject you’re photographing. A centered subject in the ball will have less distortion and more impact in the frame. There are always exceptions, of course, as leaf beds or puddles work well when the ball is placed right in them.

#3 – Fill the glass ball with your subject

You have to get close to your subject, or it (they) will appear very small inside the ball. The best advice I can give here is to see if your scene would fill a wide angle lens. If so you’re gold.

Doing Crystal Ball Refraction Photography

In this photo, the cityscape is captured inside the ball, and a closer framing was employed.

#4 – Choose the correct lens

The best option here is to use a macro lens or a telephoto lens with macro capability. The macro lens will allow you to get close to the ball, making it easier to create bokeh around the ball. Using a wider angle lens can also work if your scene allows it.

#5 – Choose the correct aperture

You need to get the correct aperture for your scene. An aperture that’s too small won’t blur out the background. One that’s too large will make it hard to get a sharp image inside the ball. I would choose an aperture of around f/4, it depends on the scene you are photographing, though.

Doing Crystal Ball Refraction Photography

One of the best ways of dealing with the upside down image is to use reflection in the photo.

#6 – Find a safe place to position the ball

This is very important, especially if you are photographing from a high vantage point. The ball needs to sit on a flat surface, finding a crevice to sit the ball on is better. Once you have placed the ball ensure it isn’t going to fall and keep your hands near it during this time.

If there is no place to rest the ball you can ask a friend if they’ll hold the ball for you. You need to be especially careful on a windy day, a strong gust of wind can move the ball if it’s not in a secure position.

In this photo of the Taj Mahal there is reflection in the background, and this reflected image is in fact upside down.

In this photo of the Taj Mahal, there is a reflection in the background, and this reflected image is in fact upside down.

#7 – Lighting the subject in front of the ball

You should have a well-lit subject in any kind of photo, but it’s even more important with refraction photographs. A strongly lit subject will shine through the ball with less reflection appearing on the ball. Look to photograph when the sun is behind you or during blue hour shooting towards lit buildings.

Refraction photography versus a standard landscape

A lot of locations that suit refraction photography with a glass ball will also be good for regular landscapes. The question is why photograph a refraction photo when you could take a wide-angle shot of the same scene? Let’s take a look at some of the pros and cons of crystal ball refraction photography.

Pros of refraction

  • A glass ball is cheaper than a lens and allows you to create a fish-eye like effect.
  • You can move the ball to different positions in your scene.
  • Using a large aperture in conjunction with the ball to create bokeh, is great for minimalism.
  • Scenes created with a crystal ball often have a more artistic feel.
  • The ball creates a natural frame for your photo.
Images that work well as a wide angle photo also work well inside a crystal ball.

Scenes that are well suited for a wide-angle photo also often work well inside a crystal ball.

Cons of refraction

  • The larger glass balls are heavy to carry, in an already heavy camera bag.
  • You need a macro lens, something a landscape photographer may not normally carry.
  • Distortion on the edge of the ball.
  • It’s difficult to get a sharp image inside the ball.
  • The image in the ball is upside down.
This is a wide angle photo of a famous road junction in Shanghai.

This is a wide angle photo of a famous road junction in Shanghai.

The choice of taking a glass ball is yours to make, I highly recommend experimenting with it, though.  The pros really outweigh the cons, and following the tips in this article will help. You may also find weight an issue, so I recommend scouting a location before shooting with the ball. Then return for a second visit with just the equipment you need to take the photo, this will reduce the weight somewhat.

Experiment with the ball

The first thing you’ll need of course is a crystal ball, you can buy them easily through amazon for 27$ . While you wait you can try filling a wine glass with water, you’ll get the refraction effect this way too.

Now you’re ready to get started, so head to a local landmark and start experimenting. The list of subjects is really endless; you can start with a lone tree, a church, or a cityscape scene. If you have any photos that show refraction please add them to the comments below, it would be great to see them.

Natural landscape look great inside the ball. This is a volcanic lake found in Indonesia.

Natural landscapes look great inside the ball. This is a volcanic lake found in Indonesia.

googletag.cmd.push(function() {
tablet_slots.push( googletag.defineSlot( “/1005424/_dPSv4_tab-all-article-bottom_(300×250)”, [300, 250], “pb-ad-78623” ).addService( googletag.pubads() ) ); } );

googletag.cmd.push(function() {
mobile_slots.push( googletag.defineSlot( “/1005424/_dPSv4_mob-all-article-bottom_(300×250)”, [300, 250], “pb-ad-78158” ).addService( googletag.pubads() ) ); } );

The post 7 Tips for Doing Crystal Ball Refraction Photography by Simon Bond appeared first on Digital Photography School.


Digital Photography School

 
Comments Off on 7 Tips for Doing Crystal Ball Refraction Photography

Posted in Photography


10 Tips for Doing Your First Family Portrait Session

15 Nov

Photographs from a good family portrait session will be treasured for many years to come. It’s an incredibly rewarding area of photography, but it can also be a little daunting for new photographers. You need to build a rapport with the family fast, keep the children on board, and meet the parents’ expectations with gorgeous photographs.

Family portrait FAMILY GROUP

So where do you start? Which camera settings should you choose?

Here are some important pointers to make your first session go smoothly, and to help you take great family portraits.

1. Get down to their level

Get down to a child’s eye level. This will lead to far more engaging photographs, as well as helping you to interact better with the child.

Family portrait INDIV GIRL flowers

2. Use Centre point focus

Different focus settings suit different photographers, but center point focusing tends to be the most useful for family portraits. As you take more and more family portraits, you’ll get a feeling for whether this suits you, But it’s a great starting point for your first session.

3. Choose an appropriate aperture

Your aperture settings will be influenced by the style you prefer. As a starting point, many lifestyle family photographers choose to shoot wide open for individual portraits (f/2.2 works really well), and around f/5.6 for group shots to ensure everyone is in focus.

Family portrait DAD AND SON opt

This was taken at f/5.6.

Family portrait INDIV GIRL park

This was shot at f/2.2.

4. Starting shutter speed

You will probably find yourself needing a slightly faster shutter speed for family portraits than you’d need for many other kinds of portraits. Children move fast, and sometimes unpredictably! A good setting to start with is 1/250th, which will give you flexibility for children rolling over or waving. If you have a situation where someone is moving very fast, such as a child jumping or racing off into the distance, choose a much faster shutter speed like 1/800th.

Family portrait BABY opt

This was taken at 1/800th]

5. Use Auto ISO

While you’re familiarizing yourself with the apertures and shutter speeds that work for you on family portrait sessions, consider setting your ISO to auto. The results are usually satisfactory, and it’s one less thing to think about on the day. As you gain experience and confidence, you can start to select the ISO as you go along.

6. Metering mode

Certain metering options seem to suit some photographers better than others. As you take more family portraits, you’ll soon see which works best for you. To start with, try using spot metering for individual portraits, and evaluative metering for a group shot.

Family portrait MUM AND BABY

This was taken with the evaluative metering mode.

7. Shoot in RAW format

The editing options open significantly in Lightroom, and you’ll have a far greater range of colors and detail recorded if you shoot in the RAW format.

8. Auto White Balance

Set your white balance to auto if you’re doing a location shoot. You’ll be working in a variety of locations with different lighting, and you won’t have much time for setting white balance as you go. Correcting white balance is an easy edit in Lightroom, so you’d be better off spending the time engaging with the family you’re photographing.

9. Choose your lenses

Consider which lenses to take with you to the family portrait session. If your budget doesn’t stretch to having several lenses, consider renting some. It can be surprisingly economical, and it gives you the opportunity to try out different focal lengths to see which suit you best.


Family portrait BABY

This was taken with an 85mm lens.

Using several lenses throughout a family portrait session will give you lots of variety in the images, as well as meaning you can cope with most locations. A zoom lens like a 24-70mm will give you lots of flexibility, or a popular prime lens for family portraits is an 85mm lens, which is very flattering for portraits. A wide lens like a 35mm will help you to set the scene.

As you gain experience photographing families, you’ll develop a sense for which lenses suit you best. That’s a good time to invest in the best quality lenses you can afford.

Family portrait SIBLINGS INSIDE

This was taken with a 35mm lens.

10. Set limits

Limit yourself to taking five versions of each scene. This will train your eye to look for the details and expressions you want to capture and to make sure you ultimately combine them all in one photograph.

Conclusion

So there you have it – family portraits in a nutshell. Practice makes perfect, though, so be prepared to work hard and hone your camera skills. Above all, a friendly and professional attitude combined with careful preparation for each family portrait shoot should make for happy clients and repeat business.

Please share your family portrait tips and photos in the comments section below.

googletag.cmd.push(function() {
tablet_slots.push( googletag.defineSlot( “/1005424/_dPSv4_tab-all-article-bottom_(300×250)”, [300, 250], “pb-ad-78623” ).addService( googletag.pubads() ) ); } );

googletag.cmd.push(function() {
mobile_slots.push( googletag.defineSlot( “/1005424/_dPSv4_mob-all-article-bottom_(300×250)”, [300, 250], “pb-ad-78158” ).addService( googletag.pubads() ) ); } );

The post 10 Tips for Doing Your First Family Portrait Session by Louise Downham appeared first on Digital Photography School.


Digital Photography School

 
Comments Off on 10 Tips for Doing Your First Family Portrait Session

Posted in Photography


How to Photograph the Magical Microscopic World – Photomicroscopy

11 Nov

What is photomicroscopy

There is a whole world right under your eyes where everyday and unique objects take on a fascinating new appearance. This world is microscopic and even though it is right in front of you, the tiny scale makes it difficult to see the incredible detail.

Photomicroscopy in its simplest form is high magnification photography, which in practice involves the use of a microscope to magnify images followed by using a camera for image capture. With the advent of eBay and other online auction style sites, photomicroscopy is becoming far more accessible to the wider population, allowing anyone to see the incredible detail.

photomicroscopy photomicrograph micrograph

Monosodium Glutamate (MSG) at high magnification by polarized light microscopy.

My passion for photomicroscopy

As a scientist, I spend a significant part of my time conducting investigations which require me to use microscopes. It was this exposure (and my embedded love of science) that got me interested in microscopy. Once I caught the bug, I acquired a microscope from an online auction store and purchased the accessories needed to couple the microscope to my Nikon DSLR. It should be noted that you can easily find accessories to couple with most camera brands, so this is not limited to Nikon.

My Nikon attached to the microscope.

My Nikon attached to the microscope.

Over time my setup expanded, to try and optimize the workflow through the addition of focus stacking software and hardware to counter the very shallow depth of field microscopes have.

How to take photomicrographs

photomicroscopy photomicrograph micrograph - toile paper

Two-ply toilet paper by transmitted light microscopy.

Photomicrographs are high magnification images which are captured using both a microscope and a camera, in my case a Nikon D5300 DSLR. First, you need to find an object that can be imaged and prepare it.

Because the depth of field is so narrow, most item(s) need to be cut into thin slices or focus stacked to get an adequate depth of field. Once you have found the item you want to photograph, it is then a case of putting it under the microscope on a glass slide, setting the light to evenly illuminate the item and setting your camera to take the image.

One point to note is that many entry level DSLR’s (including the Nikon D5300) do not meter with microscope adapters. As such, to capture an image you will need to have the camera in Manual mode and use trial and error to adjust your shutter speed to expose the image properly.

photomicroscopy photomicrograph micrograph - chili

Dried chili flake by transmitted light microscopy.

What items look great under the microscope?

A significant number of everyday objects look incredible under the microscope, some of these can be found in the kitchen, while others are more likely to be found outside. Here are a few ideas:

  • Insect wings
  • Pine needle cross-section
  • Lake water creatures (e.g. water fleas)
  • Granules of sand
  • Onion skin
photomicroscopy photomicrograph micrograph - sand grains

Sand grains by transmitted light microscopy (and focus stacked).

photomicroscopy photomicrograph micrograph - onion skin

Onion skin by transmitted light microscopy (and focus stacked).

When you start to add polarization to the mix, a number of chemicals take on a new life, some of these are every day, while others are more unique:

  • Caffeine
  • Menthol
  • Nicotinic Acid
  • Benzoic Acid
  • Stearic Acid
photomicroscopy photomicrograph micrograph - benzoic acid

Benzoic acid by polarized light microscopy.

photomicroscopy photomicrograph micrograph - caffeine

Caffeine by polarized light microscopy.

Tips and tricks for photomicroscopy

As with photography, lighting is essential for photomicroscopy. Microscopes essentially have two types of lighting. One is transmitted lighting which is where the light is shone up through the item. The second type of lighting is where light is shone on the item which is known as reflected lighting. Transmitted lighting is best for transparent samples, while reflected lighting is best for opaque samples.

Using a polarizing filter retrofit will make many chemicals under the microscope come to life due to a property called birefringence. This property is where the refractive index of a material changes based on the degree of polarization and light, leading to many different colors within chemical crystals.

The depth of field in photomicroscopy is VERY shallow, as such you may need to either use thin slices of a material or do focus stacking to achieve a suitable depth of field. There is a range of software packages which can help with focus stacking, these include; Helicon Focus, Zerene Stacker and Photoshop.

photomicroscopy photomicrograph micrograph Peppercorn by reflected light microscopy.

Peppercorn by reflected light microscopy.

A few more images

Here are a couple more example images.

photomicroscopy photomicrograph micrograph

Absorbent Wipe by reflected light microscopy.

photomicroscopy photomicrograph micrograph

Butterfly wing by dark field microscopy.

photomicroscopy photomicrograph micrograph

Glutamaic Acid

photomicroscopy photomicrograph micrograph

Sponge

Have any idea(s) on what might look great under the microscope? Let us know in the comments below, please.

googletag.cmd.push(function() {
tablet_slots.push( googletag.defineSlot( “/1005424/_dPSv4_tab-all-article-bottom_(300×250)”, [300, 250], “pb-ad-78623” ).addService( googletag.pubads() ) ); } );

googletag.cmd.push(function() {
mobile_slots.push( googletag.defineSlot( “/1005424/_dPSv4_mob-all-article-bottom_(300×250)”, [300, 250], “pb-ad-78158” ).addService( googletag.pubads() ) ); } );

The post How to Photograph the Magical Microscopic World – Photomicroscopy by Travis Hale appeared first on Digital Photography School.


Digital Photography School

 
Comments Off on How to Photograph the Magical Microscopic World – Photomicroscopy

Posted in Photography


Step by Step Plan for Backing Up Your Images While Traveling

11 Nov

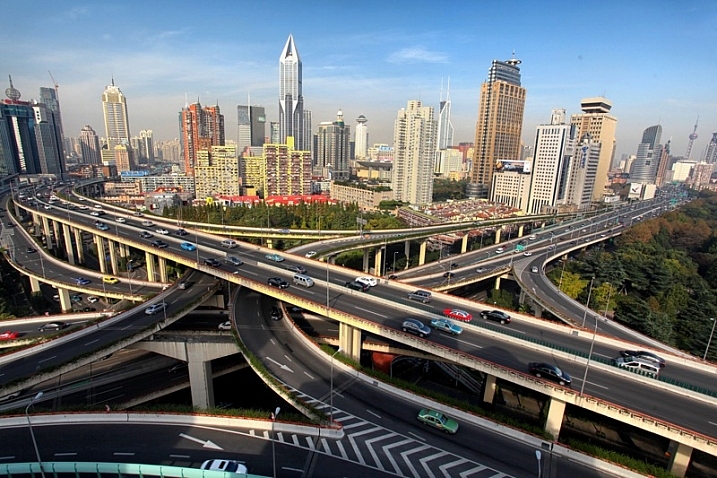
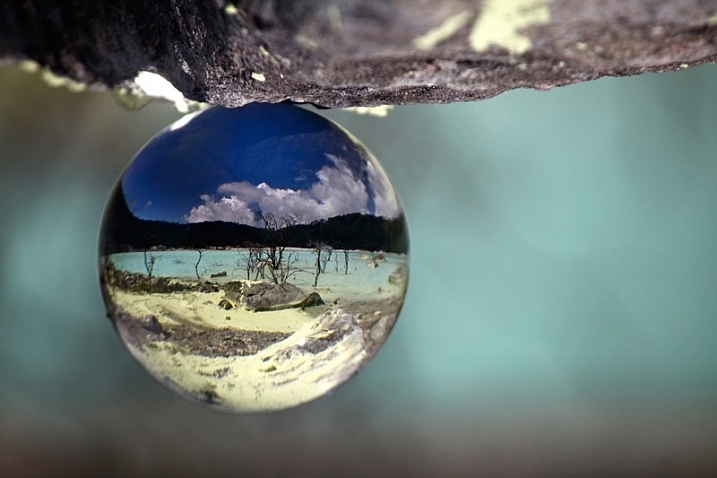
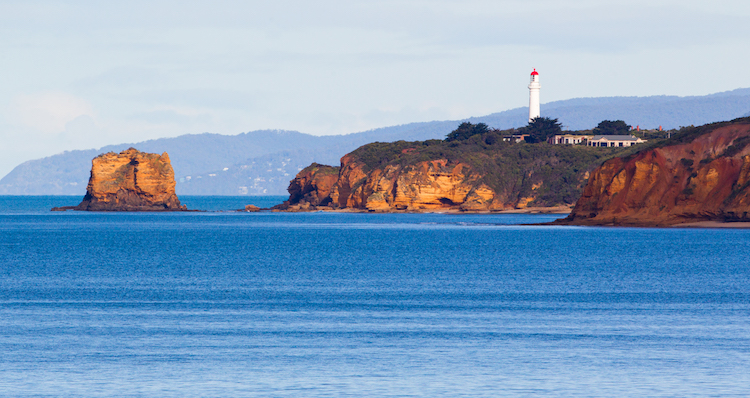
Planning how to back up your images while you travel isn’t nearly as exciting as planning your itinerary or buying gear for your upcoming trip. But it’s an important step in the travel planning process. Especially if you’re going someplace rugged and amazing like Iceland in the dead of winter, having a plan for uploading and backing up your images while you travel will help you ensure that all of your images are securely stored in multiple locations. After all, if you finally get a chance to photograph ice caves and the aurora borealis, you don’t want to worry about getting those hard-won images safely home with you.

Backing up images traveling 01

Following is a step-by-step plan for backing up your images starting with preparing to travel, guidelines for backing up during your trip, and how to complete the process once you return home.

Part I. Before you leave on your trip

Step #1 – Examine, reformat and test all of your memory cards

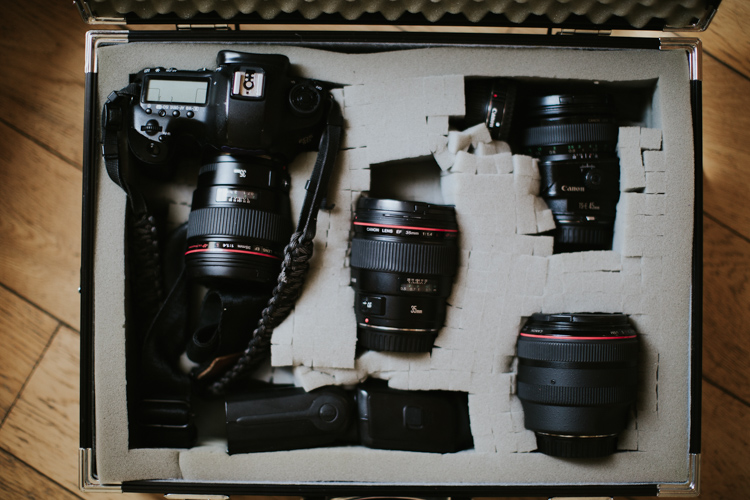
Before you leave on your trip, make sure that you have plenty of memory cards. I budget approximately two 32gb cards per day. You may need more or fewer, depending on your style of shooting.

First, examine all of your memory cards for damage. If any are visibly bent, warped or deeply scratched, it might be time to retire them.

Next, reformat all your memory cards in your camera. Take and save several images on each memory card and then upload the images, one card at a time. This test verifies that each memory card is still in good working order. If a memory card does not pass the upload test, retire it.

Backing up images traveling 02

Step #2 – Buy smaller memory cards to reduce risk

If you need to buy additional memory cards, evaluate using smaller cards like 32gb and 64gb. You have to change memory cards more often while you’re shooting but if one memory card goes bad, you’ll have endangered far fewer images than if a huge 256gb or 512gb memory card corrupts.

Use stickers to indicate if memory cards are full or empty.

Create a system to keep full memory cards separate from empty memory cards. An easy method is to buy a memory card case or folder with clear pockets. Put blue sticker dots on one side of your memory cards. Put red sticker dots on the other side of your memory cards.

Blue sticker dots mean used or full cards. You can remember this mnemonically since blue, used and full all contain the letter U in them. Red sticker dots mean empty cards. You can this remember this mnemonically since red and empty all contain the letter E in them.

Memory cards case stickers Image C

Step #3 – Number your memory cards sequentially

Before placing the stickers on the cards, I also like to number the sticker dots one through however many cards I have. I file the memory cards numerically in the case. On day number one of my trip, I’m using cards numbered one and two. On day number two of my trip, I’m using cards three and four. By numbering the cards, I ensure I rotate them which further reduces the chance of corruption since no one card is used excessively. Then if I do lose a card, it’s also easier to keep track of which card from which day has gone missing if the memory cards are numbered sequentially.

Lastly, if a card does corrupt, it’s easy to keep track of which one because it’s numbered. I usually pull it out of my case and stow it separately in a secure pocket elsewhere in my bag. If memory card number four goes bad on a trip, I want to ensure I don’t accidentally reformat it or save more images to it before I’ve tried to recover the images.

After you test, number, and sticker all of your memory cards, place them in the case with the red sticker dot facing up. While you’re traveling, place full (used) memory cards back into the case sequentially with the blue dots facing up. If you’ve budgeted the amount of cards you need for your trip correctly, on the last day of your trip, all of the memory cards in your case should have blue dots facing up.

SD or CF cards or both?

If your camera has two memory card slots, evaluate carefully whether or not you want your main memory card to back up to the second card while you’re shooting. My Canon 5D Mark III has two memory card slots. One is a CF card slot and the other is for an SD card. I typically only use the CF card slot because they write faster than SD cards. Since I photograph horses and wildlife and set my camera to high-speed burst mode, I want my images to write to my memory card as fast as possible. Since my camera defaults to the write speed of the slowest card, I leave the SD card slot empty.

While this method works for me, your camera might function differently than mine. You may also have different priorities than I do when you shoot. Landscape photographers, for example, don’t use high-speed burst mode very often. Neither do macro photographers. If you specialize in landscape or macro photography, automatically creating a backup in camera by writing your RAW images to two memory cards simultaneously might be a good failsafe for you.

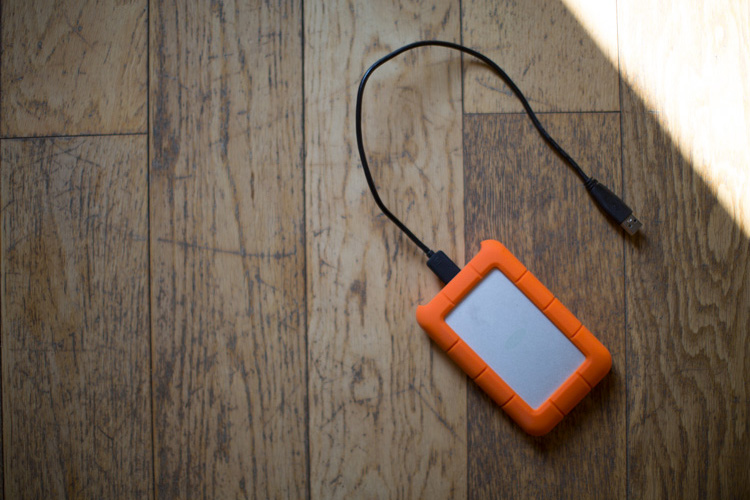
Step #4 – Buy two identical portable hard drives for travel

Travel Hard Drives Image D

I recommend uploading your travel images to two identical, high-quality, portable hard drives. I use 1TB drives. One terabyte is typically enough for my style of shooting since I rarely travel for more than 10 days at a time. Digital storage is inexpensive these days. So evaluate the best size portable hard drive for you by reviewing your image files from past trips. Buying more storage than you think you need is more effective in the long run. So if you think you need 500gb drives, buy 1TB. If you think you need 1TB, buy 2TB.

Step #5 – Protect your new hard drives

Now that you have two new hard drives to keep your images safe, you need to physically protect them. Use rubber bumpers or cases to protect the drives in case they fall out of your bag or are dropped. If you’re shopping online, you can usually find the correct size bumper or case listed on the same web page as your hard drive.

Step #6 – Label your portable hard drives

When you are setting up your new portable hard drives, label each one clearly. I literally use a thick permanent marker to do this. Keep the names consistent since you’ll be referencing these drives frequently. Mine are simply called Travel #1 and Travel #2.

Step #7 – Format and set up your portable hard drives

Format your new portable storage drives according to your operating system – usually OSX or Windows. When you’re formatting the hard drives, you’ll probably also be prompted to register them with the manufacturer. Registering your new drives might seem like a silly step but it often activates your warranty or image rescue software so don’t skip it.

Step #8 – Create a backup recipe

Once my new portable hard drives are set up and working, I create a folder on each drive called Travel Photos #1 (on drive Travel #1) and Travel Photos #2 (on drive #2). I use a software program called Chronosync (for Mac) to create a recipe that when it is run, backs up drive Travel #1 to drive Travel #2. There are many options for backup software and I would encourage you to do a little research to find the software that’s best for you.

Backing up images traveling 05

Step #9 – Back up and update your laptop

Right before you go, back up the entire contents of your laptop. I use a MacBook Pro so I run Time Machine. After the backup finishes, I have an up-to-date copy of everything on my laptop on a small hard drive that I leave at home. That copy will come in handy if my laptop is stolen or damaged while I’m traveling. Also, I also check for software updates – especially any related to security – and install those as well.

I skip beta versions or major operating system upgrades since sometimes those are glitchy. I want my laptop software as safe and secure as possible while I travel but I don’t want to have to deal with any new OSX headaches.

Now that you’ve done all that prep work, it’s time to pack, hit the road and make some memorable images.

Part II. While you’re traveling

I know that after a long day of travel, the last thing you want to do is unpack your laptop, upload, and duplicate your image files. But get in the habit of doing it anyway. After a while, it will become routine, like brushing your teeth or washing your face, and you won’t dream of skipping it.

When your friends tell you their horror stories about losing images while they travel, you’ll have to work hard to wipe the smug look off your face because you’ll know you’ve minimized your chances of that happening to you.

Step #1 – Upload images with Lightroom

My first step when I upload images is to plug in my hard drive called Travel #1, then I plug in my CF card reader, insert the memory card and open up Lightroom CC. I always use Lightroom to catalog all of my images. When uploading, I tell Lightroom to import the day’s images to the folder called Travel Photos #1 on the portable hard drive called Travel #1.

Backing up images traveling 06

Step #2 Option A – Duplicate images on import

In the Import Dialog, you can check a box to tell LR to “Make a 2nd copy to” and duplicate your images by importing them to two locations at once. If you check that box, you also want to click the tiny arrow to the right, click Choose Folder and select the location you want the duplicate images to be stored.

In my case, I would choose the folder called Travel #2 on the portable hard drive called Travel #2. I normally do not duplicate on import because I only have two USB ports on my MacBook Pro. During the import process, both are in use: one for the hard drive Travel #1 and one for my CF card reader. If you have space in your camera bag, you can carry a USB port hub that enables you to attach more drives to your laptop at the same time.

Backing up images traveling 07

Backing up images traveling 08

Step #2 Option B – Use software to create a backup

Since I don’t carry a USB port hub, instead of checking the “Make a 2nd copy to” box in the LR import dialog, I use Chronosync to sync one drive to another. This is the backup recipe we set up above. After the images are loaded to my first drive, I run my Chronosync recipe to duplicate them to the second drive. Once I’m done, I have three copies of each image; one on the original memory card and one on each portable of my portable hard drives, Travel #1, and Travel #2.

Don’t erase your memory cards

If possible, don’t erase the images on your memory cards while you’re on the trip. Instead, save them in the memory card holder you prepared in Part I.

Step #3 – Upload after every shoot

When you travel, I encourage you to upload and back up images after every shoot. If you have one shoot per day at sunset, upload and back up before you head out to dinner.

Tip: This is a good time to plug in and charge your batteries too.

Before you head to bed, verify that the image files are mirrored on each drive. Swap the batteries in your charger before bed too to make sure you’ll be all set to shoot again in the morning.

If you have two photo shoots per day, follow these same steps, except do them twice a day. In addition to uploading before dinner, I upload before lunchtime. I usually sneak in a quick nap then too.

Aurora borealis Image A

Step #4 – Sync images to the cloud

If you have an excellent Wi-Fi connection you might also consider syncing to your cloud service. I normally don’t have very strong Wi-Fi service when I travel so I don’t waste time with this step.

Step #5 – Store your hard drives in different locations

Now that you’ve done all this work setting up this system to back up your travel images, you have one more step to ensure their safety while you travel. You want to keep each of your two drives in different locations. For example, keep one drive in your camera bag and keep one in your luggage.

Always make sure to keep one drive in the bag on (or very near) your person. Keep your luggage with your second drive in your hotel room (or locked in the trunk of the car if you are traveling between locations). In the case of theft, accident, or fire, one copy of your images will be safely stored on the drive in the alternate location.

Part III. When you return home

Once you return home, you need to move your images from Travel Drive #1 to your main photography hard drive. The easiest way to do this is to do it inside Lightroom.

Step by step

Here’s a step-by-step guide for moving your images from your travel drive to your main photography storage drive:

  1. Attach Travel Drive #1 to your laptop.
  2. Attach your main photography hard drive to your laptop. In this example, my main drive is called PHOTOS 9/2016 TO NOW.
  3. Open Lightroom CC in the Library module.
  4. One by one, drag and drop each folder of your images from Travel Drive #1 to your main storage drive.

Backing up images traveling 09

  1. Note that at this stage, since I keep all my images organized chronologically I drop my travel images into the folder on the drive labeled 2016 SEPT to DEC. Next year I’ll drop images into the folder labeled 2017.
  2. Be patient while your computer works. It takes a few minutes for Lightroom to show you that this task is complete and your images have been successfully moved to your main storage drive. Tip: This is a good time to clean your gear.
  3. Now that your images are on your main drive, run another backup.

Backing up images traveling 10

  1. I use a Chronosync recipe to back up my drive called PHOTOS 9/2016 TO NOW to my drive called PHOTOS BACK UP.
  2. After completing this step, verify that the images have been moved. I do this by opening a Finder window on my MacBook Pro and checking that the image file names match on both my main storage drive and my backup drive.
  3. After you verify that you have two copies again, you can wipe your travel hard drives and memory cards to prepare them for your next trip.
  4. At this point, it’s good idea to back up to your cloud service so that you once again have three copies of your images.

Final notes

Since I travel often, I find it easiest to keep my entire Lightroom catalog on my MacBook Pro. If I need to work on a bigger screen, I connect to an external display.

If you keep your main Lightroom catalog on a different computer than the one you travel with, rather than dragging and dropping as I’ve instructed above, attach your travel hard drive and your main photography storage drive to your home computer, open Lightroom and go through the complete import process to your main storage drive. After you’ve imported your travel images to your main Lightroom catalog on your home computer, in addition to formatting your memory cards and wiping your travel hard drive, I’d recommend completely removing the images from the Lightroom catalog on your laptop.

Now you can go unpack and do laundry. Or, if you’re like me, you can start to cull, edit, and create collections with your travel images.

Backing up images traveling 12

googletag.cmd.push(function() {
tablet_slots.push( googletag.defineSlot( “/1005424/_dPSv4_tab-all-article-bottom_(300×250)”, [300, 250], “pb-ad-78623” ).addService( googletag.pubads() ) ); } );

googletag.cmd.push(function() {
mobile_slots.push( googletag.defineSlot( “/1005424/_dPSv4_mob-all-article-bottom_(300×250)”, [300, 250], “pb-ad-78158” ).addService( googletag.pubads() ) ); } );

The post Step by Step Plan for Backing Up Your Images While Traveling by Lara Joy Brynildssen appeared first on Digital Photography School.


Digital Photography School

 
Comments Off on Step by Step Plan for Backing Up Your Images While Traveling

Posted in Photography


5 Steps to Achieve the Look of Black and White Film Using Lightroom

10 Nov

As a hobbyist, amateur, or professional photographer, you may be interested in achieving the look and feel of black and white film without the hassle and investment in equipment and gear. You can edit a digital image using Lightroom with this goal without having your hands smell like rotten eggs (developing chemicals). If you shoot black and white film often, as I do, then you might actually love that smell. If not, then you might want to read on.

Look feel black white film Lightroom01

The feel of black and white film – research first

The objective here is to provide you with a few basic steps to get you started on the path to edit your digital images to look like they were shot on black and white film, without the mess. If you are not familiar with the qualities of film images or have not examined them closely, it would be a good idea to do so. Try to pick up and look closely at some actual prints on photographic paper. You might find these in your grandmother’s attic or your local museum. Photography books or online searches will yield many reprinted or scanned examples as well.

First, consider the subject of style as it relates to film photography. Film photographs generally have a certain nostalgic or vintage look and quality to them that distinguish them from the clarity and realistic look of a well-composed digital image. Film tends to render subjects and scenes in a more abstract manner. Although you can make tack sharp and very realistic looking images using today’s film and gear, that’s not really the role of film photography.

Look feel black white film Lightroom02

If you want clean, shoot digital. Film should look old, slightly out of focus, and definitely grainy. All film has some or a lot of grain and it is basically the equivalent of digital noise. While you may prefer some of your images to look super sharp and smooth, you may also find it pleasing to add a little (or a lot) of grain from time to time.

Film adds an air of mystery

You might want to experiment with this more abstract style or look of film that comes with a distinctive aesthetic. One advantage of presenting this style of image is that the viewer is given the task of filling in the blanks, so to speak. Subjects in your image that are not entirely in focus or even blurry can be representative of anything or anyone. Your image can be more open to interpretation by the viewer as compared to an image that was sharply composed with a subject that is obvious. In other words, you might want to leave some room for mystery in your images. Film photography, or working towards the look and feel of film, can do that for your images.

Look feel black white film Lightroom03

Like digital, film is really just another medium in which we can express ourselves as artists and photographers. I love many things about both film and digital and each has a place in my professional and personal photography life.

5 steps to getting the look and feel of film using Lightroom

If you shoot digital and are looking to achieve the look and feel of film, below are five easy steps using Lightroom.

1. Set your ISO high

ISO should be set to somewhere between 1600 and 6400. Digital noise is the modern day equivalent of the grain in film. The grain or digital noise creates atmosphere and the look or aesthetic that you are trying to emulate.

2. Make an image of something interesting

Look feel black white film Lightroom04

Choose a subject. Framing and composition should be pleasing, and be careful to avoid too many distractions. Emotion is usually a good idea to include if there are people or animals in your photo. Any additional compositional techniques can be applied to the image. The subject could be in focus or blurry. This is completely up to you and your vision.

3. Convert the image to black and white

To convert your image to black and white, press V or use another method for black and white conversion in Lightroom. You can stay in color, but the look and feel of color film is more difficult to achieve and will require some additional steps.

4. Open the Develop module in Lightroom

Look feel black white film Lightroom11In the bottom panel of the Develop module called Effects, make the following adjustments:

  • Using the sliders, set the Post-Crop Vignetting to -10. Older camera lenses tended to impart some vignetting onto the image. This will give the image an authentic older film quality to it. Ansel Adams famously burned (darkened) the edges to all of his prints.
  • Set the Grain Amount slider to 50.
  • Adjust the Grain Size to 50.
  • Set the Grain Roughness to 25.

5. Review your image and make the finishing touches

Adjust the sliders to increase or decrease the three Grain options to achieve your vision for the given image. You can also dial in or out the vignette as well. All images are different and all digital image files will respond differently to these adjustments based on the sharpness and ISO settings.

Look feel black white film Lightroom05

You may want to consider the following questions to evaluate your adjustments at this point. Do these edits help the image? Does it assist in the presentation of the image as more abstract so that it might connect better with the viewer? Did the adjustments achieve the look at feel of film that you were gong for? You can decide on the answers to these questions and make editing decisions as you see fit or recruit a friend to provide a critique.

If you like your results and would like to explore this topic further, there are free online software programs such as Analog Efex Pro that are part of Google’s Nik Collection. Presets are also available that will aid you in this process and even help you to achieve the look and feel of color film. You might want to consider making your own presets and applying them en masse to a given photo shoot or batch of images as well.

Look feel black white film Lightroom06

Below are a few images representing multiple genres that I made with a digital camera then edited to achieve the look I was going for using the settings in the Effects panel above.

Look feel black white film Lightroom07

Look feel black white film Lightroom08

Look feel black white film Lightroom09

Look feel black white film Lightroom10

Do you enjoy shooting film or reproducing the look of it using digital methods? Do you have a favorite way to achieve it? Please share in the comments below.

googletag.cmd.push(function() {
tablet_slots.push( googletag.defineSlot( “/1005424/_dPSv4_tab-all-article-bottom_(300×250)”, [300, 250], “pb-ad-78623” ).addService( googletag.pubads() ) ); } );

googletag.cmd.push(function() {
mobile_slots.push( googletag.defineSlot( “/1005424/_dPSv4_mob-all-article-bottom_(300×250)”, [300, 250], “pb-ad-78158” ).addService( googletag.pubads() ) ); } );

The post 5 Steps to Achieve the Look of Black and White Film Using Lightroom by Jeremy H. Greenberg appeared first on Digital Photography School.


Digital Photography School

 
Comments Off on 5 Steps to Achieve the Look of Black and White Film Using Lightroom

Posted in Photography


Photographer’s Dress Code – What to Wear to a Photo Shoot

10 Nov

As a budding photographer, one of the biggest questions that will eventually come to mind is, “What should I wear to a photo shoot? Is there a photographer’s dress code?” The answer varies widely depending on the type of photo shoot you’re conducting, the specific client you’re working with, your overall style and brand as a photographer, and the culture of the region where you’re shooting.

A portrait photographer, for example, may have more flexibility in how he or she dresses compared to a corporate event photographer. Similarly, a photographer shooting in the West Coast of America will likely be able to dress more casually than an East Coast photographer. All variations aside, here are some general photographer dress code guidelines to start off with.

Michael Broad

By Michael Broad

1. Invest in a solid, comfortable pair of shoes

Regardless of what kind of photo shoot you’ll be conducting, start with shoes. Consider that you’ll likely be standing for hours on end, so comfort and ergonomics are key. Also, think about the terrain you might encounter during your shoot, and the seasonal weather. Will there be grassy fields, sandy shores, or other outdoor elements you might be venturing into to get unique angles? If so, shoes that can take a light beating and still look good will be of utmost importance.

As a female photographer who shoots mainly for corporate clients, I generally opt for black leather flats during the warm season, black leather boots for colder weather, or dressy black leather sneakers for extra long shoots with outdoor elements. In any case, it’s generally a good idea to stay away from sandals, high heels, and flip flops.

Laura Thorne

By Laura Thorne

2. Cover up

As a creative photographer in constant search of creative angles, consider the possible physical maneuvers such as bending, stooping, and squatting that you might be pulling off during a shoot. Dress accordingly, making sure to wear an outfit that will allow you to be physically flexible without giving your clients an eyeful, or worse yet, causing a wardrobe malfunction. Ladies, this means avoiding low-cut tops, ultra short skirts and dresses, and skimpy outfits. At the very least, bring a blazer or sweater to cover up. Gentlemen, don’t forget a belt and a longer shirt that can be tucked in.

3. Dress in all black

This is a contestable point, as it can also be argued that dressing according to your brand is a better strategy. However, it’s a general rule of thumb that wearing all black is best for being as invisible as possible at a photo shoot. That way you won’t stand out and take attention away from the main photo subject. Not to mention, dressing in all black makes you look more official, like a staff member which can potentially be helpful in navigating around a venue.

Personally, I opt for the all-black rule for all of my photo shoots, simply because it’s one less thing to worry about when I have a pre-assembled uniform to fall back on. For me, this uniform consists of mixing and matching from the following selection; one pair of black skinny jeans, one pair of black slacks, a black leather belt, several button-down black blouses, several black polo shirts, and a black blazer. Whenever possible, I also try to buy my black clothing in lightweight, moisture resistant fabrics rather than cotton, to avoid sweat absorption.

what-to-wear-as-a-photographer-01

4. Add a personal touch

Some photographers might contest the above point of dressing in all black with the argument that it’s important to dress according to your brand. This is something I definitely believe in as well, but having brand elements infused in your style of dress can also be done while still wearing all black. As an example, I always make sure to wear a few pieces of statement jewelry to accent my outfit and also serve as a conversation starter. I have a couple pairs of unique earrings, necklaces, and watches that almost always attract comments or questions, but they are also subtle in size so they don’t stand out too much.

Another idea is to custom order black clothing that has your logo on it, such as a polo shirt with a subtle branding element. A photography colleague of mine has done this with huge success as it further reinforces his brand, while also making him look and appear more official at photo shoots.

what-to-wear-as-a-photographer-01

5. When in doubt, ask

If you’re truly stumped on what to wear to a photo shoot, ask your client if they have any preferences. This is likely less important if you’re doing an intimate portrait session, but for event photographers, in particular, it never hurts to ask the client. I once had a corporate photography client who forgot to send over their two-page document detailing their dress code for photographers, which I would never have received had I not asked. At the very least, it’s important to find out if the dress code for your shoot is formal, semi-formal, or casual, and what exactly those terms mean to the client.

Jpellgen

By jpellgen

Over to you

To some photographers, what you wear to a photo shoot may not seem like a big deal. But I firmly believe how you dress is a reflection of your brand, so considering every element of your outfit is crucial.

What do you wear when you’re conducting photo shoots? Let me know in the comments below!

googletag.cmd.push(function() {
tablet_slots.push( googletag.defineSlot( “/1005424/_dPSv4_tab-all-article-bottom_(300×250)”, [300, 250], “pb-ad-78623” ).addService( googletag.pubads() ) ); } );

googletag.cmd.push(function() {
mobile_slots.push( googletag.defineSlot( “/1005424/_dPSv4_mob-all-article-bottom_(300×250)”, [300, 250], “pb-ad-78158” ).addService( googletag.pubads() ) ); } );

The post Photographer’s Dress Code – What to Wear to a Photo Shoot by Suzi Pratt appeared first on Digital Photography School.


Digital Photography School

 
Comments Off on Photographer’s Dress Code – What to Wear to a Photo Shoot

Posted in Photography


How to Give Your Landscape Photos Extra Punch in One Easy Step

09 Nov

Have you ever felt that your landscape photography is missing a little punch? You look at other photographers’ images and their colours have a very appealing amount of contrast. But no matter how much you play around with HSL (Hue, Saturation, Luminance), Contrast, Vibrance or Saturation, your colours just don’t get the same depth and contrast and end up looking fake and oversaturated.

The quality of the lens being used affects color greatly (more expensive lenses generally give a much better colour contrast than entry-level lenses). But there is a step that you can do when post-processing your recent landscape photos to give the colours an extra little bit of punch and contrast and more importantly, keep them from looking overcooked.

before-after

Color space

You may be aware of a term Colour space which essentially determines how devices represent colour. The two most common colour spaces are Adobe RGB and sRGB. Adobe sRGB is used on the web and for many smart devices. Adobe RGB is a little bigger than sRGB and can show more colors. However, these are not the only colour spaces around. Lightroom, for example, uses one of the largest (able to produce a larger amount of colours) called ProPhoto RGB.

But enough about colour spaces! I can already see your eyes glazing over, mine are already as I type this. But knowing that there are different colour spaces can be helpful. Knowing exactly how they work isn’t necessarily all that important.

Convert to Lab Color

The colour space that you’ll want to recognize is LAB Color. How does it work? Doesn’t really matter. But how can you use it give your images that extra punch? In this article, I’ll explain how a very simple step (and I mean simple!) that will help give your images that extra punch using the LAB colour space in Photoshop.

Okay, so first up you’re going to want to bring your image into Photoshop. Before you do this, you may need to develop the image a little in Adobe Camera Raw or Lightroom. Fix up any exposure issues, correct the white balance, etc.

This is the image that I’ll use as an example.

before

This image has had very little done to it prior to Photoshop. A simple crop, general contrast and exposure correction were all that was applied.

Now that your images is open in Photoshop, the very first thing you need to do is convert it from Adobe RGB or sRGB (depending on what you have set as the working colour space in Photoshop) to LAB Color.

To do this, go to: Image > Mode > Lab Color.

The tick next to RGB Color means that Adobe RGB is currently being used.

The tick next to RGB Color means that Adobe RGB is currently being used.

Now Photoshop is using LAB instead. You won’t notice a change at all at this step because nothing has changed on your end. All you have simply done is tell Photoshop which method to use to display colours.

Add a Curves Adjustment Layer

With your image in LAB Color, the next step is to create a Curves Adjustment Layer. Once this layer has been created, you should see something like this:

lab-curves1

Generally, this doesn’t look any different to any other Curves Adjustment Layer except for one thing. Instead of having RGB in the drop down menu, you will see Lightness.

With this adjustment layer created, the next step is to click on the Lightness drop down menu. This brings up Lightness, A, B; which is what LAB is short for!

lab-curves

Adjust Channel A

Now, you need to select the A-channel. With the A-channel selected, bring in the shadows anchor point at the bottom-left corner toward the bottom-centre. You will notice the Input numbers increasing from -128. As a starting point, I like to bring this value to -100. Now, find the highlight anchor point (top-right) and bring that toward the top-centre by the same value; for -100 set it to 100.

Notice the anchor points have moved toward the centre equally?

Notice the anchor points have moved toward the centre equally?

You’ll notice strange things happening to your colours as you slide the anchor points along. Don’t panic – this is supposed to happen.

Adjust Channel B

Now do the same steps by the same values for both shadows and highlights for the B-channel.

Same steps have been done for Channel B

Same steps have been done for Channel B

NOTE: make sure your Output value remains at -128 for the shadows and 127 for the highlights. If these numbers are altered it means that the anchor point is being lifted from the bottom for shadows and dropped from the top for highlights. You just want to drag the sliders along horizontally (not move them up or down).

With both A and B channels having been done now, the colour and colour contrast of your image should look different from the original. This is how my original image looks after these steps.

This is after setting A/B shadows to -100 and highlights to 100.

This is after setting A/B shadows to -100 and highlights to 100.

Fine tuning

For me, that is looking a little overdone. But no problem! To change this, all you have to do is reduce the amount you moved the anchor points in both A and B channels. I generally find going by increments of 10 is most helpful.
If you feel your image needs more punch, then you will want to bring the anchor points closer to the centre. Just remember to keep each value across the shadow/highlight, A/B channels the same.

After increasing the numbers in my images, I felt that -110/110 in A/B worked the best (see below).

after-110

Convert back to RBG

Once you are happy with how your image looks, it’s time to change it back to RGB. To change your image from LAB to RGB, go to: Image > Mode > RGB color.

change-to-rgb

You’ll be alerted that changing modes will discard adjustment layers, but that is fine. Select OK and you’ll be brought back into RGB. You’ll notice that the Curves Adjustment layer is now gone and that your image is now the background layer. However, the effect on the colours should remain. Now you’re free to go about editing the photo as much as you like.

So that’s a very simple technique to add more colour punch in your images. Just remember these two points:

  • This is something that you should do at the beginning of editing your image in Photoshop and not the end as you will lose all your adjustment layers when changing modes.
  • Remember to alter the anchors points from A/B b by the same value to eliminate strange things happening to your colours.

googletag.cmd.push(function() {
tablet_slots.push( googletag.defineSlot( “/1005424/_dPSv4_tab-all-article-bottom_(300×250)”, [300, 250], “pb-ad-78623” ).addService( googletag.pubads() ) ); } );

googletag.cmd.push(function() {
mobile_slots.push( googletag.defineSlot( “/1005424/_dPSv4_mob-all-article-bottom_(300×250)”, [300, 250], “pb-ad-78158” ).addService( googletag.pubads() ) ); } );

The post How to Give Your Landscape Photos Extra Punch in One Easy Step by Daniel Smith appeared first on Digital Photography School.


Digital Photography School

 
Comments Off on How to Give Your Landscape Photos Extra Punch in One Easy Step

Posted in Photography


Overview of the Samyang 12mm F2.8 ED AS NCS Fisheye Lens

09 Nov

There is nothing quite like seeing the world through a fisheye lens. The way it bends straight lines and creates curves where there were none. You get to see more of the world through it than you can with your own eyes, well that is unless you turn your head. Recently I was loaned the Samyang 12mm F2.8 ED AS NCS Fisheye lens to play with and I have been having a lot of fun seeing what it can do.

leannecole-samyang-12mm-fisheye-30

Samyang 12mm F2.8 ED AS NCS Fisheye lens

Price out this lens on Amazon and B&H Photo.

Fisheye lenses have been around for a long time. But for most of us, they have not been something that we thought would be worth spending all that money on. However, the 12mm fisheye from Samyang is affordable and can give your photography a new look.

How wide is it?

There is nothing like using a wide angle for the first time and having objects fit into your frame like never before. This lens is very much like that. The first reaction most people have when they look through the viewfinder for the first time is “wow”. It is incredible what you can fit into it.

You get an 180-degree view with it. It really does fill the frame with all that you can see, including your periphery vision. While this is a good thing, there is also a downside. You can end up with unwanted distractions in the image. If you point the lens down too far you may end up with your feet in the image. Or if your camera bag on the ground is not behind you, it too will be included. Going out with friends to take photos means constantly asking them to step back behind you. If they are good friends, they won’t mind.

leannecole-samyang-12mm-fisheye-38

Melbourne from across the river.

This lens won’t break the bank

When you consider how much other lenses with an f/2.8 aperture cost, you would think this one would also be very expensive, a thousand bucks or so. But it retails for around USD$ 500 (less if you have a mirrorless system) so it makes it a lot more affordable than the top brand fisheye lenses. It is a good quality lens and is a great alternative for those that can’t afford the pricier top brand ones.

leannecole-samyang-12mm-fisheye-33

One of the rides at the Royal Melbourne Show

This lens is fun!

Without a doubt, this is a fun lens. It can have real uses, but in the end, I dare anyone to put the lens on their camera and not have a great time seeing what they can get with it. It is amazing to watch how the world is transformed through it.

I was first loaned the lens one day while in the city and I wouldn’t take it off my camera. I really enjoyed seeing what it could do and how much I could see with it. It was a challenge to see how I can make the world make sense with it. In the end you have to let that go and just take photos.

leannecole-samyang-12mm-fisheye-32

One of the rides at the Royal Melbourne Show.

It is small

For a fisheye, it is very small which is great because it means it’s easy to carry around with you. You would expect a fisheye to be a large bulky lens with big bulbous glass on the front. The Samyang fisheye is a lot smaller and not much bigger than a normal 50mm lens. Don’t let the size fool you, as it still takes a great image.

Full frame lens

Surprisingly for the cost, it is a lens for a full frame camera. It seems that many lenses for these are usually a lot more expensive. You are going to get much wider images with the full frame, and if you put the lens on a cropped sensor that aspect will suffer and you won’t get as wide an angle (about like an 18mm), though you should still get the fisheye effect.

First time mounting the lens

When you first put the lens on your camera you can get some strange numbers coming up on your camera display. If that happens you need to change the aperture ring on the lens. Turn it all the way around until you can see the aperture on your camera.

leannecole-samyang-12mm-fisheye-35

Looking at the city through the Seafarers Bridge.

It distorts the world around

For many the distortions may be too much and maybe the lens won’t be for them. The first time I posted a few photos I took with it, some people pointed out that I could get rid of the weird curves. My first thought was why would I, isn’t that the reason for using a fisheye in the first place?

It is a manual focus lens

For many people, the manual focusing for the lens is a negative. We have gotten used to autofocus, and having to go back to do it manually again can seem too hard. However, it is amazing how quickly you can adapt to it. The more you do it the easier it really does get. I seem to be using a lot of lenses lately that are manual focus and I don’t have an issue with it now.

One of the benefits with the Samyang fisheye is that for most subjects they are going to be several feet or meters from you so you can put the focus ring on infinity and just click away. It is rare than anything you shoot will be too close for that. Obviously if something is close you will need to focus the lens, but for the most part you can put it on infinity and just go for it. Just remember that it is on that setting and don’t forget to keep checking that the image is focused (zoom in on the image playback).

leannecole-samyang-12mm-fisheye-31

Fireworks at the Royal Melbourne Show.

Conclusions

Working with the lens

If you have purchased the fisheye then it would seem you are looking for more than just a wide angle lens. The lens is known for its distortions, so work with that. Find subjects that will be enhanced due to the curve of the lens. If you are somewhere like in a city, try different compositions to see which will work the best.

If you want something to appear straight, like the bridge, if you put that more in the centre of the image the distortion is far less. The same is true for the horizon. If you put the horizon line in the center of the frame then it will stay straight, but if you move it up or down it will get a curve to it. That can be really effective as well.

leannecole-samyang-12mm-fisheye-34

Looking down a pier into the night sky at Sorrento. See the horizon is almost straight as it is closer to the middle of the image.

Applications

The lens is perfect for astrophotography and that is mainly where it is used. You can get a lot of sky into a fisheye image and the distortions wouldn’t matter so much. You can get brilliant shots of the Milky Way, or great star trails. Samyang Australia tends to market it to aurora hunters too, but it has other uses as well.

Architecture is a great subject for this lens. It does give many of the lines a curved shape, and in people’s minds they know they are meant to be straight. But you can use those distortions to create unique images.

leannecole-samyang-12mm-fisheye-36

Some of the new architecture down at Docklands.

Many sports photographers could also find it useful. Not for everything, but for some special images. Cycling photographer Graham Watson often uses a fisheye for unique views of races like the Tour de France. With cycling ,you can get very close to the cyclists. So the fisheye would be perfect for some races, especially for a criterium when they are going around corners.

As the lens is so wide, there are many types of photography that it is not well suited for. Landscapes could work, but you need to have something in the foreground, otherwise everything would be too far away. The use of leading lines is important for that type of photography.

leannecole-samyang-12mm-fisheye-37

The full curve of the Webb Bridge in the Docklands.

Who is this lens for?

The most obvious answer to this would be astrophotographers and aurora hunters, but there are others who would also benefit from it as well, like sports and architectural photographers. Perhaps others who want to add something unique or different to their images. For the price and size, it could be a great addition to any photographer’s kit.

If you are looking for a challenge in your photography, or perhaps you want to start looking at the world in a different way, I would highly recommend the Samyang 12mm F2.8 ED AS NCS Fisheye lens. It’s a fun and not too expensive piece of kit. While you may not use it a lot, you will get it out and take photos with it from time to time. We all have lenses that we don’t use a lot, but enjoy using them when we do.

Price out this lens on Amazon and B&H Photo.

googletag.cmd.push(function() {
tablet_slots.push( googletag.defineSlot( “/1005424/_dPSv4_tab-all-article-bottom_(300×250)”, [300, 250], “pb-ad-78623” ).addService( googletag.pubads() ) ); } );

googletag.cmd.push(function() {
mobile_slots.push( googletag.defineSlot( “/1005424/_dPSv4_mob-all-article-bottom_(300×250)”, [300, 250], “pb-ad-78158” ).addService( googletag.pubads() ) ); } );

The post Overview of the Samyang 12mm F2.8 ED AS NCS Fisheye Lens by Leanne Cole appeared first on Digital Photography School.


Digital Photography School

 
Comments Off on Overview of the Samyang 12mm F2.8 ED AS NCS Fisheye Lens

Posted in Photography


5 Non-HDR Things You Can Do With MacPhun’s Aurora HDR 2017

08 Nov

Yes Aurora HDR was developed for creating HDR photographs. But did you ever think of using it for non-HDR tasks?

You’re in luck because in the next few minutes I’m going to open your eyes to some new ideas. Specifically ideas for using Aurora HDR in your photography workflow without using the term HDR.

What is Aurora HDR?

If you haven’t heard of Aurora HDR, it’s MacPhun’s answer to all the other HDR software out there. Developed in partnership with Trey Ratcliff, Aurora HDR has unique tools which rival even non-HDR software. I look at it as a mix between Photoshop and MacPhun’s Intensify.

But this isn’t about HDR. It’s about anything other than HDR. Before we dig in, know that the software can open a single image just like any other app or plugin. Let’s take a look inside:

scott-wyden-kivowitz_dps_1

Air Force Airmen saluting Air Force One as it takes off.

1. Local Adjustments

Aurora HDR 2017 includes some local adjustment features which you are used to seeing in non-HDR software, like Lightroom or ON1. It includes things like gradient filters, radial filters, and the new Zone System Luminosity Masking. These are all powerful tools to make unique changes to specific areas of a photograph. The beauty is that any edits made to those local areas do not impact any other region of the image.

One local adjustment feature often overlooked is the Top & Bottom Adjustment module. It’s like the gradient tool but has a few sliders specific to this module. It includes things like exposure, warmth, vibrancy, and contrast. Each of which appears twice; once for the top of the frame and once for the bottom of the frame.

Before

Before

After the Top and Bottom Adjustment.

After the Top and Bottom Adjustment.

What makes this even cooler is the quick slider method of changing the gradient smoothing (blend), X or Y axis location of the tool (shift), and the rotation which makes it vertical or horizontal.

Because the standard gradient tool in Aurora HDR 2017 requires you to make adjustments to the mask, having this module makes quick adjustments to a larger local area really quick.

Local adjustments in Aurora HDR 2017

Local adjustments in Aurora HDR 2017

2. Luminosity Masking

Aurora HDR Pro (pre-2017 version) had Luminosity Masking, but it has been improved in the new version.

Luminosity Masking is popular in portrait processing, but it’s also useful for other kinds of photography. What MacPhun did in the new version is to take a page out of Ansel Adam‘s book, by adding the Zone System into the Luminosity masking tool. Now you can create a mask based on specific zones of light. And they made it so simple.

Aurora HDR 2017's Zone System Luminosity Masking.

Aurora HDR 2017’s Zone System Luminosity Masking.

luminosity-masking-before

With the Luminosity Mask applied.

With the Luminosity Mask applied (masking the sky).

3. Advanced Masking

The layers and masking tools in the software are advanced. When you add a layer, you can do it from a single bracket, a blank slate, and other choices. The options enable you to load any amount many brackets you want, and not process them as HDR, but instead do regular masking and editing.

Masking can be implemented using a Wacom Tablet and as a radial or gradient brush, or using the new zone system tool.

adv-masking

This shows both color toning being combined with a brush mask.

4. Color Toning

Aurora has heavy duty color toning (split toning) features built into the software. Like Lightroom, users can choose a color to tone the highlights and shadows individually. But Aurora goes beyond that by adding highlight protection of the color. That way you can be more strategic on how much of the highlights are affected by the toning. You also have saturation control of the color for both highlights and shadows.

Like Lightroom, Aurora provides the ability to adjust the balance of the color tone. To add more or less color in either the highlights or shadows. Of course, there is also an amount slider which enables you to reduce the impact of the color on the complete photo.

Color toning applied.

Color toning applied.

Mask applied to keep the color toning off the roof of the barn and other areas.

Mask applied to keep the color toning off the roof of the barn and other areas.

There are also a variety of preset color toning swatches included, or you can make your own by making an Aurora HDR 2017 preset. When combining color toning with the masking tools you have some incredible color options.

5. Batch Processing

Batch Processing might sound silly to some but think about it for a moment. Imagine you like one of the editing tools in the software, like the color grading tool, and you want to add that to a large volume of photos. With the batch processing tool, you can do that. You would launch the Batch Processor and then choose the preset and settings you want to be used. So if you want color grading, make a preset with it. Simple!

The way MacPhun does it is you can drop a folder of images and pick what preset you want to use on the photos. It will then run through it quickly without you having to do anything.

So Much More

Aurora HDR 2017 is made for HDR photography. I think that’s obvious by its name. But I think it’s important for photographers to understand when a tool can be beneficial, even when it is least expected.

This software has made its way into my regular rotation of post-processing tools. The reason is that when using a tool with a different user experience and features my creativity expands. Doors are opened which were once closed, and I walk away with fun edits of photographs I once didn’t know if I would touch.

scott-wyden-kivowitz_dps_3

Not the end!

If you have made it to the end and wanted one more takeaway, here goes.

My last piece of advice for you is this – go for it and try something new. Even if it’s not this software or the next. If you don’t try, you won’t learn and grow. But really, as a wise green man once said, “Do or do not, there is no try.”

googletag.cmd.push(function() {
tablet_slots.push( googletag.defineSlot( “/1005424/_dPSv4_tab-all-article-bottom_(300×250)”, [300, 250], “pb-ad-78623” ).addService( googletag.pubads() ) ); } );

googletag.cmd.push(function() {
mobile_slots.push( googletag.defineSlot( “/1005424/_dPSv4_mob-all-article-bottom_(300×250)”, [300, 250], “pb-ad-78158” ).addService( googletag.pubads() ) ); } );

The post 5 Non-HDR Things You Can Do With MacPhun’s Aurora HDR 2017 by Scott Wyden Kivowitz appeared first on Digital Photography School.


Digital Photography School

 
Comments Off on 5 Non-HDR Things You Can Do With MacPhun’s Aurora HDR 2017

Posted in Photography


How to Travel Safely with Your Camera Gear

08 Nov

One of our favorite things about becoming photographers is the way the entire world seemed to open up once we picked up a camera. We currently live wherever we’re shooting. Over the past year, we’ve visited 10 countries on three continents, and countless cities in between. While we love the freedom of travel, our biggest concern is always how to travel safely with our gear. Whether you’re hopping on flights every other week or want to keep your camera with you to document your kiddos around town, there are some simple hacks to keep your gear in good shape and out of thieving hands.

travel-safely-with-gear-10

Make a list and check it twice

Before you leave the house, make a detailed list of every piece of equipment you’re taking with you, along with all the serial numbers. It’s helpful to be able to tally the list up whenever you’re in transit. There isn’t a worse feeling than hopping on a train and realizing you thought your 50mm lens was in your backpack when it is actually waiting for you on the kitchen table. Make a list, run through it, and save yourself the effort of keeping every piece of gear in your own head. Having the serial numbers recorded will help you report and track them should they ever go missing.

travel-safely-with-gear-1

Our travel gear checklist changes depending on how long and far we’re traveling. When we took a six-month honeymoon in Asia last autumn, our list looked very different from when we fly to say, New York to shoot a wedding. Our two checklists look something like this:

Personal Travel Checklist

  • 2 Canon Mark IIIs – one for each of us, though sometimes we get crazy and only bring one body.
  • 50mm f/1.2 lens – ALWAYS. We never leave home without this lens as it affords us the greatest flexibility to shoot any scene.
  • 45mm f/2.8 tilt-shift lens – When we travel through cities, having a tilt-shift is ideal for us, and since we also love shooting portraits with it, it somehow became one of our most versatile lenses.

Professional Travel Checklist

  • 2 Canon Mark IIIs
  • 50mm f/1.2 – If pressed, we could probably shoot an entire wedding with it!
  • 45mm f/2.8 tilt-shift – Again, awesome for setting scenes and for individual portraits.
  • 35mm f/1.4 – Shooting couple’s portraits with this one sets a slightly more interesting scene than the 50mm and allows you to get better environmental details. It’s also our go-to for dance floor shots.
  • 85mm f/1.2 – Though we wish this one had a faster focus, it is just nuts how gorgeous this lens is. It takes portraits to an entirely new level. But it also weighs roughly one million pounds, so we use it less often than we’d like because it’s just too heavy for casual personal travel.

travel-safely-with-gear-4

Depending on the size and scope of the project, we may also bring:

  • 70-200mm f/2.8 – This is a battle because we definitely prefer to not carry it. But it’s a great catch-all lens for shooting from the very back of large ceremonies or capturing wedding guests from a distance and staying out of a scene.
  • 17-40mm f/4 (we use this wide-angle lens less and less, but occasionally it provides a good way to grab an entire wedding ceremony or a building from closer up. We’re increasingly turning to our 35mm for the work we used to put on the wide angle.)

Our lighting setups are the most difficult part of travel, and inevitably earn us a long date with security. If we’re bringing our bare minimum, it includes the following:

  • Canon Speedlite 600EX-RTs – We have two matching Speedlites and the ST-E3-RT Transmitter. These serve us well for most weddings, but if we have to bring something a little heftier, we’ll also add . . .
  • Profoto B1 setup – This light is amazing. But it adds one more whole bag to carry on with us and we try to leave it for home studio work as much as possible to reduce our carry-ons. with the Profoto 36″ RFI Octa Softbox. The B1 also requires a . . .
  • C-stand –These are heavy as heck and a huge hassle to fly with, so we normally end up leaving it at home and just renting it wherever we land. For some equipment that is just too bulky, heavy, or awkward, consider the relative costs and benefits of renting it at your shoot location. For us, the $ 20 or so to rent a C-stand far outweighs the hassle of traveling with it.

travel-safely-with-gear-9

Before you leave for any trip, whether personal or professional, it’s imperative to know your ideal outcome for photos. We don’t bring a zoom lens or flashes on personal trips because we don’t shoot wildlife or anything that would require long lenses. We use only ambient light whenever possible and prefer our night photography to only incorporate the light that already sets the scene.

Even for professional projects, we pack very carefully and keep our projects in mind as we put our gear together. Some large weddings or events might require a wide angle lens or a longer zoom, but if we can avoid bringing a lens we will. This requires more work on the planning end, working closely with our clients, and knowing our equipment really well. But it’s worth it when we can pack all of our gear into a little bag and be very confident that we can produce great work with it!

Downsize

On that note, pre-travel is a great time to downsize your gear. Take only what is most important to you, and consider the images you’ll be aiming for while you travel. We never leave home without our 50mm f/1.2, but depending on the kind of trip we may also bring along our tilt-shift lens or our 1950s Yashica film camera as well. You want to have options, but bringing along your entire catalog of gear without a specific plan for it will only add stress to your life. Keep it light, and use what you’ve got.

travel-safely-2

We got this case used for $ 20 at a camera shop and it has the best repackable/removeable foam pads in it.

travel-safely-1


If you’re flying, this is especially true. Keep your gear minimal enough to fit in your carry-on luggage. We would rather crawl to a destination than check a bag containing our most precious gear and let it out of our sight. Yes, it’s a super hassle to run your gear through security (they always seem to be blown away by light sets, old film cameras, and unusual lenses), but it also leads to some good conversations, and the extra time is worth the peace of mind.

Going through customs

A thought on customs forms: If you enter a country that may have an iffy relationship with journalists, lay low and don’t mark “photographer” or “journalist” on their customs forms. Drawing attention to your camera gear and your ability to use it will often create more hassle at the airport when you land. While we don’t encourage anyone to lie on their entry forms, the more you can stay under the radar the better.

travel-safely-with-gear-11

Protect your data

We carry LaCie Rugged hard drives with us everywhere and back up whenever we can. We use online storage when we can find fast internet, but good luck finding wifi strong enough to upload a thousand raw files when you’re high up in the Burmese mountains. I keep track of this thing just as closely as I keep track of my passport. Why LaCie Rugged? The last thing we need is a hard drive failing because the dirt road was too bumpy when it was sitting in the back of some mud covered jeep.

Note: Price LaCie Rugged drives on Amazon.com and B&H Photo’s websites. 

lacie-drive-travel-photography

We also use large memory cards that we back up every night. We always have a backup card in our briefcase, but as long as our cameras are with us, the memory card is as well. 

Make your gear look cheap

Avoid fancy, overdone camera cases and accessories. Anything with brand logos or obviously expensive features will draw attention to you. While you move your gear into your new low-key camera bag (there are lots of solid options out there that look like a regular bag, or you can buy protective inserts to slip into the old backpack that’s already sitting in the back of your closet), make a couple of tweaks to your gear that will instantly make it look less conspicuous:

  • Remove your logo-covered camera strap (I mean, unless Canon is paying you to advertise for them, you don’t need their logo on your strap) and replace it with something more personal.Cover up your camera brand on the body with black gaffer’s tape (or even duck tape if you’re super committed). Not having that white print will make your camera look more average and take the attention away from how much you might have paid for it.

travel-safely-with-gear-14

  • Scuff it up, baby! We’ve been shooting on our Canon 5D Mark IIIs for over three years now, and they are certainly showing the wear and tear of being dragged all over the world—and I love it! It’s like that well-worn sweater that everyone else thinks is a bit too beat-up, but you love it more every time you wear it. Those scuffs and marks mean you’re using your gear and that it’s serving you. Don’t rush to polish it up or replace it when it looks old. That charm is hard-earned and will cause anybody eyeing your gear to think it’s worth less than it probably is. Double win.

travel-safely-with-gear-12

Safety at your location

Of course, getting to a place in one piece is only half the battle. Once you’ve landed, you have to keep your wits about you and work wisely. A few brief thoughts on shooting safely once you arrive:

  • Just like at home, don’t display your camera gear in a way that invites attention. Keep it close to your body, on a strap, or zipped into a bag that’s close to you. It’s amazing to me how many people will wander around with their cameras on full display, which doesn’t just make you look like a tourist, it’s inviting thieves to follow you.
  • Don’t talk to strangers about your stuff! We sat next to some drunk and friendly travelers in a bar once who wanted to show us their big zoom lenses they just bought. They made fun of our tiny 50mm, but we couldn’t help but feel like we’d get the last laugh as our camera setup was (though more expensive than theirs) tiny, inconspicuous, and less appealing to thieves who don’t know the difference.travel-safely-with-gear-8
  • A thought on tripods: we never, ever travel with them. They are awkward to set up in public areas, invite unwanted attention, and in 99% of cases aren’t actually necessary. We use makeshift tripods – things like banisters, tables, rocks, bar tops, etc., to get a steady shot when needed. We too often see other photographers making a big deal out of setting up a tripod Hi, thieves! We’re over here!) when they could have gotten just as excellent a shot with a slightly faster shutter speed. Strongly consider whether or not you need a tripod and make the best decision for yourself, and if you do bring one, keep your camera strap around your neck while you shoot
  • While you should always be careful in unsafe neighborhoods, we also recommend that you do not limit yourself to only visiting “safe” areas while you travel. Not only can theft happen anywhere, but you’ll miss some of the best parts of travel if you restrict yourself too much. When shooting in neighborhoods with a higher likelihood of crime, be alert. Walk confidently with your head up and avoid hunching around your gear as if you have something to hide. Keep your bags zipped and always be aware of pick-pockets, no matter where you are. Shoot confidently without inviting too much attention to yourself. 

Conclusion

travel-safely-with-gear-7

Capturing all the beauty and hidden corners of this world is one of the most satisfying things about becoming more proficient with our gear. Though there are risks anytime you leave the house with pricey items strapped to your shoulder, this gear is made to be used, to show some wear and tear, and not to be thought of as so precious that it’s left at home.

How do you protect your gear when you travel? Please share your comments and tips below.

googletag.cmd.push(function() {
tablet_slots.push( googletag.defineSlot( “/1005424/_dPSv4_tab-all-article-bottom_(300×250)”, [300, 250], “pb-ad-78623” ).addService( googletag.pubads() ) ); } );

googletag.cmd.push(function() {
mobile_slots.push( googletag.defineSlot( “/1005424/_dPSv4_mob-all-article-bottom_(300×250)”, [300, 250], “pb-ad-78158” ).addService( googletag.pubads() ) ); } );

The post How to Travel Safely with Your Camera Gear by Tim Sullivan appeared first on Digital Photography School.


Digital Photography School

 
Comments Off on How to Travel Safely with Your Camera Gear

Posted in Photography