RSS
 

Archive for the ‘Photography’ Category

How to Choose the Right Camera Mode to Get the Shot You Want

02 Dec

When starting out in photography, one of the scariest and most confusing things for a beginner is deciding which camera mode to use. While the automatic modes provide a bit of a safety net for those just starting out, there will come a time when you either want to or have to, take greater control of your camera to get the results you desire. But how do you know what camera mode to use?

Aperture Priority Mode

Aperture Priority mode is a perfect choice for a scene like this where you know you’ll want deep depth of field to keep the entire scene in focus.

First off, I won’t discuss any of the automatic modes here. A full discussion of what those do can be found here: Camera Modes Explained for Newbies. What I’d like to do here is discuss specific situations and the appropriate mode for each. Before we dive into that, I’ll explain the basics before we move forward.

Aperture

The aperture is the opening of the lens, which determines exactly how much light enters the camera and strikes the imaging sensor. The aperture also affects the field of focus from foreground to background, otherwise known as depth of field. A shallow depth of field is one that has a sharp focus on the subject, while objects in front of or behind the subject are out of focus. Deep depth of field is when the entire image is in sharp focus from foreground to background. And of course, you can have a depth of field that is somewhere in between those two.

Aperture is shown as a number on your lens, usually as a ratio. For instance, lenses with a maximum (widest) aperture of f/1.8 will have a very shallow depth of field. That same lens set to f/16 will have a deeper depth of field. An easy way to remember this is smaller numbers give you less and higher numbers give you greater depth of field.

Aperture Priority

When you know you want the background blurred, setting a wide aperture to create a shallow depth of field is key. Aperture Priority mode can be used in cases like this (keep reading to learn more on that a bit later).

Shutter Speed

Shutter speed determines the amount of time light strikes the sensor when it enters the camera. The faster the shutter speed, the less light strikes the sensor. In addition, shutter speed is directly responsible for how movement is rendered in an image. Shutter speeds are referred to in fractions of a second, such as 1/125th, 1/60th, or 1/1000th. Faster shutter speeds, such as 1/500th, freeze motion, while slower shutter speeds, such as ½, 1 second, or even 30 seconds,  will show motion as more of a blur. The longer the shutter speed, the more blur motion will create.

ISO

Your camera’s ISO determines how sensitive it is to light. Lower numbers such as ISO 100 or 200 mean your camera is less sensitive to light and are used in bright situations, such as in direct sunlight. When there is less light, such as in shade, or indoors, you might use a higher ISO such as 800, 1600, or 3200 to make your camera more sensitive to light. ISO plays an important part in the various situations I will discuss going forward, so always keep in mind that you can change this setting, and don’t be afraid to raise your ISO if needed.

Camera Modes

Before going any further, I want to clarify that there are multiple ways to get a specific desired result with your camera, using any of these modes. Once you understand the relationship between shutter speed, aperture, and ISO, you’ll be able to do whatever you like in any of these modes.

But which mode is best for which situation? You’ll have to visualize your image to decide.

Program Mode

"<yoastmark

Program Mode resides on the advanced side of the camera mode dial, usually denoted by a P. In this mode, the camera will set the aperture, ISO, and shutter speed for you. So when should you use Program Mode?

Program Mode is good when you’re not looking for any effect in particular. Your camera, when set to Program Mode, will attempt to give you a proper exposure that can be handheld, meaning you won’t be required to use a tripod to steady your camera. This is a good mode for when you’re just casually photographing and just want to be sure your exposures are right.

It is a lot like Automatic Mode in that regard, except that you have the ability to override, or shift, the exposure the camera sets, as well as many other settings such as white balance and picture style. In addition, while in Auto mode, the camera will pop your flash up when it thinks it needs more light. But in Program Mode the flash will not pop up unless you tell it to.

Aperture Priority

On some cameras, this mode is simply denoted by an A on the mode dial, while on Canon cameras it is denoted as Av, meaning Aperture Value. In any case, in this mode, you set the aperture and ISO you want and the camera will set the appropriate shutter speed for you. So when should you use Aperture Priority mode?

Aperture Priority

When you want a shallower depth of field, such as in a portrait, using Aperture Priority and setting a wide aperture is an excellent choice.

To determine the answer, visualize your finished image in your mind’s eye. What do you want it to look like? Generally speaking, if you’ve decided that the most important factor in your image is a specific depth of field, you’ll want to use Aperture Priority Mode so that you can force your camera to give you the depth of field that you want. For instance, if you’re making a portrait, you probably want your subject in sharp focus, but you may also want the background to be a little blurred, to keep your viewer’s focus on the subject. An out of focus background can create a setting without distractions for the viewer. So you might decide you want to use a fairly wide aperture such as f/4, to create enough depth of field to keep your subject sharp, but let the background blur nicely.

But watch your shutter speed too

It’s important to note, however, that you also need to keep an eye on the shutter speed setting. While the camera will set this for you, unlike in Program Mode, the camera is not going to try and give you a fast enough shutter speed to handhold. If there isn’t enough light, this will result in a slower shutter speed that may not be fast enough to freeze any subject movement. This could result in a slight blur due to unsteady hands or slight movement by your subject. If the shutter speed chosen by the camera (based on the aperture you’ve set) isn’t fast enough to freeze motion in this situation, you’ll need to raise your ISO. Raising your ISO will effectively increase the shutter speed given for the aperture you’ve set.

Aperture Priority Landscape

Aperture Priority is a great choice when photographing a landscape where you want a deep depth of field, and the shutter speed doesn’t need to be set at anything specific to capture motion a certain way.

For landscape photography

Another situation for Aperture Priority would be a landscape photo, where you may want greater depth of field to keep the entire scene in focus. In this situation, your primary goal is to get lots of depth of field to keep the entire scene in focus, so you’d set an aperture of f/11 or even f/16 to capture a greater amount of the scene sharply. In this situation, if you’re using a tripod, the shutter speed may not be as big of a factor for you.

But if you’re handholding the camera,  you will want to pay attention to the shutter speed the camera sets to ensure it’s fast enough to avoid camera shake. In addition, if there is moving water or clouds, or the wind is blowing the trees or grass, you’ll want to ensure that the shutter speed the camera sets is appropriately stopping that movement to your liking. If not, you’ll want to adjust your ISO so the camera sets a more appropriate shutter speed.

Shutter Priority

Panning using Shutter Priority

When you know you need a specific shutter speed, such as this image where a panning technique was used, Shutter Priority is often the best choice.

Shutter Priority is usually denoted using an S on most cameras, while Canon uses Tv, representing Time Value to denote Shutter Priority mode. Shutter Priority Mode is just the opposite of Aperture Priority. In this mode, you set the shutter speed you want, as well as the ISO, and let the camera choose the appropriate aperture.  This mode is an excellent choice when you’ve decided that rendering motion in a certain way is the key component of your image.

Shooting sports

For example, suppose you are photographing a sporting event. Most likely, you’ll want to freeze the action of the athletes on the field. To do so, you need a fast shutter speed, such as 1/500th or even 1/1000th. In shutter priority, you’ll need to again keep an eye on your ISO to ensure that the camera is giving you a proper exposure. Usually, the exposure indicator in your viewfinder will flash to show that at the current settings, proper exposure cannot be achieved. In this case, raise the ISO to achieve the correct exposure for the shutter speed you want.

Shutter Priority for Fast Action

You might want to use Shutter Priority Mode when you know you need a fast shutter speed to stop action, such as when photographing sports.

As another example, let’s say you want a slower shutter speed to create a panning effect. Again you would set the correct shutter speed to create the effect, and let the camera adjust the aperture. Any time the primary concern is the appearance of motion in an image, Shutter Priority is a good choice for shooting or camera mode.

Panning in Shutter Priority mode

Another example of using a slow shutter speed to create a panning effect in Shutter Priority Mode.

Manual Mode

Once you’re comfortable with changing settings and you really want to take control of your camera, Manual mode is the way to do that. You will set all of your settings according to how you want your final image to look. There is one caveat, however. Your settings will also be dependent on the available light in the scene. So if you want a fast shutter speed, and deep depth of field, you’ll probably need to raise your ISO a bit. Or compromise on one of the other settings as well.

Watch the meter

Just keep an eye on your camera’s meter and it will help you find the right combination of shutter speed, ISO, and aperture. The other modes do a nice job of taking some of the load off your brain by allowing you to choose one setting to have priority, but sometimes you just need to take full control.

Silhouette in Manual Mode

Manual Mode is the best choice when you want to create an effect that the camera’s normal exposure modes just don’t normally do, such as this silhouette.

Exposures long than 30 seconds

One instance where you’ll need to do this is when creating an exposure longer than 30 seconds. Today’s cameras don’t have shutter speeds for longer than that, so you would need to calculate in your head how long to keep the shutter open, and then use the Bulb setting to do so. Any time the camera can’t properly calculate exposure is a good time to use Manual Mode.

manual-mode-long-exposure

When creating images using a long exposure, such as this one with an exposure time of two minutes, Manual Mode is the best (or possibly only) choice.

Another time to use Manual Mode is when the lighting in a scene is especially challenging, such as when there are a lot of dark shadows. Your camera will try to expose for the deep shadows, causing the highlights to overexpose. Using a manual setting to override the camera’s choices will work well in achieving a satisfactory exposure.

Summary

As I mentioned, there are many ways to capture an image and arrive at similar settings. But each time I’m out photographing, I go through the following checklist in my head:

  1. Do I want deep or shallow depth of field?
  2. Do I want to stop action or is some motion blur okay?
  3. Which of the above two choices is more important for this image?
  4. Is one of the priority modes suitable for the available light of the scene?

The answer to those four questions should lead you to the correct mode for the shot you want.

Shutter Priority for fast action

Shutter Priority can be used when photographing sports to set a fast shutter speed to stop action.

googletag.cmd.push(function() {
tablet_slots.push( googletag.defineSlot( “/1005424/_dPSv4_tab-all-article-bottom_(300×250)”, [300, 250], “pb-ad-78623” ).addService( googletag.pubads() ) ); } );

googletag.cmd.push(function() {
mobile_slots.push( googletag.defineSlot( “/1005424/_dPSv4_mob-all-article-bottom_(300×250)”, [300, 250], “pb-ad-78158” ).addService( googletag.pubads() ) ); } );

The post How to Choose the Right Camera Mode to Get the Shot You Want by Rick Berk appeared first on Digital Photography School.


Digital Photography School

 
Comments Off on How to Choose the Right Camera Mode to Get the Shot You Want

Posted in Photography


The dPS Ultimate Guide to Landscape Photography

01 Dec


Download “The Ultimate Guide to Landscape Photography”

We respect your email privacy

Introduction

Landscape photography is one of the most challenging and most rewarding hobbies a person can have. One of the things I like most about it is that there is always more to learn. It keeps our brains active! Between learning about what type of gear you need, how to use it, understanding light and composition, and learning to process your photos, you will quickly come to the realization that making a striking landscape photograph involves a number of essential ingredients.

Note: this is one of the most comprehensive articles we’ve written – get a free downloadable copy to print and/or refer to later above.

DPS ultimate landscape photography guide 12

The goal of this guide is to touch on each of these essential ingredients because you need to know a little about each one before you’ll start making the quality of images you are after.

My journey in landscape photography began 25 years ago, and since then I’ve constantly thought about what makes a truly great landscape image. I hope that you will take what I have learned over the past 25 years and use it to jump start your own journey in photography and start making striking images you are proud of.

Gear Essentials

I want to emphasize that gear is not the most important factor in landscape photography. The other chapters outlined in this guide are all more important when it comes to making striking images. However, you do need some gear, and it can be hard to make the right choices when you are just getting started. This chapter will help you understand the most important things to look for when buying your gear.

DPS ultimate landscape photography guide 14

Your Camera

There are three basic categories of digital cameras: point-and-shoot; digital single lens reflex (DSLR); and mirrorless.

Point and shoot cameras are the small digital cameras that most people start with. These cameras do not have interchangeable lenses, and they have tiny sensors that have limited image quality. Point-and-shoots are used for making snapshots. If you are getting serious about your photography, you’ll want a camera that has a bigger sensor for better image quality, manual functions, and one that accepts a variety of different lenses.

DSLRs are the most popular type of camera for landscape photography for a number of reasons. They allow you to shoot in RAW format for maximum data capture (more about that later). They have a variety of shooting modes including fully manual. DSLRs have large sensors and you can use a huge variety of lenses with them.

DPS ultimate landscape photography guide 08 DPS ultimate landscape photography guide 09

Mirrorless cameras are relatively new technology. They have all the same features as a DSLR, but they don’t have the internal mechanism that includes the mirror, which is why the camera bodies are smaller and lighter. However, they are not cheaper! But if weight and size are important factors to you, you may want to check out a mirrorless system.

Sensor size

When it comes to image quality, the only thing you should concern yourself with is sensor size. Megapixels are not nearly as important as sensor size.

The largest sensor is known as a Full frame because it is the same size as a 35mm film negative. You’ll pay the highest price for a system with a full frame sensor, whether it is a DSLR or mirrorless system.

Sensor sizes smaller than full frame are known as Cropped (or Crop) Sensors. The largest cropped sensor is an APS size. You’ll find a wide variety of cameras with these types of sensors at a more affordable price.

DPS ultimate landscape photography guide 10

The next smaller size is the four-thirds sensor. There are actually quite a number of sensor sizes in between the three I have mentioned, but these are the most common. Sensors smaller than these three are what you find in point-and-shoots and mobile phone cameras.

Personally, I use a mirrorless camera with an APS sensor for my landscape photography because the weight of the kit makes a huge difference for me when carrying my gear on long hikes.

I recommend that when you are choosing a camera, you pick the sensor size you can afford, then choose the camera that feels good in your hands and has a menu system that makes sense to you. These days, all of the DSLR and mirrorless cameras available are capable of making great images so don’t worry about whether Canon, Nikon, Sony or another brand is better. They are all good.

Lenses

DPS ultimate landscape photography guide 11 DPS ultimate landscape photography guide 17

Once you have your camera picked out, you’ll want to pick a few quality lenses that give you good focal range from wide-angle, which puts everything in your field of view into the frame, to telephoto, which will allow you to zoom in to something in the distance.

Lens choice is important because your photograph is influenced much more by your lens than by your camera. Sharpness, contrast, depth of focus, clarity, and detail are all determined almost exclusively by the glass (lens). It forms the image, while the camera simply captures it.

While it may seem absurd to spend more on a lens than on the camera itself, most photographers agree that they would always prefer to have a less expensive camera with a quality lens, rather than the other way around. And because lenses don’t depreciate in price as quickly, the investment is far more worthwhile.

DPS ultimate landscape photography guide 13

Prime versus zoom lenses

Lenses come in two forms; prime and zoom. A prime lens has one fixed focal length, such as 35mm. A zoom lens has a focal range, such as 18-55mm. Prime lenses are often slightly sharper than zoom lenses. However, zoom lenses are much more versatile and allow you to carry fewer lenses in your bag.

I recommend that you start out with three zoom lenses that cover a focal range from 10mm to 200mm for maximum versatility. These are the three that I use for my landscape photography:

  • Wide Angle Zoom 10-18mm
  • Regular Zoom 18-55mm
  • Telephoto 55-210mm

DPS ultimate landscape photography guide 15

Tripod

For landscape photography, a tripod is an essential piece of gear. When you have lots of light, you might get away with hand holding your camera. But if you want to make images in low light situations such as sunrise or twilight, you’ll need a tripod so that you can use longer shutter speeds.

This is the purchase where everyone seems to make the same mistake. Buy cheap, buy twice. Most landscape techniques require long shutter speeds – sometimes very long. A bargain bin tripod is not strong enough to hold your camera steady with a telephoto lens on it. It’s not strong enough if there is any wind. It’s a waste of money. On the other hand, if you purchase a sturdy, well-built tripod from a reputable brand it can last you a lifetime.

Make sure you check the load capacity of your tripod and ensure it can handle your camera with its longest (heaviest) lens attached. Expect to spend as much money on your tripod as you did on your camera.

Filters

Many landscape photographers also carry filters, which can help you enhance your images. The two most commonly used are a Polarizing Filter and a Neutral Density (ND) filter. Graduated ND filters can be helpful as well, but become tricky to use if you do not have a clean, straight horizon.

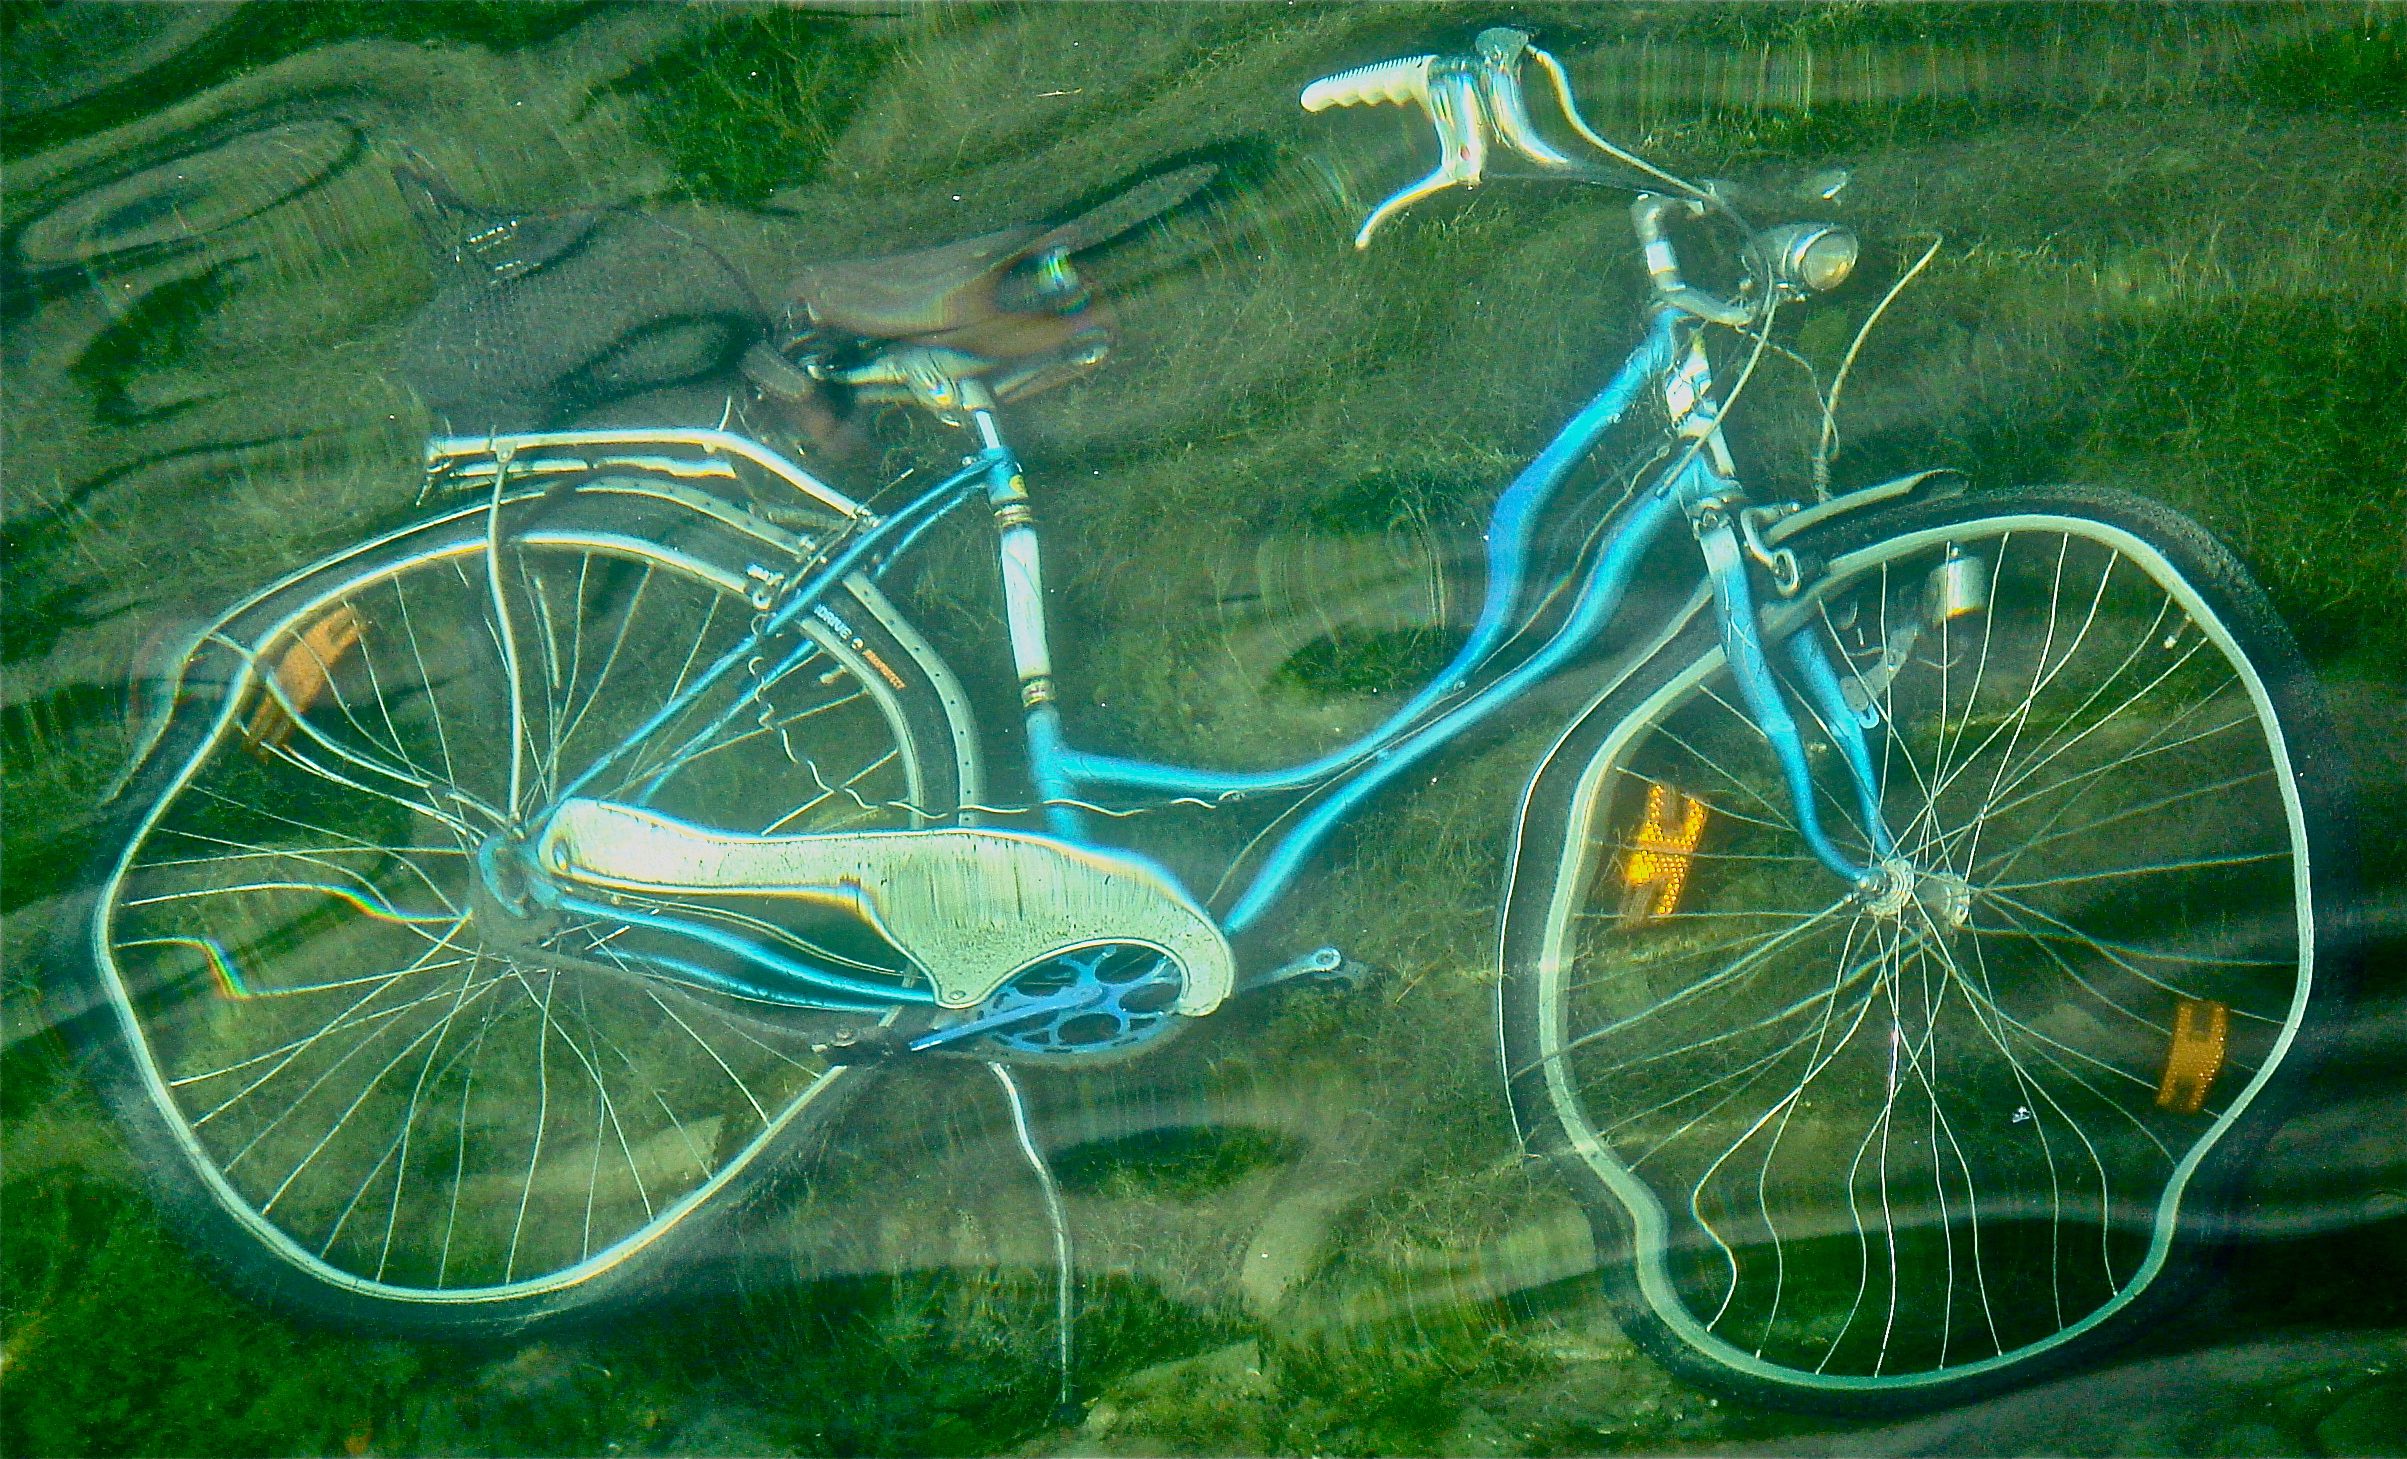
  • Circular polarizing filter – This is an essential piece of equipment when photographing water to allow you to remove reflections and glare from the water’s surface and allow you to see through the water to any interesting rocks underneath.  It can also help enhance the richness of a clear blue sky, or remove reflections from windows and other shiny surfaces in urban settings.
  • Neutral density (ND) filter – If you decide to shoot a long exposure and it happens to be the middle of the day when there is a lot of light, you will need this gray-tinted piece of glass placed in front of your lens. It blocks some of the light from hitting your sensor, allowing you to use a slower shutter speed. These are sold in varying strengths, and can be stacked for different levels of light absorption.

Make sure to get the right filter size for your lenses. Better yet buy one for your biggest lens (look inside your lens cap for the filter size) and step down rings to your smaller ones.

Recommended Camera Settings

DPS ultimate landscape photography guide 19

Shooting in RAW

Most people are used to shooting pictures that come out as JPG (jay-peg) files since this is the default setting on most cameras. JPG is a compressed format meaning that some of the data the camera captures is discarded to make a smaller file size. Raw format, on the other hand, is completely uncompressed with no information thrown away.

What results from this is a digital negative – a large file that can only be accessed through Adobe Camera Raw, Lightroom, Photoshop and other compatible image editing software products. We’ll talk more about processing your photos later, but start off by capturing a RAW file so you have more information to work with when you process your photos.

Shooting Mode

Your camera will likely have a mode dial on the top where you can choose your shooting mode from one of the following; auto; aperture priority; shutter priority; program; or manual. For landscape photography, I highly recommend shooting in aperture priority mode, likely marked on your camera’s mode dial as “A” or “Av”.

DPS ultimate landscape photography guide 30

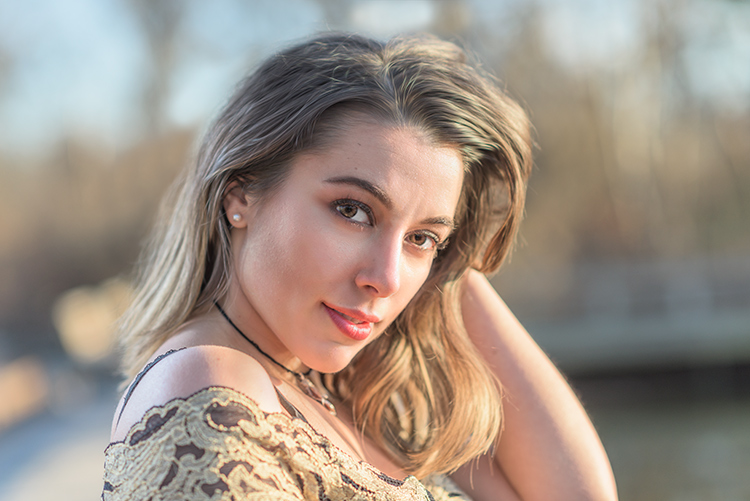
The reason for using aperture priority is because aperture controls the depth of field in your image – the amount of the scene (in your image) that will be in focus. Generally, for grand landscapes, you will want everything from the foreground to the background sharp, so you’ll pick an aperture like f/11 or f/18. But sometimes, you might want only your subject to be sharp and everything else to be blurred and out of focus. For this, you might pick f/4 or f/5.6.

More information about how aperture affects depth of field is coming up in the chapter on exposure below.

Using aperture priority shooting mode allows you to make this choice based on your artistic vision and the camera will choose the corresponding shutter speed to give you a good exposure.

Metering Mode

DPS ultimate landscape photography guide 27

Evaluative or Average metering is the most common metering mode to use in landscape photography because the camera reads the light information from the entire frame. This is your best bet most of the time when the highlights and shadows are spread relatively evenly throughout the scene.

However, if there are very dark blacks or very bright whites, this can throw your camera’s meter off. In this case, you might want to switch to Spot Metering. Using Spot Metering, your camera will take its reading based on one single spot in the frame, which you choose. Choose the most important part of the image, likely the main subject, and let the rest of the scene fall where it may.

Note: Just a word of caution. Make sure you are familiar with how your camera meter works and how to do Spot Metering before you attempt this. Remember, your camera meter will always try to measure for medium or 18% gray. Therefore, if you meter off something that is black or really light in tone, your camera will compensate and try and make it gray. So you will need to adjust accordingly by using Exposure Compensation. 

DPS ultimate landscape photography guide 22

Focus Mode

Your camera likely has at least four focus modes, they are; single shot autofocus; automatic autofocus; continuous autofocus; and full manual focus. If you have good eyes and focusing comes easy to you, use manual focus. For the rest of us, one of the autofocus modes is better.

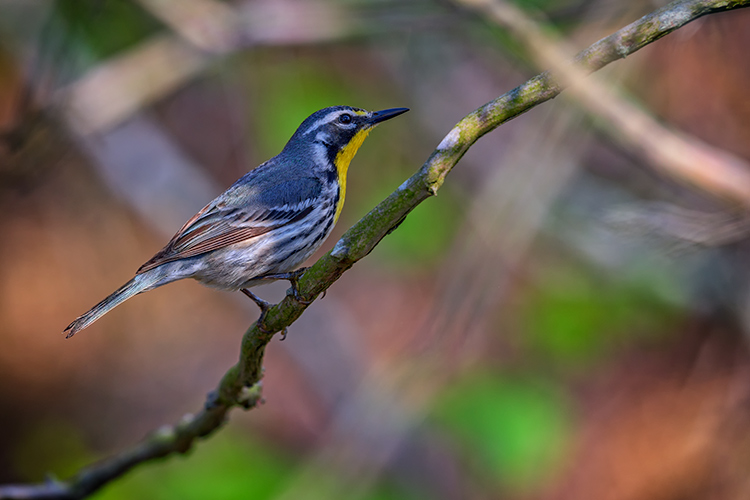
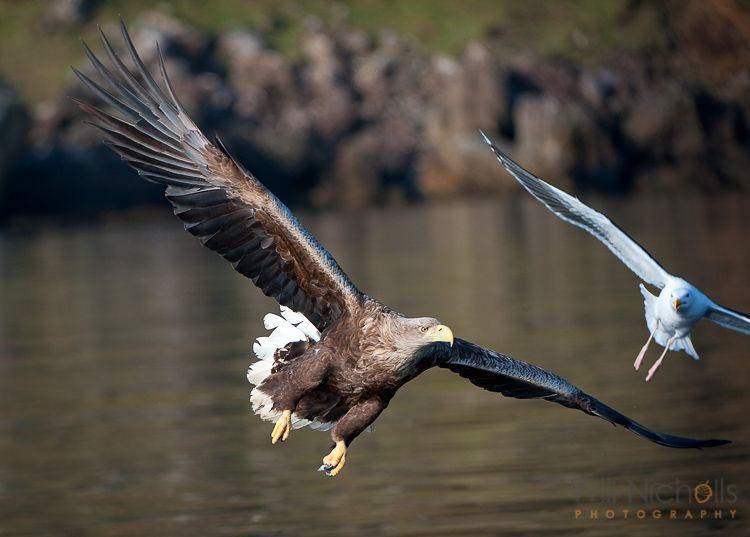
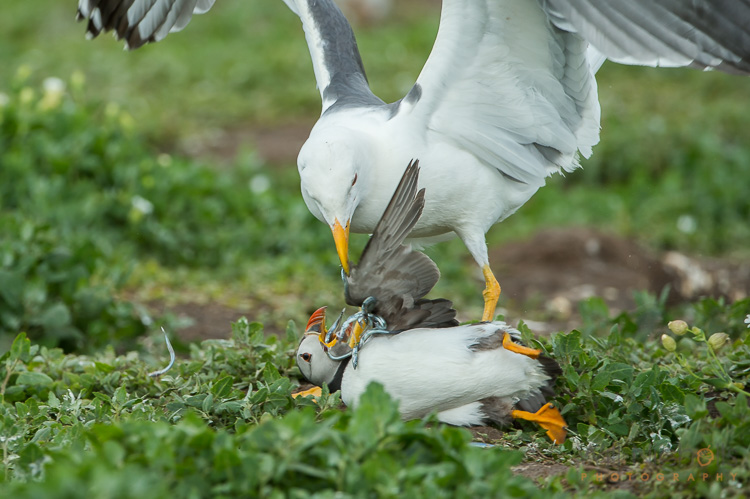
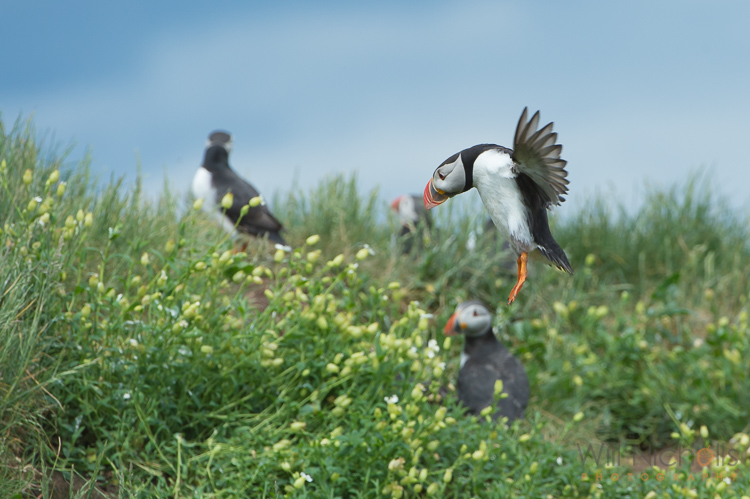
For landscape photography, single shot autofocus is the best option because it will focus the camera once (and lock on) when the shutter button is pressed halfway down. The other focus modes are good when you have something moving in the frame that you want to lock on to, as you would with wildlife photography.

Location Scouting

Now that you have your equipment sorted out, you’re ready to do some shooting! But how do you find those specific spots where you can make images with impact?

DPS ultimate landscape photography guide 26

The first step is to research the location to get a good overview of the place and see what kinds of scenes are on the menu. These days, my favorite tool for doing this type of research is Pinterest. Keyword searches on Pinterest will bring up loads of photos of any given location. You can create a Pinterest board, which is like a virtual scrapbook, where you can collect these images in one place for future reference.

The next step is to map out the specific locations you have chosen so you know how to get there on the ground. You can look on Google Maps or pick up a hard copy map at a visitor center.

Next, visit the location in person and have a walk around looking for good compositions. I like to do this during midday when I’m not likely to be photographing due to the bright, harsh, light. Finding your spot during the day means you will know exactly where to go and you’ll be ready during the limited hours on the edges of the day when the light is just right.

DPS ultimate landscape photography guide 28

Helpful apps

Speaking of good light, the final tool you can use in your location scouting is something that will tell you sunrise and sunset times, when moonrise and moonset occur, and the direction that those things will take place. This will help you immensely when thinking about the direction the light will be coming from on the edges of the day.

My favorite tool for this part of my research is an app called The Photographer’s Ephemeris. You can use it on your desktop or mobile device. It will tell you exactly what is happening in the celestial sky at a particular time. So if you want to get a photo of the full moon rising behind a bridge, you can find out when the full moon is, exactly when it will rise, its position in the sky and then it will calculate where you have to be to get the point of view you want.

DPS ultimate landscape photography guide 36

Making the Most of Natural Light

Understanding natural light is a critical aspect of landscape photography. Even when you’ve done everything else right, if the light isn’t right for your scene, your photos are not going to look their best. That is not to say there is such a thing as “good light” and “bad light”. You just have to know what to do with various types of lighting situations.

Remember, you can change the direction of light simply by moving around your subject. Or, you can photograph subjects that are in the shade.
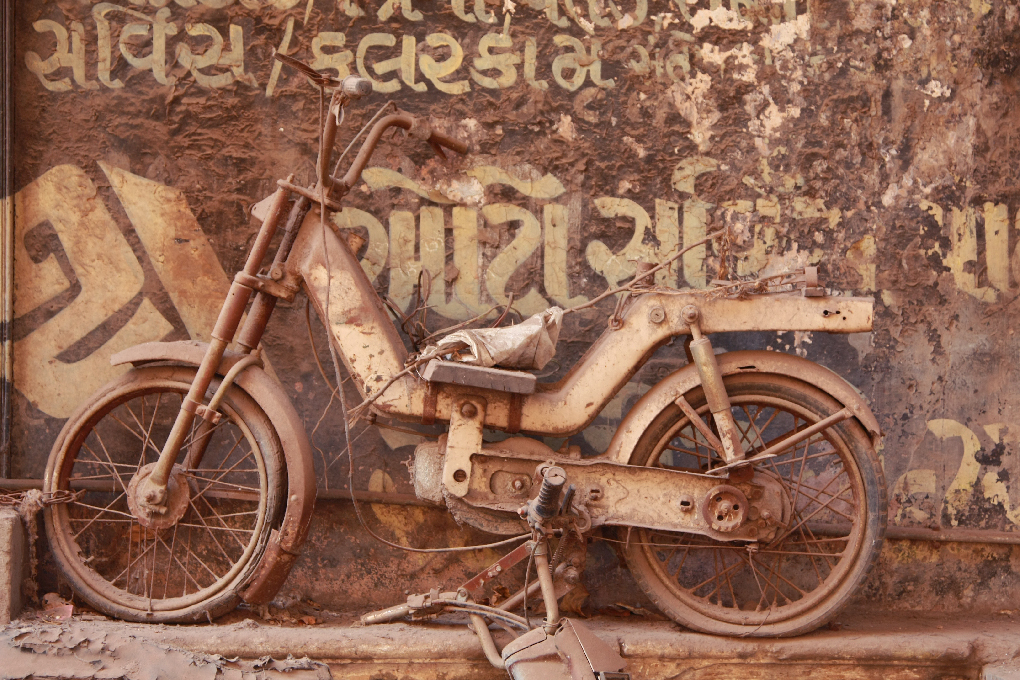
DPS ultimate landscape photography guide 20

Sidelight

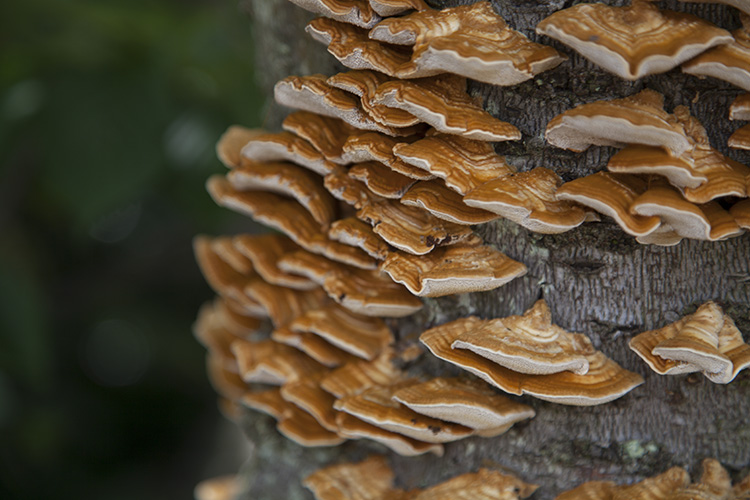
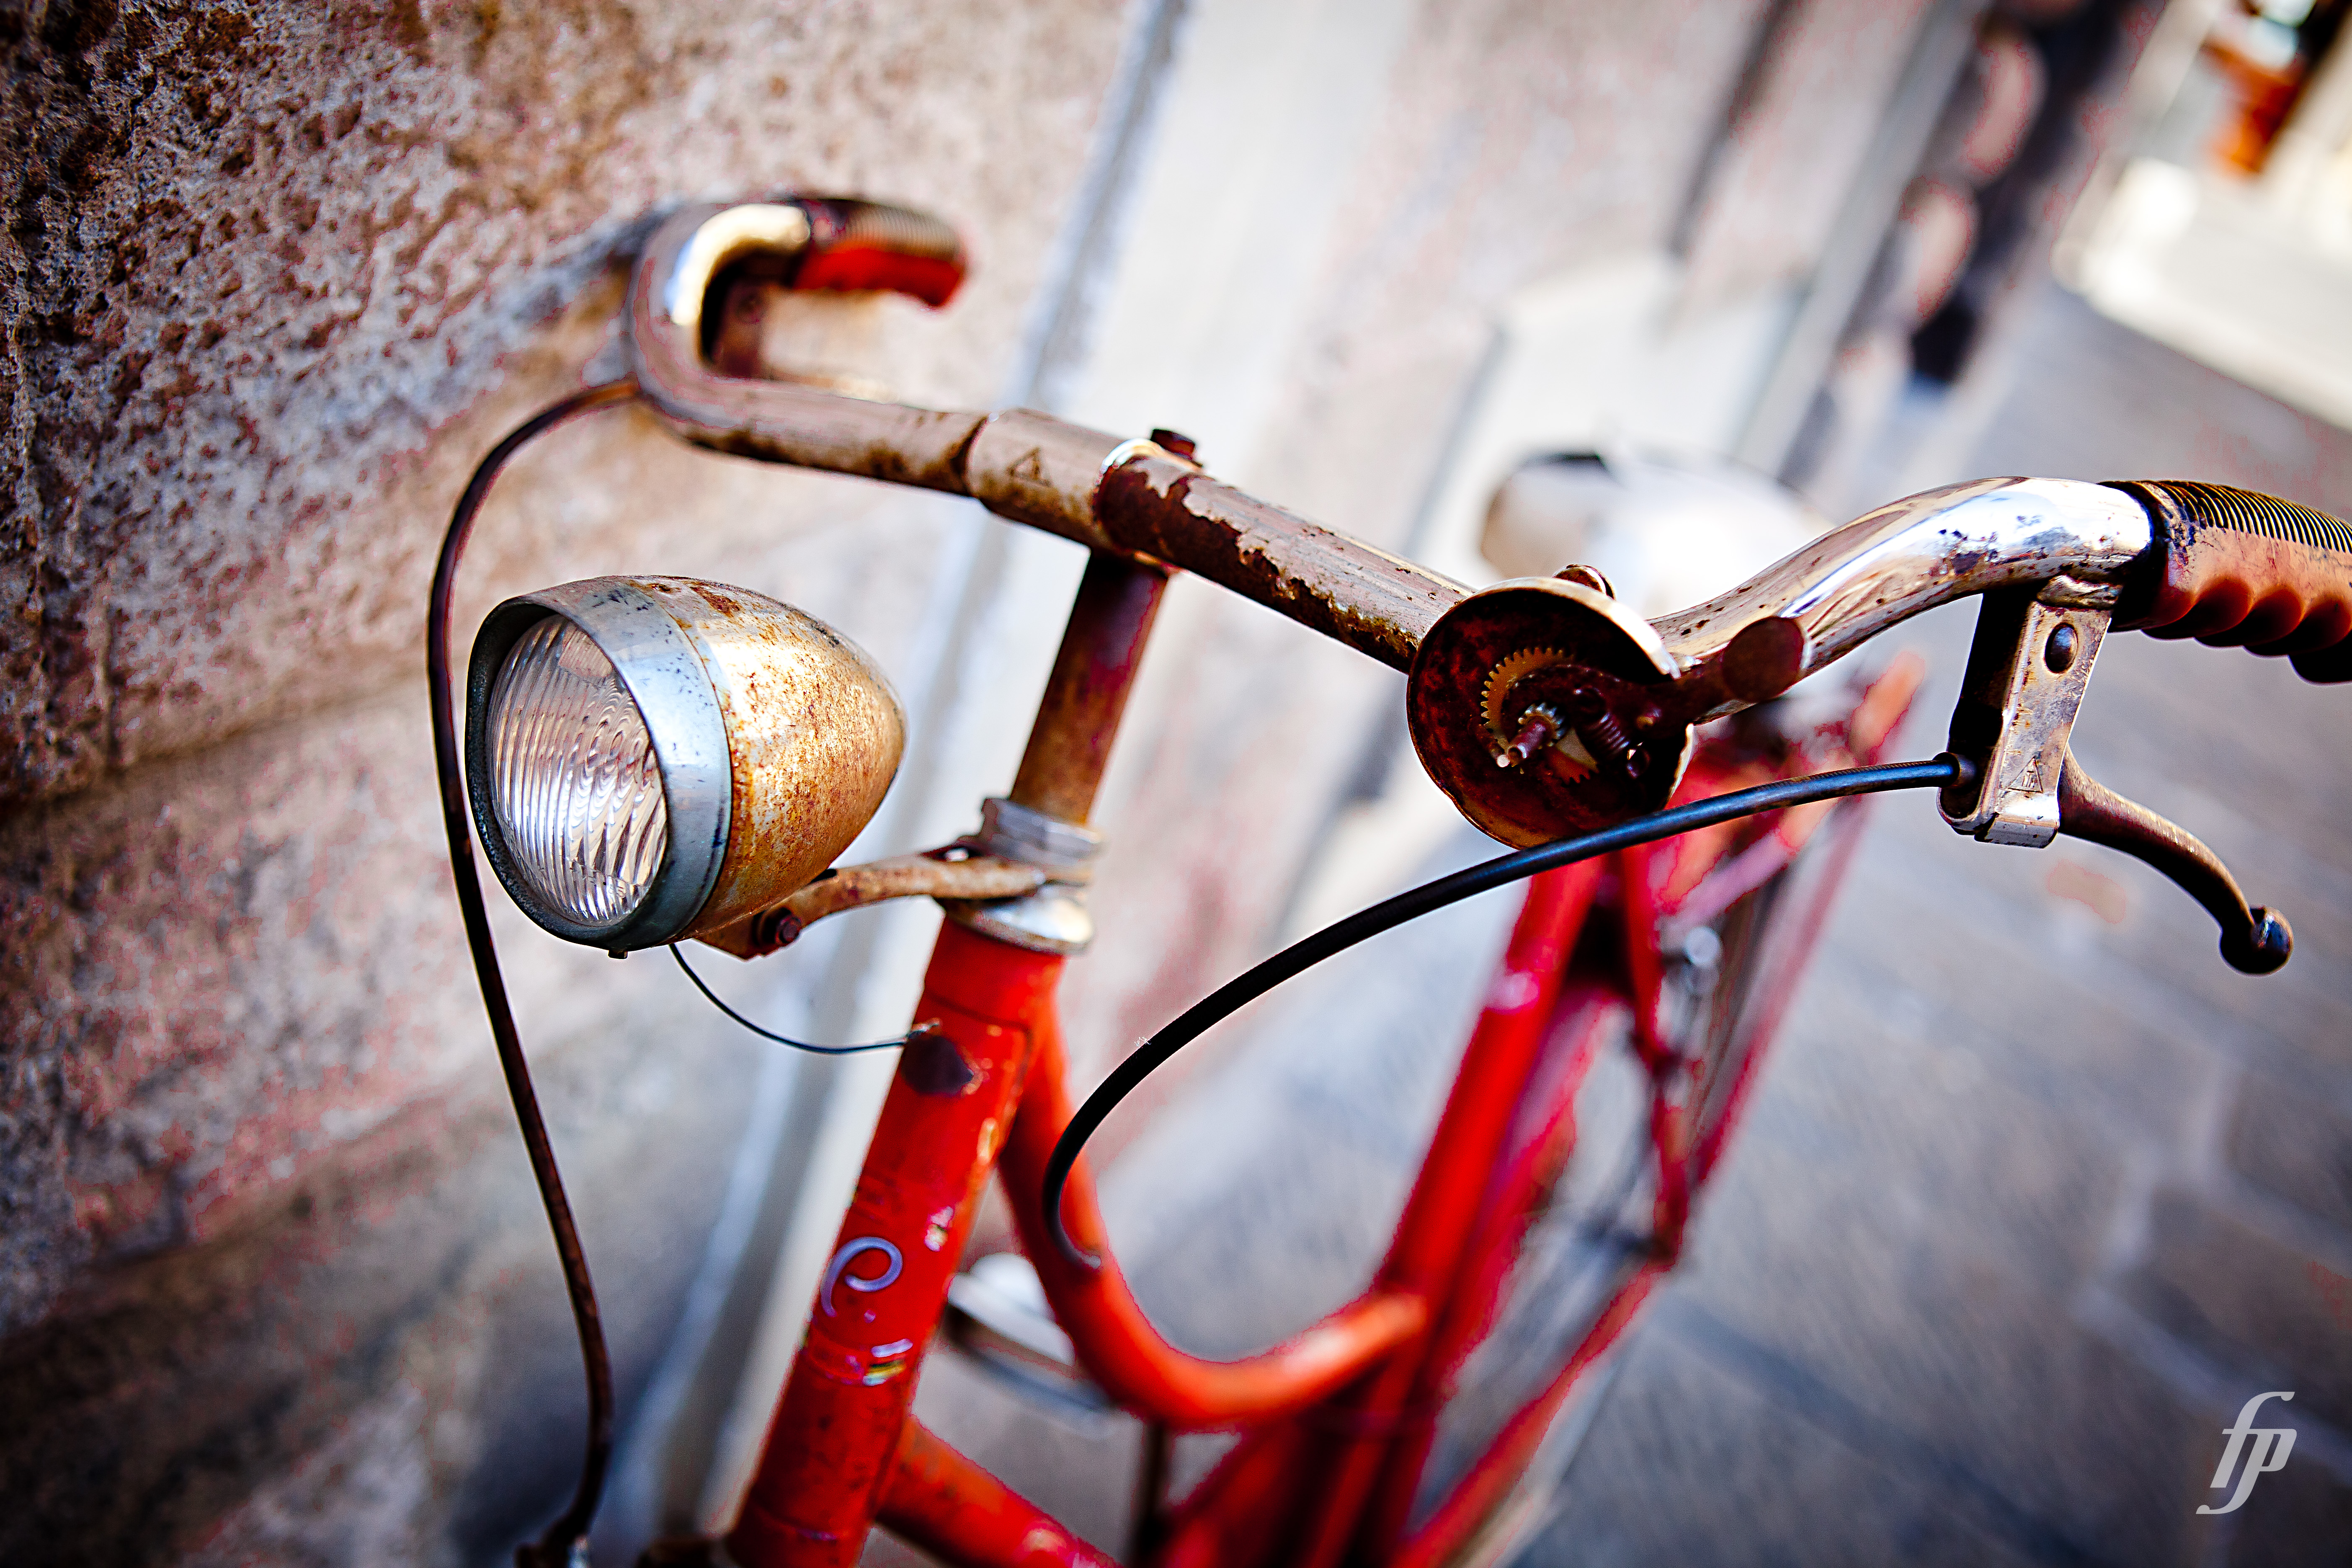
Sidelighting occurs when light hits your subject on one side casting a shadow on the other. It is often thought to be the most pleasing type of light for landscape photography because the contrast between light and dark emphasizes texture and shape.

If you have a round object with light hitting it on the side, it will have a shadow on the other, and the gradation of light will emphasize the round shape. Similarly, subjects with textures will have shadows that serve to emphasize the texture. Without the shadows, the texture will be more difficult to convey in an image.

Ultimate landscape photography guide 01

In this photograph from the Palouse region in Washington, sidelight emphasizes the curves in the hillside.

Backlight

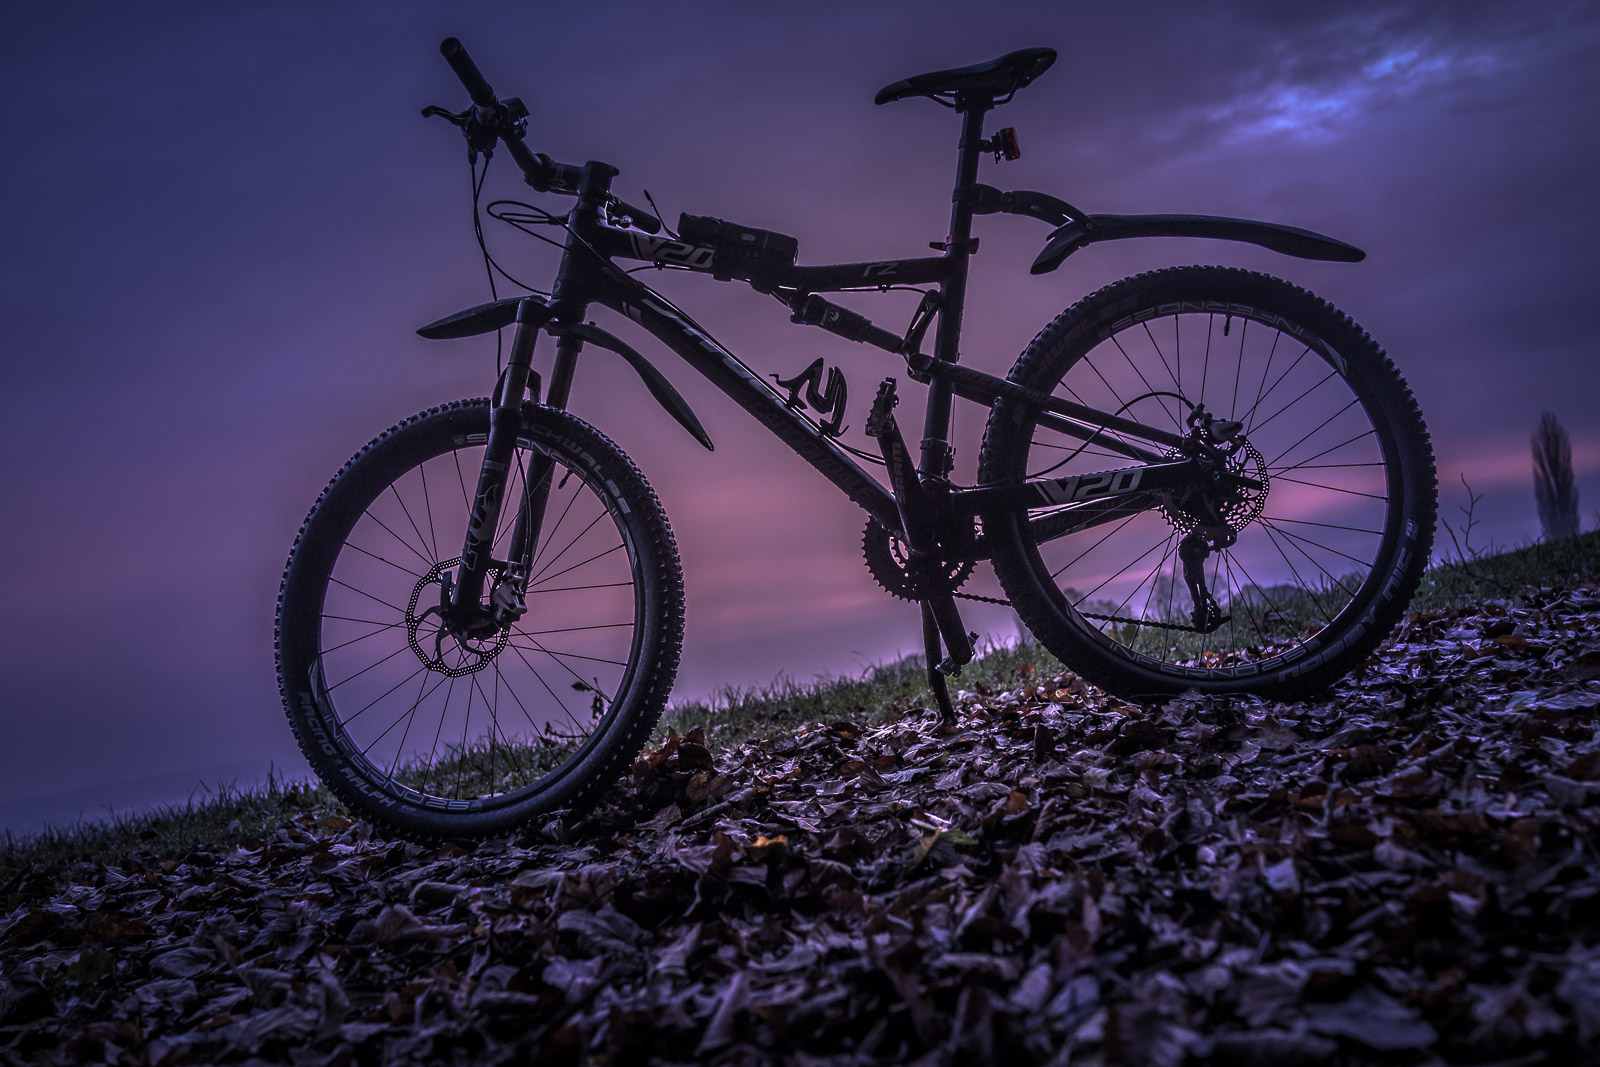
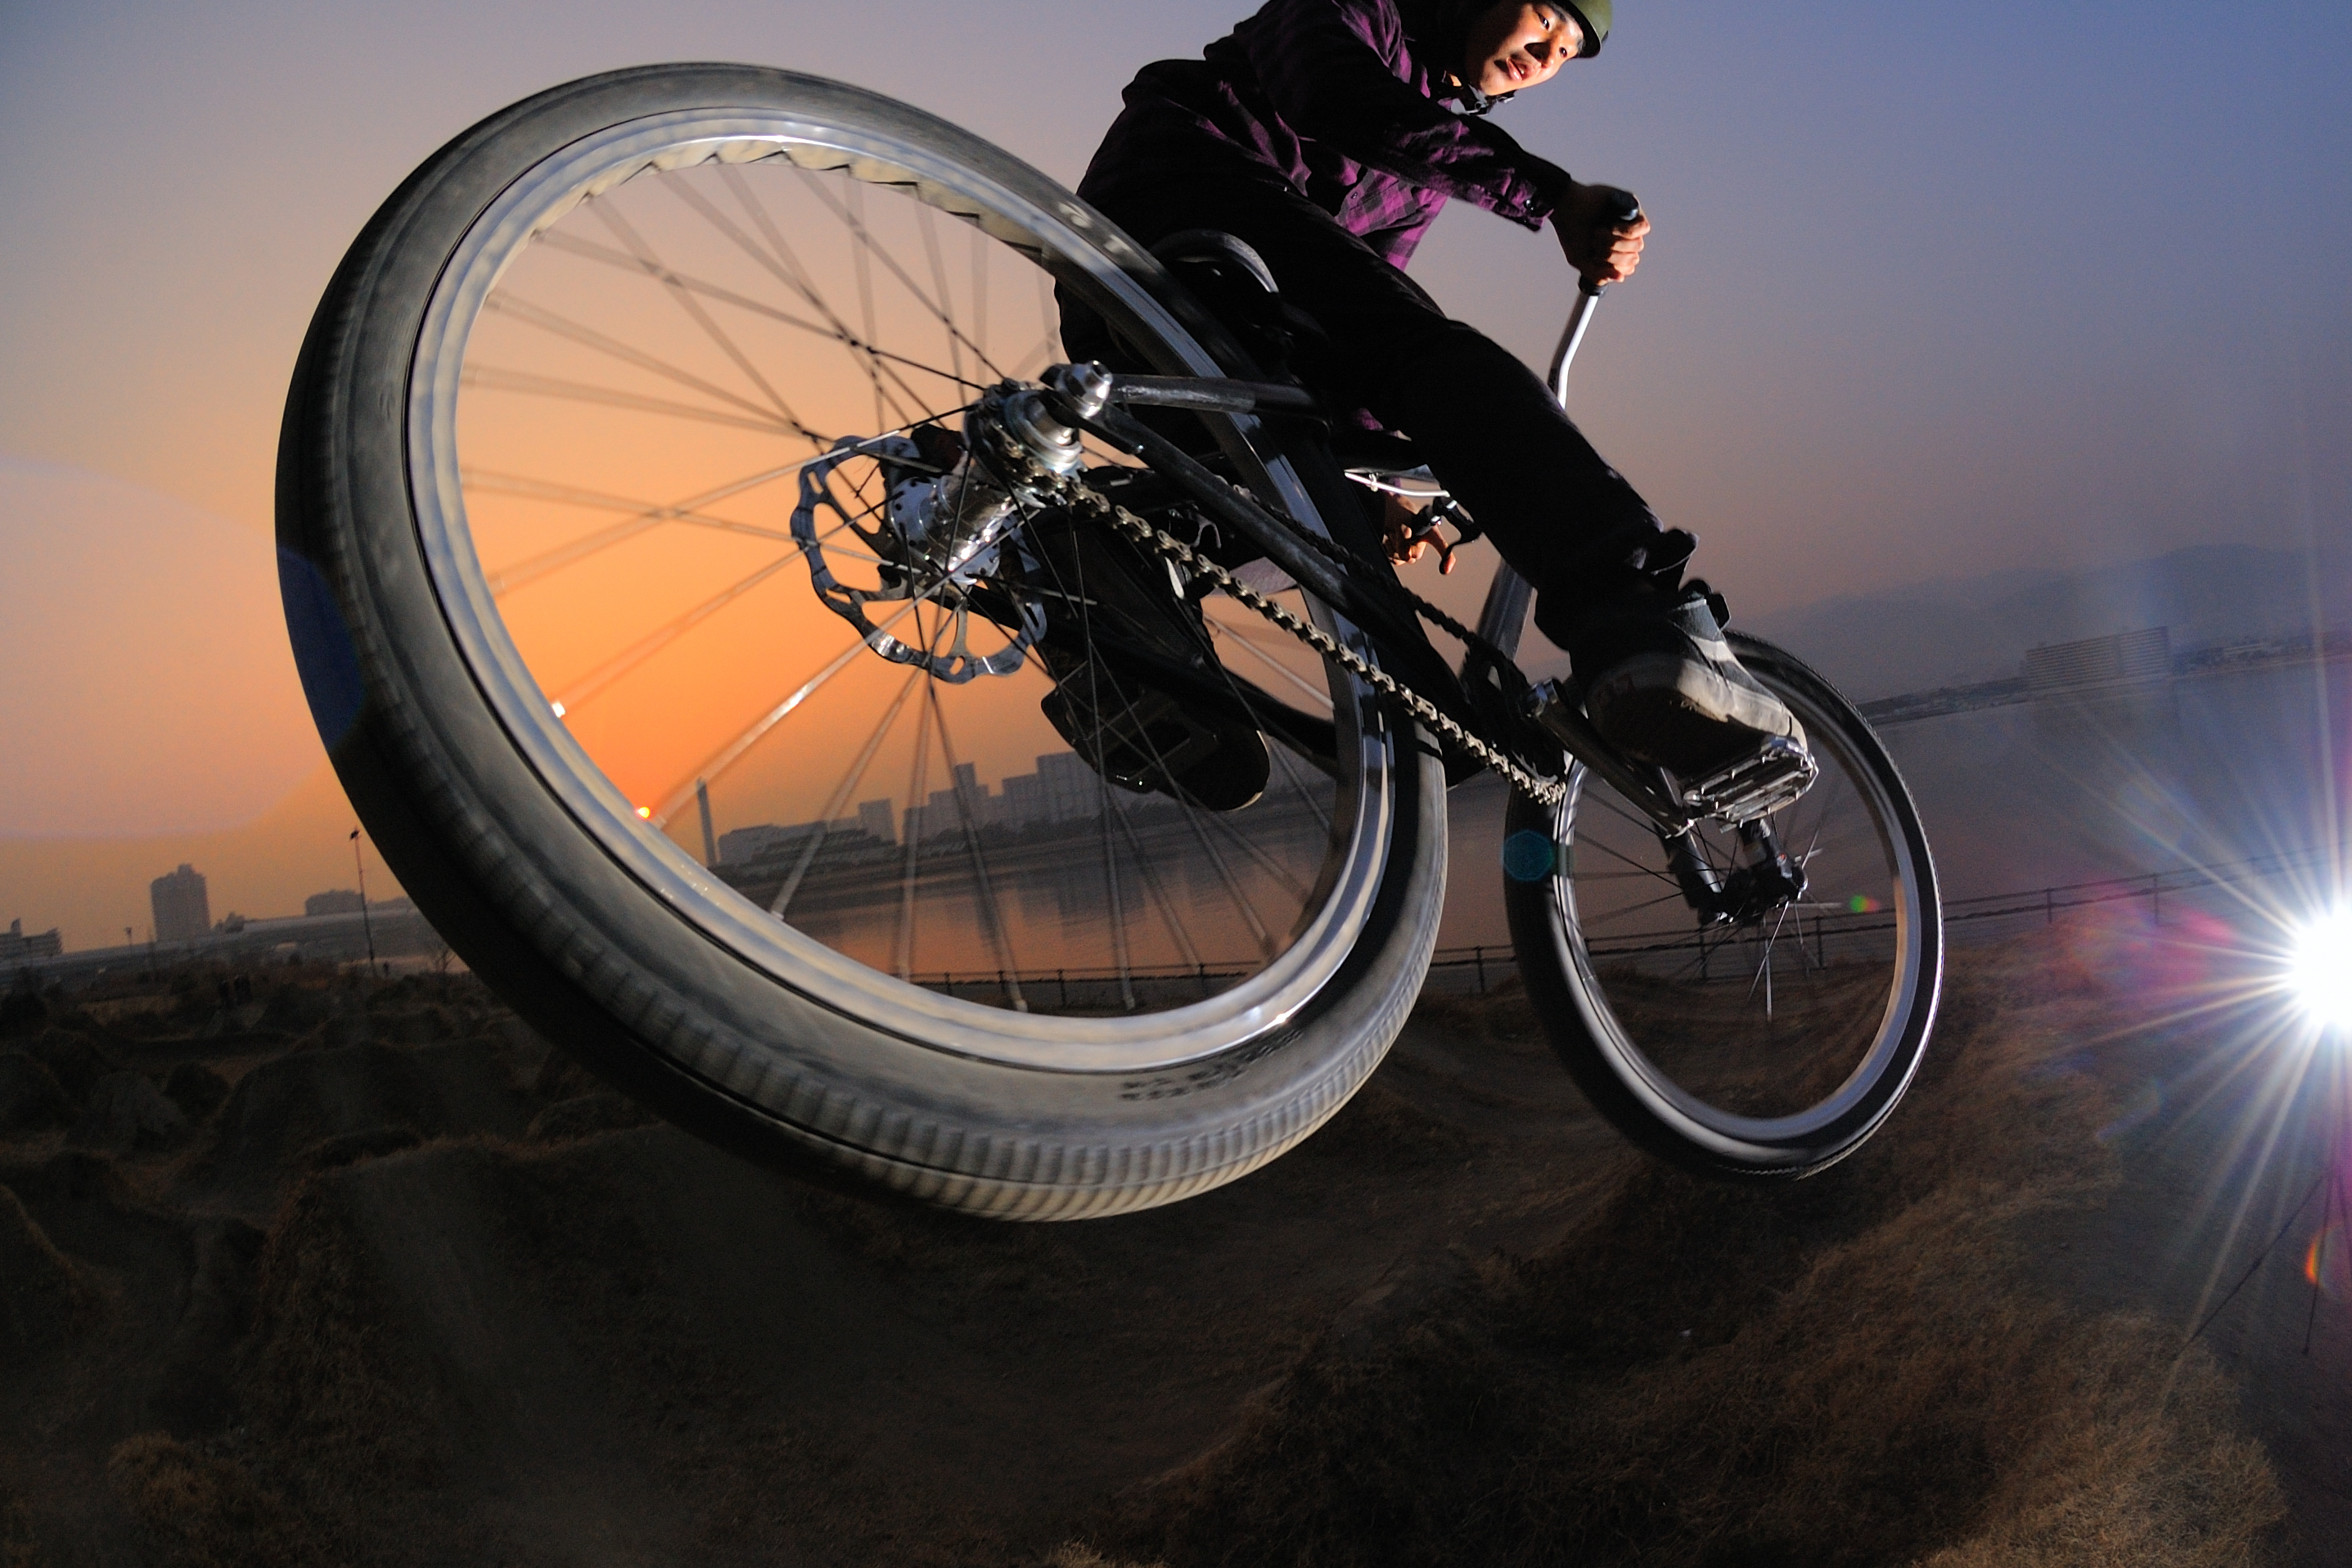
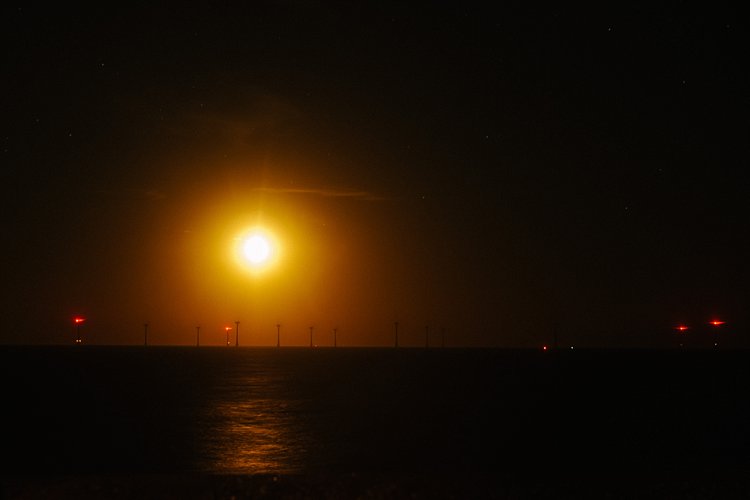
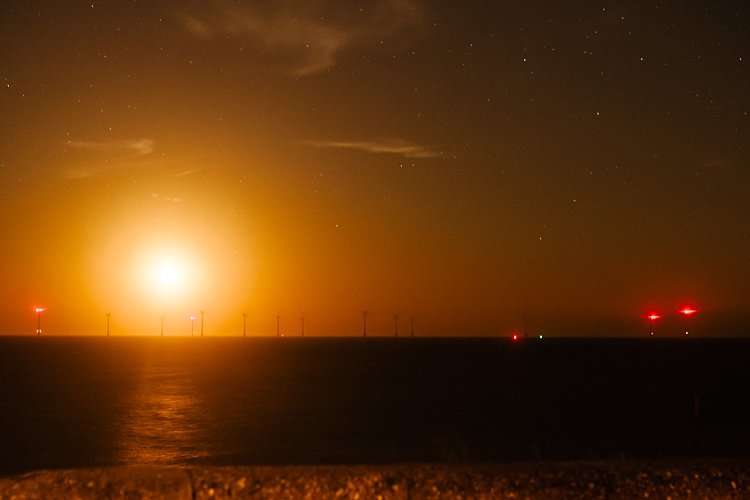
Backlight occurs when the light source is directly in front of you, hitting your subject from behind. It is a bit more difficult to create a good exposure in these kinds of high contrast situations, though.

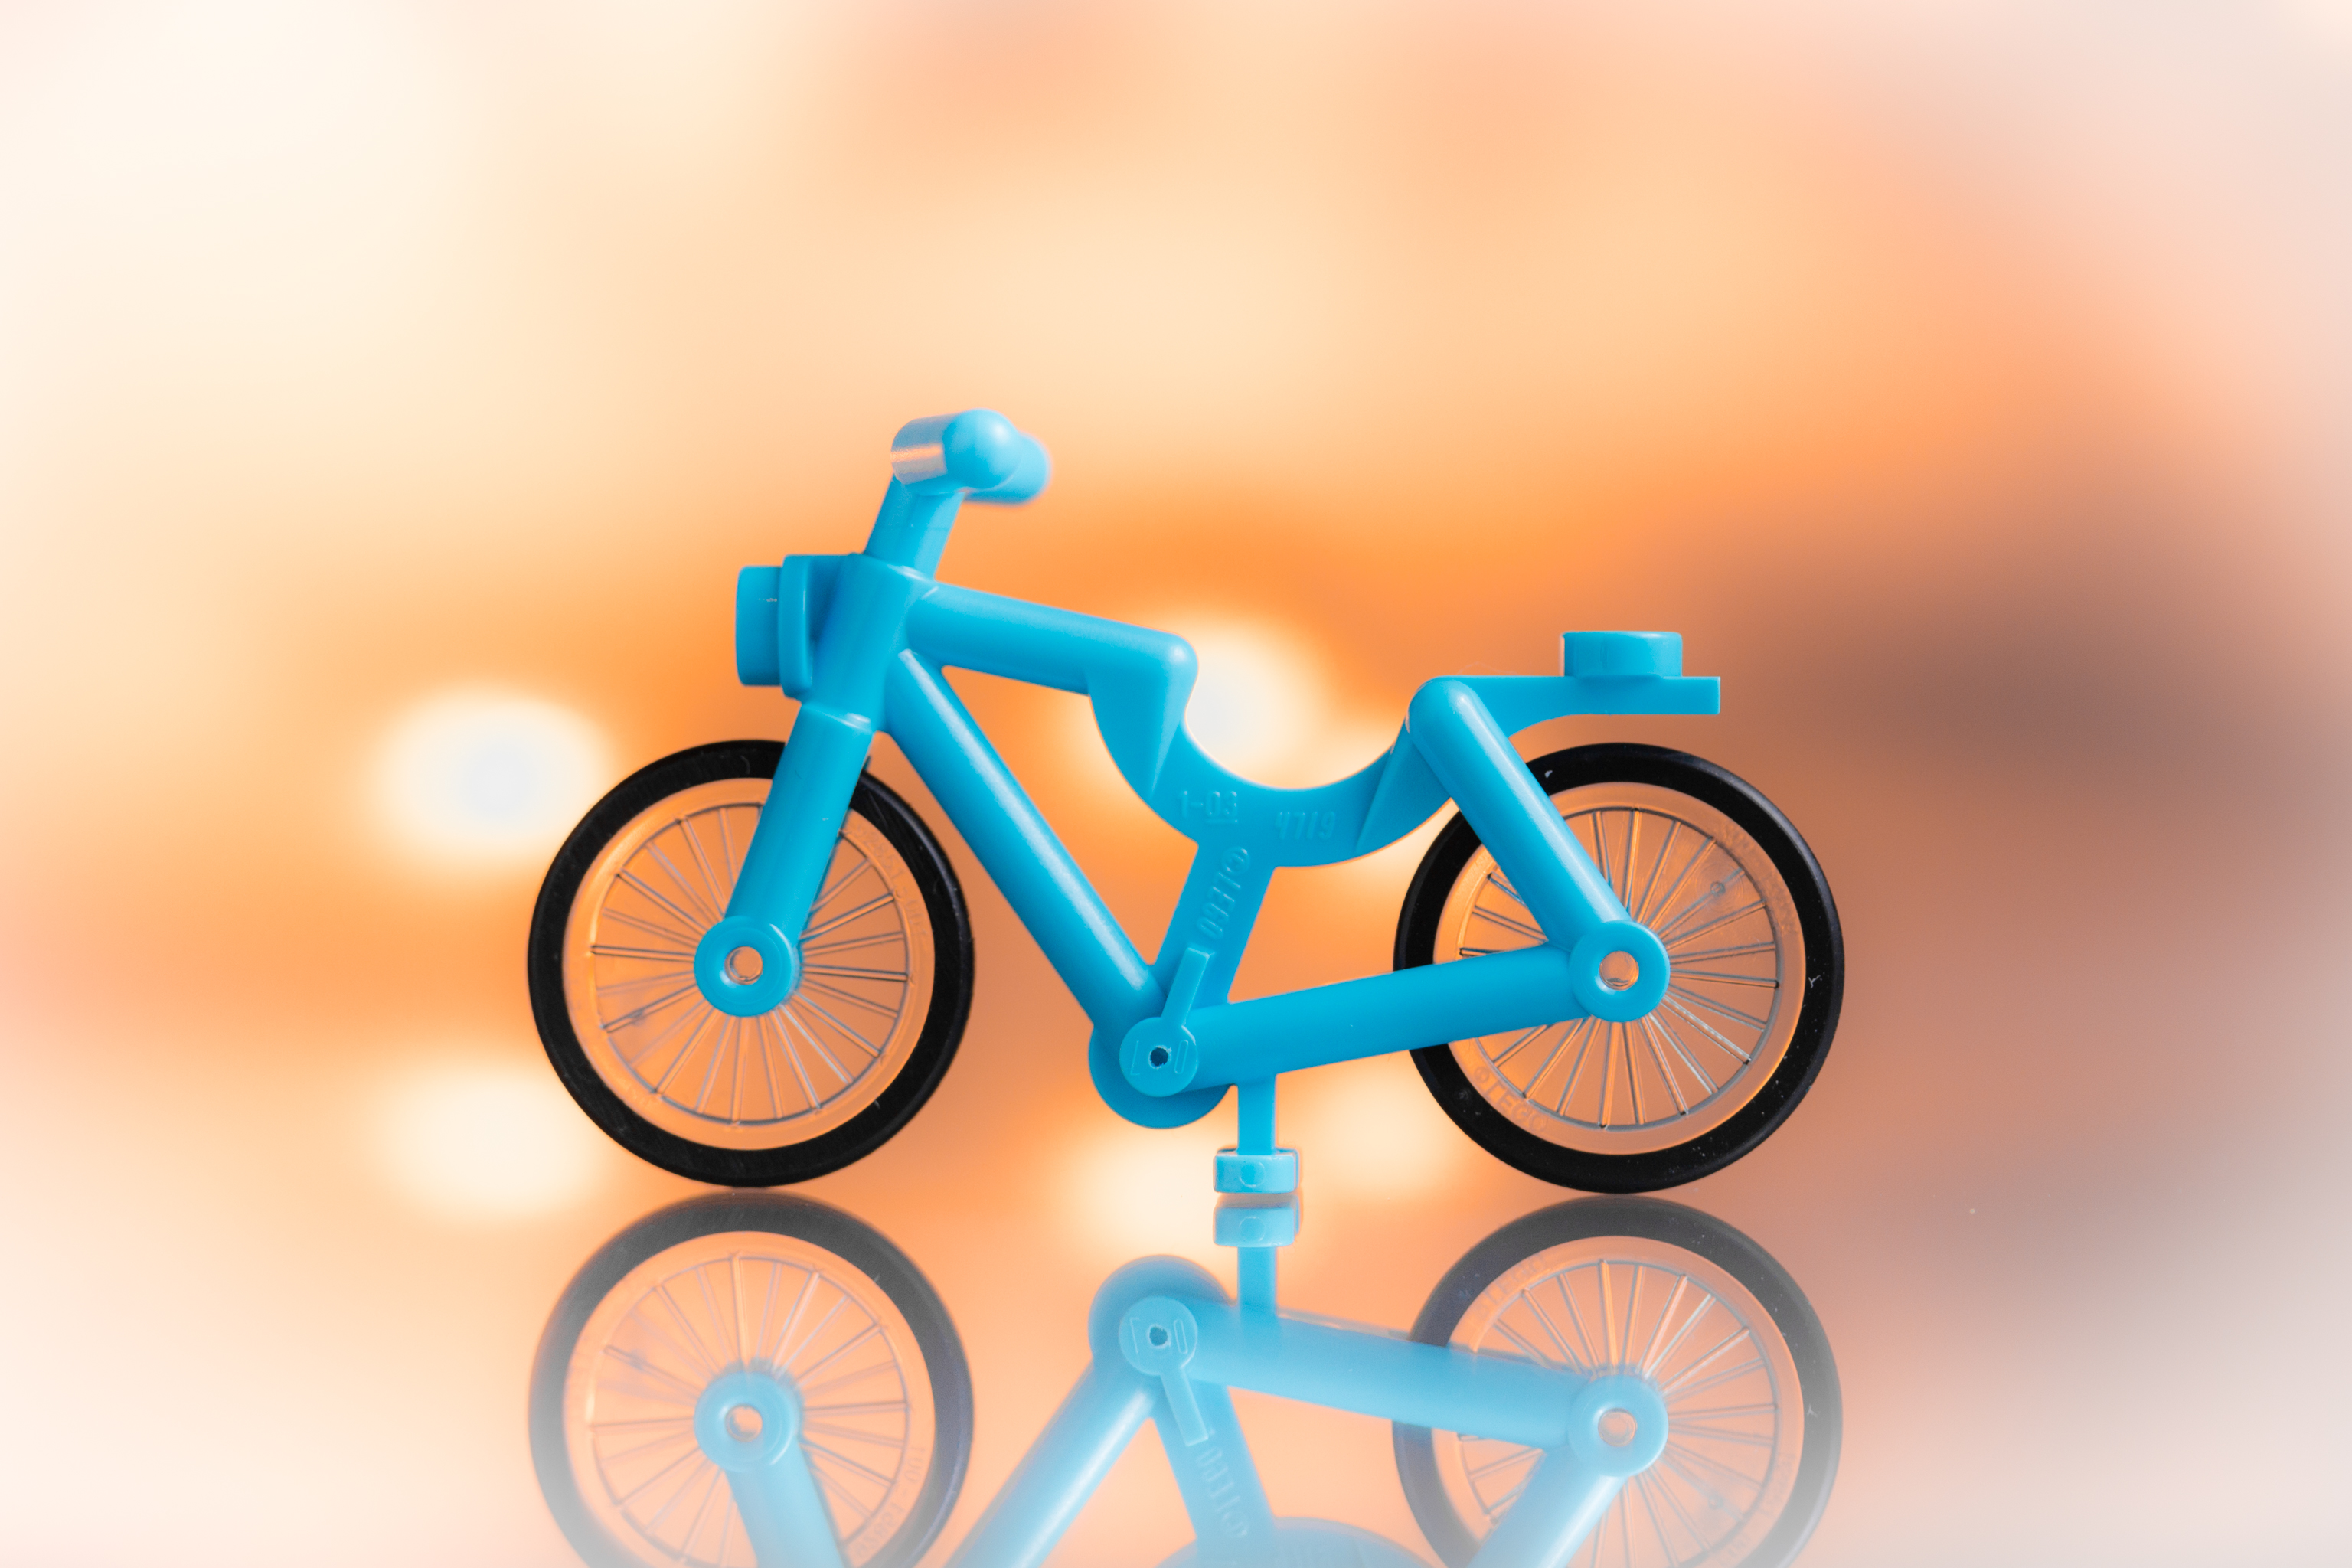
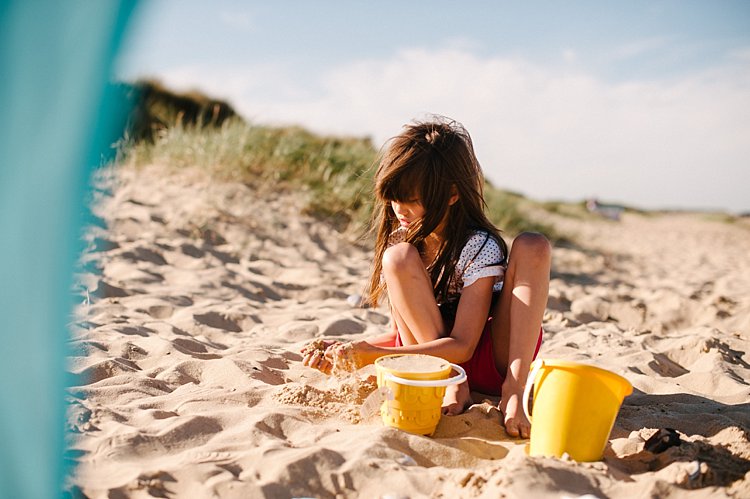
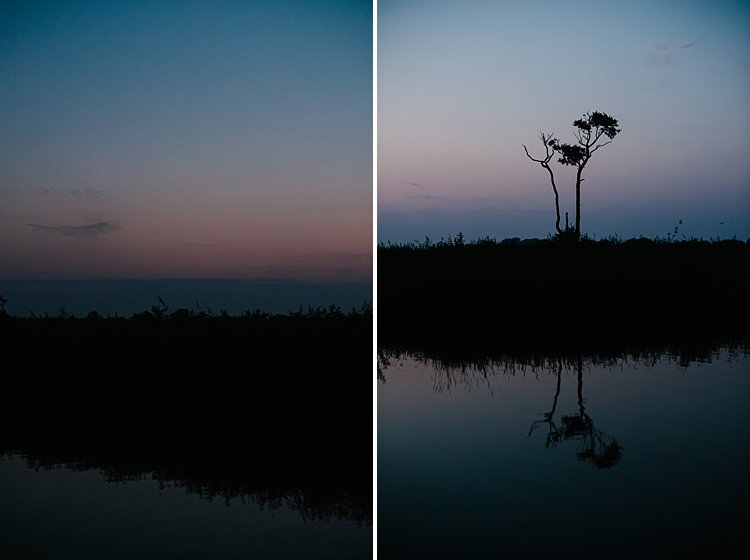
Backlighting is wonderful when your subject is somewhat transparent, like the petals of a flower for instance, because it will make your subject appear to have an inner glow (image below left). This is especially effective when you have a dark background. In this situation, make sure you meter on your subject and allow the rest of the image to fall into shadow.

Ultimate landscape photography guide 02 Ultimate landscape photography guide 03

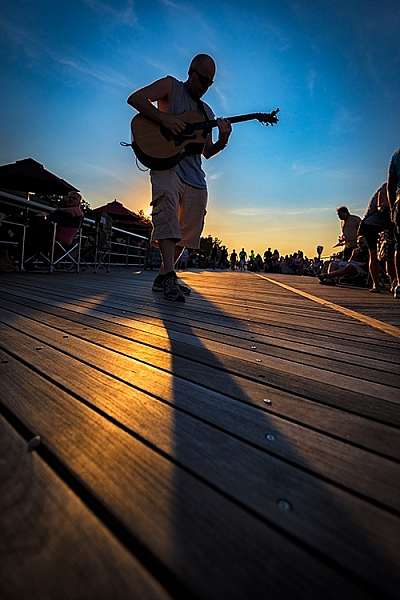
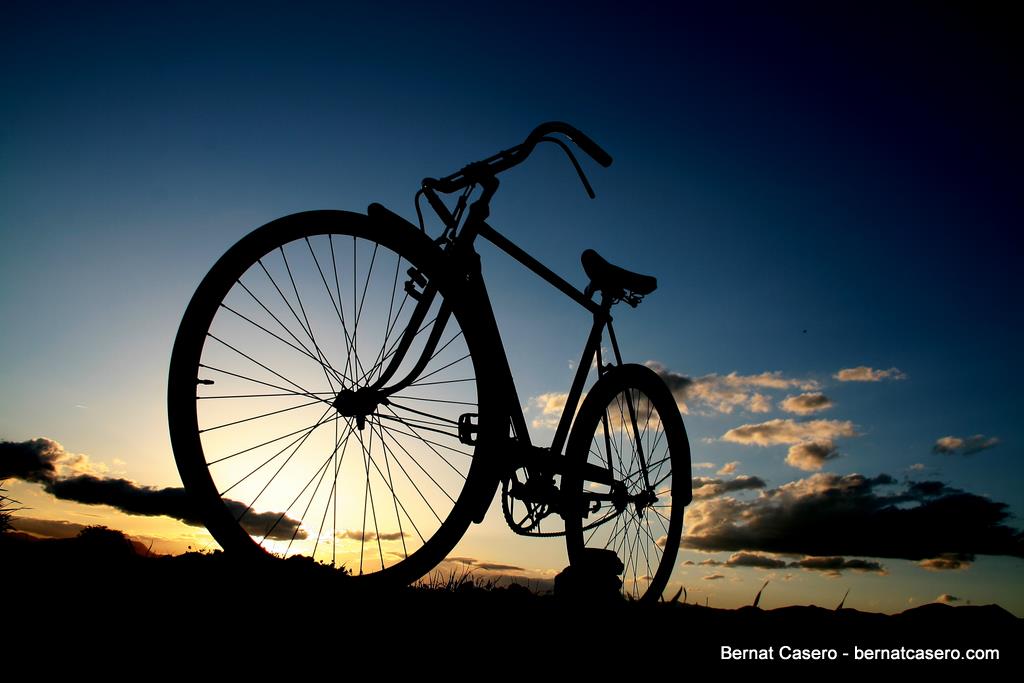
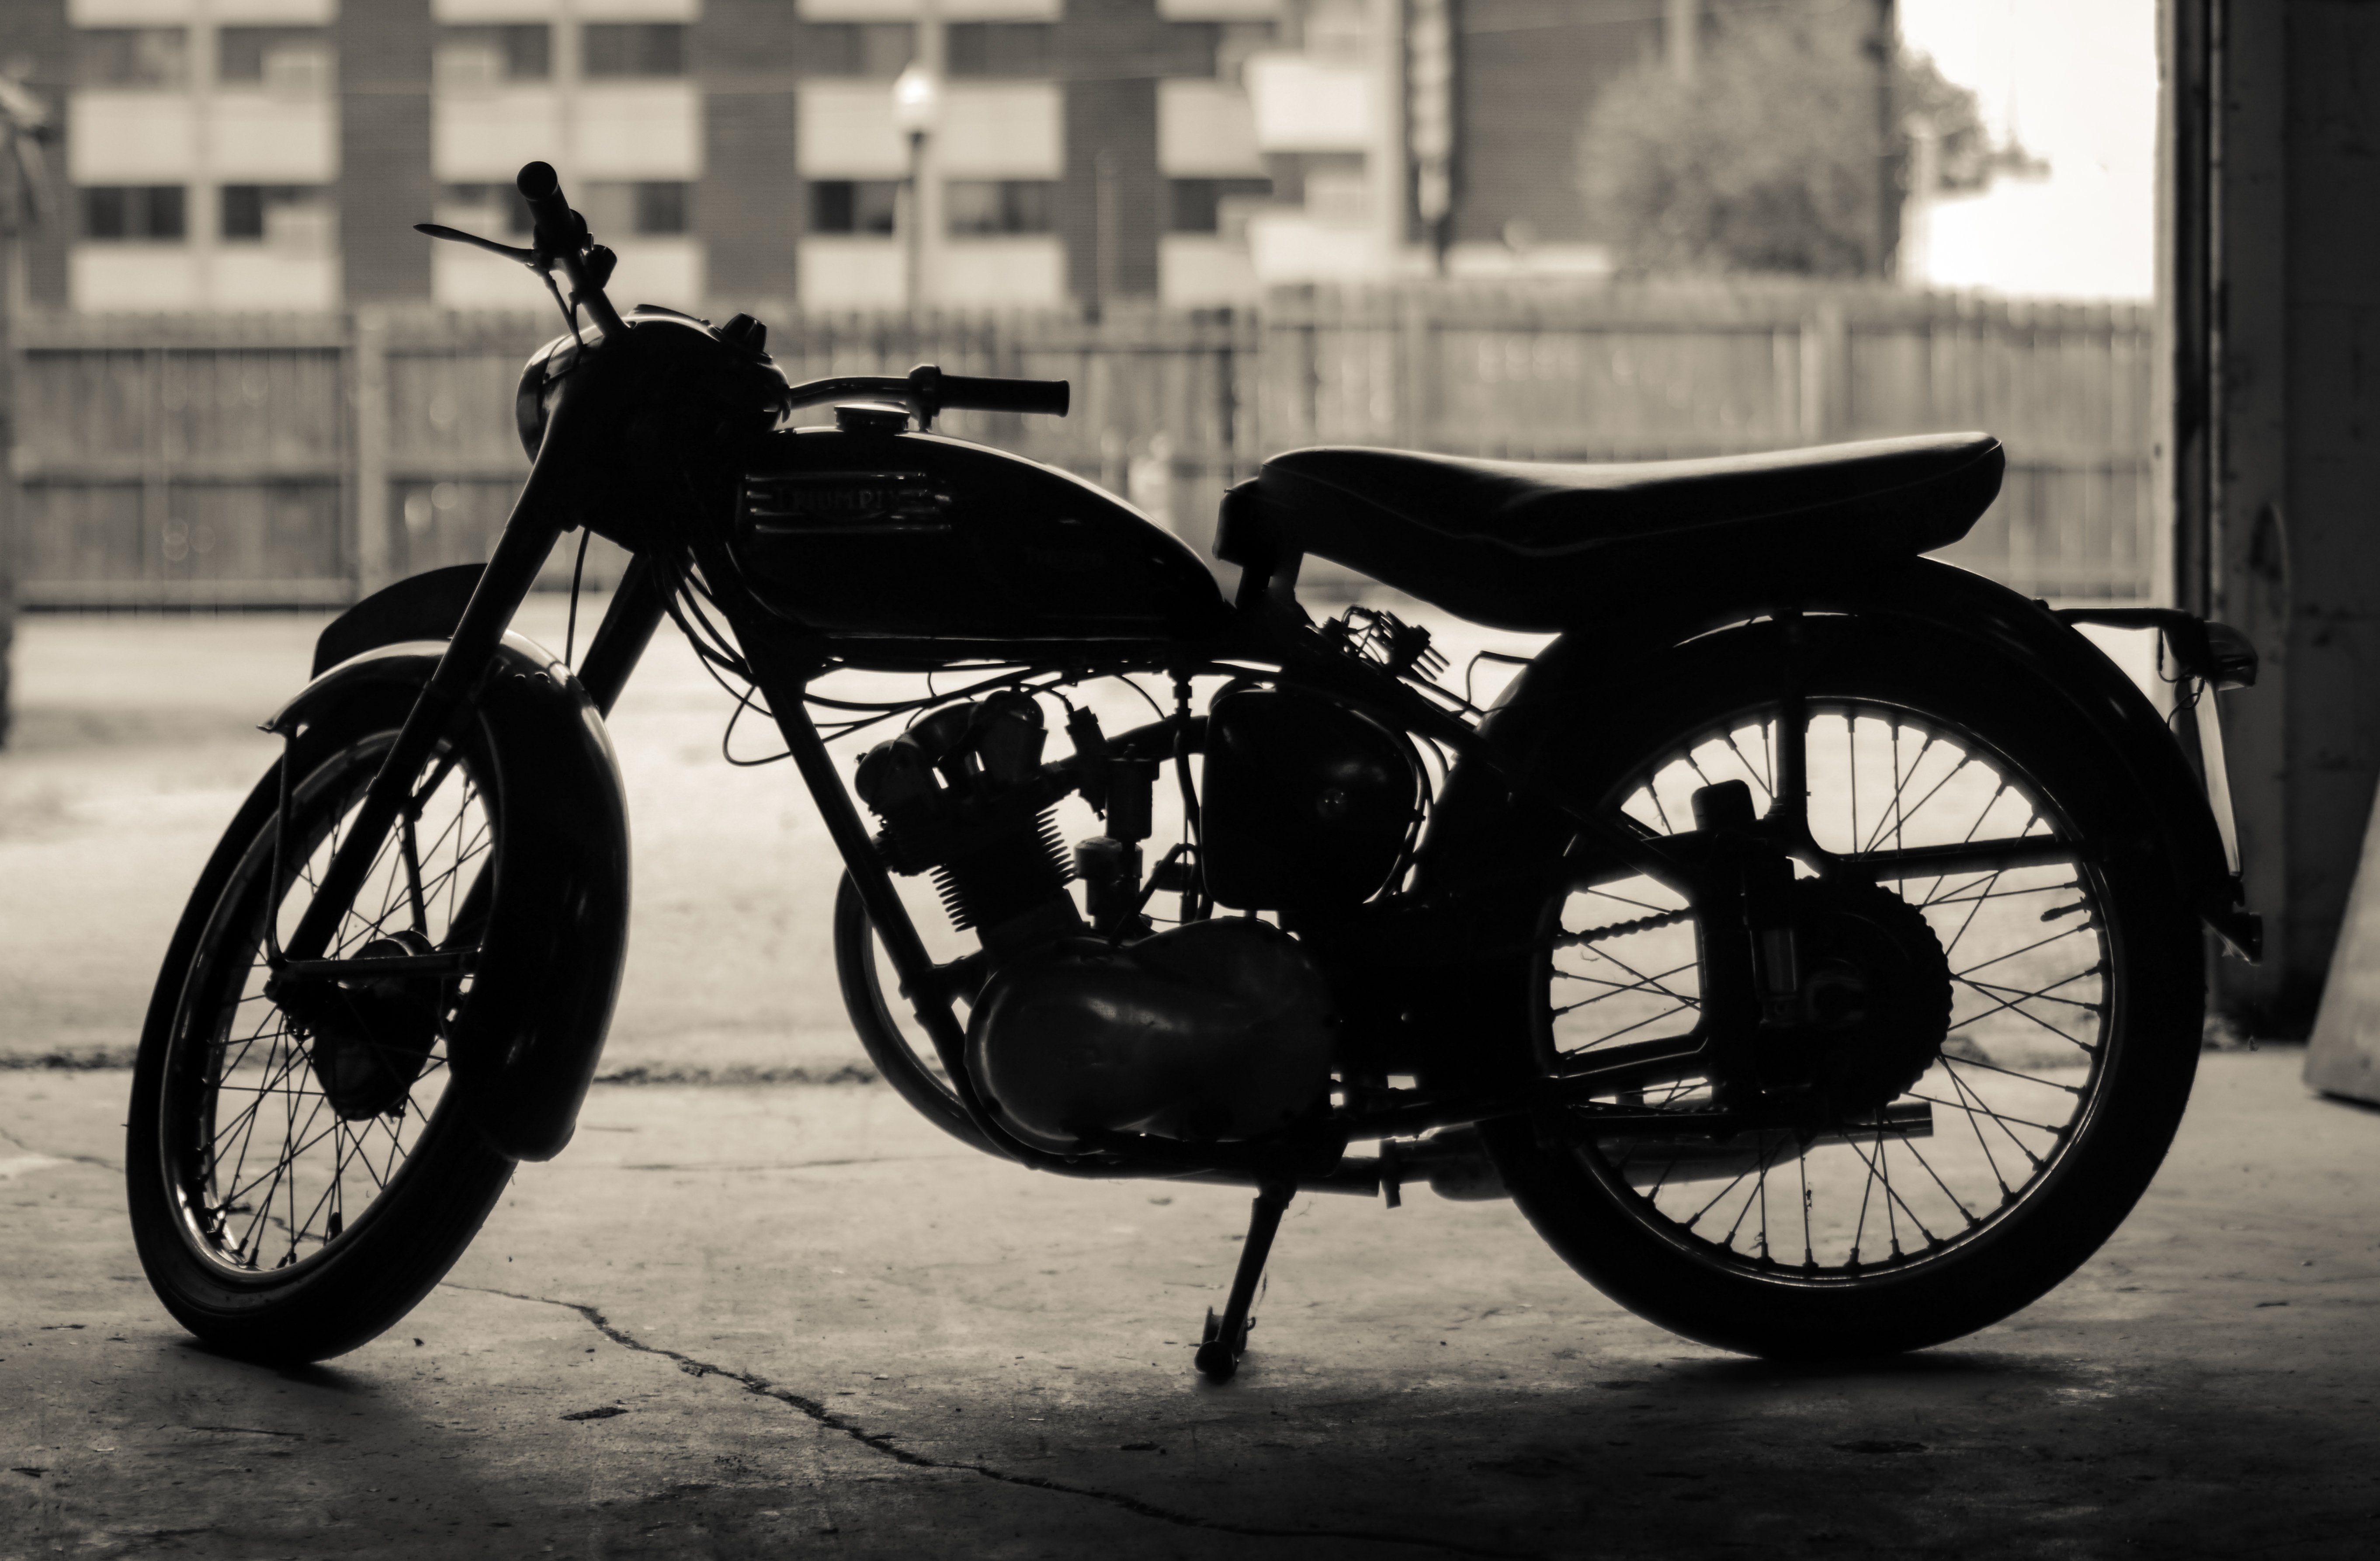
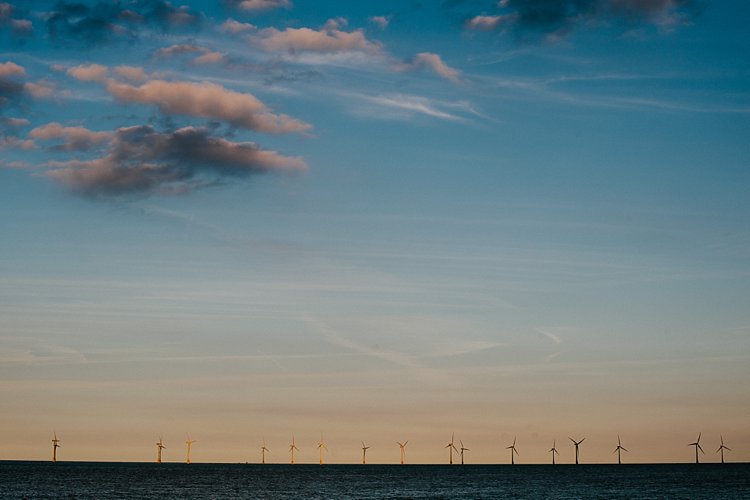
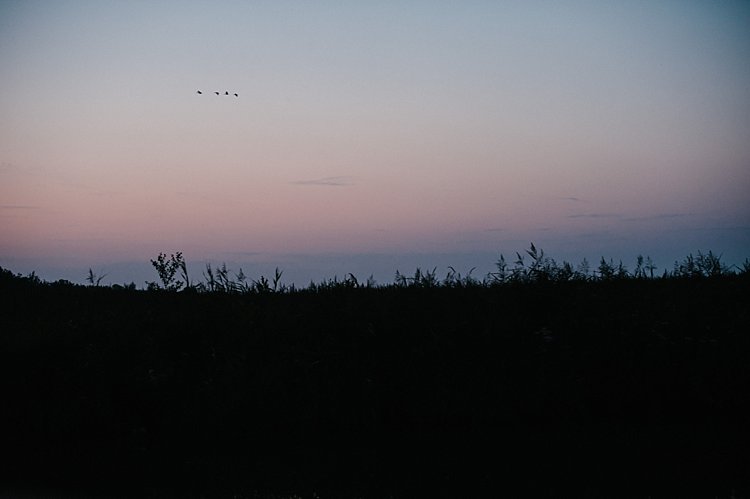
Backlighting is also useful when you have a subject with a great shape that you can make into a silhouette (image above right). To do this, meter on the sky portion of your frame so the sky will have a proper exposure and your subject will go completely black.

When you have backlight and you want to meter on a specific portion of the frame, this is a good time to use spot metering instead of evaluative metering mode. It’s a little bit more difficult but well worth the effort for the dramatic images you can create using this method.
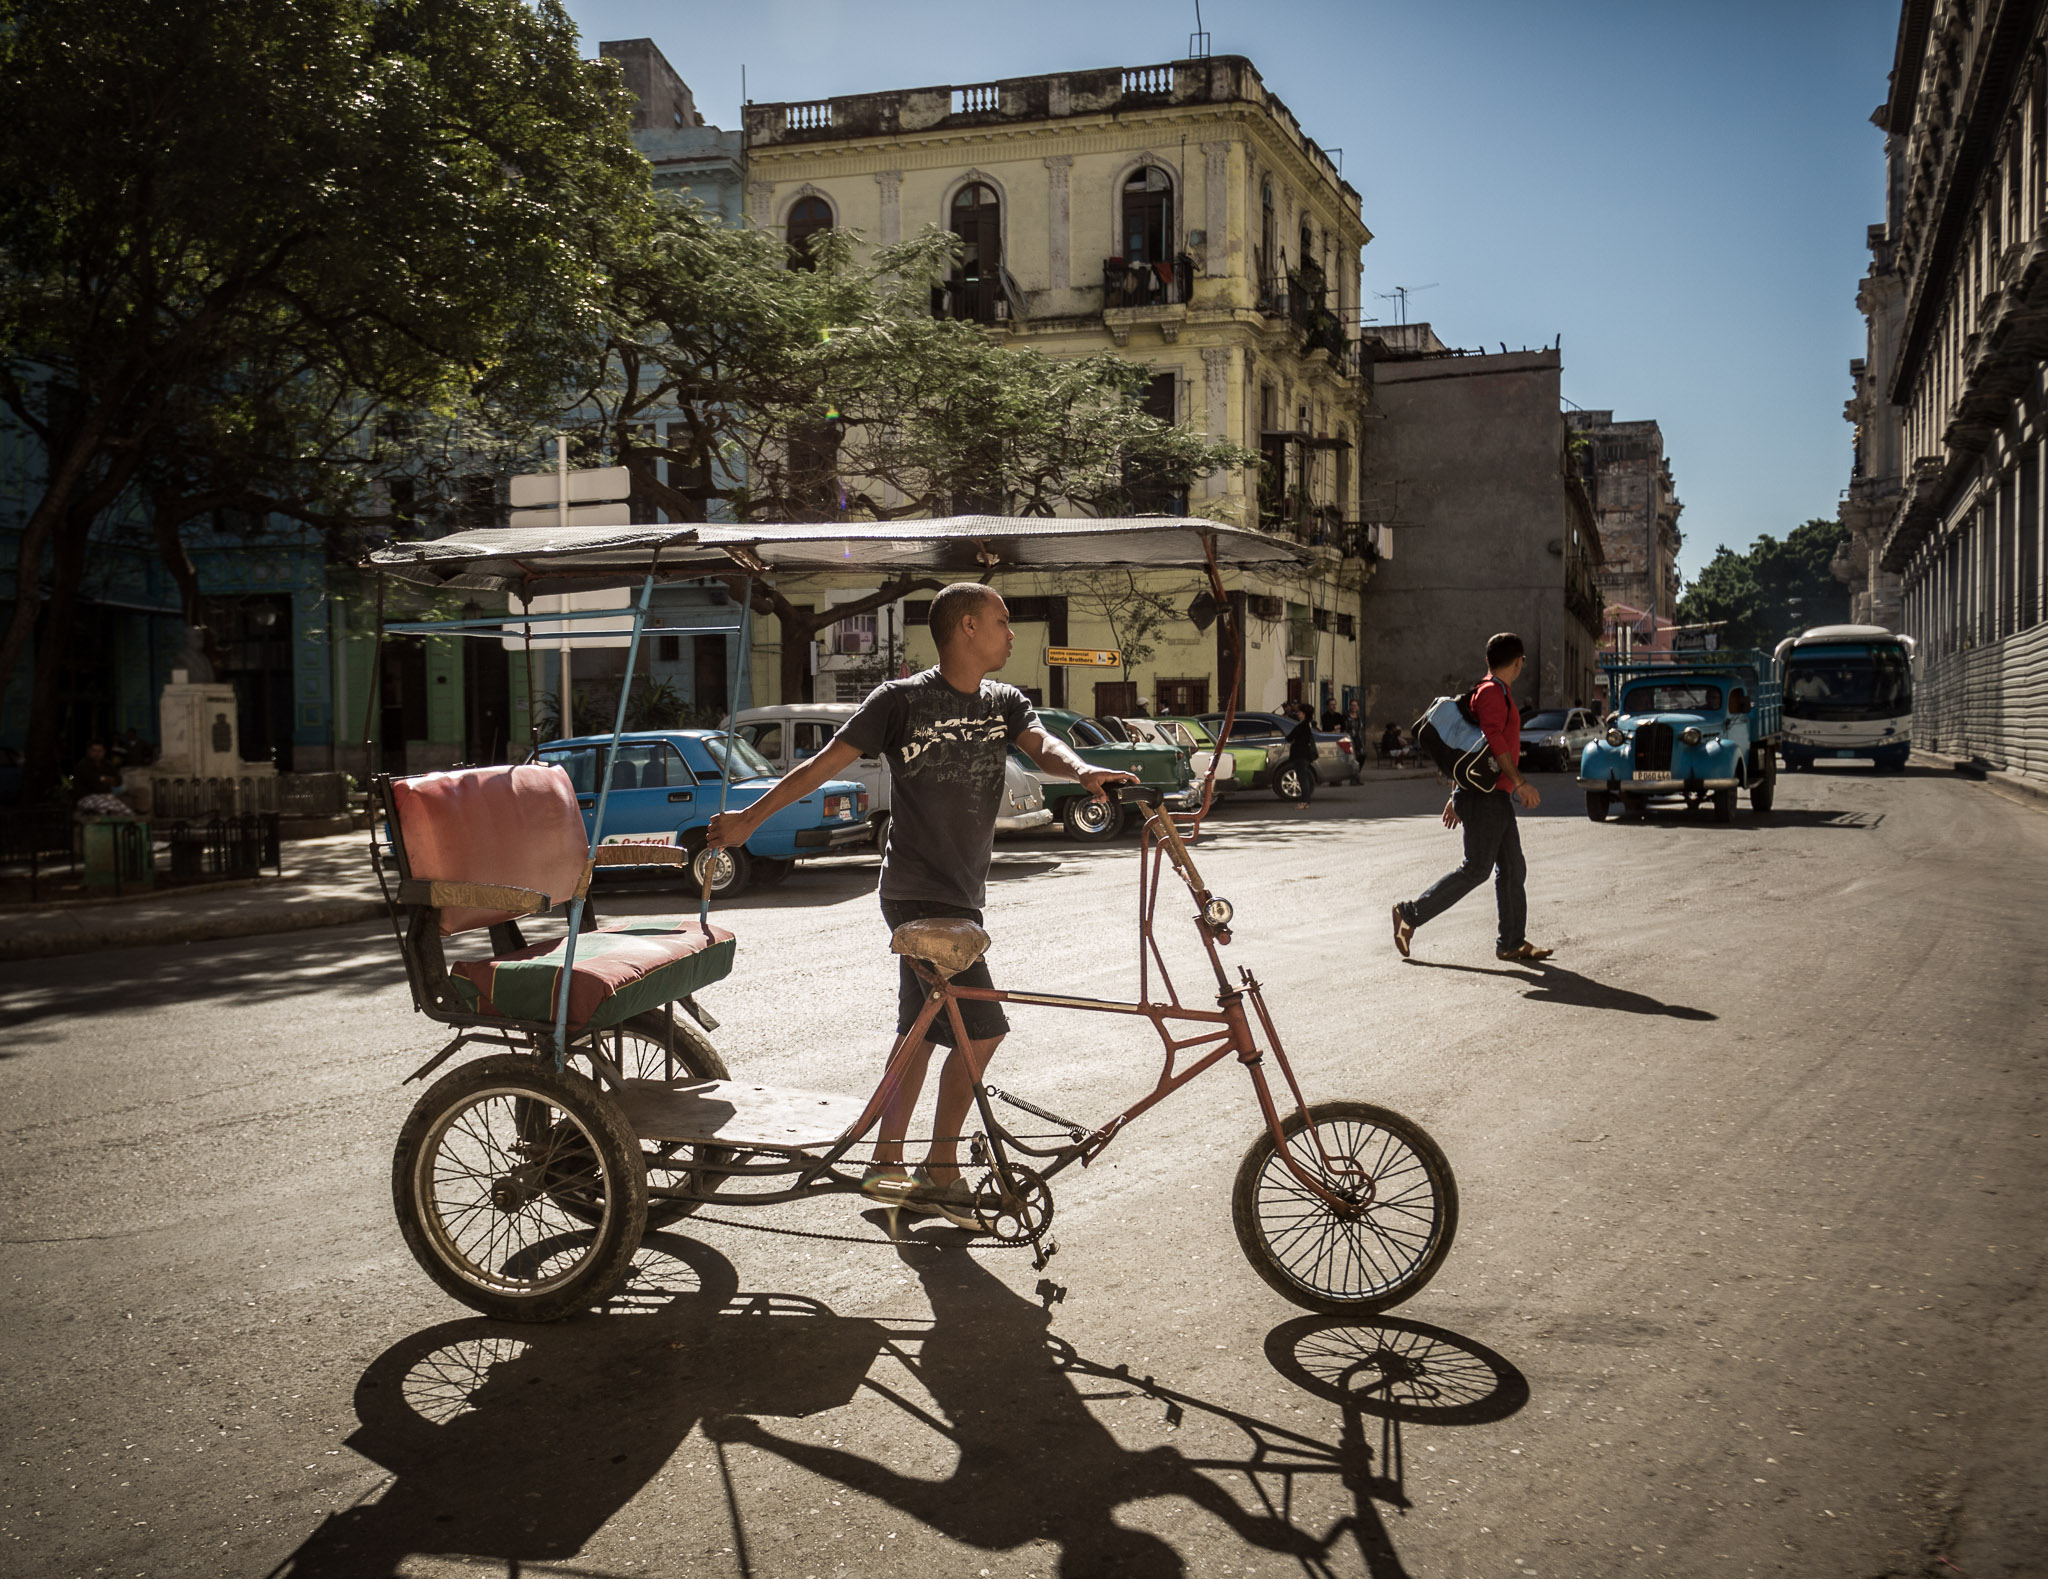
Front Light

Front light occurs when the sun is behind you hitting your subject directly in front of you. This is my least favorite type of light because it is often intense and unforgiving causing a scene with a lack of texture and depth.

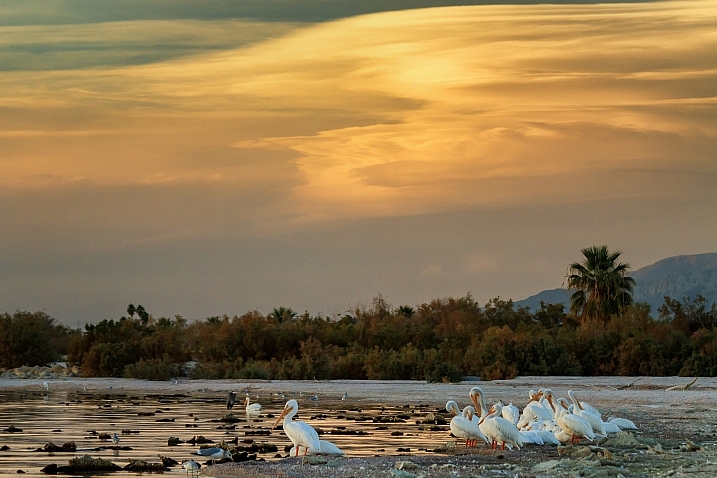
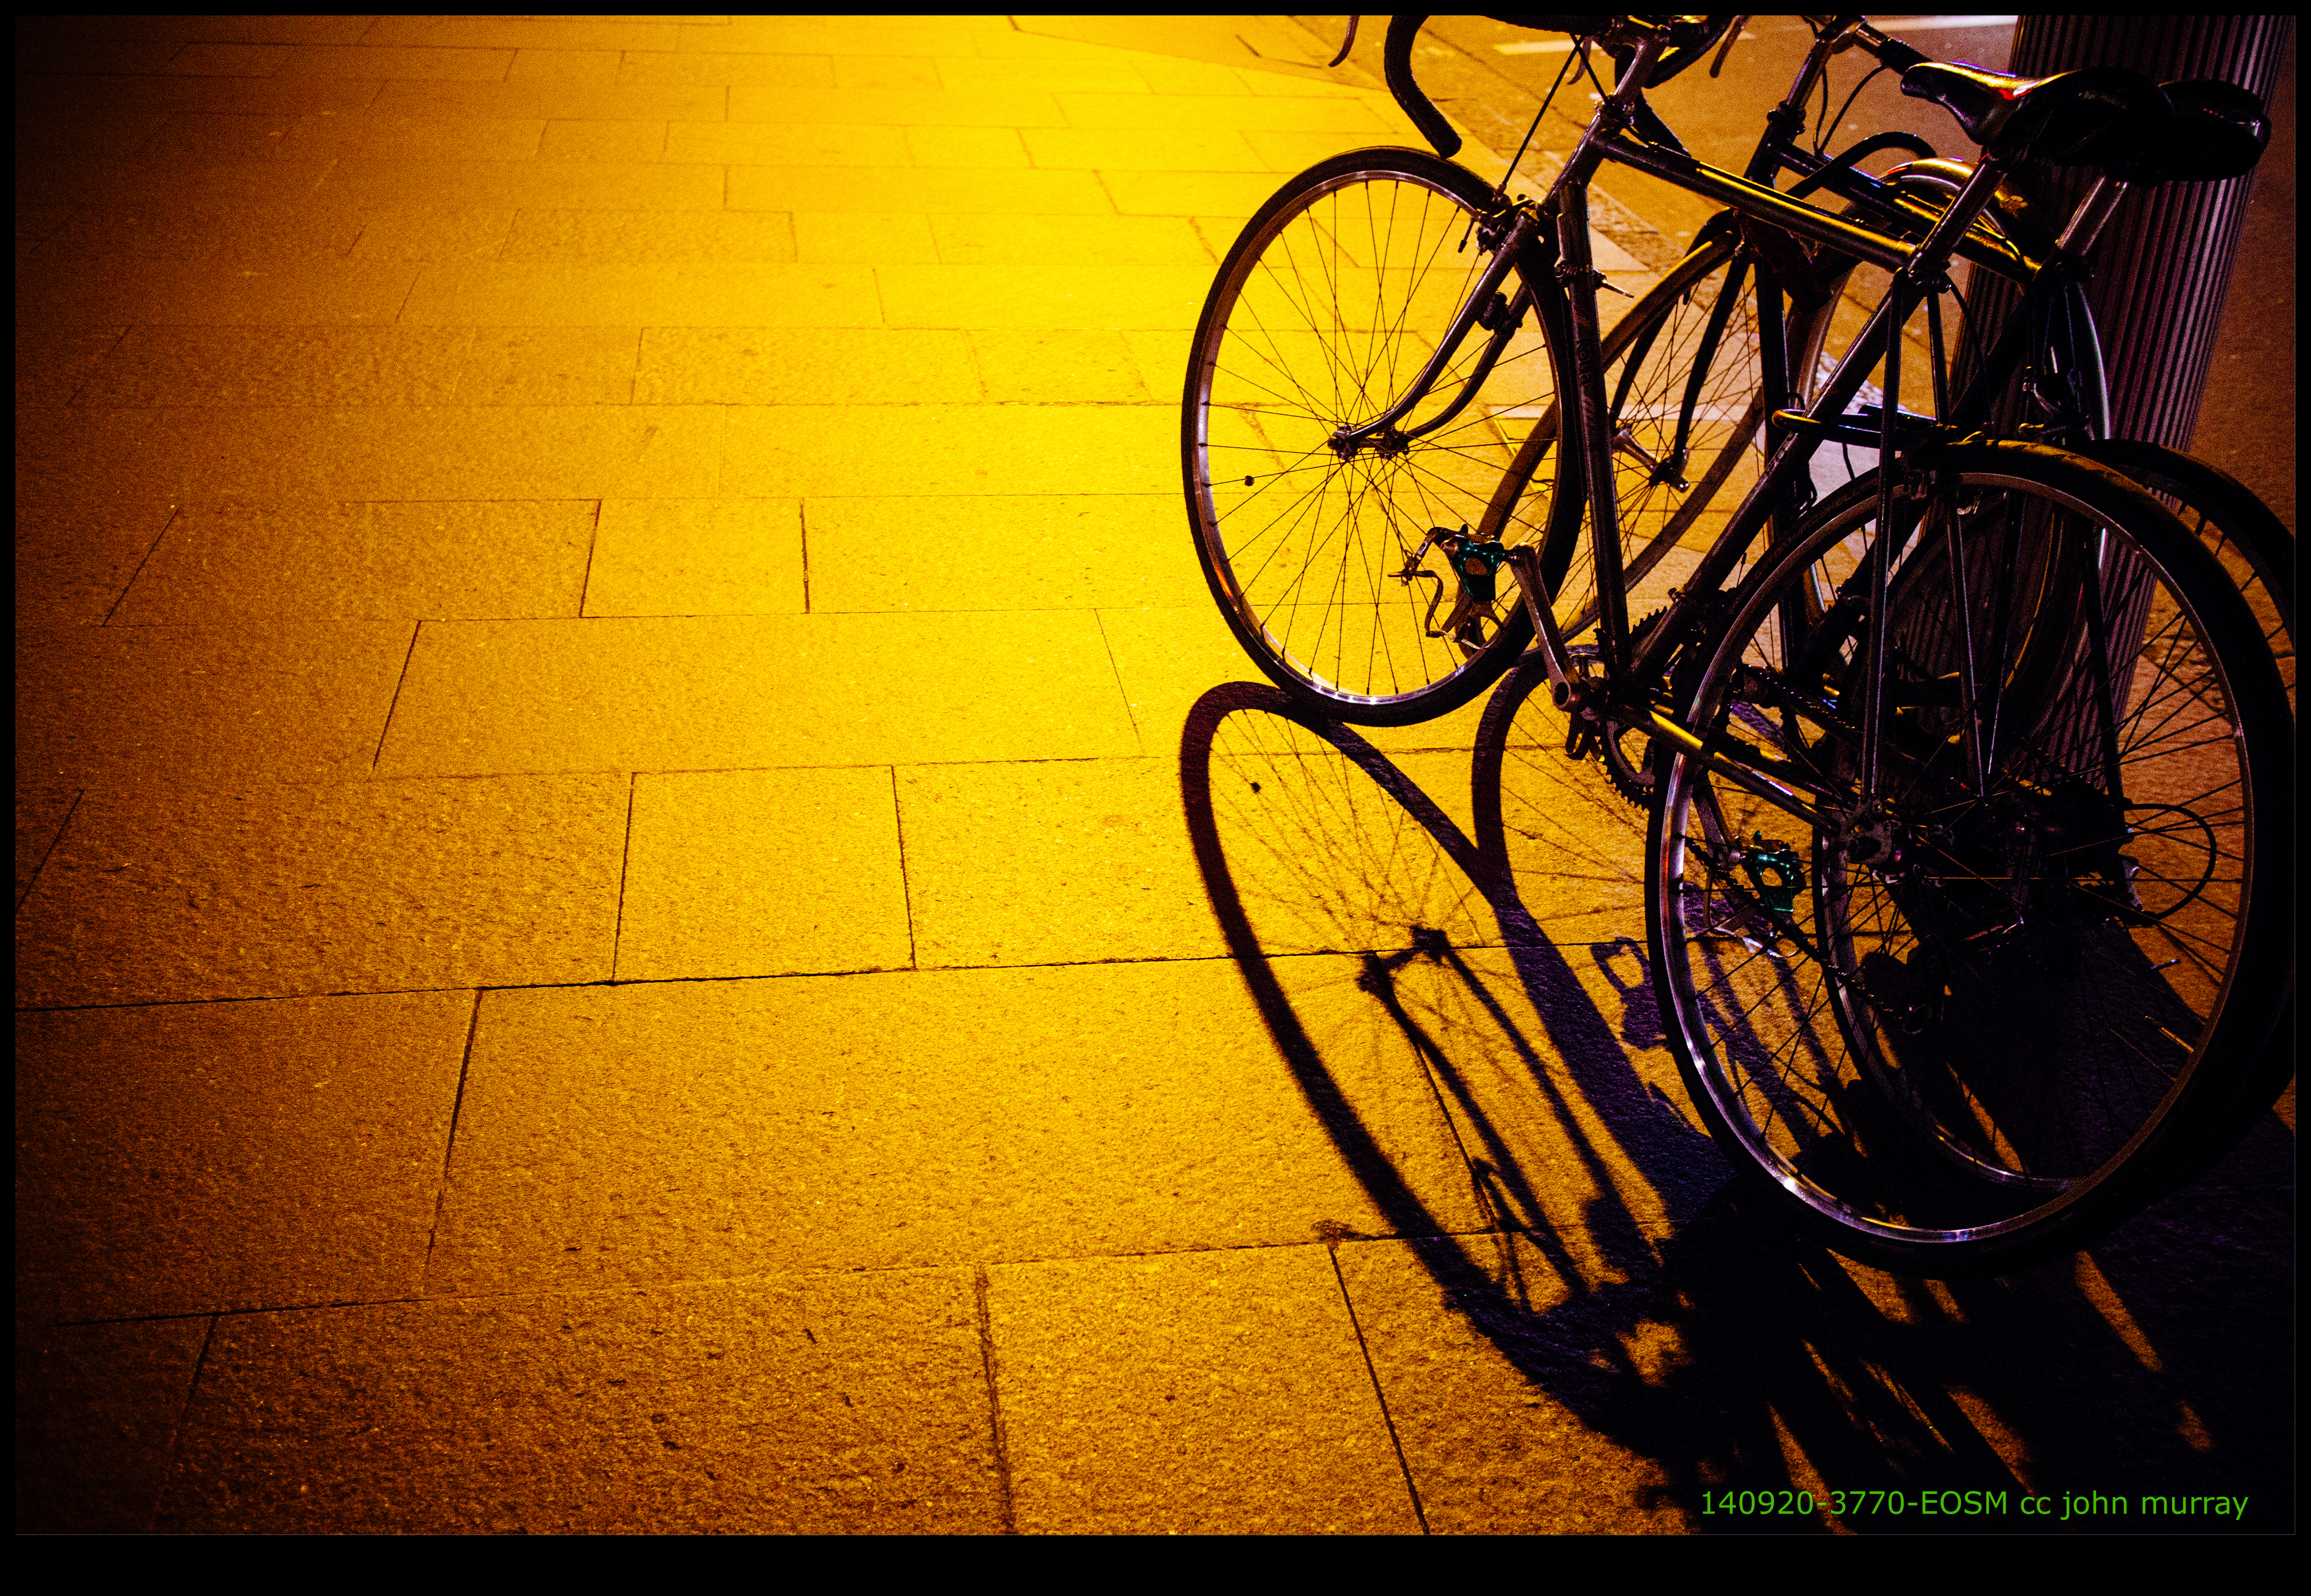
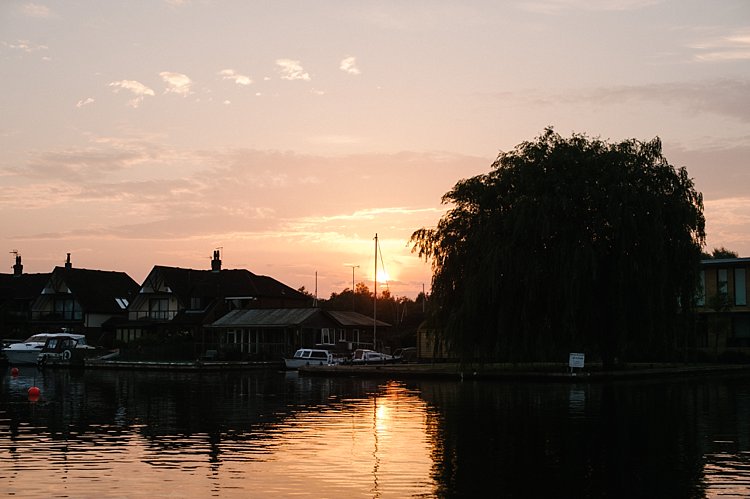
However, used at the right time it can be the best kind of light! When the sun is low in the sky, such as at sunrise and sunset, the light is not so harsh and it can cast a golden glow on your subject, especially when your subject is tall such as a mountain or a cityscape. The golden light will fall on the tallest part of the scene, casting its golden glow, while the rest of the scene remains in shadow creating a dramatic shot.
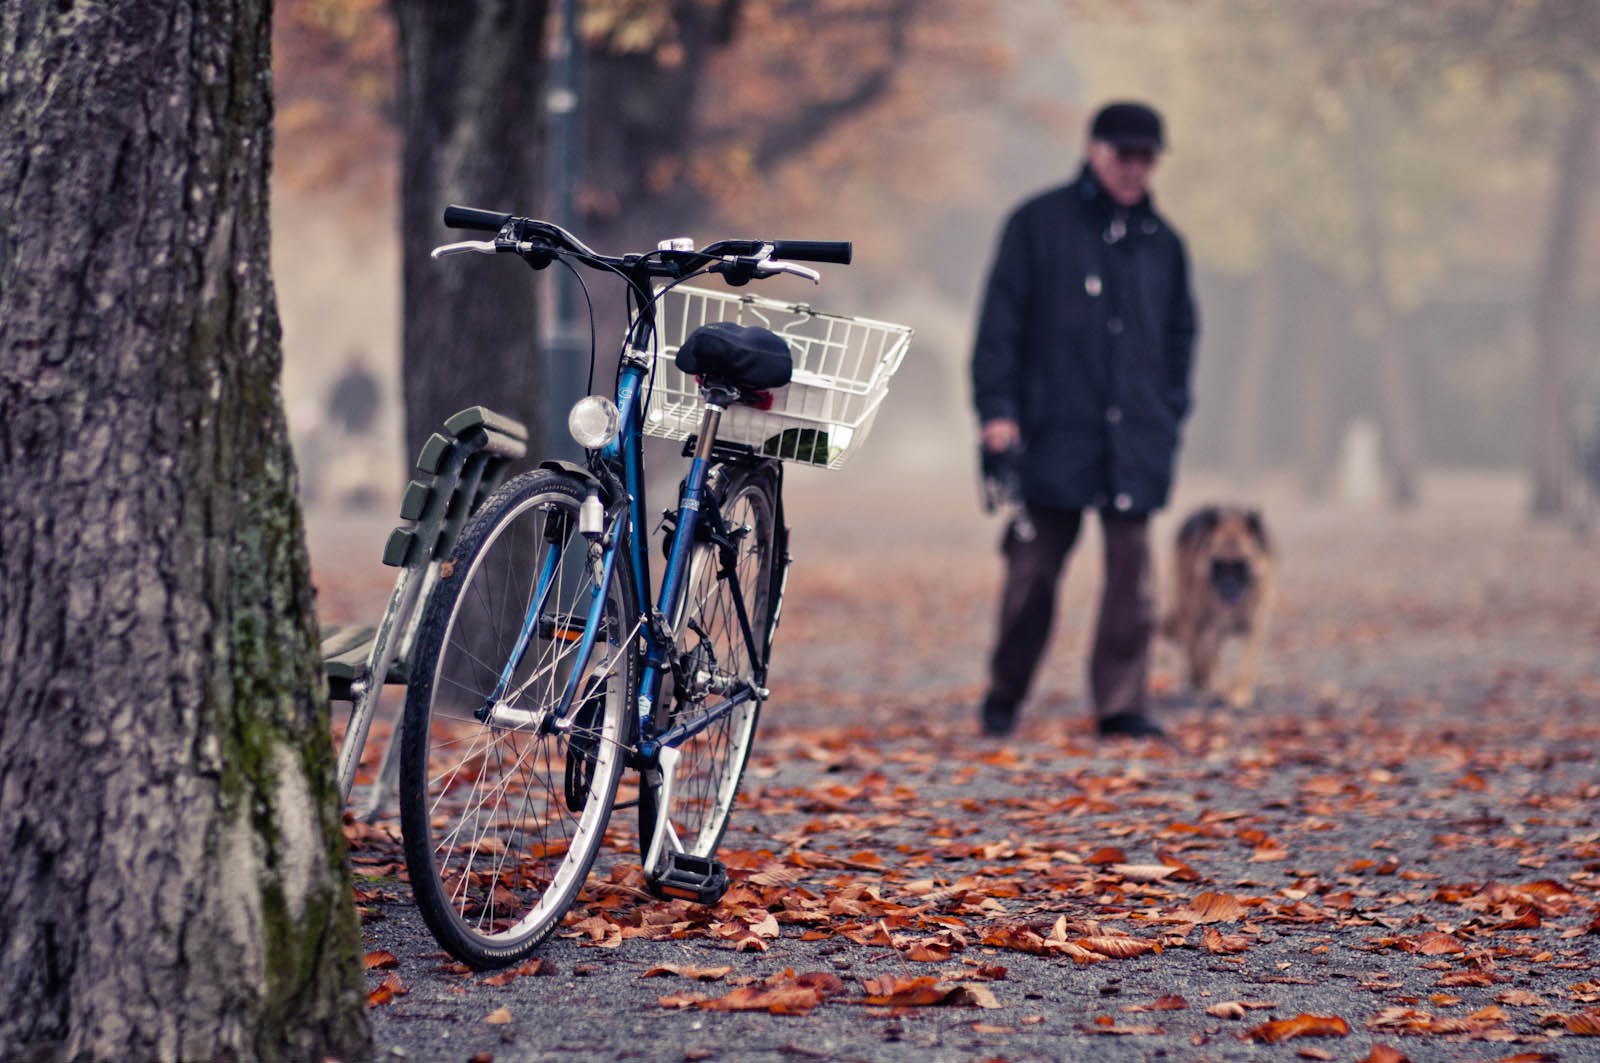
Ultimate landscape photography guide 04

Diffused Light

Diffused light happens on an overcast day or when your subject is in the shade. Under this type of light, your subject will have soft pastel colors and soft or no shadows. You will not get the same sense of shape and texture that you would under different types of lighting situations. As well, your scene will have very low contrast.

However, this is the best type of light for creating soft, gentle images. For example, flowers and colorful scenes work especially well under diffused light.

Ultimate landscape photography guide 05

But remember, when you have a bright overcast sky, it is best to exclude it from the frame and get in closer to your subject.

Getting a Good Exposure

Getting a good exposure means using a balanced aperture, shutter speed, and ISO so that you don’t have any areas of the frame that are too bright (known as blown out highlights). The problem is that if you have blown out highlights, there is nothing you can do in post processing to fix it. It will forever be a white spot. You may also want to make sure that you don’t have any areas that are too dark unless solid blacks are what you are after as in the example of creating a silhouette.

When you make an image, you can see the areas of light and dark using your camera’s histogram. Using a histogram is easy! It is simply a graph with the darks on the left and the brights or white on the right.

Ultimate landscape photography guide histogram good

All you really need to do is make sure there is not a spike on the right edge of the graph. If it spikes before the edge, that’s okay. You only need to be concerned if the spike touches the right edge. If your image is too bright, you can use your camera’s exposure compensation to reduce the brightness.

The Aperture is Key in Landscape Photography

So, how do you get the right exposure balance? For landscape photography, we are usually most interested in aperture because it affects the depth of field of the photo, so let’s start with selecting the correct aperture for the scene.

Aperture is the variable opening through which light travels to your camera’s sensor and its size is expressed in f-stops.

The smaller the f-stop number, the larger the opening. That’s kind of confusing, isn’t it? It’s because the f-stop number is actually a ratio. But I don’t want to get into too much mathematics here, just remember it’s like a fraction and 1/2 is bigger than 1/8 so f/2 is bigger than f/8.

Ultimate landscape photography guide aperture

The larger the opening the more shallow the depth of field. In other words, the amount of your scene that will be sharp, measuring from the object you focused on, is smaller.

Here are three images that illustrate the effect of aperture on the depth of field.

Ultimate landscape photography guide aperture f4point5Aperture: f/4.5 Ultimate landscape photography guide aperture f11Aperture: f/11 Ultimate landscape photography guide aperture f29Aperture: f/29

Once you have the aperture selected, the other two factors in exposure are ISO and shutter speed. ISO is the sensitivity of your sensor to light. A low ISO is good when you have lots of light. A high ISO might be necessary if you are shooting hand-held in low light situations. However, increasing the ISO causes noise in your image, so for landscape photography, we usually use the lowest ISO and if we need more light we reduce the shutter speed and use a tripod.

When you are in the field, set your ISO to 100. This is usually the lowest setting on most cameras. Then set your camera to aperture priority shooting mode and set the aperture you want for the depth of field you desire in the image. Then, the camera will calculate the appropriate shutter speed to create a balanced exposure. Remember to keep your eye on what that shutter is, because if it is any slower than about 1/100th of a second, you’ll need to use your tripod.

Composition Tips

DPS ultimate landscape photography guide 33

When you are just getting started in landscape photography, it can be hard to know what to include the frame to make a compelling composition. In this chapter, I’ll show a few different types of compositions to help get you started so you know what to look for in the field.

Of course, there are many more composition options than these to explore, and some that you’ll discover on your own through experimentation. But this will give you a starting place on which to base your own vision in photography.

Rule of Thirds

The rule of thirds is probably the most well-known “rule” in photography. I like to think of it as more of a guideline. As you grow in your photography, you’ll probably start to break these rules and come up with your own unique ways of composing images. But you have to understand the rule before you can break it.

Using the rule of thirds, the frame is divided into three vertical and three horizontal sections, like a tic-tac-toe game. The idea is that your main subject should fall on one of the lines in order to create a dynamic and interesting composition. Locating your subject on the intersection of two lines is ideal.

Ultimate landscape photography guide rule of thirds

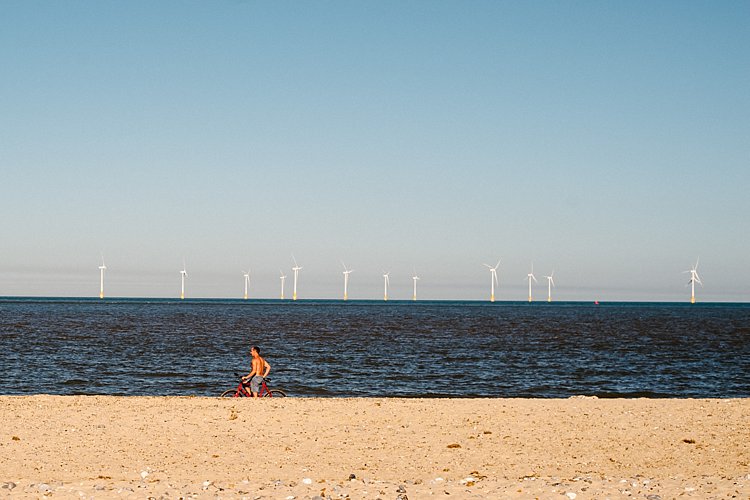
A centered horizon gives equal importance (visual weight) to both the sky and land portions of your image, and the viewer is left with no direction where to look. For example, by placing the horizon along the bottom third line, you will give more visual weight to the sky area and direct the viewer’s eye to that area. A higher horizon placement will have the viewer’s eye going to the bottom of the image where there is more emphasis.
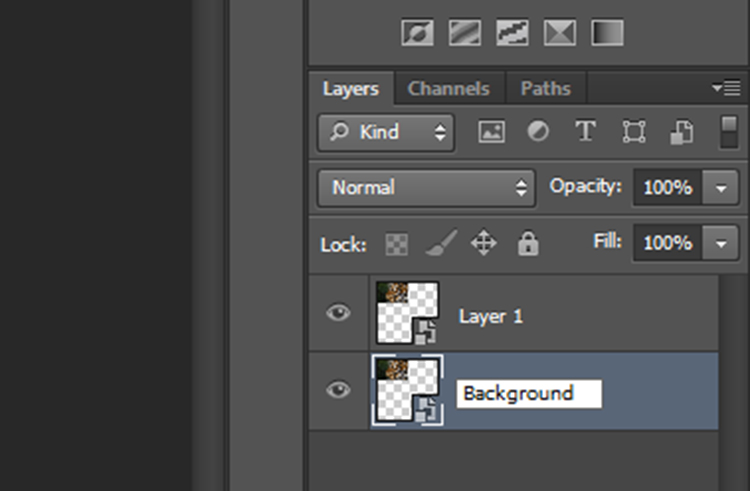
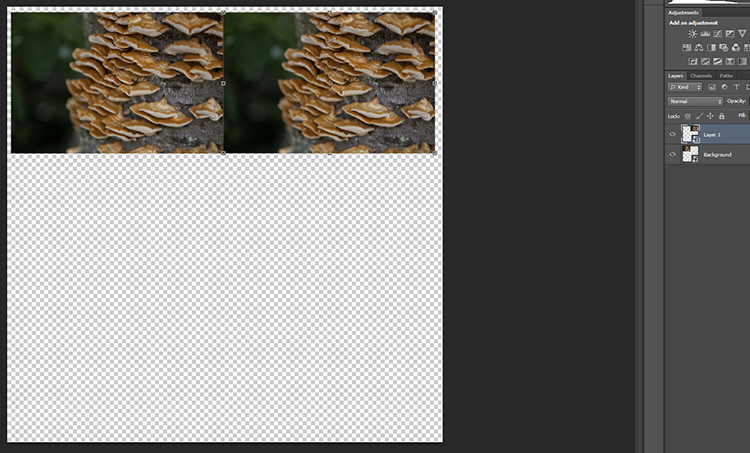
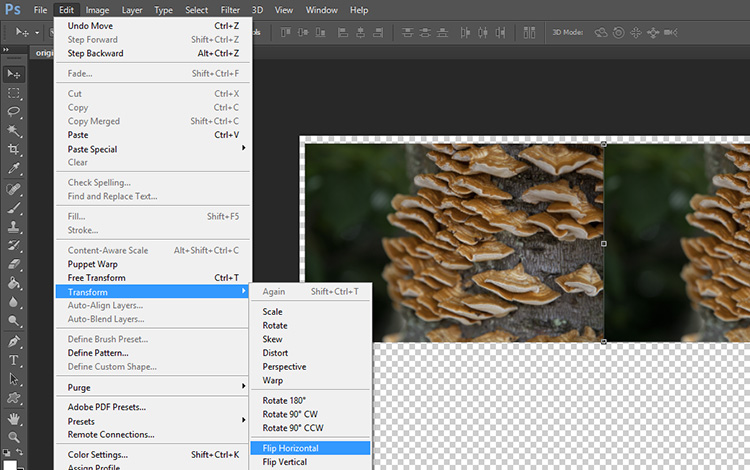
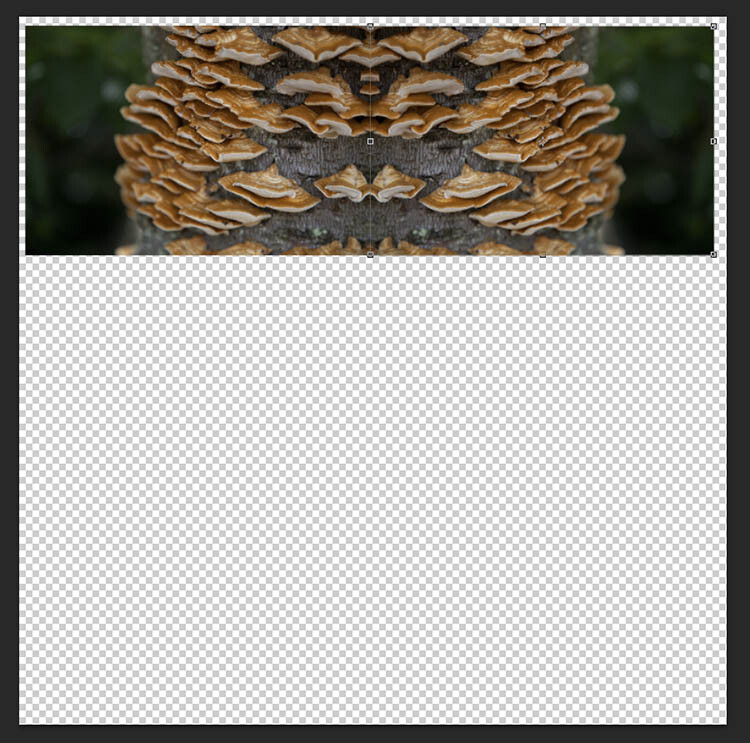
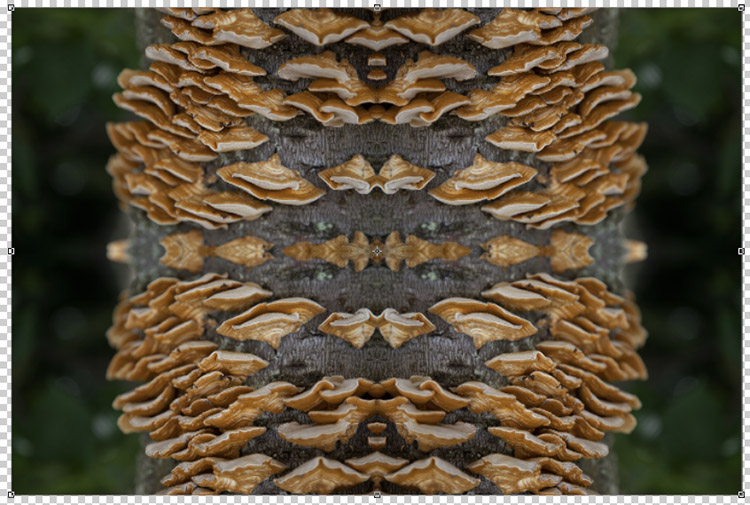
Symmetry

Symmetry is the exact opposite of the rule of thirds. A symmetrical composition has the center of the subject exactly in the middle of the frame with equal weight on either side. The two sides of the image are often a mirror image of each other. This works especially well with subjects that are naturally symmetrical like plants or architecture.

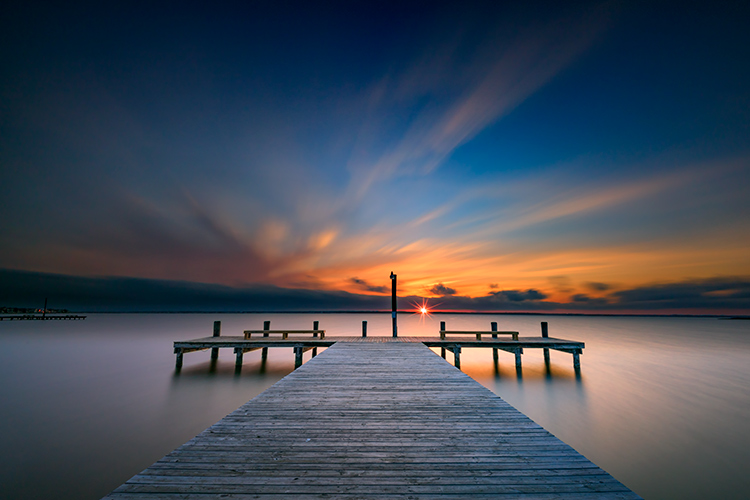
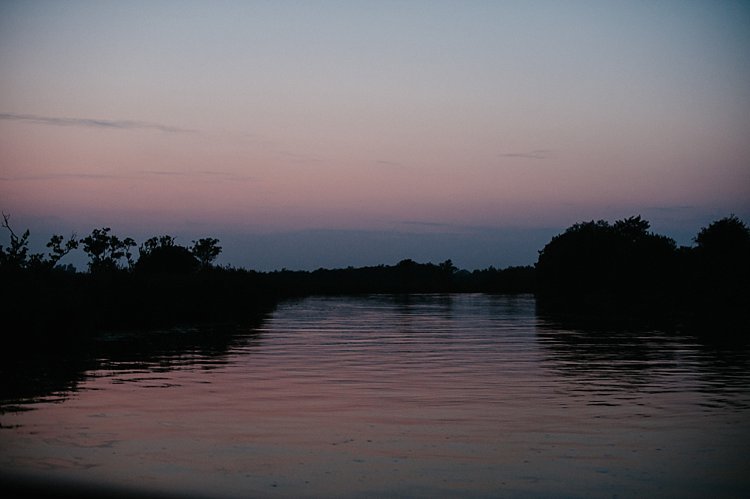
Another way to use symmetry is to put a shoreline in the center of the frame, especially when you have a reflection to balance out the image.
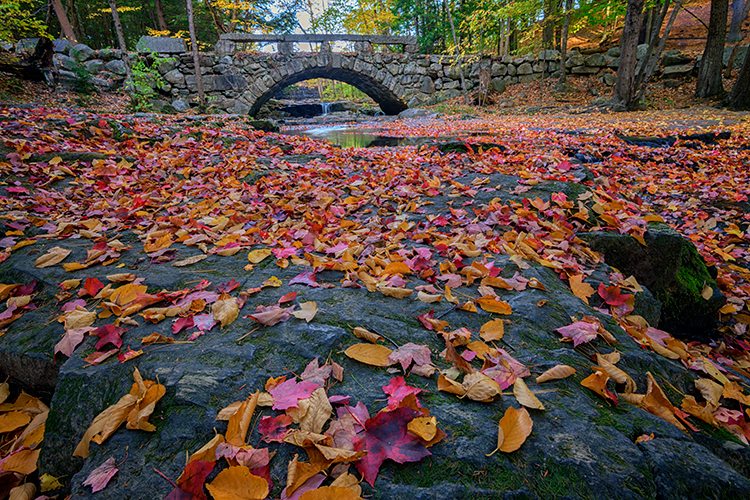
Ultimate landscape photography guide 06

DPS ultimate landscape photography guide 29

Leading Lines

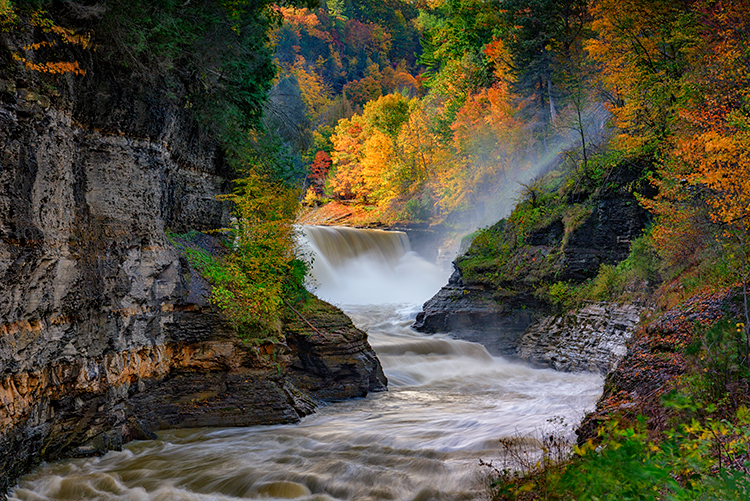
Another effective type of composition uses leading lines to draw the viewer’s eye to the main subject. The lines can be man-made such as roads, fences, or bridges, or they can be natural elements such as rivers, shorelines or rocks.

Usually, the lines start from the bottom of the frame and move upward and inward to draw the eye into the image, connecting the foreground and background, and often leading to the main subject.

In the field, when you find a subject you want to work with, take a look around and see what lines you can use in your composition that would lead up to the subject creating depth and perspective in your image.

Ultimate landscape photography guide 07

Processing Your Photos

Processing your photos is an important part of digital photography. In the old film days, the lab technicians who processed the negatives and printed made a lot of decisions about color and contrast that affected the final outcome. These days, that job has become yours. If you find that your photos look gray and dull, it’s probably because you haven’t processed them.

When you shoot in RAW format, as mentioned earlier, you have collected the highest amount of data you can which will help you when it comes to processing. You’ll need to use Adobe Camera Raw, either on its own or within Lightroom, Photoshop or other Raw compatible software.

I recommend that you go with Lightroom. Not only does Lightroom include Adobe Camera Raw for processing your photos, but it also provides an excellent way to keep your photos organized and accessible. I do all of my basic processing in Lightroom and only use Photoshop if I want to do something unusual with my image.

Note: check out the dPS course Lightroom Mastery here.

DPS ultimate landscape photography guide 37

Using the sliders in Adobe Camera Raw, you can make subtle adjustments that will have a huge impact on the end product. For most of my images, I make adjustments to the following settings:

  • White Balance
  • Contrast
  • Vibrance and Saturation
  • Sharpening
  • Noise Reduction
  • Cropping

A little processing can go a long way. With solid ingredients like good composition and effective use of light, a little processing can turn a good image into a great one.

Taking it to the Next Level

If you want to take your landscape photography to the next level, beyond just snapshots and postcard-like images here are a few places to start, and links to articles on this topic in more depth.

Add a Foreground Element

One of the biggest hurdles in photography is the fact that our majestic three-dimensional scene is rendered into a mere two-dimensional image, and the physical depth that we experience in real life is lost. To resurrect this spacious feeling, we can create the illusion of depth where there is none, by using strong elements in the foreground.

Read more about how to add a foreground element to your images here: How to Use Foreground to Create Depth in Your Images.

Ultimate landscape guidebook foreground

Use Shadows to add Depth to Your Images

In music, they say the spaces between the notes are just as important as the notes themselves. Similarly, in photography, it is the spaces that are not in the light that can add impact to an image. Shadows help tell a story and enhance the mood and visual power of a photograph. In fact, they can be so interesting, that they “overshadow” the subject itself!

By focusing your attention on the shadows, you can create beautiful compositions full of contrast, form, and minimalist simplicity. An object and its shadow will strengthen each other. Sometimes you might even want to cut the object out entirely, and play with capturing only the interesting shadows that are cast by it.

Read more about how to use shadows in your images here: Add Impact to Your Photos by Including Shadows.

Summary

DPS ultimate landscape photography guide 32 DPS ultimate landscape photography guide 25

Landscape photography can be a fun and rewarding endeavor. Use these tips as a starting point for your journey and continue exploring this wonderful world and all it has to offer and share your images with others to enjoy as well.

Remember, photography is a journey, so continue to learn and grow as a photographer. Look back on your work from a year ago and see how far you’ve come. Then think about what you can learn and master next. Have fun, and enjoy the ride.


Download “The Ultimate Guide to Landscape Photography”

We respect your email privacy

googletag.cmd.push(function() {
tablet_slots.push( googletag.defineSlot( “/1005424/_dPSv4_tab-all-article-bottom_(300×250)”, [300, 250], “pb-ad-78623” ).addService( googletag.pubads() ) ); } );

googletag.cmd.push(function() {
mobile_slots.push( googletag.defineSlot( “/1005424/_dPSv4_mob-all-article-bottom_(300×250)”, [300, 250], “pb-ad-78158” ).addService( googletag.pubads() ) ); } );

The post The dPS Ultimate Guide to Landscape Photography by Anne McKinnell appeared first on Digital Photography School.


Digital Photography School

 
Comments Off on The dPS Ultimate Guide to Landscape Photography

Posted in Photography


10 of the Biggest Business and Marketing Mistakes Photographers Make

01 Dec

James ebook Creative Freelance Marketing is on sale now at 50% OFF over at Snapndeals (only until December 13th, 2016)

Photographers can be some of the best business people around or some of the worst. But realistically, if you’re building a photography business, you probably didn’t get into it because you enjoyed business and marketing. This is why some photographers struggle at being successful. They got into it for the passion, and then wake up one day to the reality that it is a business like any other.

The 10 Biggest Business and Marketing Mistakes That Photographers Make

Dancer Portrait

However, fear not. The business and marketing aspect of photography can actually be rewarding and interesting. It’s necessary to learn it to be able to succeed, but once you start to see it work, it becomes empowering. It’s a way to guarantee your success as a photographer so you can continue to do what you love.

But you can’t do that if you make too many mistakes. Here are the biggest mistakes that I see photographers make (and which I have also made myself).

Mistake #1 – Not charging enough

Business Portrait Photography - The 10 Biggest Business and Marketing Mistakes That Photographers Make

Business portrait photography

How much you charge is going to be the backbone of your entire business. You cannot let clients lowball you over and over again. By doing that you are lowering the perceived value of the work for the entire industry, and you are not even giving yourself a chance to succeed. By not charging enough, you will inevitably go out of business. Even if you feel desperate for a job, know that it will take up time that would be better spent on marketing yourself to get jobs that pay what you need to survive and thrive.

Many young photographers are afraid of losing jobs, but that’s a regular part of the business. You should not feel bad about it if the client cannot afford you. If they can’t afford you, then it was never a real job in the first place. How can you do good work or create a portfolio worthy piece if you’re not being paid enough to have your heart in it? In addition, these cheap jobs always end up to be the biggest headaches anyway. Every photographer has a story from when they were starting out about that client who just wouldn’t go away.

Commercial Photography

Commercial Photography

Even worse than a client lowballing you, are situations when you do not charge enough! Sometimes you will have no idea that a client has budgeted much more than you quoted them. A simple and fantastic question to ask to help you handle confusing pricing situations is, “What is your budget?” This question is sometimes not appropriate, but there are many ways to say it, such as telling them that you offer multiple levels of service based on the cost and asking what their budget is for the project. Or if they say they are tight on budget, you can offer to help them and simultaneously ask what they can pay. When introduced in the right way, this can get your client to lay all their cards on the table.

Mistake #2 – Not responding to inquiries quickly enough

Musician Photography - The 10 Biggest Business and Marketing Mistakes That Photographers Make

Musician photography

Every ounce of business development and every second of time spend on the tedious aspects of building a business serves the specific purpose of getting someone to contact you with a job. Well then answer them! I get nervous if it takes me 24 hours to respond to an inquiry, and the clients usually come back thanking me for responding so quickly. If you answer your emails and calls efficiently, then you immediately put yourself ahead of the majority of photographers. I can’t tell you how many times I’ve been told that we were able to have a whole back and forth and book a job before a competitor even replied.

In addition, responding regularly and efficiently will add to their comfort in working with you. Showing that you are responsible enough to do this also shows them that you are probably responsible in all aspects of your business. It is a great way to set the tone for what working with you will be like and can be excellent for gaining referrals in the future.

Mistake #3 – Not having a focused business plan

Business Photography - The 10 Biggest Business and Marketing Mistakes That Photographers Make

Business or corporate photography

You need to know how you are going to make money. Having a focused plan with an income target, price per job needed to reach that target, and a strategy to reach clients will become the basis for your entire business. The more focused that plan is, the more focused you will be. Figure out the strategy with the most potential to help you make a living and start with that. Focus on that before you waist your time on anything else. You do not want to fragment yourself too early in the building process.

Mistake #4 – Not setting aside enough time for personal work

Fine Art Photography - The 10 Biggest Business and Marketing Mistakes That Photographers Make

Fine art photography

Personal work is what you do to renew your passion for photography. Without that, it will be very difficult to succeed in the photography business. However, it is also the way that you get jobs and build your portfolio. It’s where you test out new strategies and ways of photographing, and it is a way to improve overall at your craft. If there is a type of job that you want to start booking, then build a portfolio of work that will help sell you as a photographer to those clients. They don’t have to know that this portfolio wasn’t made of paid jobs, and in many cases they will enjoy knowing how passionate you are in pursuing your personal work.

Mistake #5 – Not researching colleagues/competitors

As a business owner, you need to know what’s out there. Learning from your competition and even your friends is incredibly important. Go through their work and figure out what you like and what you dislike. Try to figure out the different ways that they market themselves and where their jobs come from. See how they use social media and where they get press from. Learn their pricing and test out their website.

All of this information is so important to helping you find your way. Take the best aspects of everyone you research, and put them together into your own plan. All of the information is out there for you to be successful, it’s just up to you to find it.

Family Photography - The 10 Biggest Business and Marketing Mistakes That Photographers Make

Family photography

Mistake #6 – Not having a plan for editing and delivering

One of the biggest problems that I see newer photographers have is that they take way too much time editing. They end up missing deadlines, wasting their time, and worrying too much. This is not a good situation for anybody and is one of the quickest ways to hold your entire business back. Learn to cull your images from a job quickly. Right away, knock 800 images into the top 200 or 150 as fast as possible and work from there. Organizing and attacking a job’s editing in an efficient matter will make your life so much better, and it will make your clients very happy.

Always tell a client that you will deliver a job to them a couple days after you plan to (under promise over deliver). That way you will look very good when you deliver the work early, and if you have some unfortunate setback or issue in your life, you will still have extra time to complete the job.

Mistake #7 –  Not doing enough local networking

Writer Portrait Photography - The 10 Biggest Business and Marketing Mistakes That Photographers Make

Writer environment portrait

Friends, family, and colleagues are your first line of people who can help you gain work. The second line is your local area. Figure out the businesses and people in your community that might need your services, and figure about the best way to reach them. Find business meet-up groups, local meet-ups, and trade shows that occur in your community and become a part of them. And this tip doesn’t mean that you should only show up once and never again. Become a regular part of them. Spend more time socializing within your community and that will come back to you business-wise.

Mistake #8 – Not using a mailing list

Business Portrait Photography- The 10 Biggest Business and Marketing Mistakes That Photographers Make

Business portrait photography

Social networks come and go. They all change constantly and hold you at their whim. While they are necessary to be a part of, social networks are in it for themselves, not for you. Diversify your marketing and build up a mailing list of all your contacts, clients, and friends. This way there is nothing between you and reaching them with important news. Mailing lists have a significantly higher open and click-through rate than social networks, and won’t charge you (per email) to reach your list.

Mistake #9 – Trying to do too much all at once

Event Photography - The 10 Biggest Business and Marketing Mistakes That Photographers Make

Event photography

There are so many strategies to market yourself in photography. Every situation is unique, and every marketing plan should be different. It is important to learn as much as you can about marketing, but at the same time you need to prioritize. Five strategies done with a small amount of your attention on each will be much less effective than one strategy with all of your attention focused on it. Spend some time to figure out which strategies will have the most potential for your situation and rank them. Then start with the first one and over time move down the list.

Mistake #10 – Not putting yourself out there

Artist / Writer Portrait Photography focused

Artist / Writer Portrait Photography

Nobody is going to give you an opportunity if you don’t ask. The biggest difference between the people who make it and the people who fail is that the ones who succeed will wake up tomorrow and take these steps. None of this is rocket science – it just takes dedication, organization, and follow-through.

Many people won’t give you an opportunity the first time you ask. Learn to take rejection because rejection isn’t that bad. It means you’re pushing yourself and it’s inevitable along the way. Keep a thick skin and pride yourself on trying. Marketing is a grind at first. The photographers who can dive right in despite every frightened feeling their brain gives them will be the most successful.

James ebook Creative Freelance Marketing is on sale now at 50% OFF over at Snapndeals (only until December 13th, 2016)

googletag.cmd.push(function() {
tablet_slots.push( googletag.defineSlot( “/1005424/_dPSv4_tab-all-article-bottom_(300×250)”, [300, 250], “pb-ad-78623” ).addService( googletag.pubads() ) ); } );

googletag.cmd.push(function() {
mobile_slots.push( googletag.defineSlot( “/1005424/_dPSv4_mob-all-article-bottom_(300×250)”, [300, 250], “pb-ad-78158” ).addService( googletag.pubads() ) ); } );

The post 10 of the Biggest Business and Marketing Mistakes Photographers Make by James Maher appeared first on Digital Photography School.


Digital Photography School

 
Comments Off on 10 of the Biggest Business and Marketing Mistakes Photographers Make

Posted in Photography


7 Smart Lighting Setups for Portraits Taken at Home

30 Nov

Let’s get one thing clear – you’re not going to learn how to shoot perfect portraits overnight. There are many things you need to learn first. When it comes to portrait-shooting, no factor is more important than lighting. Even if you’re planning a home portrait session, you can still make the most from various lighting setups to achieve great results. Continue Reading

The post 7 Smart Lighting Setups for Portraits Taken at Home appeared first on Photodoto.


Photodoto

 
Comments Off on 7 Smart Lighting Setups for Portraits Taken at Home

Posted in Photography


How to Turn Your Images into Kaleidoscope Patterns

29 Nov

This tutorial is a lot of fun, transforming photographs into kaleidoscopic wonders, often with surprising results. The resulting kaleidoscope patterns make fantastic desktop backgrounds and wallpapers too.

Remember kaleidoscopes? Those curious tubes with an array of mirrors and colorful beads inside? As a kid, I would while away sunny weekends straining my eye against the viewing aperture, hypnotized by the endless combination of shapes, patterns, and colors. Although I now spend most of my time looking through the viewfinder of a camera, the magic of the kaleidoscope remains in my mind as an early foray into image making.

Step 1 – Setting up the canvas

kaleidoscope-01

First, select a photograph. I’ve chosen this photograph of some fungi growing on an old tree stump. From my own experimentation I’ve found images with bold, contrasting colors and negative space result in the best kaleidoscopic images.

Once you have selected an image and opened it in Photoshop, right click on the image in the layers panel and select Convert to Smart Object. This will enable you to move the image around the canvas.

kaleidoscope-02

Now we need to add some space around the image. Go to Image > Canvas Size and a window will pop up with the dimensions of your current image.

kaleidoscope-03

To calculate the dimensions of the canvas, look at the largest side of the image, double that figure and add four. For example, the image I selected was originally 59.44 x 39.62cm so I multiplied 59 by 2 to get 118m then added 4 to get 122. Add the same value to the smaller side of the image so that the canvas will be square. Click OK.

kaleidoscope-04

kaleidoscope-05

Step 2- Creating the template

Zoom out so you can view see the entire canvas and select the Move Tool located at the top of the left toolbar.

kaleidoscope-06

kaleidoscope-07

Click on your photograph on the canvas, and with the left mouse button depressed, drag the image to a corner of the canvas. Leave a few centimeters between the image and the edge of the canvas. Don’t worry about making this too exact as we will crop it to more exact proportions later. Now, duplicate this layer by right clicking it in the layers panel and selecting Duplicate Layer (or use the keyboard shortcut Cmd/Ctrl+J).

kaleidoscope-08

In the Duplicate Layer prompt, rename this layer as “Layer 1” as we will be duplicating a number of layers over the next few steps. Click OK and a new layer will appear in the layers panel.

kaleidoscope-09

Rename the original image layer as “Background” by double clicking on the name “Layer 0” in the layers panel. This will help avoid confusion later.

kaleidoscope-10

At the moment, both layers will be in the same spot on the canvas, with Layer 1 sitting on top of Background. With the Move Tool selected, click on the top layer, and with the left mouse button depressed, drag Layer 1 next to the Background image.

kaleidoscope-11

kaleidoscope-12

Keeping Layer 1 selected, click Edit on the main toolbar and then Transform > Flip Horizontal. Layer 1 will flip to create a mirrored image of the Background.

kaleidoscope-13

Your image should look something like this now.

Just two more to go!

Duplicate the Background layer again, and when the prompt window appears, rename it “Layer 2”.

kaleidoscope-14

kaleidoscope-16

With the Move Tool selected, click on the newly created Layer 2 (which will be over Background). Keep the left mouse button depressed, and drag Layer 2 underneath Background.

kaleidoscope-17

With Layer 2 selected, click Edit on the main toolbar and then Transform > Flip Vertical. Layer 2 will flip vertically to create a mirrored image of Background from below.

kaleidoscope-18

kaleidoscope-19

Duplicate Background one more time, this time naming the layer “Layer 3”. With the Move Tool selected, click on the newly created Layer 3 (which will be over Background) and with the left mouse button depressed, drag Layer 3 into the remaining slot to complete the rectangle.

With Layer 3 selected, click Edit on the main toolbar and then Transform > Flip Horizontal. To complete the pattern, keep Layer 3 selected click Edit on the main toolbar and then Transform > Flip Vertical.

kaleidoscope-20

The next step is to merge the layers of the rectangle you have made so that it can be moved around as one layer. To do this, right-click on the layer titled Background in the layers panel and select Merge Visible.

kaleidoscope-21

If it hasn’t done so automatically, it is a good idea to rename this merged layer as “Background” so it will be easier to keep track of which layers are where. You now have the template for your kaleidoscopic image!

Step 3 – Creating the kaleidoscope

Select the Background layer, and with the Move tool selected, drag the layer into the center of the canvas. Right-click on Background in the layers panel and select Duplicate Layer. Rename this layer as “Layer 1”.

With Layer 1 selected, click Edit > Transform > Rotate.

kaleidoscope-22

In the Transform settings panel, there is a text box next to the symbol of an angle. In this text box, type 45 and press enter. Layer 1 will be rotated to a 45-degree angle.

kaleidoscope-23

kaleidoscope-24

Duplicate Background again, this time renaming the layer “Layer 2”. With Layer 2 selected in the layers panel, click Edit > Transform > Rotate. In the Transform settings panel, in the text box next to the angle symbol, enter -45 and press enter.

kaleidoscope-25

kaleidoscope-26

Duplicate the Background layer one last time, renaming the layer “Layer 3”. With Layer 3 selected in the layers panel, click Edit > Transform > Rotate. In the Transform settings panel, in the text box next to the angle symbol, enter 90 and press enter. The layer will be rotated 90 degrees.

kaleidoscope-27 kaleidoscope-28

Step 4 – Blending Modes

Select the top three layers in the layers panel by holding down the shift key and clicking on Layers 1, 2, and 3. With the layers selected, click on the Blending Mode drop down menu (red arrow below) and select the Lighten option. The selected layers will blend to form a kaleidoscope pattern.

kaleidoscope-29

kaleidoscope-30

kaleidoscope-31

Crop it

To neaten up the image you can crop the edges of the kaleidoscope down to a square or rectangle. With the Crop Tool selected, hold the shift key on your keyboard and drag the corners of the Crop Tool over the image to create a square or rectangle. When you are happy, press enter and save the image via File > Save As.

kaleidoscope-32

Step 5 – Making a desktop background

To make a wallpaper effect, open a new Photoshop document by selecting File > New and entering the dimensions 3000 pixels by 2000 pixels in the text boxes. Make sure the resolution set to at least 300 pixels/inch, so it will look nice on a large monitor screen.

kaleidoscope-33

Select File > Place… and select your new kaleidoscope file.

kaleidoscope-34

Once placed in the Photoshop canvas, you can choose to duplicate the image any number of times to create an interesting pattern, or add layers on top of one another and have fun experimenting with more Blending Modes. The possibilities are endless! Here are a few ideas.

Have you done this technique before to make a kaleidoscope pattern? Please share your results in the comments section below.

desktop

desktop-01

desktop-02

googletag.cmd.push(function() {
tablet_slots.push( googletag.defineSlot( “/1005424/_dPSv4_tab-all-article-bottom_(300×250)”, [300, 250], “pb-ad-78623” ).addService( googletag.pubads() ) ); } );

googletag.cmd.push(function() {
mobile_slots.push( googletag.defineSlot( “/1005424/_dPSv4_mob-all-article-bottom_(300×250)”, [300, 250], “pb-ad-78158” ).addService( googletag.pubads() ) ); } );

The post How to Turn Your Images into Kaleidoscope Patterns by Megan Kennedy appeared first on Digital Photography School.


Digital Photography School

 
Comments Off on How to Turn Your Images into Kaleidoscope Patterns

Posted in Photography


6 Tips for Capturing Action in Your Wildlife Photos

29 Nov

Even with the fastest lenses and top-end DSLR cameras, catching fast movement in your wildlife photos can be tricky. The physical speed of your autofocus may not be able to keep up with and track a moving subject. Away from the limitations of your equipment, you may find that you miss a flutter of wings or fight between two animals.

action-wildlife-photos-6

Luckily, there are some things you can do to overcome both problems. Here are my top tips for successfully capturing action in your wildlife photos.

#1 Pay Attention to Behavioural Cues

Animals are great at giving away information about what they are going to do next. If you pay real attention to the subjects you a photographing, then chances are you’ll be able to predict the future and have a better chance at capturing something awesome on camera. You can often apply a general rule to a class of animals, rather than having to learn hundreds of different cues from all sorts of different species. For example, when a bird is about to fly off, most will first lean forwards and appear “twitchy” before taking flight.

When photographing this greenshank, I saw it bathing in a puddle in a field. From my experience, I know that birds will fluff their  feathers or shake off water after bathing and preening. I composed the image properly then sat in wait with the subject in focus and my finger on the trigger. Eventually, probably after about 20 minutes of waiting, the bird stretched out its wings and I clicked the shutter.

wildlife photos

Being able to anticipate this behaviour made catching this moment possible. If I had tried to jump into action having seen the stretch, the action would have been over before I could even focus the camera. The same principle applied to the following image. I saw a black-headed gull dipping its head underwater washing itself. Soon after it finished, it threw droplets up into the air. Waiting in position made it possible.

action-wildlife-photos-7

#2 Don’t Use Live View

The live view mode on your DSLR camera shouldn’t be touched with wildlife photos. It makes tracking very difficult, and whenever you engage autofocus the live view goes off as the mirror flips down. Because of the way you end up holding the camera, things become unstable too. Instead, stick to using your viewfinder. It is so much easier to react quickly and track your subject that way.

Two hooded crows engaged in a scrap.

Two hooded crows engaged in a scrap.

#3 Use a Sufficient Shutter Speed

It goes without saying that if you have enough available light, then you should use a fast shutter speed to freeze movement. A general rule to avoid camera shake is 1 over the focal length of your camera. For example, a 400mm lens should have a shutter speed of at least 1/400th second to avoid camera blur.

However, this rule may not give you a shutter speed fast enough to freeze the subject. Animals often move quickly, so adjust it as required. 1/1000th second or more is a good bet for fast running or flying creatures. It’ll depend on what you are photographing, and how exactly you are shooting it, as to what shutter speed you should go for.

action-wildlife-photos-5

1/2000th, f/4, ISO 320

A good tip is to review your images, when possible, to check that your shutter speed is fast enough. Zoom in on the LCD and look for motion blur. If you spot any, then just increase your shutter speed.

#4 Don’t Stick to Your Tripod

If you are comfortable with handholding, then maybe you can ditch your tripod. Some tripod heads, like ball heads, can make things restrictive when you’re trying to follow a moving subject that stops and starts. Having to undo knobs to be able to move the camera slows you down.

Releasing your camera from the grips of your tripod will allow you to move freely. If you have it, then engage vibration reduction on your lens. This will help to get rid of camera shake, but you should be using a fast shutter speed so that shouldn’t prove a problem at all.

A lesser black-backed gull pins down an Atlantic puffin and steals its catch of sandeels.

A lesser black-backed gull pins down an Atlantic puffin and steals its catch of sand eels.

#5 Use Continuous Focus

Switch your camera to continuous focus mode so that you can track focus with a moving subject. If you continually have to refocus manually because your camera locks onto a spot once it achieves focus, then you’ll probably find you’re always one step behind the animal. Continuous focus mode will keep the plane of focus shifting.

Be sure to dive into your camera’s menu and find the setting which chooses whether achieving focus or pressing the shutter gets priority. Set it to the shutter, and then you can ensure you are able to fire off frames at the opportune moments.

#6 Lay in Wait

If you find that your equipment’s focusing motors are too slow and you can’t keep up with a moving animal, then you should change your approach. Look for patterns of behaviour, such as a route an animal may take regularly. Chances are there will be places where they pause. Focus there, and point your camera straight at it. Lay in wait, and once the animal moves into view, fire the shutter.

An Atlantic puffin (Fratercula arctica) coming into land at its burrow on the Farne Islands, Northumberland.

An Atlantic puffin (Fratercula arctica) coming in to land at its burrow on the Farne Islands, Northumberland.

If you’re following a bird in flight, try setting your focus to a plane the bird will pass through. Pan along with the animal (you’ll need to be in manual focus by this point), and hold down the shutter to utilise burst mode as it passes you. Hopefully, one of the shots will be in focus if you’ve timed it right. You’ll need to do this a number of times to adjust the focal plane to the optimum distance, and then have a bit of luck on your side!

googletag.cmd.push(function() {
tablet_slots.push( googletag.defineSlot( “/1005424/_dPSv4_tab-all-article-bottom_(300×250)”, [300, 250], “pb-ad-78623” ).addService( googletag.pubads() ) ); } );

googletag.cmd.push(function() {
mobile_slots.push( googletag.defineSlot( “/1005424/_dPSv4_mob-all-article-bottom_(300×250)”, [300, 250], “pb-ad-78158” ).addService( googletag.pubads() ) ); } );

The post 6 Tips for Capturing Action in Your Wildlife Photos by Will Nicholls appeared first on Digital Photography School.


Digital Photography School

 
Comments Off on 6 Tips for Capturing Action in Your Wildlife Photos

Posted in Photography


Handlebars to Spokes – 20 Impressive Images of Bikes

29 Nov

One of my favorite things to look for and to photograph is bicycles. They have a great shape, make interesting shadows and you can shoot them standing still or moving.

I think it’s a common subject of many photographers including these:

Maryl Gonzalez

By Maryl Gonzalez

Thomas Meier

By Thomas Meier

Darlene Hildebrandt

By Darlene Hildebrandt

Vaidotas Mišeikis

By Vaidotas Mišeikis

Meena Kadri

By Meena Kadri

Carlo Scherer

By Carlo Scherer

Riccardo Cuppini

By Riccardo Cuppini

Mike Boening Photography

By Mike Boening Photography

Markus Spiering

By Markus Spiering

PhilHendley

By philHendley

Bernat Casero

By Bernat Casero

Julian Schüngel

By Julian Schüngel

Francesco

By Francesco

Petur?

By Petur?

Shinobu Sugiyama

By shinobu sugiyama

Clement127

By clement127

Todd F Niemand

By Todd F Niemand

Photographer

By Photographer

Hopeless128

By hopeless128

Owen's

By Owen’s

googletag.cmd.push(function() {
tablet_slots.push( googletag.defineSlot( “/1005424/_dPSv4_tab-all-article-bottom_(300×250)”, [300, 250], “pb-ad-78623” ).addService( googletag.pubads() ) ); } );

googletag.cmd.push(function() {
mobile_slots.push( googletag.defineSlot( “/1005424/_dPSv4_mob-all-article-bottom_(300×250)”, [300, 250], “pb-ad-78158” ).addService( googletag.pubads() ) ); } );

The post Handlebars to Spokes – 20 Impressive Images of Bikes by Darlene Hildebrandt appeared first on Digital Photography School.


Digital Photography School

 
Comments Off on Handlebars to Spokes – 20 Impressive Images of Bikes

Posted in Photography


Weekly Photography Challenge – Bicycles

29 Nov

We already saw some other photographers’ images of bikes here.

Martin Fisch

By Martin Fisch

·júbilo·haku·

By ·júbilo·haku·

Weekly Photography Challenge – Bicycles

Now it’s your turn. There are bikes everywhere in all different shapes, sizes, and colors. Go find some interesting ones and photograph them. Think outside the box of the usual shots, go macro, shoot a shadow, process it in black and white.

Thomas Hawk

By Thomas Hawk

Robert Couse-Baker

By Robert Couse-Baker

R. Nial Bradshaw

By r. nial bradshaw

Share your images below:

Simply upload your shot into the comment field (look for the little camera icon in the Disqus comments section) and they’ll get embedded for us all to see or if you’d prefer, upload them to your favorite photo-sharing site and leave the link to them. Show me your best images in this week’s challenge. Sometimes it takes a while for an image to appear so be patient and try not to post the same image twice.

Share in the dPS Facebook Group

You can also share your images on the dPS Facebook group as the challenge is posted there each week as well.

googletag.cmd.push(function() {
tablet_slots.push( googletag.defineSlot( “/1005424/_dPSv4_tab-all-article-bottom_(300×250)”, [300, 250], “pb-ad-78623” ).addService( googletag.pubads() ) ); } );

googletag.cmd.push(function() {
mobile_slots.push( googletag.defineSlot( “/1005424/_dPSv4_mob-all-article-bottom_(300×250)”, [300, 250], “pb-ad-78158” ).addService( googletag.pubads() ) ); } );

The post Weekly Photography Challenge – Bicycles by Darlene Hildebrandt appeared first on Digital Photography School.


Digital Photography School

 
Comments Off on Weekly Photography Challenge – Bicycles

Posted in Photography


4 Tips to Leverage Natural Light Using Just your Camera and One Lens

29 Nov

In photography light is everything. Without light, whether that be artificial or natural, there is no photography. The problem is that sometimes there is just too much or too little, and in both cases, artificial light may need to be added. But what if you don’t have any artificial light available to you? And what if all you have is literally a camera with a lens and nothing else? This article focuses on how you can leverage natural light using just one lens and working without a reflector or a speedlight.

#1 Position your subject in relation to the light

Let’s take a look at these photos below. It was a very sunny day and I wanted to capture the blueness of the sky and the sea as well as the people in the shots. I had a D700 which has a base ISO of 200 and the 50mm 1.4 lens. I have provided the settings below for each photo.

creative-ways-available-light-with-the-50mm_0000

f/5.6 ISO 200, 1/2000th

creative-ways-available-light-with-the-50mm_0000

f/5.6 ISO 200, 1/1250th

creative-ways-available-light-with-the-50mm_0000

f/6.3 ISO 200, 1/2000th

These settings are okay on a very sunny day if you shoot with the sun positioned behind you shining towards your subject. In this case the sea and sky, which also illuminated the people that I wanted to be in the photo.

Lighting position

While these photos are fine, there are a few issues. First, put simply, when this is the lighting position, anyone, and any camera can take these types of photos. You can shoot in automatic mode and the photos would look the same. Mobile phones nowadays can take even more amazing photos in this situation where there is a huge amount of light hitting the subject and the background directly.

I love these types of photos for travel photography, high contrast shots and snapshots that would make me remember such scenes. But if I am after portraits, would I hire a professional photographer who would give me photos that anyone can take? Definitely not! Sure, the occasional lifestyle snapshot in this lighting is acceptable such as this one directly below shot at f/2.5 ISO 200, 1/2500th. But I would not want proper portraits of my family to be taken in this lighting situation.

creative-ways-available-light-with-the-50mm_0000

creative-ways-available-light-with-the-50mm_0000

creative-ways-available-light-with-the-50mm_0000

Harsh shadows

The second issue is the harsh shadows. As a professional photographer, this would never be my lighting position for people or portraits. Even if the sun was coming in at a side-angle, undiffused sunlight directly hitting the subject still produces harsh shadows and hotspots. I would prefer for the sun to be behind the subjects, also known as backlighting, rather than directly in front of them.

If your intention is to take nicely lit portraits with a background that is not blown out, for backlighting to work, you would need to have a big enough flash or reflector to illuminate your subject to avoid silhouettes. Conversely, you can simply expose for your subject but you will have to blow out (overexpose) the background. Therefore, you end up with a white sky rather than a blue sky.

An example of backlighting is this sunset photo below. The houses and the boats were not illuminated. I was too far away for my pop-up flash to be of any help, and I didn’t have a tripod for a long exposure and smaller aperture. But I still wanted to capture some of the soft sky color along with the sunset. Balancing the exposure was tricky and I ended up shooting this image with the following settings; f/5, ISO 200, 1/320th. While the ambient light of the sunset was captured, the other elements in the photo were too dark and ended up almost like silhouettes.

creative-ways-available-light-with-the-50mm_0000

What if you have nothing else but a camera and lens with you? You do not want all your photos to be silhouettes when shooting backlit, or too dark when shooting in the shade. So what you can do is leverage your surroundings by positioning your subject carefully in relation to the light. If you have to shoot backlit portraits in a situation similar to above, shoot an intentional silhouette or use your flash for fill light (more on this below).

If you’re doing portraits where you want to focus on well-exposed faces, avoid positioning your subject where they are facing the sun which results in harsh light and shadows. On a very sunny day, you may want to wait for the golden hour – the time shortly after sunrise or before sunset –  when the sun is much lower on the horizon and the light is much softer. This yields a light that is much more flattering for portraits. If it is a bright but overcast day, the clouds act as a huge diffuser and the shadows are not as harsh so it is easier to photograph portraits in those conditions.

#2 Look for ideal light

Ideal light is often indirect, reflected, or subtractive light. This can take various forms:

  • Indirect lighting can be the soft diffused light coming from a window.
  • Reflected light can be that bouncing off a white floor, wall, bright sand, or from white or light-colored clothing you are wearing.
  • Subtractive light can be achieved by blocking the light with a diffuser, umbrella or a flag (any flat black object large enough to block any direct light hitting your subject).

Get out of the sun

As this article does not involve any equipment other than your camera and lens, instead of blocking the light, I positioned my subject in the shade. So that instead of subtracting light from my subject, I subtracted my subject from the light and put her in the shade.

In this example below, it was a very bright day and I did not want any direct light falling on my daughter’s face. I put her completely in the shade but deliberately next to the caravan wall which was light beige. There is some reflected light from the side that helps illuminate her face and the generally shadowed area we were in.

creative-ways-available-light-with-the-50mm_0000

In this photo below taken in the zoo, there was no natural light at all. A fluorescent light illuminated the box where the snake was. You can see this white light reflected on the top part of the snake’s eye (catchlight). I waited for the snake to get into this position and used the light which was bouncing from the ceiling onto him to get this shot.

creative-ways-available-light-with-the-50mm_0000

In this photo below, there was no ideal light! We were in a pretty darkly shaded area and the enclosure was mottled with spots of sun and shade. I positioned myself where I knew I could catch a good close up of the tiger in complete shade and waited for it to pass by.  The contrast between the light and shade was so strong that had I taken the photo of the tiger with his body in half sun and half shade, it would not have come out well at all.

creative-ways-available-light-with-the-50mm_0000

#3 Use your pop-up flash as fill light

Now I know that photographers are sometimes funny (and snobby) about using the camera’s built-in pop-up flash. I am one of those photographers, with good reasons. The camera’s pop-up flash blasts light directly onto your subject. It gives you a rather flat and unflattering light with a harsh shadow around the jaw and head to boot. Unless your intention is to shoot like this such as some fashion houses do (and they do it so professionally by the way), then this is a no-no in portrait photography. Ideally, you want the light bounced and angled – anything but aimed directly from the camera toward the subject.

However, I do use my pop-up flash quite a bit! In fact, I use it when I don’t have a flash gun (speedlight) and I’m shooting backlit, especially when the sun is strong. And I have no qualms using it as a direct light in this situation because the camera’s flash is not strong enough to overpower the sun anyway. So the most you get out of it is a little bit of fill light.

Take this photo of the monkeys below. Had I not used my pop-up flash, there would have been no detail captured on the monkey’s face at all. The sun was too powerful that the pop-up flash could never have flattened the face and created harsh shadows anyway, and I was also too far away from the monkeys for that to happen.

creative-ways-available-light-with-the-50mm_0000

Using the pop-up flash is a fast and easy way to add light. Just be mindful of the caveats and be circumspect when using it.

#4 Try long exposures to capture natural light

Shutter speed has everything to do with ambient light regardless of whether you are doing long exposures or using on-camera, off-camera, or pop-up flash. In fact, with regards to the latter three, flash exposure is completely unaffected by shutter speed.

With long exposures, you can take photos even when very little light is available. You need a tripod, or something steady and flat to rest your camera on like a table or chair, and you’re good to go. So why would you want to slow down your shutter speed and when must you do it? Do it when you want to capture the ambient light.

Armed with just a 50mm and the camera placed on a steady surface, I slowed my shutter speed right down to a few seconds using the bulb setting. I may have captured the moon rising but the sky is pitch black and not enough ambient light was captured. My shutter speed might have been slow but not slow enough. Ambient light was very crucial here because there were stars in the sky.

creative-ways-available-light-with-the-50mm_0000

In contrast to the above, the photo below is the same scene photographed with a much slower shutter speed so that the stars are visible.

creative-ways-available-light-with-the-50mm_0000

Even with just the 50mm you can photograph the starry sky such as below. However, don’t go over 10 seconds as you would then start capturing the star trails.

creative-ways-available-light-with-the-50mm_0000

Using shutter speed wisely and skillfully is a great tool for capturing mood, color, and ambient light, even when there is very little of it. There is some light you don’t ever want to kill such as the soft evening light just after sunset. These photos were taken simply with a camera with a 50mm lens at a slow shutter speed, a wide aperture, and a fairly high ISO (as I was on a slow moving boat). These images were shot at;  f/2.5, ISO 2500, 1/100th. A faster shutter speed would have killed this light and rendered the sky pitch black. Too slow I would have run the risk of blurry photos due to the moving boat.

creative-ways-available-light-with-the-50mm_0000

creative-ways-available-light-with-the-50mm_0000

creative-ways-available-light-with-the-50mm_0000

creative-ways-available-light-with-the-50mm_0000

googletag.cmd.push(function() {
tablet_slots.push( googletag.defineSlot( “/1005424/_dPSv4_tab-all-article-bottom_(300×250)”, [300, 250], “pb-ad-78623” ).addService( googletag.pubads() ) ); } );

googletag.cmd.push(function() {
mobile_slots.push( googletag.defineSlot( “/1005424/_dPSv4_mob-all-article-bottom_(300×250)”, [300, 250], “pb-ad-78158” ).addService( googletag.pubads() ) ); } );

The post 4 Tips to Leverage Natural Light Using Just your Camera and One Lens by Lily Sawyer appeared first on Digital Photography School.


Digital Photography School

 
Comments Off on 4 Tips to Leverage Natural Light Using Just your Camera and One Lens

Posted in Photography


How to Publish Images Directly to Instagram From Lightroom

29 Nov

The Lightroom Library module offers more than just the option to organize your images. With its Publish Services, it allows uploading content to online services from within its interface. The best known Publish Services might be connections to Facebook or Flickr built into the software by Adobe. Since the summer of 2016, you can add Instagram to this list. The LR/Instagram plugin allows publishing on the popular sharing platform through a direct connection from the Library module.

From Lightroom to Instagram

This comes in pretty handy since Instagram does not allow uploads from desktop computers directly. Until now you had to find ways to export images from Lightroom and transfer them to your smartphone before being able to publish them on Instagram.

Installation of the LR/Instagram plugin

The plugin is free to download and try, and there is no time or volume limit to the usage. The publisher, however, asks for a $ 10 payment if you like it. The payment can be done through the plugin manager in Lightroom with a PayPal transaction.

Please also note that this plugin is programmed by a third party, neither Adobe nor Instagram can offer any support, and the plugin may fail at times when either Lightroom or Instagram change their code. So keep yourself updated through the author’s website.

The LR/Instagram plugin acts as a publishing service within the Lightroom Library module. To install the plugin, you first need to download a ZIP file from the website and unpack that to your hard drive.

Lightroom Module folder

While Lightroom allows you to install the plugin from that location, I recommend first moving it from your download folder or desktop to a more permanent location. I use the “Modules” subfolder in the Application Library structure on my hard drive to store my LR plugins. But as your system may vary, make sure it is located in a folder that is related to your Lightroom installation.

Now in Lightroom, open the Plug-In Manager through the File menu structure. Below the list of existing plugins you can find an “Add” button. Point Lightroom to the location of the plugin and tell it to “Add Plug-In”.

Add LR/Instagram Plug-In

How to set up your Instagram Publish Service in Lightroom

Once it is installed, you have to set up a Publish Service using that plugin. For this, press the Plus button on top of the Publish Services section in Lightroom’s Library module. The Publishing Manager will show up and offer LR/Instagram as an additional service. You can name the new service and enter your Instagram username and password.

Please note that the plugin does not work with a Facebook connection login, you need to have a password directly on the Instagram site.

Setting up the LR/Instagram Plug-In

If you now press the Login button, the plugin will show your Instagram profile picture if successful.

Configure settings

In the Preference section, you can limit the number of images published at once. As Instagram and its users might react negatively to one user filling up pages of images at once, it is recommended to set this to a value of around five.

Since Instagram changed their platform to also allow non-square images, you could upload portrait or landscape oriented images to the platform. Still, some users prefer to make their images all appear in the commonly known square format. For this, you can have the plugin add a white or black padding border for images that are not natively in square format.

However, I prefer to crop my images to square format before uploading them to Instagram. For this, I usually create a Virtual Copy of my image in Lightroom before making the Instagram crop. I might upload the original format to other platforms like Facebook and want to avoid going back and forth between different formats.

As Instagram widely relies on #hashtags for users to find content outside of their followings, the LR/Instagram plugin offers a separate metadata field with the option to add these hashtags within the Lightroom interface. You can find the hashtag field in the Metadata section through the drop down menu selecting the LR/Instagram section.

LR/Instagram Preferences

In the preferences area of the Publishing Manager, you can choose to “Caption #Hashtag” as an option to publish the image on Instagram using your caption and add the hashtags from that separate field. If preferred, you can also just publish the image using Title or Caption from your metadata as you also could enter hashtags in a second stage on the Instagram platform directly.

Publishing images to Instagram from Lightroom

Once set up, the new Publish Service will appear in your Library module. You can now simply drag the image you want to publish to the “Instagram photos” collection. This serves as a collection like all others in Lightroom. If you prefer, you can also set this as your Target Collection which allows you to use the B shortcut to directly add images from anywhere in your library into it.

Drag and drop images in Lightroom

When you are finished adding images, you can now tell Lightroom to publish those images. Personally, I try to limit myself to one new image each time. But if preferred, the plugin will now publish as many images as you have recently added to its collection or the limit you have set in the Preferences as explained above. The Publish Service will now run in the background and use Instagram’s API to publish your image.

Publishing from Lightroom to Instagram

Instagram Stream with photo from Lightroom

If you ever want to change the settings you have originally entered, just press the Plus button on the Publish Services section in the Library module and open the Publishing Manager again.

You can also set up multiple different publishing streams, either with different settings or even for a separate Instagram account.

Multiple Publishing Streams for second account

Give it a go

So if you’re on Instagram you might want to have a look this the LR/Instagram plugin. If you’ve used it tell us about your experience. Please share your profile so others can see your work, and follow dPS on Instagram as well.

Read this on how to get more Instagram followers too.

googletag.cmd.push(function() {
tablet_slots.push( googletag.defineSlot( “/1005424/_dPSv4_tab-all-article-bottom_(300×250)”, [300, 250], “pb-ad-78623” ).addService( googletag.pubads() ) ); } );

googletag.cmd.push(function() {
mobile_slots.push( googletag.defineSlot( “/1005424/_dPSv4_mob-all-article-bottom_(300×250)”, [300, 250], “pb-ad-78158” ).addService( googletag.pubads() ) ); } );

The post How to Publish Images Directly to Instagram From Lightroom by Michael Zwahlen appeared first on Digital Photography School.


Digital Photography School

 
Comments Off on How to Publish Images Directly to Instagram From Lightroom

Posted in Photography